18
islandtimber.com | Reclaimed Indonesian Teak 1
islandtimber.com | Reclaimed Indonesian Teak 1
islandtimber.com | Reclaimed Indonesian Teak 2
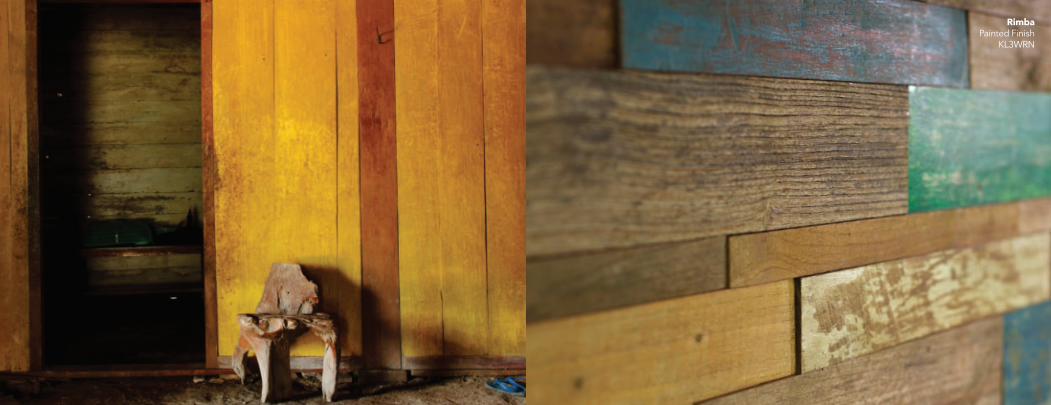
RimbaPainted Finish
KL3WRN

islandtimber.com | Reclaimed Indonesian Teak 3
579
1113
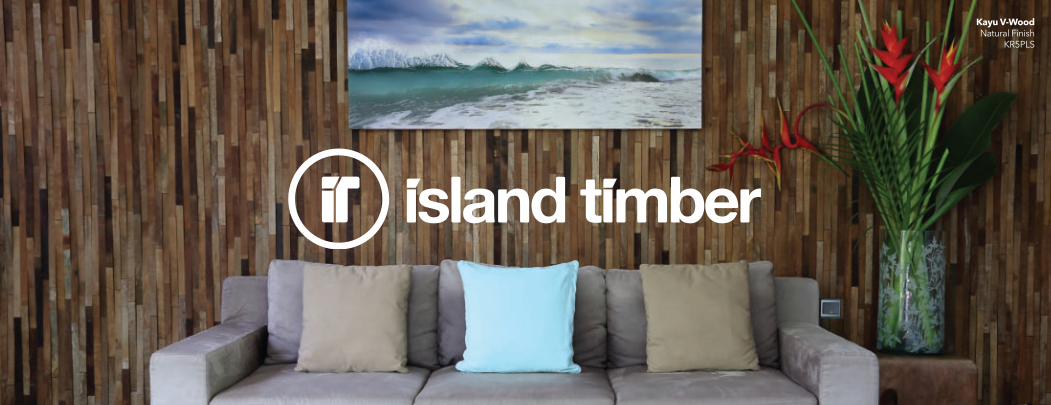
Island Timber - Reclaimed Indonesian Teak
Application and installation
Papan Planks
Rimba
Kayu V-Wood
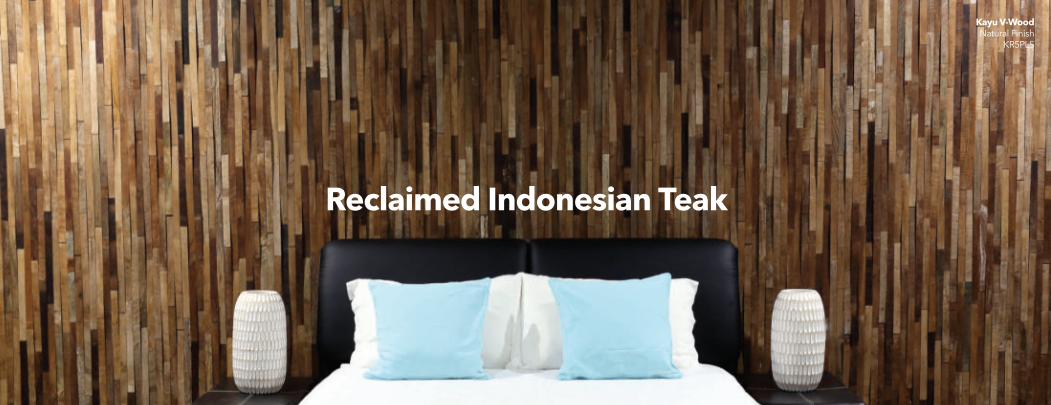
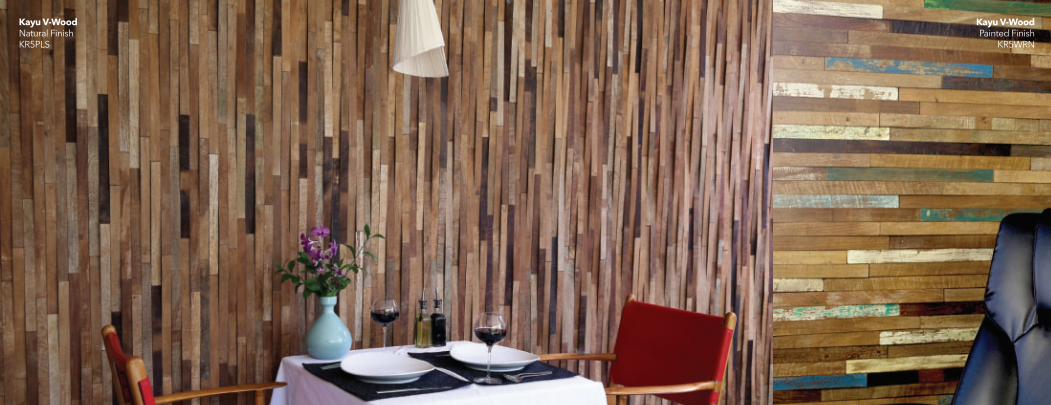
Kayu V-WoodNatural Finish
KR5PLS
islandtimber.com | Reclaimed Indonesian Teak 4
Reclaimed Indonesian Teak
Kayu V-WoodNatural Finish
KR5PLS
islandtimber.com | Reclaimed Indonesian Teak 5
Our company, Island Timber, organically grew
from immersing ourselves into Indonesian culture
and embracing the exotic.
For decades we’ve been obsessed with
exploring new ways to create unique
surfaces from natural resources. Over
time our love of Indonesian hardwoods
turned from interest to obsession and
we were compelled to develop a range
of wood veneer products to showcase
and share this aesthetic we’d fallen so
deeply for.
It’s our pleasure to present our first Island Timber range, re-purposed from timber
salvaged from historic tropical buildings.
The authentic weathered appearance of
the aged teak panels is the focal point of
our original, reclaimed designs.
Each piece has its own story and its
next chapter is to bring pleasure to
the senses of people who love the
substance and history rendered across
every Island Timber surface.
Enjoy.

islandtimber.com | Reclaimed Indonesian Teak 6
Transform your environment with Island Timber
RimbaPainted Finish
KL3WRN
islandtimber.com | Reclaimed Indonesian Teak 7
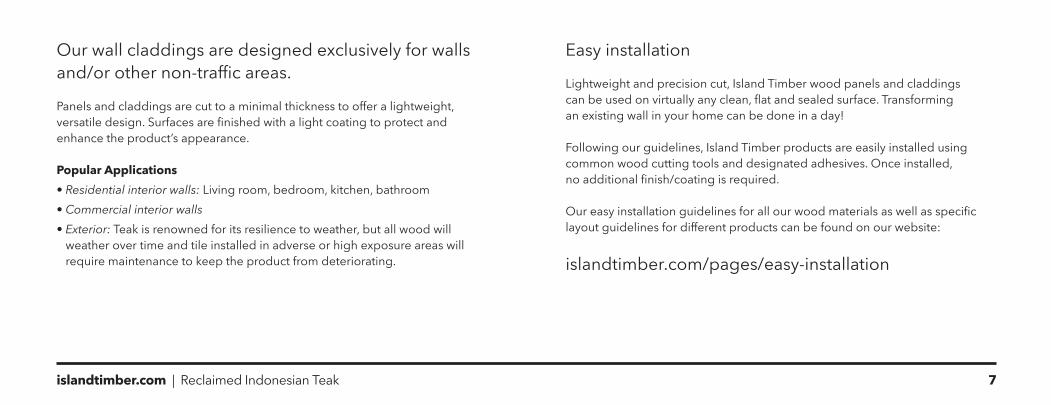
Our wall claddings are designed exclusively for walls
and/or other non-traffic areas. Panels and claddings are cut to a minimal thickness to offer a lightweight,
versatile design. Surfaces are finished with a light coating to protect and
enhance the product’s appearance.
Popular Applications• Residential interior walls: Living room, bedroom, kitchen, bathroom
• Commercial interior walls• Exterior: Teak is renowned for its resilience to weather, but all wood will
weather over time and tile installed in adverse or high exposure areas will
require maintenance to keep the product from deteriorating.
Easy installation
Lightweight and precision cut, Island Timber wood panels and claddings
can be used on virtually any clean, flat and sealed surface. Transforming an existing wall in your home can be done in a day!
Following our guidelines, Island Timber products are easily installed using
common wood cutting tools and designated adhesives. Once installed,
no additional finish/coating is required.
Our easy installation guidelines for all our wood materials as well as specific layout guidelines for different products can be found on our website:
islandtimber.com/pages/easy-installation
islandtimber.com | Reclaimed Indonesian Teak 8
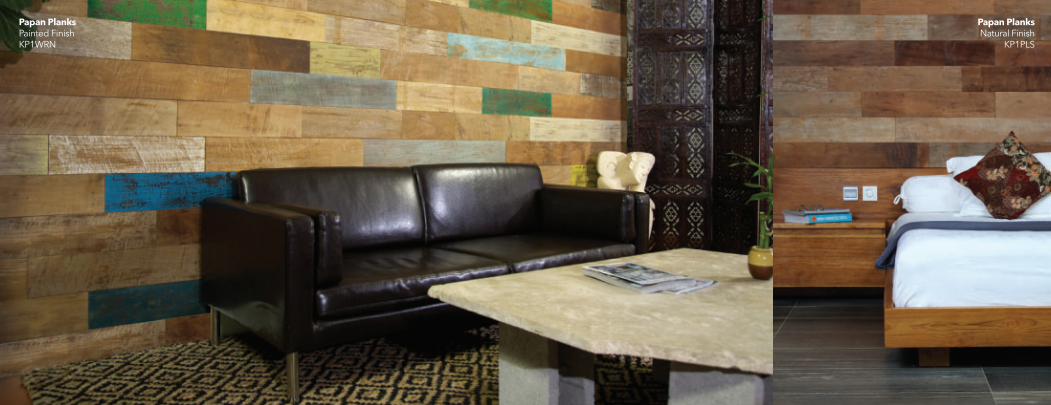
Papan Planks Natural Finish
KP1PLS
Papan Planks Painted Finish
KP1WRN
islandtimber.com | Reclaimed Indonesian Teak 9
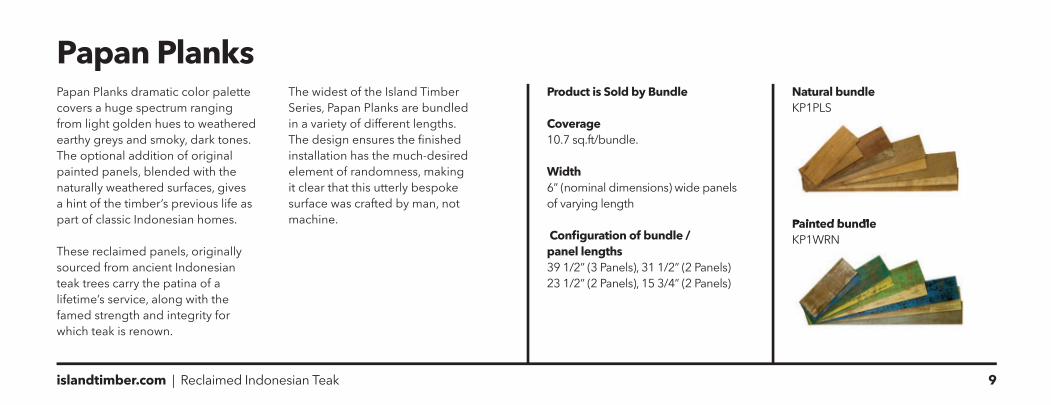
Papan Planks dramatic color palette
covers a huge spectrum ranging
from light golden hues to weathered
earthy greys and smoky, dark tones.
The optional addition of original
painted panels, blended with the
naturally weathered surfaces, gives
a hint of the timber’s previous life as
part of classic Indonesian homes.
These reclaimed panels, originally
sourced from ancient Indonesian
teak trees carry the patina of a
lifetime’s service, along with the
famed strength and integrity for
which teak is renown.
The widest of the Island Timber
Series, Papan Planks are bundled
in a variety of different lengths.
The design ensures the finished installation has the much-desired
element of randomness, making
it clear that this utterly bespoke
surface was crafted by man, not
machine.
Papan PlanksProduct is Sold by Bundle
Coverage 10.7 sq.ft/bundle.
Width6” (nominal dimensions) wide panels
of varying length
Configuration of bundle / panel lengths39 1/2” (3 Panels), 31 1/2” (2 Panels)
23 1/2” (2 Panels), 15 3/4” (2 Panels)
Natural bundleKP1PLS
Painted bundleKP1WRN
Painted bundle
islandtimber.com | Reclaimed Indonesian Teak 10
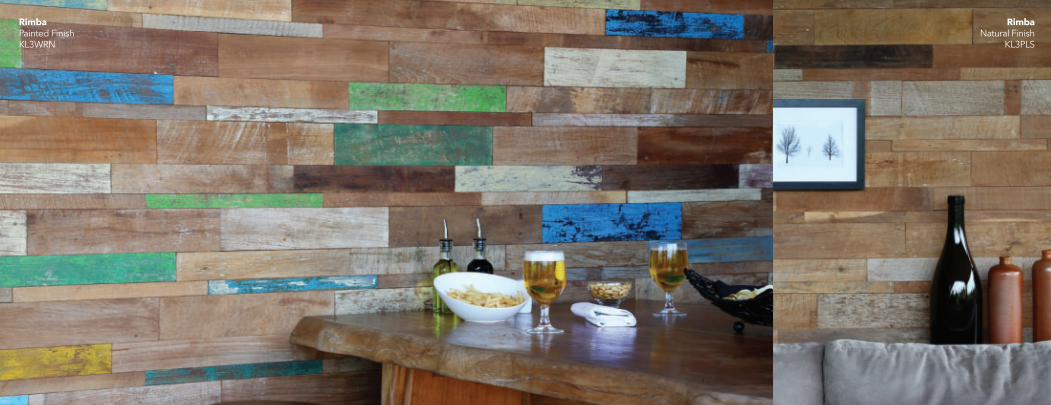
RimbaNatural Finish
KL3PLS
RimbaPainted Finish
KL3WRN
islandtimber.com | Reclaimed Indonesian Teak 11
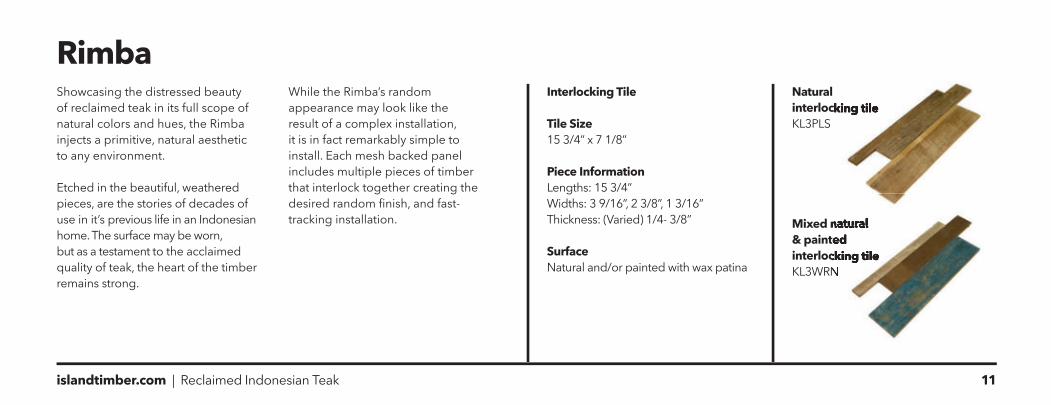
Showcasing the distressed beauty
of reclaimed teak in its full scope of
natural colors and hues, the Rimba
injects a primitive, natural aesthetic
to any environment.
Etched in the beautiful, weathered
pieces, are the stories of decades of
use in it’s previous life in an Indonesian
home. The surface may be worn,
but as a testament to the acclaimed
quality of teak, the heart of the timber
remains strong.
While the Rimba’s random
appearance may look like the
result of a complex installation,
it is in fact remarkably simple to
install. Each mesh backed panel
includes multiple pieces of timber
that interlock together creating the
desired random finish, and fast-tracking installation.
RimbaInterlocking Tile
Tile Size 15 3/4” x 7 1/8”
Piece Information Lengths: 15 3/4”
Widths: 3 9/16”, 2 3/8”, 1 3/16”
Thickness: (Varied) 1/4- 3/8”
Surface
Natural and/or painted with wax patina
Natural interlocking tileKL3PLS
Mixed natural & painted interlocking tileKL3WRN
Mixed natural & painted interlocking tileKL3WRN
interlocking tile
Mixed natural
islandtimber.com | Reclaimed Indonesian Teak 12
Kayu V-WoodPainted Finish
KR5WRN
Kayu V-WoodNatural Finish
KR5PLS
islandtimber.com | Reclaimed Indonesian Teak 13
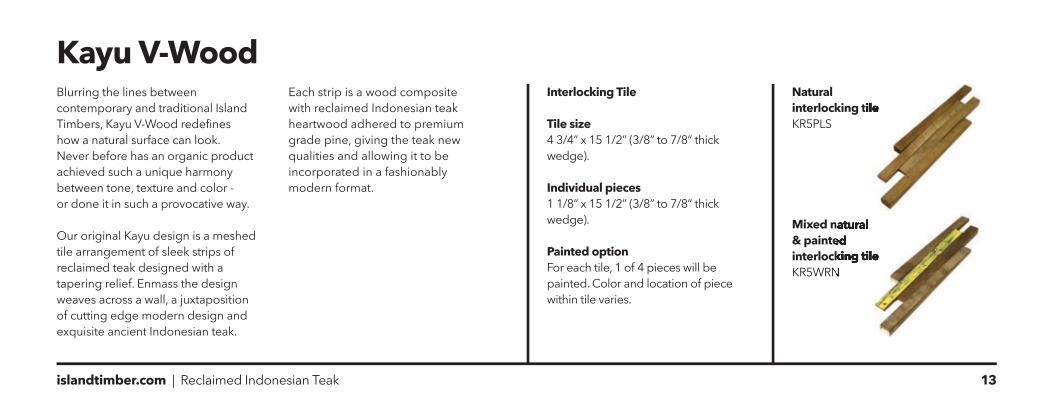
Blurring the lines between
contemporary and traditional Island
Timbers, Kayu V-Wood redefines how a natural surface can look.
Never before has an organic product
achieved such a unique harmony
between tone, texture and color -
or done it in such a provocative way.
Our original Kayu design is a meshed
tile arrangement of sleek strips of
reclaimed teak designed with a
tapering relief. Enmass the design
weaves across a wall, a juxtaposition
of cutting edge modern design and
exquisite ancient Indonesian teak.
Each strip is a wood composite
with reclaimed Indonesian teak
heartwood adhered to premium
grade pine, giving the teak new
qualities and allowing it to be
incorporated in a fashionably
modern format.
Kayu V-WoodInterlocking Tile
Tile size 4 3/4” x 15 1/2” (3/8” to 7/8” thick
wedge).
Individual pieces 1 1/8” x 15 1/2” (3/8” to 7/8” thick
wedge).
Painted option For each tile, 1 of 4 pieces will be
painted. Color and location of piece
within tile varies.
Natural interlocking tileKR5PLS
Mixed natural & painted interlocking tileKR5WRN
interlocking tile
Mixed natural & painted interlocking tileKR5WRN
islandtimber.com | Reclaimed Indonesian Teak 14
islandtimber.com | Reclaimed Indonesian Teak 15islandtimber.com | Reclaimed Indonesian Teak 15
Kayu V-WoodNatural Finish
KR5PLS
islandtimber.com | Reclaimed Indonesian Teak 16
For further information or to locate your nearest supplier please visit:
islandtimber.comNote: While every effort has been made to capture a true likeness to color, color samples
and photographs seen in this publication may not be an exact color match of product.
All images © Island Timber, 2016. | © Island Timber, 2016. All rights reserved.
Reclaimed Indonesian Teak
!
For!additional!information!go!to!www.islandtimber.com!
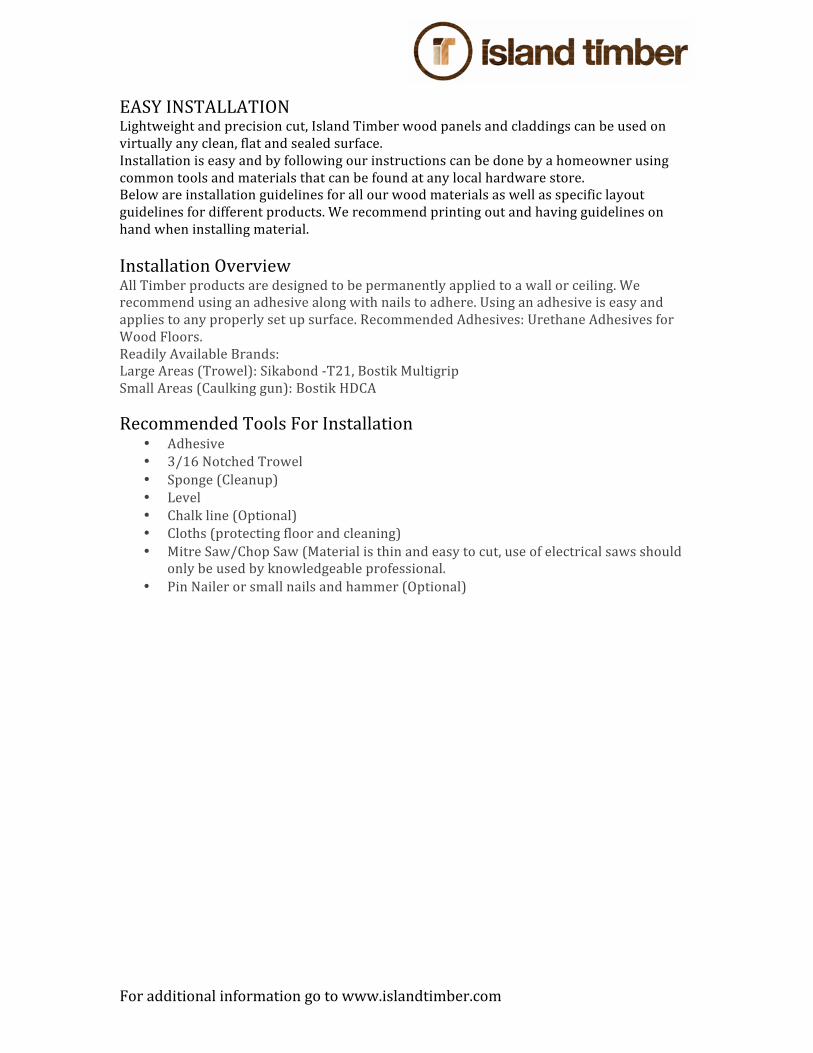
EASY!INSTALLATION!Lightweight!and!precision!cut,!Island!Timber!wood!panels!and!claddings!can!be!used!on!virtually!any!clean,!flat!and!sealed!surface.!Installation!is!easy!and!by!following!our!instructions!can!be!done!by!a!homeowner!using!common!tools!and!materials!that!can!be!found!at!any!local!hardware!store.!Below!are!installation!guidelines!for!all!our!wood!materials!as!well!as!specific!layout!guidelines!for!different!products.!We!recommend!printing!out!and!having!guidelines!on!hand!when!installing!material.!!Installation!Overview!All!Timber!products!are!designed!to!be!permanently!applied!to!a!wall!or!ceiling.!We!recommend!using!an!adhesive!along!with!nails!to!adhere.!Using!an!adhesive!is!easy!and!applies!to!any!properly!set!up!surface.!Recommended!Adhesives:!Urethane!Adhesives!for!Wood!Floors.!!Readily!Available!Brands:!Large!Areas!(Trowel):!Sikabond!KT21,!Bostik!Multigrip!Small!Areas!(Caulking!gun): Bostik HDCA!!Recommended!Tools!For!Installation!
• Adhesive!• 3/16!Notched!Trowel!• Sponge!(Cleanup)!• Level!• Chalk!line!(Optional)!• Cloths!(protecting!floor!and!cleaning)!• Mitre!Saw/Chop!Saw!(Material!is!thin!and!easy!to!cut,!use!of!electrical!saws!should!
only!be!used!by!knowledgeable!professional.!• Pin!Nailer!or!small!nails!and!hammer!(Optional)!
!! !
!
For!additional!information!go!to!www.islandtimber.com!
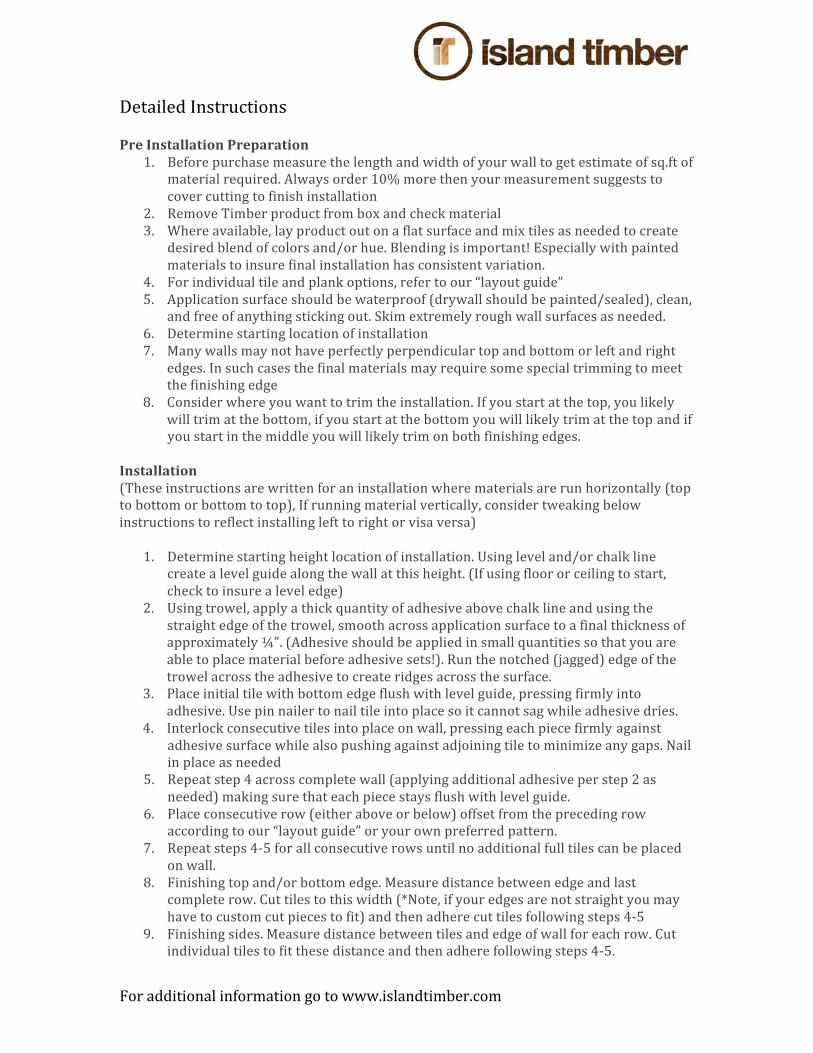
Detailed!Instructions!!Pre$Installation$Preparation$
1. Before!purchase!measure!the!length!and!width!of!your!wall!to!get!estimate!of!sq.ft!of!material!required.!Always!order!10%!more!then!your!measurement!suggests!to!cover!cutting!to!finish!installation!
2. Remove!Timber!product!from!box!and!check!material!!3. Where!available,!lay!product!out!on!a!flat!surface!and!mix!tiles!as!needed!to!create!
desired!blend!of!colors!and/or!hue.!Blending!is!important!!Especially!with!painted!materials!to!insure!final!installation!has!consistent!variation.!
4. For!individual!tile!and!plank!options,!refer!to!our!“layout!guide”!5. Application!surface!should!be!waterproof!(drywall!should!be!painted/sealed),!clean,!
and!free!of!anything!sticking!out.!Skim!extremely!rough!wall!surfaces!as!needed.!6. Determine!starting!location!of!installation!7. Many!walls!may!not!have!perfectly!perpendicular!top!and!bottom!or!left!and!right!
edges.!In!such!cases!the!final!materials!may!require!some!special!trimming!to!meet!the!finishing!edge!
8. Consider!where!you!want!to!trim!the!installation.!If!you!start!at!the!top,!you!likely!will!trim!at!the!bottom,!if!you!start!at!the!bottom!you!will!likely!trim!at!the!top!and!if!you!start!in!the!middle!you!will!likely!trim!on!both!finishing!edges.!
!Installation$$(These!instructions!are!written!for!an!installation!where!materials!are!run!horizontally!(top!to!bottom!or!bottom!to!top),!If!running!material!vertically,!consider!tweaking!below!instructions!to!reflect!installing!left!to!right!or!visa!versa)!!
1. Determine!starting!height!location!of!installation.!Using!level!and/or!chalk!line!create!a!level!guide!along!the!wall!at!this!height.!(If!using!floor!or!ceiling!to!start,!check!to!insure!a!level!edge)!
2. Using!trowel,!apply!a!thick!quantity!of!adhesive!above!chalk!line!and!using!the!straight!edge!of!the!trowel,!smooth!across!application!surface!to!a!final!thickness!of!approximately!¼”.!(Adhesive!should!be!applied!in!small!quantities!so!that!you!are!able!to!place!material!before!adhesive!sets!).!Run!the!notched!(jagged)!edge!of!the!trowel!across!the!adhesive!to!create!ridges!across!the!surface.!
3. Place!initial!tile!with!bottom!edge!flush!with!level!guide,!pressing!firmly!into!adhesive.!Use!pin!nailer!to!nail!tile!into!place!so!it!cannot!sag!while!adhesive!dries.!
4. Interlock!consecutive!tiles!into!place!on!wall,!pressing!each!piece!firmly!against!adhesive!surface!while!also!pushing!against!adjoining!tile!to!minimize!any!gaps.!Nail!in!place!as!needed!
5. Repeat!step!4!across!complete!wall!(applying!additional!adhesive!per!step!2!as!needed)!making!sure!that!each!piece!stays!flush!with!level!guide.!
6. Place!consecutive!row!(either!above!or!below)!offset!from!the!preceding!row!according!to!our!“layout!guide”!or!your!own!preferred!pattern.!!
7. Repeat!steps!4K5!for!all!consecutive!rows!until!no!additional!full!tiles!can!be!placed!on!wall.!
8. Finishing!top!and/or!bottom!edge.!Measure!distance!between!edge!and!last!complete!row.!Cut!tiles!to!this!width!(*Note,!if!your!edges!are!not!straight!you!may!have!to!custom!cut!pieces!to!fit)!and!then!adhere!cut!tiles!following!steps!4K5!
9. Finishing!sides.!Measure!distance!between!tiles!and!edge!of!wall!for!each!row.!Cut!individual!tiles!to!fit!these!distance!and!then!adhere!following!steps!4K5.!


