1 Important Information Basic Information 2 Getting Started 3 Saving and Deleting Data 4 Nintendo Network Controls 5 Basic Controls Before a Battle 6 On the World Map 7 Preparations Menu About Battles 8 Battle Preparations 9 Battle Basics 10 Battle Screen 11 Moving Units
Transcript
1 Important Information
Basic Information
2 Getting Started
3 Saving and Deleting Data
4 Nintendo Network
Controls
5 Basic Controls
Before a Battle
6 On the World Map
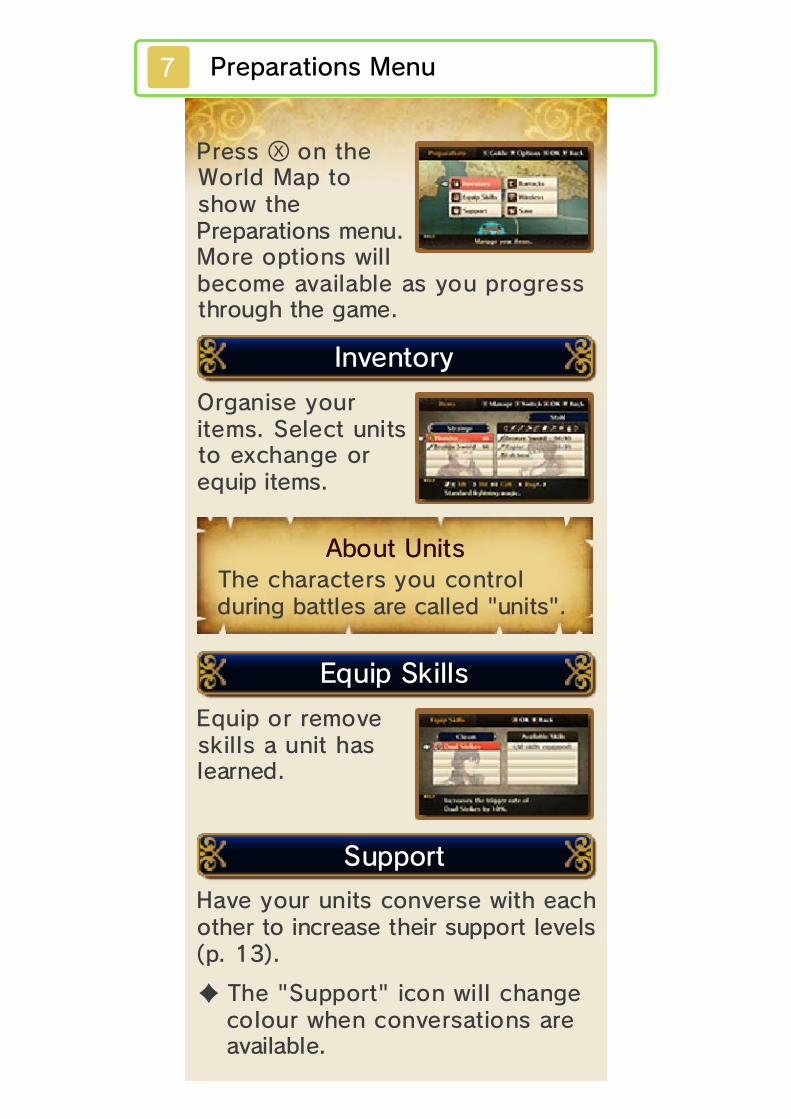
7 Preparations Menu
About Battles
8 Battle Preparations
9 Battle Basics
10 Battle Screen
11 Moving Units
12 Combat
13 Support & Pairing Up
14 Unit Growth
15 System menu
Communication Modes
16 Wireless Communication
17 StreetPass
18 SpotPass
19 Double Duel
20 Purchasing Add-On Maps
Support Information
21 How to Contact Us
1 Important Information
Thank you for selecting FireEmblem™: Awakening forNintendo 3DS™.
Please read this manual carefullybefore using this software. If thesoftware is to be used by youngchildren, the manual should be readand explained to them by an adult.
Before use, please also read theOperations Manual for yourNintendo 3DS system. It containsimportant information that will helpyou enjoy this software.
This software is designed only foruse with the European/Australianversion of the Nintendo 3DS system.
♦ Unless stated otherwise, anyreferences to "Nintendo 3DS" inthis manual refer to bothNintendo 3DS andNintendo 3DS™ XL systems.
IMPORTANT
Important information about yourhealth and safety is available in theHealth and Safety Informationapplication on the HOME Menu.
To access this application, touch the icon on the HOME Menu, then
touch OPEN and read the contentsof each section carefully. When youhave finished, pre to
Health and Safety Information
ss
return to the HOME Menu.
You should also thoroughly read theOperations Manual, especially the"Health and Safety Information"section, before using Nintendo 3DSsoftware.
For precautions related to wirelesscommunication and online play,please refer to the OperationsManual, "Health and SafetyInformation".
When sharing content with otherusers, do not upload/exchange/sendany content that is illegal oroffensive, or could infringe on therights of others. Do not includepersonal information and make sureyou have obtained all necessaryrights and permissions from thirdparties.
Information Sharing Precautions
The in-game language depends onthe one that is set on the system.This title supports five differentlanguages: English, German, French,Spanish and Italian.If your Nintendo 3DS systemlanguage is set to one of these, thesame language will be displayed inthe software. If your Nintendo 3DS
Language Selection
♦ Any content you upload/send maybe modified and/or re-distributedby other users.
For age rating information for thisand other software, please consultthe relevant website for the agerating system in your region.
This software (including any digitalcontent or documentation youdownload or use in connection withthis software) is licensed byNintendo® only for personal andnon-commercial use on yourNintendo 3DS system. Your use ofany network services of thissoftware is subject to theNintendo 3DS Service UserAgreement and Privacy Policy,
system is set to another language,the in-game default language will beEnglish.For instructions about how to changethe system language, please refer tothe System Settings electronicmanual.
which includes the Nintendo 3DSCode of Conduct.
Unauthorised reproduction or use isprohibited.This software contains copyprotection technology to preventreproduction and copying ofcontent.Your Nintendo 3DS system andsoftware are not designed for usewith any existing or futureunauthorised technical modificationof the hardware or software or theuse of any unauthorised device inconnection with your Nintendo 3DSsystem.After the Nintendo 3DS system orany software is updated, anyexisting or future unauthorisedtechnical modification of thehardware or software of yourNintendo 3DS system, or the use ofany unauthorised device inconnection with your Nintendo 3DSsystem, may render yourNintendo 3DS system permanentlyunplayable. Content deriving fromthe unauthorised technicalmodification of the hardware orsoftware of your Nintendo 3DSsystem may be removed.
This software, instruction manualand other written materialsaccompanying the software areprotected by domestic andinternational intellectual propertylaws.
Trademarks are property of theirrespective owners. Nintendo 3DS isa trademark of Nintendo.
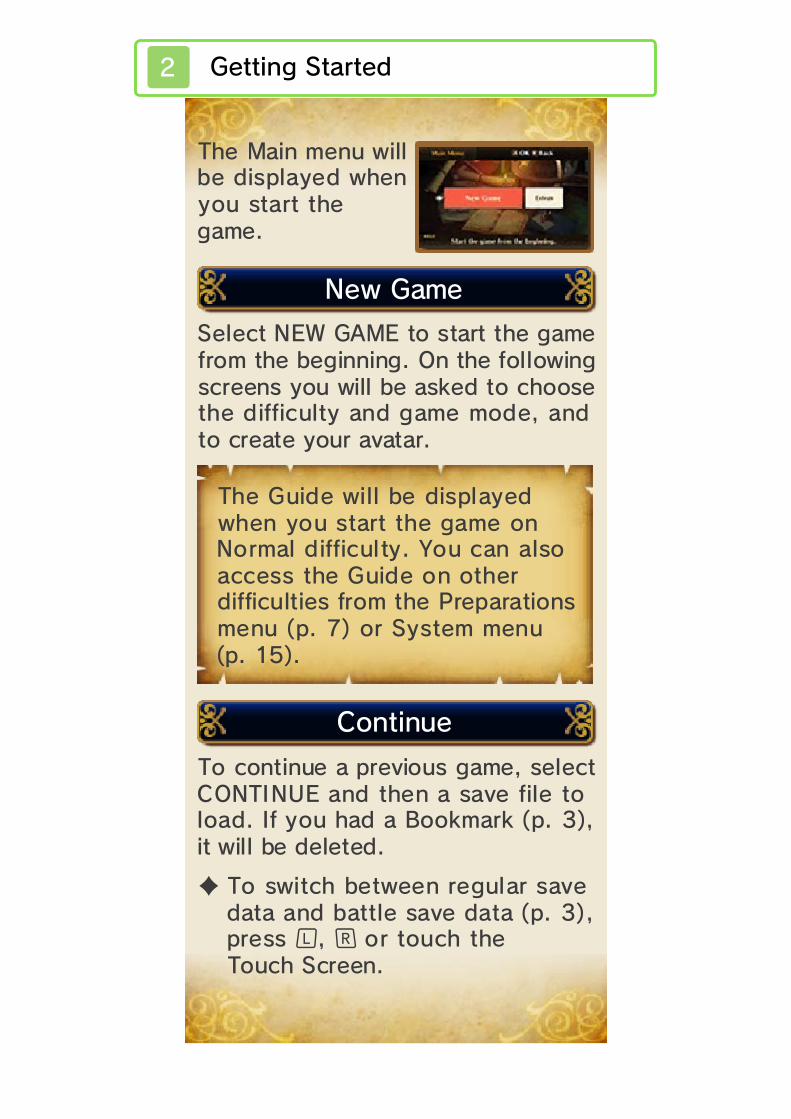
To continue a previous game, selectCONTINUE and then a save file toload. If you had a Bookmark (p. 3),it will be deleted.
The Main menu wbe displayed wheyou start thgame
Select NEW GAME to start the gamefrom the beginning. On the followingscreens you will be asked to choosethe difficulty and game mode, andto create your avatar.
♦ To switch between regular savedata and battle save data (p. 3),press , or touch theTouch Screen.
emaG weN
.)51 .p(unem metsyS ro )7 .p( unem
snoitaraperP eht morf seitluciffidrehto no ediuG eht ssecca
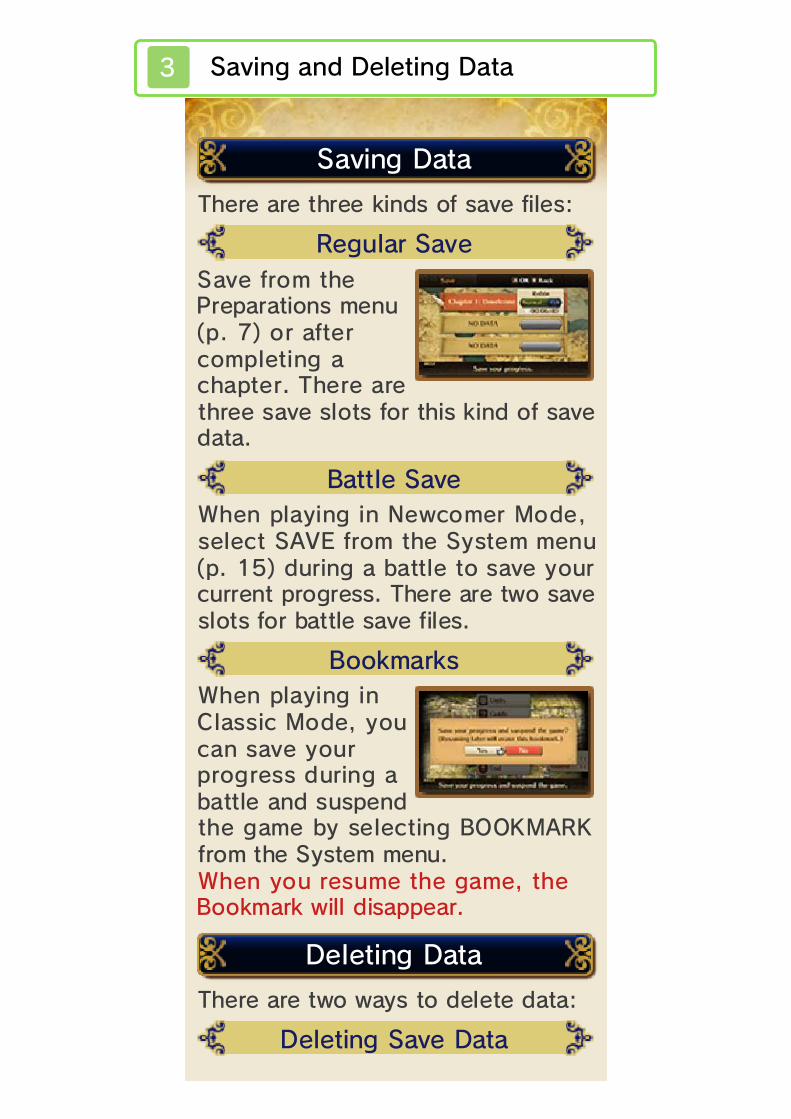
When playing in Newcomer Mode,select SAVE from the System menu(p. 15) during a battle to save yourcurrent progress. There are two saveslots for battle save files.
Save from thPreparations men(p. 7) or aftecompleting chapter. There arthree save slots for this kind of savedata.
When playing iClassic Mode, yocan save youprogress during battle and suspenthe game by selecting BOOKMARKfrom the System menu.When you resume the game, theBookmark will disappear.
There are two ways to delete data:
There are three kinds of save files:
ataD gnivaS
ataD evaS gniteleD
ataD gniteleD
skramkooB
da
ru
n
evaS ralugeR
ear
ue
evaS elttaB
Select DELETE from the Main menuand then select the save file youwant to delete.
From the Main menu, select EXTRASand then select WIPE DATA todelete all data. Add-on maps(p. 20) you have purchased at theOutrealm Gate will not be deleted.
To copy your save data to adifferent save slot, select COPY fromthe Main menu and select thedestination. If save data alreadyexists in the specified save slot, itwill be overwritten.
♦ Deleted data cannot berecovered, so be careful.
ataD gniypoC
ataD llA gniteleD
.luferac eb os ,tnenamrepsi noitacifidom ynA
.atad evas fo ssol ro ssergorpot ytilibani na ot dael nac
siht sa ,atad evas ruoy yfidomot erawtfos ro seirossecca
lanretxe esu ton oD ●.ssol atad tnenamrep
ni tluser dluoc snoitcaesehT .slanimret eht ni trid
teg ot ton erus ekaM .gnivaselihw sdraC DS/sdraC emaG
evomer ro metsys eht teser,ffo rewop eht nrut ton oD ●
4 Nintendo Network
This software supports NintendoNetwork™.You can obtain things such as itemsvia SpotPass™ and purchasedownloadable maps using NintendoNetwork. Refer to the"Communication Modes" section(p. 16-20) for more information.
Navigate the World Map to entermaps where battles await you orwhere you can visit shops.The number of maps you can accesswill increase as you progressthrough the game.
●: Next Objective○: Completed Map
●: Side Story Map
neercS paM dlroW
nocI pohS ④
⑥
④
⑤
③
②
①
paM dlroW eritnE ③
retpahCdna noitacoL tnerruC ②
paM ①
can be purchased at the shop.
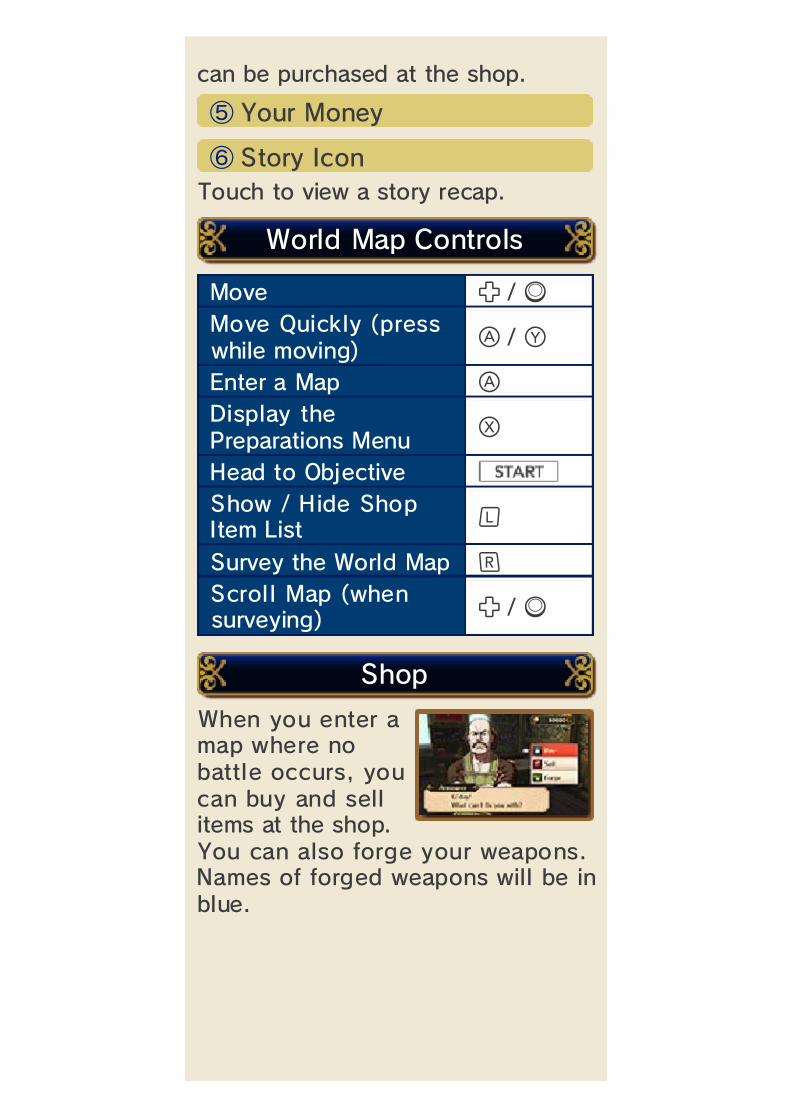
When you enter map where nbattle occurs, yocan buy and selitems at the shopYou can also forge your weapons.Names of forged weapons will be inblue.
Touch to view a story recap.
Move / Move Quickly (presswhile moving) /
Enter a Map Display thePreparations Menu
Head to ObjectiveShow / Hide ShopItem List
Survey the World Map Scroll Map (whensurveying) /
pohS
slortnoC paM dlroW
nocI yrotS ⑥
yenoM ruoY ⑤
.lu
oa
♦ Time in the game is synchronisedwith the time on your system. Toprevent problems such as theWorld Map not updating, Barracks(p. 7) events not occurring or aninability to obtain units viaSpotPass (p. 18), do not changethe date or time settings on your
tnahcreM
ymenE
yrotS ediS
.smeti laiceps yubot ro elttab a trats ot sraeppa
retcarahc a hcus erehw pama retnE .)71 .p( ™ssaPteertS
aiv tem evah uoy sreyalprehto ro stnahcrem ,seimene
retnuocne osla yam uoY.enilyrots niam eht morf
etarapes si taht elttab a tratsot eno retnE .seirots edis ssorcaemoc yllautneve lliw uoy ,emag
eht hguorht ssergorp uoy sAstnevE paM dlroW
system.
7 Preparations Menu
Equip or removskills a unit halearned
Have your units converse with eachother to increase their support levels(p. 13).
♦ The "Support" icon will changecolour when conversations areavailable.
Press on thWorld Map tshow thPreparations menMore options wilbecome available as you progressthrough the game.
."stinu" dellac era selttab gnirudlortnoc uoy sretcarahc ehT
stinU tuobA
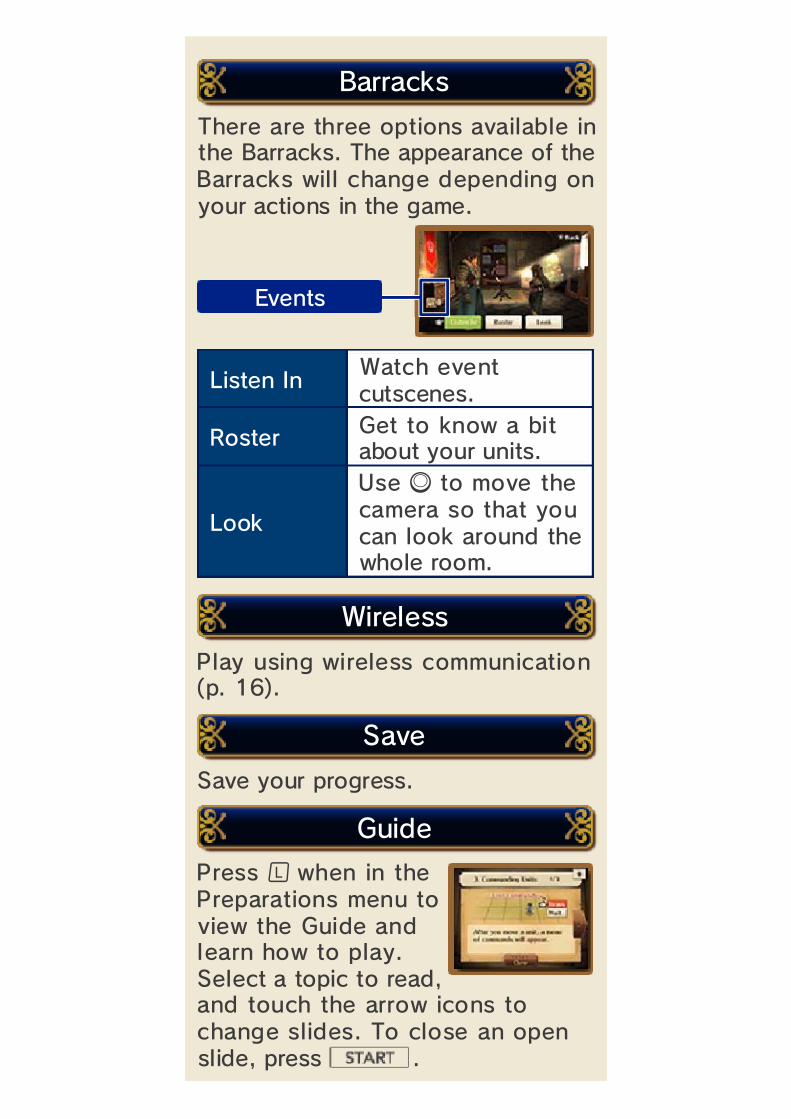
There are three options available inthe Barracks. The appearance of theBarracks will change depending onyour actions in the game.
Listen In Watch eventcutscenes.
Roster Get to know a bitabout your units.
Look
Use to move thecamera so that youcan look around thewhole room.
Play using wireless communication(p. 16).
Save your progress.
Press when in thPreparations menu tview the Guide anlearn how to playSelect a topic to reaand touch the arrow icons tochange slides. To close an openslide, pre .
stnevE
ss
,d.d
oe
ediuG
evaS
sseleriW
skcarraB
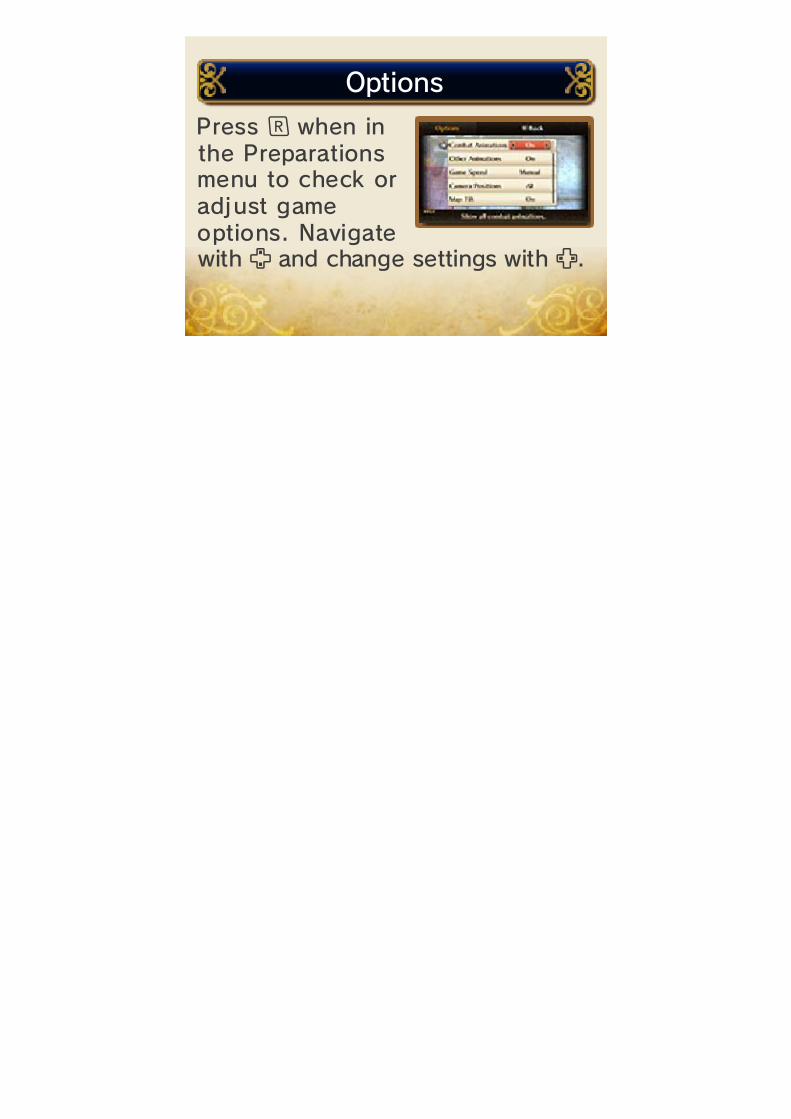
Press when ithe Preparationmenu to check oadjust gamoptions. Navigatwith and change settings with .
snoitpO
ee
rsn
8 Battle Preparations
Shows unit placement and terrain.The enemy leader is marked with aflashing icon.
Satisfy the conditions to win thebattle.
Select the units you want to use inbattle. Select FIGHT to start thebattle or EXIT to return to the WorldMap.
When you enter a map where abattle awaits you, the screen willchange to the battle screen. SelectFIGHT or pres when youare ready.
③
④
●: Other Units●: Enemy Units●: Friendly Units
①
②
s
rebmuNnruT dna snoitidnoC yrotciV ③
paM lluF ②
)7 .p( uneM snoitaraperP ①
Blue units are friendly, red units arehostile and green marks other units.
marks the unitthat are chosen fthe battle
Select for Battle Inventory (p. 7) More Information(p. 15)
Manage Equipment
Change your unitpositions or vieinformation abouenemy units. Pre to return to thPreparations screen.
ess
tw
's
paM weiV
.ros
stinU tceleS
stinU fo rebmuN ④
9 Battle Basics
♦ If the combat animations havebeen disabled in Options (p. 7),pressing and holding beforeengaging in combat with anenemy will display the animation.
Move your units othe battle mapengage thenemies andefeat them
Move Cursor /
Move Cursor Quickly + / +
Select Unit (no active unitselected) DisplaySystem Menu
Show / HideDanger Area
(before engagingunit) Switch Weaponor Staff
/
Point Cursor at NextUnit
Skip CombatAnimation
Press andhold beforeengagingin combat.
Zoom In/Out
slortnoC paM elttaB
.d
e,
n
The battle is divided into turns. APlayer Phase, during which you giveorders to your units, is followed byan Enemy Phase, when youropponents carry out their attacks.
♦ If any other units participate inthe battle, they take their turnafter the Enemy Phase.
You can tell which faction a unitbelongs to by its colour. The bardisplayed below each unit showstheir remaining HP (Hit Points).
A unit is defeated when its HPreaches 0. In Classic Mode,defeated units will be lost forever. InNewcomer Mode, defeated units areonly withdrawn from the currentbattle.
stinU gnitaefeD
rehtO
ymenE
yllA
stinU
snruT
Game Over occurs if either youravatar or Chrom is defeated. If thathappens, you can restart the gamefrom where you last saved.
revO emaG
10 Battle Screen
Shows terrain info for the selectedsquare. Terrain type affects units incertain ways.
Point the cursor at a unit to seetheir face. Touch it to view the unit'sbio.
View the unit's skills, status, etc.Touch icons to see their description.To close the description, simplytouch another part of the screen.
Touch FULL to toggle betweenregular and detailed informationabout the unit.
⑥⑦
①
④
③ ⑤
②
tinU pU-deriaP ⑥
yalpsiD elggoT ⑤
ofnI tinU ④
ecaF s'tinU ③
ofnI niarreT ②
rosruC ①
When the selected unit is paired up(p. 13) with another one, touch thisto display information about theother unit.
Display the full map (p. 8).paM weiV ⑦
11 Moving Units
Once a unit is iposition, select aaction. Thavailable actionvary depending othe unit and the situation. Units thathave already acted turn grey andcannot be used until the next turn.
♦ When the destination is occupiedby another unit, the units will pairup if it's an ally or engage incombat if it's an enemy.
Each unit can be moved once perturn.
Select a unit anits destinationThe unit'movement rangwill be highlightein blue and the attack range in red.For units equipped with staves, thestaff range will be highlighted in green.
de
s.
d
evoM
ns
en
n
snoitcA s'tinU
12 Combat
The attacking unit attacks first, andthe attacked unit second. In somecases, a unit may attack twice or asupport unit (p. 13) may attack aswell.
Combat begins when you attack orare attacked by an enemy.
Select a weapowith or beforattacking aenemy
Atk The damage you will dealto your opponent.
Hit The chance of yourattack being successful.
Crit
The chance of a criticalattack occurring.
♦ A critical attack dealsmuch more damagethan a regular attack.
.n
en
nopaeW tceleS
neercS tabmoC
.esu tsal ehtretfa kaerb lliw sesu fo rebmun
detimil a evah taht snopaeWsesU fo rebmuN
Switch to Auto / /Touch
Switch to Unit'sView
/Touch
Switch to SideView
/Touch
Change Viewpoint Zoom Out Zoom In
③
⑤④
②
①
slortnoC noitaminA
slortnoC aremaC
slortnoCnoitaminA tabmoC
slortnoC noitaminA ⑤
slortnoC aremaC ④
ofnI kcattA ③
tinU troppuS ②
nopaeW deppiuqE dna PH ①
Speed Up Hold /Touch
Pause /Touch
Slow Playback /Touch
Skip Animation
13 Support & Pairing Up
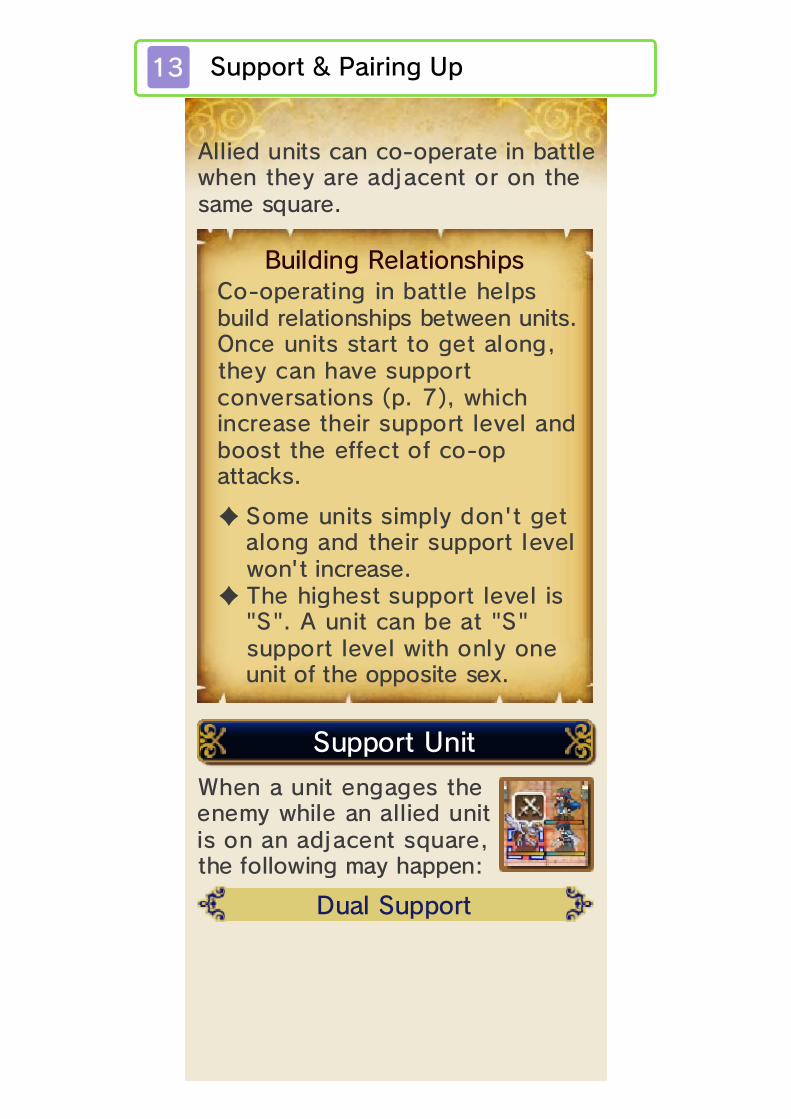
When a unit engages thenemy while an allied unis on an adjacent squarthe following may happen
Allied units can co-operate in battlewhen they are adjacent or on thesame square.
"S" ta eb nac tinu A ."S"si level troppus tsehgih ehT ♦
.esaercni t'nowlevel troppus rieht dna gnola
teg t'nod ylpmis stinu emoS ♦
.skcattapo-oc fo tceffe eht tsoob
dna level troppus rieht esaercnihcihw ,)7 .p( snoitasrevnoc
troppus evah nac yeht,gnola teg ot trats stinu ecnO
.stinu neewteb spihsnoitaler dliubspleh elttab ni gnitarepo-oC
spihsnoitaleR gnidliuB
troppuS lauD
:,eti
e
tinU troppuS
Your unit's HiRate anAvoidance will btemporarilboosted. The morthe units get along, the higher theboost.
♦ The effect on the unit's attributeswill be greatest when it issurrounded by allies on all fouradjacent squares.
There is a set chance that theadjacent unit will launch a follow-upattack.
♦ If there is more than one unitstanding next to the active unit,the one with the highest supportlevel will join the attack.
There is a set chance that theadjacent unit will protect the activeunit from damage.
♦ If there is more than one unitstanding next to the active unit,the one with the highest supportlevel will protect the active unit.
pU gniriaP
drauG lauD
ekirtS lauD
ey
ed
t
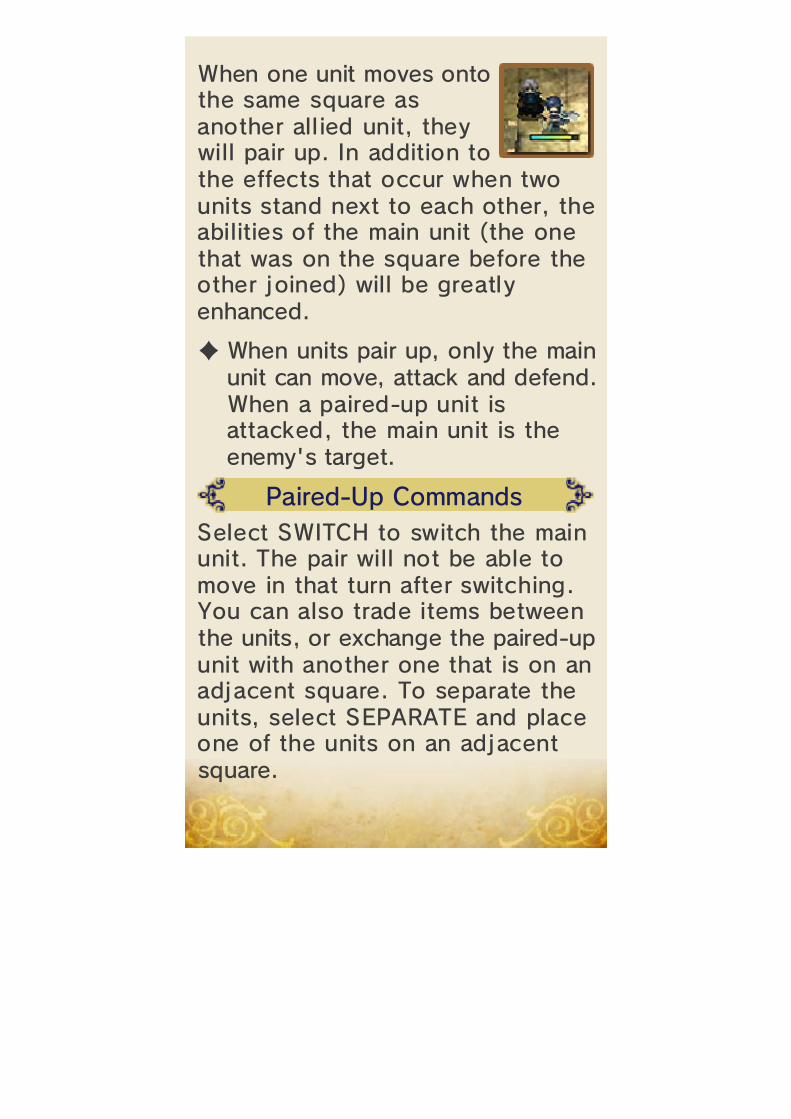
When one unit moves ontthe same square aanother all ied unit, thewill pair up. In addition tthe effects that occur when twounits stand next to each other, theabilities of the main unit (the onethat was on the square before theother joined) will be greatlyenhanced.
♦ When units pair up, only the mainunit can move, attack and defend.When a paired-up unit isattacked, the main unit is theenemy's target.
Select SWITCH to switch the mainunit. The pair will not be able tomove in that turn after switching.You can also trade items betweenthe units, or exchange the paired-upunit with another one that is on anadjacent square. To separate theunits, select SEPARATE and placeone of the units on an adjacentsquare.
sdnammoC pU-deriaP
oy
so
14 Unit Growth
Units level 10 or higher can use aMaster Seal to change to a moreadvanced class. In addition, unitsthat are level 10 or advancedclasses can use a Second Seal tochange to an entirely different class.Using any of these Seals will resetthe unit's level to 1.
Units become stronger as they gainexperience in battle.
Units are awardeEXP (experiencpoints) foparticipating icombat or usinstaves. Once a unit gains 100 EXP,they will level up and get stronger.
gn
re
d
pU gnilleveL& stnioP ecneirepxE
egnahC ssalC
15 System menu
Create a battle save (p. 3) to saveyour current progress.
♦ This option is only available inNewcomer Mode.
Bookmark (p. 3) your progress andquit the game.
♦ This option is only available inClassic Mode.
Press when the cursor is on anempty square or on a unit that hasalready finished its turn to displaythe System menu.
♦ For Guide and Options, check thePreparations menu (p. 7).
View a list of allieunits. Use tselect a unit an to toggle thinformation shown.
ed
od
stinU
otuA
kramkooB
evaS
Initiate auto-battlbased on selectetactics. Press tset the tacticsSelect CUSTOM tchoose tactics individually for eachunit.
♦ This option will not be displayedif Advanced Auto is disabled inOptions.
End the Player Phase, starting theEnemy Phase.
dnE
o.
ode
16 Wireless Communication
Data received via SpotPass (p. 18)can be viewed here. Select UPDATENOW to download any new bonuses.
Exchange your Renown for items.
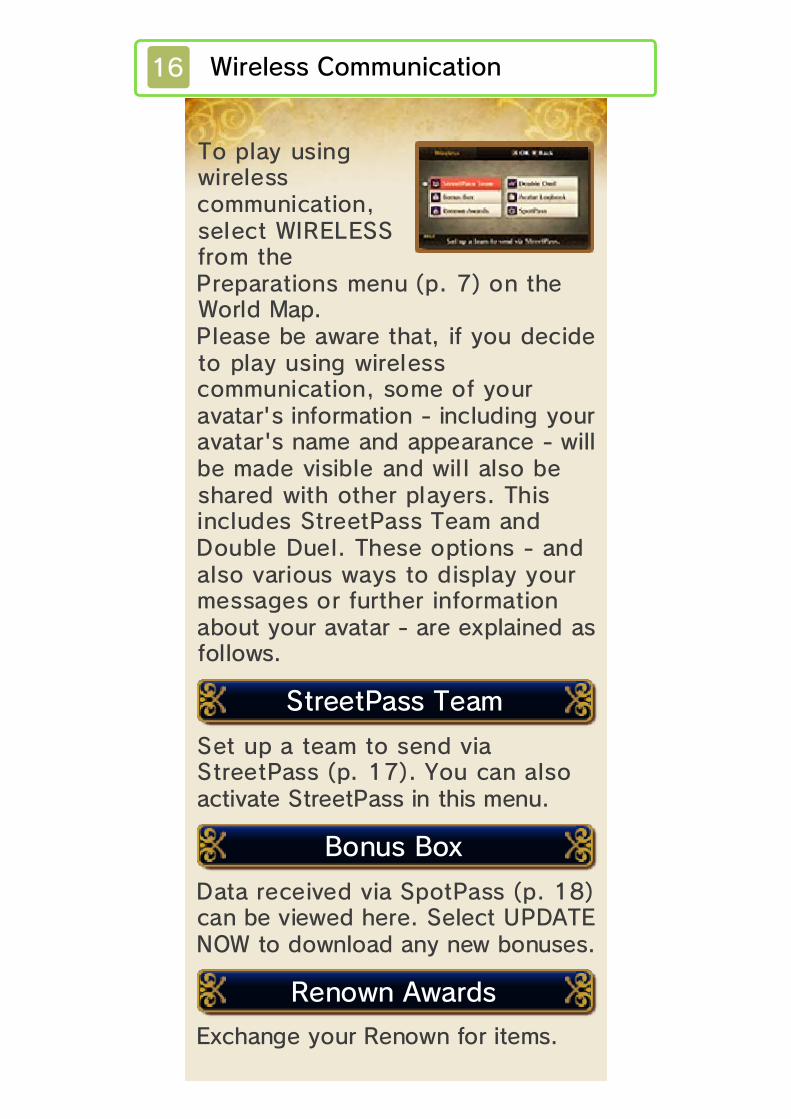
To play usinwirelescommunicationselect WIRELESfrom thPreparations menu (p. 7) on theWorld Map.Please be aware that, if you decideto play using wirelesscommunication, some of youravatar's information - including youravatar's name and appearance - willbe made visible and will also beshared with other players. Thisincludes StreetPass Team andDouble Duel. These options - andalso various ways to display yourmessages or further informationabout your avatar - are explained asfollows.
Set up a team to send viaStreetPass (p. 17). You can alsoactivate StreetPass in this menu.
maeT ssaPteertS
eS
,s
g
sdrawA nwoneR
xoB sunoB
Add Register a new unit.
Play alongside your friends' unitsusing Local Play (p. 19).
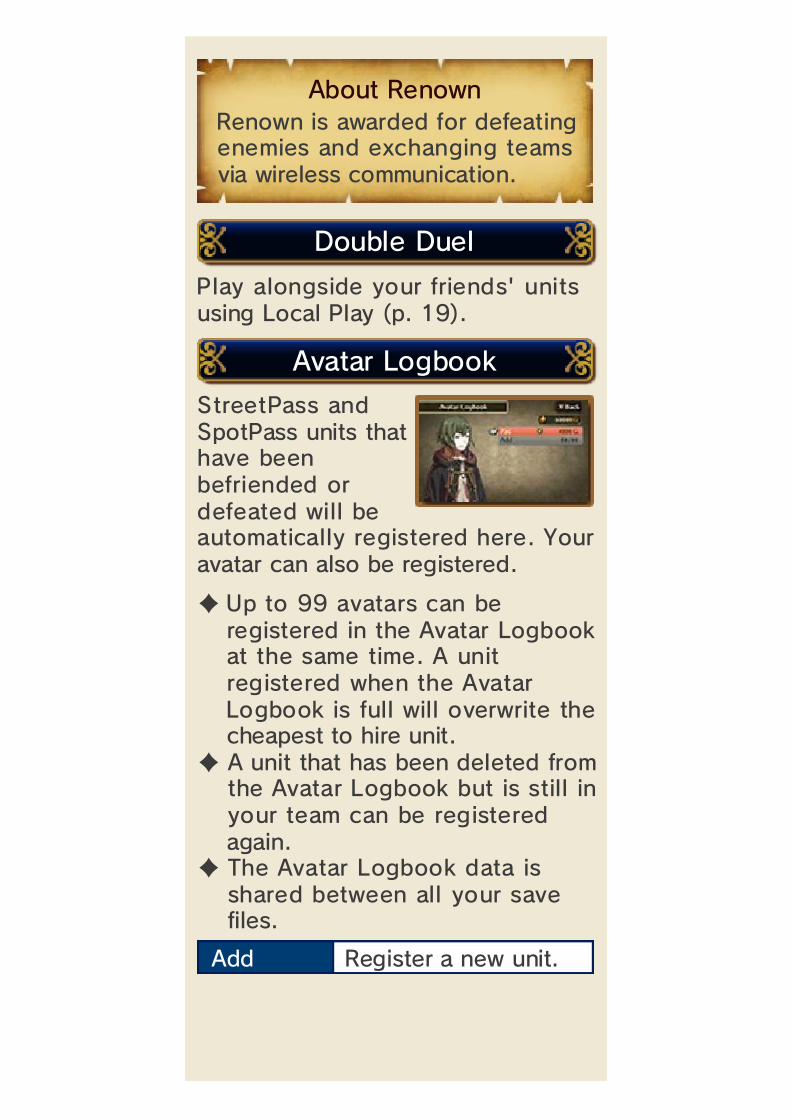
StreetPass anSpotPass units thhave beebefriended odefeated will bautomatically registered here. Youravatar can also be registered.
♦ Up to 99 avatars can beregistered in the Avatar Logbookat the same time. A unitregistered when the AvatarLogbook is full will overwrite thecheapest to hire unit.
♦ A unit that has been deleted fromthe Avatar Logbook but is still inyour team can be registeredagain.
♦ The Avatar Logbook data isshared between all your savefiles.
er
nta
d
koobgoL ratavA
leuD elbuoD
.noitacinummoc sseleriw aivsmaet gnignahcxe dna seimenegnitaefed rof dedrawa si nwoneR
nwoneR tuobA
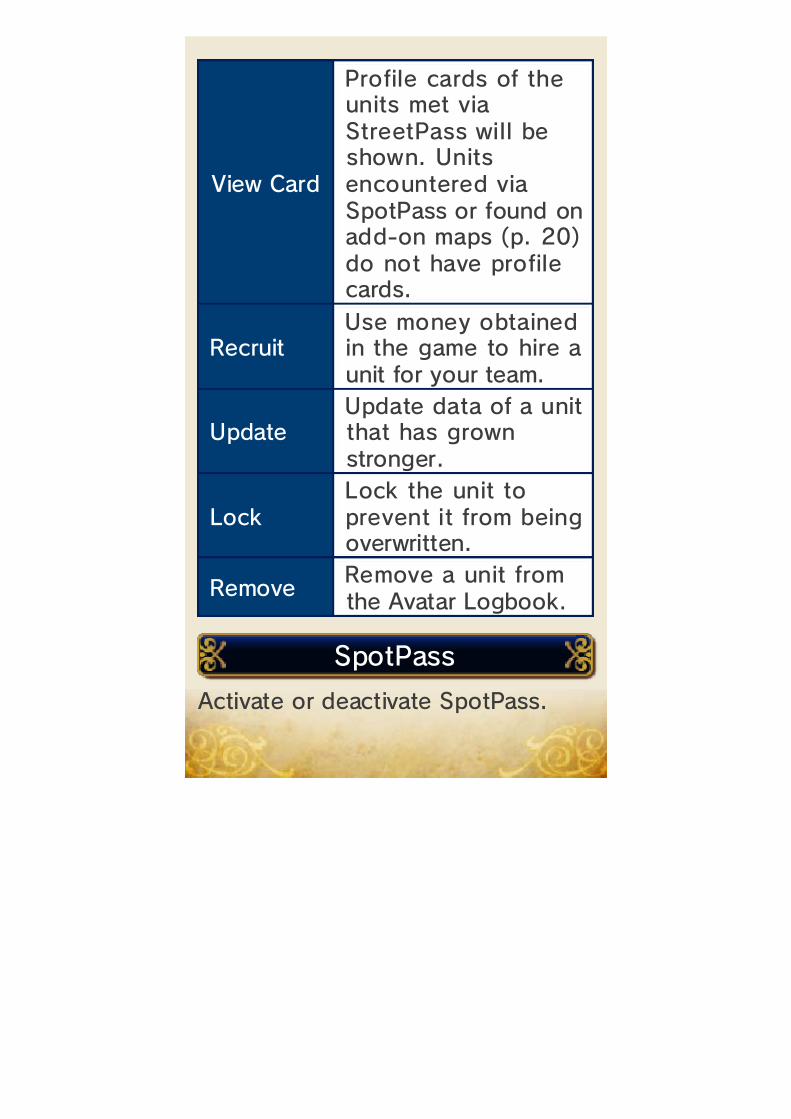
View Card
Profile cards of theunits met viaStreetPass will beshown. Unitsencountered viaSpotPass or found onadd-on maps (p. 20)do not have profilecards.
RecruitUse money obtainedin the game to hire aunit for your team.
UpdateUpdate data of a unitthat has grownstronger.
LockLock the unit toprevent it from beingoverwritten.
Activate or deactivate SpotPass.
Remove Remove a unit fromthe Avatar Logbook.
ssaPtopS
17 StreetPass
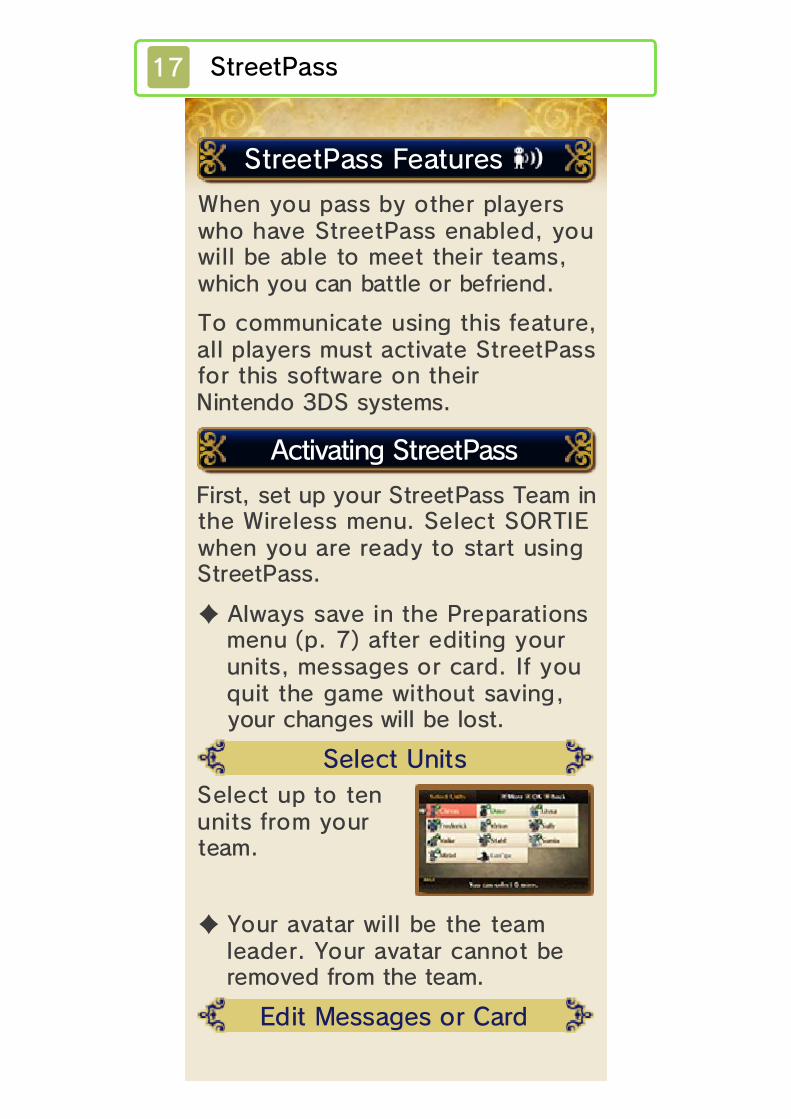
Select up to teunits from youteam
♦ Your avatar will be the teamleader. Your avatar cannot beremoved from the team.
When you pass by other playerswho have StreetPass enabled, youwill be able to meet their teams,which you can battle or befriend.
To communicate using this feature,all players must activate StreetPassfor this software on theirNintendo 3DS systems.
First, set up your StreetPass Team inthe Wireless menu. Select SORTIEwhen you are ready to start usingStreetPass.
♦ Always save in the Preparationsmenu (p. 7) after editing yourunits, messages or card. If youquit the game without saving,your changes will be lost.
serutaeF ssaPteertS
ssaPteertS gnitavitcA
draC ro segasseM tidE
stinU tceleS
.rn
Select EDIMESSAGES tchange thmessages anEDIT CARD tchange the card that will be sent tothe players you meet via StreetPass.
Teams receivefrom other playerwill appear on thWorld Map when is updated. Up tthree teams can appear on the mapper update. Move to the location ofa team and press to talk to, hire,challenge, or buy items from them.Press when you're done dealingwith the team to bid them farewell.
To deactivate StreetPass, open the
♦ Up to nine StreetPass teams canbe on the World Map at the sametime.
♦ Some of the teams cannot bebefriended.
ssaPteertS gnitavitcaeD
.ssaPteertS aiv reyalp emaseht teem uoy fi niaga raeppa
nac maet emas ehT .paM dlroWeht morf raeppasid lliw yeht
,meht htiw gnilaed retfa maetssaPteertS a htiw trap uoy nehW
oti
es
d
smaeT gnivieceR
od
eo
T
System Settings and select DATAMANAGEMENT, then STREETPASSMANAGEMENT. Touch the icon for this software title,then select DEACTIVATESTREETPASS.
Even when you're not playing thegame, you can receive new maps,teams and items via SpotPass.SpotPass is active only when thesystem is in Sleep Mode and withinrange of a compatible internetaccess point.
♦ To change the language of themessages you receive viaSpotPass, first change thelanguage settings on theNintendo 3DS system. Next, inthe Wireless menu turn SpotPassoff and then on again. Refer to“Wireless Communication” (p. 16)for more information.
♦ Data received via SpotPass issaved to the SD Card. Make surethat an SD Card is inserted intothe SD Card slot at all times.
- Accept the Nintendo 3DS ServiceUser Agreement and Privacy Policy
- Set up an internet connection- Insert an SD Card into the
Nintendo 3DS system.
For information on these, refer to theOperations Manual.
ssaPtopS gnitavitcA
:tsriftsum uoy ,ssaPtopS esu oT
serutaeF ssaPtopS
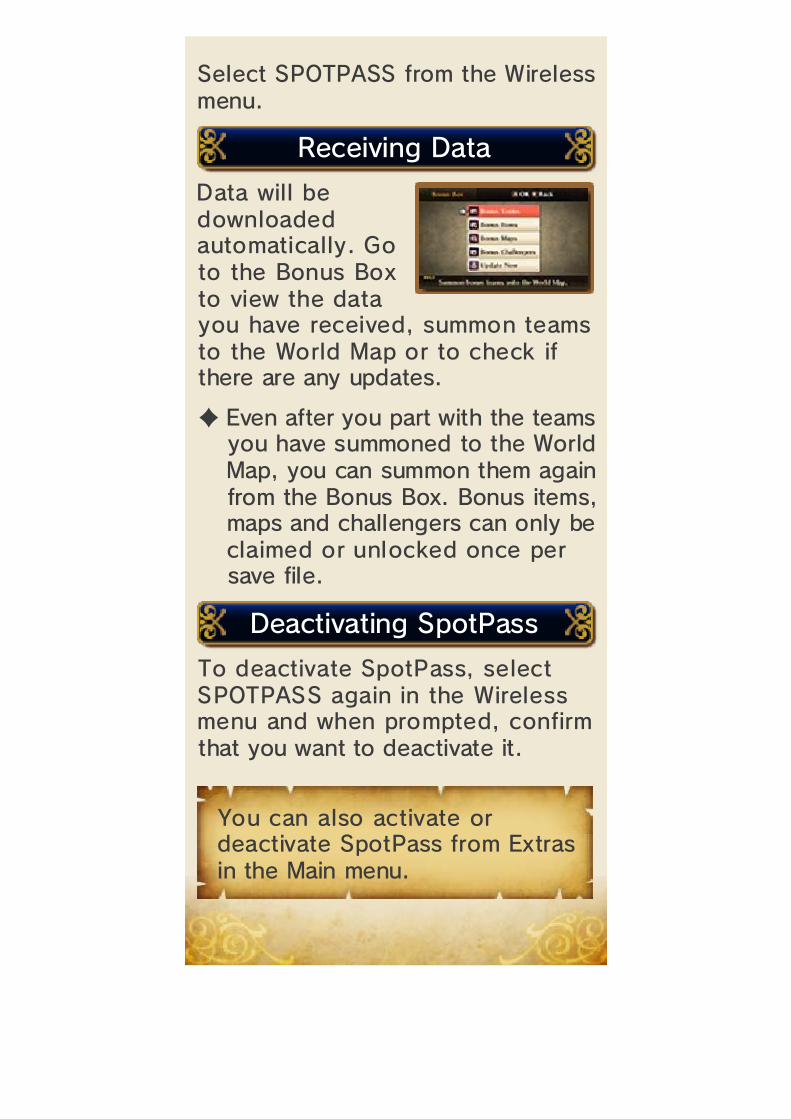
Data will bdownloadeautomatically. Gto the Bonus Boto view the datyou have received, summon teamsto the World Map or to check ifthere are any updates.
To deactivate SpotPass, selectSPOTPASS again in the Wirelessmenu and when prompted, confirmthat you want to deactivate it.
Select SPOTPASS from the Wirelessmenu.
♦ Even after you part with the teamsyou have summoned to the WorldMap, you can summon them againfrom the Bonus Box. Bonus items,maps and challengers can only beclaimed or unlocked once persave file.
.unem niaM eht nisartxE morf ssaPtopS etavitcaed
ro etavitca osla nac uoY
ssaPtopS gnitavitcaeD
ataD gnivieceR
axo
de
19 Double Duel
One player needto select CREATA ROOM so thathe other playecan join the rooOnce the other player hasconnected, both need to confirmbefore they can select their units.
Select a challengand up to threunits from youallies. SelecFIGHT! when readand the duel wilstart. If the playerchoose differenchallengers, onwill be selected at random.
- One Nintendo 3DS system perplayer
- One copy of the software perplayer
Up to two players can participate.Each player must have a copy of thesoftware.
)yalP lacoL( pO-oC
:deeN lliW uoY
et
sly
tre
re
puteS
stinUdna regnellahC a gnitceleS
.mrtEs
In each turn, botplayers will submone unit from theteam to participatin combat. Selecthe unit you want to use beforeevery turn. Players alternate eachturn between acting as the main andsupport unit. Defeat all enemies towin, earn Renown and receive areward. You will not receive anythingif you are defeated at any point.You can also choose to YIELD onthe unit selection screen. If youyield after defeating some enemies,you will get Renown depending onthe number of defeated enemies.
teriti
h
seluR
20 Purchasing Add-On Maps
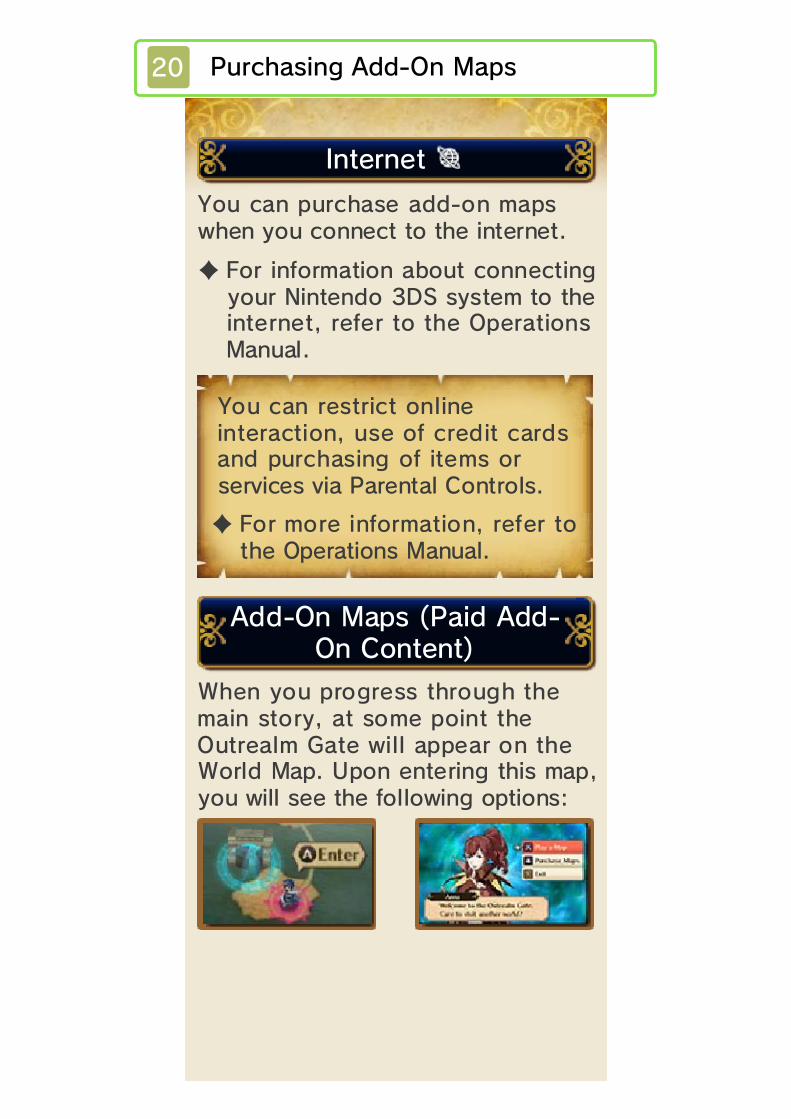
When you progress through themain story, at some point theOutrealm Gate will appear on theWorld Map. Upon entering this map,you will see the following options:
You can purchase add-on mapswhen you connect to the internet.
♦ For information about connectingyour Nintendo 3DS system to theinternet, refer to the OperationsManual.
Play thedownloadablemaps you havepurchased. Thesemaps areaccessible from allsave files.
PurchaseMaps
Purchasedownloadablemaps. You can alsocheck yourremaining NintendoeShop funds oradd funds.
Exit Exit to the WorldMap.
Select the map you want andthen select BUY. Read theprecautions and then selectNEXT.
2
Select BUY. Be sure to read theterms and conditions.
3
1 Select PURCHASE MAPS in theOutrealm Gate.
4 When you select BUY again, thedownload will start.
Connect to the internet andpurchase downloadable maps.
tnetnoC gnisahcruP
erudecorP
To purchase add-on contentlicences, you must have the requiredfunds in your Nintendo eShopaccount balance. If you do not havethe required funds, you will be
regnol on yam tnetnoc sihT ♦.eerf rof dedaolnwod-er eb
nac tnetnoc ,desahcrup ecnO ●.secivres ro
stcudorp rehto rof degnahcxeeb ton yam dna elbadnufer
-non si tnetnoc sihT ●.pohSe odnetniN
fo noitces ytivitcA tnuoccAeht ni tnetnoc desahcrup
ruoy kcehc nac uoY ●snoituacerP tnetnoC nO-ddA
sdnuF gniddA
prompted to add funds. Select ADDFUNDS to proceed.One of the following is required toadd funds:- Nintendo eShop Card- Nintendo eShop activation number- Credit card
♦ You can save your credit carddetails on your system. If you dothis, you will not need to enteryour details every time you addfunds.
♦ You can remove your saved creditcard details at any time throughSETTINGS / OTHER in NintendoeShop.
21 How to Contact Us
For product information, please visitthe Nintendo website at:www.nintendo.com
For technical support andtroubleshooting, please refer to theOperations Manual for yourNintendo 3DS system or visit:support.nintendo.com