22


10 Killer Kettlebell Workouts To be a strong and powerful human
Maddie Berky of
Mad Wellness
A note on safety: You are a uniquely awesome human. While I try to do my best in the movement guides sections of this program to explain in depth how to perform these movements safely and effectively, I cannot actually see you move and I don’t know your health and movement history. Only you know these things. If something doesn’t feel right: go down in weight or stop. No rep is ever worth your health.
Please consult your health practitioner if you have questions or concerns about any of the movements or practices in this program.

Table of Contents: 1. Intro
2. How to Get the Most out of this Program
3. 10 Killer Kettlebell Workouts
4. Guide to Kettlebell Movements
5. Guide to Non-Kettlebell Movements
6. Bio & More Info

Intro I LOVE Kettlebells. I mean, who doesn’t feel like a total bad ass when swinging around a huge blunt object?! Answer: No one. But perhaps more than that, they’re also a beautiful way to become accustomed to using our hips as a source of power. Especially if most of our history with weights in the gym has been dumbbells and isolated muscle groups, it can be super intimidating and foreign to all of a sudden make things fast and explosive. When using dumbbells we often seek out resistance on the dumbbell to either stay constant or get heavier over the course of the movement. We’ll go straight Bro on this example and use the bicep curl. As we curl our arm that dumbbell feels just as heavy, if not heavier, at the end of the curl than it did at the beginning of the curl.
You can of course use kettlebells (KBs) in a similar, isolated way as dumbbells, (just as you can also use dumbbells explosively) but in these 10 Killer KB Workouts we’re going to change the way we move weight. Instead of the KB feeling the same over the course of the movement, our goal is going to make it feel lighter. Shenanigans! But absolutely possible when we are using our hips to generate power instead of a smaller, less explosive body part.
Yes, there’s something absolutely phenomenal about strict strength movements. Just as there’s also a time and a place and a function for them. But, over the course of these 10 workouts I want to challenge you to seek out lightness instead of heaviness, explosive power instead of isolated strength. Think short, snappy (but still tight and controlled) movements instead of slow and isolated ones. The result is a uniquely tangible sense of one’s power and strength. You aren’t just moving weight. You’re moving weight with intent, and speed, and confidence. You are in control. You are powerful. You are a bad ass.

How to Get the Most out of this Program!
In your hands you currently have 10 awesome, high intensity kettlebell workouts at your disposal. I designed them to target every area of your body throughout the program so that you can be a powerful, kettlebell wielding human. Love that. However, even though the workouts can run in succession without burning out one particular body part, working out at high intensity 10 days in a row isn’t ideal. If you’re working out hard, as these workouts demand, you also need to recover adequately in order to see the gains from all that work. Otherwise you risk fatigue, burnout, and/or injury. I would recommend either rocking 2-3 days on / 1 day off, or doing these workouts M, W, & F.
If this amount of volume is new to you (i.e. you’ve never done 75 KB swings or 100 sit-ups in a workout) please cut down the reps until you become accustomed to the movements and the volume prescribed below.
A note about choosing weight: I haven’t set weights for any of the workouts below. Instead, I’ve chosen different rep schemes throughout the workouts. Every time you have a KB in your hands, you should be able to move through that entire set unbroken (without putting the bell down to rest) with good form for at least the first round.(Note: I want good form always, not just in the first round.) If your form starts to break down over the course of the workout: go down in weight! Just because you choose one weight at the beginning doesn’t mean that you’re locked into that weight for the entirety of the workout. Also, start conservatively the first time through these workouts and then add weigh over time.

10 Killer Kettlebell Workouts Workout #1
5 rounds 30 KB Swings 20 Goblet Squats 10 Walking Lunges
*This should be a weight you can do all 30 swings unbroken in the first round. **You’re using the same KB for all movements, holding it at the chest for the goblet squat and the walking lunges.
Workout #2
3 Rounds of 3 min with 2 min rest between each round
Round #1) 10 KB Deadlift / 10 Air Squats*
Round #2) 10 Russian Sings / 10 Goblet Squats
Round #3) 10 KB Swings / 10 Jumping Goblet Squats**
*Air squats = unweighted squats.
**These get heavy FAST. You may want to go down in weight or drop the KB all together for this round. How do I know if I should ditch the KB: if you are unable to maintain full depth in your squat and/or things start to fall apart (chest dips forward, butt winks, or knees cave inwards.)
Workout #3
Every Minute for 20 Minutes: 5 KB Swings 20m shuttle sprint (40 total meters)
(Every interval of work shouldn’t exceed :30. If you’re running over, shorten the sprint or cut KB swing reps.) Workout #4
For Time: 30 Single Arm Thruster* 30 Box Jumps 400m Run

20 Single Arm Thruster 20 Box Jumps 400m Run 10 Single Arm Thruster 10 Box Jumps 400m Run
*Thruster reps are shared by both sides (30 single arm thrusters = 15 on the left + 15 on the right.)
Workout #5
Death by Kettlebell
Start by doing 1 KB swing and 1 burpee, then every minute on the minute add one rep of each movement until you can’t finish the work in the allotted minute. Not to exceed 15 minutes.
Ex. Min 1 = 1 KB swing + 1 burpee, Min 2 = 2 KB swings, 2 burpees, Min 3 = 3 KB swings, 3 burpees…
Workout #6
In 10 Minutes perform as many rounds as possible of: 20 Russian Swings 10 Single Arm Push Press (L+R)*5 Push Ups
*10 total reps shared between both sides.
Workout #7
2 Rounds: 400m Farmer’s Carry 800m Run
Workout #8
5 Rounds 10 Single Arm Thrusters* 10 Box Jump Overs

20 Sit-ups
*Thruster reps shared between both sides (10 = 5 on the left + 5 on the right.)
Workout #9
3 Rounds 25 KB Swings 50 Sit-ups 200m Sprint
Workout #10
In 7 Minutes, adding 1 rep every round, do as many reps as possible of: 1 KB Swing1 Goblet Squat1 Lunge (per leg)
Ex: Round 1: 1 swing, 1 goblet squat, 1 lunge (per leg) Round 2: 2, 2, & 2Round 3: 3, 3, & 3…till 7 minutes
\

Guide to KettleBell Movements: Kettlebell Swing
Set-Up:
• Chest up• Weight in heels • Feet Squat width (right outside the hips) • KB placed 1 foot in front of feet, creating a tripod between bell and feet
Performing the Kettlebell Swing:
1) To Initiate, pull the bell off of the floor and directly into your hips.• Your knees should be slightly bent here. • This should be intimate. Like, take that thing out for dinner and a movie. As in, you should feel the bell knick you on your butt. Why? Because the closer the bell is to your body the less strain it puts on your low back and the more efficient it is to move.
2) Aggressively drive your hips forward by squeezing your butt and straightening your legs. This is your power center. Make that hip drive count! • Everything in life tends to be better with a tight tush, and kettlebell swings most definitely follow this logic. • Your hips shouldn’t pass the plane of your feet here, but stay locked right above the heels. Think about establishing a straight line traveling through your shoulders, hips, heels and into the floor.
• As you squeeze your butt, make sure you’ve solidly locked down your ribs by squeezing your belly. Imagine if someone was about to take a swing at your belly with a 2x4. How would you react? Do that.
Finish Position: By squeezing your butt like you mean it, you’ve physically shot that bell off your hips. From here, you simply let momentum do its work as the bell travels overhead. The top of your swing is arms extended, bottom of the bell facing the ceiling, and your biceps behind your ears.

• Make sure here that your butt is still squeezed tight (a common fault is sticking that butt out at the top of the swing) and that your ribs are locked down and your belly tight. Think about now extending that line from the top of the bell and having it run through your entire body and out through the heels into the ground.• To reinitiate another swing, simply press the bell down and away. Guide it back to your hips and let the momentum of that bell pull your hips back. • A common fault here is to lead with the knees, resulting in a “squatty,” quad heavy swing, which is less powerful and puts pressure on the knees. Instead, you want to lead with the hips, loading the hamstrings & glutes, and taking pressure of the knees.
Kettlebell Swing (Russian):
• All of the above is the same except instead of finishing overhead, the top position of the swing is shoulder to eye level. • These should be really tight and efficient swings. That bell doesn’t stop at shoulder height simply because you’ve been a little lazier with your hips and your momentum happened to have puttered out at shoulder height. Instead, you still squeeze that butt like you mean it, and then your lock that bell down tight right at the shoulders by drawing your shoulders down and squeezing your belly.

Goblet Squat:
Set-Up: • Bell held in both hands at the center of the chest. • There are a couple ways you can hold that bell, and it really just depends on 1) if you can keep you chest up, and 2) what’s comfortable to you. Two of the most common ways are to hold the bell upside down by the “horns” or upside down with the bell resting in your palms. No matter what, you want to draw your shoulders back and press actively up against the bell. This action will help to keep your chest up, your back solid, and the bell centered over your body. • Feet just outside hip width. Toes angled slightly out. • Weight on the heels.
Performing the Goblet Squat: 1) Pull your hips backs. • Drive your knees out towards your pinky toes. • Pull your chest up. 2) Continue to pull your hips back until they travel below parallel (or as deep as your can go while still maintaining that natural curve in your spine. If your butt starts to wink in: turn around.)
Finish Position: Driving through your heels and keeping your knees tracking out, press your hips forward (AKA: squeeze your butt like you mean it) to standing.

Single Arm Thruster
Set-Up:
•Bell is “racked” on one shoulder. Hold the bell firmly by the hand with the bell itself resting on the front of your shoulder and your bicep.• The bell should be nestled right in tight to your body. Don’t try and hold the bell in one hand off of the chest because it will strain your wrist and your shoulder, and make make this movement way harder than it needs to be - the closer the bell is to the body, the more efficiently you’ll be able to move that weight. • Everything else is the same set-up as the goblet squat.
Performing the Single Arm Thruster:
1) The decent is the same as the goblet squat.
Finish Position:
• Now as you drive up, aggressively open your hips (AKA: squeeze your butt) in the last 1/4 of your squat, driving the bell overhead. • This shouldn’t be a squat and then a press, but rather, one fluid movement. Your hips, not your arms are the power behind the press. • Finish with your arm locked out, bicep behind your ear, and the bell still resting on the back of your forearm (instead of the bottom pointing to the sky as it would in a swing.) • Note: I personally like to hold my opposite arm out in front of me as it helps to keep my chest up and energy flowing through my body.

Lunge
Set-Up:
• Bell held at the chest just as it is in the goblet squat. • Feet hip width apart or slightly wider. • Chest up. • Belly tight.
Performing a Lunge:
1) Step forward with one leg while coming onto the toe of your back leg. • Square your hips by drawing your front leg back and pulling your back leg forward (without actually moving them on the floor.) • Drop your hips between your legs, bringing your knee gently to the ground, or as far down as your can maintain hips square and chest up. • Watch that your front knee doesn’t track over your front toes, but instead stays locked over your knee (i.e. your shin should stay vertical.) • Keep your chest upright (that bell is going to want to pull you forward.)
Finish Position:
•To stand back up: drive through the front foot, pushing your hips back over your back foot. • Bring both back feet in line.

Push Press
Set-Up:
• Bell racked as it was on the Single Arm Thruster, held in one hand against the chest and resting on the front of your shoulder and bicep. • Feet hip width apart.• Feet cork-screwed into the ground (rotate your feet out towards your pinky toes without actually moving your shoes.) • Butt squeezed. • Belly tight. • Shoulders drawn together and back. • Weight in the heels.
Performing the Push Press:
1) Pulling knees out towards your pinky toes (versus forward), dip down 1-2 inches. • Keep chest vertical (pretend you have your back to a wall, and you’re maintaining contact with the wall as you dip.) • Keep weight solidly in the heels.
Finish Position:
• Driving through the heels, aggressively stand, pressing the bell overhead. Note: there should be no pause here from step one (the dip) to step 2 (driving out of the dip.) Think of it more as a bounce.• Just like the thruster, your hips not your arms are your power source here - aggressively standing is what generates the power to drive that bell overhead, not you pressing it overhead with your arms. • End with your arm locked out, bicep behind the ear, and your body in straight line (belly & butt tight.)

Farmer’s Carry
Set-Up:
• Hold a bell down by your side in one or both hands (both if you have 2 bells.)
Performing a Farmer’s Carry:
• This movement is deceptively simple. But trust me, it is not so deceptively effective. It will kick you in the pants and be none too subtle about that kicking. Trust me. • Maintaining excellent posture (stand up tall with your shoulders drawn back and belly squeezed tight) walk briskly - not run the allotted distance.

Guide to Non-Kettlebell Movements:
Box Jumps & Box Jump Overs
Set-Up:
• Start with feet hip width apart.
Performing the Box Jump:
1) Draw hips back and jump on box. • Land in a 1/4 squat (weight in heels and knees slightly bent and drawn out towards pinky toes.)
Finish Position:
• Stand all the way up on the top of the box (AKA: squeeze your butt.) • Step down.
Performing the Box Jump Over:
• Same rules apply as in the box jump except instead of stepping down on the same side, you are traversing the top of the box and stepping down on the other side. • You can also switch it up and jump onto the box laterally. This can feel tricky at first, but takes out all that turning around business on the top of the box and throws in some lateral movement. • Note: you don’t have to open your hips (or stand all the way up) at the top of a box jump over.

Push-ups
Set-Up:
•Begin in a solid plank position with hands just outside shoulders, arms locked out, eyes of the elbows facing forward, and guts, butt, and quads squeezed tight.
Performing the Pushup: •1) Drive your elbows back at a 45 degree angle from your body. • Bring your chest all the way to the floor while keeping shoulders and hips along the same line (don’t worm your body towards the ground.)
Finish Position:
• Press through your palms, driving your arms straight and lifting your body (maintaining again
that solid plank position versus the worm.) End with locked out arms.

Burpees
Set-Up:
• Start with feet hip width or wider.
Performing a Burpee:
1) Lean forward by sending your hips back and place your hands on the floor. 2 + 3) Pressing into your hands and jump back with your feet to a plank position. 4) Lower yourself down to the ground till your chest touches. 5 + 6 +7) Press back up though your hands, drive your hips up, and jump your feet back forward towards your hands.
Finish Position: • Jump and clap your hands over your head.
A couple burpee notes:•While a burpee travels through the same points as a push-up, it doesn’t need to be as tight and controlled as a pushup. Instead of pausing at your plank position, controlling your negative, and then pressing back up, try to move move fluidly through all those points. Your wheels shouldn’t totally come off, but you don’t need to do the most beautiful push-up along with a burpee. It’s more of a controlled fall…

Sit-Ups
Middle school standards still apply: shoulder blades touch the ground as your lay back & sit all the way up at the top. And don’t slouch. No one likes a slouchy sit-up!

Shuttle Sprints
Run the allotted distance (20 meters, etc.) Touch the ground. Run back to the start. Bam. Shuttle sprint done.
Thank You!!!
Stay safe. Have fun. And don’t forget to unleash that inner lioness. She is the one who’s going to be able to throw these bells around like she means it.
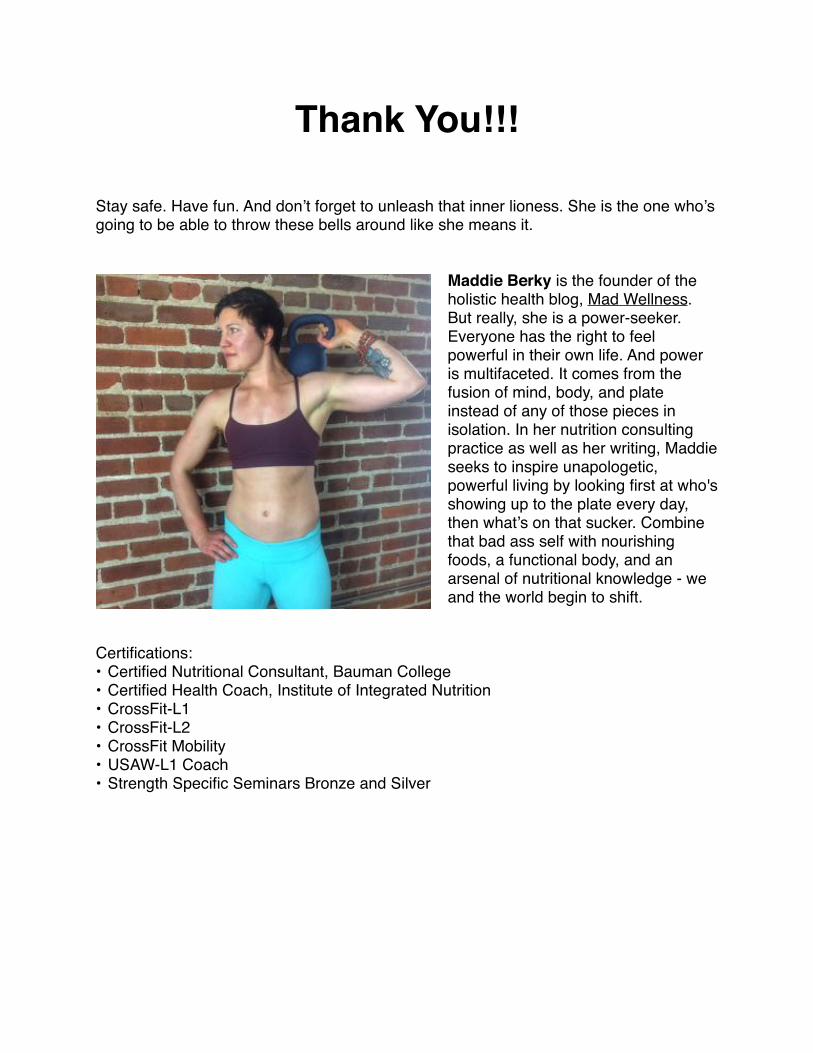
Maddie Berky is the founder of the holistic health blog, Mad Wellness. But really, she is a power-seeker. Everyone has the right to feel powerful in their own life. And power is multifaceted. It comes from the fusion of mind, body, and plate instead of any of those pieces in isolation. In her nutrition consulting practice as well as her writing, Maddie seeks to inspire unapologetic, powerful living by looking first at who's showing up to the plate every day, then what’s on that sucker. Combine that bad ass self with nourishing foods, a functional body, and an arsenal of nutritional knowledge - we and the world begin to shift.
Certifications: • Certified Nutritional Consultant, Bauman College • Certified Health Coach, Institute of Integrated Nutrition • CrossFit-L1 • CrossFit-L2• CrossFit Mobility • USAW-L1 Coach • Strength Specific Seminars Bronze and Silver


