Page 1
15’$IGT$Safety$Net$Enclosure$Adapter$System$$IGT$suggests$using$JumpSports$480$XT$Safety$net$system.$Any$safety$net$system$should$work$as$long$as$there$are$8$poles$that$are$1$½$inches$in$diameter.$Please$note$this$instruction$manual$is$conceived$and$intended$for$use$with$the$JumpSport$system.$$$$Safety$net$enclosure$adapter$system$components:$$8J$1$½”$x$20”$PVC$tubes.$8J$2”$$UJBolts$8J$Bolts$8J$Nuts$16J$Washers$8J$Setscrews$$$Tools$required:$$$$$$Tape$measure$$$$$Felt$tip$pen$$$$$Drill$$$$$5/16$drill$bit$$$$$1/8$drill$bit$$$$$1/2$“$wrench$or$socket$$$$$5/16”$wrench$or$socket$$$
First,$assemble$the$entire$frame$of$the$InJGround$Trampoline$system$following$the$IGT$instructions$$
$$$$$$$$$$$$$$$$$$$$ $
Page 2
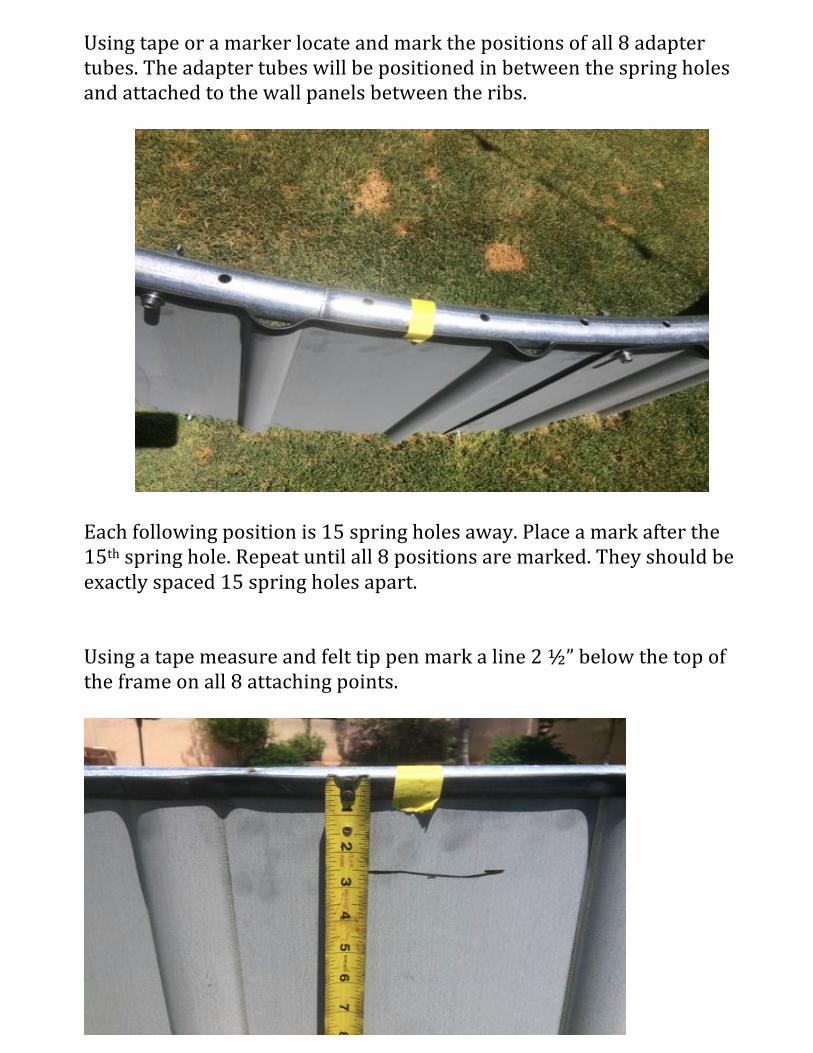
Using$tape$or$a$marker$locate$and$mark$the$positions$of$all$8$adapter$tubes.$The$adapter$tubes$will$be$positioned$in$between$the$spring$holes$and$attached$to$the$wall$panels$between$the$ribs.$$
$$$$$$$$$$$ $$Each$following$position$is$15$spring$holes$away.$Place$a$mark$after$the$15th$spring$hole.$Repeat$until$all$8$positions$are$marked.$They$should$be$exactly$spaced$15$spring$holes$apart.$$$Using$a$tape$measure$and$felt$tip$pen$mark$a$line$2$½”$below$the$top$of$the$frame$on$all$8$attaching$points.$$
$
Page 3
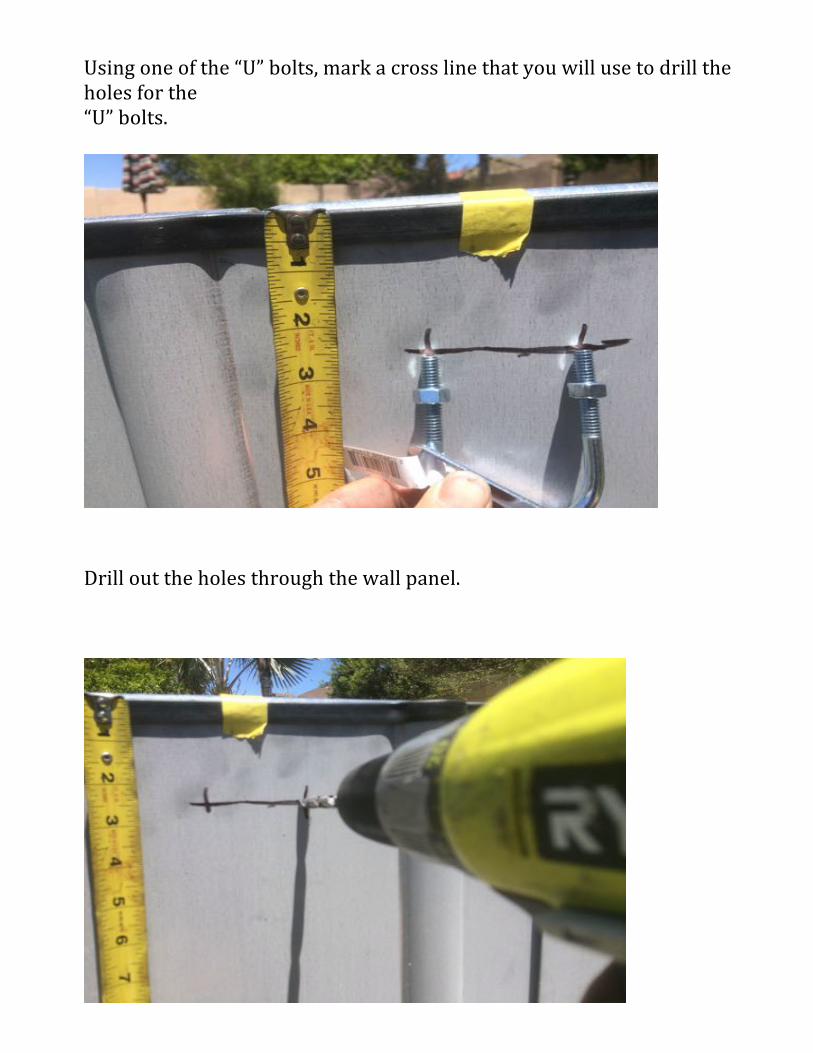
$Using$one$of$the$“U”$bolts,$mark$a$cross$line$that$you$will$use$to$drill$the$holes$for$the$$“U”$bolts.$$
$$$$
Drill$out$the$holes$through$the$wall$panel.$$$$
$$$
Page 4
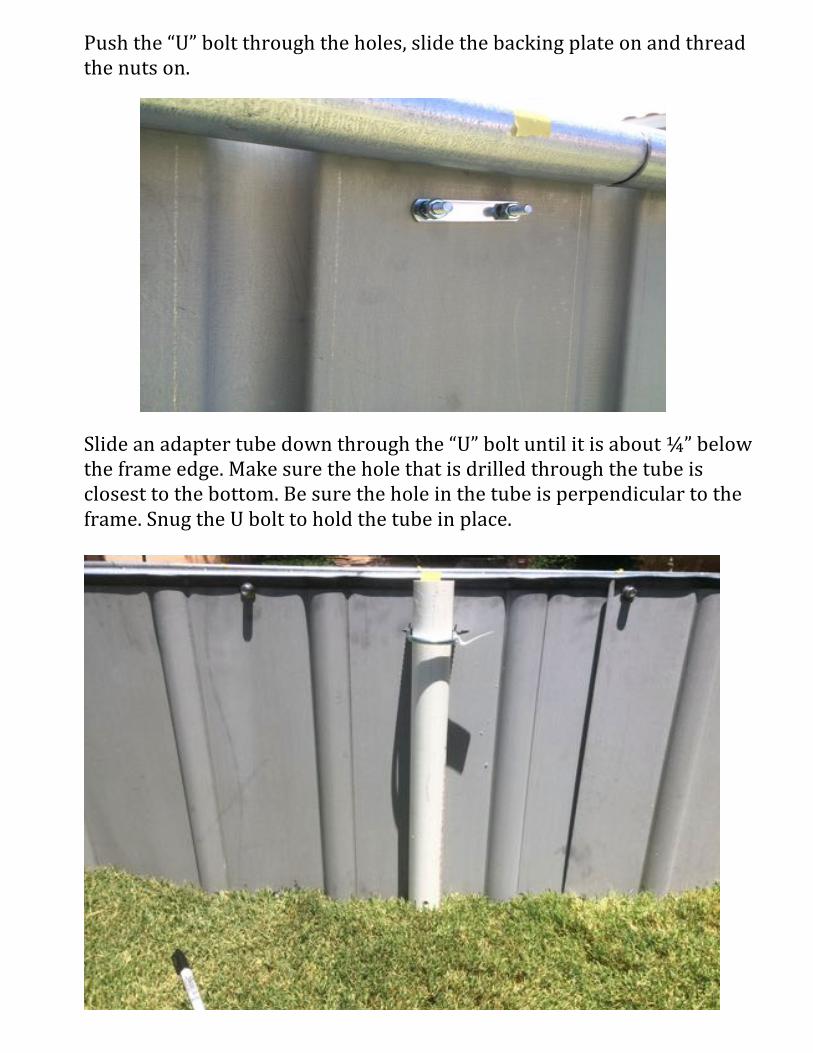
Push$the$“U”$bolt$through$the$holes,$slide$the$backing$plate$on$and$thread$the$nuts$on.$$
$$$$$$$$$$$$$$$$ $$
Slide$an$adapter$tube$down$through$the$“U”$bolt$until$it$is$about$¼”$below$the$frame$edge.$Make$sure$the$hole$that$is$drilled$through$the$tube$is$closest$to$the$bottom.$Be$sure$the$hole$in$the$tube$is$perpendicular$to$the$frame.$Snug$the$U$bolt$to$hold$the$tube$in$place.$$
$$$
Page 5
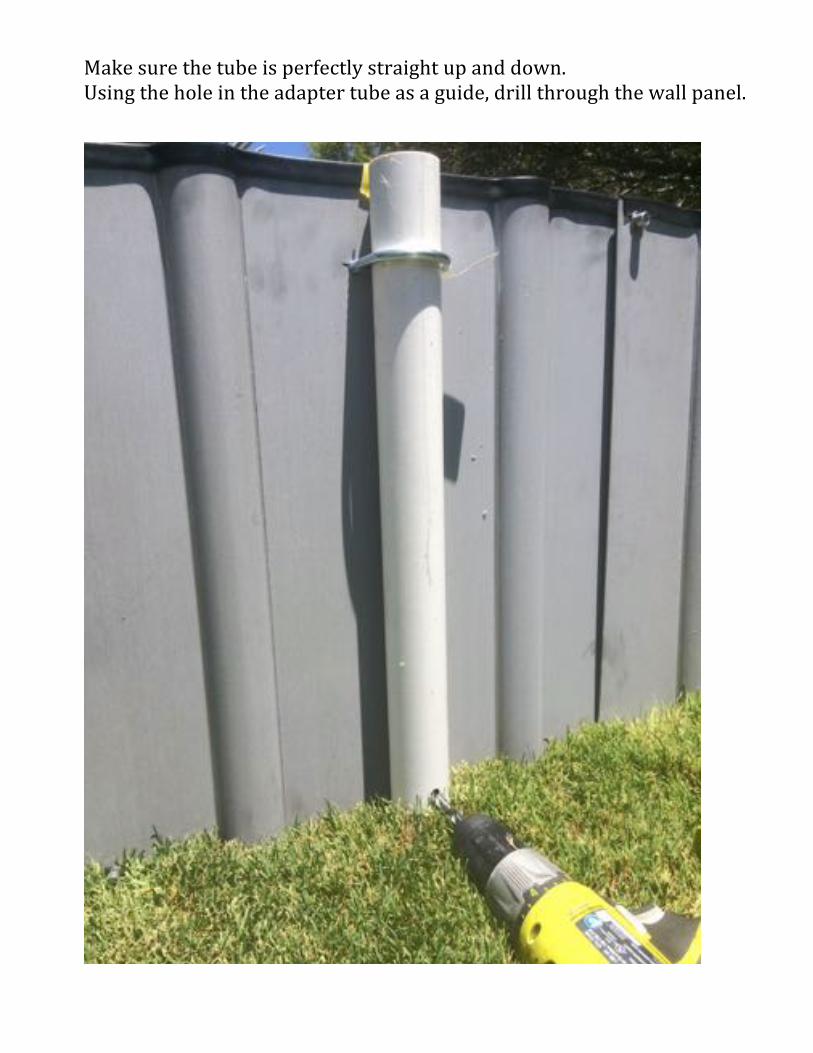
$Make$sure$the$tube$is$perfectly$straight$up$and$down.$Using$the$hole$in$the$adapter$tube$as$a$guide,$drill$through$the$wall$panel.$$$$$$$$$$$$$$$$$$$$$$
$$
$$
Page 6
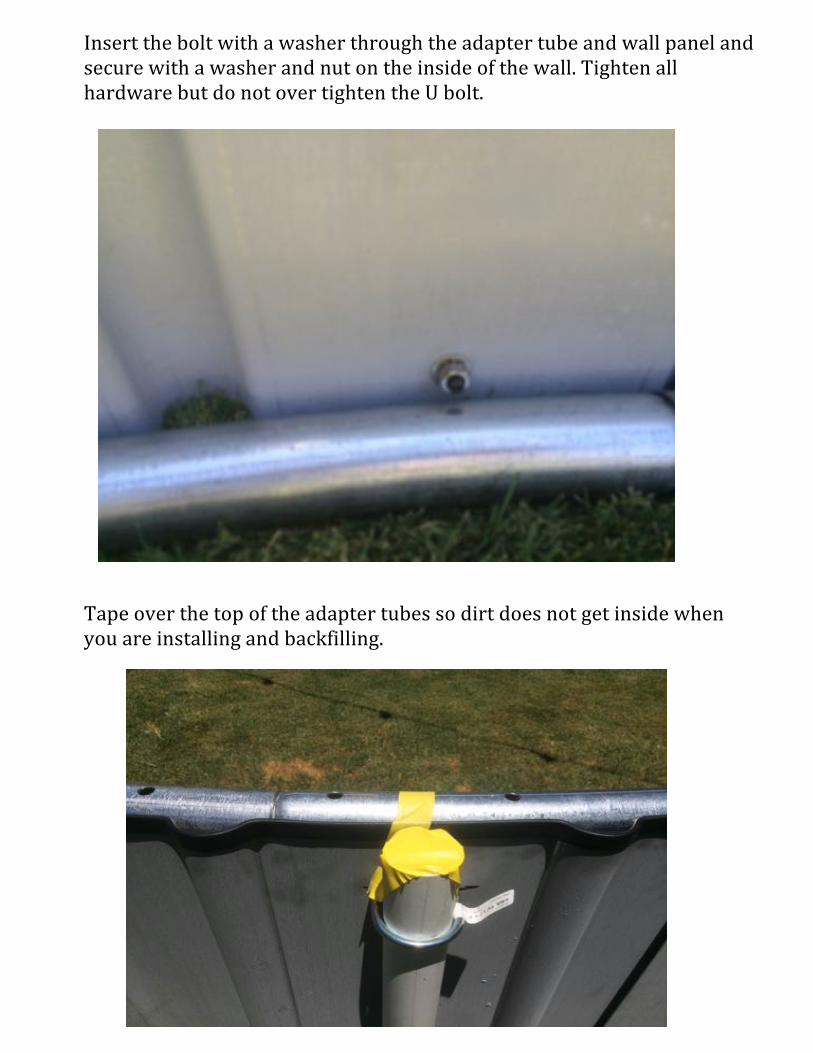
Insert$the$bolt$with$a$washer$through$the$adapter$tube$and$wall$panel$and$secure$with$a$washer$and$nut$on$the$inside$of$the$wall.$Tighten$all$hardware$but$do$not$over$tighten$the$U$bolt.$$
$$$$ $$$
Tape$over$the$top$of$the$adapter$tubes$so$dirt$does$not$get$inside$when$you$are$installing$and$backfilling.$$
$$$$$$$$$$$$ $$$$$$$$$$$$$$$$$$$$$$$$$$$$$$$$
Page 7
$$
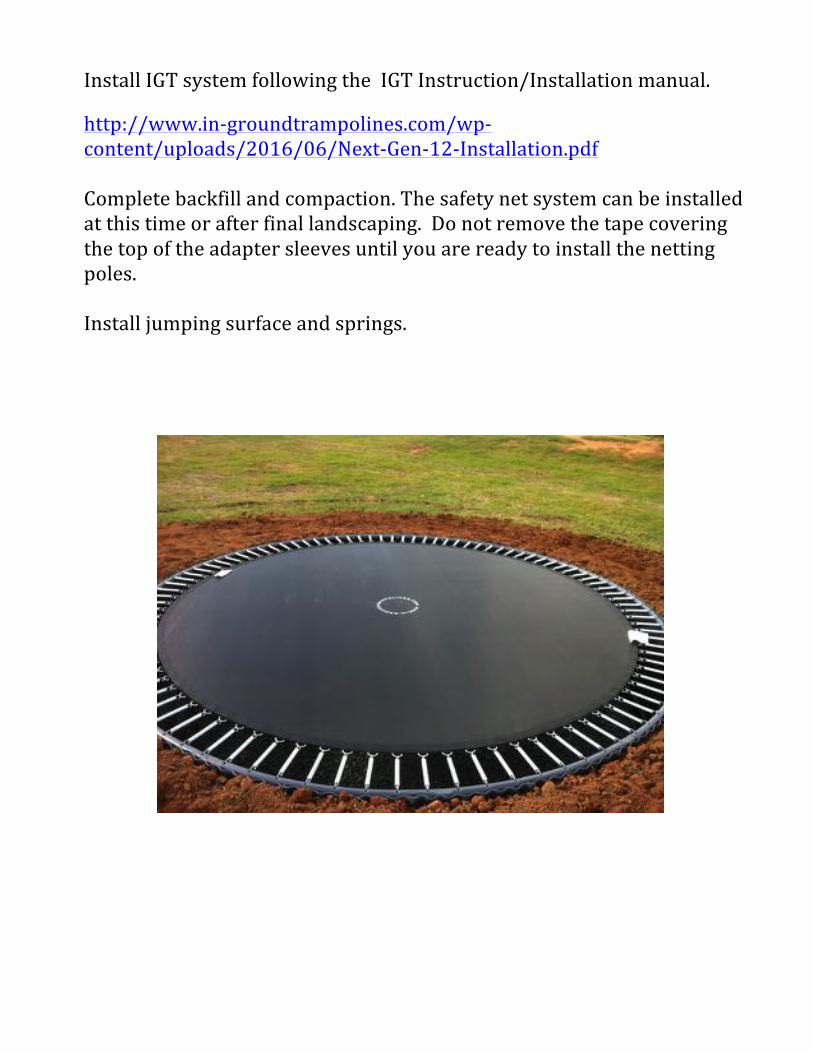
Install$IGT$system$following$the$$IGT$Instruction/Installation$manual.$$$
http://www.inJgroundtrampolines.com/wpJcontent/uploads/2016/06/NextJGenJ12JInstallation.pdf$$Complete$backfill$and$compaction.$The$safety$net$system$can$be$installed$at$this$time$or$after$final$landscaping.$$Do$not$remove$the$tape$covering$the$top$of$the$adapter$sleeves$until$you$are$ready$to$install$the$netting$poles.$$Install$jumping$surface$and$springs.$$$$$$
$$$$$$$$$$$$$$$$$$$$$ $$$$$$$$$$$$$
Page 8
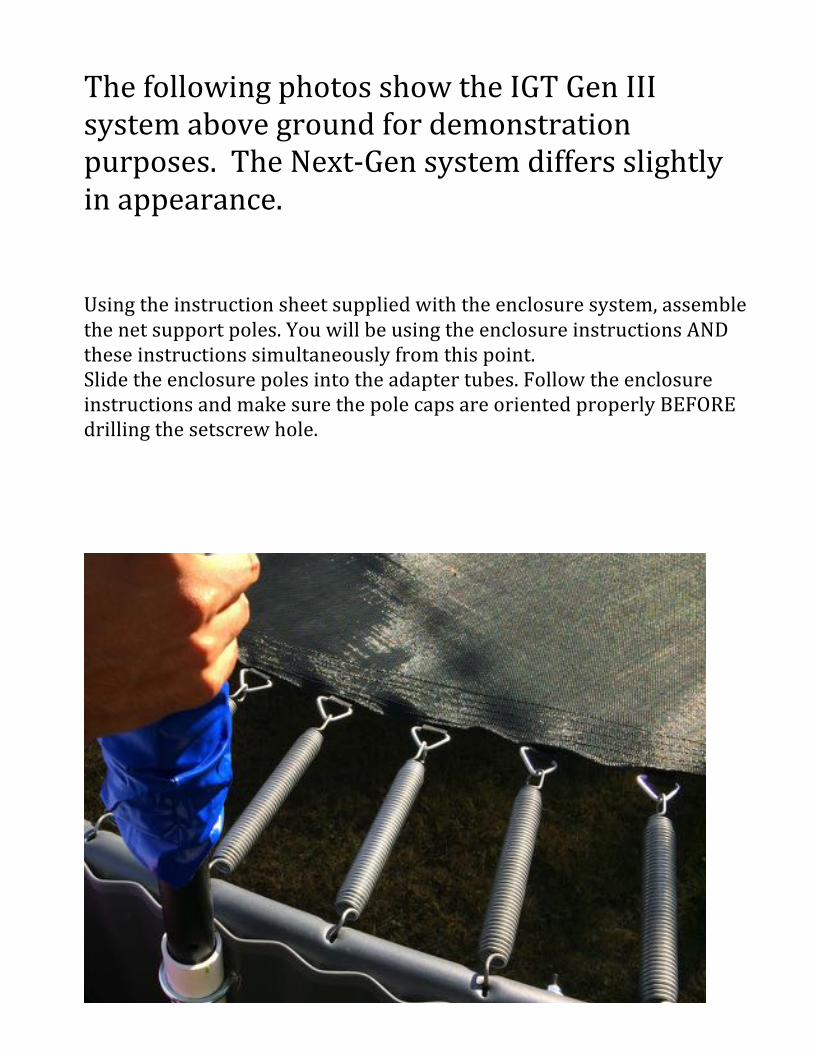
$The$following$photos$show$the$IGT$Gen$III$system$above$ground$for$demonstration$purposes.$$The$NextJGen$system$differs$slightly$in$appearance.$$$$$$
Using$the$instruction$sheet$supplied$with$the$enclosure$system,$assemble$the$net$support$poles.$You$will$be$using$the$enclosure$instructions$AND$these$instructions$simultaneously$from$this$point.$$$Slide$the$enclosure$poles$into$the$adapter$tubes.$Follow$the$enclosure$instructions$and$make$sure$the$pole$caps$are$oriented$properly$BEFORE$drilling$the$setscrew$hole.$!!!!!!
$$$
Page 9
$$$
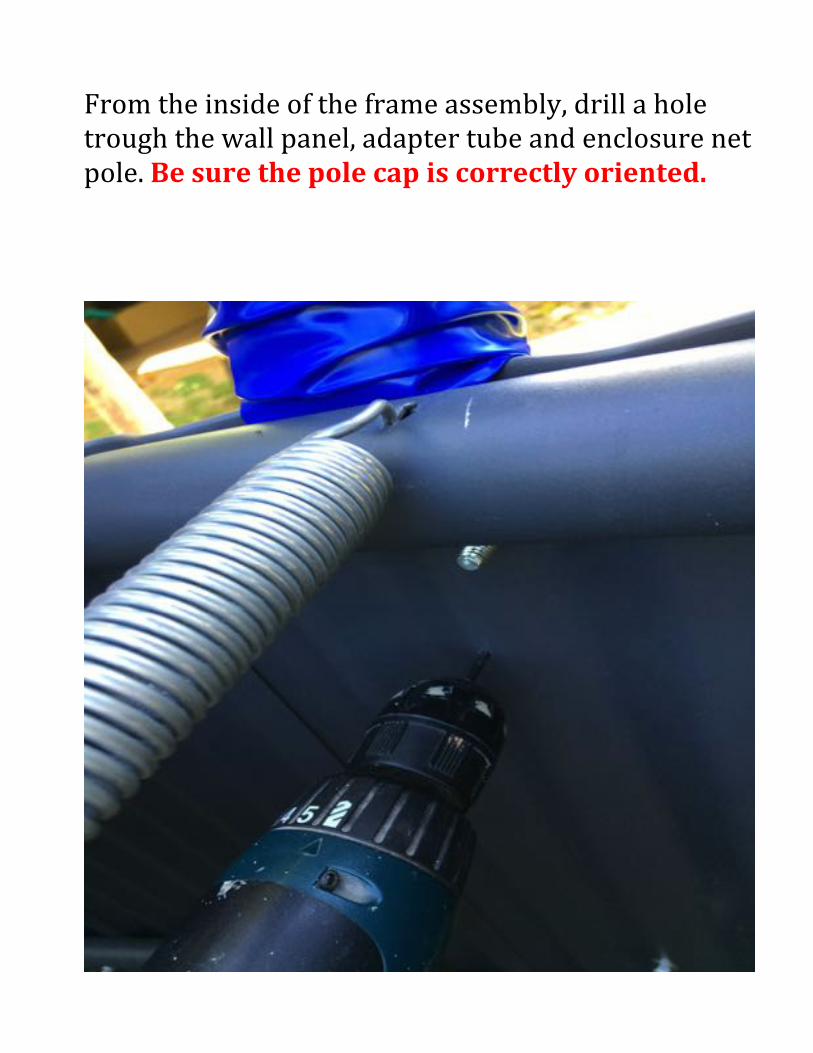
From$the$inside$of$the$frame$assembly,$drill$a$hole$trough$the$wall$panel,$adapter$tube$and$enclosure$net$pole.$Be!sure!the!pole!cap!is!correctly!oriented.!!!!!!!
!$$$$
Page 10
$$$
$$Insert$and$tighten$the$set$screws$on$each$pole.$$$
$$$$$
Page 11
$$
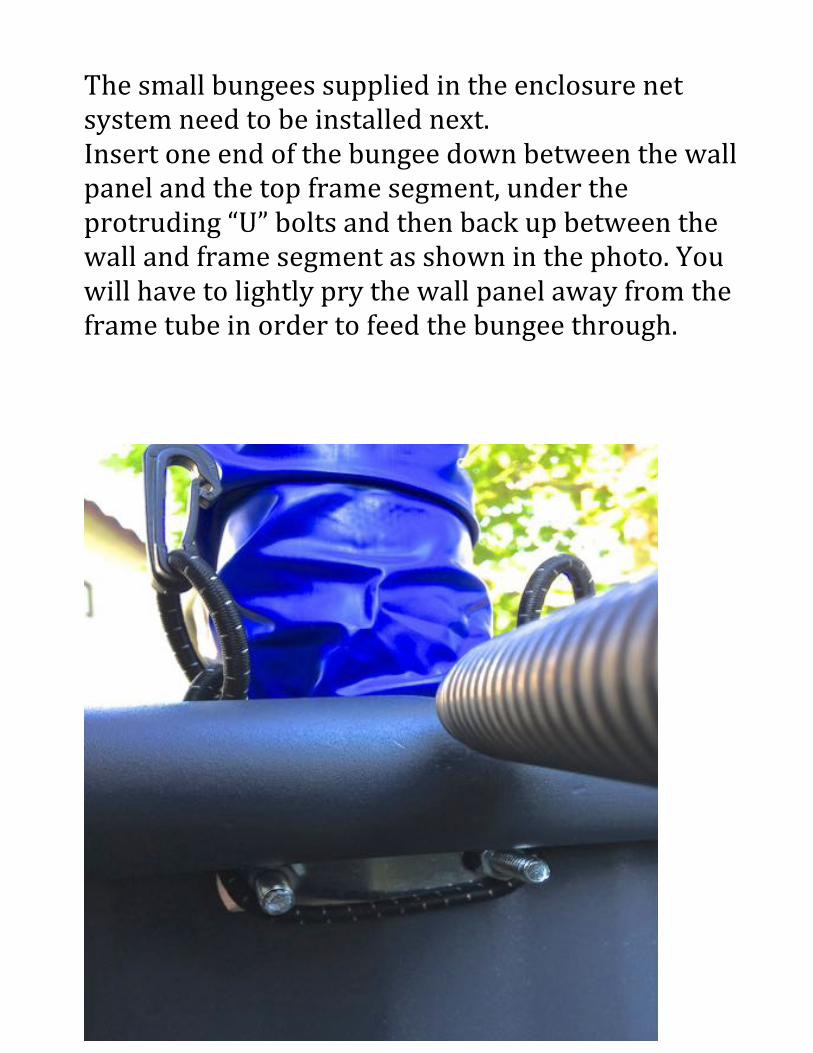
The$small$bungees$supplied$in$the$enclosure$net$system$need$to$be$installed$next.$Insert$one$end$of$the$bungee$down$between$the$wall$panel$and$the$top$frame$segment,$under$the$protruding$“U”$bolts$and$then$back$up$between$the$wall$and$frame$segment$as$shown$in$the$photo.$You$will$have$to$lightly$pry$the$wall$panel$away$from$the$frame$tube$in$order$to$feed$the$bungee$through.$$$$
$
Page 12
$$
$$$Join$ends$on$the$outside$of$the$pole.$$$$$
$$$$$$$$$$$$$
Page 13
$$$
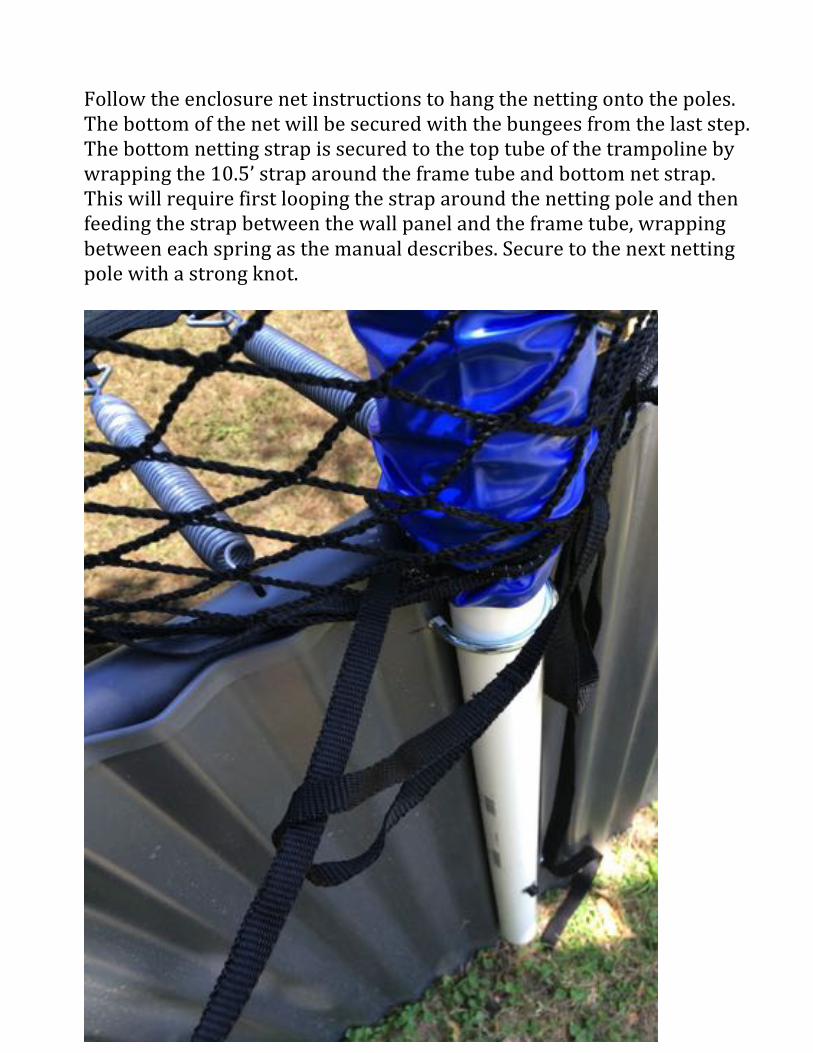
Follow$the$enclosure$net$instructions$to$hang$the$netting$onto$the$poles.$The$bottom$of$the$net$will$be$secured$with$the$bungees$from$the$last$step.$The$bottom$netting$strap$is$secured$to$the$top$tube$of$the$trampoline$by$wrapping$the$10.5’$strap$around$the$frame$tube$and$bottom$net$strap.$This$will$require$first$looping$the$strap$around$the$netting$pole$and$then$feeding$the$strap$between$the$wall$panel$and$the$frame$tube,$wrapping$between$each$spring$as$the$manual$describes.$Secure$to$the$next$netting$pole$with$a$strong$knot.$$
$
Page 14
$
$$$$$$$$$$ $$$$$$$$$
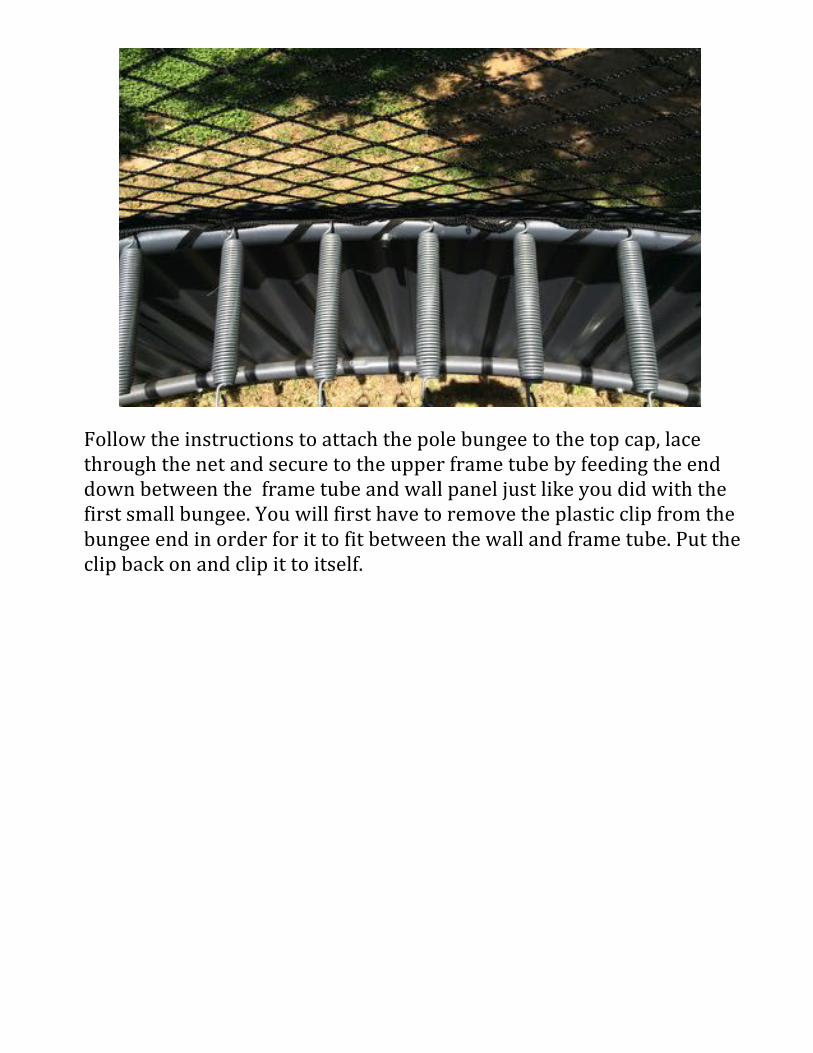
Follow$the$instructions$to$attach$the$pole$bungee$to$the$top$cap,$lace$through$the$net$and$secure$to$the$upper$frame$tube$by$feeding$the$end$down$between$the$$frame$tube$and$wall$panel$just$like$you$did$with$the$first$small$bungee.$You$will$first$have$to$remove$the$plastic$clip$from$the$bungee$end$in$order$for$it$to$fit$between$the$wall$and$frame$tube.$Put$the$clip$back$on$and$clip$it$to$itself.$$
Page 15
$$$$$$$$$$$$$$$$$$$$$$$$$$$$$$$$$$$$$$$$$$$$$$
$$$
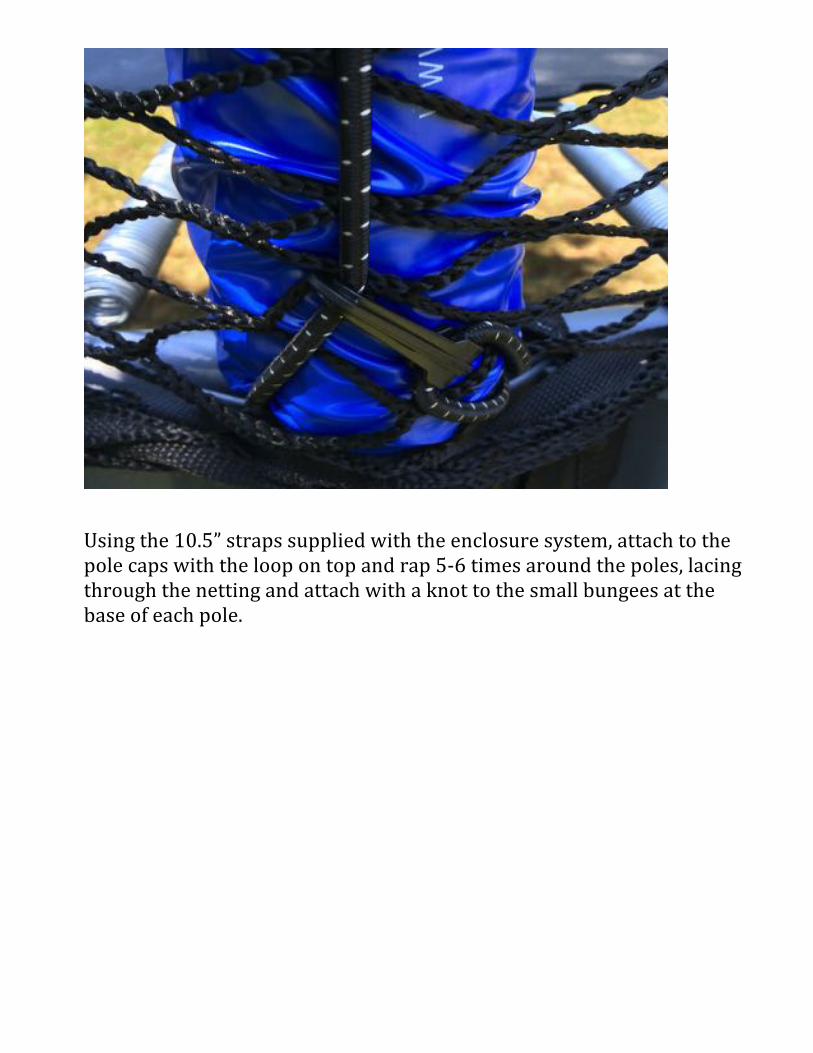
Using$the$10.5”$straps$supplied$with$the$enclosure$system,$attach$to$the$pole$caps$with$the$loop$on$top$and$rap$5J6$times$around$the$poles,$lacing$through$the$netting$and$attach$with$a$knot$to$the$small$bungees$at$the$base$of$each$pole.$$
Page 16
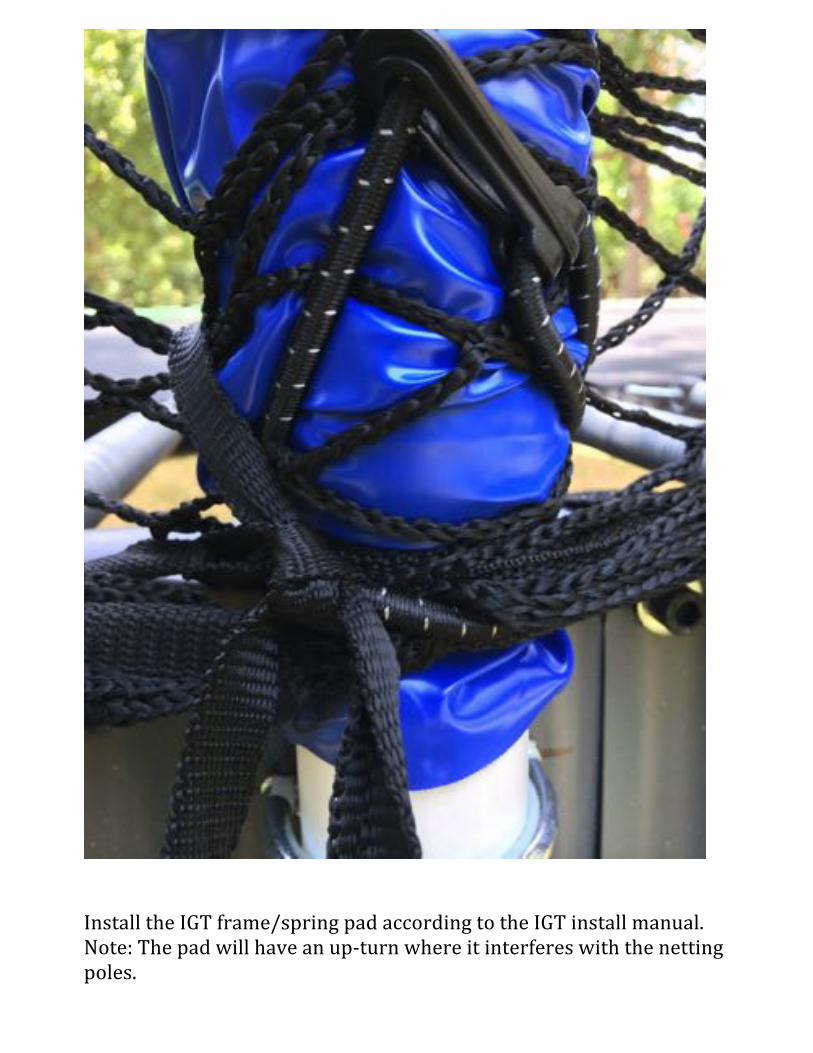
$$$$$$$$$$$Install$the$IGT$frame/spring$pad$according$to$the$IGT$install$manual.$Note:$The$pad$will$have$an$upJturn$where$it$interferes$with$the$netting$poles.$$
Page 17
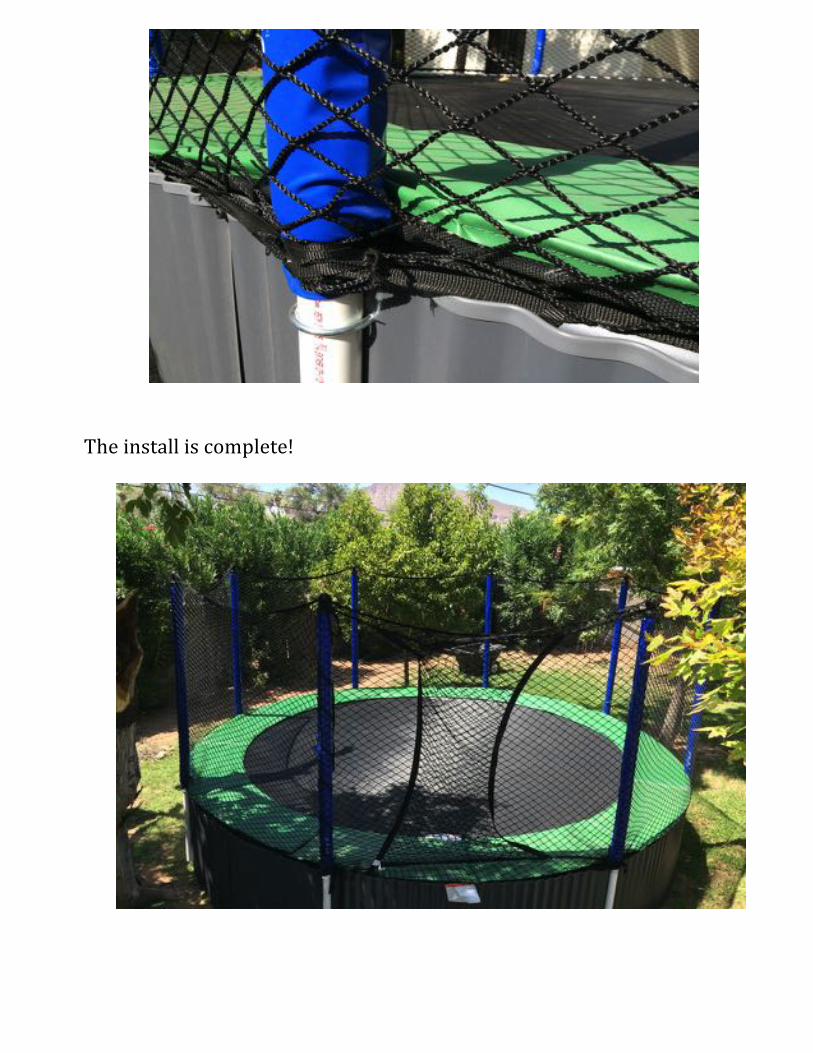
$$$$$$$$$$$$$$ $$$The$install$is$complete!$$
$$$$$$$ $


![SnUG at The SnugAlright - Supergrass SnUG @ The Snug –2nd Monday of each month at The Snug Micropub, Carnforth Railway Station, near Lancaster. We are [D] young, we run green Keep](https://static.documents.pub/doc/80x56/5e80552427ce7e5c5b78c707/snug-at-the-snug-alright-supergrass-snug-the-snug-a2nd-monday-of-each-month.jpg)


