Yiling Tay (ytay) Fall 2011 15862 Computational Photography Final Project Report Automated Cinemagraphs Introduction Cinemagraphs have recently gained popularity as a way to create artistic photography without being limited to capturing a single moment. They are painstakingly created by photographers who spend hours creating the effect with photoediting software. In this project, I created a pipeline that will automatically generate cinemagraphs given a video frame dump and a target area. This process should be fast, simple, and aimed towards general, nonenthusiast users—in other words, people who rather not spend hours to painstakingly post process their photos in Photoshop, or in fact, even know how to use image editing software, and yet want to achieve the cinemagraph effect. Motivation Currently, cinemgraphs are created using software tools like Photoshop and Gimp. However, not everyone is proficient in using these tools. Furthermore, it would be
Transcript
Yiling Tay (ytay)
Fall 2011
15-‐862
Computational Photography
Final Project Report
Automated Cinemagraphs
Introduction
Cinemagraphs have recently gained popularity as a way to create artistic
photography without being limited to capturing a single moment. They are
painstakingly created by photographers who spend hours creating the effect with
photo-‐editing software.
In this project, I created a pipeline that will automatically generate cinemagraphs
given a video frame dump and a target area. This process should be fast, simple, and
aimed towards general, non-‐enthusiast users—in other words, people who rather
not spend hours to painstakingly post-‐ process their photos in Photoshop, or in fact,
even know how to use image editing software, and yet want to achieve the
cinemagraph effect.
Motivation
Currently, cinemgraphs are created using software tools like Photoshop and Gimp.
However, not everyone is proficient in using these tools. Furthermore, it would be
appealing to have an automated way to simply convert a short clip into a
cinemagraph, much like just cropping and resizing a photo after it has been taken.
Previous Work
The major motivation behind this idea is the photographer Jamie Beck’s tumblr blog.
Jamie, along with web designer Kevin Burg, created the concept of a cinemagraph,
which rose into prominence in the middle of the year. As such, there is yet very little
published research on this topic.
Solution
My solution comprises of a few stages: pre-‐processing, target selection, background
reconstruction, and motion tracking.
Pre-‐Processing
After obtaining the frame dump of the video, the frames need to go through an
image registration process to ensure that they al align. An important part of my
solution is the assumption that the camera is stationary. Therefore, if the video was
not taken with a tripod, the images must be pre-‐processed.
I implemented simple edge aligning in order to speed up the process while
preventing too much jitter. The alignment was done with respect to a known
invariant, as shown in Figure 1.
Figure 1: Alignment with a known invariant
Target Selection
This is provided by the user. An example is shown in Figure 2.
Figure 2: Target selection
Background Reconstruction
Since there is motion in a cinemagraph, and yet only one frame is chosen to be used
as the background, it is possible that the target will move to uncover an area that
cannot be seen in the chosen frame. To reconstruct this background, we have a few
choices: averaging, naïve selection, and majority selection.
The first choice is to average the target area over all the frames to create the frozen
frame. This will remove anything that is moving fast. However, since there are
presumably a small number of frames, this may not work if the original frame is the
outlier with respect to what lies behind the target region.
The second choice is naïve selection. Basically, we can just copy over the area from
the current frame on to the frozen frame. However, this can lead to artifacts if the
background in the original video is not constant.
The third choice is, for every pixel in the target area, fill it with the color that is
present in majority of the other frames. This suffers from the same outlier problem
as the first choice, but is decidedly more robust towards slight movement.
In my implementation, I opted for averaging as it gave sufficiently good results
without being as slow as majority selection. The resulting background is shown in
Figure 3.
Figure 3: Averaging background reconstruction
Target Tracking
I implemented this using SSD over the target area, with a mask that provides more
weight towards the center. This ensures the focus of the region gets the most
weight, and the region will move with the target.
Tracking is done in a feedback loop, in order to take advantage of the temporal
information in the video. Basically, for every frame, the assumption is that the
location of the target is close to its location in the previous frame, allowing is to use
a smaller window when searching.
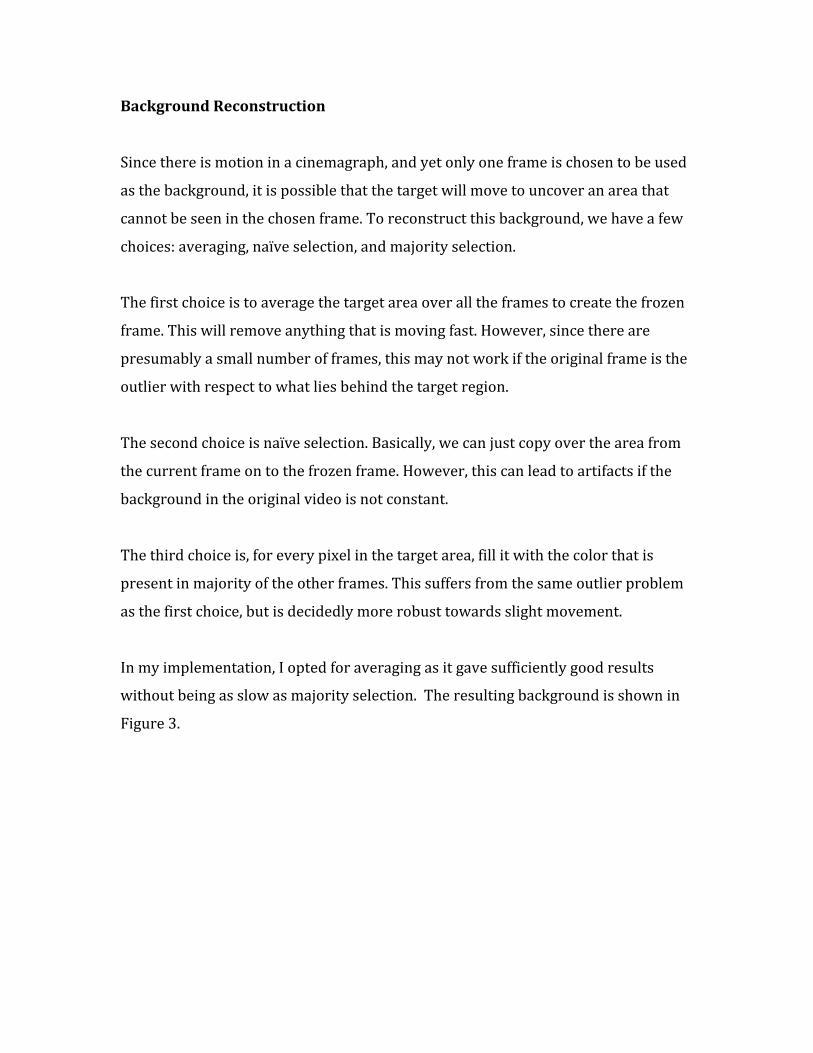
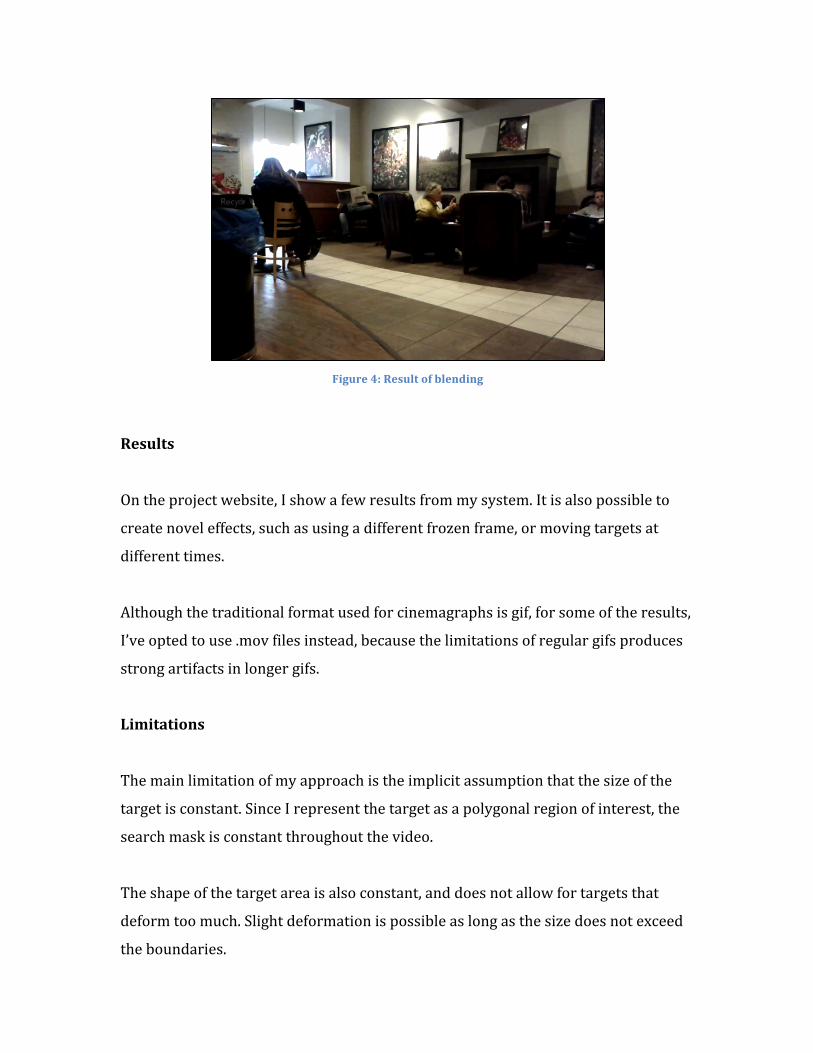
Blending
After determining the location of the target in the new frame, the new target area is
blended back into the reconstructed frozen frame via feathering. Feathering gave
the best results despite some jitter left from my simple image aligning process.
Figure 4: Result of blending
Results
On the project website, I show a few results from my system. It is also possible to
create novel effects, such as using a different frozen frame, or moving targets at
different times.
Although the traditional format used for cinemagraphs is gif, for some of the results,
I’ve opted to use .mov files instead, because the limitations of regular gifs produces
strong artifacts in longer gifs.
Limitations
The main limitation of my approach is the implicit assumption that the size of the
target is constant. Since I represent the target as a polygonal region of interest, the
search mask is constant throughout the video.
The shape of the target area is also constant, and does not allow for targets that
deform too much. Slight deformation is possible as long as the size does not exceed
the boundaries.
Future Work
An interesting area to explore would be to use video texturing to extend this effect.
After extracting the target area and blending the frames, we can create novel
cinemagraphs that do not obviously loop.
Another possible addition would be to use feature points in place of a region mask.
While it may be hard to estimate a good border when extracting the target, it would
eliminate the constraint that the target size be constant, allowing for more