Cricut Design Space User Manual Page | 1 16. Mat Preview A. Mat Preview overview Viewing your project on the Mat Preview is the final step before sending your project to the Cricut ® machine. On the Mat Preview, you can make some final edits to your project, including: Changing project quantity Selecting material size Moving images around on the mats Rotating images on the mats For Print then Cut projects, you also will be able to select whether you want the images to print with a bleed around the edges. Printing with a bleed prevents having to trim away white space around the edges. To access the Mat Preview, click Make It on the design screen. All of the images on your project will be separated onto different mats based on Line Type and material color. Attached images will be placed together based on selections made on the design screen. On the Mat Preview, you can select the number of projects you would like to make. Click in the box next to Project Copies, then type in the number of copies or click on the up and down arrows. Click Apply.
Transcript
Cricut Design Space User Manual
Page | 1
16. Mat Preview
A. Mat Preview overview
Viewing your project on the Mat Preview is the final step before sending your project to the
Cricut® machine. On the Mat Preview, you can make some final edits to your project, including:
Changing project quantity
Selecting material size
Moving images around on the mats
Rotating images on the mats
For Print then Cut projects, you also will be able to select whether you want the images to print
with a bleed around the edges. Printing with a bleed prevents having to trim away white space
around the edges.
To access the Mat Preview, click Make It on the design screen.
All of the images on your project will be separated onto different mats based on Line Type and
material color. Attached images will be placed together based on selections made on the design
screen.
On the Mat Preview, you can select the number of projects you would like to make. Click in the
box next to Project Copies, then type in the number of copies or click on the up and down
arrows. Click Apply.
Cricut Design Space User Manual
Page | 2
Each of the images in your project will be duplicated as many times as indicated. The images
will automatically flow to new mats as necessary.
You can preview each of your mats by clicking on the mat thumbnail from the list at the left
side of the screen. The large Mat Preview is located in the middle of screen.
Cricut Design Space User Manual
Page | 3
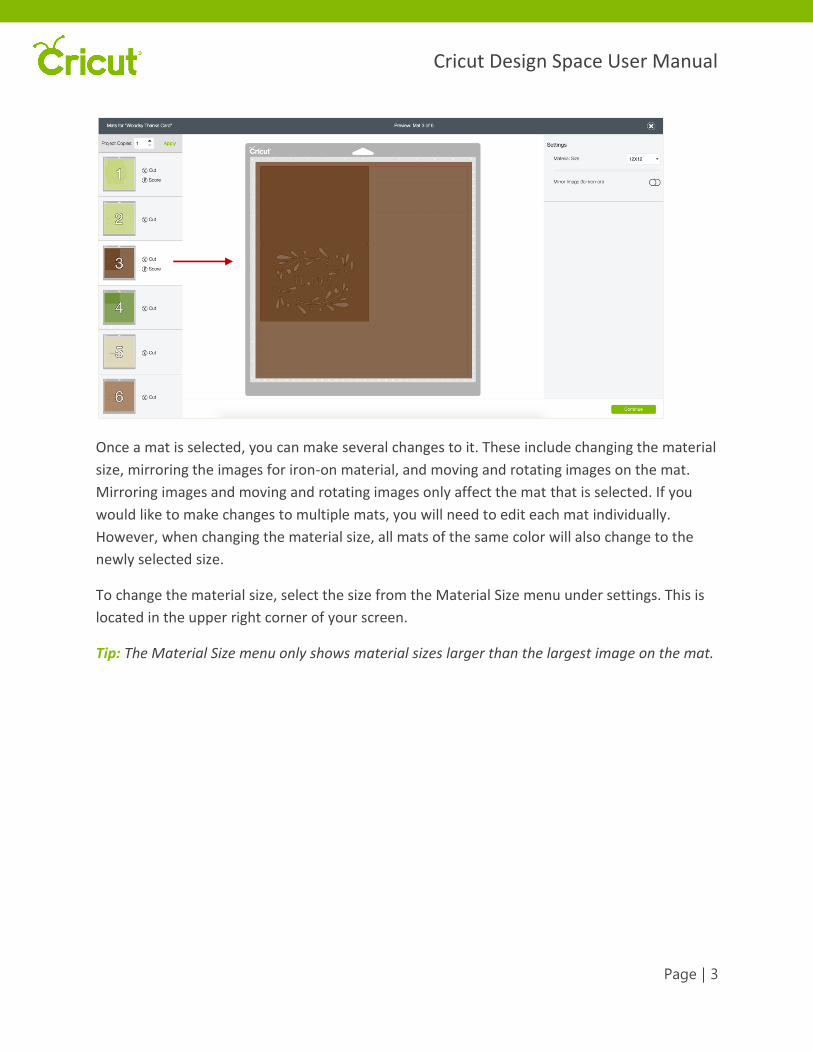
Once a mat is selected, you can make several changes to it. These include changing the material
size, mirroring the images for iron-on material, and moving and rotating images on the mat.
Mirroring images and moving and rotating images only affect the mat that is selected. If you
would like to make changes to multiple mats, you will need to edit each mat individually.
However, when changing the material size, all mats of the same color will also change to the
newly selected size.
To change the material size, select the size from the Material Size menu under settings. This is
located in the upper right corner of your screen.
Tip: The Material Size menu only shows material sizes larger than the largest image on the mat.
Cricut Design Space User Manual
Page | 4
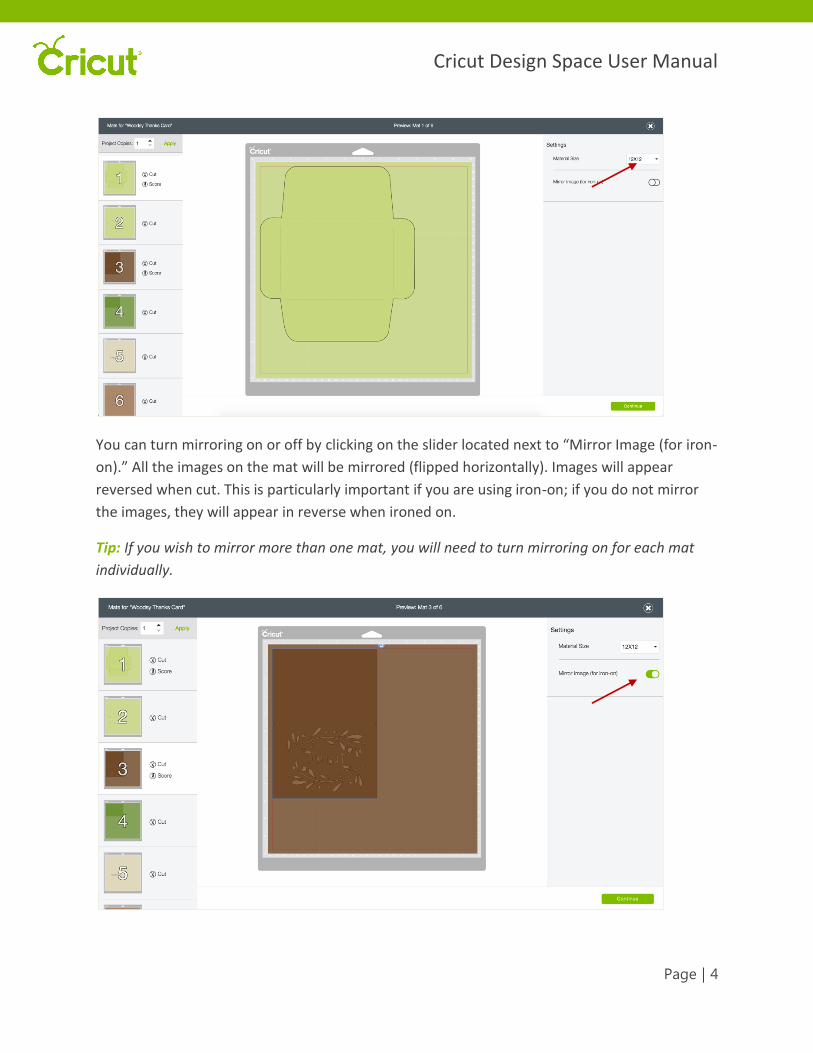
You can turn mirroring on or off by clicking on the slider located next to “Mirror Image (for iron-
on).” All the images on the mat will be mirrored (flipped horizontally). Images will appear
reversed when cut. This is particularly important if you are using iron-on; if you do not mirror
the images, they will appear in reverse when ironed on.
Tip: If you wish to mirror more than one mat, you will need to turn mirroring on for each mat
individually.
Cricut Design Space User Manual
Page | 5
Images will be placed on your mat as shown in the Mat Preview. You have the option to move
images around on the Mat Preview the way you would like them.
To move images, drag the image to the desired location. Bounding Boxes can overlap; however,
cut lines that overlap on the Mat Preview will cut into one another.
To rotate an image, first click on it to select it, and then drag the Rotation Handle to rotate the
image in either direction. The Rotation Handle is a circle icon at the top right corner of the
Bounding Box; when you hover over it, a curved arrow appears.
Cricut Design Space User Manual
Page | 6
Once you are satisfied with image placement, click Continue to proceed to the cut screen.
Tip: If you are not signed into your Cricut account, you will need to do so in order to continue.