55
Oracle® Database 2 Day + Java Developer's Guide Release 18c E83919-02 May 2018

Oracle® Database2 Day + Java Developer's Guide
Release 18cE83919-02May 2018

Oracle Database 2 Day + Java Developer's Guide, Release 18c
E83919-02
Copyright © 2007, 2018, Oracle and/or its affiliates. All rights reserved.
Primary Author: Tanmay Choudhury
Contributing Authors: Tulika Das
Contributors: Kuassi Mensah, Nirmala Sundarappa
This software and related documentation are provided under a license agreement containing restrictions onuse and disclosure and are protected by intellectual property laws. Except as expressly permitted in yourlicense agreement or allowed by law, you may not use, copy, reproduce, translate, broadcast, modify,license, transmit, distribute, exhibit, perform, publish, or display any part, in any form, or by any means.Reverse engineering, disassembly, or decompilation of this software, unless required by law forinteroperability, is prohibited.
The information contained herein is subject to change without notice and is not warranted to be error-free. Ifyou find any errors, please report them to us in writing.
If this is software or related documentation that is delivered to the U.S. Government or anyone licensing it onbehalf of the U.S. Government, then the following notice is applicable:
U.S. GOVERNMENT END USERS: Oracle programs, including any operating system, integrated software,any programs installed on the hardware, and/or documentation, delivered to U.S. Government end users are"commercial computer software" pursuant to the applicable Federal Acquisition Regulation and agency-specific supplemental regulations. As such, use, duplication, disclosure, modification, and adaptation of theprograms, including any operating system, integrated software, any programs installed on the hardware,and/or documentation, shall be subject to license terms and license restrictions applicable to the programs.No other rights are granted to the U.S. Government.
This software or hardware is developed for general use in a variety of information management applications.It is not developed or intended for use in any inherently dangerous applications, including applications thatmay create a risk of personal injury. If you use this software or hardware in dangerous applications, then youshall be responsible to take all appropriate fail-safe, backup, redundancy, and other measures to ensure itssafe use. Oracle Corporation and its affiliates disclaim any liability for any damages caused by use of thissoftware or hardware in dangerous applications.
Oracle and Java are registered trademarks of Oracle and/or its affiliates. Other names may be trademarks oftheir respective owners.
Intel and Intel Xeon are trademarks or registered trademarks of Intel Corporation. All SPARC trademarks areused under license and are trademarks or registered trademarks of SPARC International, Inc. AMD, Opteron,the AMD logo, and the AMD Opteron logo are trademarks or registered trademarks of Advanced MicroDevices. UNIX is a registered trademark of The Open Group.
This software or hardware and documentation may provide access to or information about content, products,and services from third parties. Oracle Corporation and its affiliates are not responsible for and expresslydisclaim all warranties of any kind with respect to third-party content, products, and services unless otherwiseset forth in an applicable agreement between you and Oracle. Oracle Corporation and its affiliates will not beresponsible for any loss, costs, or damages incurred due to your access to or use of third-party content,products, or services, except as set forth in an applicable agreement between you and Oracle.
Contents
Preface
Audience vi
Related Documents vi
Conventions vi
1 Aims and Objectives of This Book
Architecture of the Application 1-1
Components and Repositories 1-3
Objectives and Tasks for Day 1 1-3
Objectives and Tasks for Day 2 1-4
2 Brief Introduction to JDBC, UCP, and Java in the Database
Java Database Connectivity Driver (JDBC) 2-1
Universal Connection Pool 2-3
Java in the Database (OJVM) 2-5
3 Overview of the HR Web Application
Functionalities of the HR Web Application 3-1
4 Getting Started with the Application
What You Need to Install 4-1
Oracle Database 12c Release 2 (12.2) 4-2
Unlocking the HR Schema for the JDBC Application 4-3
JDK 8 4-4
JDeveloper IDE 4-4
J2SE or JDK 4-4
Integrated Development Environment 4-5
Web Server 4-5
Verifying the Oracle Database 12c Release 2 (12.2) Installation 4-5
iii

Github Repository Details 4-5
Import the Application in JDeveloper 4-6
Compile Applications in JDeveloper 4-6
Compile Using Maven and Run the Application in any Java EE Container 4-6
5 List All Employees
Creating a Java Bean Entity for an Employee 5-1
Creating a Java Bean Interface for a JDBC Connection 5-3
Creating a Java Bean Implementation for a JDBC Connection 5-3
Creating a Servlet to Process the Request 5-5
Create an HTML Page to Display Results 5-8
Create a CSS File 5-10
6 Search by Employee ID
Employee Java Bean 6-1
Add the code to a Servlet to process the request 6-2
Create a New HTML for Search by Employee Id 6-3
7 Update an Employee Record
Declare a new method getEmployeeByFn(String) in EmployeeBean.java 7-1
Declare a new method updateEmployee(Employee) 7-2
Implement a New Method getEmployeebyFn() for Search by Employee name 7-2
Implement a new method updateEmployee(Employee) 7-3
Add the Code to a Servlet (WebController.java) 7-4
Create a new HTML(incrementSalary.html) 7-5
Creating Login Users in Tomcat 7-7
8 Best Practices
9 Troubleshooting and Debugging
Index
iv
List of Tables
1-1 Architecture of the Web Application 1-2
1-2 Components Required for the Application 1-3
4-1 Github Repository Details 4-5
v

Preface
This preface discusses the intended audience and conventions of the OracleDatabase 2 Day + Java Developer's Guide.. It also includes a list of related Oracledocuments that you can refer to for more information.
AudienceThis guide is intended for application developers using Java to access and modify datain Oracle Database. This guide illustrates how to perform these tasks using a simpleJava Database Connectivity (JDBC) application. This guide uses the OracleJDeveloper integrated development environment (IDE) to create the application. Thisguide can be read by anyone with an interest in Java programming, but it assumes atleast some prior knowledge of the following:
• Java
• Oracle PL/SQL
• Oracle databases
Related DocumentsFor more information, see the following documents in the Oracle Databasedocumentation set:
• Oracle Database JDBC Developer’s Guide
• Oracle Database Java Developer’s Guide
• Oracle Universal Connection Pool Developer’s Guide
ConventionsThe following text conventions are used in this document:
Convention Meaning
boldface Boldface type indicates graphical user interface elements associatedwith an action, or terms defined in text or the glossary.
italic Italic type indicates book titles, emphasis, or placeholder variables forwhich you supply particular values.
monospace Monospace type indicates commands within a paragraph, URLs, codein examples, text that appears on the screen, or text that you enter.
Preface
vi
1Aims and Objectives of This Book
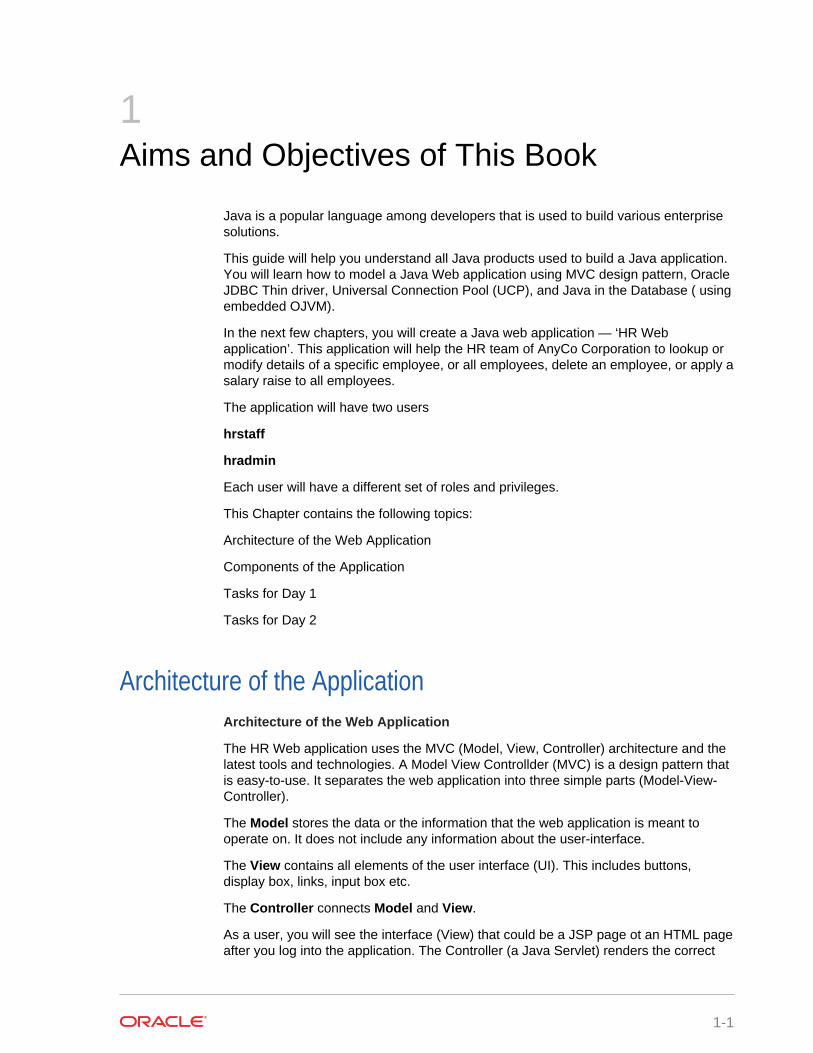
Java is a popular language among developers that is used to build various enterprisesolutions.
This guide will help you understand all Java products used to build a Java application.You will learn how to model a Java Web application using MVC design pattern, OracleJDBC Thin driver, Universal Connection Pool (UCP), and Java in the Database ( usingembedded OJVM).
In the next few chapters, you will create a Java web application — ‘HR Webapplication’. This application will help the HR team of AnyCo Corporation to lookup ormodify details of a specific employee, or all employees, delete an employee, or apply asalary raise to all employees.
The application will have two users
hrstaff
hradmin
Each user will have a different set of roles and privileges.
This Chapter contains the following topics:
Architecture of the Web Application
Components of the Application
Tasks for Day 1
Tasks for Day 2
Architecture of the ApplicationArchitecture of the Web Application
The HR Web application uses the MVC (Model, View, Controller) architecture and thelatest tools and technologies. A Model View Controllder (MVC) is a design pattern thatis easy-to-use. It separates the web application into three simple parts (Model-View-Controller).
The Model stores the data or the information that the web application is meant tooperate on. It does not include any information about the user-interface.
The View contains all elements of the user interface (UI). This includes buttons,display box, links, input box etc.
The Controller connects Model and View.
As a user, you will see the interface (View) that could be a JSP page ot an HTML pageafter you log into the application. The Controller (a Java Servlet) renders the correct
1-1
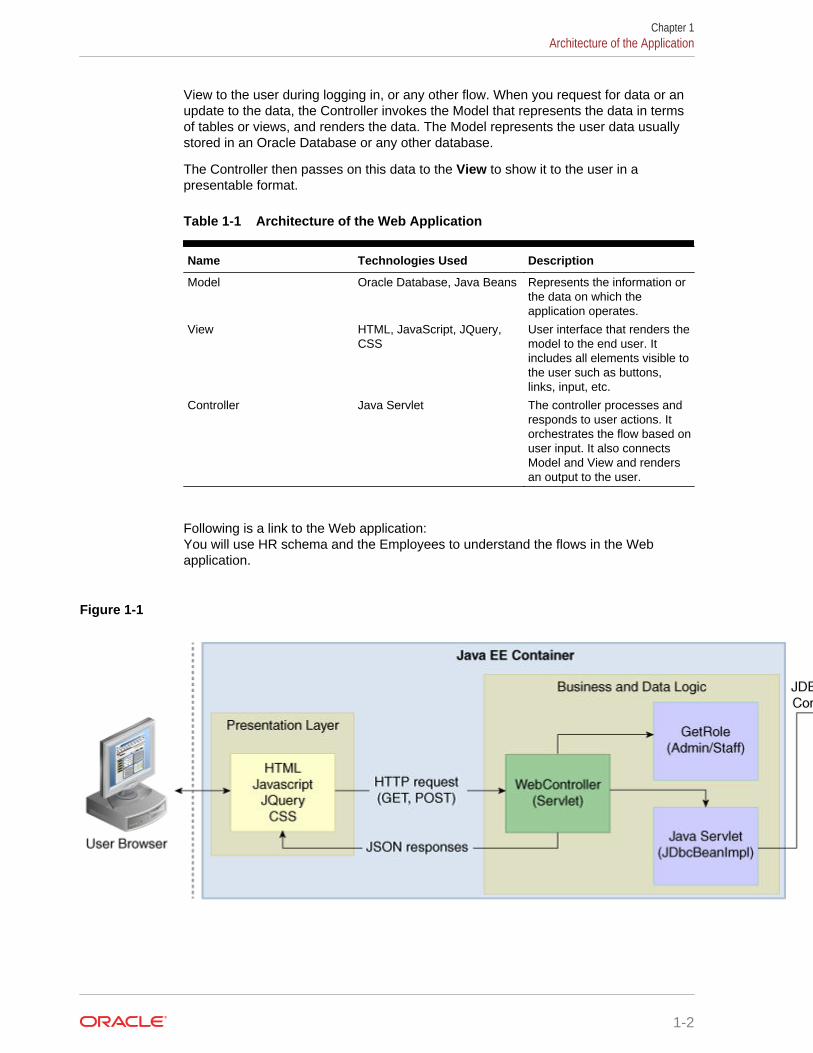
View to the user during logging in, or any other flow. When you request for data or anupdate to the data, the Controller invokes the Model that represents the data in termsof tables or views, and renders the data. The Model represents the user data usuallystored in an Oracle Database or any other database.
The Controller then passes on this data to the View to show it to the user in apresentable format.
Table 1-1 Architecture of the Web Application
Name Technologies Used Description
Model Oracle Database, Java Beans Represents the information orthe data on which theapplication operates.
View HTML, JavaScript, JQuery,CSS
User interface that renders themodel to the end user. Itincludes all elements visible tothe user such as buttons,links, input, etc.
Controller Java Servlet The controller processes andresponds to user actions. Itorchestrates the flow based onuser input. It also connectsModel and View and rendersan output to the user.
Following is a link to the Web application:You will use HR schema and the Employees to understand the flows in the Webapplication.
Figure 1-1
Chapter 1Architecture of the Application
1-2
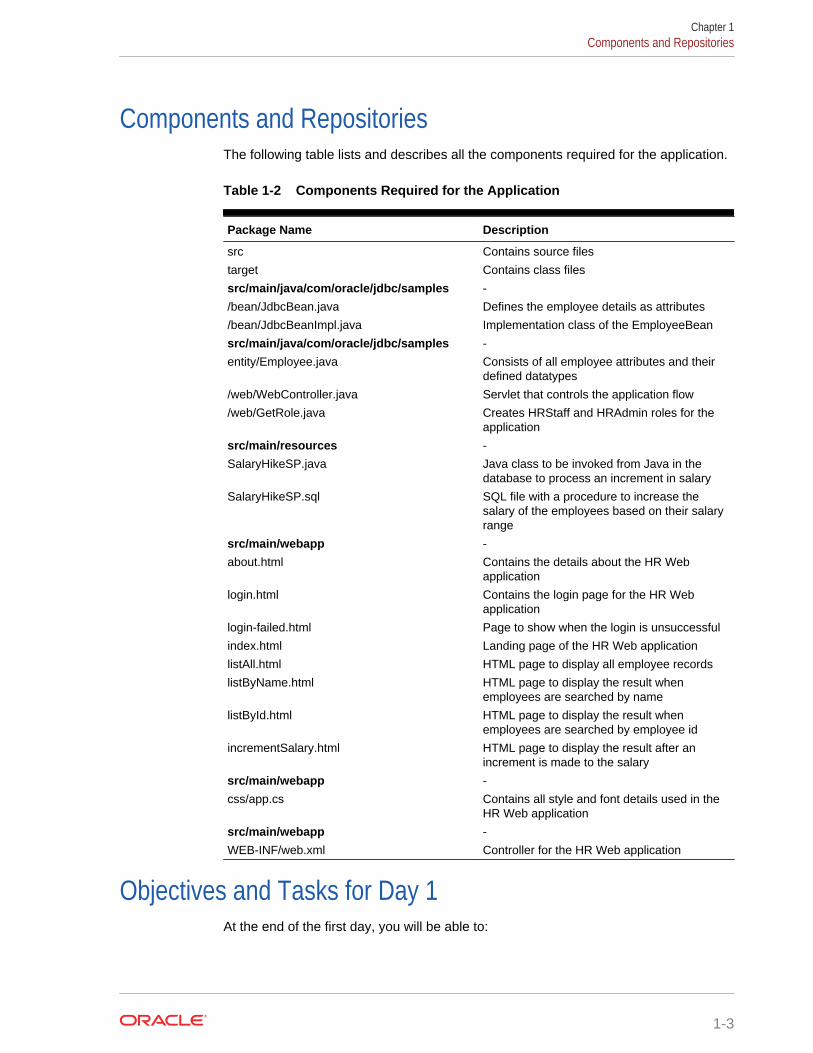
Components and RepositoriesThe following table lists and describes all the components required for the application.
Table 1-2 Components Required for the Application
Package Name Description
src Contains source files
target Contains class files
src/main/java/com/oracle/jdbc/samples -
/bean/JdbcBean.java Defines the employee details as attributes
/bean/JdbcBeanImpl.java Implementation class of the EmployeeBean
src/main/java/com/oracle/jdbc/samples -
entity/Employee.java Consists of all employee attributes and theirdefined datatypes
/web/WebController.java Servlet that controls the application flow
/web/GetRole.java Creates HRStaff and HRAdmin roles for theapplication
src/main/resources -
SalaryHikeSP.java Java class to be invoked from Java in thedatabase to process an increment in salary
SalaryHikeSP.sql SQL file with a procedure to increase thesalary of the employees based on their salaryrange
src/main/webapp -
about.html Contains the details about the HR Webapplication
login.html Contains the login page for the HR Webapplication
login-failed.html Page to show when the login is unsuccessful
index.html Landing page of the HR Web application
listAll.html HTML page to display all employee records
listByName.html HTML page to display the result whenemployees are searched by name
listById.html HTML page to display the result whenemployees are searched by employee id
incrementSalary.html HTML page to display the result after anincrement is made to the salary
src/main/webapp -
css/app.cs Contains all style and font details used in theHR Web application
src/main/webapp -
WEB-INF/web.xml Controller for the HR Web application
Objectives and Tasks for Day 1At the end of the first day, you will be able to:
Chapter 1Components and Repositories
1-3
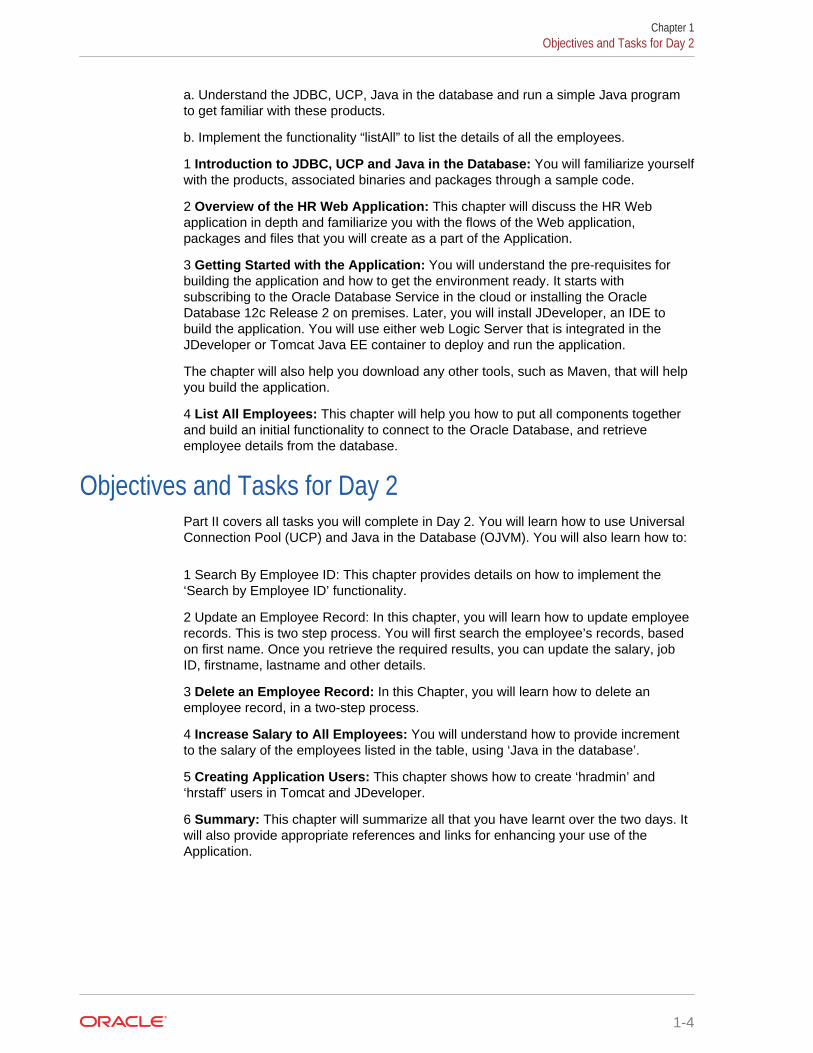
a. Understand the JDBC, UCP, Java in the database and run a simple Java programto get familiar with these products.
b. Implement the functionality “listAll” to list the details of all the employees.
1 Introduction to JDBC, UCP and Java in the Database: You will familiarize yourselfwith the products, associated binaries and packages through a sample code.
2 Overview of the HR Web Application: This chapter will discuss the HR Webapplication in depth and familiarize you with the flows of the Web application,packages and files that you will create as a part of the Application.
3 Getting Started with the Application: You will understand the pre-requisites forbuilding the application and how to get the environment ready. It starts withsubscribing to the Oracle Database Service in the cloud or installing the OracleDatabase 12c Release 2 on premises. Later, you will install JDeveloper, an IDE tobuild the application. You will use either web Logic Server that is integrated in theJDeveloper or Tomcat Java EE container to deploy and run the application.
The chapter will also help you download any other tools, such as Maven, that will helpyou build the application.
4 List All Employees: This chapter will help you how to put all components togetherand build an initial functionality to connect to the Oracle Database, and retrieveemployee details from the database.
Objectives and Tasks for Day 2Part II covers all tasks you will complete in Day 2. You will learn how to use UniversalConnection Pool (UCP) and Java in the Database (OJVM). You will also learn how to:
1 Search By Employee ID: This chapter provides details on how to implement the‘Search by Employee ID’ functionality.
2 Update an Employee Record: In this chapter, you will learn how to update employeerecords. This is two step process. You will first search the employee’s records, basedon first name. Once you retrieve the required results, you can update the salary, jobID, firstname, lastname and other details.
3 Delete an Employee Record: In this Chapter, you will learn how to delete anemployee record, in a two-step process.
4 Increase Salary to All Employees: You will understand how to provide incrementto the salary of the employees listed in the table, using ‘Java in the database’.
5 Creating Application Users: This chapter shows how to create ‘hradmin’ and‘hrstaff’ users in Tomcat and JDeveloper.
6 Summary: This chapter will summarize all that you have learnt over the two days. Itwill also provide appropriate references and links for enhancing your use of theApplication.
Chapter 1Objectives and Tasks for Day 2
1-4
2Brief Introduction to JDBC, UCP, and Javain the Database
Oracle Database is a relational database that you can use to store, modify and usedata.
The Java Database Connectivity (JDBC) standard is used by Java applications toaccess and manipulate data in relational databases.
JDBC is an industry-standard application programming interface (API) that lets youaccess a RDBMS using SQL from Java. JDBC complies with the Entry Level of theJDBC escape standard. Each vendor implements the JDBC Specification with its ownextensions.
Universal Connection Pool (UCP) is a connection pool used to cache the databaseconnection objects to reuse the connections, thus improving the performance.
Java in the Database (OJVM) helps group SQL operations with Java data logic andload them into the database for in-place processing.
See Also:
http://www.oracle.com/technetwork/java/overview-141217.html
This chapter introduces you to the JDBC driver, Universal Connection Pool (UCP) andJava in the Database (OJVM) with Oracle Database 12c Release 2 (12.2)
• Java Database Connectivity Driver (JDBC)
• Universal Connection Pool (UCP)
• Java in the Database (OJVM)
Java Database Connectivity Driver (JDBC)JDBC is a database access protocol that enables you to connect to a database andrun SQL statement and queries on the database. JDBC drivers implement and complywith the latest JDBC specifications. Java application need to have ojdbc8.jarcompatible with JDK8 in their classpath.
The core Java class libraries provide the JDBC APIs, java.sql and javax.sql
The following sections describe Oracle support for the JDBC standard:
• Oracle JDBC Thin Driver
• Oracle JDBC Packages
2-1
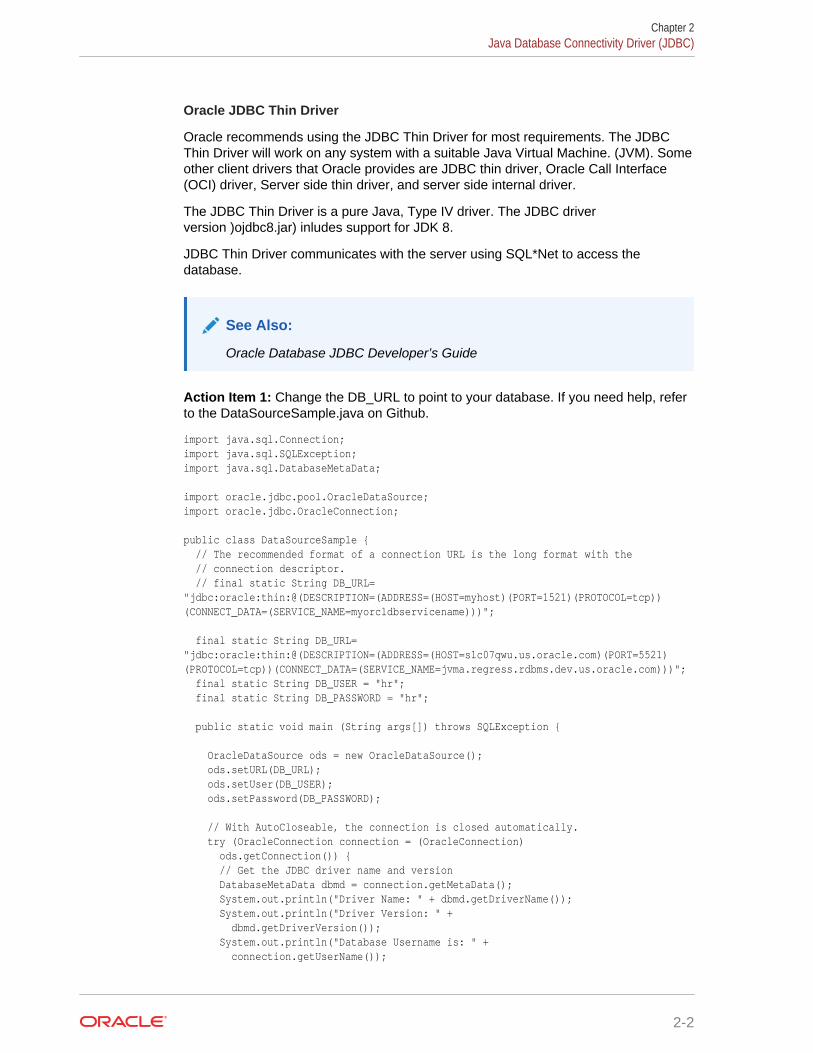
Oracle JDBC Thin Driver
Oracle recommends using the JDBC Thin Driver for most requirements. The JDBCThin Driver will work on any system with a suitable Java Virtual Machine. (JVM). Someother client drivers that Oracle provides are JDBC thin driver, Oracle Call Interface(OCI) driver, Server side thin driver, and server side internal driver.
The JDBC Thin Driver is a pure Java, Type IV driver. The JDBC driverversion )ojdbc8.jar) inludes support for JDK 8.
JDBC Thin Driver communicates with the server using SQL*Net to access thedatabase.
See Also:
Oracle Database JDBC Developer’s Guide
Action Item 1: Change the DB_URL to point to your database. If you need help, referto the DataSourceSample.java on Github.
import java.sql.Connection;import java.sql.SQLException;import java.sql.DatabaseMetaData;
import oracle.jdbc.pool.OracleDataSource;import oracle.jdbc.OracleConnection;
public class DataSourceSample { // The recommended format of a connection URL is the long format with the // connection descriptor. // final static String DB_URL= "jdbc:oracle:thin:@(DESCRIPTION=(ADDRESS=(HOST=myhost)(PORT=1521)(PROTOCOL=tcp))(CONNECT_DATA=(SERVICE_NAME=myorcldbservicename)))";
final static String DB_URL= "jdbc:oracle:thin:@(DESCRIPTION=(ADDRESS=(HOST=slc07qwu.us.oracle.com)(PORT=5521)(PROTOCOL=tcp))(CONNECT_DATA=(SERVICE_NAME=jvma.regress.rdbms.dev.us.oracle.com)))"; final static String DB_USER = "hr"; final static String DB_PASSWORD = "hr";
public static void main (String args[]) throws SQLException {
OracleDataSource ods = new OracleDataSource(); ods.setURL(DB_URL); ods.setUser(DB_USER); ods.setPassword(DB_PASSWORD);
// With AutoCloseable, the connection is closed automatically. try (OracleConnection connection = (OracleConnection) ods.getConnection()) { // Get the JDBC driver name and version DatabaseMetaData dbmd = connection.getMetaData(); System.out.println("Driver Name: " + dbmd.getDriverName()); System.out.println("Driver Version: " + dbmd.getDriverVersion()); System.out.println("Database Username is: " + connection.getUserName());
Chapter 2Java Database Connectivity Driver (JDBC)
2-2
} }}
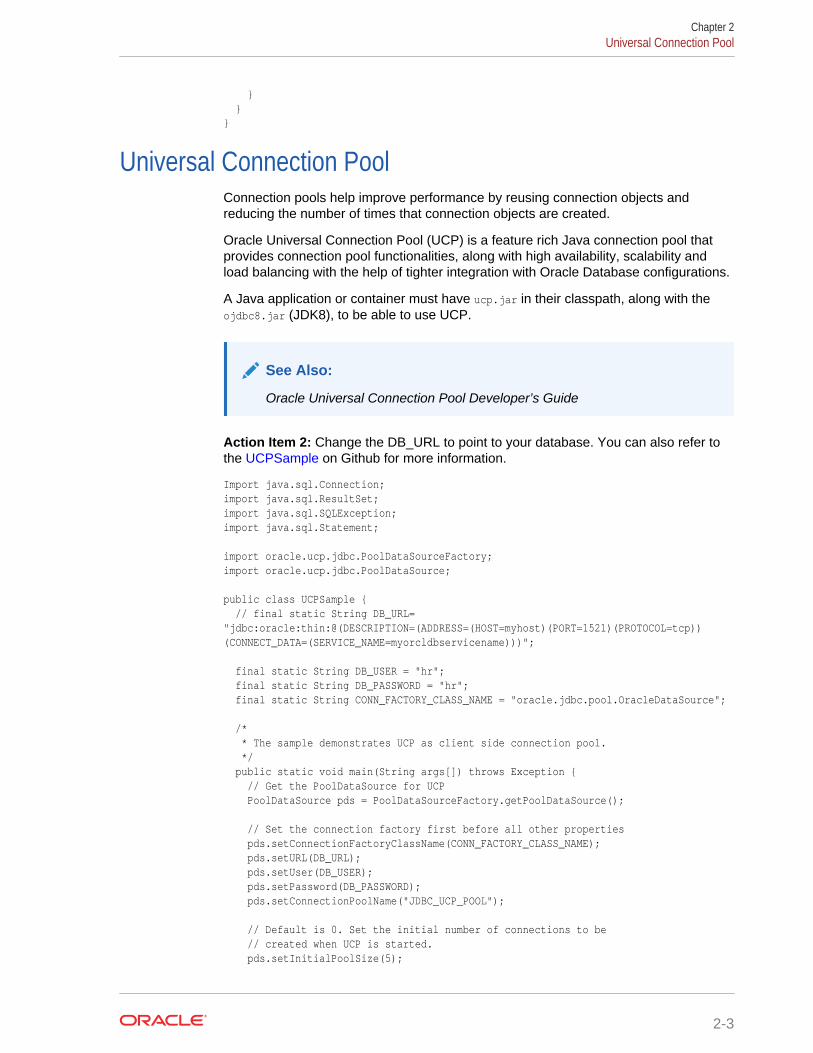
Universal Connection PoolConnection pools help improve performance by reusing connection objects andreducing the number of times that connection objects are created.
Oracle Universal Connection Pool (UCP) is a feature rich Java connection pool thatprovides connection pool functionalities, along with high availability, scalability andload balancing with the help of tighter integration with Oracle Database configurations.
A Java application or container must have ucp.jar in their classpath, along with theojdbc8.jar (JDK8), to be able to use UCP.
See Also:
Oracle Universal Connection Pool Developer’s Guide
Action Item 2: Change the DB_URL to point to your database. You can also refer tothe UCPSample on Github for more information.
Import java.sql.Connection;import java.sql.ResultSet;import java.sql.SQLException;import java.sql.Statement;
import oracle.ucp.jdbc.PoolDataSourceFactory;import oracle.ucp.jdbc.PoolDataSource;
public class UCPSample { // final static String DB_URL= "jdbc:oracle:thin:@(DESCRIPTION=(ADDRESS=(HOST=myhost)(PORT=1521)(PROTOCOL=tcp))(CONNECT_DATA=(SERVICE_NAME=myorcldbservicename)))"; final static String DB_USER = "hr"; final static String DB_PASSWORD = "hr"; final static String CONN_FACTORY_CLASS_NAME = "oracle.jdbc.pool.OracleDataSource";
/* * The sample demonstrates UCP as client side connection pool. */ public static void main(String args[]) throws Exception { // Get the PoolDataSource for UCP PoolDataSource pds = PoolDataSourceFactory.getPoolDataSource();
// Set the connection factory first before all other properties pds.setConnectionFactoryClassName(CONN_FACTORY_CLASS_NAME); pds.setURL(DB_URL); pds.setUser(DB_USER); pds.setPassword(DB_PASSWORD); pds.setConnectionPoolName("JDBC_UCP_POOL");
// Default is 0. Set the initial number of connections to be // created when UCP is started. pds.setInitialPoolSize(5);
Chapter 2Universal Connection Pool
2-3

// Default is 0. Set the minimum number of connections // that is maintained by UCP at runtime. pds.setMinPoolSize(5);
// Default is Integer.MAX_VALUE (2147483647). Set the maximum // number of connections allowed on the connection pool. pds.setMaxPoolSize(20);
// Default is 30secs. Set the frequency in seconds to enforce // the timeout properties. Applies to // inactiveConnectionTimeout(int secs), // AbandonedConnectionTimeout(secs)& //TimeToLiveConnectionTimeout(int secs). // Range of valid values is 0 to Integer.MAX_VALUE. pds.setTimeoutCheckInterval(5);
// Default is 0. Set the maximum time, in seconds, that a // connection remains available in the connection pool. pds.setInactiveConnectionTimeout(10);
System.out.println("Available connections before checkout: " + pds.getAvailableConnectionsCount()); System.out.println("Borrowed connections before checkout: " + pds.getBorrowedConnectionsCount()); // Get the database connection from UCP. try (Connection conn = pds.getConnection()) { System.out.println("Available connections after checkout: " + pds.getAvailableConnectionsCount()); System.out.println("Borrowed connections after checkout: " + pds.getBorrowedConnectionsCount()); // Perform a database operation printEmployees(conn); } catch (SQLException e) { System.out.println("UCPSample - " + "SQLException occurred : " + e.getMessage()); } System.out.println("Available connections after checkin: " + pds.getAvailableConnectionsCount()); System.out.println("Borrowed connections after checkin: " + pds.getBorrowedConnectionsCount()); } /* * Displays first_name and last_name from the employees table. */ public static void printEmployees(Connection connection) throws SQLException { // Statement and ResultSet are AutoCloseable and closed // automatically. try (Statement statement = connection.createStatement()) { try (ResultSet resultSet = statement .executeQuery("select first_name, last_name from employees")) { System.out.println("FIRST_NAME" + " " + "LAST_NAME"); System.out.println("---------------------"); while (resultSet.next()) System.out.println(resultSet.getString(1) + " " + resultSet.getString(2) + " "); } }
Chapter 2Universal Connection Pool
2-4
} }
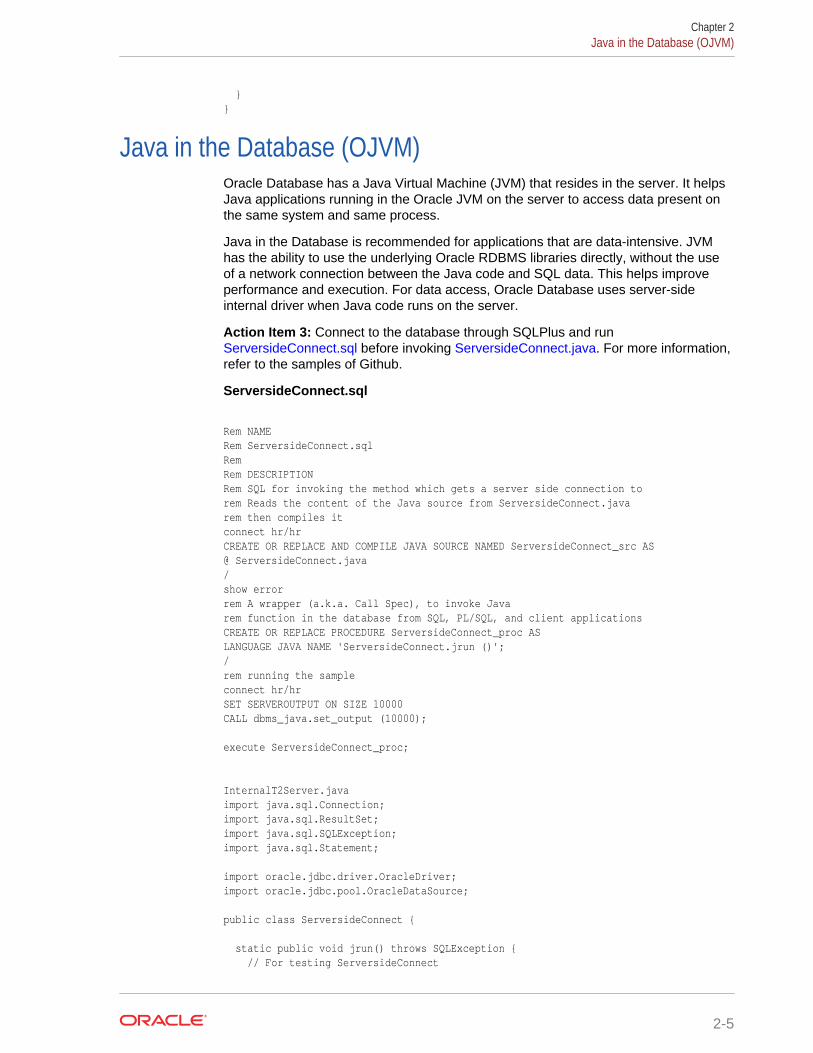
Java in the Database (OJVM)Oracle Database has a Java Virtual Machine (JVM) that resides in the server. It helpsJava applications running in the Oracle JVM on the server to access data present onthe same system and same process.
Java in the Database is recommended for applications that are data-intensive. JVMhas the ability to use the underlying Oracle RDBMS libraries directly, without the useof a network connection between the Java code and SQL data. This helps improveperformance and execution. For data access, Oracle Database uses server-sideinternal driver when Java code runs on the server.
Action Item 3: Connect to the database through SQLPlus and run ServersideConnect.sql before invoking ServersideConnect.java. For more information,refer to the samples of Github.
ServersideConnect.sql
Rem NAMERem ServersideConnect.sql RemRem DESCRIPTIONRem SQL for invoking the method which gets a server side connection torem Reads the content of the Java source from ServersideConnect.java rem then compiles it connect hr/hrCREATE OR REPLACE AND COMPILE JAVA SOURCE NAMED ServersideConnect_src AS@ ServersideConnect.java/show errorrem A wrapper (a.k.a. Call Spec), to invoke Javarem function in the database from SQL, PL/SQL, and client applicationsCREATE OR REPLACE PROCEDURE ServersideConnect_proc AS LANGUAGE JAVA NAME 'ServersideConnect.jrun ()';/rem running the sampleconnect hr/hrSET SERVEROUTPUT ON SIZE 10000 CALL dbms_java.set_output (10000);
execute ServersideConnect_proc;
InternalT2Server.javaimport java.sql.Connection;import java.sql.ResultSet;import java.sql.SQLException;import java.sql.Statement;
import oracle.jdbc.driver.OracleDriver;import oracle.jdbc.pool.OracleDataSource;
public class ServersideConnect {
static public void jrun() throws SQLException { // For testing ServersideConnect
Chapter 2Java in the Database (OJVM)
2-5
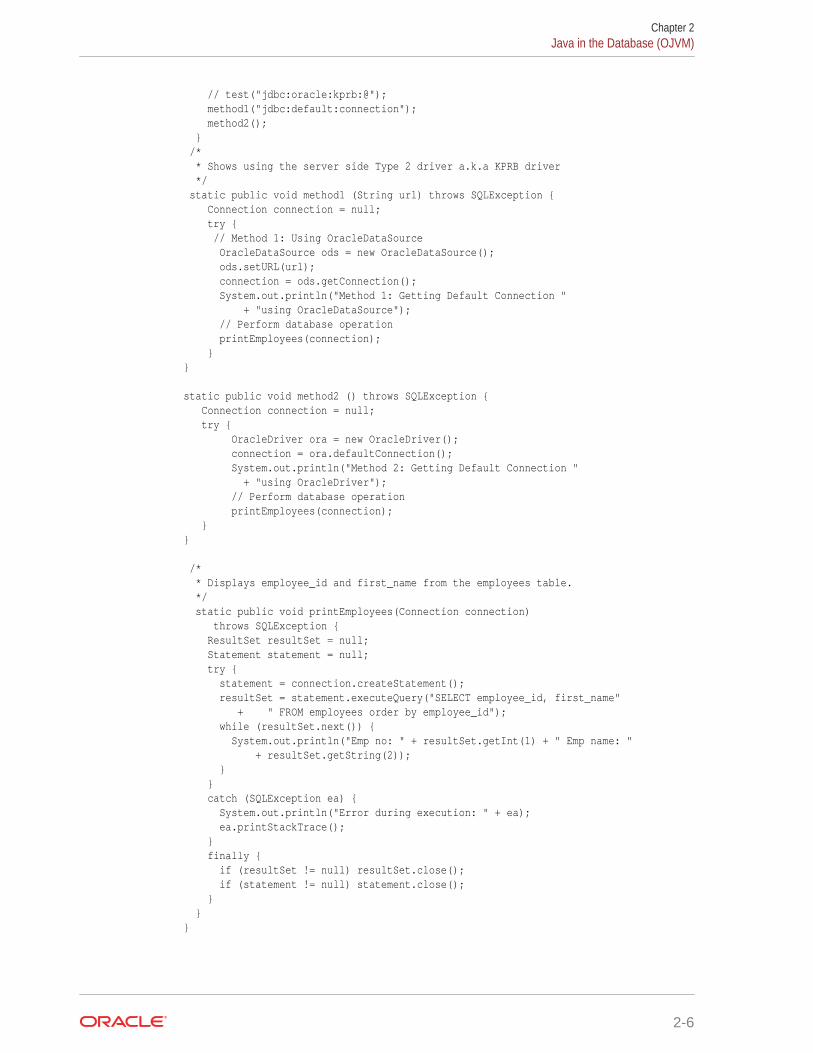
// test("jdbc:oracle:kprb:@"); method1("jdbc:default:connection"); method2(); } /* * Shows using the server side Type 2 driver a.k.a KPRB driver */ static public void method1 (String url) throws SQLException { Connection connection = null; try { // Method 1: Using OracleDataSource OracleDataSource ods = new OracleDataSource(); ods.setURL(url); connection = ods.getConnection(); System.out.println("Method 1: Getting Default Connection " + "using OracleDataSource"); // Perform database operation printEmployees(connection); }}
static public void method2 () throws SQLException { Connection connection = null; try { OracleDriver ora = new OracleDriver(); connection = ora.defaultConnection(); System.out.println("Method 2: Getting Default Connection " + "using OracleDriver"); // Perform database operation printEmployees(connection); }}
/* * Displays employee_id and first_name from the employees table. */ static public void printEmployees(Connection connection) throws SQLException { ResultSet resultSet = null; Statement statement = null; try { statement = connection.createStatement(); resultSet = statement.executeQuery("SELECT employee_id, first_name" + " FROM employees order by employee_id"); while (resultSet.next()) { System.out.println("Emp no: " + resultSet.getInt(1) + " Emp name: " + resultSet.getString(2)); } } catch (SQLException ea) { System.out.println("Error during execution: " + ea); ea.printStackTrace(); } finally { if (resultSet != null) resultSet.close(); if (statement != null) statement.close(); } }}
Chapter 2Java in the Database (OJVM)
2-6
3Overview of the HR Web Application
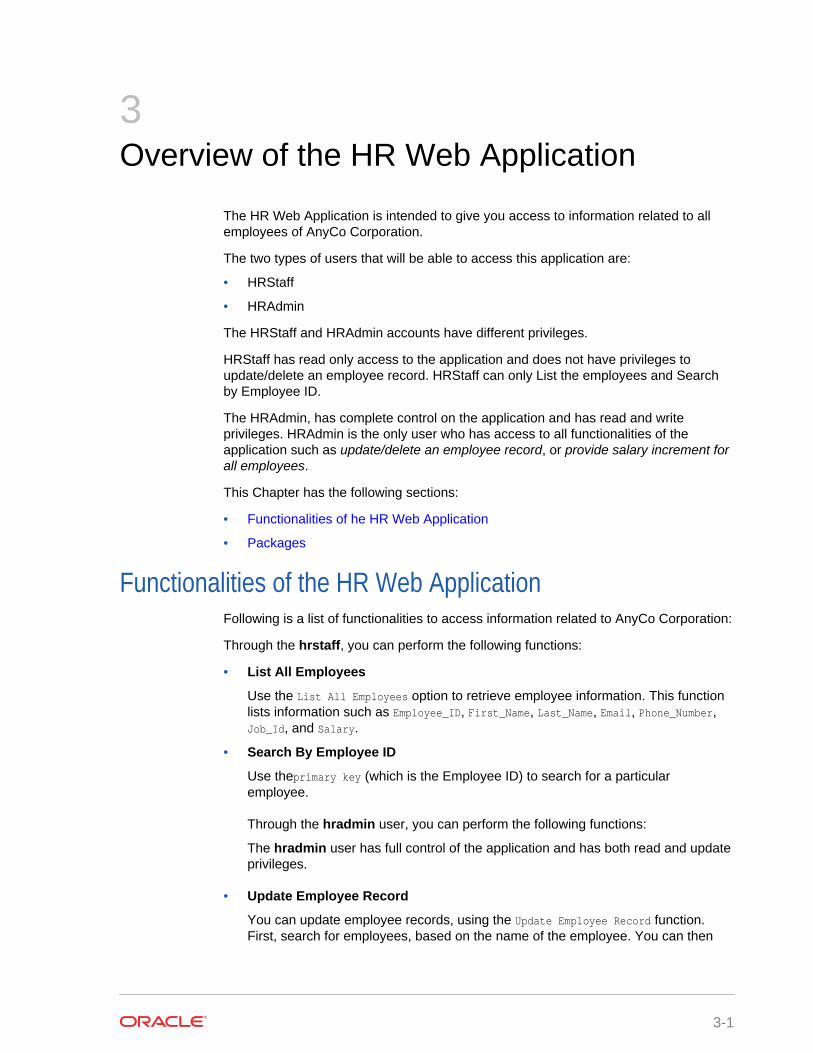
The HR Web Application is intended to give you access to information related to allemployees of AnyCo Corporation.
The two types of users that will be able to access this application are:
• HRStaff
• HRAdmin
The HRStaff and HRAdmin accounts have different privileges.
HRStaff has read only access to the application and does not have privileges toupdate/delete an employee record. HRStaff can only List the employees and Searchby Employee ID.
The HRAdmin, has complete control on the application and has read and writeprivileges. HRAdmin is the only user who has access to all functionalities of theapplication such as update/delete an employee record, or provide salary increment forall employees.
This Chapter has the following sections:
• Functionalities of he HR Web Application
• Packages
Functionalities of the HR Web ApplicationFollowing is a list of functionalities to access information related to AnyCo Corporation:
Through the hrstaff, you can perform the following functions:
• List All Employees
Use the List All Employees option to retrieve employee information. This functionlists information such as Employee_ID, First_Name, Last_Name, Email, Phone_Number,Job_Id, and Salary.
• Search By Employee ID
Use theprimary key (which is the Employee ID) to search for a particularemployee.
Through the hradmin user, you can perform the following functions:
The hradmin user has full control of the application and has both read and updateprivileges.
• Update Employee Record
You can update employee records, using the Update Employee Record function.First, search for employees, based on the name of the employee. You can then
3-1
update employee details in the record, such as first_name, last_name, email,phone_number, job_id and salary using the UPDATE function.
Use the DELETE function to the delete the entire employee record from thedatabase.
• Increment Salary
Through the increment salary tab, you can alter (increase or decrease) thepercentage of salary for hike.
• About
This page provides an overview of the HR Application and explains the variousfunctionalities it offers.
Chapter 3Functionalities of the HR Web Application
3-2
4Getting Started with the Application
To develop a Java application that connects to Oracle Database 12c Release 2 (12.2),you must ensure that certain components are installed as required. This chaptercovers the following topics:
• What You Need to Install
• Verifying the Oracle Database 12c Release 2 (12.2) Installation
• Installing Oracle JDeveloper or any Java IDE (Eclipse, NetBeans, Intellij)
What You Need to InstallTo be able to develop the sample application, you need to install the followingproducts and components:
• Oracle Database 12c Release 2 (12.2)
• J2SE or JDK
• Apache Maven
• JDeveloper IDE
• Web Server (Tomcat)
• Oracle Database 12c Release 2 (12.2)
To develop the Java web application, you need a working installation of OracleDatabase 12c Release 2 (12.2) server with the HR schema, which usually comeswith the database. There are two ways you can install the Oracle Database 12cRelease 2 (12.2).
Oracle Database Services on Cloud
The Oracle Database Services on Cloud offer access to a single Oracle Databasewith Oracle providing the computing power, physical storage, and tools formaintenance and management operations. You can get access to a workingdatabase in just a few minutes. After creating an instance of the database on theOracle cloud, you will have full access to the features and the operations availablewith the Oracle Database excluding the EECS option.
Oracle Cloud gives you the flexibility to start at a cost and level suitable to yourneeds. Later, you can adapt with your changing requirements.
You can login to Database Cloud Services page to review various optionsavailable and to sign-up. Some of the options are listed here for easy reference:
Oracle Database Cloud Service (DBCS)
Oracle Database Cloud Service on Oracle Cloud Infrastructure (CS)
Oracle Database Exadata Express Cloud Service (EECS) - Fully Managed
Oracle Database Exadata Cloud Service (ExaCS)
4-1

Oracle Database Exadata Cloud Machine (ExaCM)
Create an account in the Oracle Database Cloud Service (DBCS). This will giveyou access to HR schema as well.
Note:
Using Java Applications and IDEs with Oracle Database CloudService(DBCS) OTN page provides instructions to create a databaseinstance and also try to connect to it using JDBC and UCP code samplesprovided in the beginning of the guide
Step 1:
Oracle Database Installation Available on OTN
As an alternative option, Oracle Database 12c Release 2 can also be installed onpremise. Follow the links to install Oracle Database and check out the releasenotes.
• Oracle Database 12c Release 2 for Linux
• Oracle Database 12c Release 2 for Windows
Note:
Download JDK 8 — a Java Development Kit (JDK 8) to create andcompile Java applications. Refer http://www.oracle.com/technetwork/java/javase/downloads/index.html for more information about installingJava.
Refer http://www.oracle.com/technetwork/java/overview-141217.html forinformation about the JDBC API.
Oracle Database 12c Release 2 (12.2)To develop the Java application, you need a working installation of Oracle Database12c Release 2 (12.2) Server with the HR schema, which comes with the database. Theinstallation creates an instance of Oracle Database 12c Release 2 (12.2) and providesadditional tools for managing this database.
Oracle Database Services on Cloud
The Oracle Database Services on Cloud offer access to a single Oracle Database withOracle providing the computing power, physical storage, and tools for maintenanceand management operations. You can get access to a working database in just a fewminutes. After creating an instance of the database on the Oracle cloud, you will havefull access to the features and the operations available with the Oracle Databaseexcluding the EECS option.
Oracle Cloud gives you the flexibility to start at a cost and level suitable to your needs.Later, you can adapt with your changing requirements.
Chapter 4What You Need to Install
4-2

You can login to Database Cloud Services page to review various options availableand to sign-up. Some of the options are listed here for easy reference:
Oracle Database Cloud Service (DBCS)
Oracle Database Cloud Service on Oracle Cloud Infrastructure (CS)
Oracle Database Exadata Express Cloud Service (EECS) - Fully Managed
Oracle Database Exadata Cloud Service (ExaCS)
Oracle Database Exadata Cloud Machine(ExaCM)
Create an account in the Oracle Database Cloud Service (DBCS). This will give youaccess to HR schema as well.
Follow the step-by-step instructions provided on Using Java Applications and IDEswith Oracle Database Cloud Service(DBCS) OTN page to create a database instanceand also try to connect to it using JDBC and UCP code samples provided in thebeginning of the guide.
Step 1:
Oracle Database Installation Available on OTN
As an alternative option, Oracle Database 12c Release 2 can also be installed onpremise. Follow the links to install Oracle Database and check out the release notes.
For more information, refer to the following Oracle Database 12c Release 2 (12.2)installation guides and release notes:
• Oracle Database Installation Guide for Linux
• Oracle Database Installation Guide for Microsoft Windows
Unlocking the HR Schema for the JDBC ApplicationThe HR user account, which owns the sample HR schema used for the Java applicationin this guide, is initially locked. You must log in as a user with administrative privileges(SYS) and unlock the account before you can log in as HR.
If the database is locally installed, use the Run SQL Command Line to unlock theaccount as follows:
1. To access the Run SQL Command Line, from the Start menu, select Programs(or All Programs), then Oracle Database 12c Release 2 (12.2), and then clickRun SQL Command Line. Log in as a user with DBA privileges, for example:
> CONNECT SYS AS SYSDBA;Enter password: password
2. Run the following command:
> ALTER USER HR ACCOUNT UNLOCK;
or,
> ALTER USER HR IDENTIFIED BY HR;
3. Test the connection as follows:
> CONNECT HREnter password: password
Chapter 4What You Need to Install
4-3
You should see a message indicating that you have connected to the database.
Note:
For information about creating and using secure passwords with OracleDatabase 12c Release 2 (12.2), refer to Oracle Database Security Guide.
In addition, some of the constraints and triggers present in the HR schema are not inline with the scope of the Java application created in this guide. You must removethese constraints and triggers as follows using the following SQL statements:
DROP TRIGGER HR.UPDATE_JOB_HISTORY;DROP TRIGGER HR.SECURE_EMPLOYEES;DELETE FROM JOB_HISTORY;
JDK 8You will need JDK8 — a Java Development Kit to create and compile Javaapplications.
Note:
Oracle Database 12c Release 2 (12.2) JDBC driver supports JDK8. Refer http://www.oracle.com/technetwork/java/javase/downloads/index.html forinformation about installing Java.
JDeveloper IDEIn this guide, Oracle JDeveloper Release 12c is the integrated developmentenvironment (IDE) used to create the sample Java web application. JDeveloper isused to edit the source code, compile the application, create a war file, and deploy thewar file onto the integrated weblogic server (WLS).
J2SE or JDKTo create and compile Java applications, you need the full Java 2 Platform, StandardEdition, Software Development Kit (J2SE SDK), formerly known as the JavaDevelopment Kit (JDK).
Note:
Oracle Database 12c Release 2 (12.2) supports JDK 8.
Chapter 4What You Need to Install
4-4
See Also:
• http://www.oracle.com/technetwork/java/javase/downloads/index.html forinformation about installing Java
• http://www.oracle.com/technetwork/java/overview-141217.html forinformation about the JDBC API
Integrated Development EnvironmentFor ease in developing the application, you can choose to develop your application inan integrated development environment (IDE). This guide uses Oracle JDeveloper tocreate the files for this application.
Web ServerThe sample application developed in this guide uses JavaServer Pages (JSP)technology to display information and accept input from users. To deploy these pages,you need a Web server with a servlet and JSP container, such as the Apache Tomcatapplication server.
This guide uses the embedded server called the Oracle WebLogic Server inJDeveloper for deploying the JSP pages. If you choose not to install OracleJDeveloper, then any Web server that enables you to deploy JSP pages shouldsuffice.
For more information about these servers, please refer to vendor-specificdocumentation.
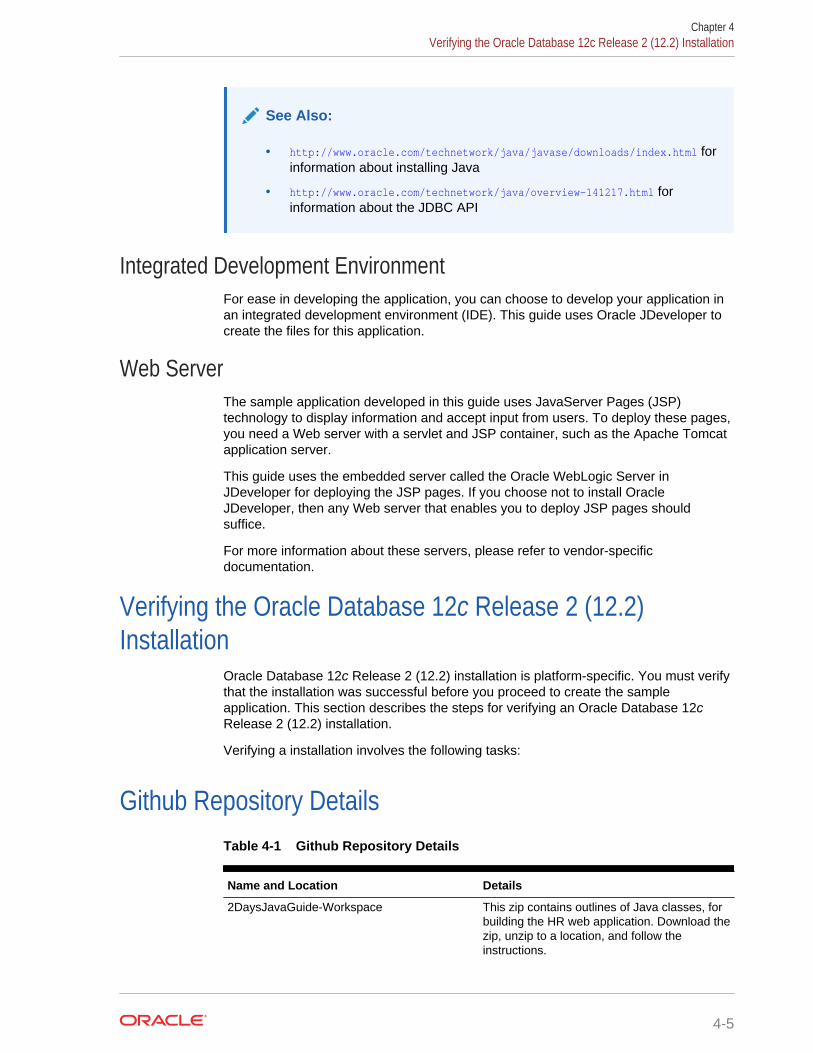
Verifying the Oracle Database 12c Release 2 (12.2)Installation
Oracle Database 12c Release 2 (12.2) installation is platform-specific. You must verifythat the installation was successful before you proceed to create the sampleapplication. This section describes the steps for verifying an Oracle Database 12cRelease 2 (12.2) installation.
Verifying a installation involves the following tasks:
Github Repository DetailsTable 4-1 Github Repository Details
Name and Location Details
2DaysJavaGuide-Workspace This zip contains outlines of Java classes, forbuilding the HR web application. Download thezip, unzip to a location, and follow theinstructions.
Chapter 4Verifying the Oracle Database 12c Release 2 (12.2) Installation
4-5

Table 4-1 (Cont.) Github Repository Details
Name and Location Details
HRWebApp This repository contains the complete codesamples of the application. Refer to this whenyou face issues or exceptions.
Import the Application in JDeveloperUse the following steps to import the application in JDeveloper:
1. Navigate to the location where the HRWebApp_Workspace is extracted.
2. Choose a name for the application.
3. It creates a project with all files required to build HR web application. Now, you canstart editing.
Compile Applications in JDeveloperYou can compile or create a .war file using maven commands through JDeveloper.
1. Right click on the project.
2. Run Maven
3. Navigate to compile/package/clean
Compile Using Maven and Run the Application in any JavaEE Container
a. Compile Using Maven:
HR web application can also be easily compiled using the Maven commands. If youare using Oracle maven repository, then make sure to have the settings.xml file withall the required details available for easy access. After you download theHRWebApp_workspace and add the required code, use the commands below toclean, compile and package the source code.
Execute the following commands:
mvn –s settings.xml clean
mvn –s settings.xml compile
mvn –s settings.xml package
b. Deploy the .war file on any Java EE container
Once the source code is packaged using the maven command “mvn –s settings.xmlpackage”, the war file will be placed under the folder “target/JdbcWebSamples.war”.Place this war file under TOMCAT_HOME/webapps/ and start the tomcat server. Once
Chapter 4Import the Application in JDeveloper
4-6

the tomcat is started, access the HR web application using the URL http://localhost:8080/JdbcWebSamples/.
If the login/logout modules are added, then login with either hradmin or hrstaff user.
Run the the Application in JDeveloper
JDeveloper uses the integrade WebLogic Server to run the web application.
List All Employees
HR web Application has several functionalities. “List All” is the functionality where thedetails of employees such as Employee_id, First_name, Last_Name, Email,Phone_number, Job_id, Salary etc., are retrieved from the “Employees” table andshown on a web page. See the screenshot below that shows “List All” functionality.
Chapter 4Compile Using Maven and Run the Application in any Java EE Container
4-7
5List All Employees
HR web Application has several functionalities. “List All” is the functionality where thedetails of employees such as Employee_id, First_name, Last_Name, Email,Phone_number, Job_id, Salary etc., are retrieved from the “Employees” table andshown on a web page. See the screenshot below that shows “List All” functionality.
Creating a Java Bean Entity for an EmployeeClass Name: src/main/java/com/oracle/jdbc/samples/entity/Employee.java
Github Location: Employee.java
Description: This is a class that contains the getter and setter methods for all theattributes of an employee. Example: First_name, Last_Name, Employee_Id etc., willhave a getter and setter methods.
Steps to be Performed:
1. Create a constructor Employee() as shown in the sample.
2. Create a getter and setter method for all the attributes of an employee to show it onthe web application.
Creating Employee.java:
1. Declare the package for the class Employee.java.
package com.oracle.jdbc.samples.entity;
2. Import the following packages required for the Employee class
import java.sql.ResultSet;import java.sql.SQLException;import java.sql.Timestamp;
3. Declare an Employee class. Add an open parenthesis ({) and closing parenthesis(}). Place the cursor in between the parenthesis:
public class Employee {
4. Declare the following variables for each one of the attributes of an employee.
private int Employee_Id;private String First_Name;private String Last_Name;private String Email;private String Phone_Number;private String Job_Id;private int Salary;
5. Create a constructor for Employee that takes ResultSet as the input and throwsSQLExceptio. In this constructor, set all the values for the attributes of the Employee.
5-1

public Employee(ResultSet resultSet) throws SQLException { this.Employee_Id = resultSet.getInt(1); this.First_Name = resultSet.getString(2); this.Last_Name = resultSet.getString(3); this.Email = resultSet.getString(4); this.Phone_Number = resultSet.getString(5); this.Job_Id = resultSet.getString(6); this.Salary = resultSet.getInt(7);}
Instructions for Creating Getter and Setter Methods:
Getter and Setter methods are used to get and set the value of X which is the way toachieve encapsulation. Create the getX and setX methods for all the attributes of theEmployee such as employee_id, first_name, last_name, salary, etc.
1. Create the getter and setter methods for the Employee_Id as shown below
public int getEmployee_Id() { return Employee_Id;} public void setEmployee_Id(int Employee_Id) { this.Employee_Id = Employee_Id; }
2. Create the getter and setter methods for the First_Name of an employee
public String getFirst_Name() { return First_Name;}public void setFirst_Name(String First_Name) { this.First_Name = First_Name;}
3. Create the getter and setter methods for the Last_Name of an employee
public String getLast_Name() { return Last_Name;}public void setLast_Name(String Last_Name) { this.Last_Name = Last_Name;}
4. Create the getter and setter methods for Email of an employee
public String getEmail() { return Email; } public void setEmail(String Email)
{ this.Email = Email; }
5. Create the getter and setter methods for Phone Number of an employee
public String getPhone_Number() {
return Phone_Number; }
public void setPhone_Number(String Phone_Number) {
this.Phone_Number = Phone_Number;
}
6. Create the getter and setter methods for JobId of an employee
Chapter 5Creating a Java Bean Entity for an Employee
5-2

public String getJob_Id() { return Job_Id;}public void setJob_Id(String Job_Id)
{ this.Job_Id = Job_Id;}
7. Create the getter and setter methods for Salary of an employee
public int getSalary() { return Salary;}public void setSalary(int Salary) { this.Salary = Salary;}
Creating a Java Bean Interface for a JDBC Connection1. Declare the package for the class EmployeeBean.java
package com.oracle.jdbc.samples.bean;
2. Import Employee entity class as it contains the employee details
import com.oracle.jdbc.samples.entity.Employee;
3. Declare an interface EmployeeBean class. Add an open parenthesis ({) and closingparenthesis (}). Place the cursor in between the parenthesis
public interface EmployeeBean {
4. On the new line, declare a method getEmployees()that returns a List of Employeeobjects.
public List<Employee> getEmployees();
Creating a Java Bean Implementation for a JDBCConnection
Class Name: src/main/java/com/oracle/jdbc/samples/bean/EmployeeBeanImpl.java
Github Location: EmployeeBeanImpl.java
Description: This is an implementation class. All the methods declared inEmployeeBean.java are implemented in this class. New methods related to each oneof the features will be added in the next chapters. To begin with, we will be adding theimplementation of the method required for “ListAll” functionality.
Steps to be performed:
Step 4: Create a method getConnection() – to establish a connection to the database.Ensure you update connection URL, DB username and DB password to point to yourdatabase.
Step 5: Create a method getEmployees() – To retrieve a list of employees fromemployees table. Update the SELECT query to be used by choosing the columns thatyou want from the Employees table.
Step 4: Instructions for creating getConnection() method:
1. Declare the package for the EmployeeBean.java.
Chapter 5Creating a Java Bean Interface for a JDBC Connection
5-3
package com.oracle.jdbc.samples.bean;
2. Import Employee class as it contains the employee details.Import com.oracle.jdbc.samples.entity.Employee;
3. Import other dependent classes as shown below. If the particular class is notimported, JDeveloper will display a message reminding you to import the requiredpackage. Press the Alt+Enter keys to import the class:
import java.sql.*;import java.util.ArrayList;import java.util.List;import java.util.logging.Level;import java.util.logging.Logger;
import java.sql.PreparedStatement;import oracle.jdbc.OracleStatement;import oracle.jdbc.OracleConnection;import oracle.jdbc.driver.OracleDriver;import oracle.jdbc.OracleTypes;import java.sql.PreparedStatement;import oracle.jdbc.OracleStatement;import oracle.jdbc.OracleConnection;
import oracle.ucp.jdbc.PoolDataSourceFactory;import oracle.ucp.jdbc.PoolDataSource;
4. Add the following class declaration EmployeeBeanImpl that implementsEmployeeBean. Add an open parenthesis ({) and closing parenthesis (}). Place thecursor in between the parenthesis.
public class EmployeeBeanImpln implements EmployeeBean {
5. Declare a static method getConnection() to establish the connection. Add an openparenthesis ({) and closing parenthesis (}). Place the cursor in between theparenthesis.
public static Connection getConnection() throws SQLException {
6. Register a driver as shown below.
DriverManager.registerDriver(new oracle.jdbc.OracleDriver());
7. Get a connection by passing the database URL and database username andpassword.
Connection connection = DriverManager.getConnection("jdbc:oracle:thin:@//
myorclhost:5521/myorcldbservice", "hr", "hr");
8. Return the database connection.
return connection;
Instructions to Create getEmployees() method:
1. Declare the method getEmployees(). Add an open parenthesis ({) and closingparenthesis (}). Place the cursor in between the parenthesis.
Public List<Employee> getEmployees()throws SQLException {
2. Declare a variable for the return value of type List<Employee>
Chapter 5Creating a Java Bean Implementation for a JDBC Connection
5-4
List<Employee> returnValue = new ArrayList<>();
3. Start a try block. The source code is compiled with JDK8 and we use auto-closeablestatements which means that there is no need to explicitly specify catch and finallyblocks. The first try block is for getting a database connection by invoking the methodgetConnection(). Declare a variable connection to establish a database connection.
try (Connection connection = getConnection()) {
4. Start another try block for creating a Statement.
try (Statement statement = connection.createStatement()) {
5. Start another try block for ResultSet. Include the query that needs to be executed.Make sure to retrieve all the required fields of the employee in the query.
try (ResultSet resultSet = statement.executeQuery("SELECT Employee_Id, First_Name,
Last_Name, Email, Phone_Number, Job_Id, Salary FROM EMPLOYEES")) {
6. Start a while loop to capture the list of employees retrieved from the ResultSet.
while(resultSet.next()) { returnValue.add(new Employee(resultSet));}
7. Ensure you close the parenthesis for all the try blocks.
8. Catch the SQLException and log the message in logger as shown below.
catch (SQLException ex) { logger.log(Level.SEVERE, null, ex); ex.printStackTrace();}
9. Return the List of employees from the method getEmployees()
return returnValue;
Creating a Servlet to Process the RequestThe following code describes the steps required to create a Servlet to process arequest.
Class Name: src/main/java/com/oracle/jdbc/samples/web/WebController.java
Github Location: WebController.java
Description: This is the main servlet that controls all the flows of the application. Forevery new functionality of the application, we will be adding the code to handle thenew requests and responses in doPost() and processResponse() respectively.
Steps to be Performed:
6. Create a servlet WebController.java and reportError() method
7. Create a method processRequest() – This method processes both GET and POSTHTTP requests.
Chapter 5Creating a Servlet to Process the Request
5-5
8. Create a method doGet() – Add details to get the employee details from thedatabase and show the results in JSON. JSON will be the output format of the resultsthat is shown on the HTML.
9. Create a method getServletInfo() – To display some generic information about theservlet.
10. Create a logger to log exceptions and other error messages.
Step 6: Instructions for creating a WebController.java and reportError() method
1. Declare the package for the WebController.java.
package com.oracle.jdbc.samples.web;
2. Import Employee class as it contains the employee details and also, theEmployeeBeanImpl.
import com.oracle.jdbc.samples.entity.Employee; import com.oracle.jdbc.samples.bean.EmployeeBean; import com.oracle.jdbc.samples.bean.EmployeeBeanImpl;
3. Import the GSON (Google GSON) for displaying the Employee results.
import com.google.gson.Gson; import com.google.gson.reflect.TypeToken;
4. Import other dependent classes as shown below. If the particular class is notimported, then JDeveloper will display a message reminding you to import the requiredpackage. Press the Alt+Enter keys to import it.
import javax.servlet.ServletException; import javax.servlet.annotation.WebServlet; import javax.servlet.http.*; import java.io.IOException; import java.io.PrintWriter; import java.io.BufferedReader; import java.util.ArrayList; import java.util.List; import java.util.Map;
import java.util.logging.Logger;
5. Add the annotation to the servlet.
@WebServlet(name = "WebController", urlPatterns = {"/WebController"})
6. Add the following class declaration WebController that extends HttpServlet. Add anopen parenthesis ({) and closing parenthesis (}). Place the cursor in between theparenthesis.
public class WebController extends HttpServlet {
7. Declare an object “employeeBean” of the type EmployeeBeanImpl. This will be aglobal variable and available for all the methods such as reportError(),processRequest(), and doGet() to use.
8. Declare an object “gson” of the type Gson. This will be a global variable andavailable for all the methods such as reportError(), processRequest(), and doGet() touse.
Gson gson = new Gson();
Chapter 5Creating a Servlet to Process the Request
5-6
9. Declare a method reportError as shown below. This is to capture the error and showit on the page.
private void reportError(HttpServletResponse response, String message) throws
ServletException, IOException {
10. Set the response content type to be “text/html” and charset=UTF-8 as shownbelow.
response.setContentType("text/html;charset=UTF-8");
11. Create a PrintWriter object and print the error message as shown.
try (PrintWriter out = response.getWriter()) {
try (PrintWriter out = response.getWriter()) { out.println("<!DOCTYPE html>"); out.println("<html>"); out.println("<head>"); out.println("<title>Servlet WebController</title>"); out.println("</head>"); out.println("<body>"); out.println("<h1>" + message + "</h1>"); out.println("</body>"); out.println("</html>"); }
Step 7: Instructions for Creating Process Request:
1. Add the following method declaration for processRequest(req, res). Add open andclose parentheses ({, }) and position the cursor in between the parenthesis.
protected void processRequest(HttpServletRequest request, HttpServletResponse
response) throws ServletException, IOException {
2. Declare a variable employeeList of the List type that contains Employee objects.Declare the variable gson to process Gson object.
List<Employee> employeeList = null;
3. Instantiate the employeeList object by invoking getEmployees method ofEmployeeBean.
employeeList = employeeBean.getEmployees();
4. Check if the employeeList is not NULL
if (employeeList != null) {
5. Set the content type to “application/json”
response.setContentType("application/json");
6. Invoke the method toJson(…) and convert the employeeList to JSON.
gson.toJson(employeeList, new TypeToken<ArrayList<Employee>>() {}.getType(),response.getWriter());
7. End of if condition. Close the parenthesis (})
8. Add an else condition to cover the error scenario when the employeeList is empty.
Chapter 5Creating a Servlet to Process the Request
5-7
else { response.setStatus(HttpServletResponse.SC_NOT_FOUND);}
Step 8: Instructions for Creating doGet():
1. Add the following method declaration for doGet().Add open and close parentheses({, }) and position the cursor in between the parenthesis.
protected void doGet(HttpServletRequest request, HttpServletResponse response) throws ServletException, IOException {
2. Invoke the method processRequest(request, response) by passing theHTTPServletRequest and HTTPServletResponse response objects.
processRequest(request, response);
Step 9: Instructions for Creating getServletInfo():
1. Add the following method declaration for getServletInfo().Add open and closeparentheses ({, }) and position the cursor in between the parenthesis.
public String getServletInfo() {
2. In the return statement, set a message about the servlet.
return "JdbcWebServlet: Reading Employees table using JDBC and transforming it as
a JSON. ";
Step 10: Instructions for Creating Logger ():
1. Create a variable logger of the type Logger at the end of the class, before closingthe parenthesis for the class WebController.java.
private static final Logger logger = Logger.getLogger(WebController.class.getName());
Create an HTML Page to Display ResultsClass Name:
src/main/webapp/listAll.html
Github Location: listAll.html
Description: This is the HTML page to show the results retrieved from the database.
Steps to be Performed:
Step 11: Create the title, stylesheet, and body of the HTML page
Step 12: Start the <script> tags and handle GET request
Step 13: Create a method processResponse() – To process the JSON response andshow the results on the HTML page.
Step 11: Instructions to create title, stylesheet, and body of the HTML Page:
1. Create the title, stylesheet, and body for the HTML page.
Chapter 5Create an HTML Page to Display Results
5-8
<!DOCTYPE html><html lang="en"><head><meta charset="UTF-8"><title>List all Employees</title>
<link rel="stylesheet" type="text/css" href="css/app.css" > </head> <body>
Step 12: Instructions for Handling GET requests:
1. Start the <script> tags and declare few variables for the URL and HTTPRequest.
<script>
var xmlhttp = new XMLHttpRequest();
var url = "WebController";
2. Define the action when the requests are sent i.e., when the links for each one of thefunctionalities is selected.
xmlhttp.onreadystatechange=function() { if (xmlhttp.readyState == 4 && xmlhttp.status == 200) { processResponse(xmlhttp.responseText); } }xmlhttp.open("GET", url, true);xmlhttp.send();
Step 13: Instructions for handling processResponse() requests:
1. Create the function processResponse() to display JSON results on HTML page.
function processResponse(response) {// Process the JSON response into an array. var arr = JSON.parse(response);var i;var out - "<table>";keys = Object.keys(arr[0]);//Print headersout += "<tr>"for(i = 0; i < keys.length; ++i) {out += "<th>"+keys [i]+"</th>"}out += "</tr>";// Print valuesfor(j = 0; j < arr.length; j++) {out += "<tr>"for(i = 0; i < keys.length; ++i) {out += "<td>"+arr[j][keys[i]]+"</td>"}out += "</tr>"}out += "</table>";
document.getElementById("id-emp").innerHTML = out;
}
}
Chapter 5Create an HTML Page to Display Results
5-9
Create a CSS FileThe following code creates a method processResponse() inside the Java script thatprocesses the JSON to show it on the HTML.
Class Name: src/main/webapp/css/app.css
Github Location : app.css
Description: The stylesheet has the color, font, and style for all the UI elements suchas buttons, side navigation, main page, links, etc., on the page.
Steps to be Performed:
Step 14: Download the app.css and use it in your application.
Chapter 5Create a CSS File
5-10

6Search by Employee ID
“Search by Employee Id” is the functionality where we can search for a particularemployee based on their employee Id which is the primary key. The user needs toinput the employee Id and submit the request.
Employee Java BeanClass Name: src/main/java/com/oracle/jdbc/samples/bean/EmployeeBean.java
Github Location: EmployeeBean.java
Description: New method getEmployee(int) for searching employee by ID.
Steps to be performed:
Step 1: Declare a method getEmployee(int)
Step 1:Instructions for Declaring getEmployee(int) method:
1. The file EmployeeBean is already created on Day 1 for “ListAll” functionality. Wecan use the same class and add new methods for each one of the functionalities.
2. On the new line, declare a method getEmployee(int) that takes EmployeeId as aparameter.
public List<Employee> getEmployee(int empId);
Implement a new method getEmployee(int) in EmployeeBeanImpl.java.
Github Location: EmployeeBeanImpl.java
Description: Implement a new method getEmployee(int) to search employee by id.This method takes the employee Id as input parameter and returns an object of typeEmployee.
Steps to be Performed:
Step 2: Implement a new method getEmployee(int):
Step 2: Instructions to create getEmployee(int) Method:
1. Declare the method getEmployee(int) that returns a List of the objects of typeEmployee.
public List<Employee> getEmployee(int empId) {
2. Declare a variable for the return value of type List<Employee>
List<Employee> returnValue = new ArrayList<>();
3. The first try block is for the getting a database connection by invoking the methodgetConnection(). Declare a variable connection to establish a database connection.
try (Connection connection = getConnection()) {
6-1
4. Start another try block for creating a PreparedStatement. PreparedStatementincludes the query that needs to be executed to select an employee based on theemployee id.
try (PreparedStatement preparedStatement = connection.prepareStatement("SELECT Employee_Id, First_Name, Last_Name, Email, Phone_Number, Job_Id, Salary FROM EMPLOYEES WHERE Employee_Id = ?")) {
5. Set the input parameter which is the employee id for the query.
preparedStatement.setInt(1, empId);
6. Start another try block for ResultSet.
try (ResultSet resultSet = preparedStatement.executeQuery()) {
7. Check if there is anything returned. If yes, then add it to returnValue; otherwise,throw an exception.
if(resultSet.next()) { returnValue.add(new Employee(resultSet)); } else { throw new SQLException("No recrods found"); }
8. Make sure to close the parenthesis for all the try blocks. There are a total of 3 tryblocks which need to be closed.
9. Catch the SQLException and log the message in logger as shown below.
catch (SQLException ex) { logger.log(Level.SEVERE, null, ex); throw ex;}
10. Return the List of Employees from the method getEmployee(int)
return returnValue;
Add the code to a Servlet to process the requestClass Name: src/main/java/com/oracle/jdbc/samples/web/WebController.java
Github Location: WebController.java
Description: This servlet has already been created in Day 1. We will be adding therelevant code to search by employee id.
Steps to be performed:
Step 3: Add the code to search by employee id to the method processRequest().
Step 3: Instruction for adding code to processRequest():
1. Declare a varianle ID_KEY to capture the employee id. This is a global variable,hence, needs to be declared outside the method processRequest() but within theWebController class.
private static final String ID_KEY = “id”;
Chapter 6Add the code to a Servlet to process the request
6-2

2. The method processRequest() is already created in the “ListAll” feature. Now, wewill add the code to implement “Search by employee id” functionality.
3. Declare a variable value of the String type to capture the input from the user.
String value = null;
4. In addition to what was added for “ListAll” feature, we will add an if condition tohandle the new functionality. Get the employee id entered by the user and invoke themethod getEmployee(int) to verify if the employee record exists.
if ((value = request.getParameter(ID_KEY)) != null) { int empId = Integer.valueOf(value).intValue(); employeeList = employeeBean.getEmployee(empId); } else { // Previously used getEmployees() method for Listall feature employeeList = employeeBean.getEmployees(); }
Create a New HTML for Search by Employee IdClass Name:
src/main/webapp/listById.html
Github Location: listById.html
Description: This is the HTML that shows an input box for user to enter the employeeid. If the employee record is found, then the details of the employee will be shown onthe page, otherwise, an error message will be displayed.
Steps to be performed:
Step 4: Create the title, head, and stylesheet for the HTML page.
Step 5: Create a function to submit the input field i.e, employee id
Step 6: Create a method processResponse() – To process the JSON response andshow the results on the HTML page.
1. Create the title, stylesheet, and body for the HTML page.
<!DOCTYPE html><html lang="en"><head><meta charset="UTF-8"><title>List Employee by Id</title><!-- Specify the stylesheet here --><link rel="stylesheet" type="text/css" href="css/app.css" ><!-- Bootstrap JS for the UI --><link rel="stylesheet" href="http://maxcdn.bootstrapcdn.com/bootstrap/3.3.6/css/bootstrap.min.css"></head>
Step 5: Instructions for handling the input field:
1. Start the <body> tag and a <input> tag for capturing the employee id.
<body><div><label>Employee Id: </label>
Chapter 6Create a New HTML for Search by Employee Id
6-3
<input id="empId" type="textfield"onkeypress="return waitForEnter(event)"\></div><br/><br/><script>function waitForEnter(e) { if (e.keyCode == 13) { var tb = document.getElementById("empId"); fetchElementById(tb.value) return false; }}<script>var xmlhttp = new XMLHttpRequest();var url = "WebController";
3. Define the action when the requests are sent i.e., when the links for each one of thefunctionalities is selected.
xmlhttp.onreadystatechange=function() { if (xmlhttp.readyState == 4 && xmlhttp.status == 200) { processResponse(xmlhttp.responseText); } }xmlhttp.open("GET", url, true);xmlhttp.send();
Step 6: Instructions for Creating processResponse() method:
1. Create the function processResponse() to display JSON results on HTML page.
function processResponse(response) {//Process the JSON respnse into an array.var arr = JSON.parse(response); var i;var out = "<table>";keys = Object.keys(arr[0]);
// Print Headersout += "<tr>"for(i = 0; i < keys.length; ++i) {out += "<th>"+keys[i]+"</th>"}out += "</tr>";// Print valuesfor(j = 0; j < arr.length; j++) {out += "<tr>"for(i = 0; i < keys.length; ++i) {out += "<td>"+arr[j][keys[i]]+"</td>"
}out += "</tr>"}out += "</table>";document.getElementById("id-emp").innerHTML = out;}
Chapter 6Create a New HTML for Search by Employee Id
6-4
7Update an Employee Record
The hradmin has the privilege to update an employee record. The hrstaff user doesnot have this privilege.
First, you must search for an employee in the records. Once you retrieve theinformation related to the employee, you will find the ‘Edit’ and ‘Delete’options tomodify details related to the employee.
This Chapter shows you the classes that need to be created and code that needs tobe added to build ‘Search by Employee ID’ functionality.
In this Chapter, you will learn how to:
1. Declare a new new method getEmployeeByFn(String) in EmployeeBean.java
2. Declare a new method updateEmployee(int) in EmployeeBean.java
3. Implement a new method getEmployeeByFn(String) in EmployeeBeanImpl.java
4. Implement a new method updateEmployee(int) in EmployeeBeanImpl.java
5. Add the code to a WebController.java to process the request and response
6. Create a HTML page (listByName.html) to display the results
Class Name:
src/main/java/com/oracle/jdbc/samples/entity/Employee.java
Use the Employee.java file that you created, earlier in the example.
Declare a new method getEmployeeByFn(String) inEmployeeBean.java
Class Name: src/main/java/com/oracle/jdbc/samples/bean/EmployeeBean.java
Github Location: EmployeeBean.java
Description: The method getEmployeeByFn(String) helps you search employees basedon their first name.
To modify details of the employee, the hradmin must first search for the employeebased on his/her first name.
Steps to be performed:
Step 1: Declare a method getEmployeeByFn(String)
Step 1: Instructions for declaring getEmployeeByFn(String) method:
1. Use the class EmployeeBean that you created on Day 1 of the exercise. You canadd new methods for each of the functionalities.
7-1
2. Declare a method getEmployeeByFn(String) that takes first name as a parameter.
public List<Employee> getEmployeeByFn(String fn)throws SQLException;
Declare a new method updateEmployee(Employee)Class Name: src/main/java/com/oracle/jdbc/samples/bean/EmployeeBean.java.
Github Location: EmployeeBean.java
Description: This method allows you to update attributes of an employee such as firstname, last name, salary, job_id etc
Steps to be Performed:
Step 2: Declare a method updateEmployee(Employee)
Instructions for declaring updateEmployee(Employee) method
1. Use the EmployeeBean file that you created in the exercise from Day 1 for ‘ListAll’functionality. You can use the same class and add new methods for the newfunctionalities.
2. Declare a method updateEmployee(Employee) that takes Employee object as aparameter.
public String updateEmployee(Employee employee) throws SQLException;
Implement a New Method getEmployeebyFn() for Search byEmployee name
Class Name:
src/main/java/com/oracle/jdbc/samples/bean/JdbcBeanImpl.java
Github Location: EmployeeBeanImpl.java
Description: Implement a new method getEmployeeByFn(String) to search by employeeid. This method uses the employee id as an input parameter and returns an object oftype Employee.
Steps to be Performed: Implement a method getEmployeeByFn(String)
Instructions for implementing getEmployeeByFn(String) method:
1. Declare getEmployeeByFn(String) that returns a an Employee object.
public List<Employee> getEmployeeByFn(String fn) throws SQLException {
2. Declare a variable for the return value of type List<Employee>
List<Employee> returnValue = new ArrayList<>();
3. Create a try block. The try block will help you create a database connection byinvoking the getConnection method.
try (Connection connection = getConnection()) {
Chapter 7Declare a new method updateEmployee(Employee)
7-2
4. Create another try block to create a PreparedStatement. Add the query that will beexecuted to select an employee based on the employee id.
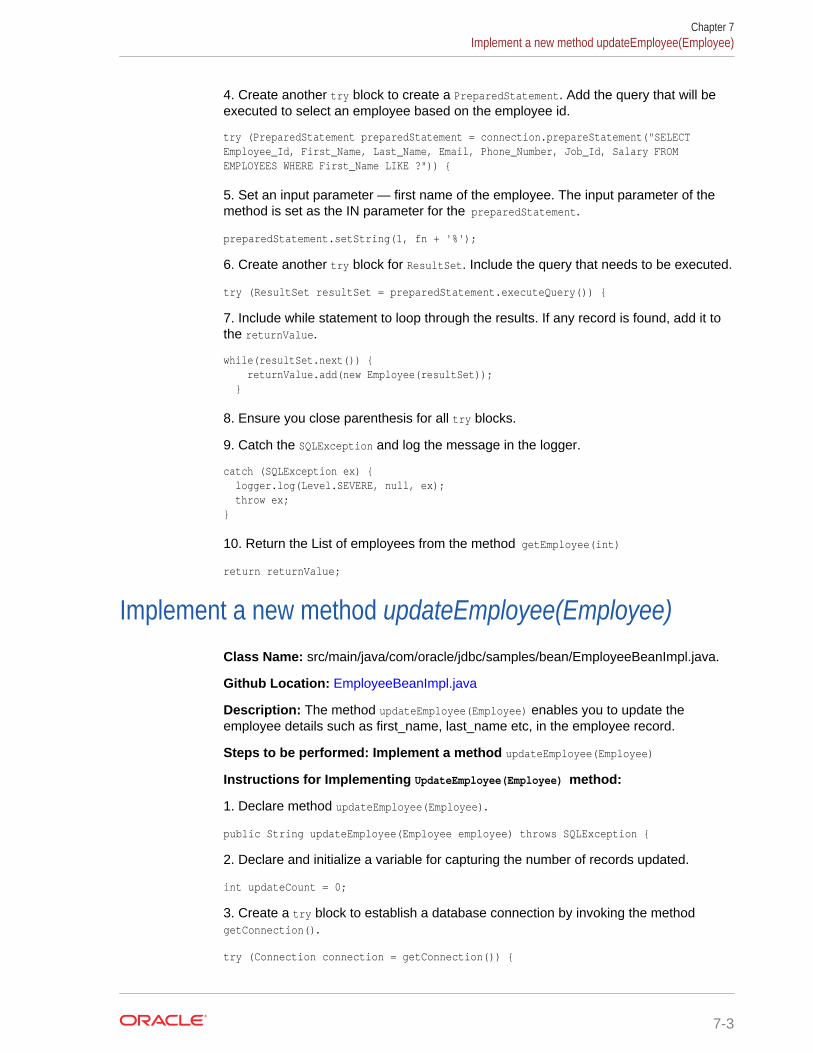
try (PreparedStatement preparedStatement = connection.prepareStatement("SELECT Employee_Id, First_Name, Last_Name, Email, Phone_Number, Job_Id, Salary FROM EMPLOYEES WHERE First_Name LIKE ?")) {
5. Set an input parameter — first name of the employee. The input parameter of themethod is set as the IN parameter for the preparedStatement.
preparedStatement.setString(1, fn + '%');
6. Create another try block for ResultSet. Include the query that needs to be executed.
try (ResultSet resultSet = preparedStatement.executeQuery()) {
7. Include while statement to loop through the results. If any record is found, add it tothe returnValue.
while(resultSet.next()) { returnValue.add(new Employee(resultSet)); }
8. Ensure you close parenthesis for all try blocks.
9. Catch the SQLException and log the message in the logger.
catch (SQLException ex) { logger.log(Level.SEVERE, null, ex); throw ex;}
10. Return the List of employees from the method getEmployee(int)
return returnValue;
Implement a new method updateEmployee(Employee)Class Name: src/main/java/com/oracle/jdbc/samples/bean/EmployeeBeanImpl.java.
Github Location: EmployeeBeanImpl.java
Description: The method updateEmployee(Employee) enables you to update theemployee details such as first_name, last_name etc, in the employee record.
Steps to be performed: Implement a method updateEmployee(Employee)
Instructions for Implementing UpdateEmployee(Employee) method:
1. Declare method updateEmployee(Employee).
public String updateEmployee(Employee employee) throws SQLException {
2. Declare and initialize a variable for capturing the number of records updated.
int updateCount = 0;
3. Create a try block to establish a database connection by invoking the methodgetConnection().
try (Connection connection = getConnection()) {
Chapter 7Implement a new method updateEmployee(Employee)
7-3

4. Create another try block to make a PreparedStatement. Include the query you willneed to execute to select an employee based on the employee id.
try (PreparedStatement preparedStatement = connection.prepareStatement("UPDATE employees SET FIRST_NAME = ?, LAST_NAME = ?, EMAIL = ?, PHONE_NUMBER = ?, SALARY = ? WHERE EMPLOYEE_ID = ?")) {
5. Set the new values entered by the user for each attribute and execute theprepapredStatement.
preparedStatement.setString(1, employee.getFirst_Name());preparedStatement.setString(2, employee.getLast_Name());preparedStatement.setString(3, employee.getEmail());preparedStatement.setString(4, employee.getPhone_Number());preparedStatement.setInt(5, employee.getSalary()); preparedStatement.setInt(6, employee.getEmployee_Id());updateCount = preparedStatement.executeUpdate();
6. Close parenthesis for all try blocks.
7. Catch the SQLException and log the message in the logger as shown below:
catch (SQLException ex) { logger.log(Level.SEVERE, "Unable to update record", ex); throw new SQLException("Alert! Record could not be updated, " +ex.getMessage(), ex);}
8. Log the message with the number of records updated to the logger.
logger.fine("Update count: " +updateCount);
9. If none of the records were updated, enter a message as follows:
if (updateCount != 1) { logger.severe("Unable to update record"); throw new SQLException("Alert! Record could not be updated");}
10. Return the success message if the record was updated.
return "Success: Record updated";
Add the Code to a Servlet (WebController.java)This is the start of your topic.
Class Name: src/main/java/com/oracle/jdbc/samples/web/WebController.java
Github Location: WebController.java
Description: You have created the servlet in the Day 1 exercise. In this section, youwill add the relevant code to give a salary raise to all employees.
Step 6: Add code to calculate salary budget, after the user enters the inputpercentage. This is handled in the doPost() method.
Instructions to add code to doPost(req, res):
1. You have already created this method in the ‘Update an Employee’ record section.
2. Create another if block to check the functionality to be invoked based on the input.
Chapter 7Add the Code to a Servlet (WebController.java)
7-4

if ("incrementSalary".equals(value)) { if ((value = request.getParameter(INCREMENT_PCT)) != null) { try { System.out.println("increment% = " +value); response.setContentType("application/json");List<Employee> employeeList = employeeBean.incrementSalary(Integer.valueOf(value)); System.out.println("incrementSalary, employeeList: " +employeeList.toString()); gson.toJson(employeeList,new TypeToken<ArrayList<Employee>>(){}.getType(),response.getWriter()); }catch (Exception ea) { response.setStatus(HttpServletResponse.SC_NOT_MODIFIED); }} else { response.setStatus(HttpServletResponse.SC_NOT_MODIFIED); }}
3. Ensure all the parenthesis are closed properly.
Create a new HTML(incrementSalary.html)Class Name: src/main/webapp/incrementSalary.html.
Github Location: incrementSalary.html
Description: This HTML displays an input box to enter the percentage for calculatingthe salary budget.
Step 7: Create the title, head, and stylesheet for the HTML page
Step 8: Create a function to submit the input field i.e, employee first name
Step 9: Create a method processResponse() – To process the JSON response andshow the results on the HTML page
Step 7: Instructions to create the title, stylesheet, and body of the HTML page:
1. Create the title, stylesheet, and body of the HTML page.
<!DOCTYPE html><html lang="en"><head><meta charset="UTF-8"><title>Increment Salary</title><link rel="stylesheet" type="text/css" href="css/app.css" ><link rel="stylesheet" href="http://maxcdn.bootstrapcdn.com/bootstrap/3.3.6/css/bootstrap.min.css"><script src="https://ajax.googleapis.com/ajax/libs/jquery/1.12.2/jquery.min.js">script src="https://ajax.googleapis.com/ajax/libs/jquery/1.12.2/jquery.min.js"></script></head>
Step 8: Instructions for Handling the Input Field
1. Start the <body> tag and a <input> tag for capturing the percentage for salary raise.
<body><div> Enter the percentage increase in salary<inputid='incrementField' type="number" max="100" min="3">%
Chapter 7Create a new HTML(incrementSalary.html)
7-5
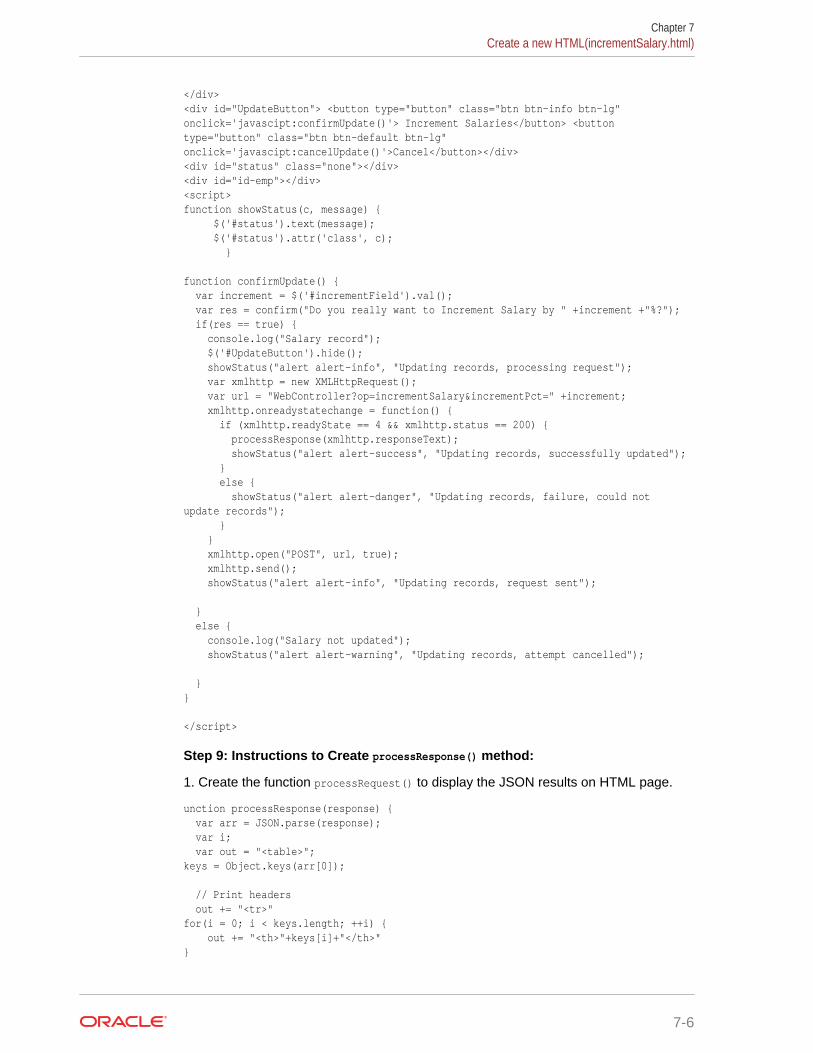
</div><div id="UpdateButton"> <button type="button" class="btn btn-info btn-lg" onclick='javascipt:confirmUpdate()'> Increment Salaries</button> <button type="button" class="btn btn-default btn-lg" onclick='javascipt:cancelUpdate()'>Cancel</button></div><div id="status" class="none"></div><div id="id-emp"></div><script>function showStatus(c, message) { $('#status').text(message); $('#status').attr('class', c); }
function confirmUpdate() { var increment = $('#incrementField').val(); var res = confirm("Do you really want to Increment Salary by " +increment +"%?"); if(res == true) { console.log("Salary record"); $('#UpdateButton').hide(); showStatus("alert alert-info", "Updating records, processing request"); var xmlhttp = new XMLHttpRequest(); var url = "WebController?op=incrementSalary&incrementPct=" +increment; xmlhttp.onreadystatechange = function() { if (xmlhttp.readyState == 4 && xmlhttp.status == 200) { processResponse(xmlhttp.responseText); showStatus("alert alert-success", "Updating records, successfully updated"); } else { showStatus("alert alert-danger", "Updating records, failure, could not update records"); } } xmlhttp.open("POST", url, true); xmlhttp.send(); showStatus("alert alert-info", "Updating records, request sent");
} else { console.log("Salary not updated"); showStatus("alert alert-warning", "Updating records, attempt cancelled");
}}
</script>
Step 9: Instructions to Create processResponse() method:
1. Create the function processRequest() to display the JSON results on HTML page.
unction processResponse(response) { var arr = JSON.parse(response); var i; var out = "<table>";keys = Object.keys(arr[0]);
// Print headers out += "<tr>"for(i = 0; i < keys.length; ++i) { out += "<th>"+keys[i]+"</th>"}
Chapter 7Create a new HTML(incrementSalary.html)
7-6

out += "</tr>";
// Print valuesfor(j = 0; j < arr.length; j++) {out += "<tr>"for(i = 0; i < keys.length; ++i) {out += "<td>"+arr[j][keys[i]]+"</td>"}out += "</tr>"}out += "</table>";document.getElementById("id-emp").innerHTML = out;}
Creating Login Users in TomcatThe HR Web Application will have two users — hradmin and hrstaff.
After you login on the home scree using your credentials, you will be able to see thelanding page, with details of the web application. The hradmin and hrstaff havedifferent privileges and access to different features.
This Chapter will show you the required classes that you need to create and how tobuild the ‘Login’ functionality in Tomcat.
• Create a XML file (tomcat-users.xml) for login functionality
• Create a HTML page (login.html) to login the user
• Create a HTML page (login-failed.html) to display the error message
• Create a web.xml to authenticate the users during login
• Create a HTML page (about.html) to show more details about the application
• Create a landing page (index.html) and define the html pages for redirection
• Add code to the servlet (WebController.java) to process logout
Create an XML file (tomcat-users.xml) for login functionality
Class Name: /java/HRWebApp/tomcat-users.java
Github Location: tomcat-users.xml
Description: Create an XML file tomcat-users.xml and list down the login users youwant to allow access to. Specify both username and password for each one of theusers.
Step 1: Create a new file tomcat-user.xml
Instructions for creating tomcat-users.xml:
1. Create the file tomcat-users.xml. Place this file under TOMCAT_HOME/conf /tomcat-users.xml
<?xml version='1.0' encoding='utf-8'?> z<tomcat-users xmlns="http://tomcat.apache.org/xml" xmlns:xsi="http://www.w3.org/2001/XMLSchema-instance"xsi:schemaLocation="http://tomcat.apache.org/xml tomcat-users.xsd" version="1.0"><role rolename="manager"/><role rolename="staff"/><user username="hradmin" password="welcome" roles="manager,staff"/>
Chapter 7Creating Login Users in Tomcat
7-7
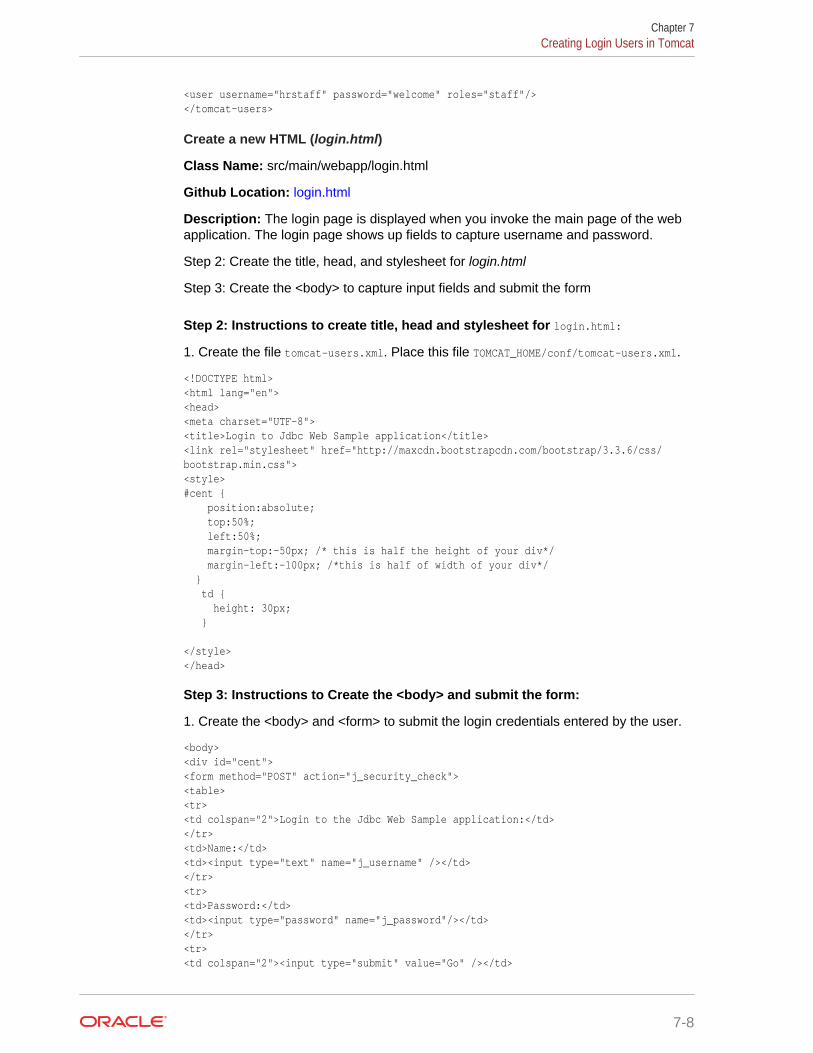
<user username="hrstaff" password="welcome" roles="staff"/></tomcat-users>
Create a new HTML (login.html)
Class Name: src/main/webapp/login.html
Github Location: login.html
Description: The login page is displayed when you invoke the main page of the webapplication. The login page shows up fields to capture username and password.
Step 2: Create the title, head, and stylesheet for login.html
Step 3: Create the <body> to capture input fields and submit the form
Step 2: Instructions to create title, head and stylesheet for login.html:
1. Create the file tomcat-users.xml. Place this file TOMCAT_HOME/conf/tomcat-users.xml.
<!DOCTYPE html><html lang="en"><head><meta charset="UTF-8"><title>Login to Jdbc Web Sample application</title><link rel="stylesheet" href="http://maxcdn.bootstrapcdn.com/bootstrap/3.3.6/css/bootstrap.min.css"><style>#cent { position:absolute; top:50%; left:50%; margin-top:-50px; /* this is half the height of your div*/ margin-left:-100px; /*this is half of width of your div*/ } td { height: 30px; }
</style></head>
Step 3: Instructions to Create the <body> and submit the form:
1. Create the <body> and <form> to submit the login credentials entered by the user.
<body><div id="cent"><form method="POST" action="j_security_check"><table><tr><td colspan="2">Login to the Jdbc Web Sample application:</td></tr><td>Name:</td><td><input type="text" name="j_username" /></td></tr><tr><td>Password:</td><td><input type="password" name="j_password"/></td></tr><tr><td colspan="2"><input type="submit" value="Go" /></td>
Chapter 7Creating Login Users in Tomcat
7-8

</tr></table></form></div></body>
Create a new HTML (login-failed.html)
Class Name: src/main/webapp/login-failed.html
Github Location: login-failed.html
Description: This the html page that will be displayed if the login is unsuccessful.
Step 4: Create the new page login-failed.html to show a message duringunsuccessful login attempts
Instructions to Create a new HTML page login-failed.html.
1. Create the login-failed.html as shown below.
<!DOCTYPE html><html lang="en"><head><meta charset="UTF-8"><title>Login Failed</title></head><body><p>Sorry, login failed!</p></body></html>
Create a web.xml to authenticate the users during login
Class Name: src/main/webapp/WEB-INF/web.xml
Github Location: web.xml
Description: The web.xml file consists of descriptors to authenticate the users whenthe login page is shows to the user.
Steps: Create the file web.xml as shown below.
Instructions for creating web.xml
1. Use the following steps to create the web.xml file:
<!DOCTYPE web-app PUBLIC "-//Sun Microsystems, Inc.//DTD Web Application 2.3//EN" "http://java.sun.com/dtd/web-app_2_3.dtd"><web-app><display-name>Jdbc Web Sample</display-name><security-role><role-name>manager</role-name></security-role><security-role><role-name>staff</role-name></security-role><security-constraint><web-resource-collection>
Chapter 7Creating Login Users in Tomcat
7-9
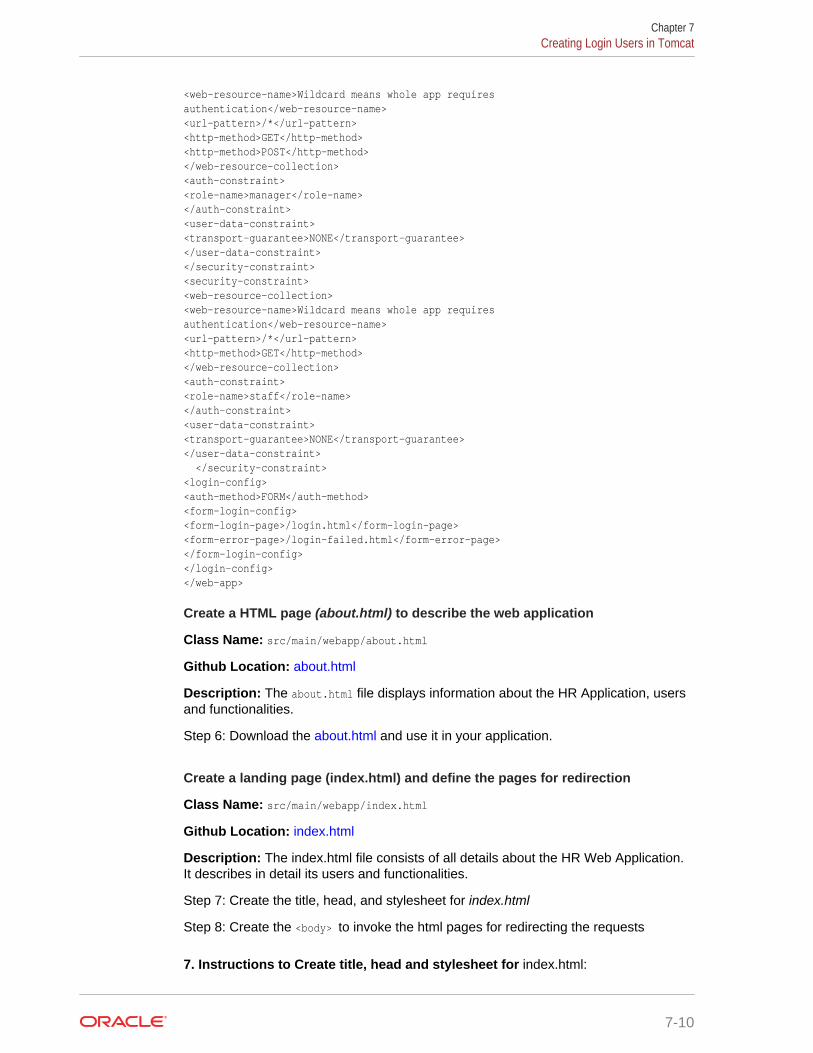
<web-resource-name>Wildcard means whole app requires authentication</web-resource-name><url-pattern>/*</url-pattern><http-method>GET</http-method><http-method>POST</http-method></web-resource-collection><auth-constraint><role-name>manager</role-name></auth-constraint><user-data-constraint><transport-guarantee>NONE</transport-guarantee></user-data-constraint></security-constraint><security-constraint><web-resource-collection><web-resource-name>Wildcard means whole app requires authentication</web-resource-name><url-pattern>/*</url-pattern><http-method>GET</http-method></web-resource-collection><auth-constraint><role-name>staff</role-name></auth-constraint><user-data-constraint><transport-guarantee>NONE</transport-guarantee></user-data-constraint> </security-constraint><login-config><auth-method>FORM</auth-method><form-login-config><form-login-page>/login.html</form-login-page><form-error-page>/login-failed.html</form-error-page></form-login-config></login-config></web-app>
Create a HTML page (about.html) to describe the web application
Class Name: src/main/webapp/about.html
Github Location: about.html
Description: The about.html file displays information about the HR Application, usersand functionalities.
Step 6: Download the about.html and use it in your application.
Create a landing page (index.html) and define the pages for redirection
Class Name: src/main/webapp/index.html
Github Location: index.html
Description: The index.html file consists of all details about the HR Web Application.It describes in detail its users and functionalities.
Step 7: Create the title, head, and stylesheet for index.html
Step 8: Create the <body> to invoke the html pages for redirecting the requests
7. Instructions to Create title, head and stylesheet for index.html:
Chapter 7Creating Login Users in Tomcat
7-10
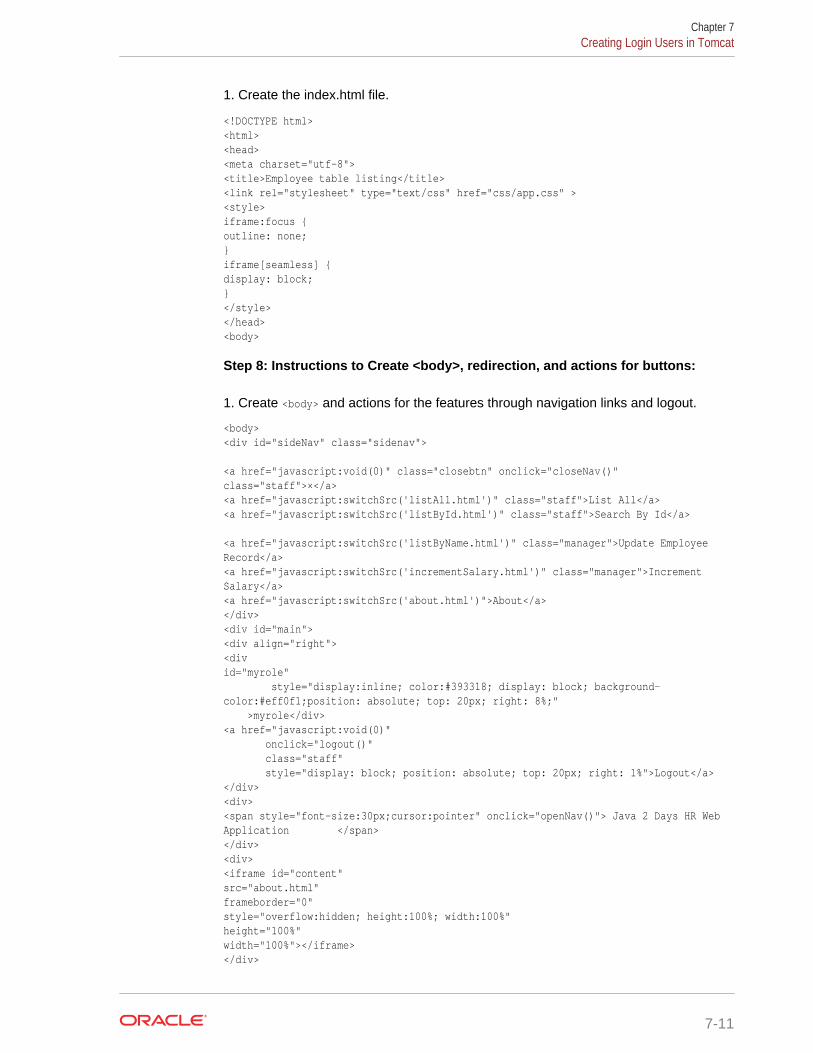
1. Create the index.html file.
<!DOCTYPE html><html><head><meta charset="utf-8"><title>Employee table listing</title><link rel="stylesheet" type="text/css" href="css/app.css" ><style>iframe:focus {outline: none;}iframe[seamless] {display: block;}</style></head><body>
Step 8: Instructions to Create <body>, redirection, and actions for buttons:
1. Create <body> and actions for the features through navigation links and logout.
<body><div id="sideNav" class="sidenav">
<a href="javascript:void(0)" class="closebtn" onclick="closeNav()" class="staff">×</a><a href="javascript:switchSrc('listAll.html')" class="staff">List All</a><a href="javascript:switchSrc('listById.html')" class="staff">Search By Id</a>
<a href="javascript:switchSrc('listByName.html')" class="manager">Update Employee Record</a><a href="javascript:switchSrc('incrementSalary.html')" class="manager">Increment Salary</a><a href="javascript:switchSrc('about.html')">About</a></div><div id="main"><div align="right"><divid="myrole" style="display:inline; color:#393318; display: block; background-color:#eff0f1;position: absolute; top: 20px; right: 8%;" >myrole</div><a href="javascript:void(0)" onclick="logout()" class="staff" style="display: block; position: absolute; top: 20px; right: 1%">Logout</a></div><div><span style="font-size:30px;cursor:pointer" onclick="openNav()"> Java 2 Days HR Web Application </span></div><div><iframe id="content"src="about.html"frameborder="0"style="overflow:hidden; height:100%; width:100%"height="100%"width="100%"></iframe></div>
Chapter 7Creating Login Users in Tomcat
7-11
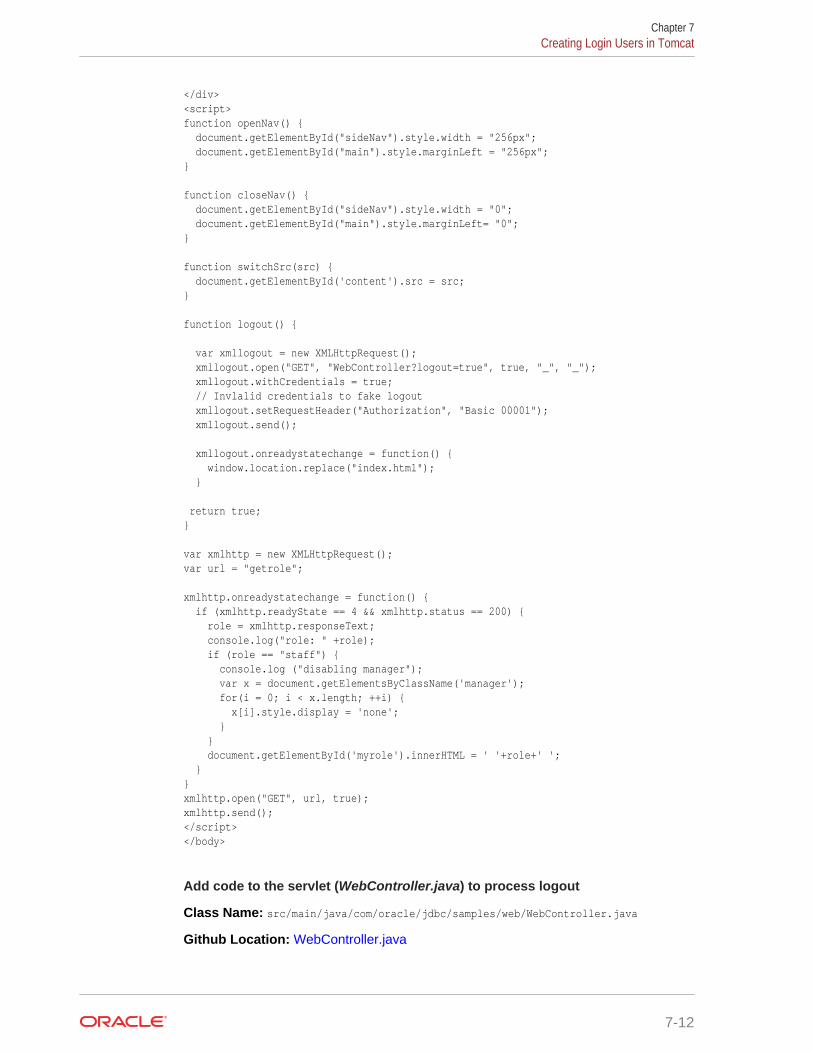
</div><script>function openNav() { document.getElementById("sideNav").style.width = "256px"; document.getElementById("main").style.marginLeft = "256px";}
function closeNav() { document.getElementById("sideNav").style.width = "0"; document.getElementById("main").style.marginLeft= "0";}
function switchSrc(src) { document.getElementById('content').src = src;}
function logout() {
var xmllogout = new XMLHttpRequest(); xmllogout.open("GET", "WebController?logout=true", true, "_", "_"); xmllogout.withCredentials = true; // Invlalid credentials to fake logout xmllogout.setRequestHeader("Authorization", "Basic 00001"); xmllogout.send();
xmllogout.onreadystatechange = function() { window.location.replace("index.html"); }
return true;}
var xmlhttp = new XMLHttpRequest();var url = "getrole";
xmlhttp.onreadystatechange = function() { if (xmlhttp.readyState == 4 && xmlhttp.status == 200) { role = xmlhttp.responseText; console.log("role: " +role); if (role == "staff") { console.log ("disabling manager"); var x = document.getElementsByClassName('manager'); for(i = 0; i < x.length; ++i) { x[i].style.display = 'none'; } } document.getElementById('myrole').innerHTML = ' '+role+' '; }}xmlhttp.open("GET", url, true);xmlhttp.send();</script></body>
Add code to the servlet (WebController.java) to process logout
Class Name: src/main/java/com/oracle/jdbc/samples/web/WebController.java
Github Location: WebController.java
Chapter 7Creating Login Users in Tomcat
7-12
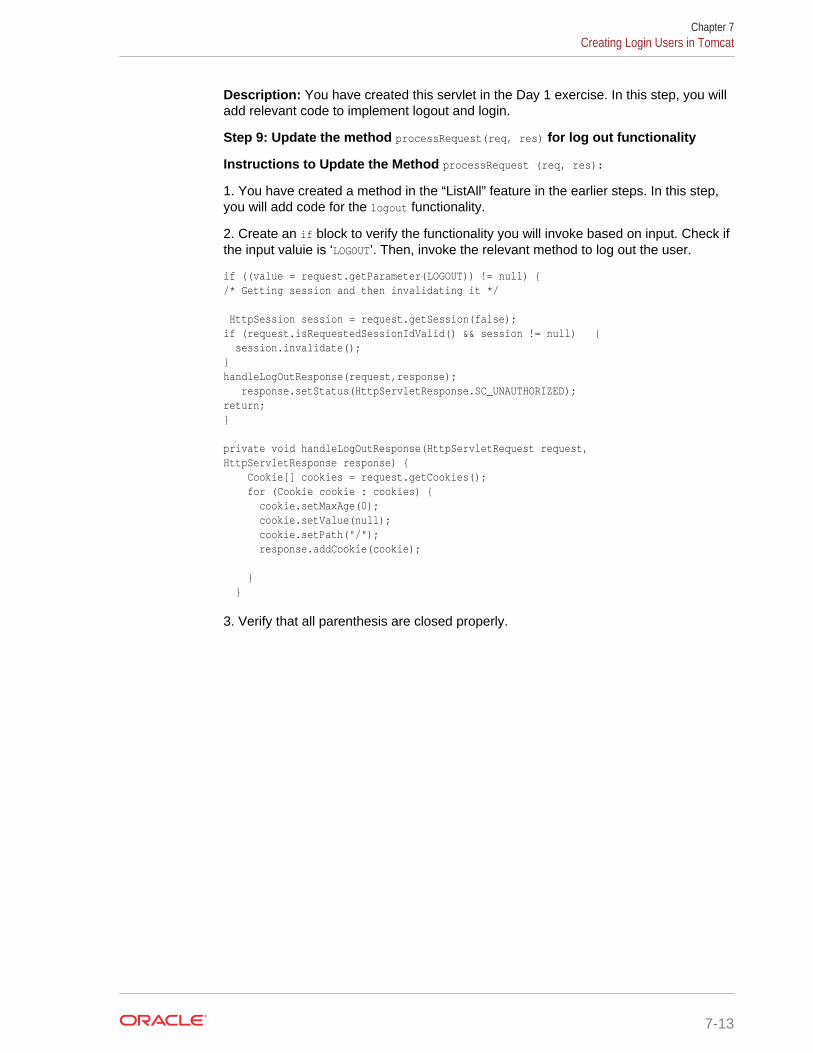
Description: You have created this servlet in the Day 1 exercise. In this step, you willadd relevant code to implement logout and login.
Step 9: Update the method processRequest(req, res) for log out functionality
Instructions to Update the Method processRequest (req, res):
1. You have created a method in the “ListAll” feature in the earlier steps. In this step,you will add code for the logout functionality.
2. Create an if block to verify the functionality you will invoke based on input. Check ifthe input valuie is ‘LOGOUT’. Then, invoke the relevant method to log out the user.
if ((value = request.getParameter(LOGOUT)) != null) {/* Getting session and then invalidating it */
HttpSession session = request.getSession(false);if (request.isRequestedSessionIdValid() && session != null) { session.invalidate();}handleLogOutResponse(request,response); response.setStatus(HttpServletResponse.SC_UNAUTHORIZED);return;}
private void handleLogOutResponse(HttpServletRequest request,HttpServletResponse response) { Cookie[] cookies = request.getCookies(); for (Cookie cookie : cookies) { cookie.setMaxAge(0); cookie.setValue(null); cookie.setPath("/"); response.addCookie(cookie);
} }
3. Verify that all parenthesis are closed properly.
Chapter 7Creating Login Users in Tomcat
7-13
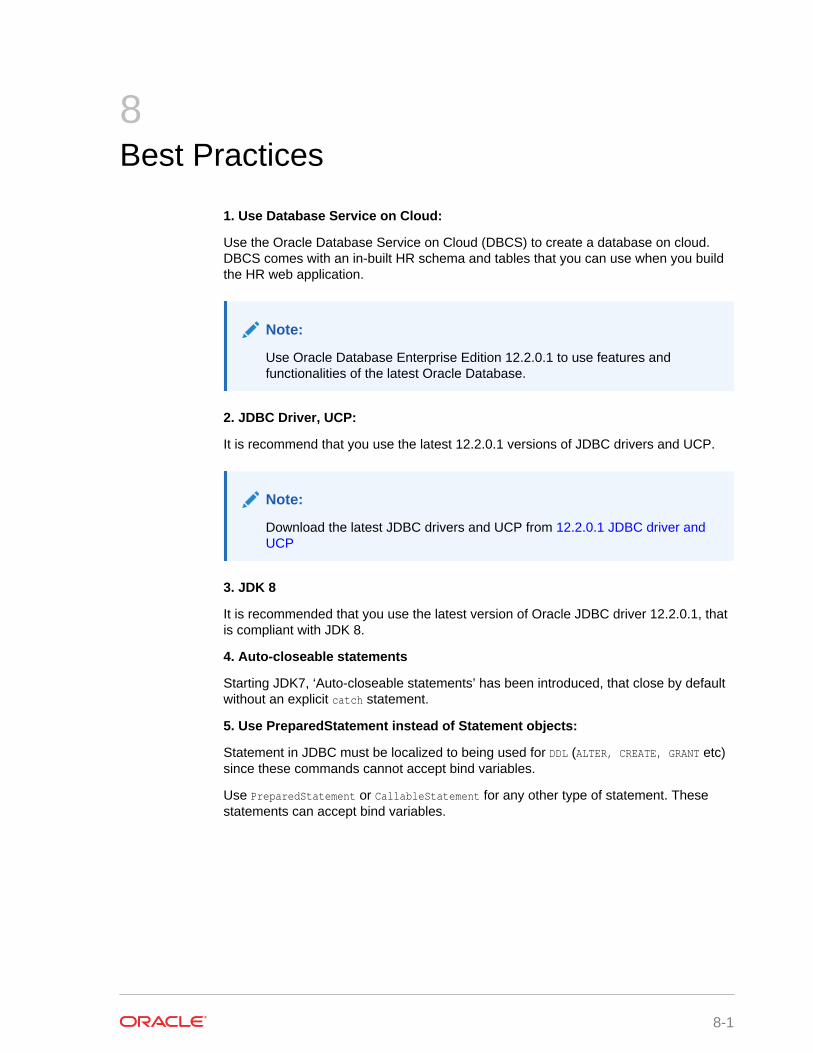
8Best Practices
1. Use Database Service on Cloud:
Use the Oracle Database Service on Cloud (DBCS) to create a database on cloud.DBCS comes with an in-built HR schema and tables that you can use when you buildthe HR web application.
Note:
Use Oracle Database Enterprise Edition 12.2.0.1 to use features andfunctionalities of the latest Oracle Database.
2. JDBC Driver, UCP:
It is recommend that you use the latest 12.2.0.1 versions of JDBC drivers and UCP.
Note:
Download the latest JDBC drivers and UCP from 12.2.0.1 JDBC driver andUCP
3. JDK 8
It is recommended that you use the latest version of Oracle JDBC driver 12.2.0.1, thatis compliant with JDK 8.
4. Auto-closeable statements
Starting JDK7, ‘Auto-closeable statements’ has been introduced, that close by defaultwithout an explicit catch statement.
5. Use PreparedStatement instead of Statement objects:
Statement in JDBC must be localized to being used for DDL (ALTER, CREATE, GRANT etc)since these commands cannot accept bind variables.
Use PreparedStatement or CallableStatement for any other type of statement. Thesestatements can accept bind variables.
8-1

9Troubleshooting and Debugging
1. Tomcat log file:
Check TOMCAT_HOME/logs/catalina.out for any errors after deploying the application.
2. Additional Logging:
Enable logging in Tomcat to find logging messages in the code.
Note:
Refer https://tomcat.apache.org/tomcat-8.0-doc/logging.html for moreinformation
Debugging UI Related Issues
1. Browser Version:
This application has been tested on Firefox (version 52) and Chrome (version 58)successfully.
2. Browser Console:
Look for errors in the browser console to find and debug issues.3. Monitor Network Traffic:Track network traffic to find out the requests being made, and the responses to therequests. A return status higher than 400 indicates errors. If you find errors in therange of 400 t 500 inspect the Tomcat log files for debugging.Inspect the JSON responses from various calls to the backend server.4. Additional Logging:Edit the packaged HTML files, and add console.log(...) to add extra logging.
9-1

Index
EEntry Level of the SQL-92, 2-1
HHR account
testing, 4-3HR user account
sample application, 4-3unlocking, 4-3
IIDE, 4-5
Oracle JDeveloper, 4-5installation
verifying on the database, 4-5integrated development environment, 4-5
JJ2SE, 4-4
installing, 4-4Java Database Connectivity, 2-1JavaServer Pages, 4-5JDBC, 2-1
JSP, 4-5JSP pages
deploying, 4-5
OOracle Database 12c Release 2, 4-2
installation, 4-5installation guides, 4-3release notes, 4-3verifying, 4-5verifying installation, 4-5
Oracle Database 12c Release 2 installationplatform-specific, 4-5
Oracle WebLogic Server, 4-5
Ssample application
HR user account, 4-3
WWeb server, 4-5
Apache Tomcat, 4-5servlet container, 4-5
Index-1


![CA IdentityMinder Java Developer's Guide Tutorial [Sample]](https://static.documents.pub/doc/80x56/55cf945a550346f57ba16d29/ca-identityminder-java-developers-guide-tutorial-sample.jpg)


