IntroductionNational VOAD in partnership with VisionLink are providing each state VOAD with their own CommunityOS platform portal. This platform offers a centralized place for each state organization to maintain all pertinent disaster related information. Information can be public and restricted to authorized users, including resources, contacts, policy and processes, documents, and much more. How to Access the State VOAD Site VisionLink is creating a website for each state VOAD. The individual state VOAD contacts will be notified once their site is ready. At that point users will need to register on the site. Training VisionLink will be hosting training sessions on the tools to manage the website. Each state VOAD contact will be invited to participate in a training session once their site is available.
Introduction (cont’d)Website Customization After completing training each state will be able to customize the content, navigation menus, and images on their website to meet their specific needs.
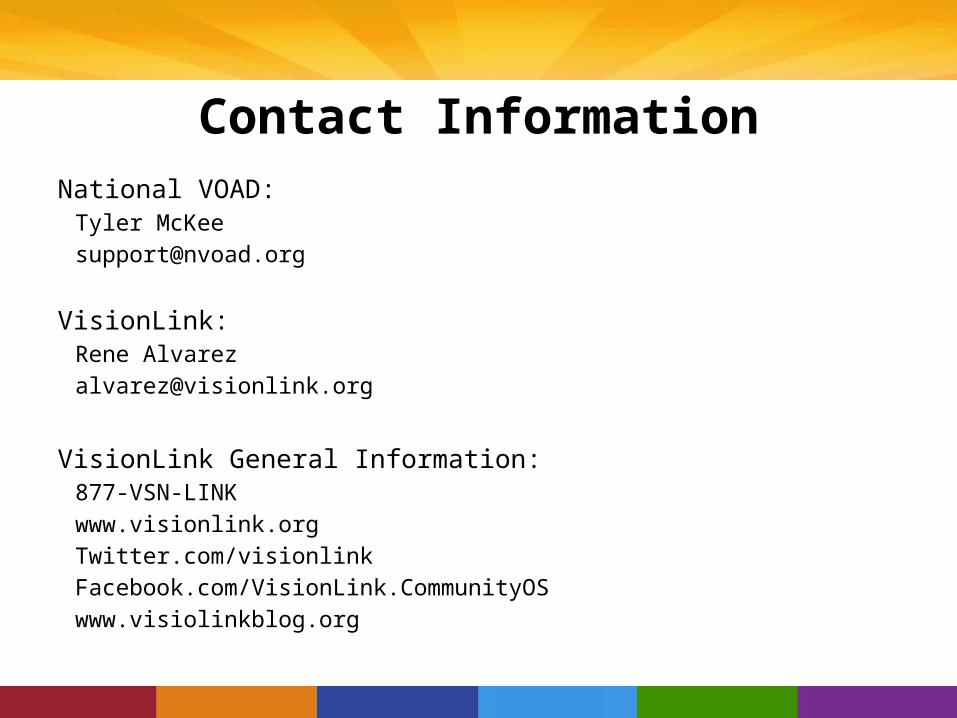
Who to Contact Once a state VOAD has completed training, Tyler McKee ([email protected]) at National VOAD is the contact person for questions about user accounts and website management. Monthly State VOAD User Group Starting in June 2012 (watch for your email dates and times), VisionLink will be hosting a monthly State VOAD Users Group. These users group sessions will give representatives from different states a chance to share ideas, and ask questions of their peers. Additional information about the users group will be distributed shortly.
BASIC FEATURES
Accessing the State VOAD Site• VisionLink has created a website for each
state VOAD: Ex: vlvoad.communityos.org
• All users will need to register on their site.
Who to Contact• Once a state VOAD has completed training,
Tyler McKee at National VOAD will serve as the contact person for questions about user accounts, and website management.
State VOAD User Group• Starting June 6, 2012, VisionLink began hosting
monthly State VOAD Users Group the first Wednesday of every month at 1PM MST.
• Topics for these user groups have included:– Suggestions for site improvements
• “I would like it if my site could…”– Discussing different tasks
• “How do I…”– Specialized Overviews
BASIC OVERVIEW: CREATING A PAGE
Content Management System (CMS)
Creating a Page
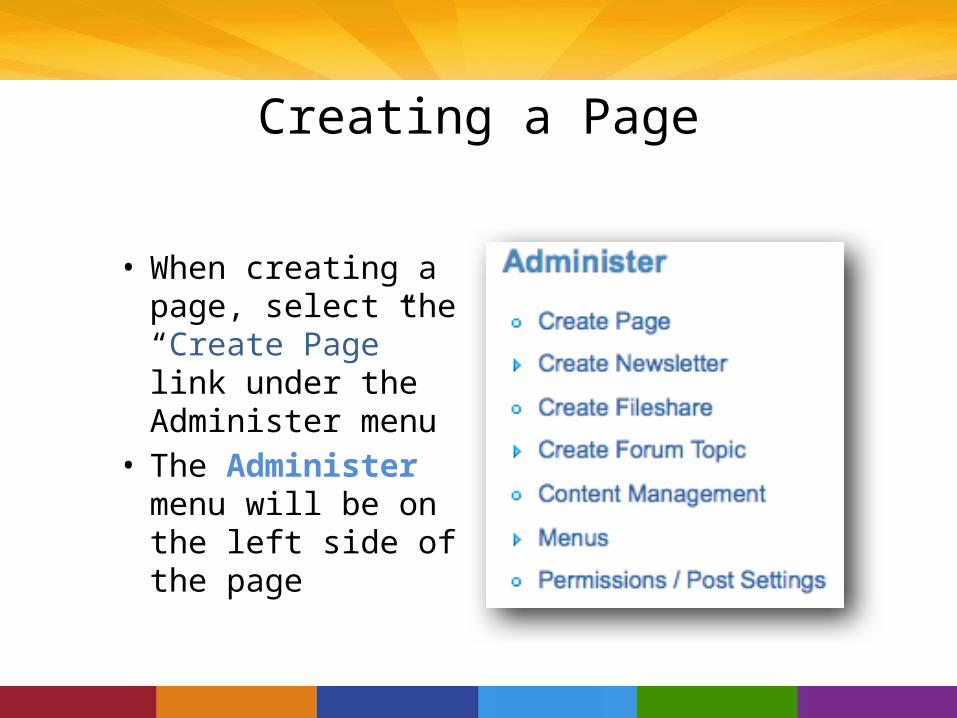
• When creating a page, select the “Create Page” link under the Administer menu
• The Administer menu will be on the left side of the page
Creating a Page: Title
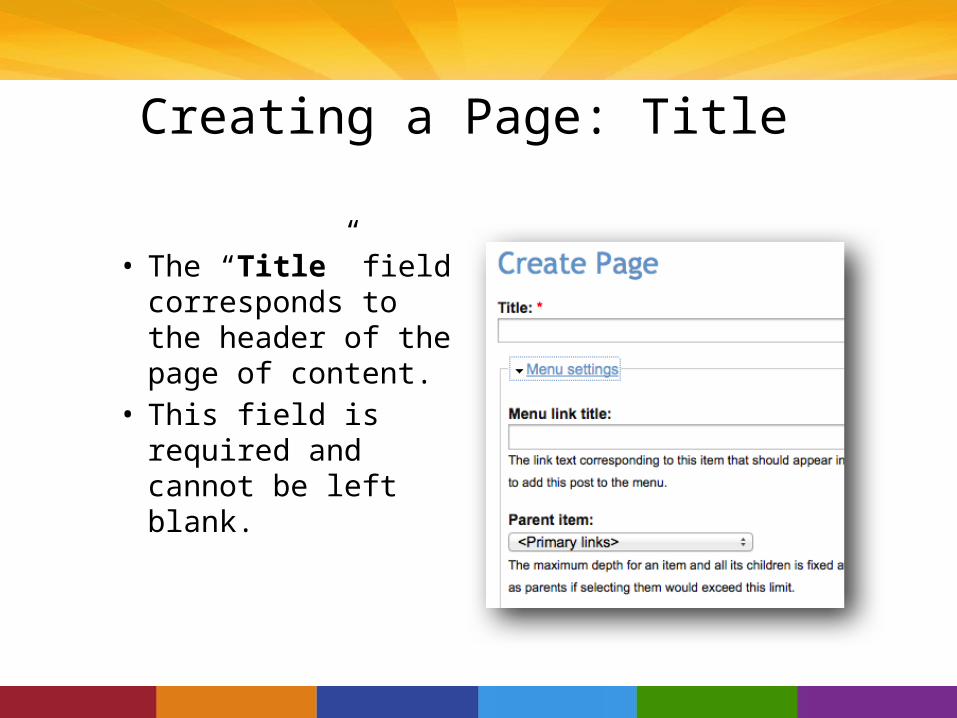
• The “Title” field corresponds to the header of the page of content.
• This field is required and cannot be left blank.
Creating a Page: Menu Link Title
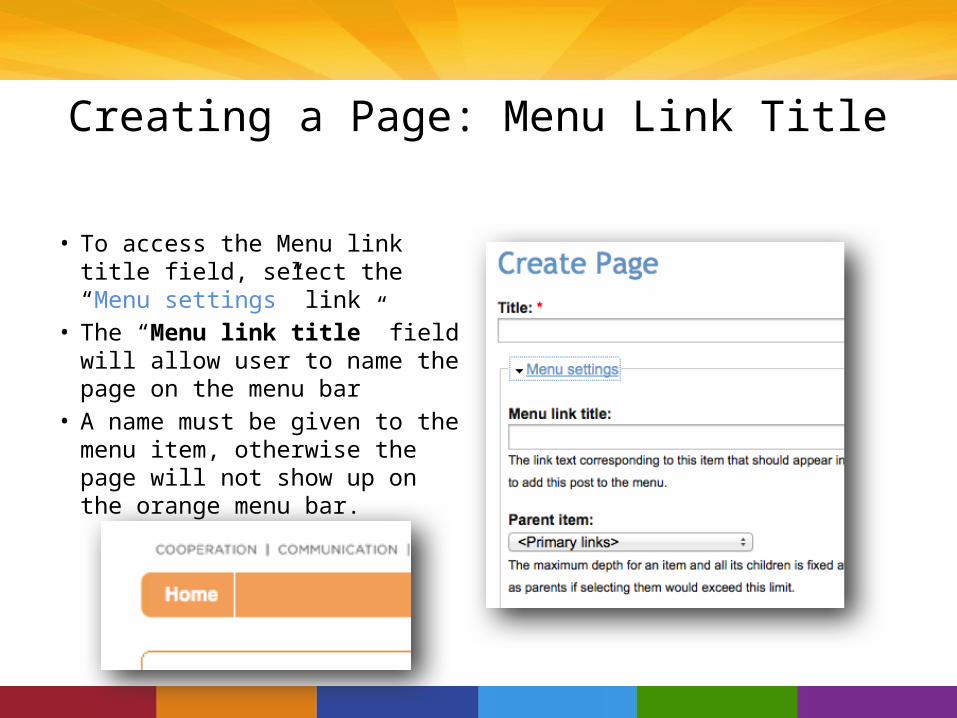
• To access the Menu link title field, select the “Menu settings” link
• The “Menu link title” field will allow user to name the page on the menu bar
• A name must be given to the menu item, otherwise the page will not show up on the orange menu bar.
Creating a Page: Parent Item
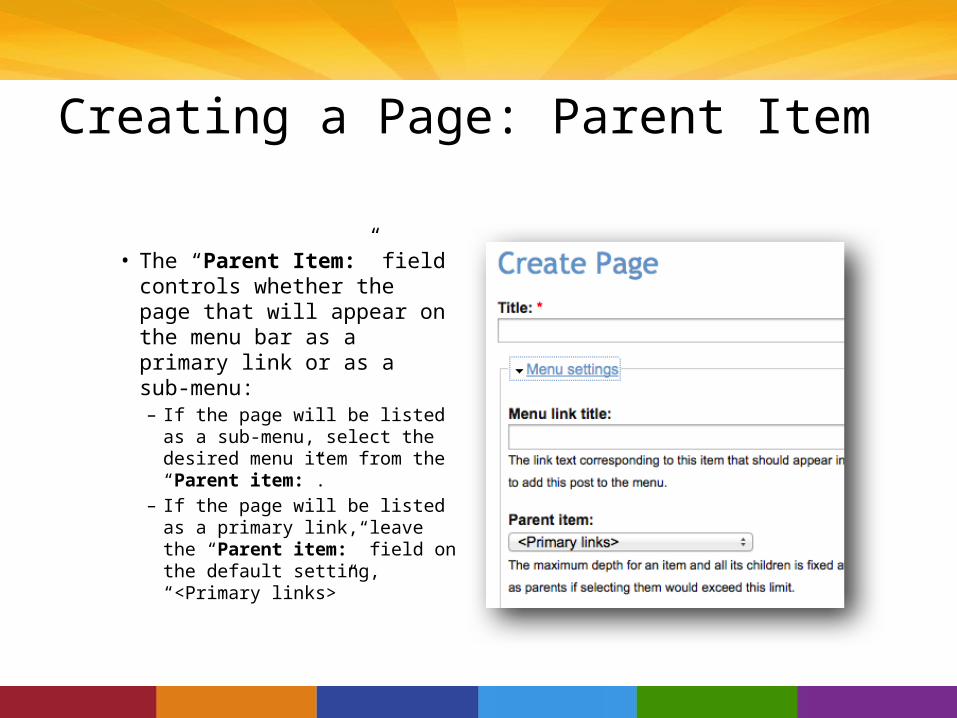
• The “Parent Item:” field controls whether the page that will appear on the menu bar as a primary link or as a sub-menu:– If the page will be listed as a
sub-menu, select the desired menu item from the “Parent item:”.
– If the page will be listed as a primary link, leave the “Parent item:” field on the default setting, “<Primary links>”
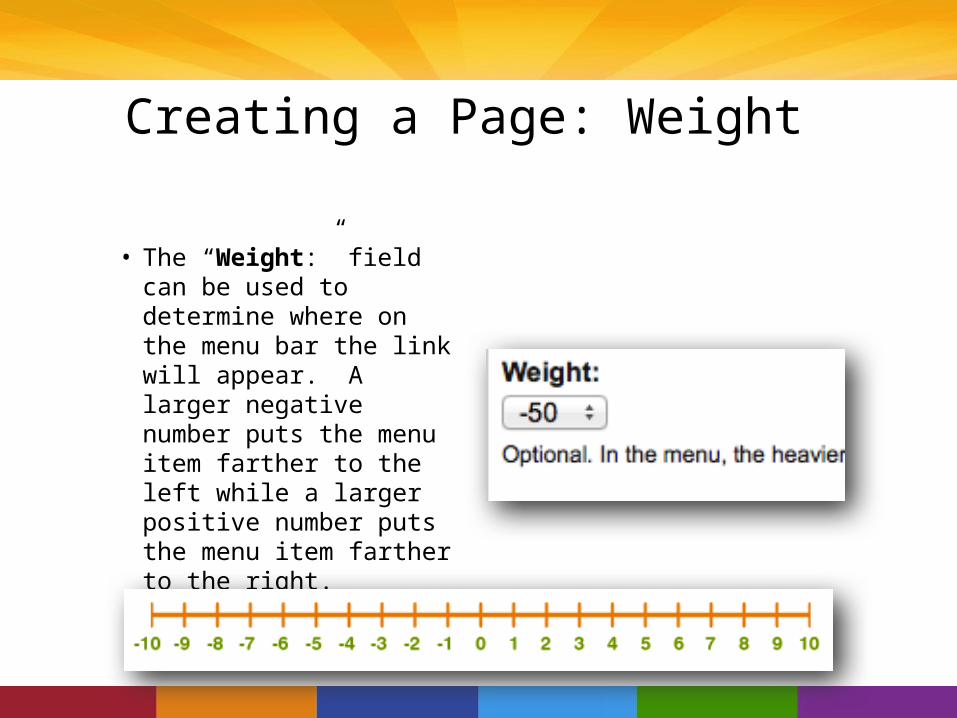
Creating a Page: Weight
• The “Weight:” field can be used to determine where on the menu bar the link will appear. A larger negative number puts the menu item farther to the left while a larger positive number puts the menu item farther to the right.
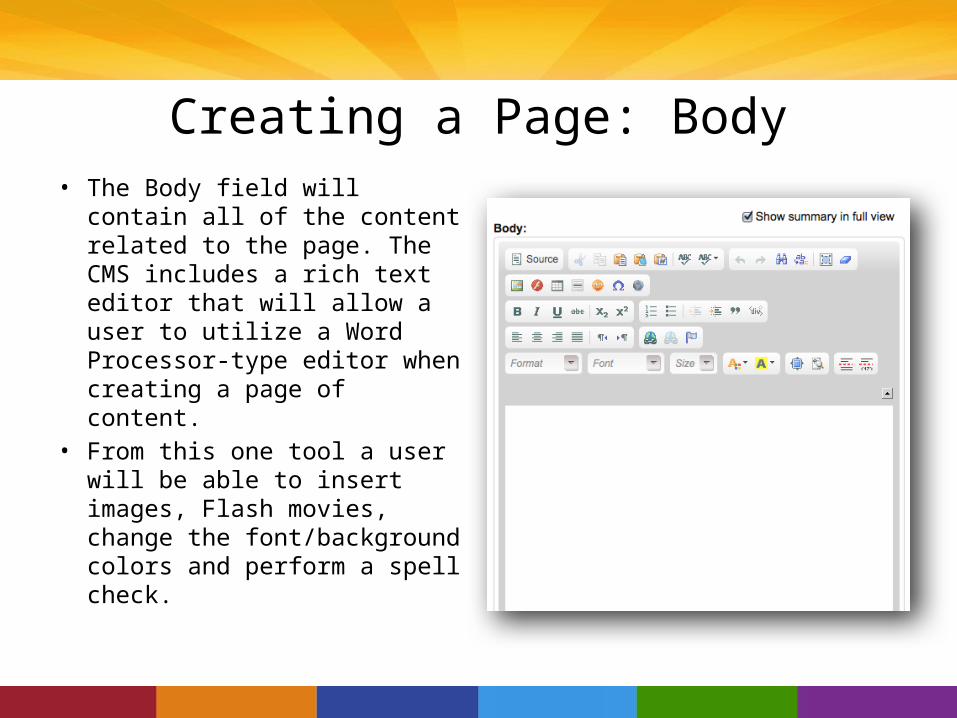
Creating a Page: Body• The Body field will contain all
of the content related to the page. The CMS includes a rich text editor that will allow a user to utilize a Word Processor-type editor when creating a page of content.
• From this one tool a user will be able to insert images, Flash movies, change the font/background colors and perform a spell check.
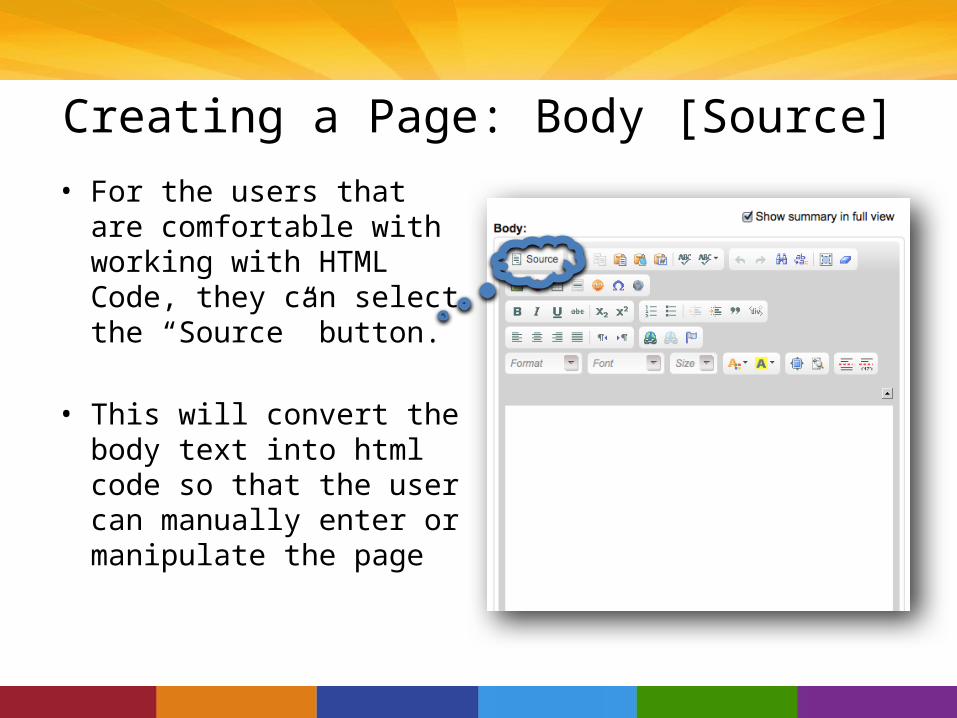
Creating a Page: Body [Source]• For the users that are
comfortable with working with HTML Code, they can select the “Source” button.
• This will convert the body text into html code so that the user can manually enter or manipulate the page
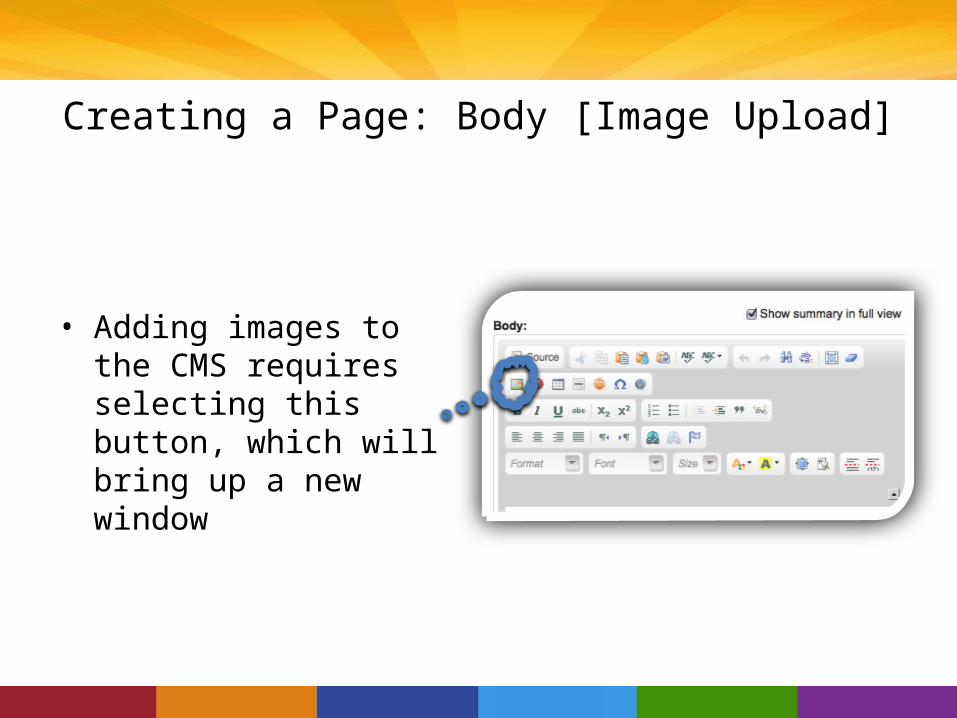
Creating a Page: Body [Image Upload]
• Adding images to the CMS requires selecting this button, which will bring up a new window
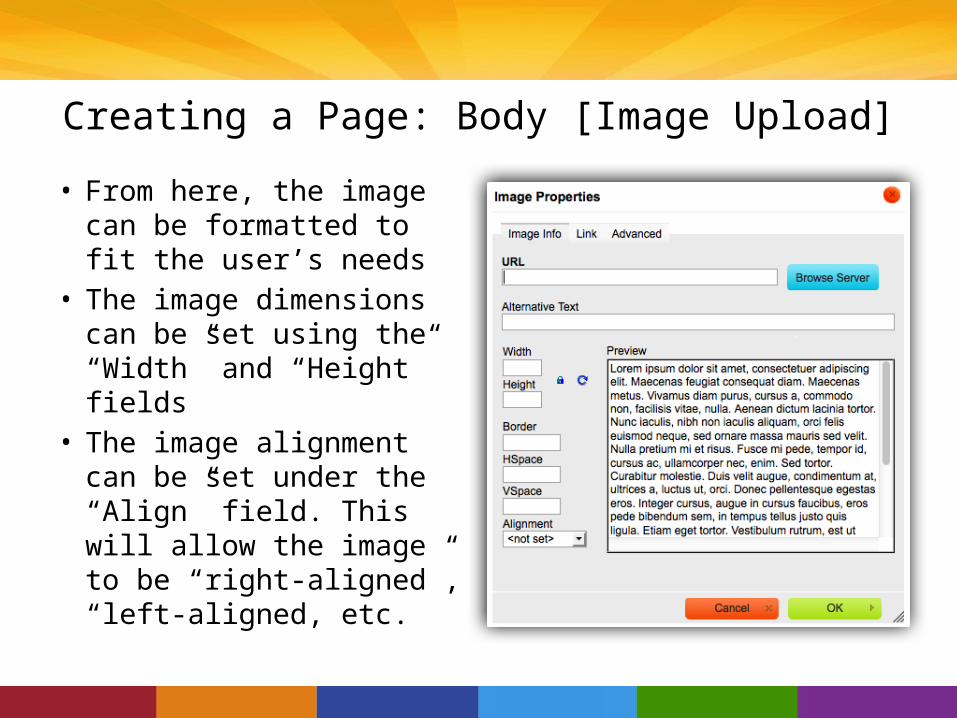
Creating a Page: Body [Image Upload]• From here, the image can
be formatted to fit the user’s needs
• The image dimensions can be set using the “Width” and “Height” fields
• The image alignment can be set under the “Align” field. This will allow the image to be “right-aligned”, “left-aligned, etc.
Creating a Page: Body [Hyperlink]
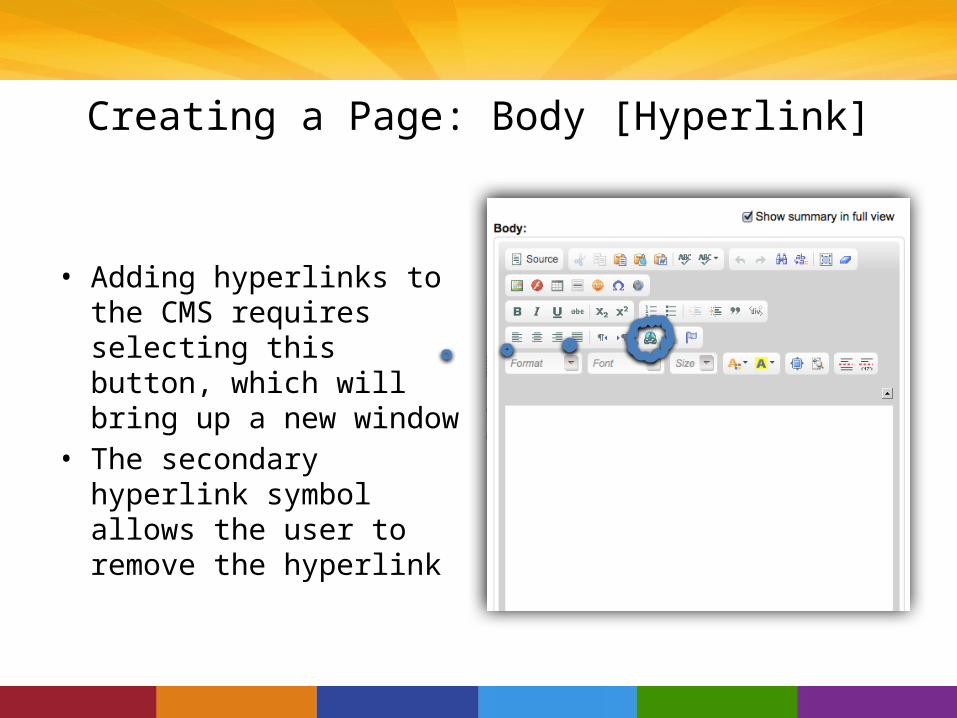
• Adding hyperlinks to the CMS requires selecting this button, which will bring up a new window
• The secondary hyperlink symbol allows the user to remove the hyperlink
Creating a Page: Body [Adding Tables]
• Adding tables to the CMS requires selecting this button, which will bring up a new window
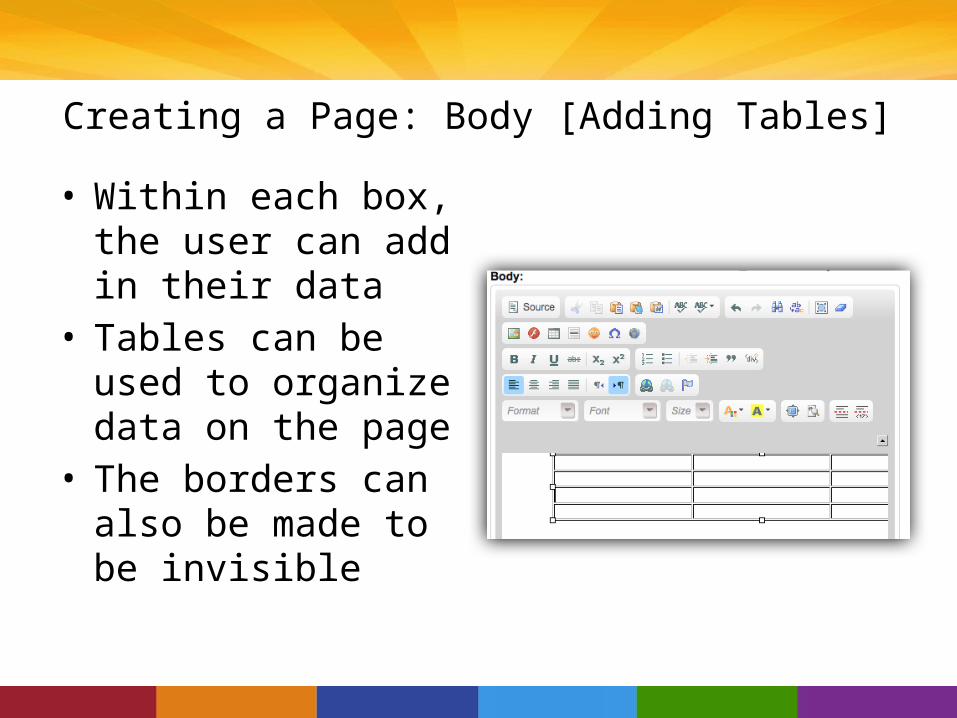
Creating a Page: Body [Adding Tables]• Within each box, the
user can add in their data
• Tables can be used to organize data on the page
• The borders can also be made to be invisible
Creating a Page: Body [Coloring]
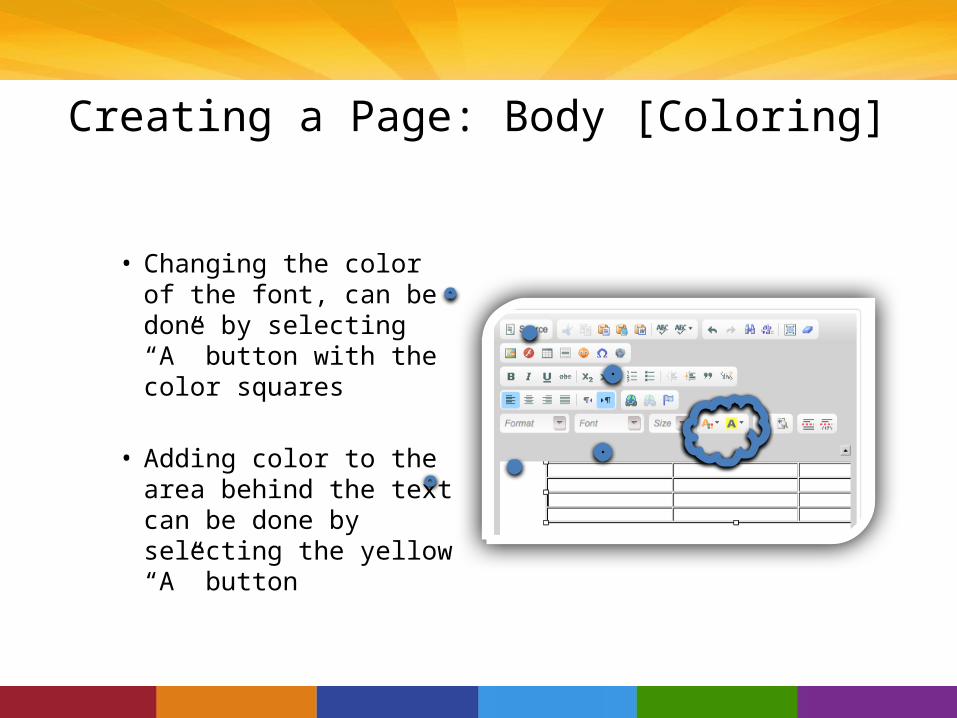
• Changing the color of the font, can be done by selecting “A” button with the color squares
• Adding color to the area behind the text can be done by selecting the yellow “A” button
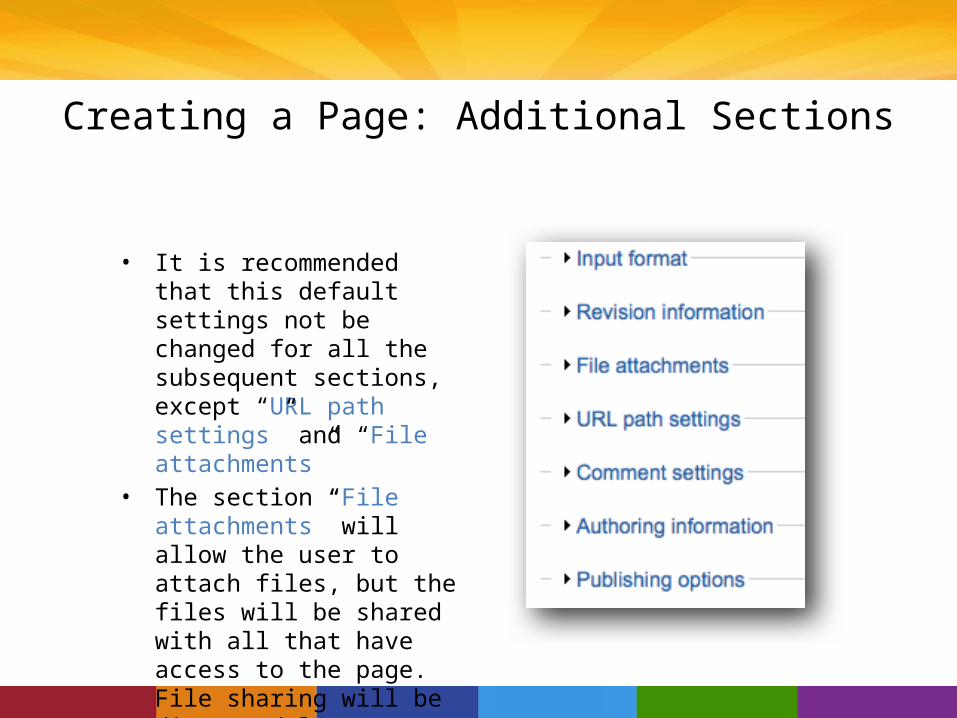
Creating a Page: Additional Sections
• It is recommended that this default settings not be changed for all the subsequent sections, except “URL path settings” and “File attachments”
• The section “File attachments” will allow the user to attach files, but the files will be shared with all that have access to the page. File sharing will be discussed later.
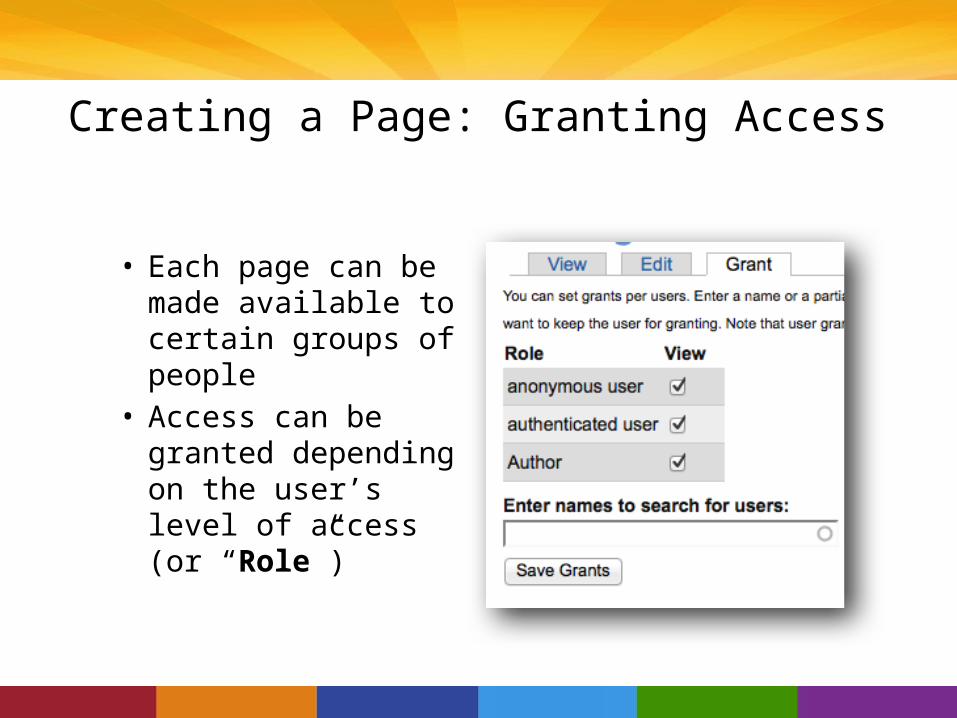
Creating a Page: Granting Access
• Each page can be made available to certain groups of people
• Access can be granted depending on the user’s level of access (or “Role”)
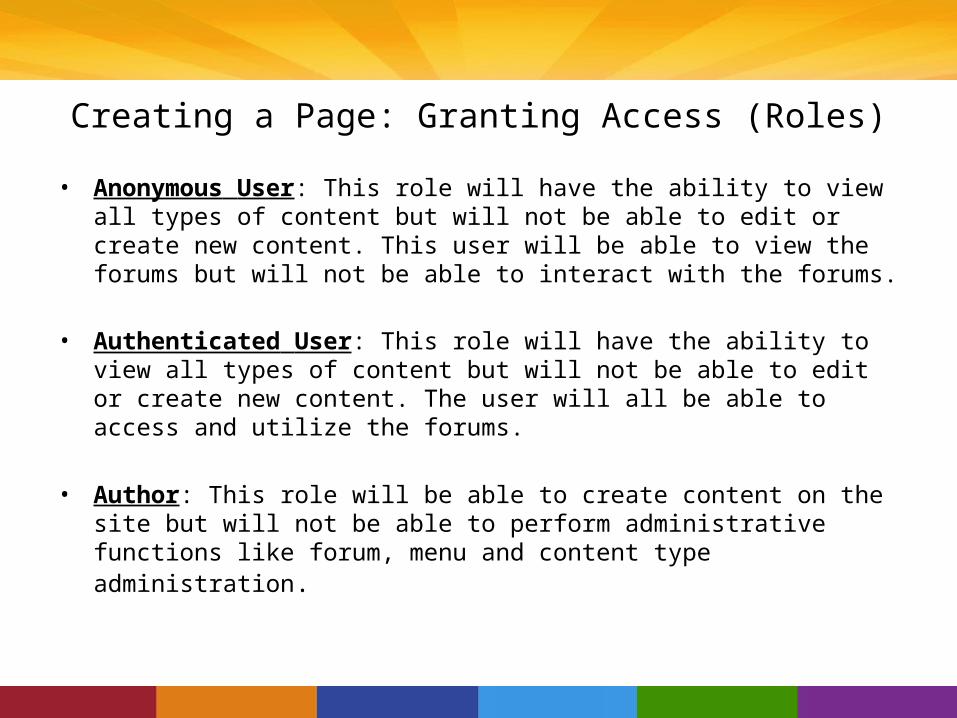
Creating a Page: Granting Access (Roles)• Anonymous User: This role will have the ability to view all types of content but will
not be able to edit or create new content. This user will be able to view the forums but will not be able to interact with the forums.
• Authenticated User: This role will have the ability to view all types of content but will not be able to edit or create new content. The user will all be able to access and utilize the forums.
• Author: This role will be able to create content on the site but will not be able to perform administrative functions like forum, menu and content type administration.
BASIC OVERVIEW: CREATING A NEWSLETTER
Content Management System (CMS)
Administering a Newsletter
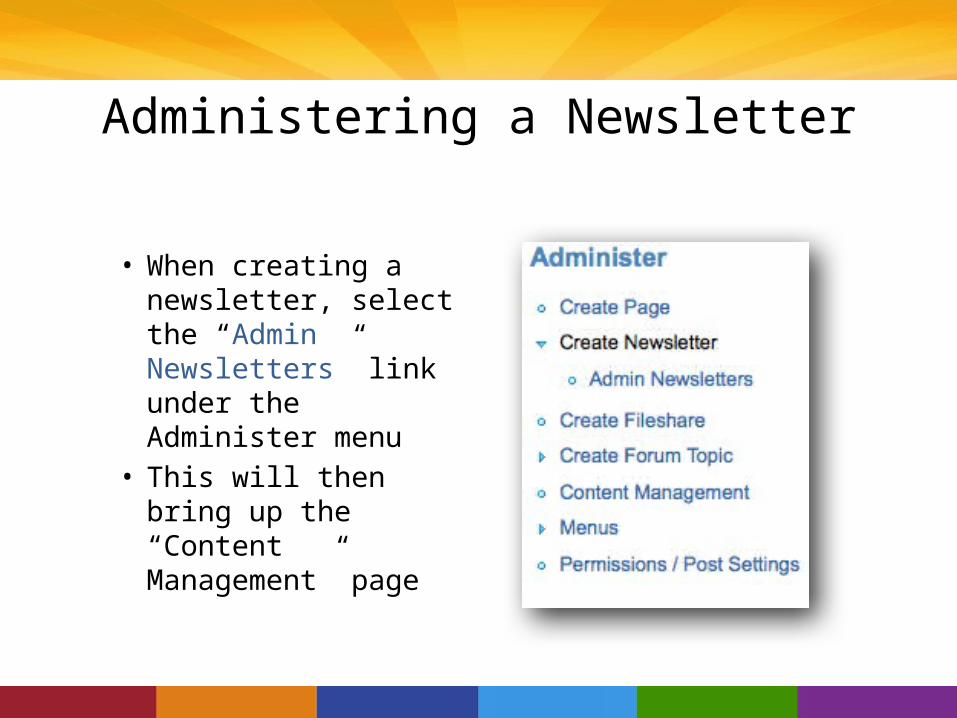
• When creating a newsletter, select the “Admin Newsletters” link under the Administer menu
• This will then bring up the “Content Management” page
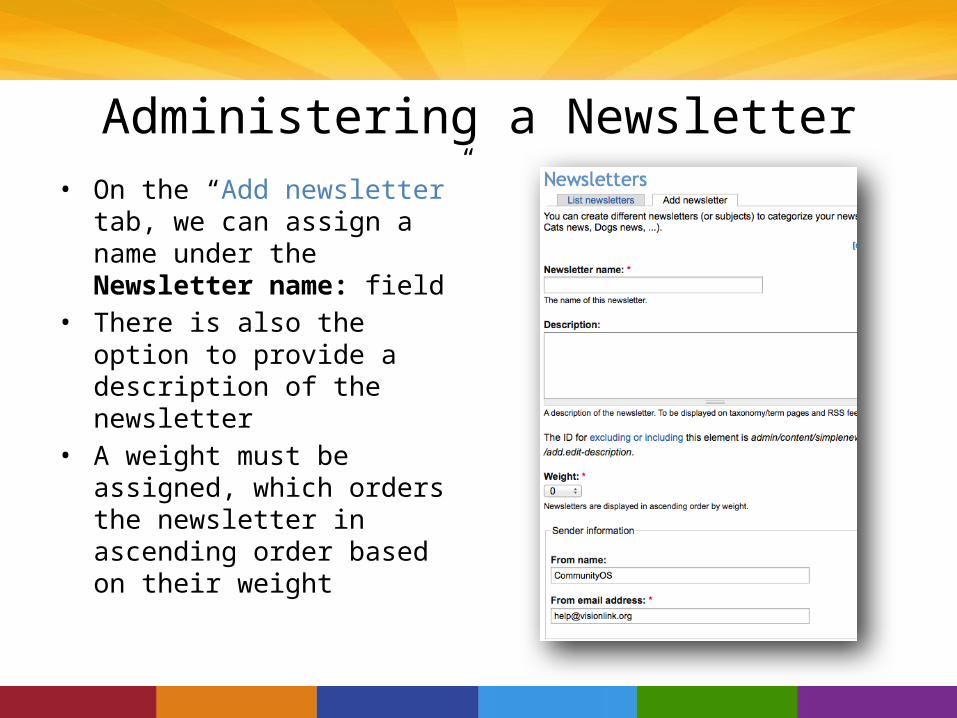
Administering a Newsletter• On the “Add newsletter” tab, we
can assign a name under the Newsletter name: field
• There is also the option to provide a description of the newsletter
• A weight must be assigned, which orders the newsletter in ascending order based on their weight
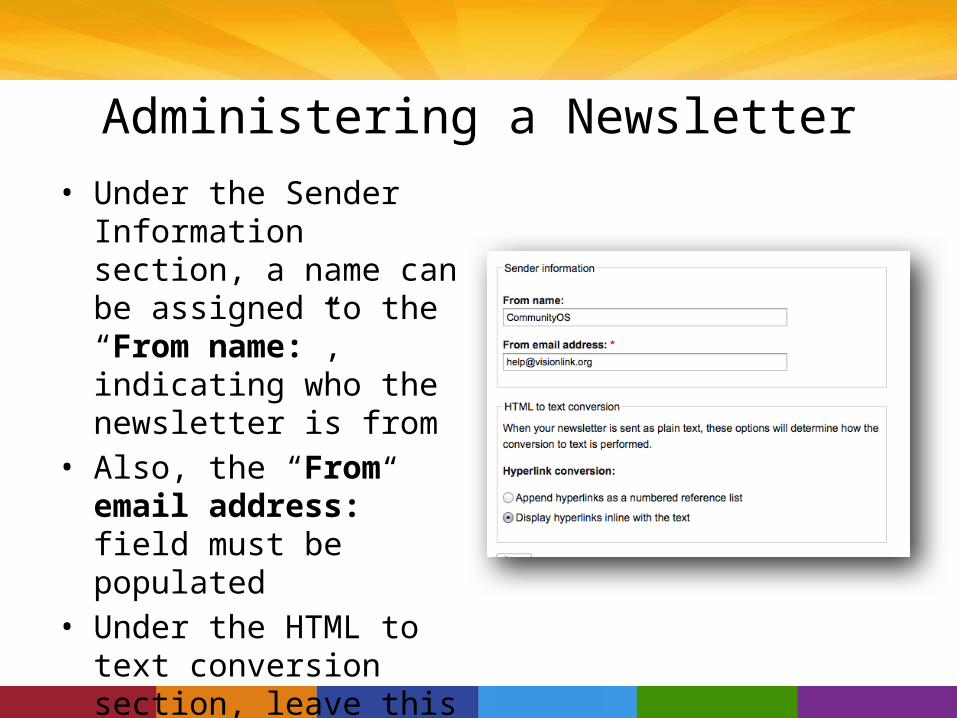
Administering a Newsletter• Under the Sender
Information section, a name can be assigned to the “From name:”, indicating who the newsletter is from
• Also, the “From email address:” field must be populated
• Under the HTML to text conversion section, leave this section under its default options
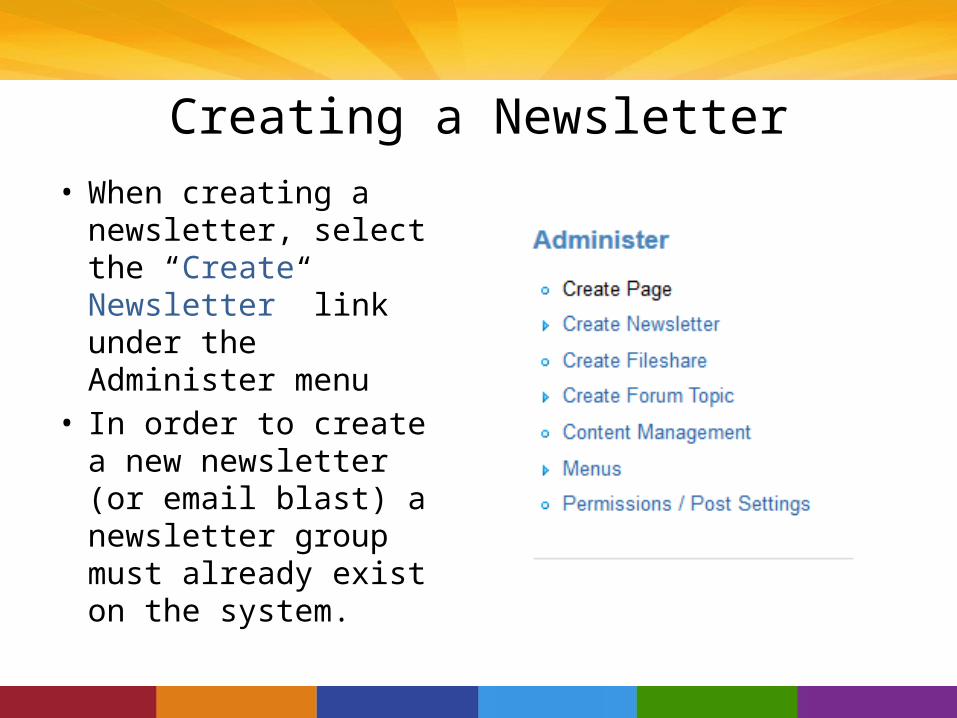
Creating a Newsletter• When creating a
newsletter, select the “Create Newsletter” link under the Administer menu
• In order to create a new newsletter (or email blast) a newsletter group must already exist on the system.
BASIC OVERVIEW: CREATING A FILESHARE
Content Management System (CMS)
Creating a Fileshare• When creating a fileshare,
select the “Create Fileshare” link under the Administer menu
• A fileshare allows a user to create a secure location to share documents between authorized users.
• A fileshare is a central repository of files that can be accessed by multiple users.
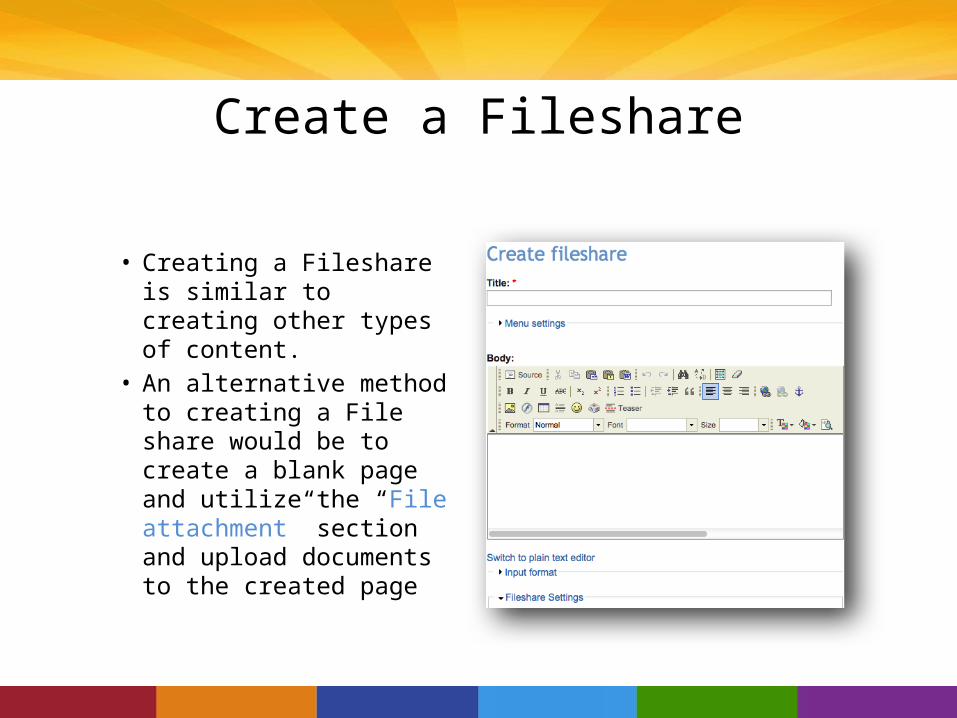
Create a Fileshare
• Creating a Fileshare is similar to creating other types of content.
• An alternative method to creating a File share would be to create a blank page and utilize the “File attachment” section and upload documents to the created page
BASIC OVERVIEW: CREATING A DISCUSSION FORUM
Content Management System (CMS)
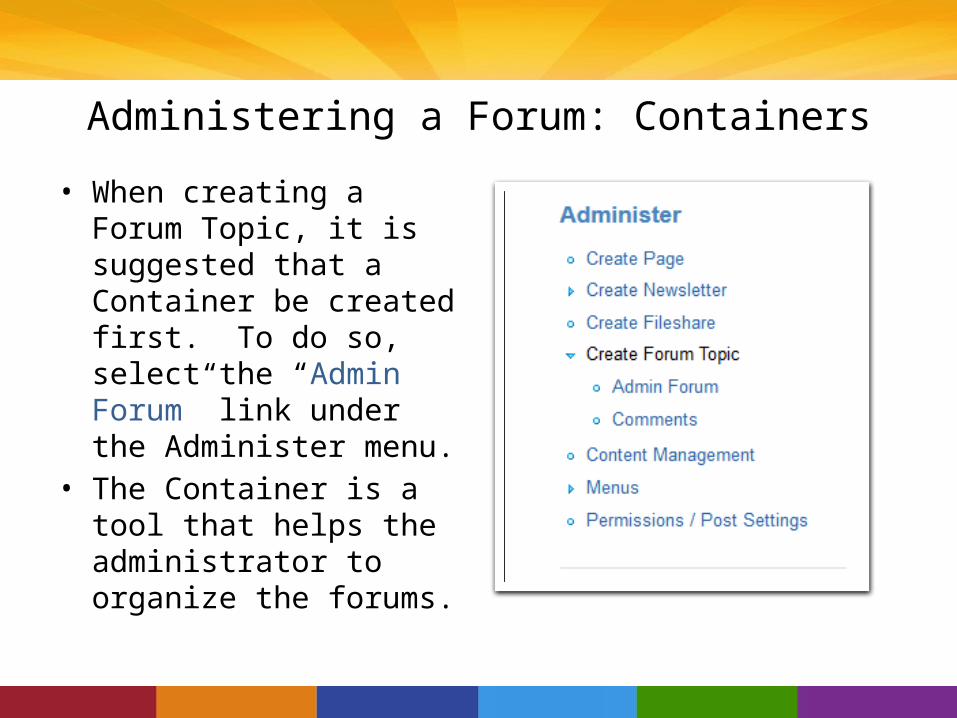
Administering a Forum: Containers• When creating a Forum
Topic, it is suggested that a Container be created first. To do so, select the “Admin Forum” link under the Administer menu.
• The Container is a tool that helps the administrator to organize the forums.
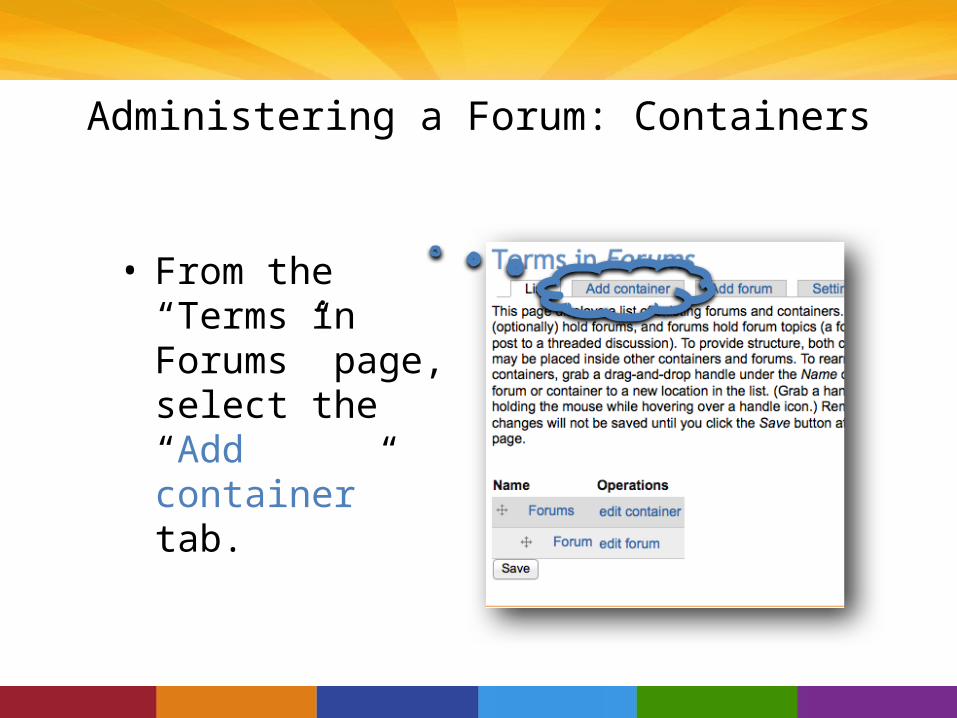
Administering a Forum: Containers
• From the “Terms in Forums” page, select the “Add container” tab.
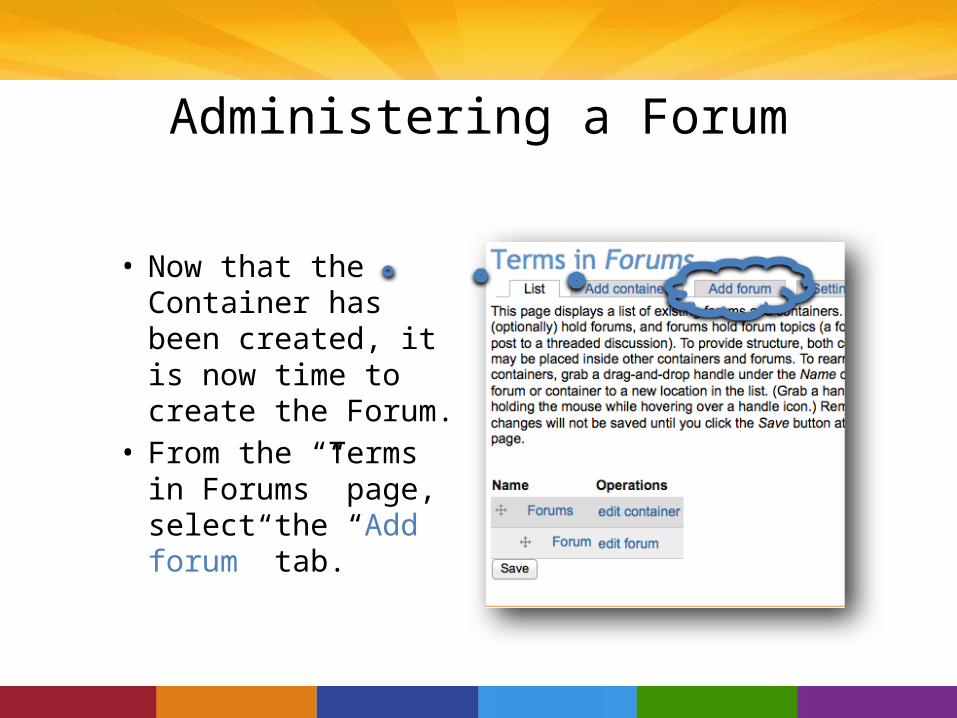
Administering a Forum
• Now that the Container has been created, it is now time to create the Forum.
• From the “Terms in Forums” page, select the “Add forum” tab.
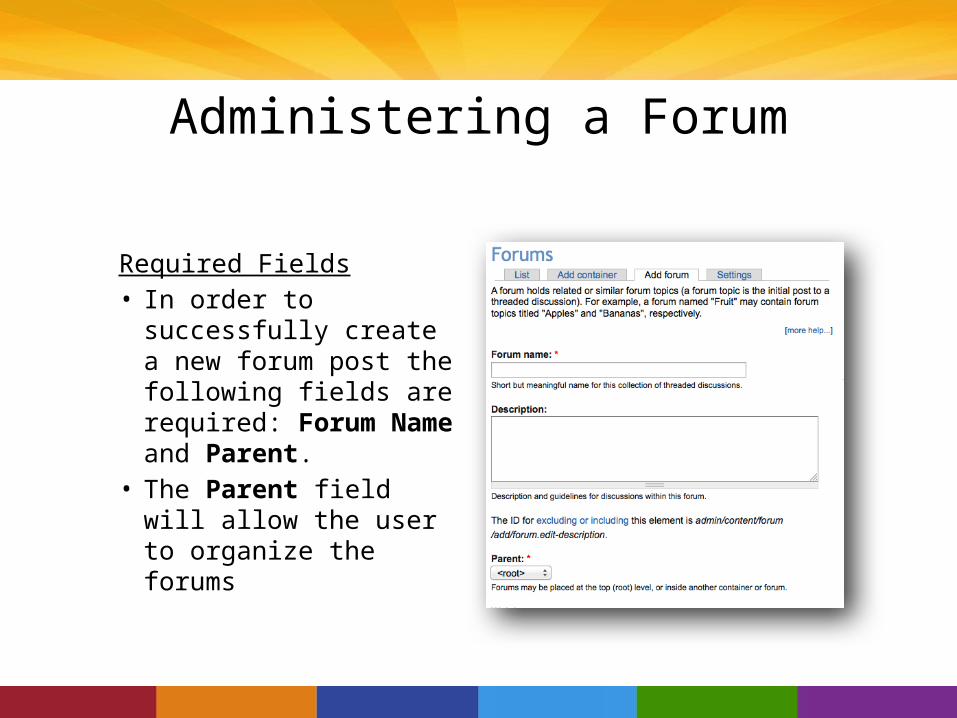
Administering a Forum
Required Fields• In order to successfully
create a new forum post the following fields are required: Forum Name and Parent.
• The Parent field will allow the user to organize the forums
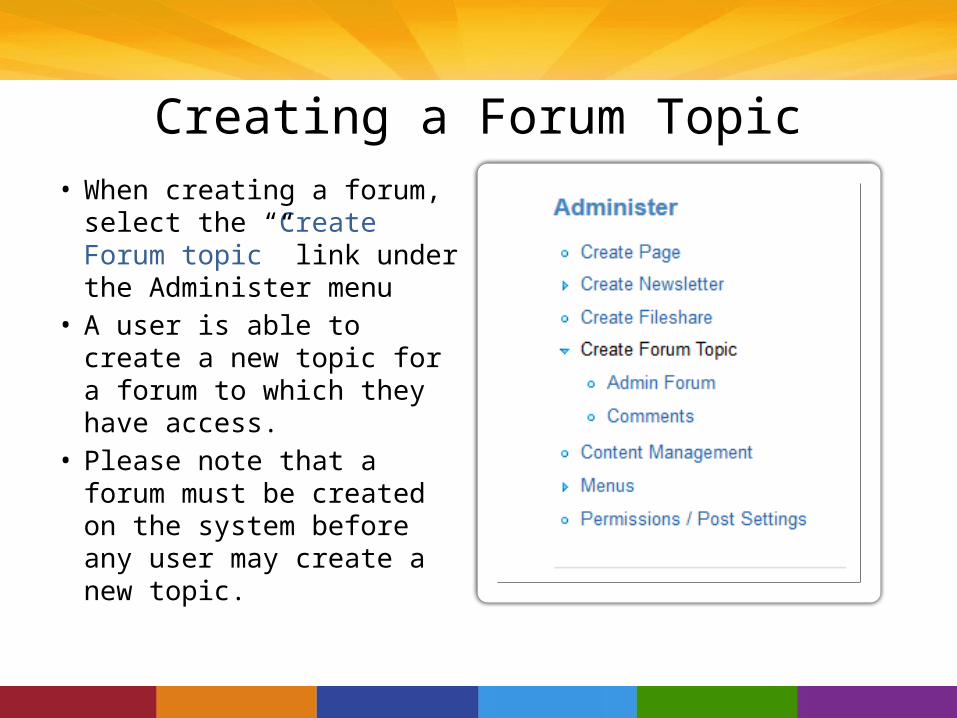
Creating a Forum Topic• When creating a forum,
select the “Create Forum topic” link under the Administer menu
• A user is able to create a new topic for a forum to which they have access.
• Please note that a forum must be created on the system before any user may create a new topic.
Creating a Forum Topic
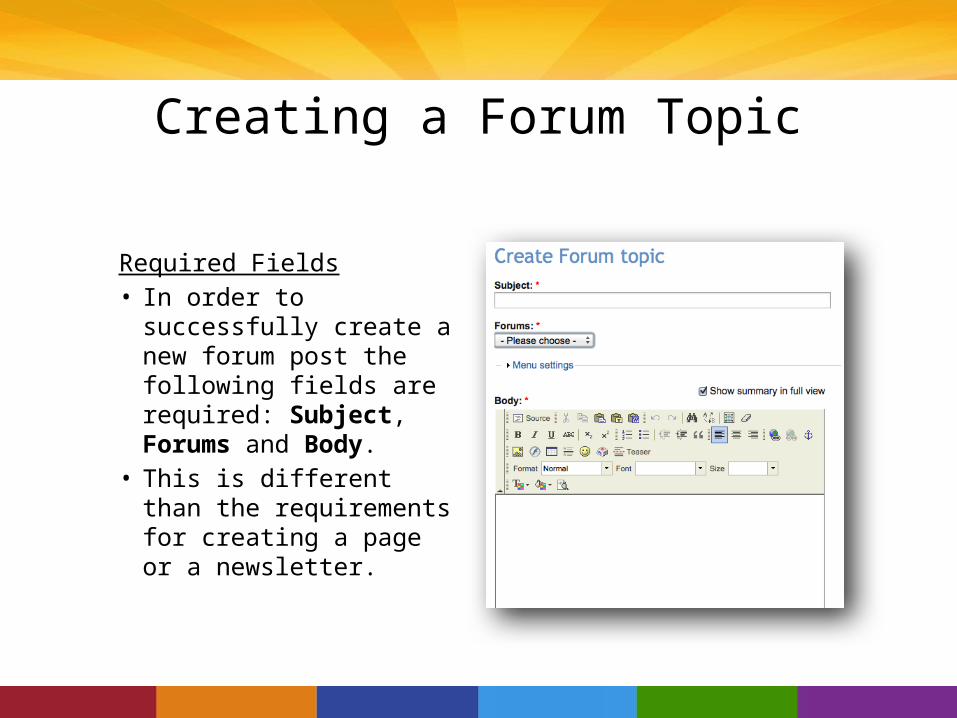
Required Fields• In order to successfully
create a new forum post the following fields are required: Subject, Forums and Body.
• This is different than the requirements for creating a page or a newsletter.
BASIC OVERVIEW: CONTENT MANAGEMENT
Content Management System (CMS)
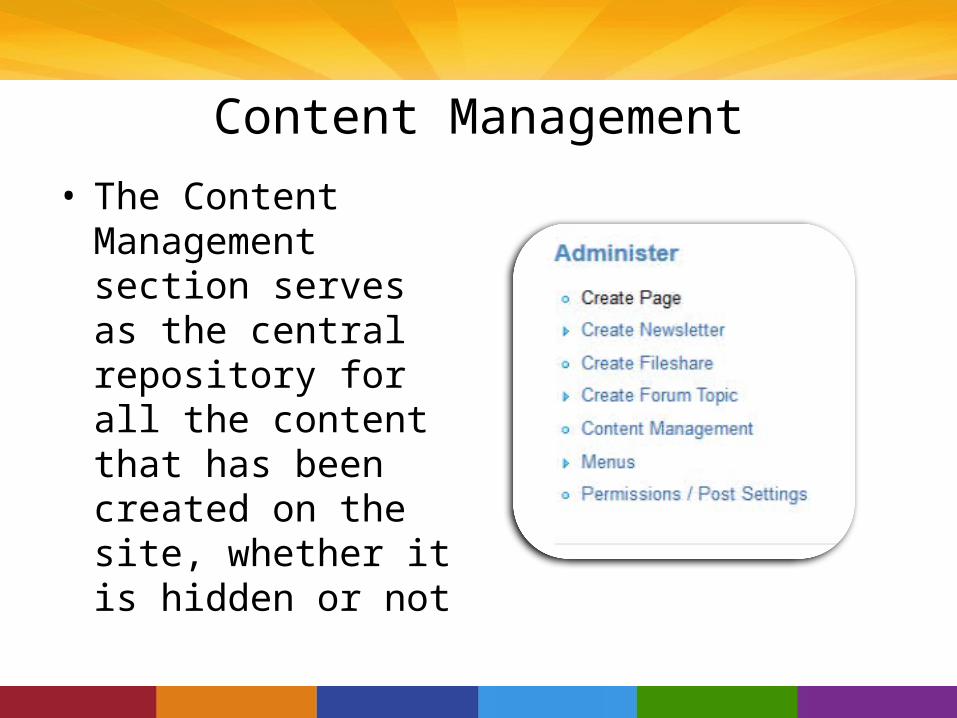
Content Management• The Content
Management section serves as the central repository for all the content that has been created on the site, whether it is hidden or not
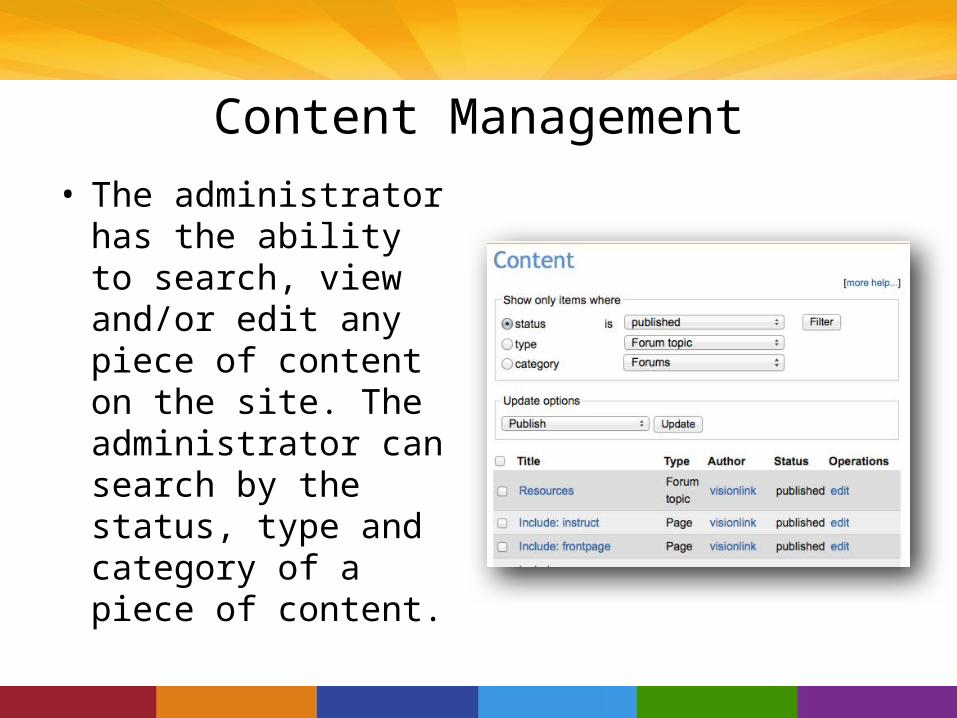
Content Management• The administrator has
the ability to search, view and/or edit any piece of content on the site. The administrator can search by the status, type and category of a piece of content.
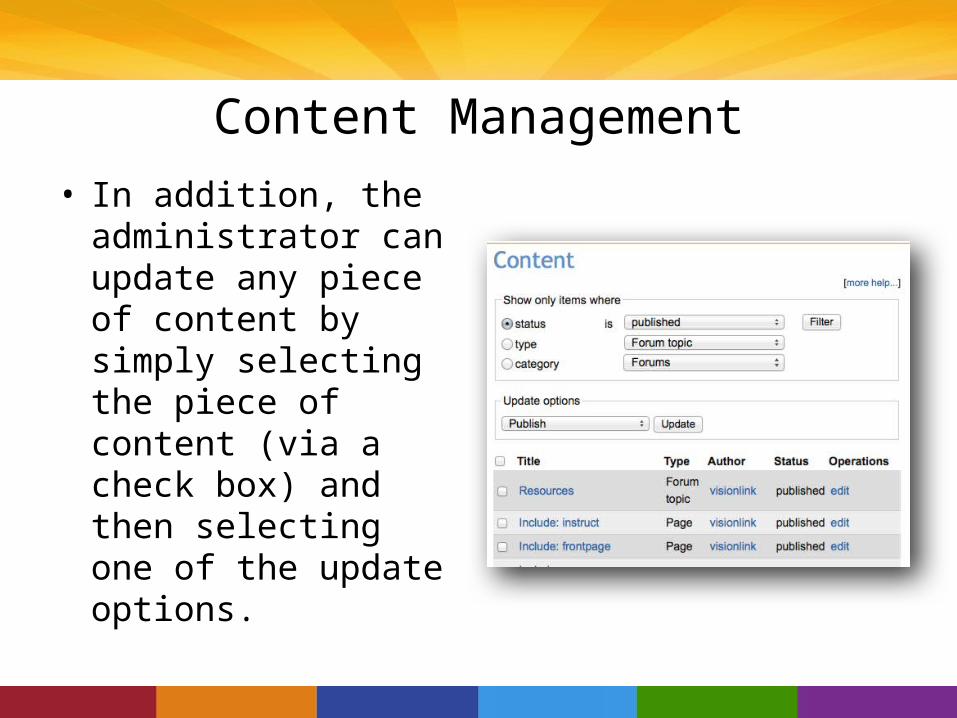
Content Management• In addition, the
administrator can update any piece of content by simply selecting the piece of content (via a check box) and then selecting one of the update options.
BASIC OVERVIEW: MENUS
Content Management System (CMS)
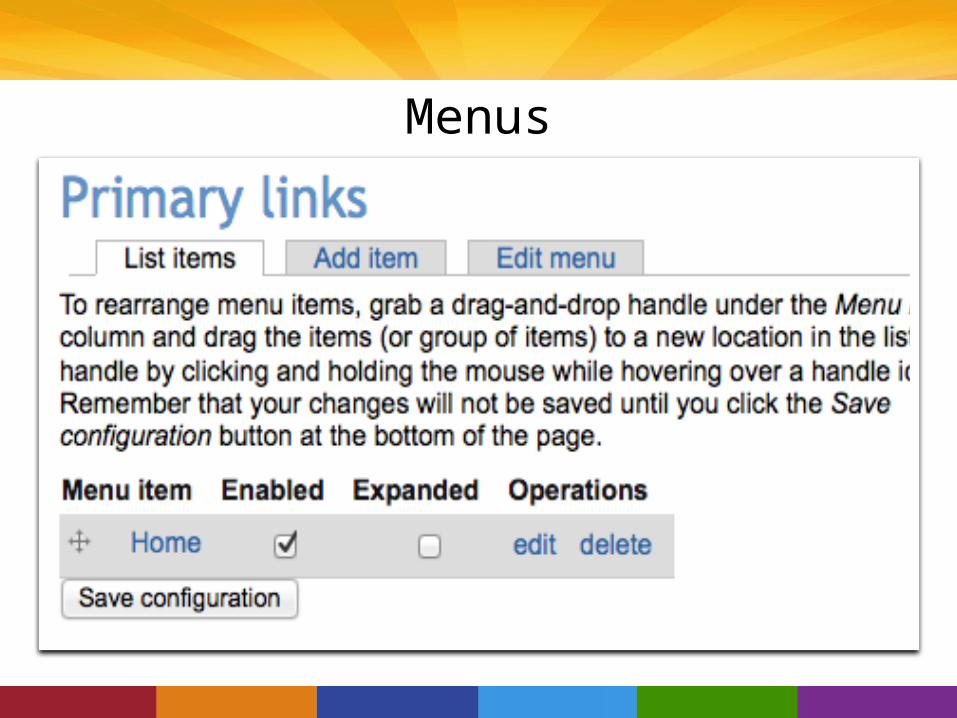
Menus
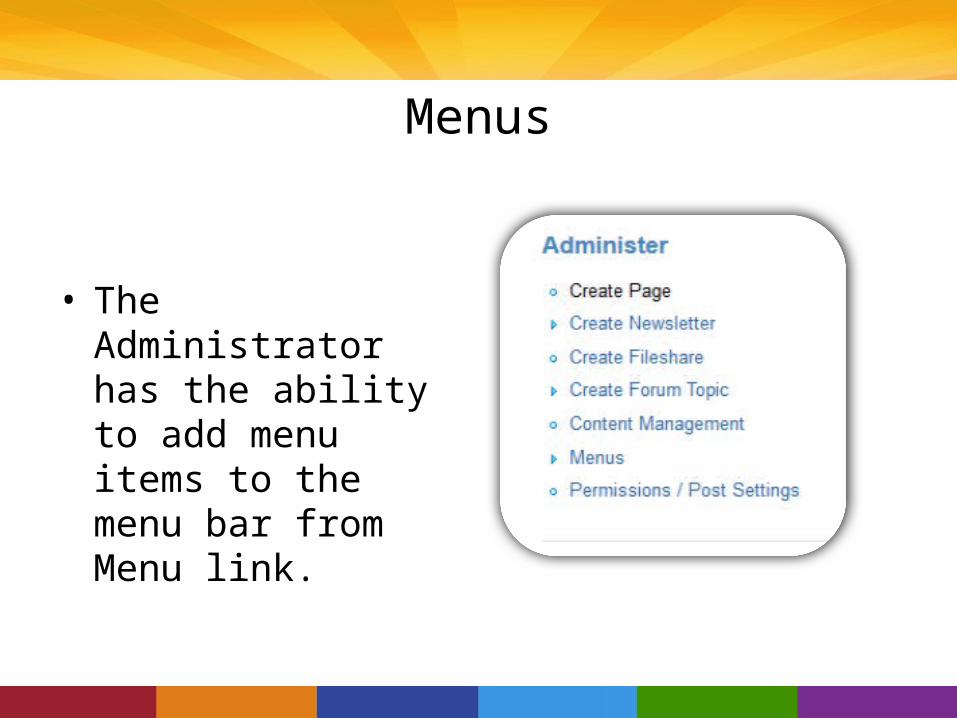
• The Administrator has the ability to add menu items to the menu bar from Menu link.
Menus
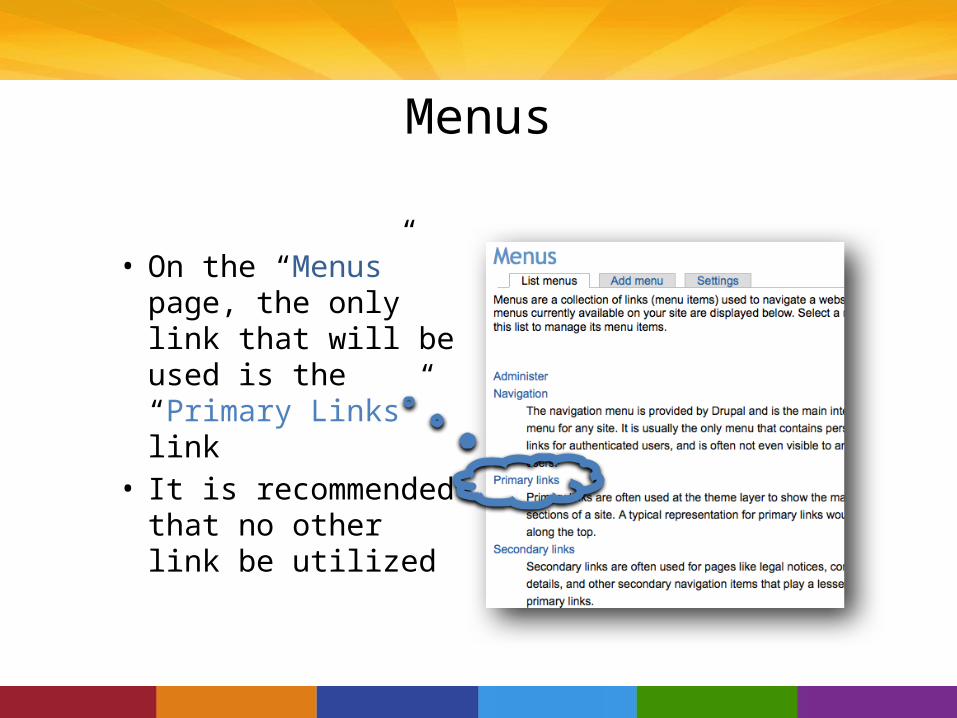
• On the “Menus” page, the only link that will be used is the “Primary Links” link
• It is recommended that no other link be utilized
Menus
BASIC OVERVIEW: PERMISSIONS/POST SETTINGS
Content Management System (CMS)
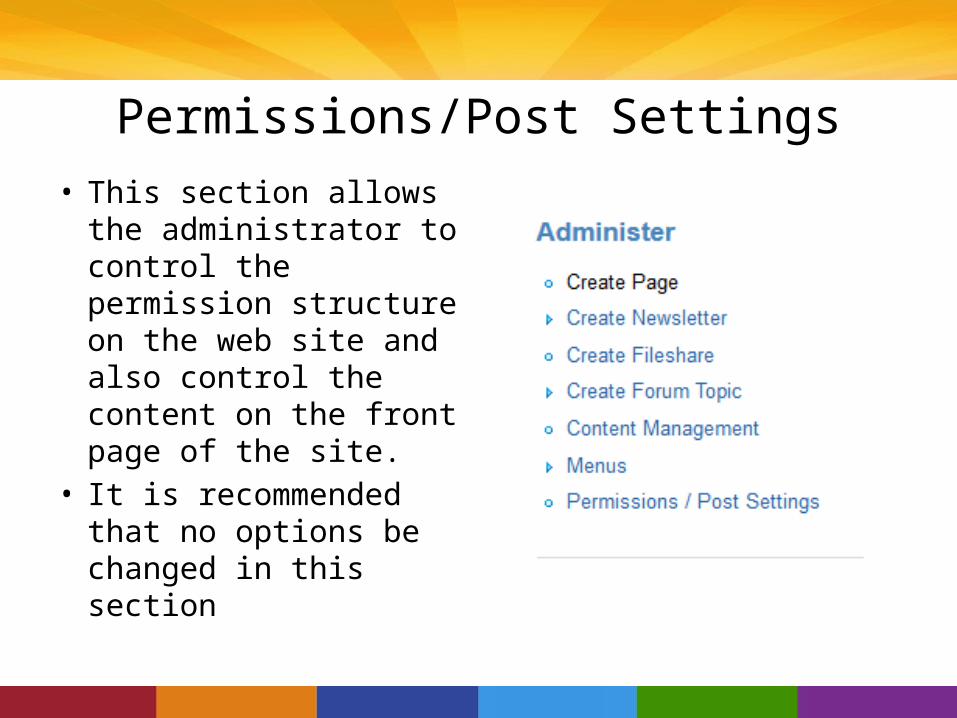
Permissions/Post Settings• This section allows the
administrator to control the permission structure on the web site and also control the content on the front page of the site.
• It is recommended that no options be changed in this section
ADVANCED OVERVIEW: BLOCKS
Content Management System (CMS)
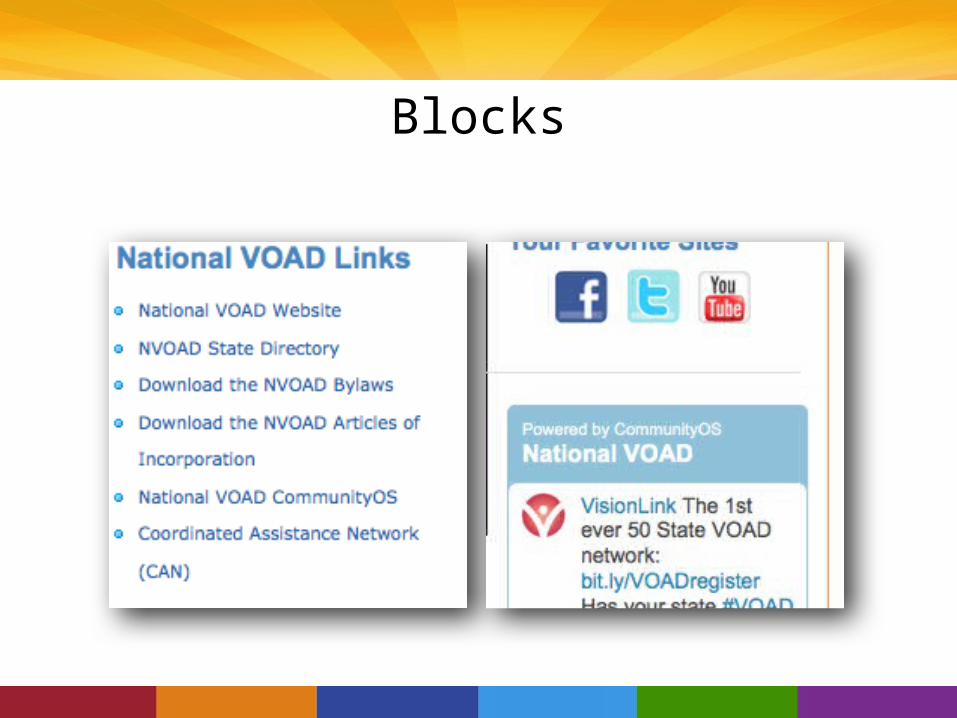
Blocks
Blocks
• The Content Management System also has the ability to utilize “blocks” which are located on the right hand or left hand side of the page.
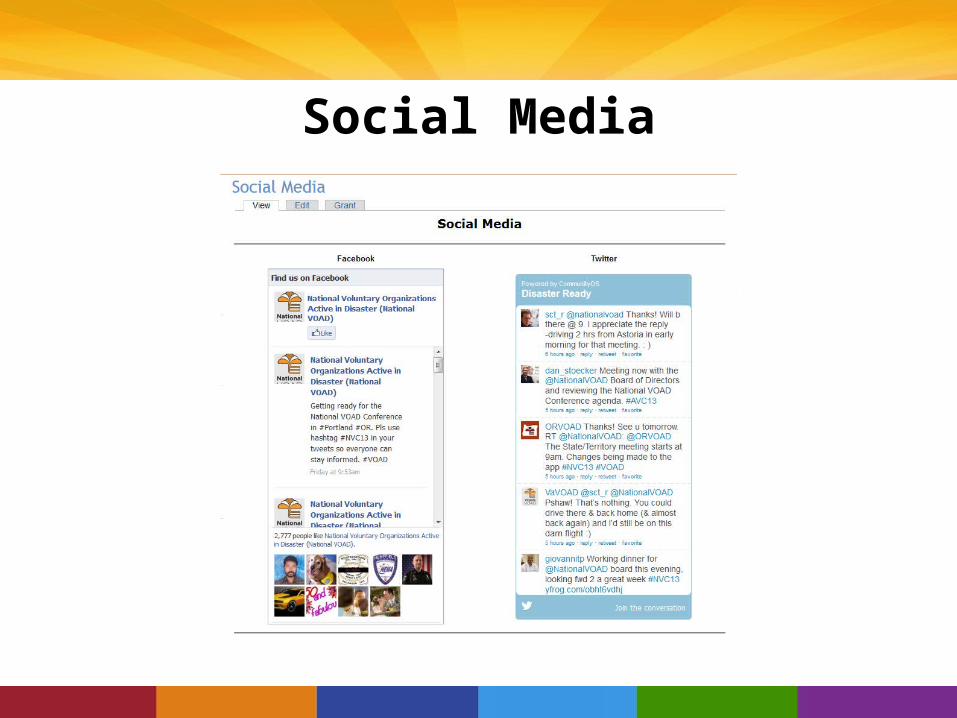
• Each block is persistent across all pages• Blocks such as Twitter feeds, links to external
sites, or any other content that can be embedded in a website