16
Drawing ¾ View Portraits Drawing the face at different angles! Emily Valenza, 2015
| Date post: | 17-Jul-2015 |
| Category: |
Education |
| Upload: | emily-valenza |
| View: | 489 times |
| Download: | 0 times |

Drawing ¾ View Portraits
Drawing the face at different angles!
Emily Valenza, 2015

We see the head turned
slightly to the side in a 3/4
view.
It’s very similar to the steps of
drawing a frontal face!

1. Choose the position of
the face
You can see how the
face is angled by looking
at the chin and the
vertical lines of the face
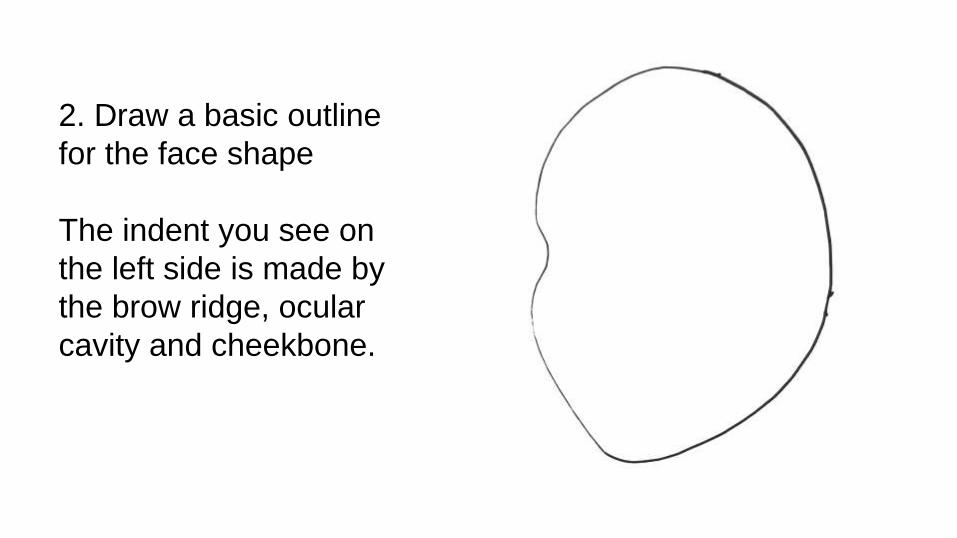
2. Draw a basic outline
for the face shape
The indent you see on
the left side is made by
the brow ridge, ocular
cavity and cheekbone.

3. Draw a curved vertical line
for the midpoint of the face
(nose line)
Now draw a curved horizontal
line for the midpoint of the face
(eyeline)
You should curve these lines
towards the indent side of the
face.

4. Measure a thumb
width from the center
line to find where to
place the first eye.
Add the second eye so
it fits in the space
between the edge of
the face and the center
line.

5. Start an arch shape
for the eyebrow above
the smaller eye, then
swoop it down along
the middle line to
create the nose.
Add a second eyebrow!

6. Draw lines down from
the center of each eye to
find the width of the mouth.
Draw the line that is formed
when the lips rest against
each other.
Draw each lip. The pilthrum
will be on the center line.
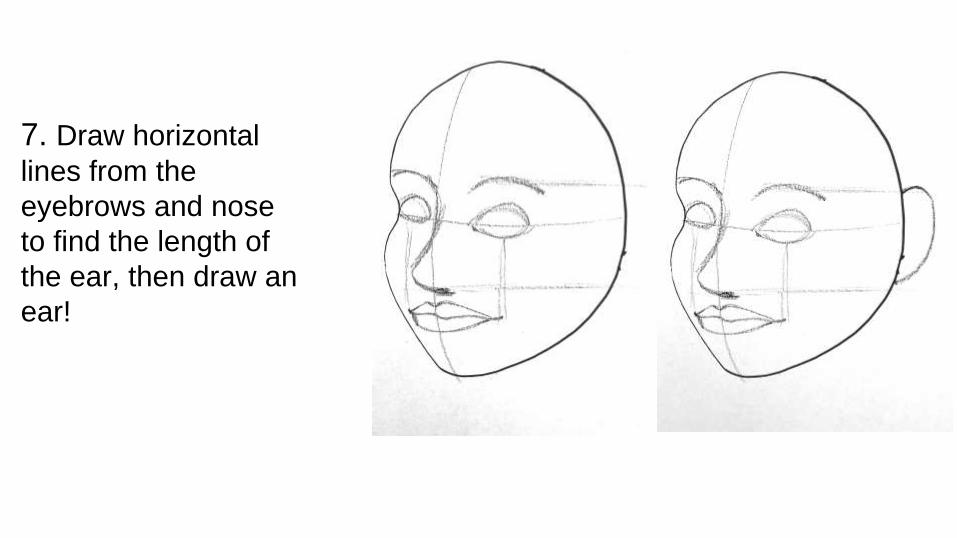
7. Draw horizontal
lines from the
eyebrows and nose
to find the length of
the ear, then draw an
ear!

8. Swoop lines towards the
“ear” side of the face to
create a neck shape.
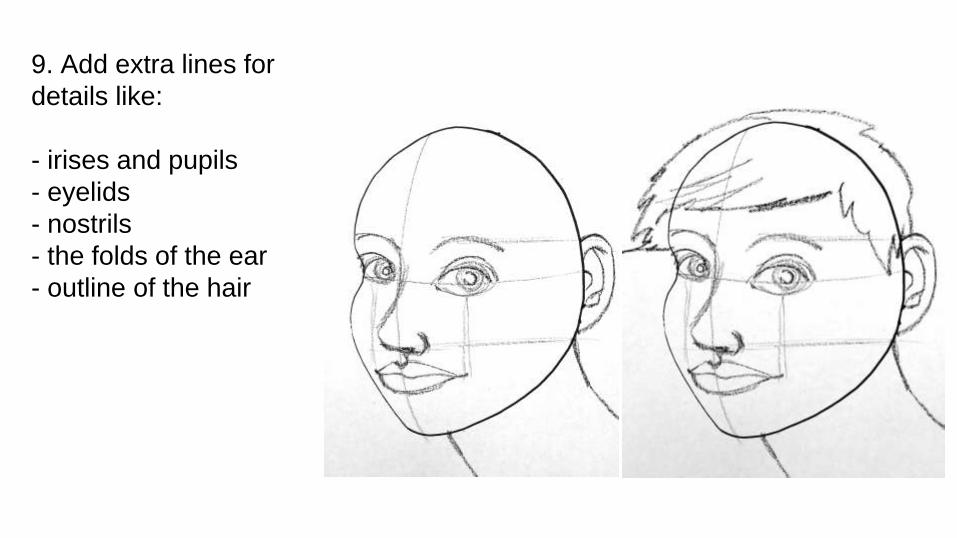
9. Add extra lines for
details like:
- irises and pupils
- eyelids
- nostrils
- the folds of the ear
- outline of the hair

10. Observe where
shadows usually form:
- under eyebrows
- the side of the nose
- next to the nostril
- inside the ear
- under the jawline
- on the top lip
- under the bottom lip

Pay attention to the hair
texture you’re drawing!
Here are a few examples:
These rules are helpful, but the most
important skill you can practice is
observation:
● Look carefully in the mirror or at your model. Note the exact
shape of the face, eyes, nose, lips and ears.
● What is unique about the person that you see? Glasses?
Braces? An awesome hairstyle?
● Make sure to add these details to achieve a likeness.
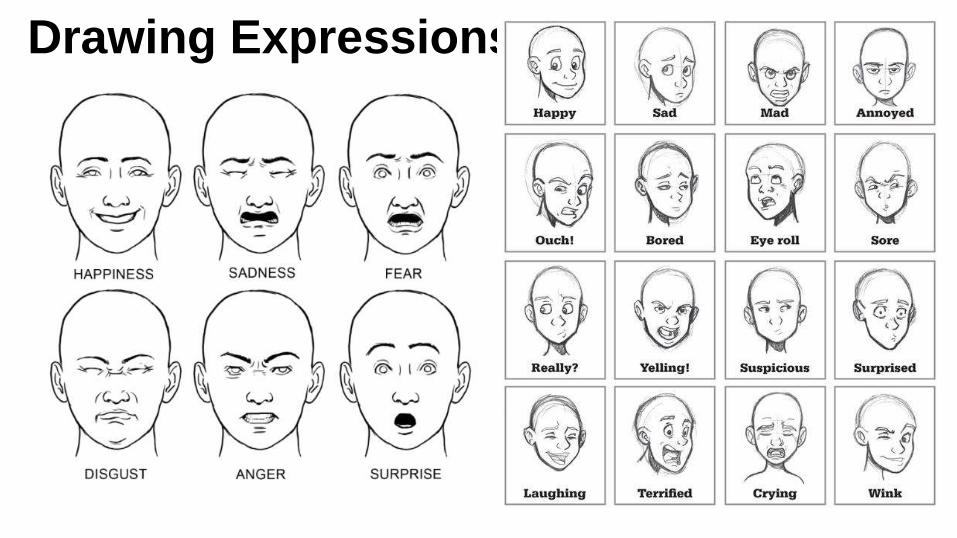
Drawing Expressions


![AIO-PHOA232 | Portraiture · Web view[Type text][Type text][Type text] COURSE CODE: AIO-PHOA232 Portraiture Milestone 5. AIO-PHOA232 | Portraiture](https://static.documents.pub/doc/80x56/60211ff80165680e0b567d86/aio-phoa232-portraiture-web-view-type-texttype-texttype-text-course-code.jpg)


