4 in 1 Evaporative Air Cooler - White IG9704 Please read these instructions carefully before use and retain for future reference Before switching on your appliance, always check for any damage which may have been caused in transit USER MANUAL
Transcript
4 in 1 Evaporative Air Cooler - White
IG9704 Please read these instructions carefully before use and retain for future reference
Before switching on your appliance, always check for any damage which may have been caused in transit
USER MANUAL
2
CONTENTS
Important Safety Instructions ...............................................2-3
Cleaning and Maintenance ........................................................8 Trouble shooting Guide .............................................................9 Fuse Replacement .......................................................................9 Disposal Information ..................................................................9 Terms and Conditions and Warranty Information ......10-11
SAFETY INSTRUCTIONS
Carefully read the instructions before operating the unit.
Please retain this manual for future reference.
Important: This product is intended for domestic and light office
use ONLY and not for commercial, industrial or outdoor use. When
using electrical appliances, basic safety precautions should always be
followed:
1. All electrical repairs must be carried out by a qualified
electrician. Inadequate repairs may result in a major source of
danger for the user and invalidate the warranty.
2. Do not operate the unit if the plug or cord is damaged, after it
malfunctions or has been dropped or damaged in any way, it
must be repaired by a qualified electrician.
3. Do not use the heating function if the fan is broken.
4. Use of an extension cord is not recommended with this
product.
5. This unit should only be used by adults.
6. Keep the unit and its cord out of reach of children.
7. Children shall not play with the appliance.
8. Cleaning and user maintenance shall not be made by children.
9. The unit should not be used by persons with reduced physical,
sensory or mental capabilities.
3
10. It is not recommended to place this appliance in cupboards,
closets, boats, caravans or similar locations.
11. Do not use the unit in a wet room, such as a bathroom or
laundry room or in areas where the unit is likely to get
splashed. 12. Do not place the unit directly underneath a wall
socket when in using Heat Modes.
13. Always place unit on a dry and stable surface.
14. Keep unit at least 1 metre away from TV’s and Radio’s to
prevent interference.
15. Do not cover or obstruct the unit’s filter or louvres.
16. Do not insert fingers, pencils or any other objects into the air
inlets or outlets of the unit.
17. Do not let chemical substances come into contact with the
appliance.
18. It is not recommended to use flammable substances or vapours
such as alcohol, insecticides, petrol, etc. whilst the unit is in
use.
19. Do not clean the unit by spraying it or immersing in water.
20. Do not unplug the unit while it is working, this could damage the
electronic circuits. Always use the control panel to start and
stop the unit.
21. Always turn the unit off when not in use by removing the plug
from the wall socket; ensuring to pull the plug top and not
the cord. Always turn off the unit before cleaning, carrying
out maintenance or moving location.
22. Do not pull or place the electrical cable near a source of heat:
always unroll it completely to avoid dangerous overheating.
23. The filter must be used with the product at all times, when
removing it for clearing always turn the unit off and unplug
from the mains wall socket.
4
24. Always turn off unit, unplug and empty the water tank before
placing into storage for a long period of time.
TECHNICAL SPECIFICATION
Model IG9704
Cooling Rated Power 70W
Heating Rated Power 2000W
Ioniser Function Yes
Humidifier Function Yes
Air Flow Volume (m³/h) 300 m³/h
Power Supply 220-240V~ / 50Hz
Fan Speeds 3
Heat Settings 2
Water Tank Capacity (Litre) 5
Timer 7.5 Hour
Net Weight (Kg) 7.5
Product Dimensions (H x W x D) mm 657 x 250 x 336 mm
APPLIANCE OVERVIEW
1.
2.
3.
4.
5.
6.
7.
13.
12.
9.
8.
10.
11.
14.
15.
5
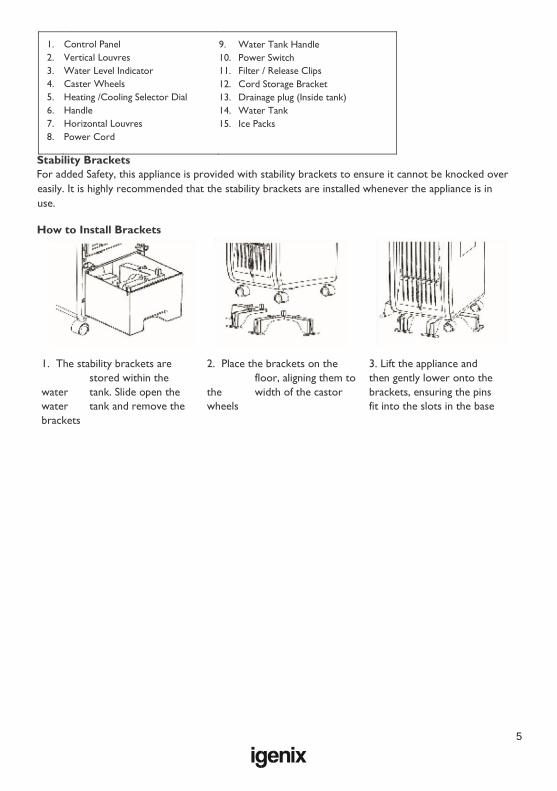
1. 2. 3. 4. 5. 6. 7. 8.
Control Panel Vertical Louvres Water Level Indicator Caster Wheels Heating /Cooling Selector Dial Handle Horizontal Louvres Power Cord
9. Water Tank Handle 10. Power Switch 11. Filter / Release Clips 12. Cord Storage Bracket 13. Drainage plug (Inside tank) 14. Water Tank 15. Ice Packs
Stability Brackets
For added Safety, this appliance is provided with stability brackets to ensure it cannot be knocked over
easily. It is highly recommended that the stability brackets are installed whenever the appliance is in
use.
How to Install Brackets
1. The stability brackets are
stored within the
water tank. Slide open the
water tank and remove the
brackets
2. Place the brackets on the
floor, aligning them to
the width of the castor
wheels
3. Lift the appliance and
then gently lower onto the
brackets, ensuring the pins
fit into the slots in the base
6
OPERATING INSTRUCTIONS
Control Panel
6. This appliance is a 4 in 1 unit with Cooling, Heating, Ioniser
Requires 2 x AAA and humidifier functions. batteries (not included) Turning On
• Once the appliance has been located in an appropriate location, plug into a wall socket and then
switch on the power switch located at the side of the appliance - the appliance will beep
once and remain in stand-by status. • You will need to use the dial located on the side of the appliance to choose Cooling or Heating
Operation
Note: The selected function of the dial is directly linked to the Mode/Heat button. • When the dial is on Cooling, the Mode/Heat button operates the Sleep, Natural and Normal
modes. • When the dial is on Heat, the Mode/Heat button operates the High, Low heating power.
Cooling
• Select dial to Cooling • Open the water tank drawer • Add cold clean water into the water tank – maximum of 5 Litres, and then close water tank
drawer. • Observe the Water Level window located at the front of the appliance, ensuring that water volume
is between MIN and MAX • To achieve additional cooling, you can add frozen ice blocks or ice cubes into the water tank.
You can use either you own ice blocks or those provided. Those provided will require filling
Remote Control
1 . Dual function button: Mode or Heat 2 . Oscillation button 3 . Ioniser button 4 . Timer button 5 . Empty Tank Indicator 6 . On/Off button 7 . Cooling/Humidifier button 8 . Fan Speed button
2. 4. 8. 1. 7. 3.
7
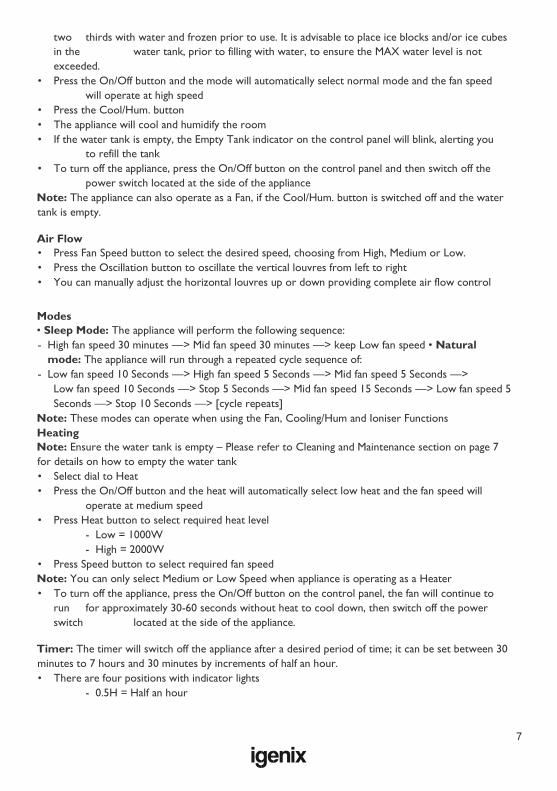
two thirds with water and frozen prior to use. It is advisable to place ice blocks and/or ice cubes
in the water tank, prior to filling with water, to ensure the MAX water level is not
exceeded. • Press the On/Off button and the mode will automatically select normal mode and the fan speed
will operate at high speed • Press the Cool/Hum. button • The appliance will cool and humidify the room • If the water tank is empty, the Empty Tank indicator on the control panel will blink, alerting you
to refill the tank • To turn off the appliance, press the On/Off button on the control panel and then switch off the
power switch located at the side of the appliance Note: The appliance can also operate as a Fan, if the Cool/Hum. button is switched off and the water
tank is empty.
Air Flow
• Press Fan Speed button to select the desired speed, choosing from High, Medium or Low. • Press the Oscillation button to oscillate the vertical louvres from left to right • You can manually adjust the horizontal louvres up or down providing complete air flow control
Modes
• Sleep Mode: The appliance will perform the following sequence: - High fan speed 30 minutes —> Mid fan speed 30 minutes —> keep Low fan speed • Natural
mode: The appliance will run through a repeated cycle sequence of: - Low fan speed 10 Seconds —> High fan speed 5 Seconds —> Mid fan speed 5 Seconds —> Low fan speed 10 Seconds —> Stop 5 Seconds —> Mid fan speed 15 Seconds —> Low fan speed 5 Seconds —> Stop 10 Seconds —> [cycle repeats] Note: These modes can operate when using the Fan, Cooling/Hum and Ioniser Functions Heating
Note: Ensure the water tank is empty – Please refer to Cleaning and Maintenance section on page 7
for details on how to empty the water tank • Select dial to Heat • Press the On/Off button and the heat will automatically select low heat and the fan speed will
operate at medium speed • Press Heat button to select required heat level
- Low = 1000W - High = 2000W
• Press Speed button to select required fan speed Note: You can only select Medium or Low Speed when appliance is operating as a Heater • To turn off the appliance, press the On/Off button on the control panel, the fan will continue to
run for approximately 30-60 seconds without heat to cool down, then switch off the power
switch located at the side of the appliance.
Timer: The timer will switch off the appliance after a desired period of time; it can be set between 30
minutes to 7 hours and 30 minutes by increments of half an hour. • There are four positions with indicator lights
- 0.5H = Half an hour
8
- 1H = One Hour - 2H = Two Hour - 4H = Four Hour
• Press Timer button to select desired period of time • The appliance will automatically switch off at the end of the selected period Note: If the timer button is not used, the appliance will continue to operate until manually switched
off.
Ioniser: The Ioniser function removes dust particles and neutralises unpleasant odours • Press the Ioniser button to turn on this function and the indicator light will illuminate • Press the Ioniser button again to turn off this function and the indicator light will switch off
CLEANING AND MAINTENANCE
Turn off the unit and unplug from the mains socket before cleaning or performing any maintenance.
Cleaning the Exterior
• Clean the plastic housing with a duster or a soft damp cloth. Do not use chemical or abrasive
cleaners to clean the exterior of the unit to prevent damage to the finish Cleaning the Filter • It is recommended that the air filter is cleaned every 4 weeks. If the air filter is blocked with dust,
the unit’s performance will be significantly affected. • Located at the top of the filter, you will notice two release clips; Pull the clips gently towards you
and then lift upwards to release the filter from the appliance • Use a vacuum cleaner or tap the filter lightly to remove loose dust and dirt. If necessary you can
wash the filter by immersing them in lukewarm water with a neutral detergent. Note: Extreme care should be taken when cleaning the filters as they are very delicate. • Gentle rinse and then dry thoroughly before re-installing the filter Important: Do not run the unit without filter
To Empty the Water Tank
• Switch off and unplug the appliance from the power socket
Cooling Pad
Cooling Pad Bracket Filter
Filter Release Clips
9
• Move the appliance to a suitable location near to a sink or drainage point • Gently slide the water tank drawer out of the back of the appliance • Place a suitably sized container underneath the drainage plug of the water tank • Remove the drainage plug and drain the tank completely, use a dry cloth to wipe away any
excess water which is hard to drain from the tank • Re-install the drainage plug and slide water tank drawer back into the appliance
End of Season Maintenance
• Ensure that the Water Tank is empty – following the instructions above • Clean the filter • To protect the unit against dust, cover and store in a dry place, not accessible by children
TROUBLE SHOOTING GUIDE
If you experience difficulties with the appliance, please check the suggestions below before contacting
customer services: Problem Solution The unit will not switch on • Check Trip Switch / Fuse
• Check if the plug is connected to mains socket correctly • Check batteries in the remote control
Runs for a short while and then
switches off • Check if air outlet is blocked, if so remove obstacle • Check if Timer function has been activated
The unit has been running for a long
period and then switches off • The overheat protection has been activated to protect the
motor – turn unit off for a least 10 minutes and then switch
back on
Runs without cooling in Cool/Hum. mode and Empty Tank Indicator
blinking
• The water tank is empty and needs to be re-filled • Check if the air filter is dirty – if so, clean • Check if air outlets or inlets are blocked
Water is leaking from unit when
moving • Drain the water tank – refer to Cleaning and
Maintenance on Page 7 • Ensure rubber drainage plug is securely fitted in
water tank Ensure unit is located on a flat and even surface
Fuse Cover MAINS PLUG FUSE REPLACEMENT
Fuse Replacement (Class II)
Remove the fuse cover with a small flat head screw driver. Take out the fuse and replace with a new
fuse of the same Amp. Replace the fuse cover and push back into place.
10
DISPOSAL INFORMATION
The European Directive 2012/19/EU on Waste
Electrical and Electronic Equipment (WEEE), requires
that old household electrical appliances must not be
disposed of in normal unsorted municipal waste. Old appliances must be collected separately in order
to optimise the recovery and recycling of the materials they
contain and reduce the impact on human health and
the environment. The crossed out “wheeled bin” symbol on the
product reminds you of your obligation, that when
you dispose of the appliance it must be separately collected. Consumers should
contact their local authority or retailer for information concerning the correct
disposal of their old appliance.
lgenix Warranty Terms & Conditions
This product is guaranteed for a period of 12 months as standard from the date of purchase against
mechanical and electrical defects. You can extend your warranty for a further 12 months by registering your product.
Upon registration we will cover your product for a period of 24 months from the original purchase date against any mechanical or electrical defects.
To qualify for the guarantee, the product must be used for domestic household use only and in
accordance with the instructions in the user manual. Any misuse of the product will result in the warranty being void.
The guarantee does not cover accidental damage, misuse, neglect, tampering or incorrect adjustment or installation.
The guarantee will be rendered invalid if the product is resold, has had its serial number removed (or has an invalid serial number), or if an unauthorised person has carried out any repairs or alterations.
The warranty does not cover accessories or consumable parts that require replacement under normal use. This includes shelving, dials, filters, belts and trays etc.
In the unlikely event of a breakdown please refer to the Troubleshooting guide in your user manual and check all plugs, fuses and the electricity supply.
11
If you still require assistance please contact our Customer Service department on 01473 271 272 or write to us at the following address:
Customer Service Department 38 Bluestem Road, Ransomes Europark Ipswich, IP3
9RR
Please quote the Product Code which begins ‘IG’ or ‘DF’ and the Batch Coder beginning ‘5’ and give details of the exact fault. We will then decide whether to repair or replace the item.
Before we arrange the repair or replacement you will be required to return a copy of your proof of purchase. Please retain your original.
If an item is replaced within the agreed guarantee period, the guarantee for the replacement item will be calculated from the purchase date of the original.
In the event that the product is inspected and no fault is found or the product is not within the guarantee period you will be charged for the repair and any carriage costs.