13
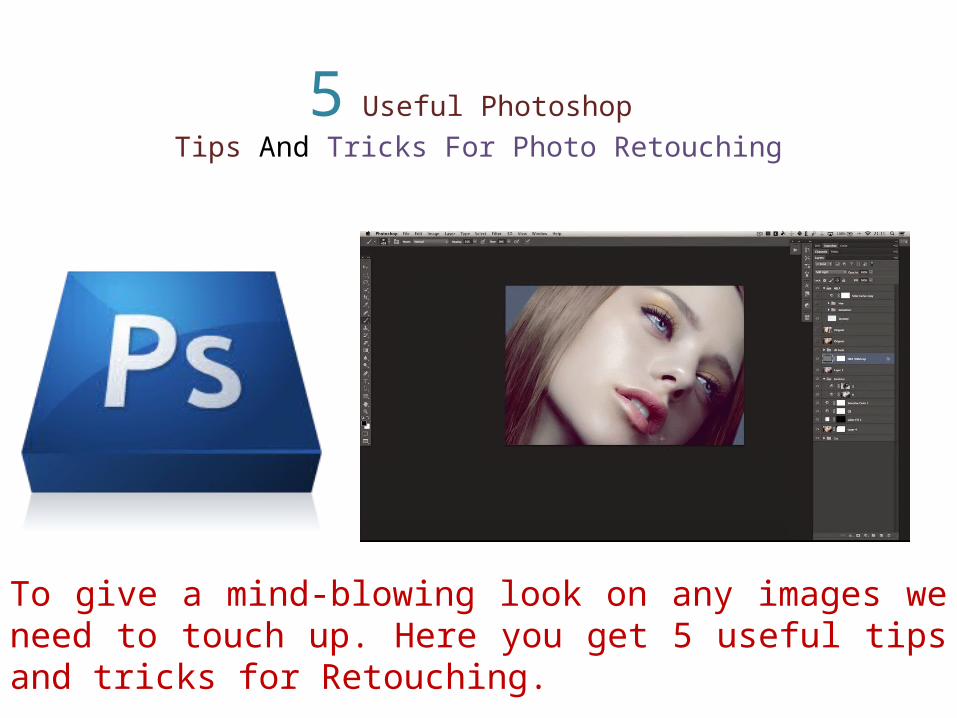
5 Useful Photoshop Tips And Tricks For Photo Retouching To give a mind-blowing look on any images we need to touch up. Here you get 5 useful tips and tricks for Retouching.
| Date post: | 10-Aug-2015 |
| Category: |
Design |
| Upload: | nazmul-hasan-jingar |
| View: | 228 times |
| Download: | 4 times |
5 Useful Photoshop Tips And Tricks For Photo Retouching
To give a mind-blowing look on any images we need to touch up. Here you get 5 useful tips and tricks for Retouching.
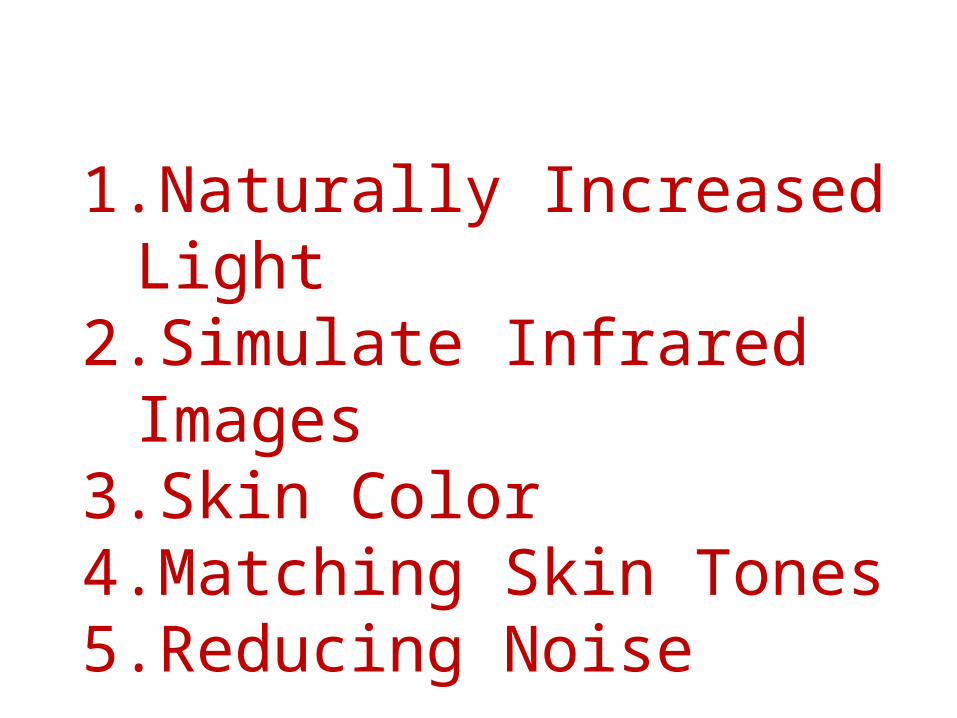
1.Naturally Increased Light2.Simulate Infrared Images3.Skin Color4.Matching Skin Tones5.Reducing Noise
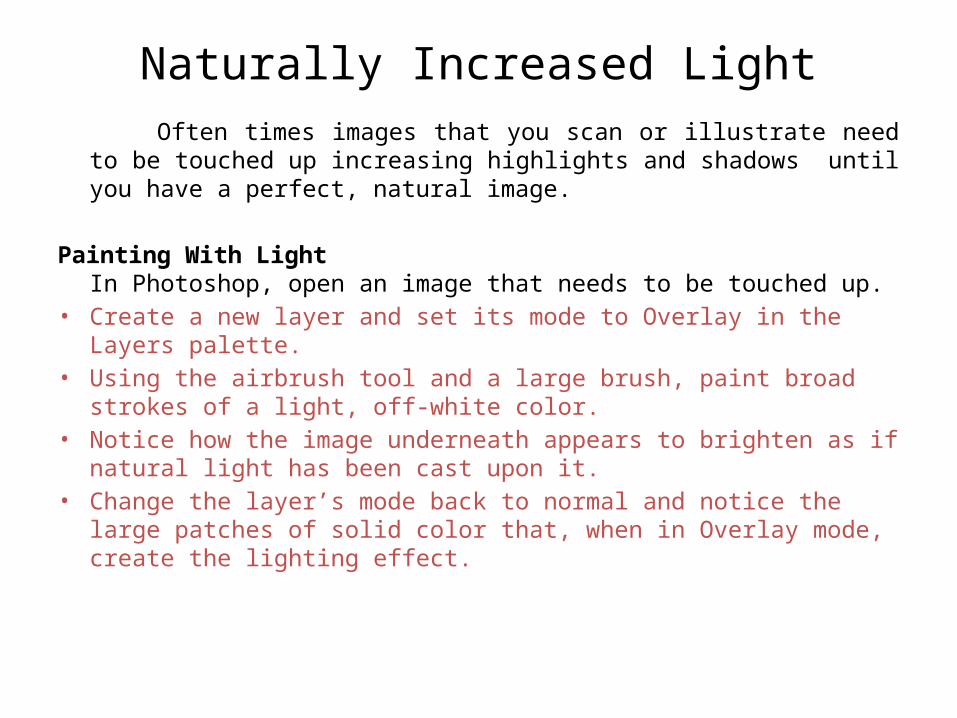
Naturally Increased Light Often times images that you scan or illustrate need to be touched up
increasing highlights and shadows until you have a perfect, natural image.
Painting With LightIn Photoshop, open an image that needs to be touched up.
• Create a new layer and set its mode to Overlay in the Layers palette. • Using the airbrush tool and a large brush, paint broad strokes of a light,
off-white color. • Notice how the image underneath appears to brighten as if natural light
has been cast upon it. • Change the layer’s mode back to normal and notice the large patches of
solid color that, when in Overlay mode, create the lighting effect.
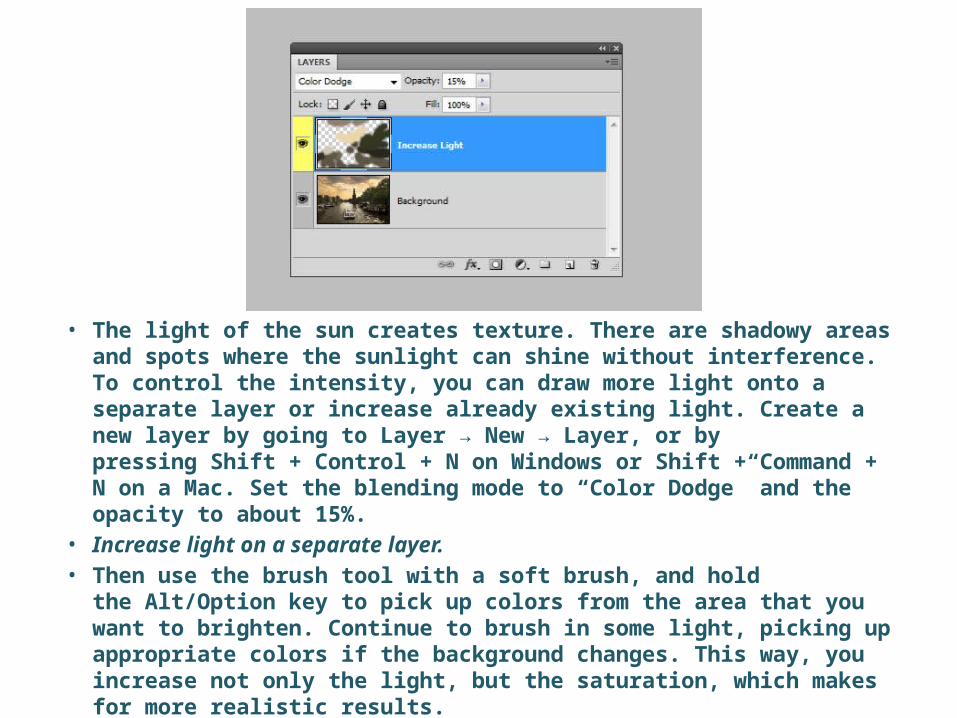
• The light of the sun creates texture. There are shadowy areas and spots where the sunlight can shine without interference. To control the intensity, you can draw more light onto a separate layer or increase already existing light. Create a new layer by going to Layer → New → Layer, or by pressing Shift + Control + N on Windows or Shift + Command + N on a Mac. Set the blending mode to “Color Dodge” and the opacity to about 15%.
• Increase light on a separate layer.• Then use the brush tool with a soft brush, and hold the Alt/Option key to
pick up colors from the area that you want to brighten. Continue to brush in some light, picking up appropriate colors if the background changes. This way, you increase not only the light, but the saturation, which makes for more realistic results.
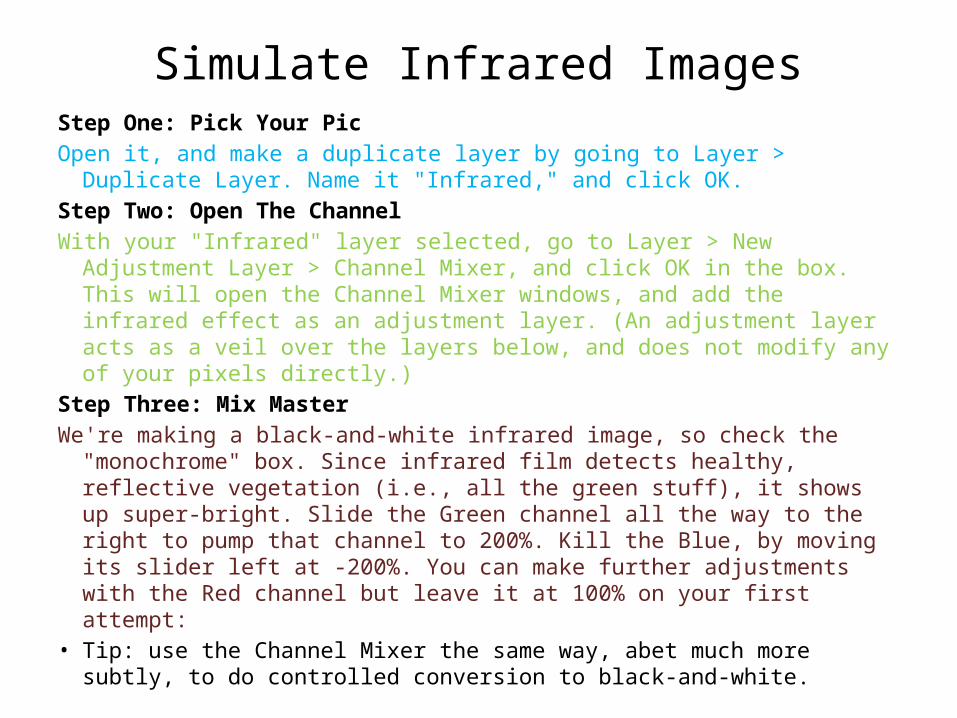
Simulate Infrared ImagesStep One: Pick Your PicOpen it, and make a duplicate layer by going to Layer > Duplicate Layer. Name it
"Infrared," and click OK.Step Two: Open The ChannelWith your "Infrared" layer selected, go to Layer > New Adjustment Layer >
Channel Mixer, and click OK in the box. This will open the Channel Mixer windows, and add the infrared effect as an adjustment layer. (An adjustment layer acts as a veil over the layers below, and does not modify any of your pixels directly.)
Step Three: Mix MasterWe're making a black-and-white infrared image, so check the "monochrome"
box. Since infrared film detects healthy, reflective vegetation (i.e., all the green stuff), it shows up super-bright. Slide the Green channel all the way to the right to pump that channel to 200%. Kill the Blue, by moving its slider left at -200%. You can make further adjustments with the Red channel but leave it at 100% on your first attempt:
• Tip: use the Channel Mixer the same way, abet much more subtly, to do controlled conversion to black-and-white.
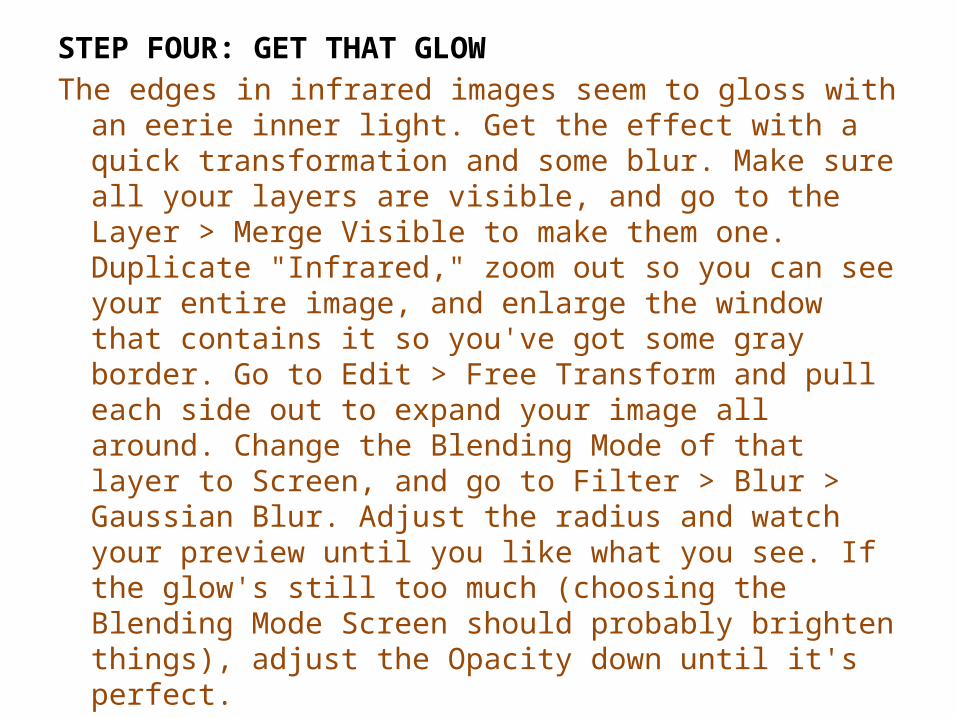
STEP FOUR: GET THAT GLOWThe edges in infrared images seem to gloss with an eerie inner
light. Get the effect with a quick transformation and some blur. Make sure all your layers are visible, and go to the Layer > Merge Visible to make them one. Duplicate "Infrared," zoom out so you can see your entire image, and enlarge the window that contains it so you've got some gray border. Go to Edit > Free Transform and pull each side out to expand your image all around. Change the Blending Mode of that layer to Screen, and go to Filter > Blur > Gaussian Blur. Adjust the radius and watch your preview until you like what you see. If the glow's still too much (choosing the Blending Mode Screen should probably brighten things), adjust the Opacity down until it's perfect.
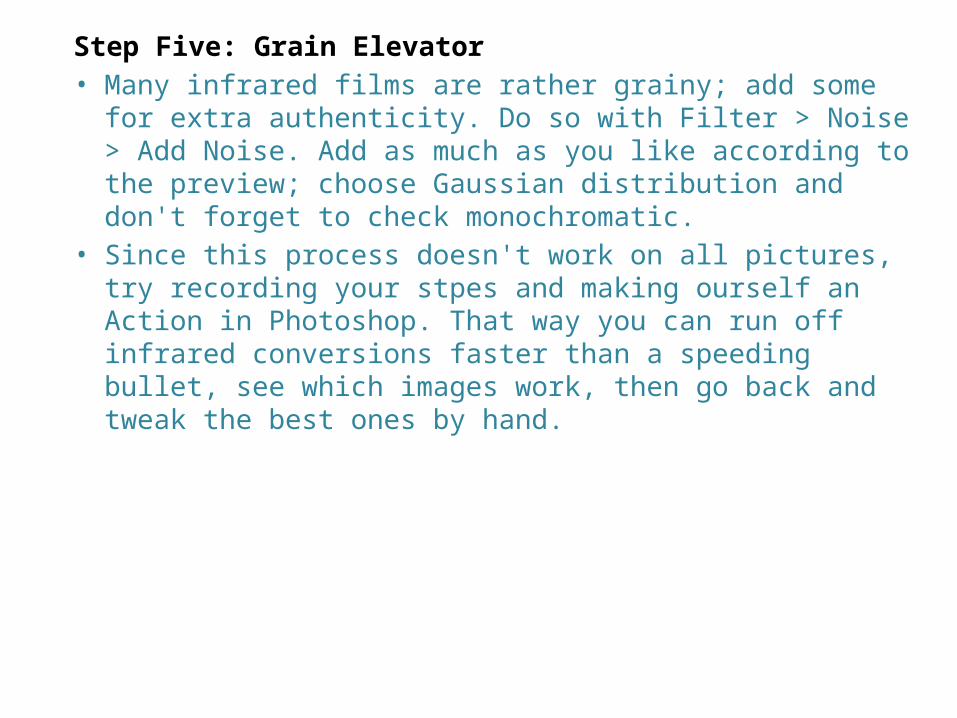
Step Five: Grain Elevator• Many infrared films are rather grainy; add some for extra
authenticity. Do so with Filter > Noise > Add Noise. Add as much as you like according to the preview; choose Gaussian distribution and don't forget to check monochromatic.
• Since this process doesn't work on all pictures, try recording your stpes and making ourself an Action in Photoshop. That way you can run off infrared conversions faster than a speeding bullet, see which images work, then go back and tweak the best ones by hand.
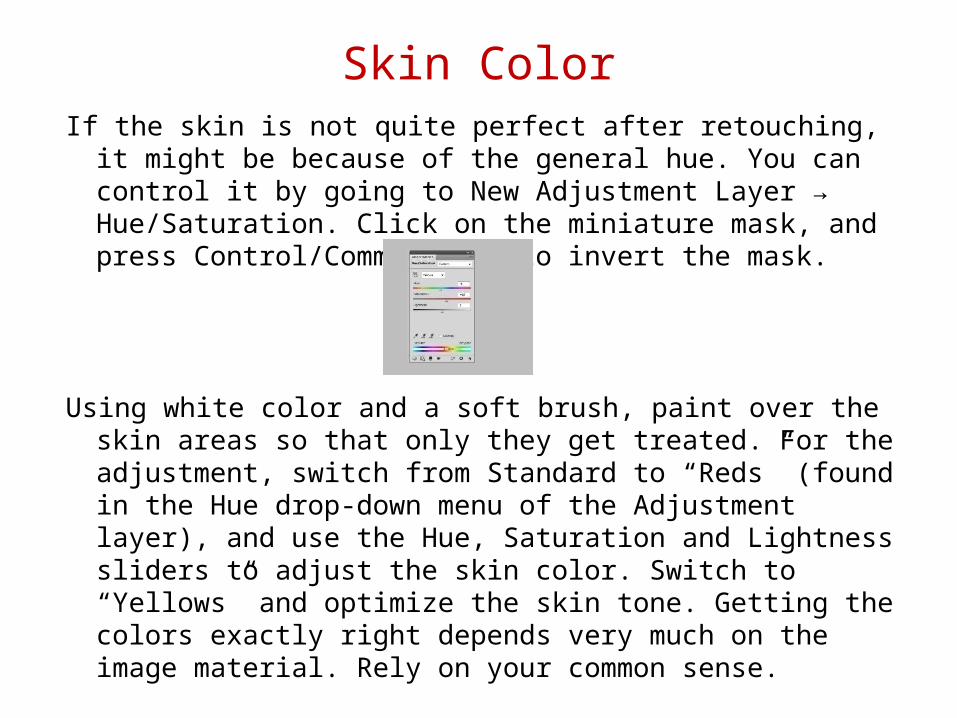
Skin ColorIf the skin is not quite perfect after retouching, it might be because
of the general hue. You can control it by going to New Adjustment Layer → Hue/Saturation. Click on the miniature mask, and press Control/Command + I to invert the mask.
Using white color and a soft brush, paint over the skin areas so that only they get treated. For the adjustment, switch from Standard to “Reds” (found in the Hue drop-down menu of the Adjustment layer), and use the Hue, Saturation and Lightness sliders to adjust the skin color. Switch to “Yellows” and optimize the skin tone. Getting the colors exactly right depends very much on the image material. Rely on your common sense.
Matching Skin Tones
• A sunburn or a blush can disrupt a portrait, especially if there is a contrasting pale person nearby. Photoshop has a tool to correct that: “Match Color” offers control over skin tones. Open your image and use the Quick Selection tool to roughly select the red skin areas.
• You can hold down the Alt/Option key and subtract areas from the selection. Click on Select → Modify → Feather and enter a value of about 15 pixels. Use the Control/Command + J shortcut to copy the selection to a new layer.
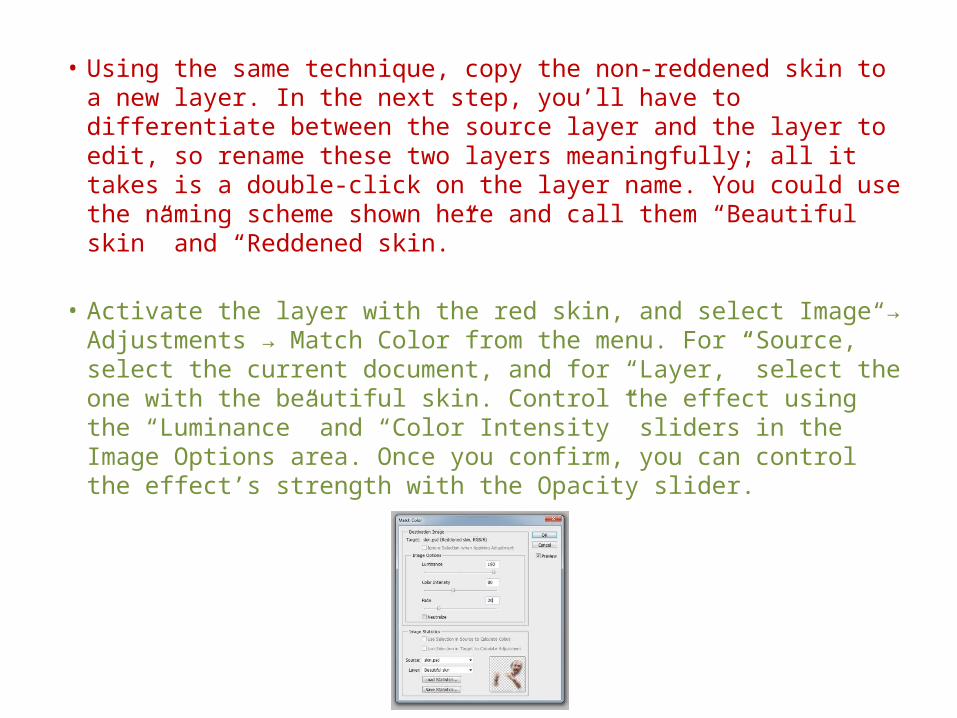
• Using the same technique, copy the non-reddened skin to a new layer. In the next step, you’ll have to differentiate between the source layer and the layer to edit, so rename these two layers meaningfully; all it takes is a double-click on the layer name. You could use the naming scheme shown here and call them “Beautiful skin” and “Reddened skin.”
• Activate the layer with the red skin, and select Image → Adjustments → Match Color from the menu. For “Source,” select the current document, and for “Layer,” select the one with the beautiful skin. Control the effect using the “Luminance” and “Color Intensity” sliders in the Image Options area. Once you confirm, you can control the effect’s strength with the Opacity slider.
Reducing Noise• Noisy images are annoying. One way to reduce noise is
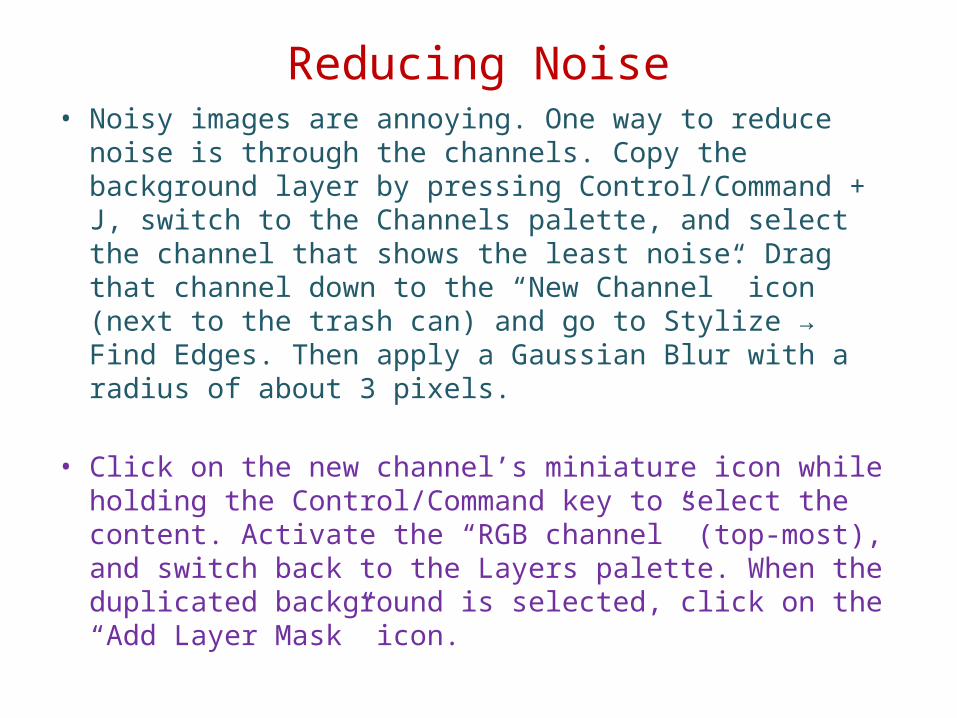
through the channels. Copy the background layer by pressing Control/Command + J, switch to the Channels palette, and select the channel that shows the least noise. Drag that channel down to the “New Channel” icon (next to the trash can) and go to Stylize → Find Edges. Then apply a Gaussian Blur with a radius of about 3 pixels.
• Click on the new channel’s miniature icon while holding the Control/Command key to select the content. Activate the “RGB channel” (top-most), and switch back to the Layers palette. When the duplicated background is selected, click on the “Add Layer Mask” icon.
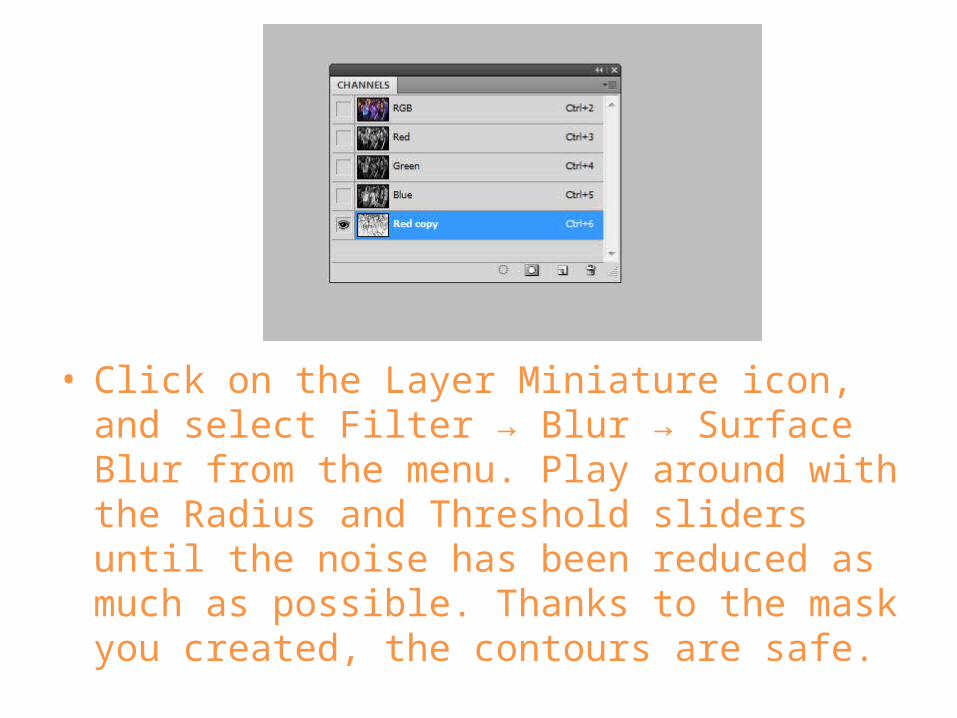
• Click on the Layer Miniature icon, and select Filter → Blur → Surface Blur from the menu. Play around with the Radius and Threshold sliders until the noise has been reduced as much as possible. Thanks to the mask you created, the contours are safe.


