8
6” Submersible Borehole Pumps Installation and Operating Instructions Please pass these instructions on to the operator of this equipment.
| Date post: | 14-Feb-2018 |
| Category: |
Documents |
| Upload: | nguyenduong |
| View: | 228 times |
| Download: | 1 times |
6” Submersible Borehole Pumps
Installation and Operating Instructions
Please pass these instructions on to the operator of this equipment.
2
Thank you for purchasing a quality Davey product.
These operating instructions contain fundamental information and precautionary notes. Please read the manual thoroughly prior to installation of unit, electrical connection and commissioning.
Contents Page1. Delivery and Storage ...................................... 31.1 Delivery ............................................................ 31.2 Storage and Handling ....................................... 3
2. General Data ................................................... 32.1 General Description .......................................... 32.2 Applications ...................................................... 32.3 Pumped Liquids ................................................ 3
3. Installation at Site ........................................... 33.1 Positional Requirements .................................. 33.2 Diameter of Pump/Motor .................................. 4
4. Electrical Connection ..................................... 44.1 General ............................................................. 44.2 Checking of Direction of Rotation ..................... 4
5. Pump Installation ........................................... 45.1 Assembly of Motor & Pump .............................. 45.2 Riser Pipe ......................................................... 45.3 Cable Fitting ..................................................... 45.4 Lowering the Pump .......................................... 45.5 Installation Depth .............................................. 4
6. Start -Up .......................................................... 5
7. Minimum Flow Requirements ....................... 5
8. Water Temperature ......................................... 5
9. Maximum Start & Pressure
System Installation ......................................... 6
10. Maintenance and Service .............................. 6
11. Fault Finding Chart ........................................ 7
12. Disposal .......................................................... 7
GeneralThis pump has been developed in accordance with state-of-the-art technology; it is manufactured with utmost care and subject to continuous quality control. These operating instructions are intended to facilitate familiarisation with the pump and its designated use. The manual contains important information for reliable, proper and efficient operation. Compliance with the operating instructions is of vital importance to ensure reliability and a long service life of the pump and to avoid any risks. This pump must not be operated beyond the limit values specified in the technical documentation for the medium handled, capacity, speed, density, pressure, temperature and motor rating. Make sure that operation is in accordance with the instructions laid down in this manual or in the contract documentation.The name plate indicates the type series, main operating data and works/serial number; please quote this information in all queries, repeat orders and particularly when ordering spare parts.
SafetyThese operating instructions contain fundamental information which must be complied with during installation, operation and maintenance. Therefore this operating manual must be read and understood both by the installing personnel and the responsible trained personnel/operators prior to installation and commissioning, and it must always be kept close to the location of operation of the machine/unit for easy access.
Marking of instructions in the manualThe safety instructions contained in this manual whose non-observance might cause hazards to person are specially marked with the general hazard sign, namely:
(safety sign)
Non-compliance with safety instructionsNon-compliance with safety instructions can jeopardise the safety of personnel, the environment and the machine itself. Non-compliance with these safety instructions will also lead to forfeiture of any and all rights to claims for damages.In particular, non-compliance can, for examples, result in:- failure of important machine/unit functions,- failure of prescribed maintenance and servicing
practices,- hazard to persons by electrical, mechanical and
chemical affects.
Safety awarenessIt is imperative to comply with the safety instructions contained in this manual, the relevant national and safety regulations and operators own internal work, operation and safety regulations.
Safety instructions for maintenance, inspection and installation workThe operator is responsible for ensuring that all maintenance, inspection and installation work be performed by authorised, qualified specialist personnel who are thoroughly familiar with the manual.Work on the machine must be carried out only during standstill. The shutdown procedure described in the manual for taking the machine out of service must be adhered to without fail.
Pumped liquids that may be hazardous to health must be decontaminated prior to maintenance.
Immediately following completion of the work, all safety-relevant and protective devices must be re-installed and/or re-activated.
Unauthorised modification and manufacture of spare partsModifications or alterations of the machine are only permitted after consultation with the manufacturer. Original spare parts and accessories authorised by the manufacturer ensure safety.
3
1. Delivery and Storage1.1 DeliveryThese submersible pumps are supplied from the factory in proper packing in which they should remain until they are to be installed.During unpacking and prior to installation, care must be taken when handling the pump to ensure that misalignment does not occur due to bending.The loose data plate supplied with the pump should be fixed close to the installation site.The pump should not be exposed to unnecessary impact and shocks.
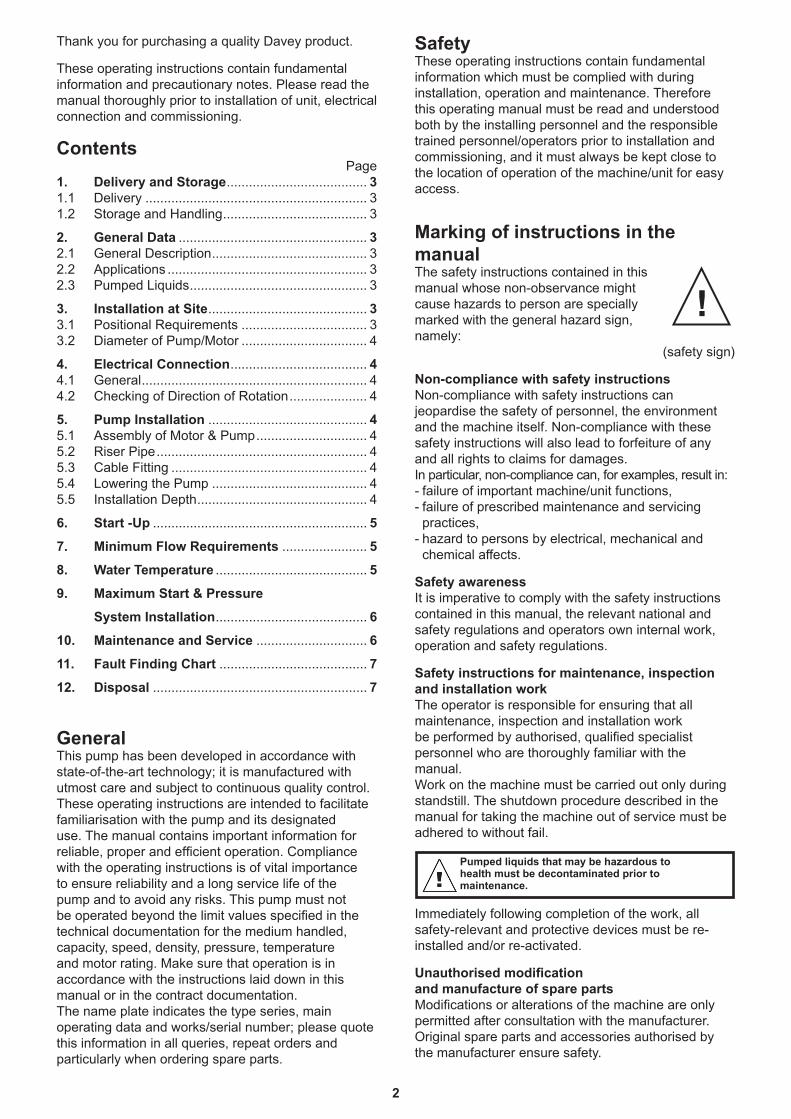
1.2 Storage and HandlingStorage temperature: -20°C to +60°CThe pump should not be exposed to direct sunlight.If the pump has been unpacked, it should be stored horizontally, adequately supported, or vertically to prevent misalignment of the pump. During storage, the pump can be supported as shown in fig. 1.
fig. 1
If the pump is not handled in a vertical position, it must be lifted by the motor and the pump at the same time. Note that the centre of gravity will vary, depending on pump type & motor size.
2. General Data2.1 General DescriptionAll 6” & 8” submersible pumps are multistage pumps working with counterclockwise direction of rotation (observing from the delivery side) directly coupled to special submersible motors (according to NEMA rules).
PUMP IDENTIFICATION CODE
SS
2.2 ApplicationsThese submersible pumps, are designed for a wide range of water supply and liquid transfer applications, such as the supply of fresh water to private homes or waterworks, water supply to nursery gardens or farms, drawdown of groundwater and pressure boosting, and various industrial jobs.
The pump must be installed so that the suction motor adaptor is completely submerged in the liquid. The pump can be installed either horizontally or vertically, see also section 3.1 Positional Requirements.
2.3 Pumped LiquidsPumped liquids must be: clean, thin, free of solid particles or fibres, compatible with pump components and materials.The maximum sand content of the water must not exceed 50 g/m3. A larger sand content will reduce the life of the pump and increase the risk of blocking.When pumping liquids with a density higher than that of water, motors with correspondingly higher outputs must be used.
3. Installation at site3.1 Positional Requirements
If the pump is to be installed in a position where it is accessible, the coupling must be suitably isolated from human touch. The pump should be installed into a suitable shroud.
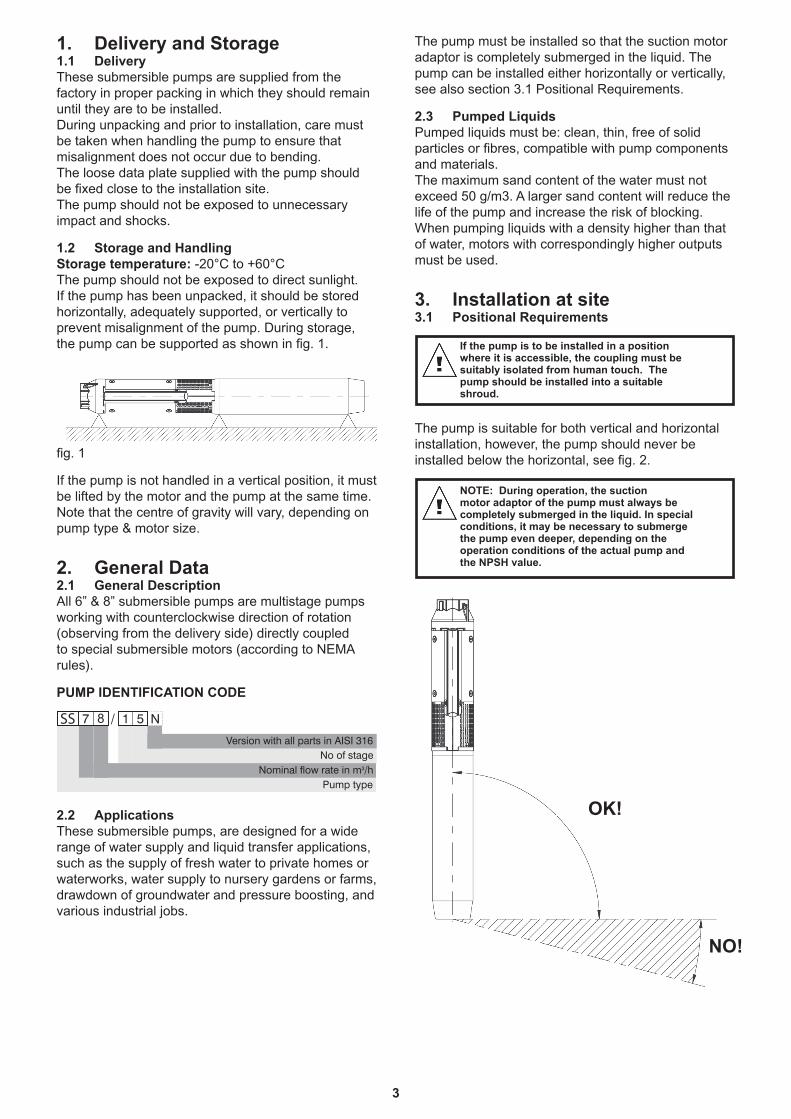
The pump is suitable for both vertical and horizontal installation, however, the pump should never be installed below the horizontal, see fig. 2.
NOTE: During operation, the suction motor adaptor of the pump must always be completely submerged in the liquid. In special conditions, it may be necessary to submerge the pump even deeper, depending on the operation conditions of the actual pump and the NPSH value.
OK!
NO!
4
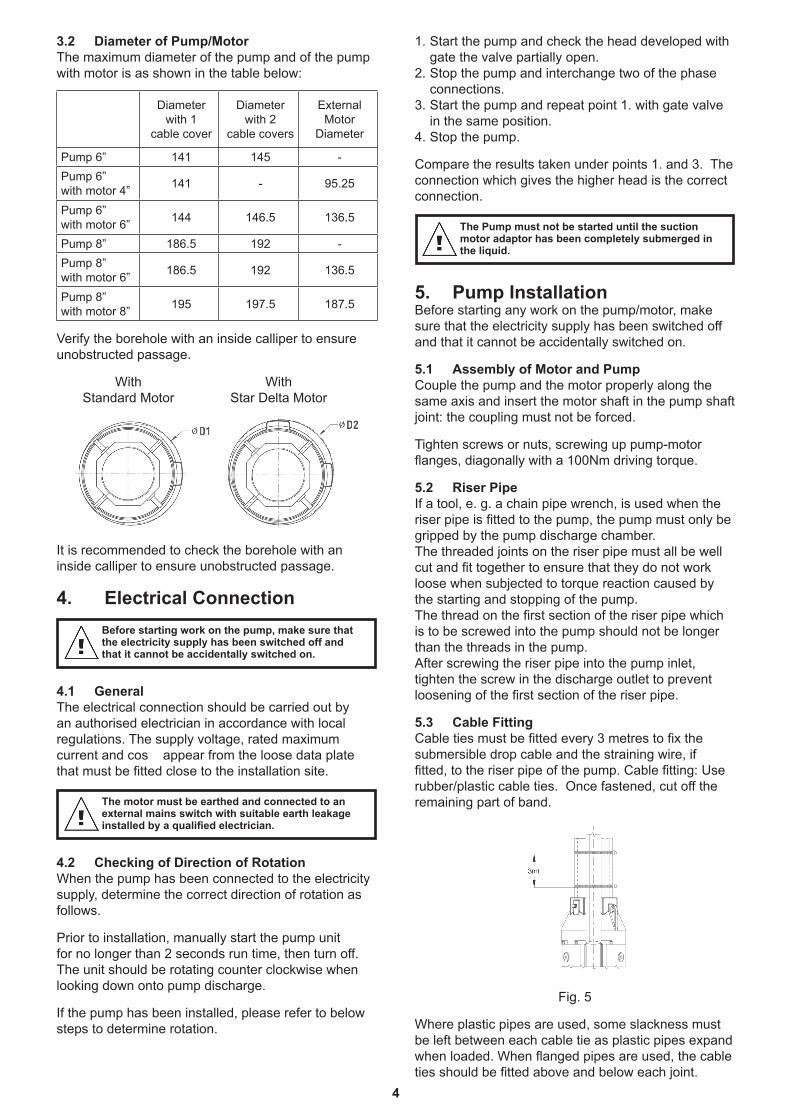
3.2 Diameter of Pump/MotorThe maximum diameter of the pump and of the pump with motor is as shown in the table below:
Diameterwith 1
cable cover
Diameterwith 2
cable covers
ExternalMotor
Diameter
Pump 6” 141 145 -
Pump 6”with motor 4”
141 - 95.25
Pump 6”with motor 6”
144 146.5 136.5
Pump 8” 186.5 192 -
Pump 8”with motor 6”
186.5 192 136.5
Pump 8”with motor 8”
195 197.5 187.5
Verify the borehole with an inside calliper to ensure unobstructed passage.
With With Standard Motor Star Delta Motor
It is recommended to check the borehole with an inside calliper to ensure unobstructed passage.
4. Electrical Connection
Before starting work on the pump, make sure that the electricity supply has been switched off and that it cannot be accidentally switched on.
4.1 GeneralThe electrical connection should be carried out by an authorised electrician in accordance with local regulations. The supply voltage, rated maximum current and cos appear from the loose data plate that must be fitted close to the installation site.
The motor must be earthed and connected to an external mains switch with suitable earth leakage installed by a qualified electrician.
4.2 Checking of Direction of RotationWhen the pump has been connected to the electricity supply, determine the correct direction of rotation as follows.
Prior to installation, manually start the pump unit for no longer than 2 seconds run time, then turn off. The unit should be rotating counter clockwise when looking down onto pump discharge.
If the pump has been installed, please refer to below steps to determine rotation.
1. Start the pump and check the head developed with gate the valve partially open.
2. Stop the pump and interchange two of the phase connections.
3. Start the pump and repeat point 1. with gate valve in the same position.
4. Stop the pump.
Compare the results taken under points 1. and 3. The connection which gives the higher head is the correct connection.
The Pump must not be started until the suction motor adaptor has been completely submerged in the liquid.
5. Pump InstallationBefore starting any work on the pump/motor, make sure that the electricity supply has been switched off and that it cannot be accidentally switched on.
5.1 Assembly of Motor and PumpCouple the pump and the motor properly along the same axis and insert the motor shaft in the pump shaft joint: the coupling must not be forced.
Tighten screws or nuts, screwing up pump-motor flanges, diagonally with a 100Nm driving torque.
5.2 Riser PipeIf a tool, e. g. a chain pipe wrench, is used when the riser pipe is fitted to the pump, the pump must only be gripped by the pump discharge chamber.The threaded joints on the riser pipe must all be well cut and fit together to ensure that they do not work loose when subjected to torque reaction caused by the starting and stopping of the pump.The thread on the first section of the riser pipe which is to be screwed into the pump should not be longer than the threads in the pump.After screwing the riser pipe into the pump inlet, tighten the screw in the discharge outlet to prevent loosening of the first section of the riser pipe.
5.3 Cable FittingCable ties must be fitted every 3 metres to fix the submersible drop cable and the straining wire, if fitted, to the riser pipe of the pump. Cable fitting: Use rubber/plastic cable ties. Once fastened, cut off the remaining part of band.
Fig. 5
Where plastic pipes are used, some slackness must be left between each cable tie as plastic pipes expand when loaded. When flanged pipes are used, the cable ties should be fitted above and below each joint.
5
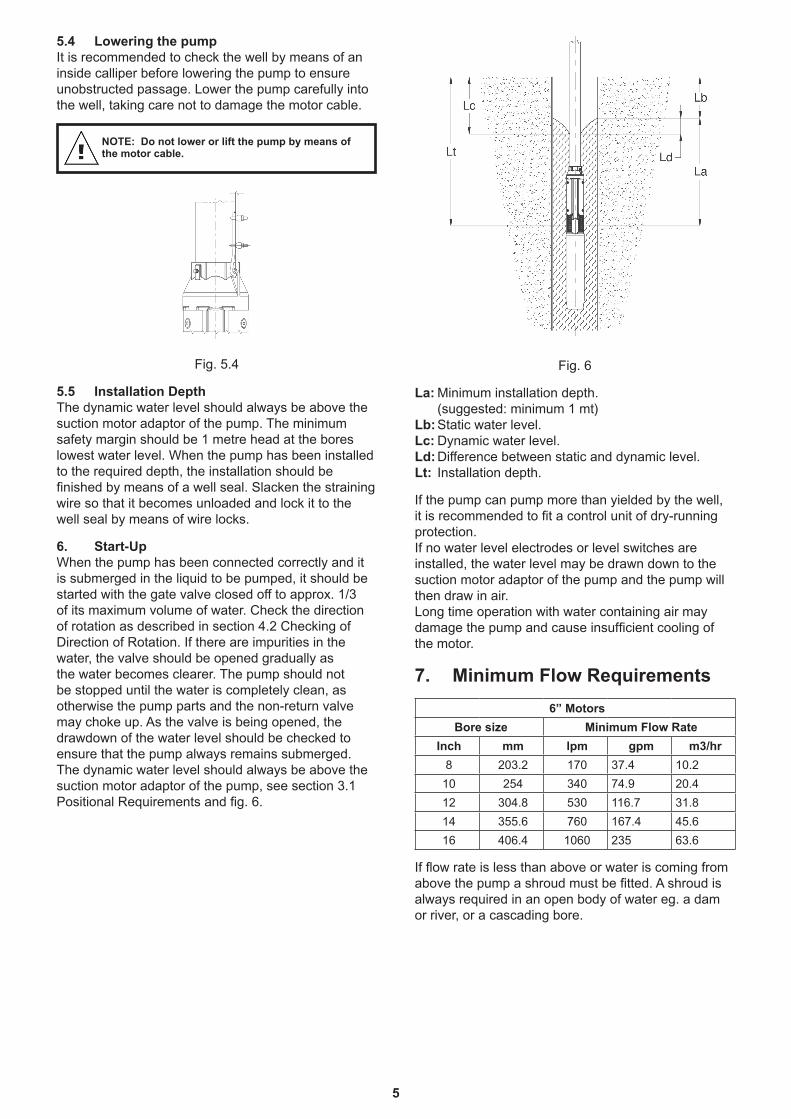
5.4 Lowering the pumpIt is recommended to check the well by means of an inside calliper before lowering the pump to ensure unobstructed passage. Lower the pump carefully into the well, taking care not to damage the motor cable.
NOTE: Do not lower or lift the pump by means of the motor cable.
Fig. 5.4
5.5 Installation DepthThe dynamic water level should always be above the suction motor adaptor of the pump. The minimum safety margin should be 1 metre head at the bores lowest water level. When the pump has been installed to the required depth, the installation should be finished by means of a well seal. Slacken the straining wire so that it becomes unloaded and lock it to the well seal by means of wire locks.
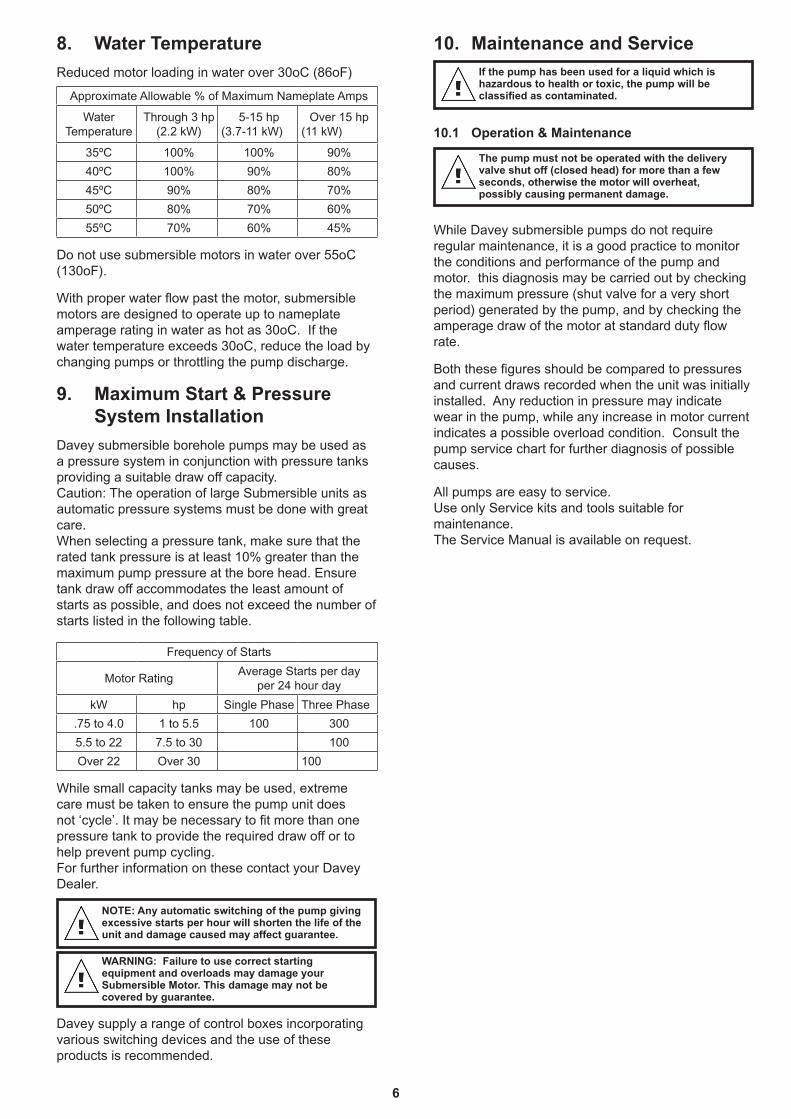
6. Start-Up When the pump has been connected correctly and it is submerged in the liquid to be pumped, it should be started with the gate valve closed off to approx. 1/3 of its maximum volume of water. Check the direction of rotation as described in section 4.2 Checking of Direction of Rotation. If there are impurities in the water, the valve should be opened gradually as the water becomes clearer. The pump should not be stopped until the water is completely clean, as otherwise the pump parts and the non-return valve may choke up. As the valve is being opened, the drawdown of the water level should be checked to ensure that the pump always remains submerged.The dynamic water level should always be above the suction motor adaptor of the pump, see section 3.1 Positional Requirements and fig. 6.
Fig. 6
La: Minimum installation depth. (suggested: minimum 1 mt)
Lb: Static water level.Lc: Dynamic water level.Ld: Difference between static and dynamic level.Lt: Installation depth.
If the pump can pump more than yielded by the well, it is recommended to fit a control unit of dry-running protection.If no water level electrodes or level switches are installed, the water level may be drawn down to the suction motor adaptor of the pump and the pump will then draw in air.Long time operation with water containing air may damage the pump and cause insufficient cooling of the motor.
7. Minimum Flow Requirements
6” Motors
Bore size Minimum Flow Rate
Inch mm lpm gpm m3/hr
8 203.2 170 37.4 10.2
10 254 340 74.9 20.4
12 304.8 530 116.7 31.8
14 355.6 760 167.4 45.6
16 406.4 1060 235 63.6
If flow rate is less than above or water is coming from above the pump a shroud must be fitted. A shroud is always required in an open body of water eg. a dam or river, or a cascading bore.
6
8. Water Temperature
Reduced motor loading in water over 30oC (86oF)
Approximate Allowable % of Maximum Nameplate Amps
Water Temperature
Through 3 hp(2.2 kW)
5-15 hp(3.7-11 kW)
Over 15 hp(11 kW)
35ºC 100% 100% 90%
40ºC 100% 90% 80%
45ºC 90% 80% 70%
50ºC 80% 70% 60%
55ºC 70% 60% 45%
Do not use submersible motors in water over 55oC (130oF).
With proper water flow past the motor, submersible motors are designed to operate up to nameplate amperage rating in water as hot as 30oC. If the water temperature exceeds 30oC, reduce the load by changing pumps or throttling the pump discharge.
9. Maximum Start & Pressure System Installation
Davey submersible borehole pumps may be used as a pressure system in conjunction with pressure tanks providing a suitable draw off capacity.Caution: The operation of large Submersible units as automatic pressure systems must be done with great care.When selecting a pressure tank, make sure that the rated tank pressure is at least 10% greater than the maximum pump pressure at the bore head. Ensure tank draw off accommodates the least amount of starts as possible, and does not exceed the number of starts listed in the following table.
Frequency of Starts
Motor RatingAverage Starts per day
per 24 hour day
kW hp Single Phase Three Phase
.75 to 4.0 1 to 5.5 100 300
5.5 to 22 7.5 to 30 100
Over 22 Over 30 100
While small capacity tanks may be used, extreme care must be taken to ensure the pump unit does not ‘cycle’. It may be necessary to fit more than one pressure tank to provide the required draw off or to help prevent pump cycling.For further information on these contact your Davey Dealer.
NOTE: Any automatic switching of the pump giving excessive starts per hour will shorten the life of the unit and damage caused may affect guarantee.
WARNING: Failure to use correct starting equipment and overloads may damage your Submersible Motor. This damage may not be covered by guarantee.
Davey supply a range of control boxes incorporating various switching devices and the use of these products is recommended.
10. Maintenance and Service If the pump has been used for a liquid which is hazardous to health or toxic, the pump will be classified as contaminated.
10.1 Operation & Maintenance
The pump must not be operated with the delivery valve shut off (closed head) for more than a few seconds, otherwise the motor will overheat, possibly causing permanent damage.
While Davey submersible pumps do not require regular maintenance, it is a good practice to monitor the conditions and performance of the pump and motor. this diagnosis may be carried out by checking the maximum pressure (shut valve for a very short period) generated by the pump, and by checking the amperage draw of the motor at standard duty flow rate.
Both these figures should be compared to pressures and current draws recorded when the unit was initially installed. Any reduction in pressure may indicate wear in the pump, while any increase in motor current indicates a possible overload condition. Consult the pump service chart for further diagnosis of possible causes.
All pumps are easy to service.Use only Service kits and tools suitable for maintenance.The Service Manual is available on request.
7
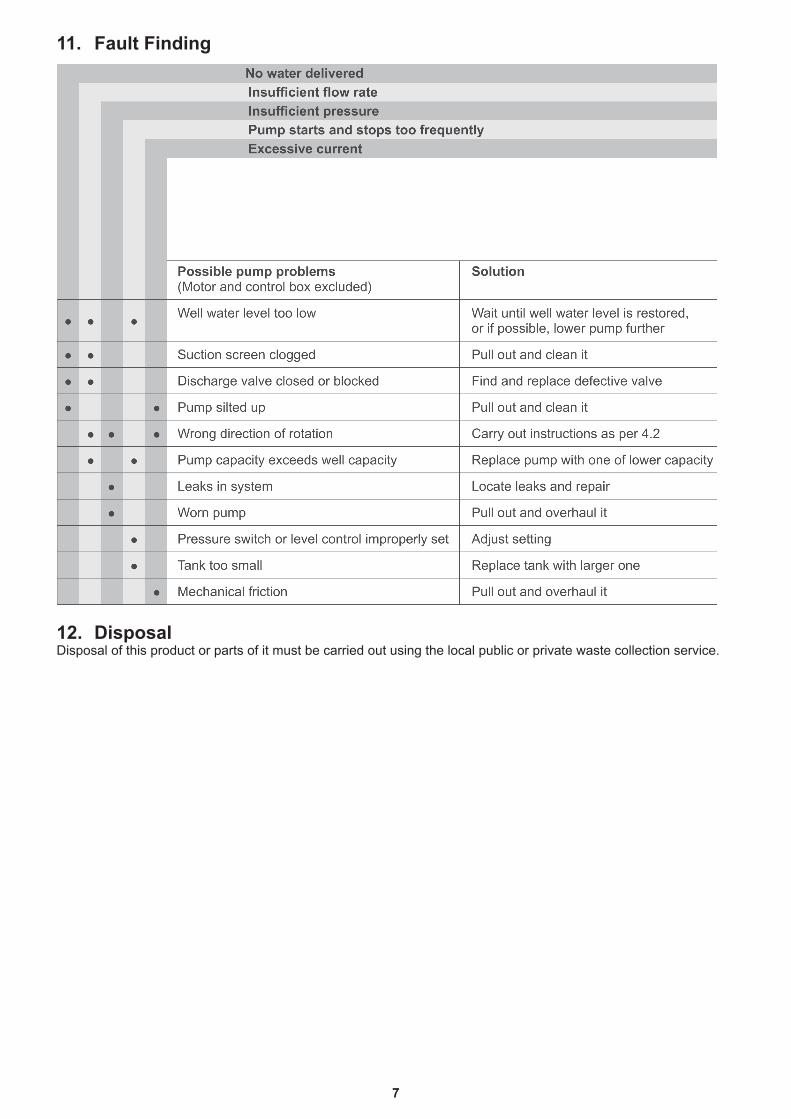
11. Fault Finding
12. Disposal Disposal of this product or parts of it must be carried out using the local public or private waste collection service.
Davey® Repair or Replacement Guarantee
In the unlikely event in Australia or New Zealand that this Davey product develops any malfunction within one year of the date of original purchase due to faulty materials or manufacture, Davey will at our option repair or replace it for you free of charge, subject to the conditions below.
Should you experience any difficulties with your Davey product, we suggest in the first instance that you contact the Davey Dealer from which you purchased the Davey product. Alternatively you can phone our Customer Service line on 1300 367 866 in Australia, or 0800 654 333 in New Zealand, or send a written letter to Davey at the address listed below. On receipt of your claim, Davey will seek to resolve your difficulties or, if the product is faulty or defective, advise you on how to have your Davey product repaired, obtain a replacement or a refund.
Your Davey One Year Guarantee naturally does not cover normal wear or tear, replacement of product consumables (i.e. mechanical seals, bearings or capacitors), loss or damage resulting from misuse or negligent handling, improper use for which the product was not designed or advertised, failure to properly follow the provided installation and operating instructions, failure to carry out maintenance, corrosive or abrasive water or other liquid, lightning or high voltage spikes, or unauthorized persons attempting repairs. Where applicable, your Davey product must only be connected to the voltage shown on the nameplate.
Your Davey One Year Guarantee does not cover freight or any other costs incurred in making a claim. Please retain your receipt as proof of purchase; you MUST provide evidence of the date of original purchase when claiming under the Davey One Year Guarantee.
Davey shall not be liable for any loss of profits or any consequential, indirect or special loss, damage or injury of any kind whatsoever arising directly or indirectly from Davey products. This limitation does not apply to any liability of Davey for failure to comply with a consumer guarantee applicable to your Davey product under the Australian or New Zealand legislation and does not affect any rights or remedies that may be available to you under the Australian or New Zealand Consumer Legislation.
In Australia, you are entitled to a replacement or refund for a major failure and for compensation for any other reasonably foreseeable loss or damage. You are also entitled to have the goods repaired or replaced if the goods fail to be of acceptable quality and the failure does not amount to a major failure.
Should your Davey product require repair or service after the guarantee period; contact your nearest Davey Dealer or phone the Davey Customer Service Centre on the number listed below.
For a complete list of Davey Dealers visit our website (davey.com.au) or call:
* Installation and operating instructions are included with the product when purchased new. They may also be found at davey.com.au
P/N 400164-1 supersedes P/N 400164
AUSTRALIA
Customer Service Centre6 Lakeview Drive,Scoresby, Australia 3179Ph: 1300 367 866Fax: 1300 369 119Website: davey.com.au
Davey Water Products Pty LtdMember of the GUD GroupABN 18 066 327 517
NEW ZEALAND
Customer Service Centre7 Rockridge Avenue,Penrose, Auckland 1061Ph: 0800 654 333Fax: 09 527 7654Website: daveynz.co.nz
® Davey is a registered trademark of Davey Water Products Pty Ltd.© Davey Water Products Pty Ltd 2012.


