52
Qt Quick for Qt Developers Presenting Data Based on Qt 5.4 (QtQuick 2.4)
| Date post: | 14-Jul-2016 |
| Category: |
Documents |
| Upload: | eliaezekiel |
| View: | 25 times |
| Download: | 2 times |

Qt Quick for Qt Developers Presenting Data
Based on Qt 5.4 (QtQuick 2.4)
Contents
• Arranging Items • Data Models • Using Views • XML Models • Views Revisited
© 2015 2
Objectives
Can manipulate and present data: • Familiarity with positioners and repeaters
• Rows, columns, grids, flows • Item indexes
• Understanding of the relationship between models • Pure models • Visual models • XML models
• Ability to define and use list models • Using pure models with repeaters and delegates • Using visual models with repeaters
• Ability to use models with views • Using list and grid views • Decorating views • Defining delegates
© 2015 3

Why Use Model/view Separation?
• Easily change the UI later • Add an alternative UI • Separation of concerns • Leads to easier maintenance • Easily change the data source
• (XML? JSON? Other?)
• Allows the use of 'dummy’ data during development • Many Qt APIs to consume the common data structures
© 2015 4
Demo: <Qt Examples>/declarative/demos/rssnews/rssnews.pro

Arranging Items

Arranging Items
Positioners and repeaters make it easier to work with many items • Positioners arrange items in standard layouts
• In a column: Column • In a row: Row • In a grid: Grid • Like words on a page: Flow
• Repeaters create items from a template • For use with positioners • Using data from a model
• Combining these make it easy to layout lots of items
© 2015 6
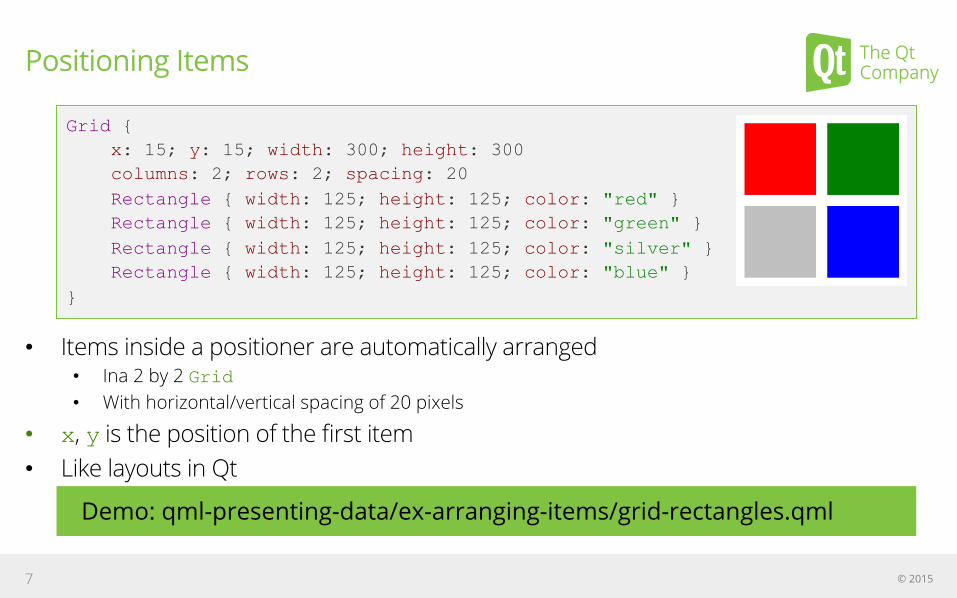
Positioning Items
• Items inside a positioner are automatically arranged • Ina 2 by 2 Grid • With horizontal/vertical spacing of 20 pixels
• x, y is the position of the first item • Like layouts in Qt
© 2015 7
Grid { x: 15; y: 15; width: 300; height: 300 columns: 2; rows: 2; spacing: 20 Rectangle { width: 125; height: 125; color: "red" } Rectangle { width: 125; height: 125; color: "green" } Rectangle { width: 125; height: 125; color: "silver" } Rectangle { width: 125; height: 125; color: "blue" } }
Demo: qml-presenting-data/ex-arranging-items/grid-rectangles.qml
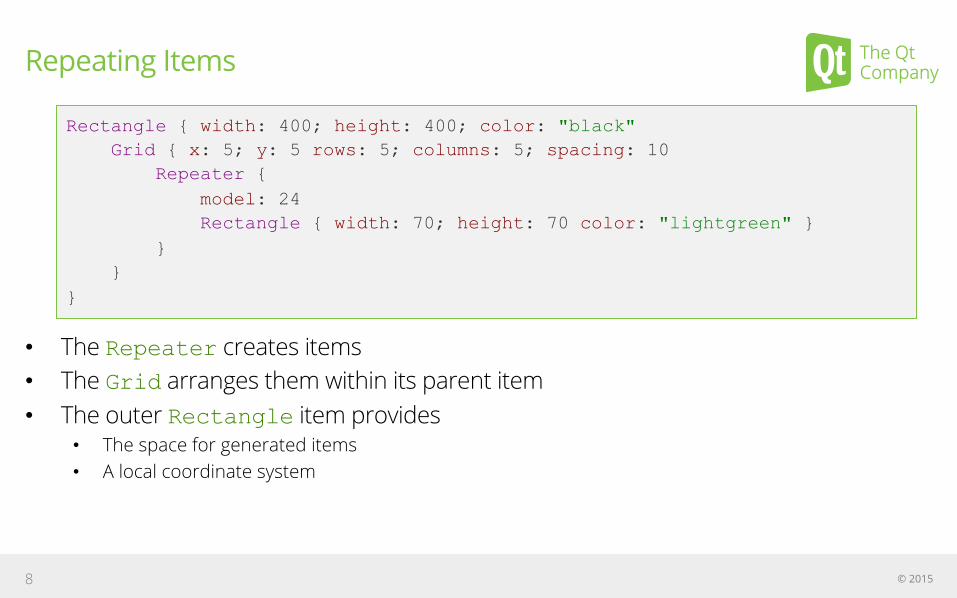
Repeating Items
• The Repeater creates items • The Grid arranges them within its parent item • The outer Rectangle item provides
• The space for generated items • A local coordinate system
© 2015 8
Rectangle { width: 400; height: 400; color: "black" Grid { x: 5; y: 5 rows: 5; columns: 5; spacing: 10 Repeater { model: 24 Rectangle { width: 70; height: 70 color: "lightgreen" } } } }
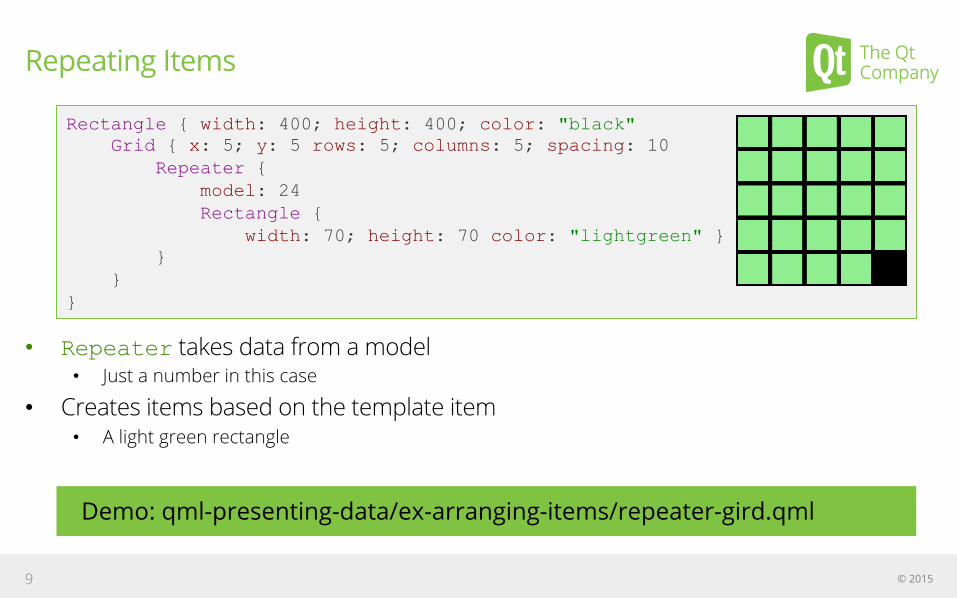
Repeating Items
• Repeater takes data from a model • Just a number in this case
• Creates items based on the template item • A light green rectangle
© 2015 9
Rectangle { width: 400; height: 400; color: "black" Grid { x: 5; y: 5 rows: 5; columns: 5; spacing: 10 Repeater { model: 24 Rectangle { width: 70; height: 70 color: "lightgreen" } } } }
Demo: qml-presenting-data/ex-arranging-items/repeater-gird.qml

Rectangle { width: 400; height: 400; color: "black" Grid { x: 5; y: 5 rows: 5; columns: 5; spacing: 10 Repeater { model: 24 Rectangle { width: 70; height: 70 color: "lightgreen" Text { text: index font.pointSize: 30 anchors.centerIn: parent } } } } }
Indexing Items
• Repeater provides an index for each item it creates
© 2015 10
Demo: qml-presenting-data/ex-arranging-items/repeater-gird-index.qml
Positioner Hints and Tips
• Anchors in the Row, Column or Grid • Apply to all the items they contain
© 2015 11
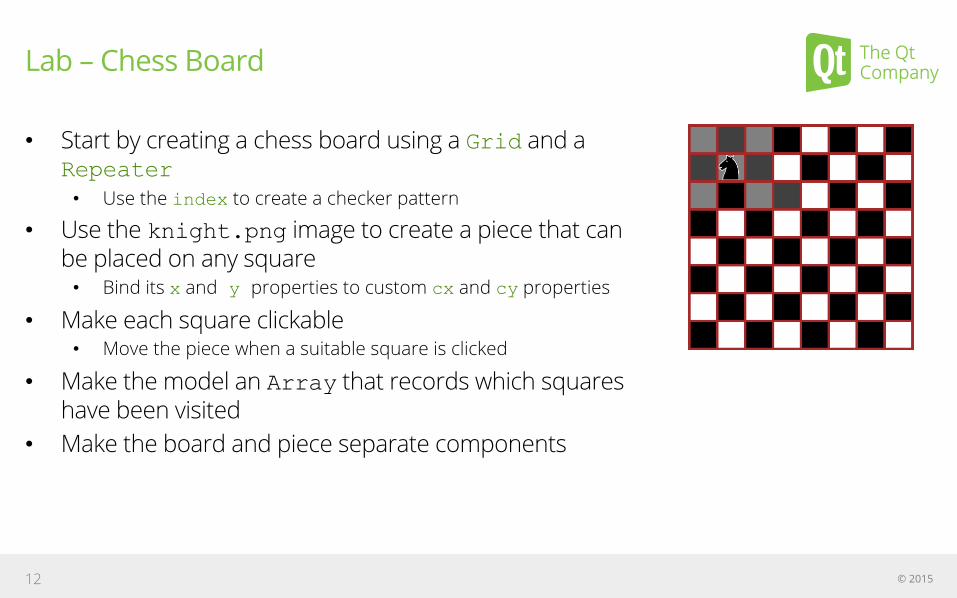
Lab – Chess Board
• Start by creating a chess board using a Grid and a Repeater • Use the index to create a checker pattern
• Use the knight.png image to create a piece that can be placed on any square • Bind its x and y properties to custom cx and cy properties
• Make each square clickable • Move the piece when a suitable square is clicked
• Make the model an Array that records which squares have been visited
• Make the board and piece separate components
© 2015 12

Lab – Calendar
• Start by creating a chess board using a Grid and a Repeater • Put the grid inside an Item • Use the index to give each square a number
• Place a title above the grid • Ensure that the current date is highlighted • Use the left.png and right.png images to
create buttons on each side of the title • Make the buttons navigate to the next and previous
months • Add a header showing the days of the week
© 2015 13

Data Models

Models and Views
Models and views provide a way to handle data sets
• Models hold data or items • Views display data or items
• Using delegates
© 2015 15

Models
Pure models provide access to data: • ListModel
• XmlListModel
Visual models provide information about how to display data: • Visual item model: ObjectModel (replaces VisualItemModel)
• Contains child items that are supplied to views
• Visual data model: DelegateModel (replaces VisualDataModel) • Contains an interface to an underlying model • Supplies a delegate for rendering • Supports delegate sharing between the views
© 2015 16
See Documentation: Data Models
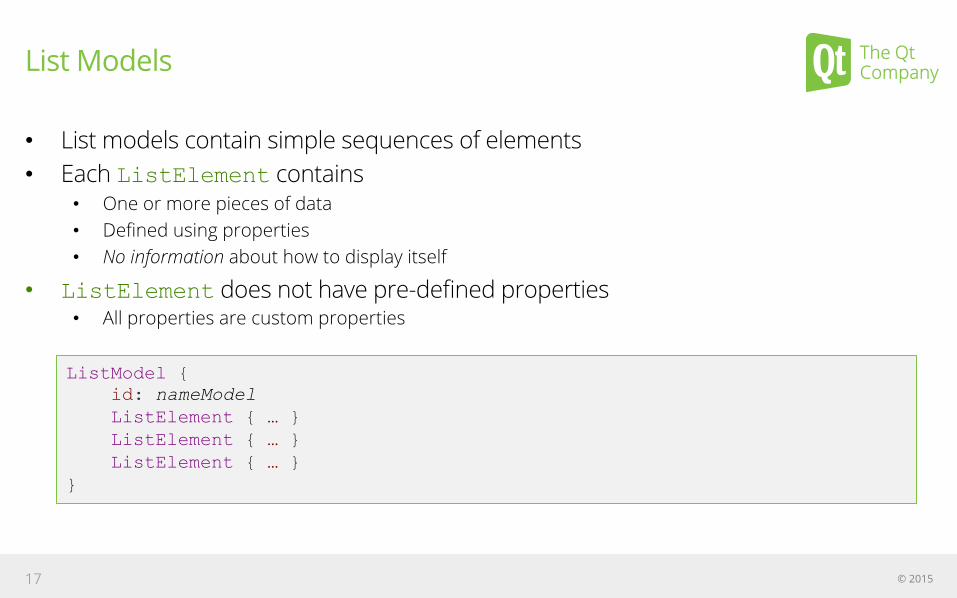
List Models • List models contain simple sequences of elements • Each ListElement contains
• One or more pieces of data • Defined using properties • No information about how to display itself
• ListElement does not have pre-defined properties • All properties are custom properties
© 2015 17
ListModel { id: nameModel ListElement { … } ListElement { … } ListElement { … } }
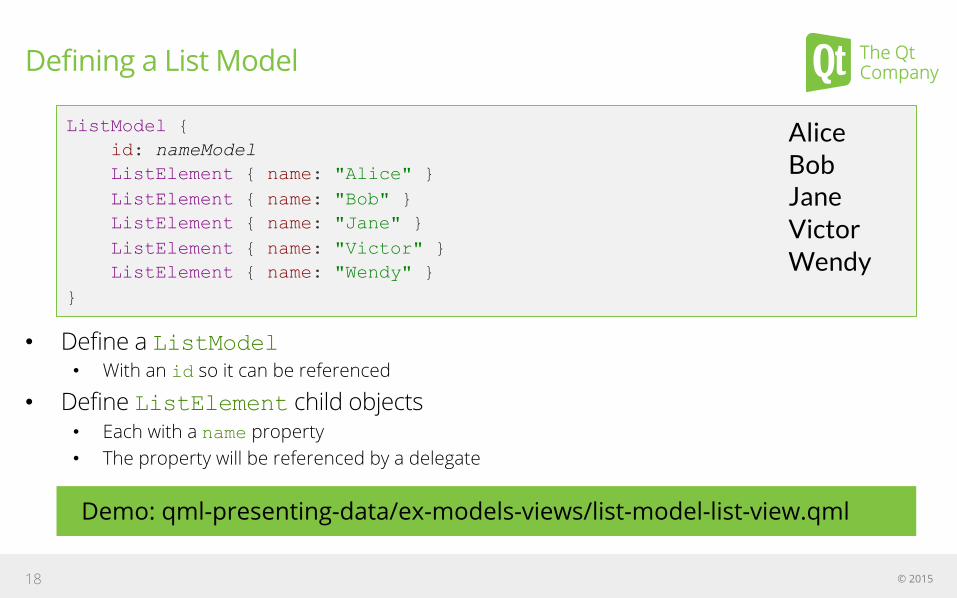
ListModel { id: nameModel ListElement { name: "Alice" } ListElement { name: "Bob" } ListElement { name: "Jane" } ListElement { name: "Victor" } ListElement { name: "Wendy" } }
Defining a List Model
• Define a ListModel • With an id so it can be referenced
• Define ListElement child objects • Each with a name property • The property will be referenced by a delegate
© 2015 18
Demo: qml-presenting-data/ex-models-views/list-model-list-view.qml
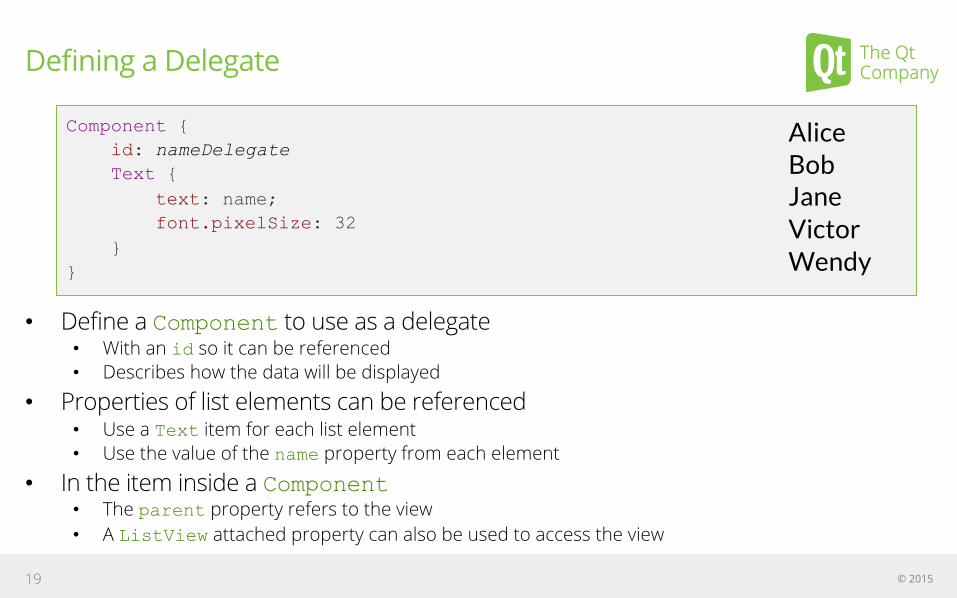
Component { id: nameDelegate Text { text: name; font.pixelSize: 32 } }
Defining a Delegate
• Define a Component to use as a delegate • With an id so it can be referenced • Describes how the data will be displayed
• Properties of list elements can be referenced • Use a Text item for each list element • Use the value of the name property from each element
• In the item inside a Component • The parent property refers to the view • A ListView attached property can also be used to access the view
© 2015 19
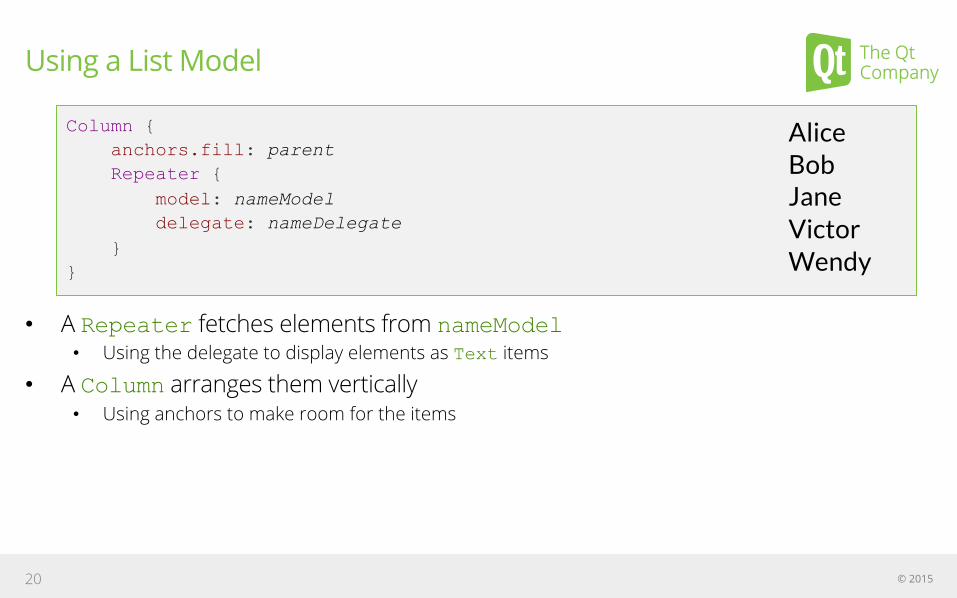
Column { anchors.fill: parent Repeater { model: nameModel delegate: nameDelegate } }
Using a List Model
• A Repeater fetches elements from nameModel • Using the delegate to display elements as Text items
• A Column arranges them vertically • Using anchors to make room for the items
© 2015 20

Working with Items
• ListModel is a dynamic list of items • Items can be appended, inserted, removed and moved
• Append item data using JavaScript dictionaries: • bookmarkModel.append({"title": lineEdit.text})
• Remove items by index obtained from a ListView • bookmarkModel.remove(listView.currentIndex)
• Move a number of items between two indices: • bookmarkModel.move(listView.currentIndex, listView.currentIndex + 1,
number)
© 2015 21
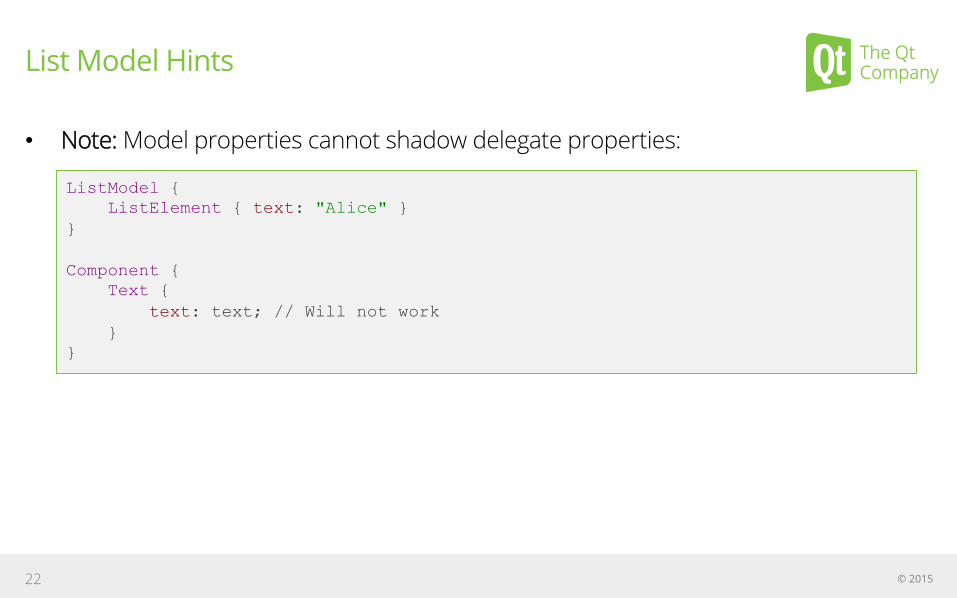
List Model Hints
• Note: Model properties cannot shadow delegate properties:
© 2015 22
ListModel { ListElement { text: "Alice" } } Component { Text { text: text; // Will not work } }
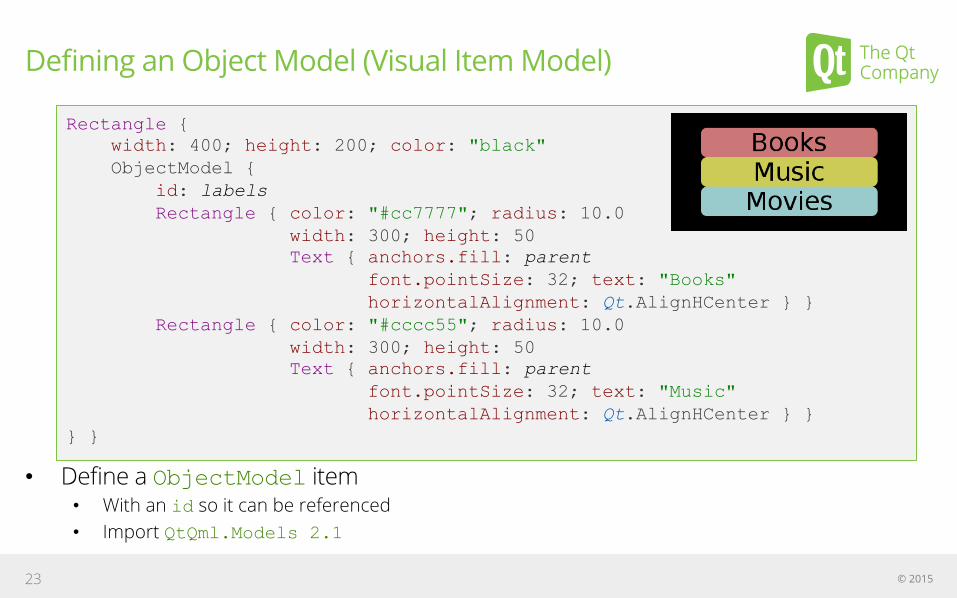
Rectangle { width: 400; height: 200; color: "black" ObjectModel { id: labels Rectangle { color: "#cc7777"; radius: 10.0 width: 300; height: 50 Text { anchors.fill: parent font.pointSize: 32; text: "Books" horizontalAlignment: Qt.AlignHCenter } } Rectangle { color: "#cccc55"; radius: 10.0 width: 300; height: 50 Text { anchors.fill: parent font.pointSize: 32; text: "Music" horizontalAlignment: Qt.AlignHCenter } } } }
Defining an Object Model (Visual Item Model)
• Define a ObjectModel item • With an id so it can be referenced • Import QtQml.Models 2.1
© 2015 23
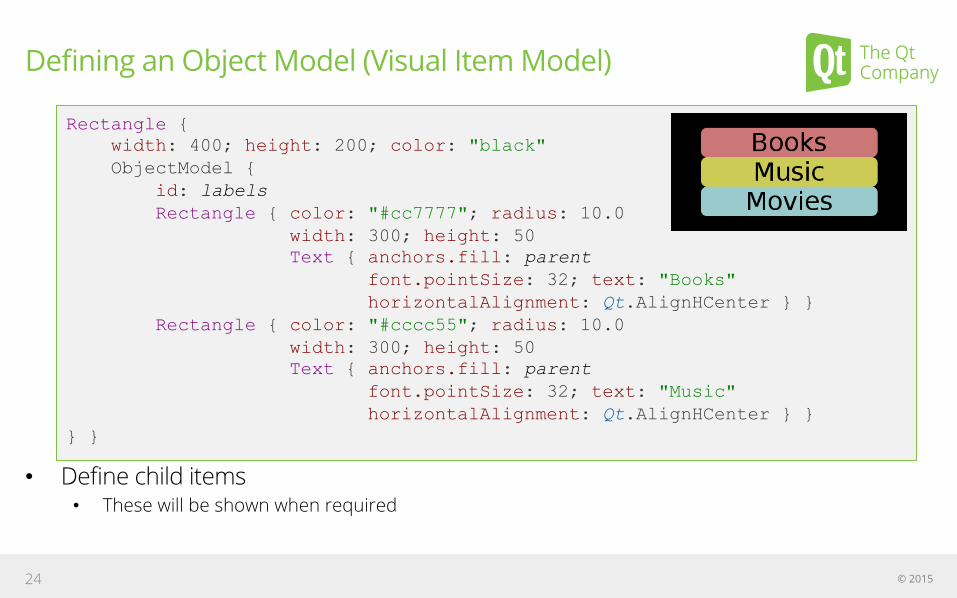
Rectangle { width: 400; height: 200; color: "black" ObjectModel { id: labels Rectangle { color: "#cc7777"; radius: 10.0 width: 300; height: 50 Text { anchors.fill: parent font.pointSize: 32; text: "Books" horizontalAlignment: Qt.AlignHCenter } } Rectangle { color: "#cccc55"; radius: 10.0 width: 300; height: 50 Text { anchors.fill: parent font.pointSize: 32; text: "Music" horizontalAlignment: Qt.AlignHCenter } } } }
Defining an Object Model (Visual Item Model)
• Define child items • These will be shown when required
© 2015 24

Rectangle { width: 400; height: 200; color: "black" ObjectModel { id: labels …. } Column { anchors.horizontalCenter: parent.horizontalCenter anchors.verticalCenter: parent.verticalCenter Repeater { model: labels } } }
Using an Object Model (Visual Item Model)
• A Repeater fetches items from the labels model • A Column arranges them vertically
© 2015 25
Presenting Data

Views
• ListView shows a classic list of items • With horizontal or vertical placing of items
• GridView displays items in a grid • Like an file manager's icon view
© 2015 27
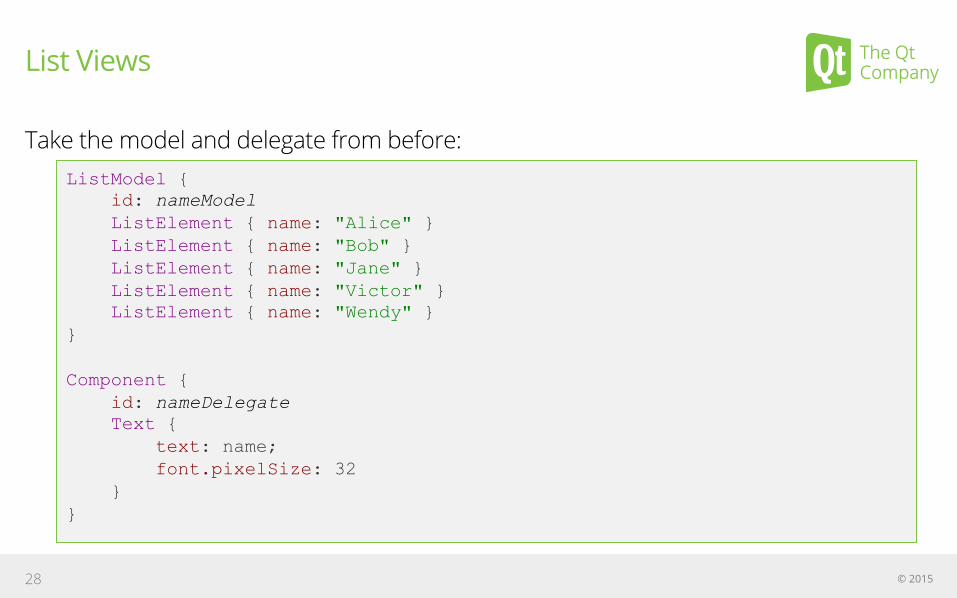
List Views
Take the model and delegate from before:
© 2015 28
ListModel { id: nameModel ListElement { name: "Alice" } ListElement { name: "Bob" } ListElement { name: "Jane" } ListElement { name: "Victor" } ListElement { name: "Wendy" } } Component { id: nameDelegate Text { text: name; font.pixelSize: 32 } }
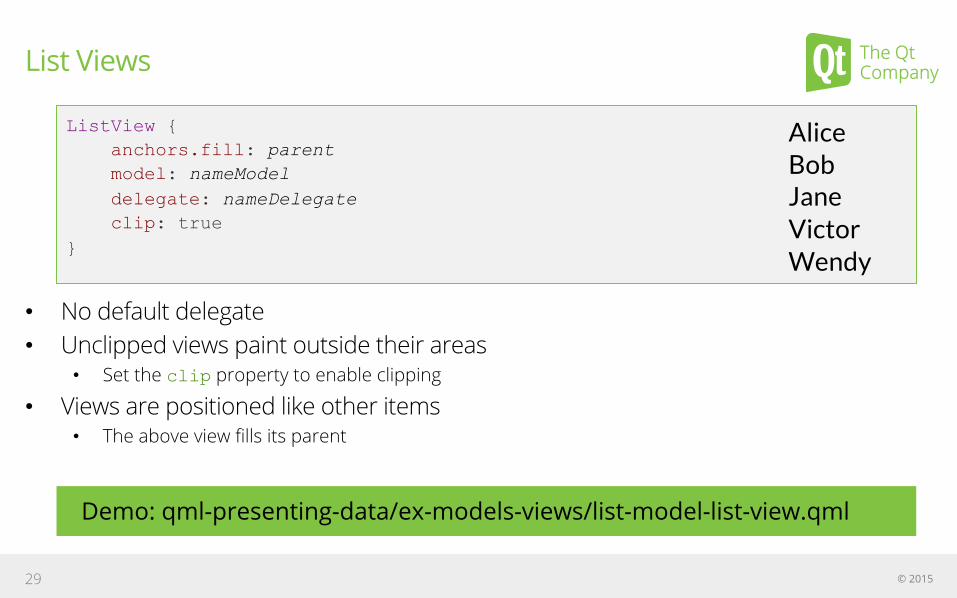
ListView { anchors.fill: parent model: nameModel delegate: nameDelegate clip: true }
List Views
• No default delegate • Unclipped views paint outside their areas
• Set the clip property to enable clipping
• Views are positioned like other items • The above view fills its parent
© 2015 29
Demo: qml-presenting-data/ex-models-views/list-model-list-view.qml

Decoration and Navigation
• By default, ListView is • Undecorated • A flickable surface (can be dragged and flicked)
• To add decoration: • With a header and footer • With a highlight item to show the current item
• To configure for navigation: • Set focus to allow keyboard navigation • Property highlight also helps the user with navigation • Unset interactive to disable dragging and flicking
© 2015 30
Demo: qml-presenting-data/ex-models-views/list-view-decoration.qml

ListView { anchors.fill: parent model: nameModel delegate: nameDelegate focus: true clip: true header: Rectangle { width: parent.width; height: 10; color: "pink” } footer: Rectangle { width: parent.width; height: 10; color: "lightblue" } highlight: Rectangle { width: parent.width color: "lightgray" } }
Decoration and Navigation
© 2015 31
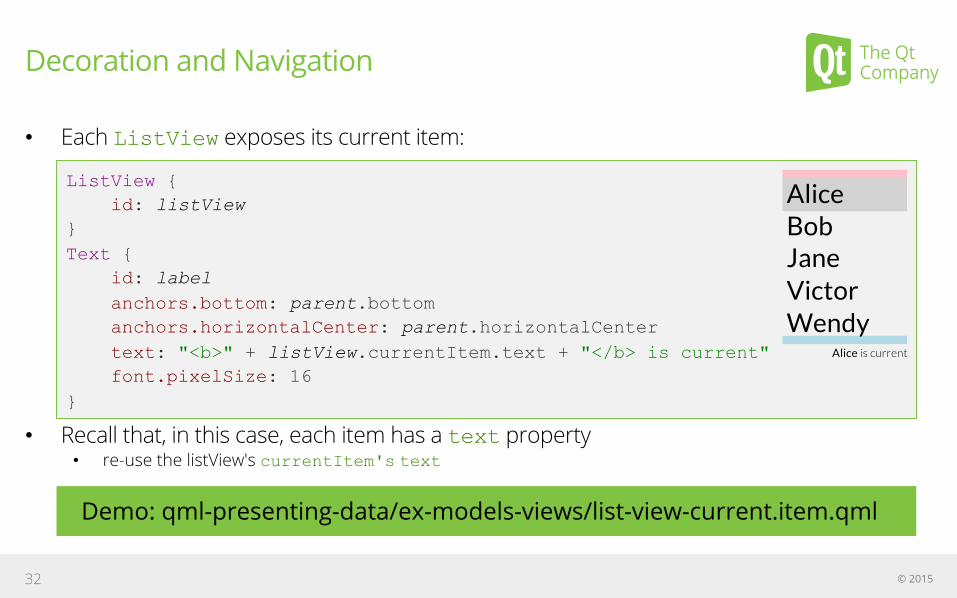
Decoration and Navigation
• Each ListView exposes its current item:
• Recall that, in this case, each item has a text property • re-use the listView's currentItem's text
© 2015 32
ListView { id: listView } Text { id: label anchors.bottom: parent.bottom anchors.horizontalCenter: parent.horizontalCenter text: "<b>" + listView.currentItem.text + "</b> is current" font.pixelSize: 16 }
Demo: qml-presenting-data/ex-models-views/list-view-current.item.qml
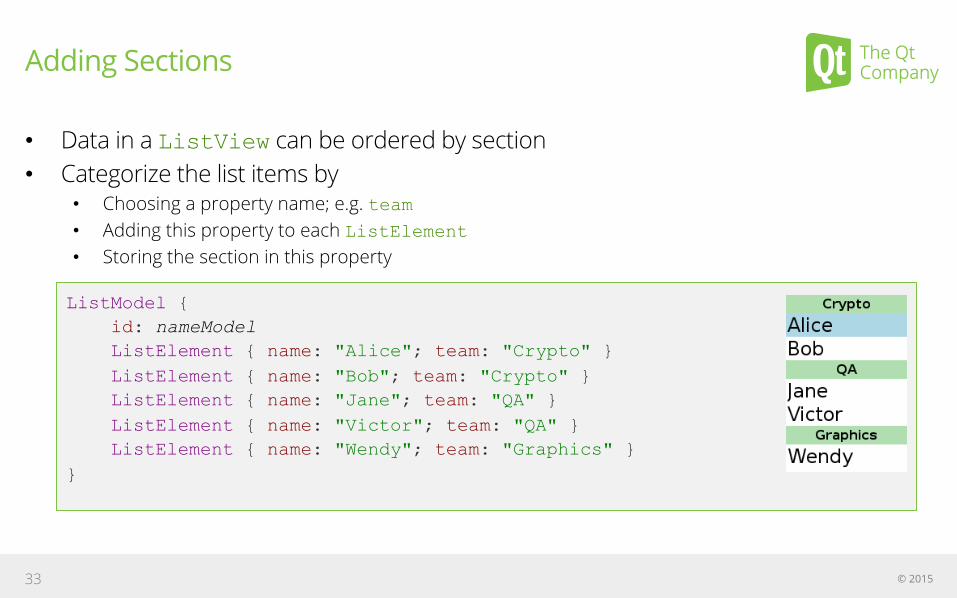
Adding Sections
• Data in a ListView can be ordered by section • Categorize the list items by
• Choosing a property name; e.g. team • Adding this property to each ListElement • Storing the section in this property
© 2015 33
ListModel { id: nameModel ListElement { name: "Alice"; team: "Crypto" } ListElement { name: "Bob"; team: "Crypto" } ListElement { name: "Jane"; team: "QA" } ListElement { name: "Victor"; team: "QA" } ListElement { name: "Wendy"; team: "Graphics" } }

Displaying Sections
Using the ListView • Set section.property
• Refer to the ListElement property holding the section name
• Set section.criteria to control what to show • ViewSection.FullString for complete section name • ViewSection.FirstCharacter for alphabetical groupings
• Set section.delegate • Create a delegate for section headings • Either include it inline or reference it
© 2015 34

ListView { model: nameModel section.property: "team” section.criteria: ViewSection.FullString section.delegate: Rectangle { color: "#b0dfb0" width: parent.width height: childrenRect.height + 4 Text { anchors.horizontalCenter: parent.horizontalCenter font.pixelSize: 16 font.bold: true text: section } } }
Displaying Sections
• The section.delegate is defined like the highlight delegate
© 2015 35
Grid Views
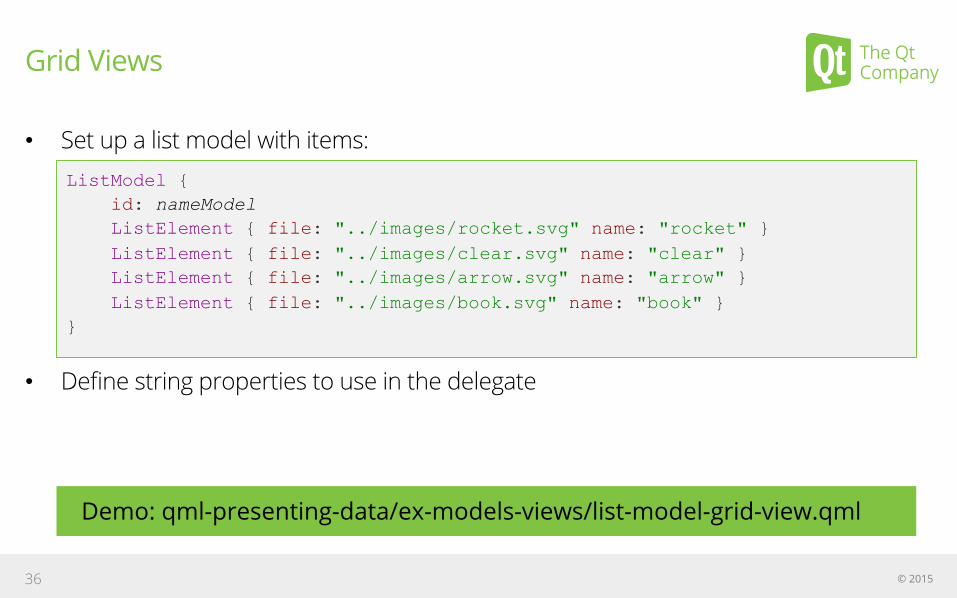
• Set up a list model with items:
• Define string properties to use in the delegate
© 2015 36
ListModel { id: nameModel ListElement { file: "../images/rocket.svg" name: "rocket" } ListElement { file: "../images/clear.svg" name: "clear" } ListElement { file: "../images/arrow.svg" name: "arrow" } ListElement { file: "../images/book.svg" name: "book" } }
Demo: qml-presenting-data/ex-models-views/list-model-grid-view.qml
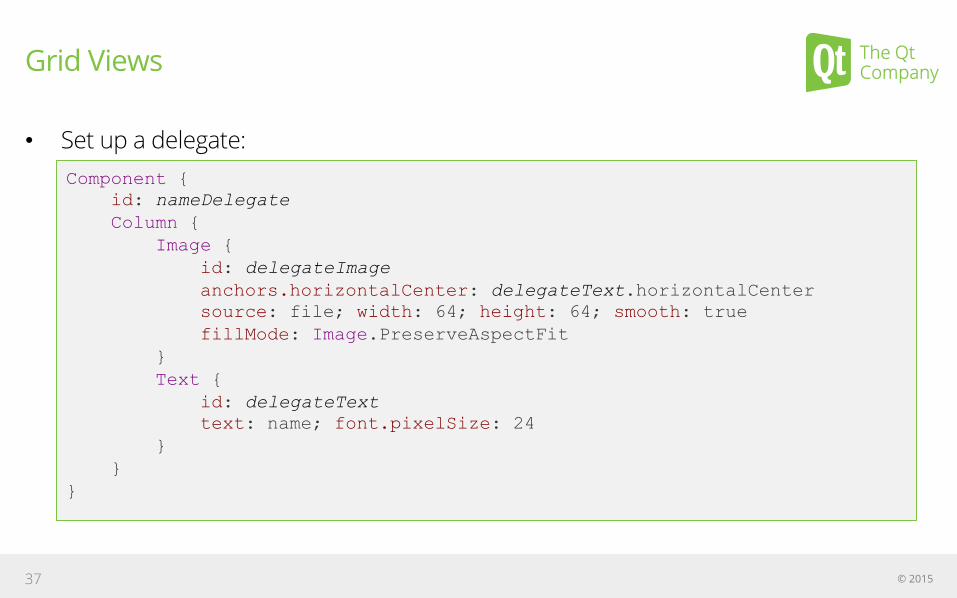
Grid Views
• Set up a delegate:
© 2015 37
Component { id: nameDelegate Column { Image { id: delegateImage anchors.horizontalCenter: delegateText.horizontalCenter source: file; width: 64; height: 64; smooth: true fillMode: Image.PreserveAspectFit } Text { id: delegateText text: name; font.pixelSize: 24 } } }

GridView { anchors.fill: parent model: nameModel delegate: nameDelegate clip: true }
Grid Views
• The same as ListView to set up • Uses data from a list model
• Not like Qt's table view • More like Qt's list view in icon mode
© 2015 38
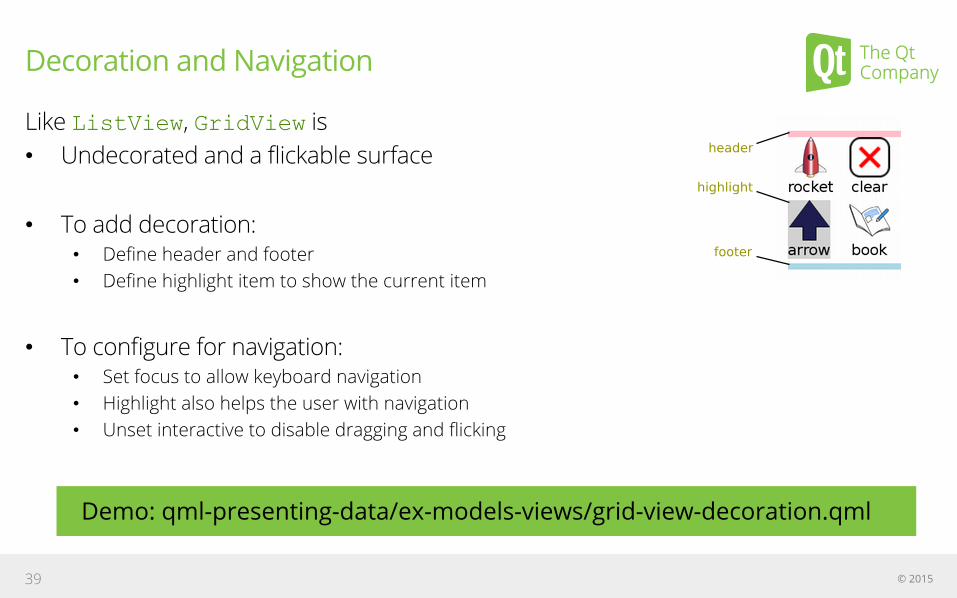
Decoration and Navigation
Like ListView, GridView is • Undecorated and a flickable surface
• To add decoration: • Define header and footer • Define highlight item to show the current item
• To configure for navigation: • Set focus to allow keyboard navigation • Highlight also helps the user with navigation • Unset interactive to disable dragging and flicking
© 2015 39
Demo: qml-presenting-data/ex-models-views/grid-view-decoration.qml
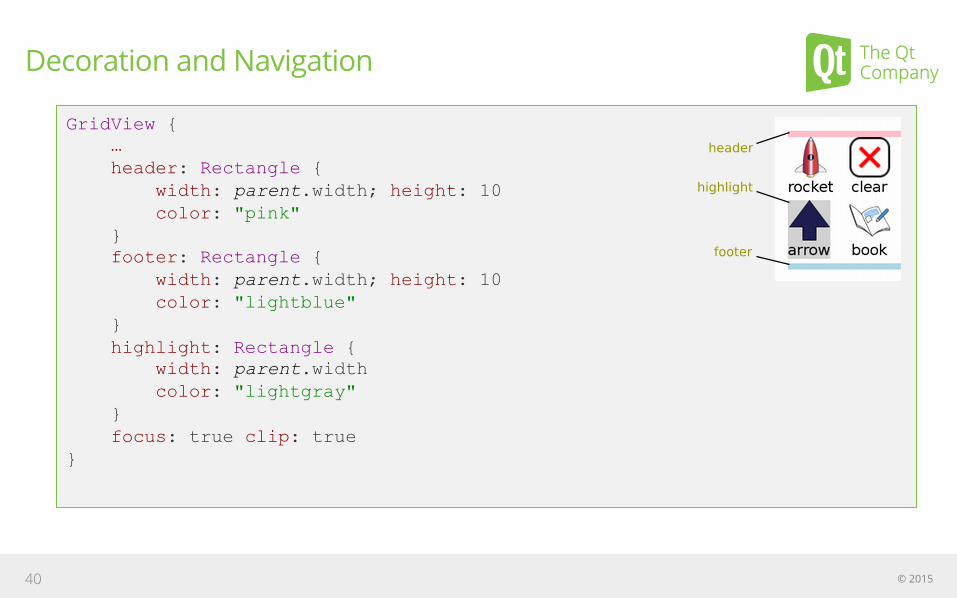
GridView { … header: Rectangle { width: parent.width; height: 10 color: "pink" } footer: Rectangle { width: parent.width; height: 10 color: "lightblue" } highlight: Rectangle { width: parent.width color: "lightgray" } focus: true clip: true }
Decoration and Navigation
© 2015 40
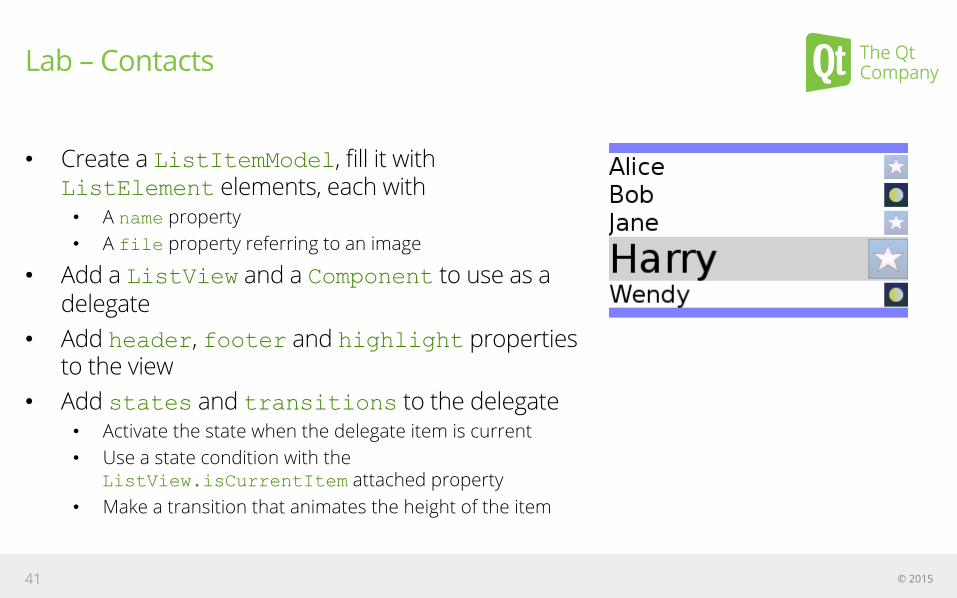
Lab – Contacts
• Create a ListItemModel, fill it with ListElement elements, each with • A name property • A file property referring to an image
• Add a ListView and a Component to use as a delegate
• Add header, footer and highlight properties to the view
• Add states and transitions to the delegate • Activate the state when the delegate item is current • Use a state condition with the
ListView.isCurrentItem attached property • Make a transition that animates the height of the item
© 2015 41

XML Models
XML List Models
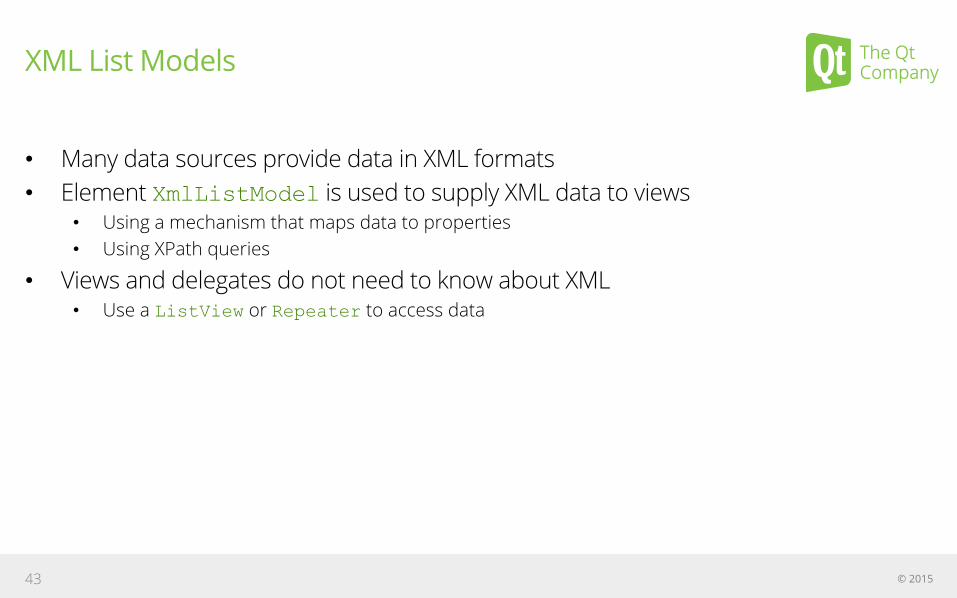
• Many data sources provide data in XML formats • Element XmlListModel is used to supply XML data to views
• Using a mechanism that maps data to properties • Using XPath queries
• Views and delegates do not need to know about XML • Use a ListView or Repeater to access data
© 2015 43

XmlListModel { id: xmlModel source: "files/items.xml" query: "//item" XmlRole { name: "title"; query: "string()" } XmlRole { name: "link"; query: "@link/string()" } } }
Defining an XML List Model
• Set the id property so the model can be referenced • Specify the source of the XML • The query identifies pieces of data in the model • Each piece of data is queried by XmlRole elements
© 2015 44
Demo: qml-presenting-data/ex-models-views/xml-list-model.qml

XML Roles
• Element XmlRole associates names with data obtained using XPath queries
• Made available to delegates as properties • Properties title and link in the above example
© 2015 45
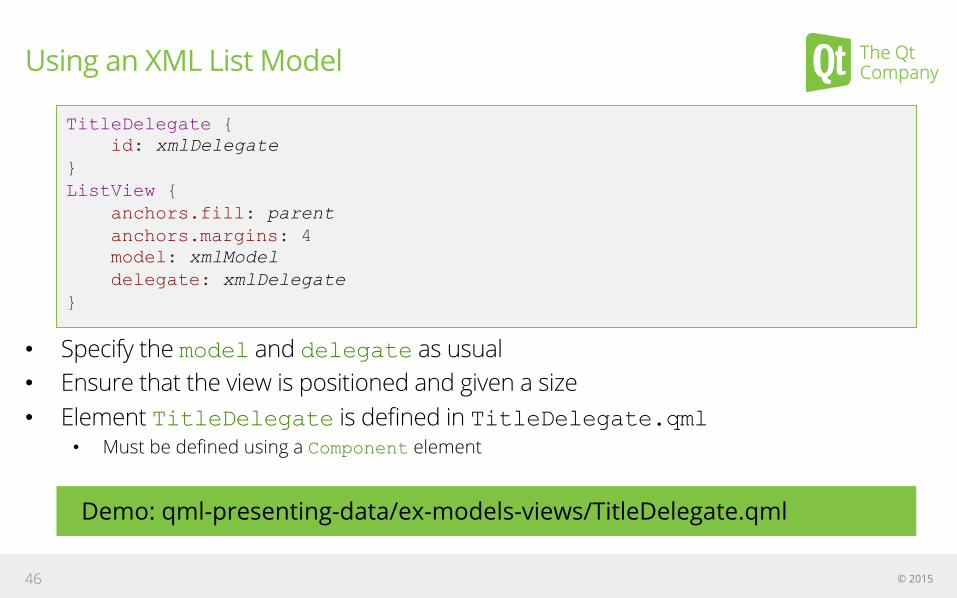
TitleDelegate { id: xmlDelegate } ListView { anchors.fill: parent anchors.margins: 4 model: xmlModel delegate: xmlDelegate }
Using an XML List Model
• Specify the model and delegate as usual • Ensure that the view is positioned and given a size • Element TitleDelegate is defined in TitleDelegate.qml
• Must be defined using a Component element
© 2015 46
Demo: qml-presenting-data/ex-models-views/TitleDelegate.qml
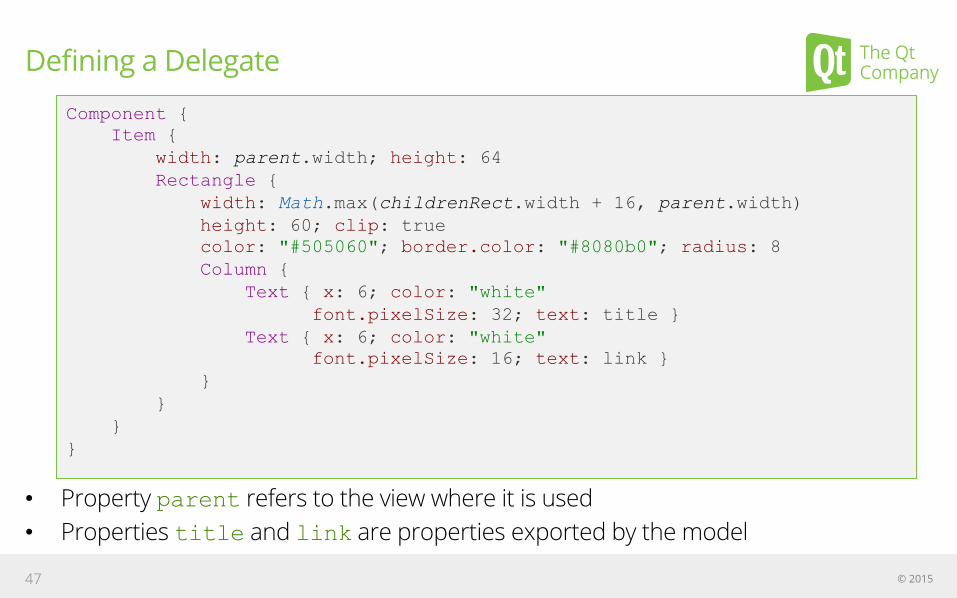
Component { Item { width: parent.width; height: 64 Rectangle { width: Math.max(childrenRect.width + 16, parent.width) height: 60; clip: true color: "#505060"; border.color: "#8080b0"; radius: 8 Column { Text { x: 6; color: "white" font.pixelSize: 32; text: title } Text { x: 6; color: "white" font.pixelSize: 16; text: link } } } } }
Defining a Delegate
• Property parent refers to the view where it is used • Properties title and link are properties exported by the model
© 2015 47

Views Revisited
Customizing Views
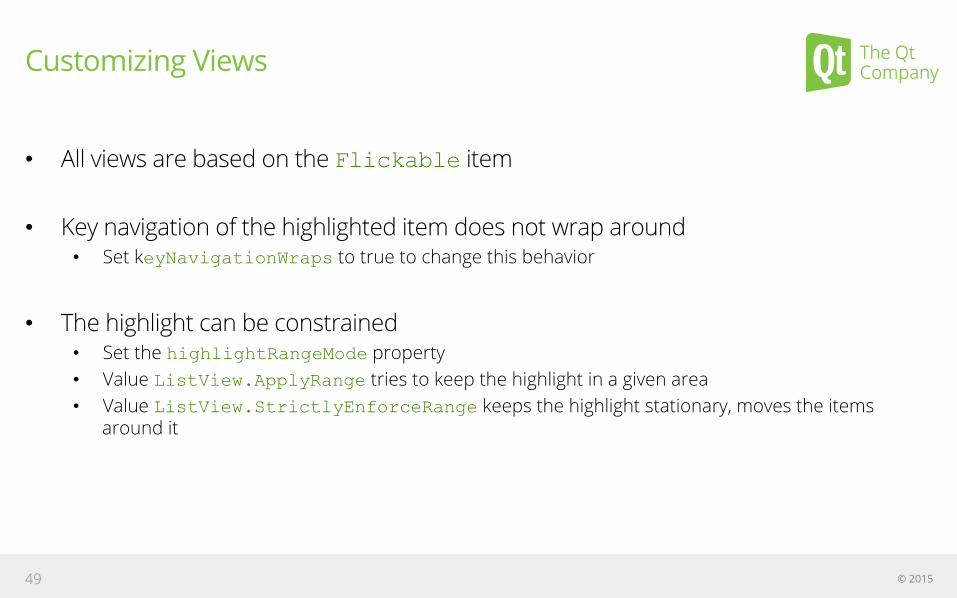
• All views are based on the Flickable item
• Key navigation of the highlighted item does not wrap around • Set keyNavigationWraps to true to change this behavior
• The highlight can be constrained • Set the highlightRangeMode property • Value ListView.ApplyRange tries to keep the highlight in a given area • Value ListView.StrictlyEnforceRange keeps the highlight stationary, moves the items
around it
© 2015 49
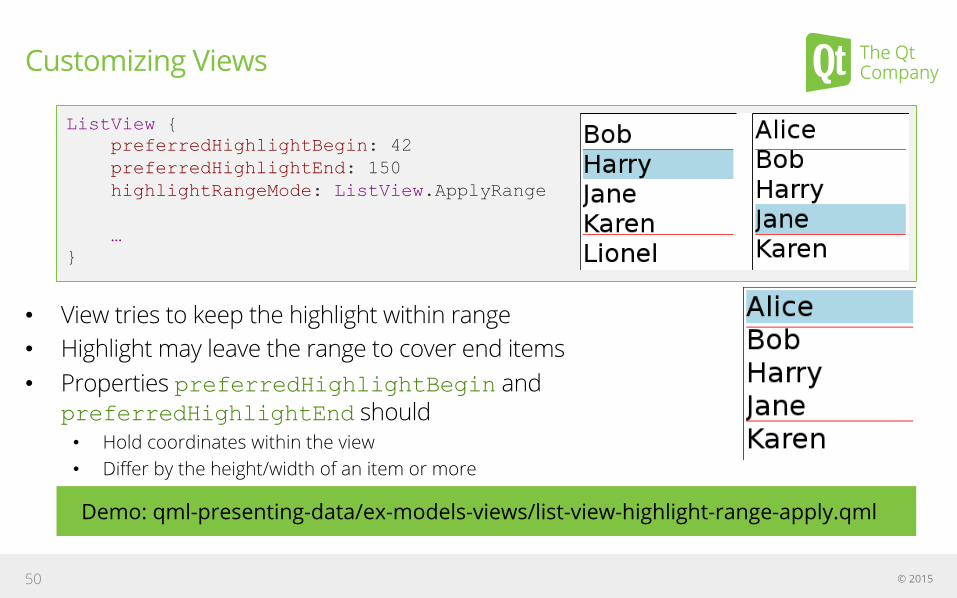
ListView { preferredHighlightBegin: 42 preferredHighlightEnd: 150 highlightRangeMode: ListView.ApplyRange … }
Customizing Views
• View tries to keep the highlight within range • Highlight may leave the range to cover end items • Properties preferredHighlightBegin and
preferredHighlightEnd should • Hold coordinates within the view • Differ by the height/width of an item or more
© 2015 50
Demo: qml-presenting-data/ex-models-views/list-view-highlight-range-apply.qml
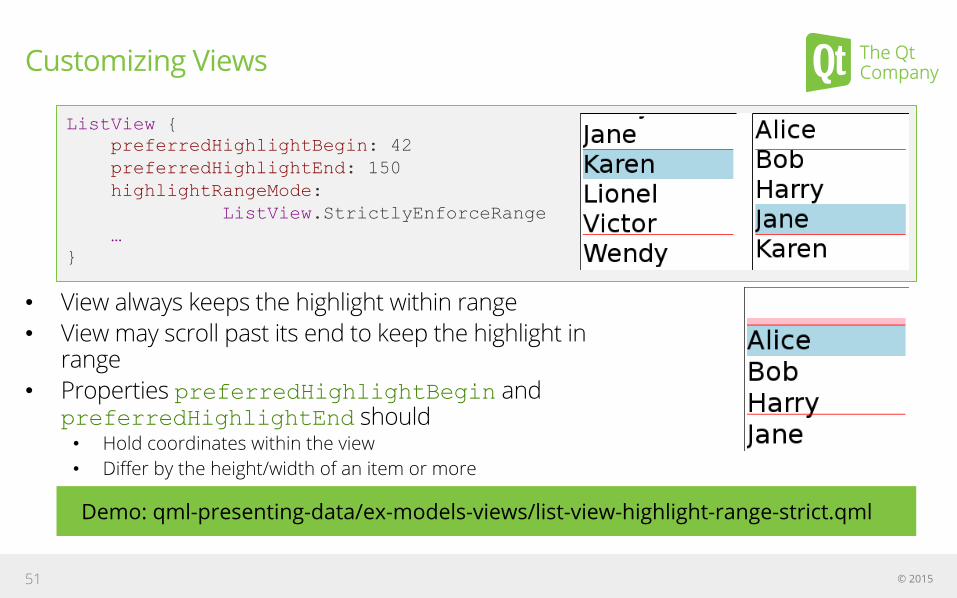
ListView { preferredHighlightBegin: 42 preferredHighlightEnd: 150 highlightRangeMode: ListView.StrictlyEnforceRange … }
Customizing Views
• View always keeps the highlight within range • View may scroll past its end to keep the highlight in
range • Properties preferredHighlightBegin and
preferredHighlightEnd should • Hold coordinates within the view • Differ by the height/width of an item or more
© 2015 51
Demo: qml-presenting-data/ex-models-views/list-view-highlight-range-strict.qml
Optimizing Views
• Views create delegates to display data • Delegates are only created when they are needed • Delegates are destroyed when no longer visible • This can impact performance
• Delegates can be cached to improve performance • Property cacheBuffer is the maximum number of delegates to keep (calculated as a multiply of
the height of the delegate) • Trades memory usage for performance • Useful if it is expensive to create delegates; for example
• When obtaining data over a network • When delegates require complex rendering
© 2015 52


