70-411 Administering Windows Server 2012 R2 LAB 1 DEPLOYING AND MANAGING SERVER IMAGES THIS LAB CONTAINS THE FOLLOWING EXERCISES AND ACTIVITIES: Exercise 1.1 Installing and Configuring Windows Deployment Services Exercise 1.2 Creating Windows Deployment Images Exercise 1.3 Generating an Autounattend.xml file Exercise 1.4 Deploying a Windows Image Exercise 1.5 Updating a Windows Image Lab Challenge Adding Drivers to a Windows Image BEFORE YOU BEGIN
Transcript
70-411 Administering Windows Server 2012 R2
LAB 1DEPLOYING AND MANAGING SERVER IMAGES
THIS LAB CONTAINS THE FOLLOWING EXERCISES AND ACTIVITIES:
Exercise 1.1 Installing and Configuring Windows Deployment Services
Exercise 1.2 Creating Windows Deployment Images
Exercise 1.3 Generating an Autounattend.xml file
Exercise 1.4 Deploying a Windows Image
Exercise 1.5 Updating a Windows Image
Lab Challenge
Adding Drivers to a Windows Image
BEFORE YOU BEGIN
The lab environment consists of student workstations connected to a local area network, along with a server that functions as the domain controller for a domain called contoso.com. The computers required for this lab are listed in Table 1-1.
70-411 Administering Windows Server 2012 R2
Table 1-1
Computers Required for Lab 1
Computer Operating System Computer Name
Server (VM 1) Windows Server 2012 R2 RWDC01
Server (VM 2) Windows Server 2012 R2 Server01
Server (VM 3) Windows Server 2012 R2 Server02
In addition to the computers, you also require the software listed in Table 1-2 to complete Lab 1.
Table 1-2
Software Required for Lab 1
Software Location
ISO of Windows Server 2012 R2 installation disk
\\rwdc01\Software
Windows Assessment and Deployment Kit (ADK) for Windows 8.1
\\rwdc01\Software
Autounattend.xml file \\rwdc01\Software
Windows8.1-KB2901549-x64.msu \\rwdc01\Software
Lab 1 student worksheet Lab01_worksheet.docx (provided by instructor)
Working with Lab WorksheetsEach lab in this manual requires that you answer questions, take screen shots, and perform other activities that you will document in a worksheet named for the lab, such as Lab01_worksheet.docx. You will find these worksheets on the book companion site. It is recommended that you use a USB flash drive to store your worksheets so you can submit them to your instructor for review. As you perform the exercises in each lab, open the appropriate worksheet file using Word, fill in the required information, and save the file to your flash drive.
After completing this lab, you will be able to:
70-411 Administering Windows Server 2012 R2
Install and configure Windows Deployment Services
Deploy Windows servers using Windows Deployment Services
Create and modify an Autounattend.xml file using Windows System Image Manager
Update an offline Windows image
Estimated lab time: 100 minutes
Exercise 1.1Installing and Configuring Windows Deployment Services
Overview In this exercise, you will first create a new server and then install and configure Windows Deployment Services so that you can quickly install Windows servers in the future.
Mindset You need to first install and configure a WDS server. You then need to add at least one boot and install image. You will then need to perform a PXE boot with the WDS boot image and perform the installation with the install image.
Completion time 10 minutes
1. Log into Server01 as contoso\administrator with the password of Pa$$w0rd.
2. On Server01, using the Server Manager console, click Manage > Add Roles and Features.
3. On the Add Roles and Features Wizard page, click Next.
4. On the Select installation type page, click Next.
5. On the Select destination server page, click Next.
6. Scroll down and select Windows Deployment Services.
7. On the Add Roles and Features Wizard page, click Add Features and then click Next.
8. On the Select features page, click Next.
9. On the WDS page, click Next.
10. On the Select role services page, make sure that the Deployment Server option is selected and the Transport Server option is selected and then click Next.
11. On the Confirm installation selections page, click Install.
70-411 Administering Windows Server 2012 R2
12. When the installation finishes, click Close.
13. In Server Manager, click Tools > Windows Deployment Services. The Windows Deployment Services console opens.
14. Expand Servers. Right-click the Server01.contoso.com and choose Configure Server.
15. On the Before You Begin page, click Next.
16. On the Install Options page, select the Integrated with Active Directory option and then click Next.
17. On the Remote Installation Folder Location page, take a screen shot by pressing Alt+Prt Scr and then paste it into your Lab01_worksheet file in the page provided by pressing Ctrl+V.
18. On the Remote Installation page, answer Questions 1 and 2 that follow and then click Next.
Question 1
What is the default path for the remote installation folder?
C:\RemoteInstall
70-411 Administering Windows Server 2012 R2
Question 2
Why is the default location not recommended?
For performance and reliability, the default location should be set to use a separate volume to store WDS images.
19. When the system volume warning appears, click Yes.
20. On the PXE Server Initial Settings page, select Respond to all client computers (known and unknown) and then click Next.
21. When the task is completed, click to deselect Add images to the server now.
22. Take a screen shot of the Windows Deployment Services Configuration Wizard page by pressing Alt+Prt Scr and then paste it into your Lab01_worksheet file in the page provided by pressing Ctrl+V.
23. Click Finish.
End of exercise. Leave Windows Deployment Services open for the next exercise.
70-411 Administering Windows Server 2012 R2
Exercise 1.2 Creating Windows Deployment ImagesOverview In this exercise, you will prepare images (boot images and install
images) that will be used to deploy Windows.
Mindset WDS uses two images to deploy Windows. The boot image is used to boot the computer, so that the installation can be started. The install image is used to perform the actual Windows installation.
Completion time 20 minutes
1. On Server01, create a C:\Software folder.
2. On Server01, right-click the Start button, choose Run, type \\RWDC01\Software, and then click OK.
3. Copy the ISO file for the Windows Server 2012 R2 installation disk, the autounattend.xml file, and the Windows8.1-KB2901549-x64.msu file to the C:\Software folder.
4. On Server01, open the C:\Software folder.
5. Right-click the ISO file for Windows Server 2012 R2 installation disk and choose Mount.
Question 3
What drive letter was the ISO file mounted to?
The E:\ Drive
6. From the Windows Deployment Services console, expand Servers and then expand Server01.contoso.com so that you can see the Install Images folder and the Boot Images folder.
7. To add a boot image, right-click the Boot Images folder and choose Add Boot Image. The Add Image Wizard opens.
Question 4
What is the boot image based on?
A .wim (windows image file)
8. Browse to the E:\Sources folder, click the boot.wim file, and then click Open. Click Next.
9. On the Image Metadata page, click Next.
70-411 Administering Windows Server 2012 R2
10. On the Summary page, click Next.
11. When the image is added to the server, click Finish.
12. Right-click the Install Images folder and choose Add Install Image. The Add Image Wizard page opens.
13. On the Image Group page, the Create an image group named option is selected. Click Next.
14. Browse to the E:\Sources folder, double-click the install.wim file and then click Next.
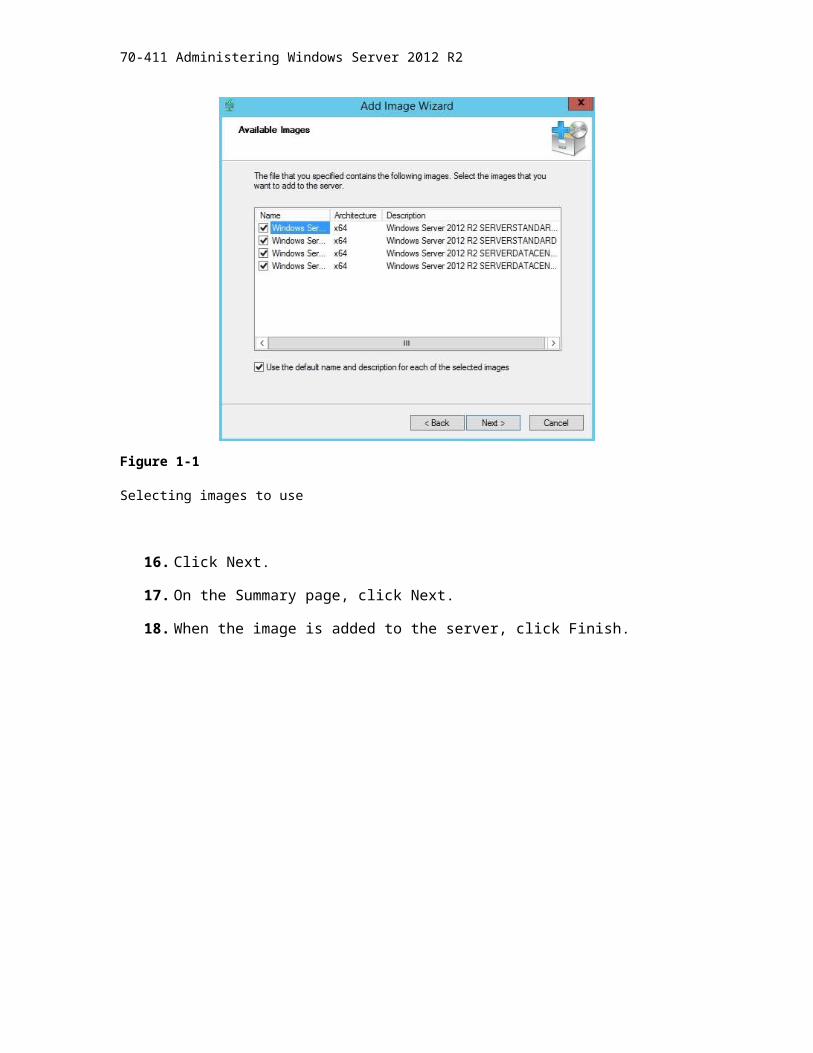
15. On the Available Images page (as shown on Figure 1-1), deselect the following images:
Windows Server 2012 R2 SERVERSTANDARDCORE Windows Server 2012 R2 SERVERDATACENTERCORE Windows Server 2012 R2 SERVERDATACENTERBe sure that Windows Server 2012 R2 SERVERSTANDARD (second option) is selected.
Figure 1-1
Selecting images to use
16. Click Next.
70-411 Administering Windows Server 2012 R2
17. On the Summary page, click Next.
18. When the image is added to the server, click Finish.
19. Take a screen shot of the Windows Deployment Services Add Image Wizard page by pressing Alt+Prt Scr and then paste it into your Lab 1 worksheet file in the page provided by pressing Ctrl+V.
End of exercise. You can leave any windows open for the next exercise.
Exercise 1.3 Generating an Autounattend.xml FileOverview You are ready to deploy Windows. However, if you install using
WDS, you will have to interact with the Windows installation program by choosing applicable settings during the installation process. To help automate the installation, in this exercise, you will create an Autoattend.xml file and then check a provided Autounattend.xml file.
Mindset You need to create an unattended xml file and then you need to configure the WDS server to use the Unattended.xml file. When
70-411 Administering Windows Server 2012 R2
configuring the unattended file, it must be configured to include each prompt during the installation process.
Completion time 20 minutes
1. On Server01, right-click the Start button, choose Run, type \\rwdc01\software, and then click OK. Copy the ADK folder to the C:\Software folder.
2. Open the E:\Sources folder and copy the install.wim file to the C:\Software folder.
3. On Server01, open the C:\Software\ADK folder.
Question 5
What are the two ways to create or modify an unattend xml file?
Using the System Image Manager (SIM) or you can create it by using a text editor.
4. To start the installation of the Windows Assessment and Deployment Kit, double-click adksetup.exe. If you are prompted to confirm that you want to run this file, click Run.
5. On the Specify Location page, leave the default settings and then click Next.
6. When you are prompted to join the Customer Experience Improvement Program (CEIP), click Next.
7. On the License Agreement page, click Accept.
8. Deselect all options except Deployment Tools and Windows Preinstallation Environment (Windows PE). Click Install.
9. When the installation is complete, click Close.
10. Using Windows Explorer, create a folder named C:\DistFold.
11. Click Start > Apps (down arrow) > Windows System Image Manager. The Windows System Image Manager console opens.
12. Click Tools > Create Distribution Share. The Create Distribution Share dialog box opens.
13. In the Folder name text box, type C:\DistFold folder and then click Open.
14. Click File > Select Windows Image. The Select a Windows Image dialog box opens.
70-411 Administering Windows Server 2012 R2
15. In the File name text box, type C:\Software\install.wim and then click Open. Click Windows Server 2012 R2 SERVERSTANDARD and then click OK.
16. If you are prompted to create a catalog file, click Yes.
17. Click File > New Answer File. The answer file elements display in the Answer File pane.
18. In the Windows Image pane, expand Components. Scroll down and right-click amd64_Microsoft-Windows-International-Core-WinPE_6. 3.9600. 16384_neutral and choose Add Setting to Pass 1 windowsPE, as shown in Figure 1-2.
Figure 1-2
Adding Settings to Pass 1 WindowsPE
The Microsoft-Windows-International-Core-WinPE component specifies the default language, locale, and other international settings to use during Windows Setup or Windows Deployment Services installations.
70-411 Administering Windows Server 2012 R2
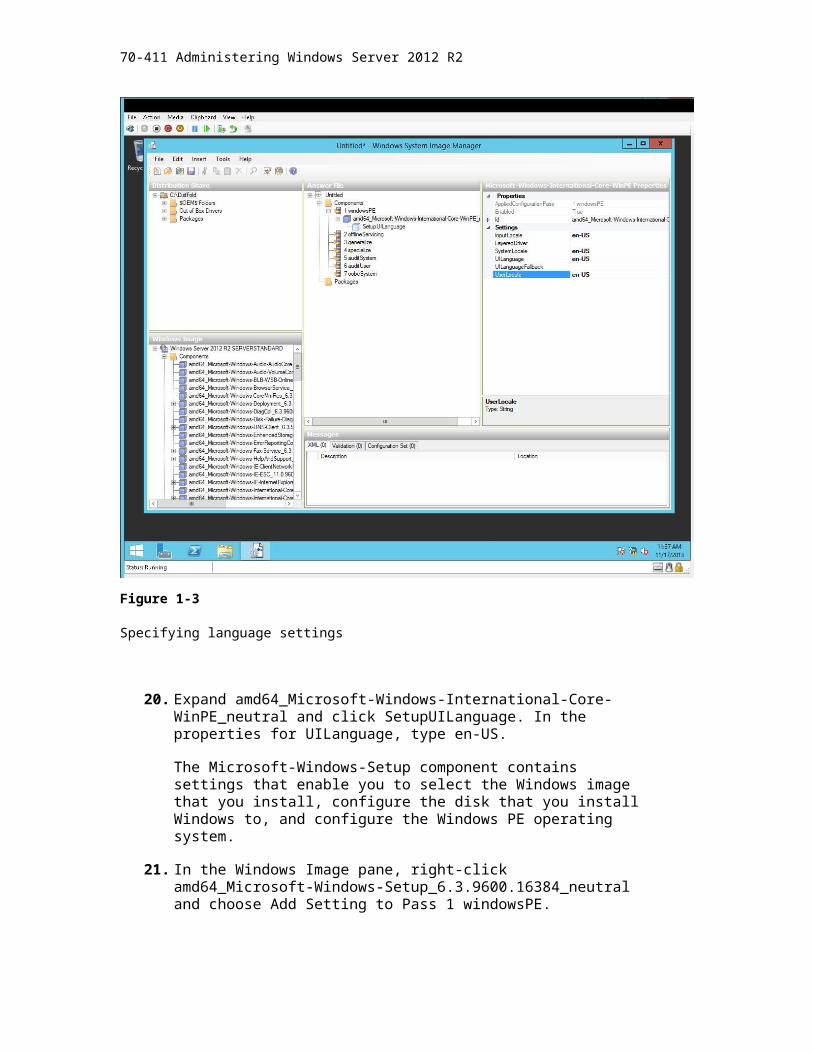
19. In the Answer File pane, click amd64_Microsoft-Windows-International-Core-WinPE_neutral. Complete the language settings (as shown in Figure 1-3) as appropriate, such as en-US.
Figure 1-3
Specifying language settings
20. Expand amd64_Microsoft-Windows-International-Core-WinPE_neutral and click SetupUILanguage. In the properties for UILanguage, type en-US.
The Microsoft-Windows-Setup component contains settings that enable you to select the Windows image that you install, configure the disk that you install Windows to, and configure the Windows PE operating system.
21. In the Windows Image pane, right-click amd64_Microsoft-Windows-Setup_6.3.9600.16384_neutral and choose Add Setting to Pass 1 windowsPE.
22. In the Answer File pane, expand amd64_Microsoft-Windows-Setup_neutral, right-click DiskConfiguration, and choose Insert New Disk.
70-411 Administering Windows Server 2012 R2
23. In the Answer File pane, expand amd64_Microsoft-Windows-Setup_neutral, expand Disk, right-click CreatePartitions, and choose Insert New CreatePartition.
24. Specify an order of 1, a size of 350, and a type of Primary.
25. Right-click CreatePartitions and choose Insert New CreatePartition. For the new CreatePartition entry, change the Extend property to true and set Order to 2. Don’t configure the size.
26. In the Answer File pane, click Disk. Change the DiskID to 0 and change WillWipeDisk to true.
27. Right-click ModifyPartitions and choose Insert New ModifyPartition. Then specify the following:
Active is true
Format is NTFS
Label is Boot
Order is 1
PartitionID is 1
28. Add a second ModifyPartitions and configure as the following:
Format is NTFS
Label is System
Order is 2
PartitionID is 2
29. In the Answer File pane, scroll down to and expand ImageInstall and then expand OSImage. Right-click InstallFrom and choose Insert New Metadata. Configure the metadata as shown Figure 1-4.
70-411 Administering Windows Server 2012 R2
Figure 1-4
Specifying which image to use
30. Click InstallTo and then configure the DiskID to 0 and PartitionID to 2.
31. In the Answer File pane, click UserData and then specify the following:
Accept EULA is true
FullName is Student
Organization is Classroom
32. Expand UserData and then click ProductKey. If you have a key, type the Windows key in the Key box. For this lab, leave it blank.
Microsoft-Windows-Shell-Setup contains elements and settings that control how the shell of the Windows operating system is installed on a destination computer.
70-411 Administering Windows Server 2012 R2
33. In the Windows Image pane, right-click amd64_Microsoft-Windows-Shell-Setup_6.3.9600.16404_neutral and choose Add Settings to Pass 4 specialize.
34. In the Answer File pane, click amd64_Microsoft-Windows-Shell-Setup_neutral. Here, you also enter the ProductKey. In addition, you can specify the ComputerName and TimeZone. For now, leave these blank.
35. In the Windows Image pane, right-click amd64_Microsoft-Windows-Shell-Setup_6.3.9600.16404_neutral and choose Add Settings to Pass 7 oobeSystem.
36. In the Answer File pane, under 7 oobeSystem/amd64_Microsoft-Windows-Shell-Setup_neutral, configure the following settings:
Registered Organization is Classroom
Registered Owner is Student
37. Click File > Save Answer File.
38. Browse to the C:\Software folder. In the File name text box, type Unattend (Temp).xml and then click Save.
39. Take a screen shot of the Unattend (Temp).xml - Windows System Image Manager screen by pressing Alt+Prt Scr and then paste it into your Lab 1 worksheet file in the page provided by pressing Ctrl+V.
70-411 Administering Windows Server 2012 R2
40. Click File > Close Answer File.
41. On Server01, using Windows System Image Manager, click File > Open Answer File. In the C:\Software folder, click the autounattend.xml file and then click Open.
Question 6
You downloaded an autounattend.xml file from the Internet and you made some changes. What is the best way to validate the file?
The best and recommended way to validate the file is to use SIM. Click Tools > Validate Answer File in the Windows System Image Manager
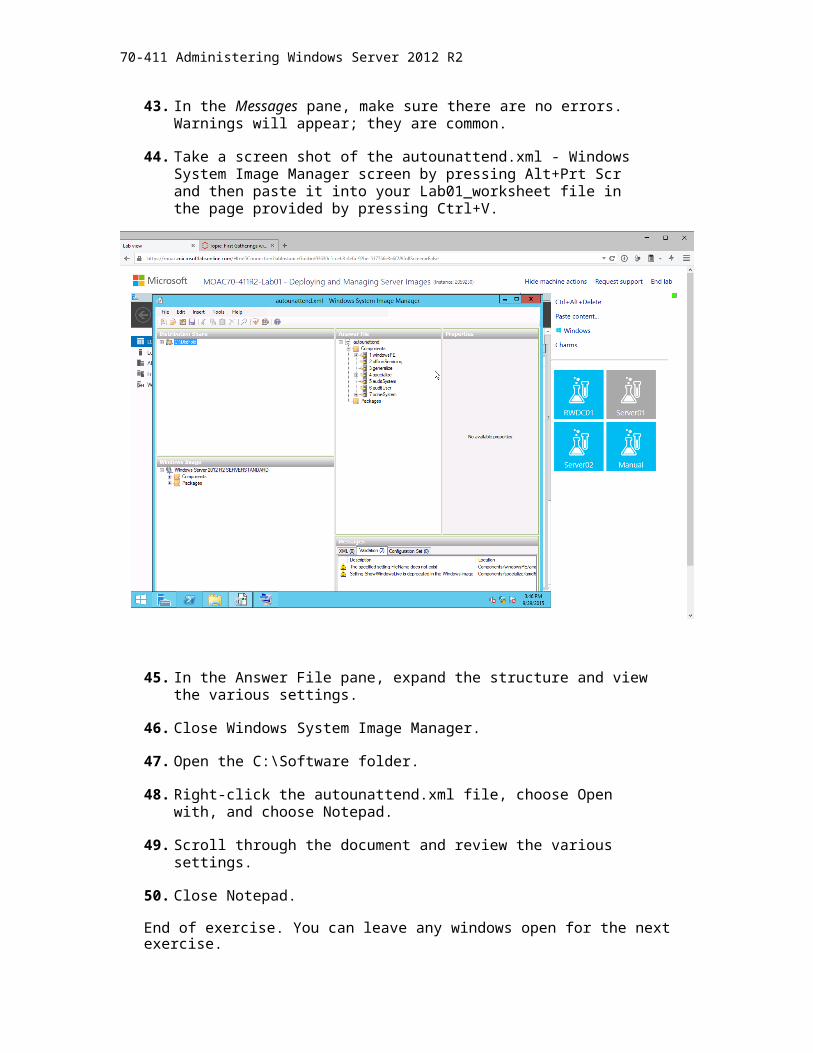
42. Click Tools > Validate Answer File.
43. In the Messages pane, make sure there are no errors. Warnings will appear; they are common.
44. Take a screen shot of the autounattend.xml - Windows System Image Manager screen by pressing Alt+Prt Scr and then paste it into your Lab01_worksheet file in the page provided by pressing Ctrl+V.
70-411 Administering Windows Server 2012 R2
45. In the Answer File pane, expand the structure and view the various settings.
46. Close Windows System Image Manager.
47. Open the C:\Software folder.
48. Right-click the autounattend.xml file, choose Open with, and choose Notepad.
49. Scroll through the document and review the various settings.
50. Close Notepad.
End of exercise. You can leave any windows open for the next exercise.
Exercise 1.4 Deploying a Windows ImageOverview In this exercise, you will deploy a Windows image from the WDS
server while using the autounattended.xml file.
Mindset By default, if you deploy Windows images using WDS, you will still be performing a manual installation over the network if you do not specify and configure autounattend.xml files.
Completion time 10 minutes
1. On Server01, copy the C:\Software\autounattend.xml file to the C:\RemoteInstall folder.
2. If Windows Deployment Services is not open, on the Server Manager console, click Tools > Windows Deployment Services. The Windows Deployment Services console opens.
3. Expand Servers. Then right-click Server01.contoso.com and choose Properties. The server’s Properties dialog box opens.
4. Click the Client tab.
5. Select the Enable unattended installation check box. Click the Browse button corresponding to the x64 architecture, browse to C:\RemoteInstall\autounattend.xml, and then click Open. When completed, the Client tab should look like Figure 1-5.
Question 7
If you have a mix of 32-bit and 64-bit versions of Windows, which architectures should you add a unattended installation file for?
You will need to add an unattended installation file for the x86
70-411 Administering Windows Server 2012 R2
and x64 architectures.
Figure 1-5
Configuring the Client settings
6. Click OK to close the server’s Properties sheet.
7. Expand the Server01.contoso.com node, expand the Install Images node, and then click ImageGroup1.
8. Right-click the Windows Server 2012 R2 SERVERSTANDARD image and choose Properties. The Image Properties dialog box opens.
9. Click to select the Allow image to install in unattended mode check box.
11. Browse to C:\RemoteInstall\autounattend.xml, click Open, and then click OK.
70-411 Administering Windows Server 2012 R2
12. Take a screen shot of the Image Properties dialog box by pressing Alt+Prt Scr and then paste it into your Lab01_worksheet file in the page provided by pressing Ctrl+V.
13. Click OK to accept your settings and to close the Image Properties dialog box.
You are now ready to perform a PXE boot on a new server and perform an installation of Windows Server 2012 R2.
End of exercise. Close Windows Deployment Services and any Explorer folders that are open.
Exercise 1.5 Updating a Windows ImageOverview From time to time, you need to patch a Windows image. In this
execise, you will add a Windows update package to the install.wim file.
Mindset When you update an installation image using the Dism command, the Windows package must be a cabinet (.cab) file or a Windows Update Stand-alone Installation (.msu) file.
Completion time 20 minutes
70-411 Administering Windows Server 2012 R2
1. On Server01, create a C:\Package folder.
2. Create a C:\Offline folder.
3. Right-click the Start button and choose Command Prompt (Admin).
4. To change to the C:\Software folder, execute the following command at the command prompt:
cd\Software
5. To extract the cab files from the Windows8.1-KB2901549-x64.msu file, execute the following command:
Windows8.1-KB2901549-x64.msu /extract:C:\Package
6. Using Windows Explorer, view the content of the C:\Package folder.
7. Take a screen shot of the Package folder by pressing Alt+Prt Scr and then paste it into your Lab01_worksheet file in the page provided by pressing Ctrl+V.
8. Open Windows Deployment Services.
9. Navigate to the ImageGroup1 node, which is under Install Images.
70-411 Administering Windows Server 2012 R2
10. In the ImageGroup1 pane, right-click the Windows Server 2012 R2 SERVERSTANDARD image and choose Disable.
11. Right-click the Windows Server 2012 R2 SERVERSTANDARD image and choose Export Image.
12. In the Export As dialog box, in the File name text box, type C:\Software\install.wim and then click Save. If you are prompted to confirm that you want to continue, click Yes.
Question 8
What is the first step that you have to perform before you can add a Windows package to a WIM file?
You need to mount the .wim file first.
13. In the Administrator: Command Prompt window, to mount the c:\Software\install.wim file, execute the following command:
16. To commit the changes to the WIM file, execute the following command:
dism /Commit-Wim /MountDir:C:\Offline
17. To dismount the WIM file, execute the following command:
dism /Unmount-Wim /MountDir:C:\Offline /commit
18. Take a screen shot of the Command Prompt by pressing Alt+Prt Scr and then paste it into your Lab01_worksheet file in the page provided by pressing Ctrl+V.
70-411 Administering Windows Server 2012 R2
19. Go back to Windows Deployment Services console.
20. Right-click the Windows Server 2012 R2 SERVERSTANDARD image and choose Replace Image.
21. On the Replace Install Image Wizard page, use the Browse button to browse to the C:\Software\install.wim file and then click Next.
22. On the Available Images page, click Next.
23. On the Image Metadata page, click Next.
24. On the Summary page, click Next.
25. When the image is replaced, click Finish. The image is automatically enabled.
26. Close the Administrator: Command Prompt window and close Windows Deployment Services.
End of exercise. Close all windows.
LAB REVIEW QUESTIONS
Completion time 10 minutes
70-411 Administering Windows Server 2012 R2
1. In Exercise 1.1, what program did you use to install WDS?
2. In Exercise 1.2, what two images did you have to add to the WDS server to handle the Windows installation?
3. In Exercise 1.3, what program did you use to create the unattend file?
4. In Exercise 1.3, what program should you use to verify a unattend file?
5. In Exercise 1.3, how was the Windows System Image Manager installed?
6. In Exercise 1.4, what two places did you have to define an unattend file?
7. In Exercise 1.5, what program did you use to modify a Windows image?
Lab Challenge Adding Drivers to a Windows ImageOverview To complete this challenge, you must demonstrate how to add
drivers to a Windows image by writing the steps to complete the tasks described in the scenerio. Since the class servers do not have drivers to add, just write the steps as if the drivers actually existed.
Mindset Over the last couple of months, you have been using WDS to deploy Windows Server 2012 R2. Recently, you started to purchase new servers that require additional drivers that are not included with the Windows installation. You need to ensure that WDS will deploy these drivers. You need to explain how to add drivers to a Windows image.
Completion time 10 minutes
Write out the steps you performed to complete the challenge.
End of lab. You can log off or start a different lab. If you want to restart this lab, you’ll need to click the End Lab button in order for the lab to be reset.