Step 1: Set the Fan in the Framed Opening. Rotate Fan Blade and Check for 1/8" Blade Tip Clearance
included in the Parts Packageincluded in the Parts Package
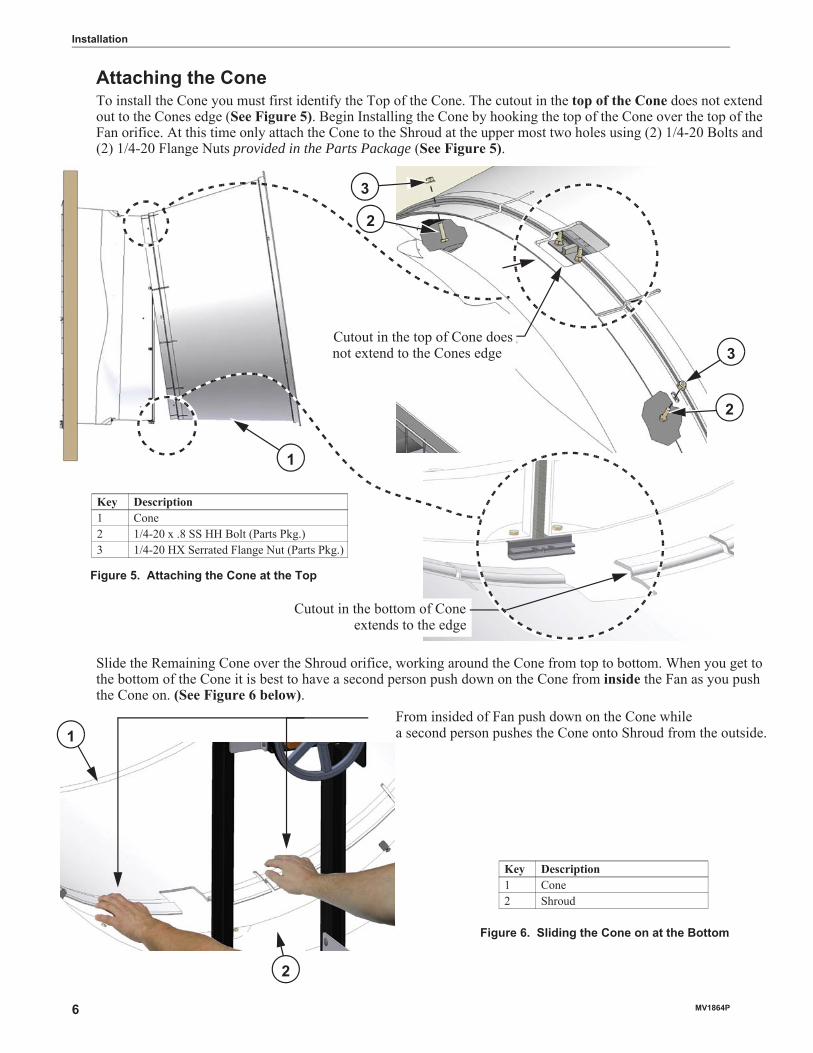
all included in the Parts Package,
Step 1: Fasten Fan to Wall at top (Use Screen
Step 2: Fasten Fan to Wall at Bottom and sides (Use Screen Clips)
Step 3: Fasten Fan to Wall at the Post Brackets
Step 1: Unhook the Door Springs
Step 3: Lift up the Door Step 4: Pull the Door out
Step 2: Remove Door Clip and Open the Doors
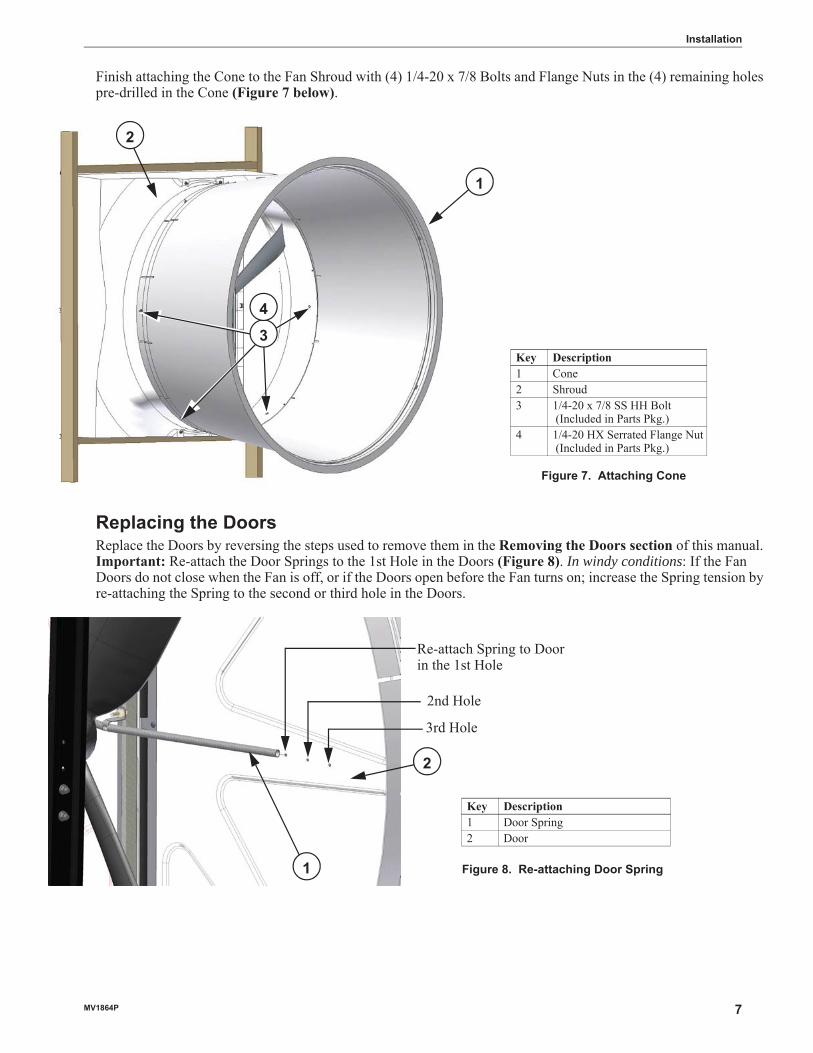
provided in the Parts Package
In windy conditions
Step 1: Insert Cable into hole in the Top Pivot Bracket
Step 2: Insert the Nylon Cable into Cable Bracket. Leave approx. 1" extend past the Bracket. Step 3: Attach Cable Bracket to Cone
with 1/4-20 Nut and Bolt
Step 1: Slide Screen under Screen Clips
Step 2: Rotate bottom Screen Clip
Step 3: Rotate remaining Screen Clips
per chart
Some jurisdictions prohibit limitations on implied warranties and/or the exclusion or limitation of such damages, so these limitations and exclusions may not apply to you. This warranty gives the original purchaser specific legal rights. You may also have other rights based upon your specific jurisdiction.


![2021-2024 US Prescriptions Final · vsrqvruv ru dq\ rwkhu rujdql]dwlrq ru riilfldo lqyroyhg zlwk wkh hyhqw 7klv lv frpprqo\ uhihuuhg wr dv dq µlqghpqlilfdwlrq¶ ru µkrog kdupohvv¶](https://static.documents.pub/doc/80x56/6129d4efb88ceb13074ae242/2021-2024-us-prescriptions-final-vsrqvruv-ru-dq-rwkhu-rujdqldwlrq-ru-riilfldo.jpg)


![BENEFITS OF D2F · zlwk dq (72 lqglfdwru dq hi¿flhqw dqg fohdu zd\ wr rswlfdoo\ ylvxdol]h wkdw doo xqlwv zhuh h[srvhg wr (72 vwhulol]dwlrq optimized use of resource d2f® surgxfwv](https://static.documents.pub/doc/80x56/611c743692919754f516b4b7/benefits-of-d2f-zlwk-dq-72-lqglfdwru-dq-hiflhqw-dqg-fohdu-zd-wr-rswlfdoo-ylvxdolh.jpg)


![CONCORSO DI IDEE Bamboo it rev CD 4 · 7kh dlp ri wkh frqwhvw lv wr ghvljq dq h[klelwlrq sdylolrq zklfk lv uhdol]hg zlwk d edperr vwuxfwxuh olnh *ox%dp wkdw lv dq hqylurqphqwdoo\](https://static.documents.pub/doc/80x56/5b4735ba7f8b9a40638bc9f9/concorso-di-idee-bamboo-it-rev-cd-4-7kh-dlp-ri-wkh-frqwhvw-lv-wr-ghvljq-dq-hklelwlrq.jpg)

