DECLARATION OF CONFORMITYWe, NOKIA CORPORATION, declare under our sole responsibility that the product CC70D is in conformity with the provisions of the following Council Directive: 1999/5/EC.A copy of the Declaration of Conformity can be found athttp://www.nokia.com/phones/declaration_of_conformity/.
Reproduction, transfer, distribution or storage of part or all of the contents in this document in any form without the prior written permission of Nokia is prohibited.
Nokia, Nokia Connecting People and Xpress-on are trademarks of Nokia Corporation. Other product and company names mentioned herein may be trademarks or tradenames of their respective owners.
Java is a trademark of Sun Microsystems, Inc.
The information contained in this user’s guide was written for the Nokia Xpress-on GPS shell product. Nokia operates a policy of ongoing development. Nokia reserves the right to make changes to any of the products described in this document without prior notice.
UNDER NO CIRCUMSTANCES SHALL NOKIA BE RESPONSIBLE FOR ANY LOSS OF DATA OR INCOME OR ANY SPECIAL, INCIDENTAL, CONSEQUENTIAL OR INDIRECT DAMAGES HOWSOEVER CAUSED.
THE CONTENTS OF THIS DOCUMENT ARE PROVIDED "AS IS". EXCEPT AS REQUIRED BY APPLICABLE LAW, NO WARRANTIES OF ANY KIND, EITHER EXPRESS OR IMPLIED, INCLUDING, BUT NOT LIMITED TO, THE IMPLIED WARRANTIES OF MERCHANTABILITY AND FITNESS FOR A PARTICULAR PURPOSE, ARE MADE IN RELATION TO THE ACCURACY, RELIABILITY OR CONTENTS OF THIS DOCUMENT. NOKIA RESERVES THE RIGHT TO REVISE THIS DOCUMENT OR WITHDRAW IT AT ANY TIME WITHOUT PRIOR NOTICE.
The availability of particular products may vary by region. Please check with the Nokia dealer nearest to you.
9232982 / Issue 1
9232982_5140_en_au.fm Page 1 Monday, June 7, 2004 11:00 AM
C o n t e n t s
2
Contents
FOR YOUR SAFETY............................................................................ 3
1. Overview........................................................................................ 4Introduction to GPS.......................................................................................................... 4GPS application and Travel guide application.......................................................... 5
2. Installation .................................................................................... 7Using the GPS receiver .................................................................................................... 8
3. Using the GPS application ........................................................... 9Viewing information about satellites.......................................................................... 9
Information shown on the Satellites screen.......................................................... 9Saving a waypoint (Mark position) ....................................................................... 10
Viewing information about the current trip .......................................................... 11Information shown on the Trip computer screen.............................................. 11Functions accessible by pressing the Options key ............................................ 12
Following a route ........................................................................................................... 13Managing waypoints .................................................................................................... 14
Receiving a waypoint as a text message............................................................. 15Managing and activating routes ............................................................................... 15Saving tracks and managing saved tracks.............................................................. 16Defining the settings .................................................................................................... 17
4. Using the Travel guide application ........................................... 18Activating and renewing a subscription to the map service............................. 18Viewing information about satellites....................................................................... 19Planning your route....................................................................................................... 19Managing the GPS address book............................................................................... 22
Receiving an address book entry as a text message ........................................ 23Following your route on a map.................................................................................. 23Using the map screen ................................................................................................... 24Defining the settings .................................................................................................... 24
Care and maintenance ................................................................... 25
9232982_5140_en_au.fm Page 2 Monday, June 7, 2004 11:00 AM
F O R Y O U R S A F E T Y
3
FOR YOUR SAFETY
Read these simple guidelines. Breaking the rules may be dangerous or illegal. Further detailed information is given in this manual.
QUALIFIED SERVICEOnly qualified personnel may repair this device.
WATER-RESISTANCEYour device is not water-resistant. Keep it dry.
CONNECTING TO OTHER DEVICESWhen connecting to any other device, read its user's guide for detailed safety instructions. Do not connect incompatible products.
9232982_5140_en_au.fm Page 3 Monday, June 7, 2004 11:00 AM
O v e r v i e w
4
1. Overview
The Nokia Xpress-onTM GPS shell allows you to use your Nokia 5140 phone for GPS (Global Positioning System) navigation in outdoor activities. The Nokia Xpress-on GPS shell includes a GPS receiver and two JavaTM applications called GPS and Travel guide.
This user’s guide describes how to install the upper and lower part of the Nokia Xpress-on GPS shell and how to use these two applications.
Read this user’s guide carefully before using the Nokia Xpress-on GPS shell. In addition to this user’s guide, read also the user’s guide of your Nokia 5140 phone, which provides important safety and maintenance information.
Check www.nokia.com/support or your local Nokia Web site for additional information, downloads and services related to your Nokia product.
■ Introduction to GPSGPS is a worldwide radio navigation system that includes 24 satellites and their ground stations that monitor the operation of the satellites.
A GPS terminal (such as the GPS receiver in the Nokia Xpress-on GPS shell) receives low-power radio signals from the satellites and measures the travel time of the signals. From the travel time, the GPS receiver can calculate its location to the accuracy of metres.
The GPS receiver in the Nokia Xpress-on GPS shell takes its power from the phone battery. Note that using the GPS receiver may drain the phone battery faster.
9232982_5140_en_au.fm Page 4 Monday, June 7, 2004 11:00 AM
O v e r v i e w
5
Note: The Global Positioning System
The Global Positioning System (GPS) is operated by the United States government, which is solely responsible for accuracy and maintenance of the system.
The accuracy of location data can be affected by adjustments to GPS satellites made by the United States government and is subject to change with the United States Department of Defense civil GPS policy and the Federal Radionavigation Plan. Accuracy can also be affected by poor satellite geometry.
Availability and quality of GPS signals may be affected by buildings and natural obstacles as well as weather conditions. The GPS receiver should only be used outdoors to allow reception of GPS signals.
Therefore, GPS should not be used for precise location measurement and you should never rely solely on location data from the GPS receiver. This GPS receiver does not support location of the phone by emergency operators.
■ GPS application and Travel guide applicationYou can operate the GPS receiver of the Nokia Xpress-on GPS shell using the GPS or Travel guide application.
GPS applicationThe GPS application is a GPS navigation tool that does not require a connection to the GSM phone network.
Travel guide applicationThe Travel guide application allows you to use a network service that shows your location on a map and allows you to plan your trip and find points of interests.
To use the Travel guide application, you need to be connected to the GSM phone network and to the GPRS (general packet radio service) or HSCSD (high speed circuit switched data) network service.
9232982_5140_en_au.fm Page 5 Monday, June 7, 2004 11:00 AM
O v e r v i e w
6
To use the GPRS or HSCSD network service, define the browser settings in the Services menu of your Nokia 5140 phone, and check which browser settings are currently used by the Travel guide application: press Menu in standby mode, and select Applications, Collection, and Select application, scroll to Travel guide, press Options, and select Connect via. For more information, see the user’s guide of your Nokia 5140 phone.
For the availability of the GPRS or HSCSD service, related fees, and appropriate settings, contact your network operator or service provider.
Note: Virtually all digital cartography is always inaccurate and incomplete to some extent. Never rely solely on the cartography provided for use in this device.
9232982_5140_en_au.fm Page 6 Monday, June 7, 2004 11:00 AM
I n s t a l l a t i o n
7
2. Installation
Note: Before removing the cover, always switch off the power and disconnect the charger and any other device. Avoid touching electronic components while changing the covers. Always store and use the device with the covers attached.
To install the shell and its two applications:
1. Install the upper and lower part of the Nokia Xpress-on GPS shell as instructed in the user’s guide of your Nokia 5140 phone.
The GPS receiver is located inside the lower part of the shell (blue area in the picture).
2. Switch on the phone.
The GPS receiver automatically installs the Cover browser application into the Collection submenu of the Applications menu in your phone.
3. To install the GPS or Travel guide application, select Cover browser in the Collection submenu, and select GPS or Travel guide. The application is added to the Collection submenu. You can install both applications if you like. The installation takes several minutes.
If you first install one of these applications but later want to install the other one as well, use the Cover browser application.
If you want to receive GPS waypoints as text messages, select Cover browser in the Collection submenu, and select the related application to install it.
9232982_5140_en_au.fm Page 7 Monday, June 7, 2004 11:00 AM
I n s t a l l a t i o n
8
4. When using the Nokia Xpress-on GPS shell for the first time or when it has not been used in the last 14 days, start the GPS or Travel guide application and keep the phone in place outdoors, with a clear view of the sky, for 15 to 30 minutes to acquire GPS almanac data from at least four satellites. The almanac data is basic information about the orbits of the GPS satellites. This information is required for GPS navigation.
Getting a GPS connection after this initial connection may take from a couple of seconds up to several minutes. Availability and quality of GPS signals may be affected by buildings and natural obstacles as well as weather conditions.
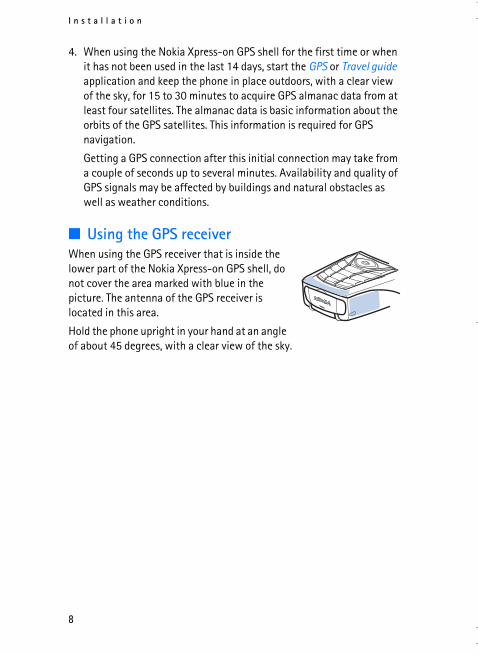
■ Using the GPS receiverWhen using the GPS receiver that is inside the lower part of the Nokia Xpress-on GPS shell, do not cover the area marked with blue in the picture. The antenna of the GPS receiver is located in this area.
Hold the phone upright in your hand at an angle of about 45 degrees, with a clear view of the sky.
9232982_5140_en_au.fm Page 8 Monday, June 7, 2004 11:00 AM
U s i n g t h e G P S a p p l i c a t i o n
9
3. Using the GPS application
To use the GPS application, press Menu in standby mode, and select Applications, Collection, and Select application. Scroll to GPS, and press Open or . Scroll to the main screen that you want to use, and press Select.
The GPS application includes the following main screens: Satellites, Trip computer, Route guidance, Waypoints, Routes, Tracking, and Settings.
The screen name is shown at the top of the screen. The screens of the GPS application and their functions are described in this chapter.
You can exit the application by pressing .
■ Viewing information about satellitesThe Satellites screen shows the following information: date, time, geographical coordinates of your current location, status of the GPS receiver, available satellites, and GPS accuracy.
Note that getting a GPS connection may take from a couple of seconds up to several minutes. Availability and quality of GPS signals may be affected by buildings and natural obstacles as well as weather conditions.
Information shown on the Satellites screen• The date and time fields show the current date and time that the GPS
receiver has received from the GPS satellites. The date and time are shown in GMT (Greenwich Mean Time) format.
• The latitude and longitude fields below the date and time fields show your current location as geographical coordinates in WGS84 format (WGS84 is a geographical coordinate system). The correct coordinates are shown only if the GPS receiver is receiving the needed positioning information from GPS satellites.
9232982_5140_en_au.fm Page 9 Monday, June 7, 2004 11:00 AM
U s i n g t h e G P S a p p l i c a t i o n
10
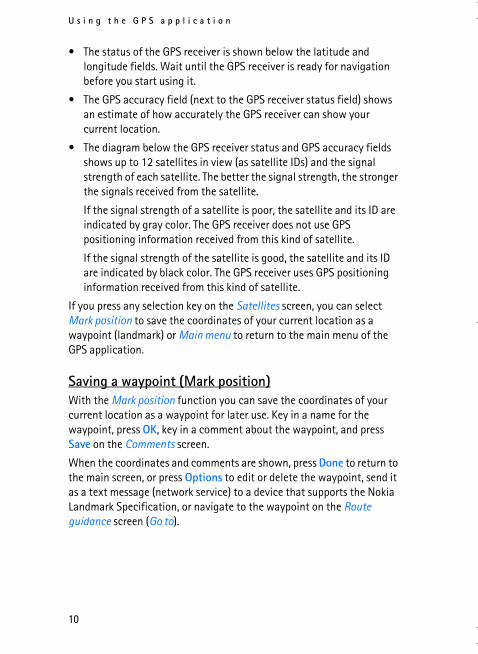
• The status of the GPS receiver is shown below the latitude and longitude fields. Wait until the GPS receiver is ready for navigation before you start using it.
• The GPS accuracy field (next to the GPS receiver status field) shows an estimate of how accurately the GPS receiver can show your current location.
• The diagram below the GPS receiver status and GPS accuracy fields shows up to 12 satellites in view (as satellite IDs) and the signal strength of each satellite. The better the signal strength, the stronger the signals received from the satellite.
If the signal strength of a satellite is poor, the satellite and its ID are indicated by gray color. The GPS receiver does not use GPS positioning information received from this kind of satellite.
If the signal strength of the satellite is good, the satellite and its ID are indicated by black color. The GPS receiver uses GPS positioning information received from this kind of satellite.
If you press any selection key on the Satellites screen, you can select Mark position to save the coordinates of your current location as a waypoint (landmark) or Main menu to return to the main menu of the GPS application.
Saving a waypoint (Mark position)With the Mark position function you can save the coordinates of your current location as a waypoint for later use. Key in a name for the waypoint, press OK, key in a comment about the waypoint, and press Save on the Comments screen.
When the coordinates and comments are shown, press Done to return to the main screen, or press Options to edit or delete the waypoint, send it as a text message (network service) to a device that supports the Nokia Landmark Specification, or navigate to the waypoint on the Route guidance screen (Go to).
9232982_5140_en_au.fm Page 10 Monday, June 7, 2004 11:00 AM
U s i n g t h e G P S a p p l i c a t i o n
11
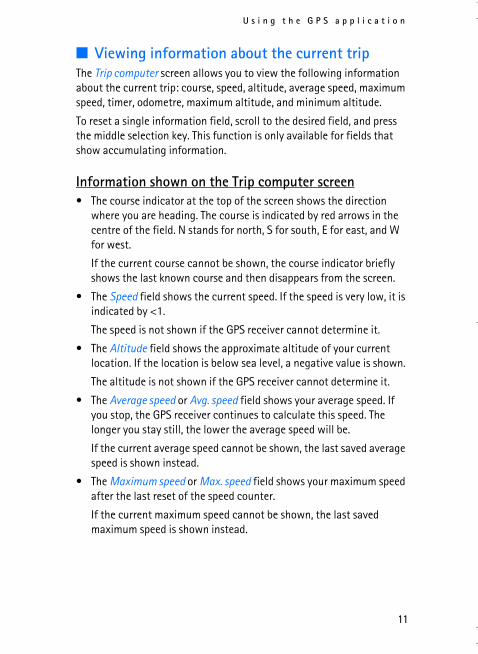
■ Viewing information about the current tripThe Trip computer screen allows you to view the following information about the current trip: course, speed, altitude, average speed, maximum speed, timer, odometre, maximum altitude, and minimum altitude.
To reset a single information field, scroll to the desired field, and press the middle selection key. This function is only available for fields that show accumulating information.
Information shown on the Trip computer screen• The course indicator at the top of the screen shows the direction
where you are heading. The course is indicated by red arrows in the centre of the field. N stands for north, S for south, E for east, and W for west.
If the current course cannot be shown, the course indicator briefly shows the last known course and then disappears from the screen.
• The Speed field shows the current speed. If the speed is very low, it is indicated by <1.
The speed is not shown if the GPS receiver cannot determine it.
• The Altitude field shows the approximate altitude of your current location. If the location is below sea level, a negative value is shown.
The altitude is not shown if the GPS receiver cannot determine it.
• The Average speed or Avg. speed field shows your average speed. If you stop, the GPS receiver continues to calculate this speed. The longer you stay still, the lower the average speed will be.
If the current average speed cannot be shown, the last saved average speed is shown instead.
• The Maximum speed or Max. speed field shows your maximum speed after the last reset of the speed counter.
If the current maximum speed cannot be shown, the last saved maximum speed is shown instead.
9232982_5140_en_au.fm Page 11 Monday, June 7, 2004 11:00 AM
U s i n g t h e G P S a p p l i c a t i o n
12
• The Timer field shows the time that has elapsed since the last reset of the timer. The timer continues to run even if the GPS receiver cannot receive signals from the GPS satellites.
The timer is reset if you exit the GPS application.
• The Odometre field shows the distance that you have covered since the last reset of the odometre.
If the current distance cannot be shown, the last saved distance is shown instead.
• The Maximum altitude or Max. altitude field shows the altitude of your highest location since the last reset of the altitude meter.
If the current maximum altitude cannot be shown, the last saved maximum altitude is shown instead.
• The Minimum altitude or Min. altitude field shows the altitude of your lowest location since the last reset of the altitude meter.
If the current minimum altitude cannot be shown, the last saved minimum altitude is shown instead.
Functions accessible by pressing the Options keyIf you press Options on the Trip computer screen, you can select from the following functions:
• Change fields - You can define which functions are shown on the Trip computer screen. Scroll to the field whose function you want to change, press Select, scroll to the desired option, and press Select.
• Change view - You can define how many fields (2, 4, or 6) are shown on the Trip computer screen.
• Reset all - You can reset all the fields to their original values.
• Restore defaults - You can reset the Trip computer screen to its default view. The values on the Trip computer screen will not be reset.
• Mark position - You can save your current location as a waypoint. For more information, see Saving a waypoint (Mark position) on page 10.
9232982_5140_en_au.fm Page 12 Monday, June 7, 2004 11:00 AM
U s i n g t h e G P S a p p l i c a t i o n
13
■ Following a routeOn the Route guidance screen, you can follow the route that you have activated on the Routes screen or navigate to the waypoint that you have activated using the Go to option of the Mark position function (available on several screens).
The screen shows the following information: course, bearing, next waypoint, speed, and distance to the next waypoint.
• The blue course arrow indicates the direction where you are heading. The direction is indicated by N (north), S (south), E (east), and W (west).
The yellow bearing arrow indicates the direction where you should be heading to reach the next waypoint.
To reach the next waypoint, adjust your direction so that the two arrows point to the same direction.
If the GPS receiver cannot receive the needed positioning information from GPS satellites, the Next: and Dist. to next fields are empty, and a question mark is shown in the middle of the screen.
Tip: You can also use the Route guidance screen as a compass if you have not activated a route but the GPS receiver is receiving the needed positioning information from GPS satellites. In this case, the screen shows the current course and speed when you are on the move.
• The Next field shows the next waypoint. The phone shows a note when you are approaching or reaching the waypoint.
• The Speed field shows the current speed.
• The Dist. to next field shows the distance to the next waypoint.
If you press any selection key on the Route guidance screen, you can select Deactivate route if you do not want the Route guidance screen to show the bearing arrow and the next waypoint, or you can select Mark position to save your current location as a waypoint (see Saving a waypoint (Mark position) on page 10).
9232982_5140_en_au.fm Page 13 Monday, June 7, 2004 11:00 AM
U s i n g t h e G P S a p p l i c a t i o n
14
■ Managing waypointsOn the Waypoints screen you can view, search, add, and delete waypoints. The waypoints shown in this screen are also available in the Travel guide application.
• Find - You can search for previously saved waypoints by their distance to your location (Nearest) or by their name (By name).
If you selected Nearest, the GPS receiver shows the nearest waypoints and the distance of each waypoint to your current or last known location. If you selected By name, key in the first letters of the waypoint name, and press Find.
To view the coordinates of a found waypoint and the comments about it, scroll to the waypoint, and press Details. You can press Options to edit or delete the waypoint, send it as a text message (network service) to a device that supports the Nokia Landmark Specification, or navigate to the waypoint on the Route guidance screen (Go to).
• Add - You can save the coordinates of the current location as a waypoint (Current position) or define the coordinates manually (Manually).
If you selected Manually, key in a name for the waypoint, press OK, key in the coordinates in WGS84 format, press OK, key in a comment about the waypoint, and press Save.
When the coordinates and comment are shown, you can press Options, for example, to send the waypoint as a text message (network service) to a device that supports the Nokia Landmark Specification or navigate to the waypoint on the Route guidance screen (Go to).
• Delete - You can remove previously saved waypoints one by one or all at once. The waypoints are removed both from the GPS and Travel guide application.
• Memory status - You can view how much memory is available to save waypoints.
9232982_5140_en_au.fm Page 14 Monday, June 7, 2004 11:00 AM
U s i n g t h e G P S a p p l i c a t i o n
15
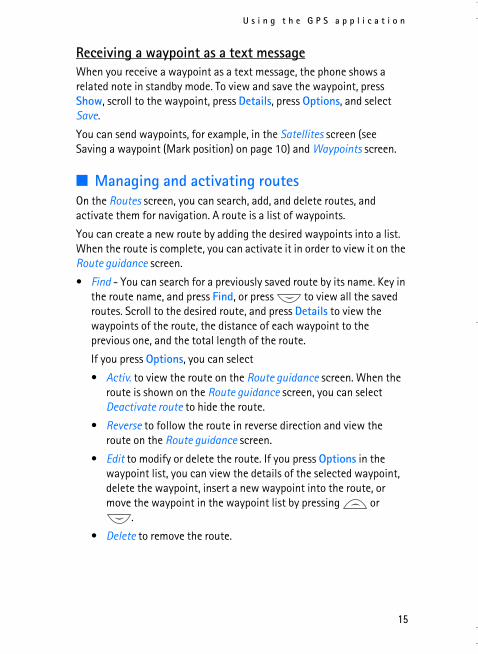
Receiving a waypoint as a text messageWhen you receive a waypoint as a text message, the phone shows a related note in standby mode. To view and save the waypoint, press Show, scroll to the waypoint, press Details, press Options, and select Save.
You can send waypoints, for example, in the Satellites screen (see Saving a waypoint (Mark position) on page 10) and Waypoints screen.
■ Managing and activating routesOn the Routes screen, you can search, add, and delete routes, and activate them for navigation. A route is a list of waypoints.
You can create a new route by adding the desired waypoints into a list. When the route is complete, you can activate it in order to view it on the Route guidance screen.
• Find - You can search for a previously saved route by its name. Key in the route name, and press Find, or press to view all the saved routes. Scroll to the desired route, and press Details to view the waypoints of the route, the distance of each waypoint to the previous one, and the total length of the route.
If you press Options, you can select
• Activ. to view the route on the Route guidance screen. When the route is shown on the Route guidance screen, you can select Deactivate route to hide the route.
• Reverse to follow the route in reverse direction and view the route on the Route guidance screen.
• Edit to modify or delete the route. If you press Options in the waypoint list, you can view the details of the selected waypoint, delete the waypoint, insert a new waypoint into the route, or move the waypoint in the waypoint list by pressing or
.
• Delete to remove the route.
9232982_5140_en_au.fm Page 15 Monday, June 7, 2004 11:00 AM
U s i n g t h e G P S a p p l i c a t i o n
16
• Add - You can create a new route. Scroll to the desired waypoint, and press Add to add it to the route. Repeat this with each waypoint that you want to add to the route. You can create a new waypoint using the New waypoint function at the end of the waypoint list.
When the route is complete, press Done. Edit the suggested route name (the first and last waypoint) if necessary, and press OK. Write a comment about the route, and press Save.
The waypoints of the route are shown. If you press Options, you can select from the same functions as when you press Options in the Find function.
• Delete - You can remove saved routes one by one or all at once. Deleting a route does not delete the waypoints that it includes.
• Memory status - You can view how much memory is available to save routes.
■ Saving tracks and managing saved tracksThe GPS application keeps a record of where you have been. On the Tracking screen, you can select from the following functions:
• Current track - You can follow the track (Return track), clear the track log and start the recording of a new track (Clear track), pause or resume the recording, save the recorded track, or view the status of the track log memory.
If you selected Return track, select whether to follow the track from the start to the end (To departure) or vice versa (To destination). The track is shown on the Route guidance screen, and the Return track function is replaced by Deactivate return. With the Deactivate return function, you can remove the track from the Route guidance screen and start the recording of a new track.
• Saved tracks - You can view previously saved tracks. If you press Options, you can follow the selected track (Return track) or delete the track.
• Tracking rate - You can select how often the GPS receiver saves the track information.
9232982_5140_en_au.fm Page 16 Monday, June 7, 2004 11:00 AM
U s i n g t h e G P S a p p l i c a t i o n
17
■ Defining the settingsOn the Settings screen, you can select the distance unit, speed unit, and altitude unit that are used in the GPS application. You can also set the backlight.
You can select from the following distance and speed units: Metric (kilometres and metres), Imperial (miles and yards), Nautical (nautical miles and yards).
You can select from the following altitude units: Metres, Feet.
You can set the backlight on until the application is closed or to be automatically switched off after 15 seconds. Note that the backlight consumes battery power.
9232982_5140_en_au.fm Page 17 Monday, June 7, 2004 11:00 AM
U s i n g t h e T r a v e l g u i d e a p p l i c a t i o n
18
4. Using the Travel guide application
To use the Travel guide application, press Menu in standby mode, and select Applications, Collection, and Select application. Scroll to Travel guide, and press Open or . Scroll to the main screen that you want to use, and press Select.
The Travel guide application includes the following main screens: Satellites, Route planning, Route guidance, Address book, and Settings.
The name of each screen is shown at the top of the screen. The screens of the Travel guide application and their functions are described in this chapter.
You can exit the application by pressing .
To set up the mobile Internet connection needed by the Travel guide application, see GPS application and Travel guide application on page 5.
■ Activating and renewing a subscription to the map service
When you start the Travel guide application for the first time, you are requested to activate a one-year subscription to the map service (network service) that is used with the Travel guide application.
Scroll to the region where you want to use the map service, and press Select. Confirm the subscription to the selected region by pressing Yes.
When the subscription expires, go to the Nokia Web site at www.softwaremarket.nokia.com, select the area related to the Nokia 5140 phone and the Nokia Xpress-on GPS shell, and apply for the activation code that allows you to renew the subscription. After you have obtained the activation code, open the Travel guide application, and select Settings, Subscription, and Subscription code. Key in the activation code, and press OK. The Travel guide application activates the subscription for the period and region that you selected.
Note that the map content (for example, the names of points of interest) provided by the map service (network service) may not be available in your local language.
9232982_5140_en_au.fm Page 18 Monday, June 7, 2004 11:00 AM
U s i n g t h e T r a v e l g u i d e a p p l i c a t i o n
19
■ Viewing information about satellitesThe Satellites screen shows the following information: date, time, geographical coordinates of your current location, status of the GPS receiver, available satellites, and GPS accuracy. For more information, see Viewing information about satellites on page 9.
If you press any selection key on the Satellites screen, you can select Mark position to save the coordinates of your current location as a waypoint (landmark), Map my position to view your location on a map, or Main menu to return to the main menu of the Travel guide application.
■ Planning your routeOn the Route planning screen, you can plan your route by specifying the departure point, intermediate points, and destination point.
You can also select which kind of routes the Travel guide application suggests you to reach your destination (Route calculation). Note that the routes suggested by the map service are mostly suitable for walking and cycling use. They are not meant for in-car use.
1. On the Route planning screen, scroll to From to add a departure point, Via points to add one or more intermediate points, or To to add a destination point, and press the middle selection key.
2. Add the desired points to the route as follows:
• To add your current position as a departure point, select Current position.
• To add an address as a departure or destination point, select Address. To add an address as an intermediate point, press Add, and select Address.
To select a country, key in the first letters of the country name, press Find, scroll to the country, and press OK.
9232982_5140_en_au.fm Page 19 Monday, June 7, 2004 11:00 AM
U s i n g t h e T r a v e l g u i d e a p p l i c a t i o n
20
To select a city, key in the first letters of the city name, or press for a list of cities that you have selected recently, and press
OK. Scroll to the city, and press OK to select it or press Options and select Display map to view a map of the city (see Using the map screen on page 24), Save to save the city in the address book of the Travel guide application, or More info to view the details of the city. Note that the availability of maps depends on the map service (network service).
To select a street, key in the first letter(s) of the desired street name, or press for a list of streets that you have selected recently, and press OK. Scroll to the desired street and press OK. If you do not want to search for a street, leave the Street screen empty and press OK.
After you have selected the street, you can define the house number and the intersecting streets of the desired location.
• To add a point of interest (for example, a library) as a departure or destination point, select Point of interest. To add a point of interest as an intermediate point, press Add, and select Point of interest. Scroll to the desired search option (Category, Sub category, Search criteria, or Name) and press Edit to change its setting.
If you selected Category or Sub category, select the category (for example Community) or the sub category (for example Library) to which the point of interest belongs.
If you selected Search criteria, select Nearest to search for a point of interest that is near your current location, or select Near address to search for a point of interest that is near a specific address or listed in the address book of the Travel guide application.
If you selected Name, key in the name of the point of interest that you search for.
To search for the points of interest, press Options and select Search.
9232982_5140_en_au.fm Page 20 Monday, June 7, 2004 11:00 AM
U s i n g t h e T r a v e l g u i d e a p p l i c a t i o n
21
When the found points of interest and their distance to your current location are shown, scroll to the desired point of interest and press OK to add it to the route, or press Options and select one of the following functions:
• Details - Shows more information about the point of interest. If you press Options, you can select, for example, Display map to view the point of interest on a map (see Using the map screen on page 24), or if you press Call, you can make a call to the point of interest if its phone number is included in its details.
• Save - You can save the point of interest in the address book of the Travel guide application.
• To add a departure or destination point from the address book of the Travel guide application, select Address book and the desired address. To add an intermediate point from the address book, press Add, and select Address book and the desired address.
3. If you added a departure or destination point in step 2, proceed to step 4.
If you added an intermediate point in step 2, do as follows: When the intermediate point is shown on the Via points screen, press Done to add the point to the route, or press Options to add a new intermediate point, delete the intermediate point, or move it in the list of intermediate points.
4. When you have added all the points that you want, press Options, and select one of the following functions:
• Navigate - You can view your location and follow the route on a map on the Route guidance screen. For more information, see Following your route on a map on page 23.
• Overview map - Shows a map of the whole route if you have defined a departure and destination point. For using this function, see Using the map screen on page 24.
• Display map - Shows a map of the departure or destination point. This function is available only if you have selected the From or To field on the Route planning screen.
9232982_5140_en_au.fm Page 21 Monday, June 7, 2004 11:00 AM
U s i n g t h e T r a v e l g u i d e a p p l i c a t i o n
22
• Save - You can save the address in the address book of the Travel guide application. This function is available only if you have selected the From or To field on the Route planning screen.
• More info - You can view the details of the selected address, intersection, or point of interest. When the details of a point of interest are shown, you can press Options, for example, to view the address on a map.
This function is available only if you have selected the From or To field on the Route planning screen.
■ Managing the GPS address bookThe Travel guide application includes an address book where you can save addresses, intersections, and points of interest. On the Address book screen, you can manage the contents of this address book. The address book is also used by the GPS application.
You can also save your current location in the address book using the Mark position function available on several screens of the GPS and Travel guide application.
• Find - You can search for the address book entries by their distance to your location (Nearest) or by their name (By name). If you selected By name, key in the first letters of the address book entry, and press Find.
When a list of search results is shown, scroll to the desired entry, and press Details. You can press Options, for example, to set the address as the departure or destination point, view the address on a map (see Using the map screen on page 24), send the address as a text message (network service), or make a call to the phone number included in the address.
• Add - You can save in the address book your current location or the desired address or point of interest.
• Delete - You can remove entries from the address book one by one or all at once.
• Memory status - You can view how much memory is available for the address book.
9232982_5140_en_au.fm Page 22 Monday, June 7, 2004 11:00 AM
U s i n g t h e T r a v e l g u i d e a p p l i c a t i o n
23
Receiving an address book entry as a text messageWhen you receive an address book entry as a text message, the phone shows a related note in standby mode. To view and save the entry, press Show, scroll to the entry, press Details, press Options, and select Save.
You can send addresses on the Address book screen.
■ Following your route on a mapThe Route guidance screen shows the route that you have activated with the Navigate option on the Route planning screen and guides you to the destination.
The name of the current street in your route is shown at the bottom of the screen and the name of the next street at the top of the screen. Your current location is indicated by . The route is shown in red.
If the GPS receiver cannot receive the needed positioning information from GPS satellites, the map of your last known location is shown, the location symbol is hidden, and a question mark is shown in the middle of the screen.
If you scroll the map manually using the scroll key, you can set the application to update the map automatically according to your location by pressing the middle selection key.
If you press any selection key on the Route guidance screen when the GPS receiver is receiving the needed positioning information from GPS satellites, you can:
• view your itinerary as a list of turns (Itinerary). The distance of each turn to the previous one is shown in brackets.
• select the desired zoom level (Zoom).
• set the application to update the map automatically according to your location (Follow my position).
• save the coordinates of your current location as a waypoint for later use. For more information, see Saving a waypoint (Mark position) on page 10.
9232982_5140_en_au.fm Page 23 Monday, June 7, 2004 11:00 AM
U s i n g t h e T r a v e l g u i d e a p p l i c a t i o n
24
• deactivate the current route. The route is deleted.
You can scroll the map using the scroll key. You can set the application to update the map automatically according to your location by pressing the middle selection key.
■ Using the map screenYou can access the map screen, for example, using the Display map option that is available on several screens. The map screen shows the location of the selected address, intersection, or point of interest on a map. You can scroll the map using the scroll key.
If you press Options on the map screen, you can select the zoom level for the map or select the desired point on the map.
■ Defining the settingsOn the Settings screen, you can check the status of your subscription to the map service (network service) or activate the subscription, if necessary, select the units of measurement for the Travel guide application, and set the backlight.
You can select from the following distance and speed units: Metric (kilometres and metres), Imperial (miles and yards), Nautical (nautical miles and yards).
You can select from the following altitude units: Metres, Feet.
You can set the backlight on until the application is closed or to be automatically switched off after 15 seconds. Note that the backlight consumes battery power.
9232982_5140_en_au.fm Page 24 Monday, June 7, 2004 11:00 AM
C a r e a n d m a i n t e n a n c e
25
Care and maintenance
Your device is a product of superior design and craftsmanship and should be treated with care. The suggestions below will help you protect your warranty coverage.
• Keep all enhancements out of the reach of small children.
• Keep the device dry. Precipitation, humidity and all types of liquids or moisture can contain minerals that will corrode electronic circuits.
• Do not use or store the device in dusty, dirty areas. Its moving parts and electronic components can be damaged.
• Do not store the device in hot areas. High temperatures can shorten the life of electronic devices, damage batteries, and warp or melt certain plastics.
• Do not store the device in cold areas. When the device returns to its normal temperature, moisture can form inside the device and damage electronic circuit boards.
• Do not drop, knock, or shake the device.
• Do not use harsh chemicals, cleaning solvents, or strong detergents to clean the device.
• Do not paint the device. Paint can clog the moving parts and prevent proper operation.
If the device is not working properly, take it to your nearest authorized service facility for service.
9232982_5140_en_au.fm Page 25 Monday, June 7, 2004 11:00 AM
C a r e a n d m a i n t e n a n c e
26
9232982_5140_en_au.fm Page 26 Monday, June 7, 2004 11:00 AM


![Index [editorial.mcpressonline.com]editorial.mcpressonline.com/web/mcpdf.nsf/wdocs/5140/$FILE/5140… · DB2 Database Manager configuration file and, 65 encryption and, 67 Generic](https://static.documents.pub/doc/80x56/5f075fca7e708231d41caa9a/index-file5140-db2-database-manager-configuration-file-and-65-encryption.jpg)


