9440300990 Rev M 123 DECS-250 BESTCOMSPlus ® Software BESTCOMSPlus ® Software General Description BESTCOMSPlus ® is a Windows®-based, PC application that provides a user-friendly, graphical user interface (GUI) for use with Basler Electric communicating products. The name BESTCOMSPlus is an acronym that stands for Basler Electric Software Tool for Communications, Operations, Maintenance, and Settings. BESTCOMSPlus provides the user with a point-and-click means to set and monitor the DECS-250. The capabilities of BESTCOMSPlus make the configuration of one or several DECS-250 controllers fast and efficient. A primary advantage of BESTCOMSPlus is that a settings scheme can be created, saved as a file, and then uploaded to the DECS-250 at the user’s convenience. BESTCOMSPlus uses plugins allowing the user to manage several different Basler Electric products. The DECS-250 plugin must be activated before use. The plugin can be activated automatically by connecting to a DECS-250 or activated manually by requesting an activation key from Basler Electric. The DECS-250 plugin opens inside the BESTCOMSPlus main shell. The same default logic scheme that is shipped with the DECS-250 is brought into BESTCOMSPlus by downloading settings and logic from the DECS-250. This gives the user the option of developing a custom setting file by modifying the default logic scheme or by building a unique scheme from scratch. BESTlogic™Plus Programmable Logic is used to program DECS-250 logic for protection elements, inputs, outputs, alarms, etc. This is accomplished by the drag-and-drop method. The user can drag elements, components, inputs, and outputs onto the program grid and make connections between them to create the desired logic scheme. BESTCOMSPlus also allows for downloading industry-standard COMTRADE files for analysis of stored oscillography data. Detailed analysis of the oscillography files can be accomplished using BESTwave™ software. Figure 111 illustrates the typical user interface components of the DECS-250 plugin with BESTCOMSPlus. Figure 111. Typical User Interface Components
Transcript
9440300990 Rev M 123
DECS-250 BESTCOMSPlus® Software
BESTCOMSPlus® Software General Description
BESTCOMSPlus® is a Windows®-based, PC application that provides a user-friendly, graphical user interface (GUI) for use with Basler Electric communicating products. The name BESTCOMSPlus is an acronym that stands for Basler Electric Software Tool for Communications, Operations, Maintenance, and Settings.
BESTCOMSPlus provides the user with a point-and-click means to set and monitor the DECS-250. The capabilities of BESTCOMSPlus make the configuration of one or several DECS-250 controllers fast and efficient. A primary advantage of BESTCOMSPlus is that a settings scheme can be created, saved as a file, and then uploaded to the DECS-250 at the user’s convenience.
BESTCOMSPlus uses plugins allowing the user to manage several different Basler Electric products. The DECS-250 plugin must be activated before use. The plugin can be activated automatically by connecting to a DECS-250 or activated manually by requesting an activation key from Basler Electric.
The DECS-250 plugin opens inside the BESTCOMSPlus main shell. The same default logic scheme that is shipped with the DECS-250 is brought into BESTCOMSPlus by downloading settings and logic from the DECS-250. This gives the user the option of developing a custom setting file by modifying the default logic scheme or by building a unique scheme from scratch.
BESTlogic™Plus Programmable Logic is used to program DECS-250 logic for protection elements, inputs, outputs, alarms, etc. This is accomplished by the drag-and-drop method. The user can drag elements, components, inputs, and outputs onto the program grid and make connections between them to create the desired logic scheme.
BESTCOMSPlus also allows for downloading industry-standard COMTRADE files for analysis of stored oscillography data. Detailed analysis of the oscillography files can be accomplished using BESTwave™ software.
Figure 111 illustrates the typical user interface components of the DECS-250 plugin with BESTCOMSPlus.
Figure 111. Typical User Interface Components
124 9440300990 Rev M
BESTCOMSPlus® Software DECS-250
Installation
BESTCOMSPlus® software is built on the Microsoft® .NET Framework. The setup utility that installs BESTCOMSPlus on your PC also installs the DECS-250 plugin and the required version of .NET Framework (if not already installed). BESTCOMSPlus operates with systems using Windows® XP 32-bit SP3, Windows Vista 32-bit SP1 (all editions), Windows 7 32-bit (all editions), Windows 7 64-bit (all editions), Windows 8, and Windows 10. Microsoft Internet Explorer 5.01 or later must be installed on your PC before installing BESTCOMSPlus. System recommendations for the .NET Framework and BESTCOMSPlus are listed in Table 9.
Table 9. System Recommendations for BESTCOMSPlus and the .NET Framework
System Type Component Recommendation 32/64 bit Processor 2.0 GHz 32/64 bit RAM 1 GB minimum, 2 GB recommended
32 bit Hard Drive 100 MB (if .NET Framework is already installed on PC.) 950 MB (if .NET Framework is not already installed on PC.)
64 bit Hard Drive 100 MB (if .NET Framework is already installed on PC.) 2.1 GB (if .NET Framework is not already installed on PC.)
To install and run BESTCOMSPlus, a Windows user must have Administrator rights. A Windows user with limited rights might not be permitted to save files in certain folders.
Install BESTCOMSPlus®
Note Do not connect a USB cable until setup completes successfully. Connecting a USB cable before setup is complete may result in unwanted or unexpected errors.
1. Insert the BESTCOMSPlus CD-ROM into the PC CD-ROM drive. 2. When the BESTCOMSPlus Setup and Documentation CD menu appears, click the Install button for
the BESTCOMSPlus application. The setup utility installs BESTCOMSPlus, the .NET Framework (if not already installed), the USB driver, and the DECS-250 plugin for BESTCOMSPlus on your PC.
When BESTCOMSPlus installation is complete, a Basler Electric folder is added to the Windows programs menu. This folder is accessed by clicking the Windows Start button and then accessing the Basler Electric folder in the Programs menu. The Basler Electric folder contains an icon that starts BESTCOMSPlus when clicked.
Activation of the DECS-250 Plugin for BESTCOMSPlus®
The DECS-250 plugin is a module that runs inside the BESTCOMSPlus shell. The DECS-250 plugin contains specific operational and logic settings for only the DECS-250. Uploading settings to the DECS-250 is possible only after activating the DECS-250 plugin.
The DECS-250 plugin can be activated automatically or manually. Automatic activation is achieved by using a USB cable to establish communication between the DECS-250 and BESTCOMSPlus. Manual activation is initiated by contacting Basler Electric for an activation key and entering the key into BESTCOMSPlus. Manual activation is useful if you want to create a settings file prior to receiving your digital excitation system. Note that if a DECS-250 is not connected, you will not be able to configure certain Ethernet settings. Ethernet settings can be changed only when an active USB or Ethernet connection is present. Refer to Manual Activation of DECS-250 Plugin.
9440300990 Rev M 125
DECS-250 BESTCOMSPlus® Software
Connect a USB Cable The USB driver was copied to your PC during BESTCOMSPlus® installation and is installed automatically after powering the DECS-250. USB driver installation progress is shown in the Windows Taskbar area. Windows will notify you when installation is complete.
Note
In some instances, the Found New Hardware Wizard will prompt you for the USB driver. If this happens, direct the wizard to the following folder:
If the USB driver does not install properly, refer to the Maintenance chapter for a troubleshooting procedure.
Connect a USB cable between the PC and your DECS-250. Apply operating power (per style chart in the Introduction chapter) to the DECS-250 at rear terminals A, B, and C. Wait until the boot sequence is complete.
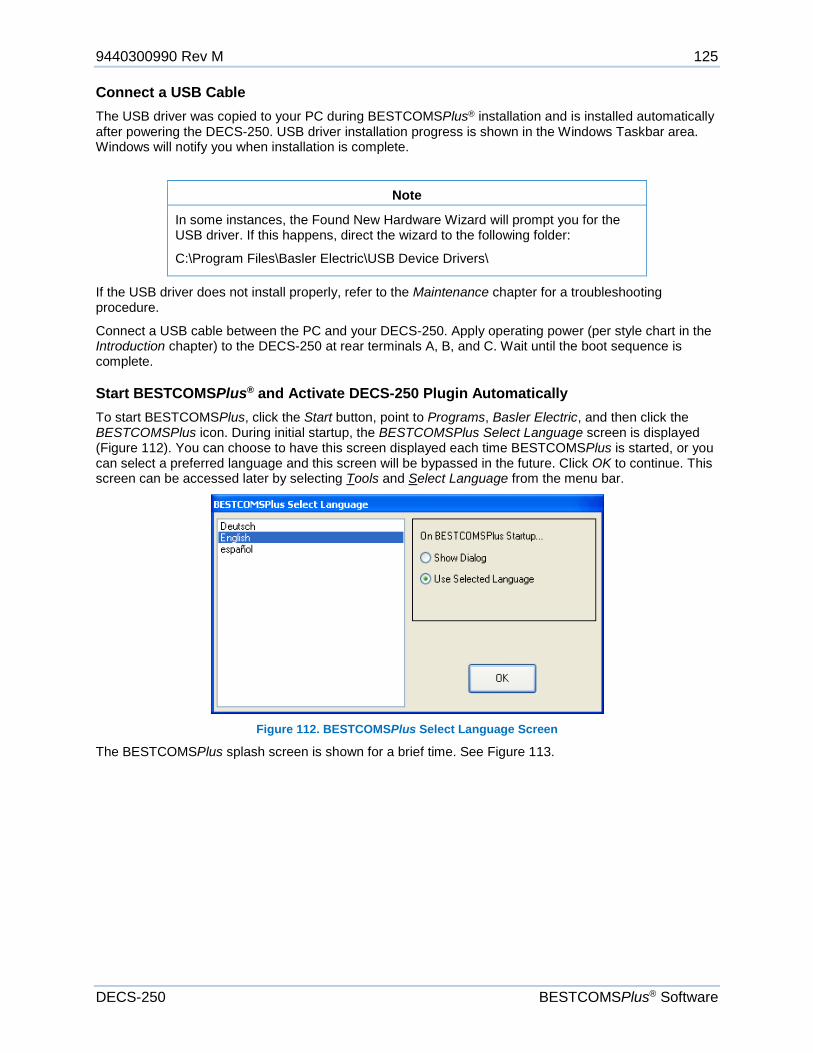
Start BESTCOMSPlus® and Activate DECS-250 Plugin Automatically To start BESTCOMSPlus, click the Start button, point to Programs, Basler Electric, and then click the BESTCOMSPlus icon. During initial startup, the BESTCOMSPlus Select Language screen is displayed (Figure 112). You can choose to have this screen displayed each time BESTCOMSPlus is started, or you can select a preferred language and this screen will be bypassed in the future. Click OK to continue. This screen can be accessed later by selecting Tools and Select Language from the menu bar.
Figure 112. BESTCOMSPlus Select Language Screen
The BESTCOMSPlus splash screen is shown for a brief time. See Figure 113.
126 9440300990 Rev M
BESTCOMSPlus® Software DECS-250
Figure 113. BESTCOMSPlus Splash Screen
The BESTCOMSPlus® platform window opens. Select New Connection from the Communication pull-down menu and select DECS-250. See Figure 114. The DECS-250 plugin is activated automatically after connecting to a DECS-250.
Figure 114. Communication Pull-Down Menu
The DECS-250 Connection screen shown in Figure 115 appears. Select USB Connection and click Connect.
9440300990 Rev M 127
DECS-250 BESTCOMSPlus® Software
Figure 115. DECS-250 Connection Screen
The DECS-250 plugin opens indicating that activation was successful. You can now configure the DECS-250 communication ports and other DECS-250 settings.
Manual Activation of the DECS-250 Plugin Manual activation of the DECS-250 plugin is required only if your initial use of BESTCOMSPlus® will be on a PC that is not connected to a DECS-250. Manual activation is described in the following paragraphs.
Requesting an Activation Key
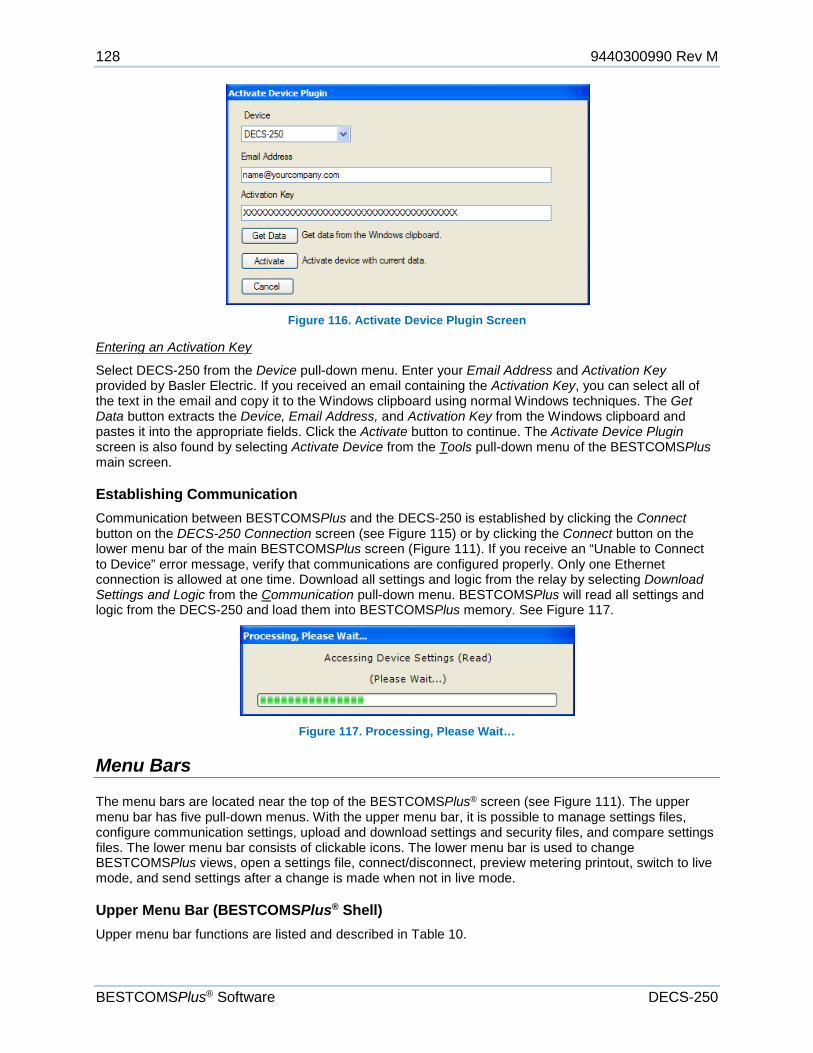
When initially running the DECS-250 plugin, the Activate Device Plugin pop-up appears. You must contact Basler Electric for an activation key before you can activate the DECS-250 plugin. You can request an activation key through email or the Basler Electric website. Click either the Website or Email button. Click the Activate button when you are ready to enter the activation key you received from Basler Electric. The Activate Device Plugin pop-up appears. Refer to Figure 116.
128 9440300990 Rev M
BESTCOMSPlus® Software DECS-250
Figure 116. Activate Device Plugin Screen
Entering an Activation Key
Select DECS-250 from the Device pull-down menu. Enter your Email Address and Activation Key provided by Basler Electric. If you received an email containing the Activation Key, you can select all of the text in the email and copy it to the Windows clipboard using normal Windows techniques. The Get Data button extracts the Device, Email Address, and Activation Key from the Windows clipboard and pastes it into the appropriate fields. Click the Activate button to continue. The Activate Device Plugin screen is also found by selecting Activate Device from the Tools pull-down menu of the BESTCOMSPlus main screen.
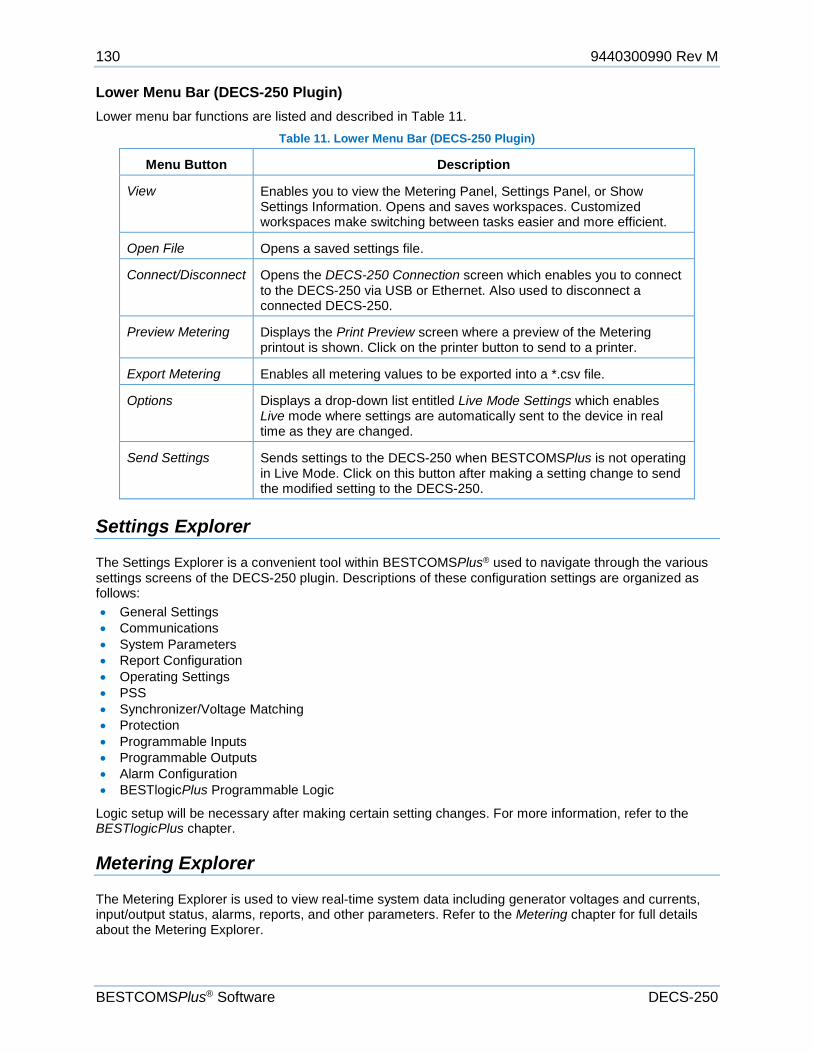
Establishing Communication Communication between BESTCOMSPlus and the DECS-250 is established by clicking the Connect button on the DECS-250 Connection screen (see Figure 115) or by clicking the Connect button on the lower menu bar of the main BESTCOMSPlus screen (Figure 111). If you receive an “Unable to Connect to Device” error message, verify that communications are configured properly. Only one Ethernet connection is allowed at one time. Download all settings and logic from the relay by selecting Download Settings and Logic from the Communication pull-down menu. BESTCOMSPlus will read all settings and logic from the DECS-250 and load them into BESTCOMSPlus memory. See Figure 117.
Figure 117. Processing, Please Wait…
Menu Bars
The menu bars are located near the top of the BESTCOMSPlus® screen (see Figure 111). The upper menu bar has five pull-down menus. With the upper menu bar, it is possible to manage settings files, configure communication settings, upload and download settings and security files, and compare settings files. The lower menu bar consists of clickable icons. The lower menu bar is used to change BESTCOMSPlus views, open a settings file, connect/disconnect, preview metering printout, switch to live mode, and send settings after a change is made when not in live mode.
Upper Menu Bar (BESTCOMSPlus® Shell) Upper menu bar functions are listed and described in Table 10.
9440300990 Rev M 129
DECS-250 BESTCOMSPlus® Software
Table 10. Upper Menu Bar (BESTCOMSPlus® Shell)
Menu Item Description File
New Create a new settings file Open Open an existing settings file Open File As Text Generic file viewer for *.csv, *,txt, etc. files Close Close settings file Save Save settings file Save As Save settings file with a different name Export To File Save settings as a *.csv file Print Open the print menu Properties View properties of a settings file History View history of a settings file Recent Files Open a previously opened file Exit Close BESTCOMSPlus program
Communication New Connection Choose new device or DECS-250 Close Connection Close communication between BESTCOMSPlus and
DECS-250 Download Settings and Logic from Device
Download operational and logic settings from the device
Upload Settings and Logic to Device Upload operational and logic settings to the device Upload Settings to Device Upload operational settings to the device Upload Logic to Device Upload logic settings to the device Download Security from Device Download security settings from the device Upload Security to Device Upload security settings to the device Configure Ethernet settings Upload Device Files Upload firmware to the device
Tools Check for Updates Check for BESTCOMSPlus® updates via the internet Select Language Select BESTCOMSPlus language Activate Device Activate the DECS-250 plugin Set File Password Password protect a settings file Compare Settings Files Compare two settings files Auto Export Metering Exports metering data on a user-defined interval Event Log - View View the BESTCOMSPlus event log Event Log - Verbose Logging Enable enhanced logging (used for troubleshooting)
Window Cascade All Cascade all windows Tile Tile horizontally or vertically Maximize All Maximize all windows
Help Check for Updates Check for BESTCOMSPlus® updates via the internet Check for Update Settings Enable or change automatic checking for update About View general, detailed build, and system information
130 9440300990 Rev M
BESTCOMSPlus® Software DECS-250
Lower Menu Bar (DECS-250 Plugin) Lower menu bar functions are listed and described in Table 11.
Table 11. Lower Menu Bar (DECS-250 Plugin)
Menu Button Description
View Enables you to view the Metering Panel, Settings Panel, or Show Settings Information. Opens and saves workspaces. Customized workspaces make switching between tasks easier and more efficient.
Open File Opens a saved settings file.
Connect/Disconnect Opens the DECS-250 Connection screen which enables you to connect to the DECS-250 via USB or Ethernet. Also used to disconnect a connected DECS-250.
Preview Metering Displays the Print Preview screen where a preview of the Metering printout is shown. Click on the printer button to send to a printer.
Export Metering Enables all metering values to be exported into a *.csv file.
Options Displays a drop-down list entitled Live Mode Settings which enables Live mode where settings are automatically sent to the device in real time as they are changed.
Send Settings Sends settings to the DECS-250 when BESTCOMSPlus is not operating in Live Mode. Click on this button after making a setting change to send the modified setting to the DECS-250.
Settings Explorer
The Settings Explorer is a convenient tool within BESTCOMSPlus® used to navigate through the various settings screens of the DECS-250 plugin. Descriptions of these configuration settings are organized as follows: • General Settings • Communications • System Parameters • Report Configuration • Operating Settings • PSS • Synchronizer/Voltage Matching • Protection • Programmable Inputs • Programmable Outputs • Alarm Configuration • BESTlogicPlus Programmable Logic
Logic setup will be necessary after making certain setting changes. For more information, refer to the BESTlogicPlus chapter.
Metering Explorer
The Metering Explorer is used to view real-time system data including generator voltages and currents, input/output status, alarms, reports, and other parameters. Refer to the Metering chapter for full details about the Metering Explorer.
9440300990 Rev M 131
DECS-250 BESTCOMSPlus® Software
Settings File Management
A settings file contains all DECS-250 settings including logic. A settings file assumes a file extension of “∗.bstx”. It is possible to save the logic only as a separate logic library file on the BESTlogicPlus Programmable Logic screen. This function is helpful when similar logic is required for several devices. A logic library file assumes a file extension of “∗.bslx”. It is important to note that settings and logic can be uploaded to the device separately or together, but are always downloaded together. For more information on logic files, refer to the BESTlogicPlus chapter.
Opening a Settings File To open a DECS-250 settings file with BESTCOMSPlus, pull down the File menu and choose Open. The Open dialog box appears. This dialog box allows you to use normal Windows techniques to select the file that you want to open. Select the file and choose Open. You can also open a file by clicking on the Open File button on the lower menu bar. If connected to a device, you will be asked to upload the settings and logic from the file to the current device. If you choose Yes, the settings displayed in BESTCOMSPlus instance will be overwritten with the settings of the opened file.
Saving a Settings File Select Save or Save As from the File pull-down menu. A dialog box pops up allowing you to enter a filename and location to save the file. Select the Save button to complete the save.
Upload Settings and/or Logic to Device To upload a settings file to the DECS-250, open the file or create a new file through BESTCOMSPlus. Then pull down the Communication menu and select Upload Settings and Logic to Device. If you want to upload operational settings without logic, select Upload Settings to Device. If you want to upload logic without operational settings, select Upload Logic to Device. You are prompted to enter the username and password. The default username is “A” and the default password is “A”. If the username and password are correct, the upload begins and the progress bar is shown.
Download Settings and Logic from Device To download settings and logic from the DECS-250, pull down the Communication menu and select Download Settings and Logic from Device. If the settings in BESTCOMSPlus® have changed, a dialog box will open asking if you want to save the current settings changes. You can choose Yes or No. After you have taken the required action to save or discard the current settings, downloading begins. BESTCOMSPlus reads all settings and logic from the DECS-250 and loads them into BESTCOMSPlus memory. See Figure 118.
Figure 118. Processing, Please Wait…
Printing a Settings File To view a preview of the settings printout, select Print from the File pull-down menu. To print the settings, select the printer icon in the upper left corner of the Print Preview screen.
Comparing Settings Files BESTCOMSPlus has the ability to compare two settings files. To compare files, pull down the Tools menu and select Compare Settings Files. The BESTCOMSPlus Settings Compare Setup dialog box appears (Figure 119). Select the location of the first file under Left Settings Source and select the location of the second file under Right Settings Source. If you are comparing a settings file located on your PC hard
132 9440300990 Rev M
BESTCOMSPlus® Software DECS-250
drive or portable media, click the folder button and navigate to the file. If you want to compare settings downloaded from a unit, click the Select Unit button to set up the communication port. Click the Compare button to compare the selected settings files.
Figure 119. BESTCOMSPlus Settings Compare Setup
A dialog box will appear and notify you if any differences were found. The BESTCOMSPlus® Settings Compare dialog box (Figure 120) is displayed where you can view all settings (Show All Settings), view only the differences (Show Settings Differences), view all logic (Show All Logic Paths), or view only logic differences (Show Logic Path Differences). Select Close when finished.
Figure 120. BESTCOMSPlus® Settings Compare
Automatic Metering Export
The auto export metering function automatically exports metering data over a user-defined period when a DECS-250 connection is active. The user specifies the Number of Exports and the Interval between each
9440300990 Rev M 133
DECS-250 BESTCOMSPlus® Software
export. Enter a filename for the metering data and a folder in which to save. The first export is performed immediately after clicking the Start button. Click the Filter button to select specific metering screens. Figure 121 illustrates the Auto Export Metering screen.
Figure 121. Auto Export Metering Screen
Firmware Updates
Future enhancements to the DECS-250 functionality may require a firmware update. Because default settings are loaded when DECS-250 firmware is updated, your settings should be saved in a file prior to upgrading firmware.
Warning!
Before performing any maintenance procedures, remove the DECS-250 from service. Refer to the appropriate site schematics to ensure that all steps have been taken to properly and completely de-energize the DECS-250.
134 9440300990 Rev M
BESTCOMSPlus® Software DECS-250
Caution – Settings will be lost! Default settings will be loaded into the DECS-250, reports and events will be cleared, and the DECS-250 will reboot when firmware is updated. BESTCOMSPlus® can be used to download settings and save the settings in a file so that they can be restored after updating firmware. Refer to Settings File Management for help with saving a settings file.
Note The latest version of BESTCOMSPlus software should be downloaded from the Basler Electric website and installed before performing a firmware upgrade.
A device package contains firmware for the DECS-250, the optional Contact Expansion Module (CEM-2020), and the optional Analog Expansion Module (AEM-2020). Embedded firmware is the operating program that controls the actions of the DECS-250. The DECS-250 stores firmware in nonvolatile flash memory that can be reprogrammed through the communication ports. It is not necessary to replace EPROM chips when updating the firmware with a newer version.
The DECS-250 can be used in conjunction with CEM-2020 or AEM-2020 expansion modules which expand the DECS-250 capabilities. When upgrading the firmware in any component of this system, the firmware in ALL of the components of the system should be upgraded to ensure compatibility of communications between the components.
Caution The order in which the components are upgraded is critical. Assuming a system of a DECS-250 and expansion module(s) is in a state where the DECS-250 is communicating with the system expansion module(s), the expansion module must be upgraded before the DECS-250. This is necessary because the DECS-250 must be able to communicate with the expansion module(s) before the DECS-250 can send firmware to it. If the DECS-250 were upgraded first, and the new firmware included a change to the expansion module communication protocol, it is possible that the expansion module(s) could no longer communicate with the upgraded DECS-250. Without communications between the DECS-250 and the expansion module(s), upgrading the expansion module(s) is not possible.
Note If power is lost or communication is interrupted during file transfer to the DECS-250, the firmware upload will fail. The device will continue to use the previous firmware. Once communication has been restored, the user must start the firmware upload again. Select Upload Device Files from the Communication pull-down menu and proceed normally.
Upgrading Firmware in Expansion Modules The following procedure is used to upgrade firmware in the expansion modules. This must be completed before upgrading firmware in the DECS-250. If no expansion module is present, proceed to Upgrading Firmware in the DECS-250.
9440300990 Rev M 135
DECS-250 BESTCOMSPlus® Software
1. Remove the DECS-250 from service. Refer to the appropriate site schematics to ensure that all steps have been taken to properly and completely de-energize the DECS-250.
2. Apply only control power to the DECS-250.
3. Enable the expansion modules that are present in the system. If they have not already been enabled, enable the expansion modules in the BESTCOMSPlus Settings Explorer, Communications, CAN Bus, Remote Module Setup screen.
4. Verify that the DECS-250 and the associated expansion modules are communicating. This can be verified by examining the alarm status using the Metering Explorer in BESTCOMSPlus or from the front panel by navigating to Metering > Status > Alarms. When communications are functioning properly, there should be no active AEM or CEM Communications Failure alarms.
5. Connect to the DECS-250 through the USB or Ethernet port if not already connected.
6. Select Upload Device Files from the Communication pull-down menu.
7. You will be asked to save the current settings file. Select Yes or No.
8. When the Basler Electric Device Package Uploader screen (Figure 122) appears, click on the Open button to browse for the device package you have received from Basler Electric. The Package Files along with File Details are listed. Place a check in the boxes next to the individual files you want to upload.
Figure 122. Basler Electric Device Package Uploader
9. Click on the Upload button and the Proceed with Device Upload screen will appear. Select Yes or No.
10. After selecting Yes, the DECS-250 Selection screen will appear. Select either USB or Ethernet.
11. After file(s) have been uploaded, click the Close button on the Basler Electric Device Package Uploader screen and disconnect communication to the DECS-250.
Upgrading Firmware in the DECS-250 The following procedure is used to upgrade firmware in the DECS-250. This must be completed after upgrading firmware in any expansion modules.
1. Remove the DECS-250 from service. Refer to the appropriate site schematics to ensure that all steps have been taken to properly and completely de-energize the DECS-250.
2. Apply only control power to the DECS-250.
136 9440300990 Rev M
BESTCOMSPlus® Software DECS-250
3. Connect to the DECS-250 with BESTCOMSPlus. Check the firmware Application Version on the General Settings > Device Info screen.
4. Select Upload Device Files from the Communication pull-down menu. You do not have to be connected to the DECS-250 at this time. Save settings when prompted, if desired.
5. Open the desired device package file (decs-250.bef).
6. Check the box for DECS-250 Firmware. Note the version number of the DECS-250 firmware; this is the version that will be used to set the Application Version in the settings file in a later step.
7. Click the Upload button and follow the instructions that appear to begin the upgrade process.
8. After the upload is complete, disconnect communication to the DECS-250.
9. Load the saved settings file into the DECS-250.
a. Close all settings files.
b. From the File pull-down menu, select New, DECS-250.
c. Connect to the DECS-250.
d. Once all settings have been read from the DECS-250, open the saved settings file by selecting File, Open File in the BESTCOMSPlus menu. Then browse for the file to upload.
e. When BESTCOMSPlus asks if you wish to upload settings and logic to the device, click Yes.
f. If you are receiving upload failures and indications that the logic is incompatible with the firmware version, check that the DECS-250 style number in the saved file matches that of the DECS-250 into which the file is being uploaded. The style number in the settings file is found under General Settings > Style Number in BESTCOMSPlus.
g. If the style number of the settings file does not match that of the DECS-250 into which it is to be loaded, disconnect from the DECS-250, then modify the style number in the settings file. Then repeat the steps titled Load the Saved Settings File into the DECS-250.
BESTCOMSPlus® Updates
Enhancements to DECS-250 firmware typically coincide with enhancements to the DECS-250 plugin for BESTCOMSPlus®. When a DECS-250 is updated with the latest version of firmware, the latest version of BESTCOMSPlus should also be obtained.
• If you obtained a CD-ROM containing a firmware update from Basler Electric, then that CD-ROM will also contain the corresponding version of BESTCOMSPlus software.
• You can download the latest version of BESTCOMSPlus by visiting www.basler.com.
• BESTCOMSPlus automatically checks for updates when Check Automatically is selected on the Check for Updates User Settings screen. This screen is accessed under the Help drop-down menu. (An internet connection is required.)
• You can use the manual “check for updates” function in BESTCOMSPlus to ensure that the latest version is installed by selecting Check for Updates in the Help drop-down menu. (An internet connection is required.)


![DECS Principles of Improvement & Effectiveness DECS School Self Study Template Site Improvement Case Study: [school name]](https://static.documents.pub/doc/80x56/56649f1c5503460f94c32c01/decs-principles-of-improvement-effectiveness-decs-school-self-study-template.jpg)


