Before you start your research project you need to think about all the following areas ofexcavation, from start to finish. We hope you find this introductory guide useful to start thinkingabout how to undertake an excavation project.
1 PERMISSIONS
Before you can excavate a site, you need to:
● Gain permission from the landowner, and the tenant or occupier of the land (if applicable).
● Check that the land is not a Scheduled Ancient Monument. If you wish to excavate orotherwise research one of these, you must contact Historic England for permission.
● Check that the land isn't under Natural England stewardship: ask the landowner and tenant.
● Inform the County Archaeology Team by emailing [email protected] ortelephoning 01223 728569/592. They will advise you on any further permissions required.
● Request an Event Cambridgeshire (ECB) number from the County Archaeology Team on thecontact details above. This is a requirement of any work carried out in the county, especially ifthere is any possibility that the County Archaeology Team will be involved in subsequentarchive preparation or deposition.
● Check with the landowner whether they will want to maintain ownership of any findsexcavated.
2 RESEARCH FRAMEWORK
Project Aims
Before you start your project, you need to think about and write some project aims. These shouldcover the following questions:
● What do you want to find out?
● Why do you want to know?
● Will you carry out training?
It is important to do this at the start, as it should clarify what you are trying to do and why, and willimpact the methodology you decide to use.
Methodology
You should decide which methodology you are going to use before you start your project, so thatall participants are clear as to what they expect to do. Questions you should think about include:
● Who will be involved? How will you cover participants under your insurance policy? Do you wish to involve children, and/or local schools?
● How will you excavate? Will you require equipment and a digger?
● How will you record? Do you have recording sheets?
● How will you fund your excavation, particularly your finds identification? You may need to think about applying to the Heritage Lottery Fund or other grant-giving organisations to cover the costs of finds-identification, digger hire, portaloo hire etc.
● Where will you store your finds/records? You will be able to deposit your prepared archive with the HER in the County stores. There is a cost to deposition that covers the long term
storage and curation of the archive but contact the HER as soon as you begin to plan for a site so that a decision can be made about how best to cover these costs.
3 LOCATING EXCAVATION AREAS
Excavation should be the final activity you conduct on the site you are researching. Before youconsider excavating, you should have completed most of the following research activities:
● Historic Environment Record (HER) search: research the archaeology of your local areaon Heritage Gateway: http://www.heritagegateway.org.uk/gateway and email the HERCounty Archaeology Team at [email protected] for more information. Youcan also visit your local HER at Shire Hall, Cambridge by appointment. The HER holds anextensive library of grey literature (both in digital and hard copy formats) alongside otheroriginal material. Grey literature reports can also be found on the Archaeology Data Service(ADS): http://archaeologydataservice.ac.uk/myads/copyrights?from=2f61726368697665732f.Old archaeological reports of Oxford Archaeology East excavations can either bedownloaded from ADS, or from http://library.thehumanjourney.net/ and more recent reportscan be accessed from the library at our Bar Hill office.
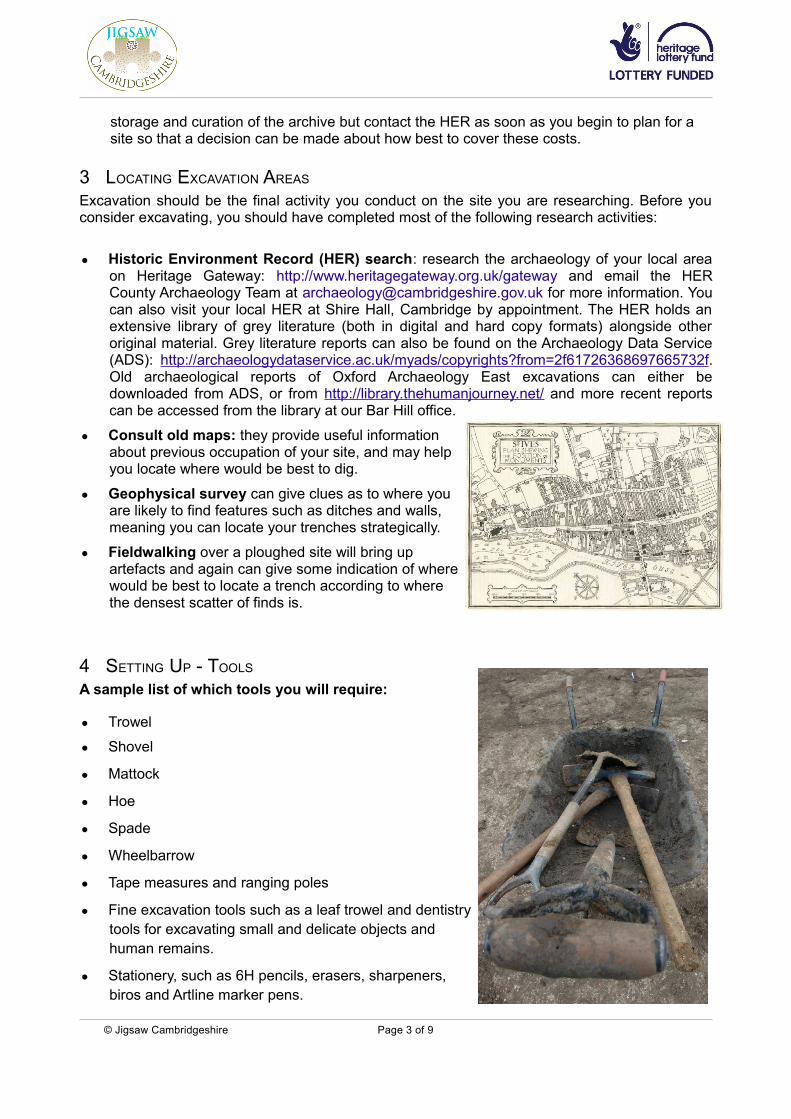
● Consult old maps: they provide useful informationabout previous occupation of your site, and may helpyou locate where would be best to dig.
● Geophysical survey can give clues as to where youare likely to find features such as ditches and walls,meaning you can locate your trenches strategically.
● Fieldwalking over a ploughed site will bring upartefacts and again can give some indication of wherewould be best to locate a trench according to wherethe densest scatter of finds is.
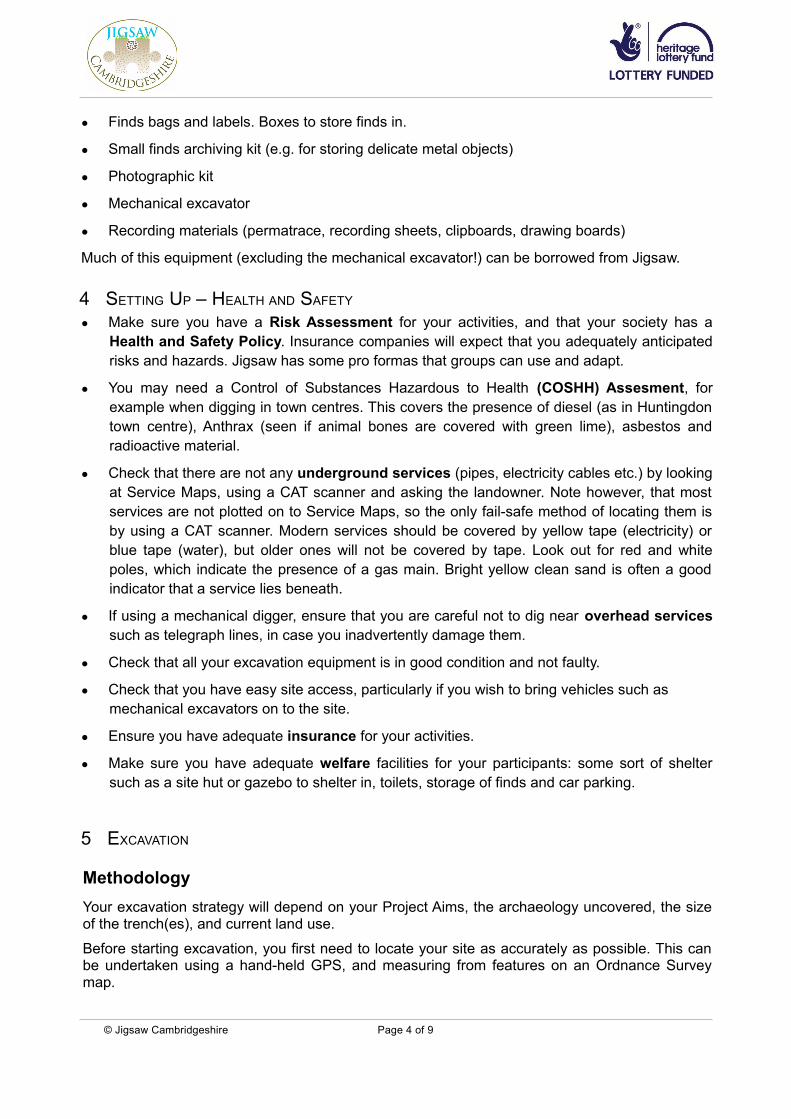
4 SETTING UP - TOOLS
A sample list of which tools you will require:
● Trowel
● Shovel
● Mattock
● Hoe
● Spade
● Wheelbarrow
● Tape measures and ranging poles
● Fine excavation tools such as a leaf trowel and dentistrytools for excavating small and delicate objects andhuman remains.
● Stationery, such as 6H pencils, erasers, sharpeners,biros and Artline marker pens.
Much of this equipment (excluding the mechanical excavator!) can be borrowed from Jigsaw.
4 SETTING UP – HEALTH AND SAFETY ● Make sure you have a Risk Assessment for your activities, and that your society has a
Health and Safety Policy. Insurance companies will expect that you adequately anticipatedrisks and hazards. Jigsaw has some pro formas that groups can use and adapt.
● You may need a Control of Substances Hazardous to Health (COSHH) Assesment, forexample when digging in town centres. This covers the presence of diesel (as in Huntingdontown centre), Anthrax (seen if animal bones are covered with green lime), asbestos andradioactive material.
● Check that there are not any underground services (pipes, electricity cables etc.) by lookingat Service Maps, using a CAT scanner and asking the landowner. Note however, that mostservices are not plotted on to Service Maps, so the only fail-safe method of locating them isby using a CAT scanner. Modern services should be covered by yellow tape (electricity) orblue tape (water), but older ones will not be covered by tape. Look out for red and whitepoles, which indicate the presence of a gas main. Bright yellow clean sand is often a goodindicator that a service lies beneath.
● If using a mechanical digger, ensure that you are careful not to dig near overhead servicessuch as telegraph lines, in case you inadvertently damage them.
● Check that all your excavation equipment is in good condition and not faulty.
● Check that you have easy site access, particularly if you wish to bring vehicles such as mechanical excavators on to the site.
● Ensure you have adequate insurance for your activities.
● Make sure you have adequate welfare facilities for your participants: some sort of sheltersuch as a site hut or gazebo to shelter in, toilets, storage of finds and car parking.
5 EXCAVATION
Methodology
Your excavation strategy will depend on your Project Aims, the archaeology uncovered, the sizeof the trench(es), and current land use.
Before starting excavation, you first need to locate your site as accurately as possible. This canbe undertaken using a hand-held GPS, and measuring from features on an Ordnance Surveymap.
Once you've chosen your excavation area and project, give it a site code e.g. BARTRA13(parish, project/street, date; Bar Hill, Trafalgar Way, 2013). This will be marked on all your findsbags and recording documentation.
There are two basic ways to undertake an excavation: tespitting and open-area trench excavation:
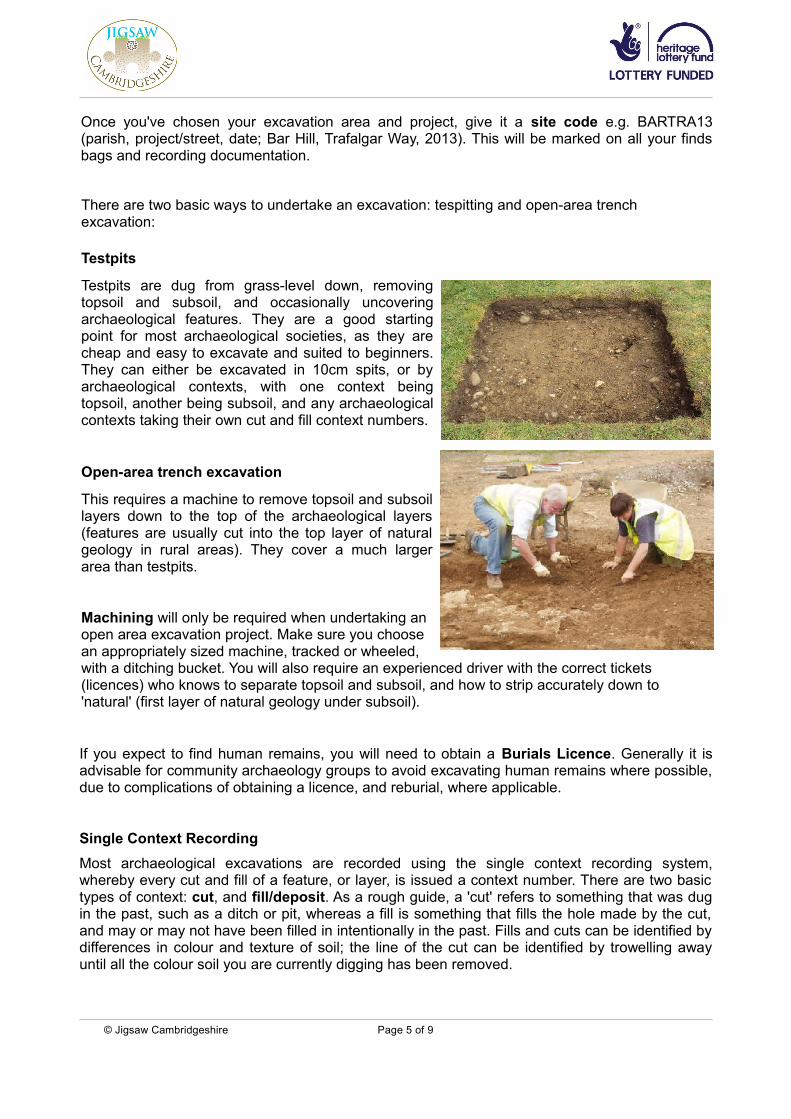
Testpits
Testpits are dug from grass-level down, removingtopsoil and subsoil, and occasionally uncoveringarchaeological features. They are a good startingpoint for most archaeological societies, as they arecheap and easy to excavate and suited to beginners.They can either be excavated in 10cm spits, or byarchaeological contexts, with one context beingtopsoil, another being subsoil, and any archaeologicalcontexts taking their own cut and fill context numbers.
Open-area trench excavation
This requires a machine to remove topsoil and subsoillayers down to the top of the archaeological layers(features are usually cut into the top layer of naturalgeology in rural areas). They cover a much largerarea than testpits.
Machining will only be required when undertaking anopen area excavation project. Make sure you choosean appropriately sized machine, tracked or wheeled,with a ditching bucket. You will also require an experienced driver with the correct tickets (licences) who knows to separate topsoil and subsoil, and how to strip accurately down to 'natural' (first layer of natural geology under subsoil).
If you expect to find human remains, you will need to obtain a Burials Licence. Generally it isadvisable for community archaeology groups to avoid excavating human remains where possible,due to complications of obtaining a licence, and reburial, where applicable.
Single Context Recording
Most archaeological excavations are recorded using the single context recording system,whereby every cut and fill of a feature, or layer, is issued a context number. There are two basictypes of context: cut, and fill/deposit. As a rough guide, a 'cut' refers to something that was dugin the past, such as a ditch or pit, whereas a fill is something that fills the hole made by the cut,and may or may not have been filled in intentionally in the past. Fills and cuts can be identified bydifferences in colour and texture of soil; the line of the cut can be identified by trowelling awayuntil all the colour soil you are currently digging has been removed.
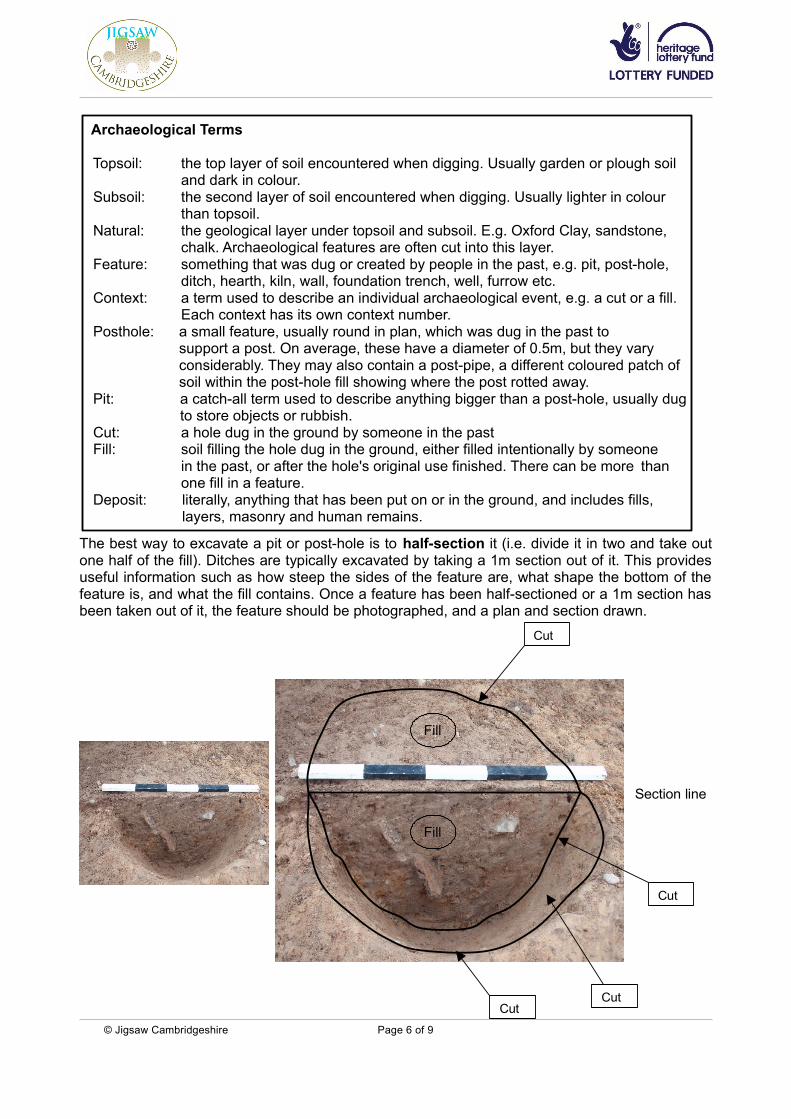
The best way to excavate a pit or post-hole is to half-section it (i.e. divide it in two and take outone half of the fill). Ditches are typically excavated by taking a 1m section out of it. This providesuseful information such as how steep the sides of the feature are, what shape the bottom of thefeature is, and what the fill contains. Once a feature has been half-sectioned or a 1m section hasbeen taken out of it, the feature should be photographed, and a plan and section drawn.
Archaeological Terms Topsoil: the top layer of soil encountered when digging. Usually garden or plough soil
and dark in colour. Subsoil: the second layer of soil encountered when digging. Usually lighter in colour
than topsoil. Natural: the geological layer under topsoil and subsoil. E.g. Oxford Clay, sandstone,
chalk. Archaeological features are often cut into this layer. Feature: something that was dug or created by people in the past, e.g. pit, post-hole,
ditch, hearth, kiln, wall, foundation trench, well, furrow etc. Context: a term used to describe an individual archaeological event, e.g. a cut or a fill.
Each context has its own context number. Posthole: a small feature, usually round in plan, which was dug in the past to
support a post. On average, these have a diameter of 0.5m, but they vary considerably. They may also contain a post-pipe, a different coloured patch of soil within the post-hole fill showing where the post rotted away.
Pit: a catch-all term used to describe anything bigger than a post-hole, usually dug to store objects or rubbish.
Cut: a hole dug in the ground by someone in the past Fill: soil filling the hole dug in the ground, either filled intentionally by someone
in the past, or after the hole's original use finished. There can be more than one fill in a feature.
Deposit: literally, anything that has been put on or in the ground, and includes fills, layers, masonry and human remains.
Cut
Cut
Cut
Section line
Cut
Fill
Fill
In the above picture, the post-hole under excavation has a cut and fill. The post-hole probablylooked roughly circular in plan before it was excavated. The excavator has half-sectioned it, i.e.drawn a line across it and removed one half of the feature, leaving a clean vertical section. Wecan see that the cut has steep sides sloping down to a concave U-shaped base. It is roughlyround in plan (looking down at the feature). The fill is a light grey sandy-silt fill, which is darkerthan the surrounding soil.
6 RECORDING
Once you have excavated your feature, you need to give it a context number, draw a section-drawing and a plan of your feature, and take a photograph with a scale and photo board. You willalso need to complete a context recording sheets for both the cut and fill(s) (see Appendix One forpro formas).
Section drawings
An archaeological section drawing is a vertical cross-section through the feature under excavationto reveal the contents of the fill and the shape of the fill. Accordingly, section drawings are a veryimportant recording technique, as they allow future researchers to see the exact forms of theexcavated features. They are usually drawn at a scale of 1:10 or 1:20.
In the above example, all the useful information about how to locate the feature has been listed inthe title. The points of the compass are very useful for identifying which section of the feature hasbeen drawn. The cut number has been put in [square brackets] and the two fill numbers havebeen put in (round brackets). The cut [101] has been given the lowest number, since the thearchaeological event of the cut being dug came before the first fill (102) and the second fill (103).
Drawing plans
Plans are the maps drawn of a site providing the bird's eye view of the features excavated.
BARTRA13 Trench 5 Section 22 Scale: 1:10 Joe Bloggs 01/05/13
BARTRA13 Trench 5 Plan 22 Scale: 1:50 Joe Bloggs 01/05/13
Section 22
[101]
(103)
N
The above plan shows that the oval feature (such as a post-hole or pit) has been cross-sectionedand the line of the section drawn has been marked 'Section 22'. The southern half of the fill (103)has been excavated, but the northern part of fill (103) remains unexcavated. The shape of the cutis marked by the hachures, which show that the cut sloped gradually down to the base on allthree sides. The plan was drawn at a scale of 1:50.
Photographs
The aim of archaeological recording is to try to create and keep a permanent record. Take aphotograph of every feature, trench and testpit, with and without a photo board (recording the sitecode, north arrow, trench/testpit number, shot/photograph number and cut context number) andscale. Professionals tend to take photographs of each feature on two types of camera: a digitalcamera and a camera with a black and white film. Black and white film is the most archively-stable but expensive (c.£6/film) and difficult to find. If you are only able to record in colour or on adigital camera, this will be sufficient. Remember to also take shots of people excavating.
7 FINDS
All finds should be bagged with a finds label. The following information should be recorded on every bag and label:
Site code e.g. BARTRA13
Trench or Testpit no. e.g. TP1
Context number of fill e.g. (102)
Material (if you are bagging finds by type) e.g. pottery or bone
Small find number (if something made of
metal, or fragile, or unusual) e.g. 7
The finds label should also have the excavator's initials and the date marked.
All finds (except metalwork and other fragile artefacts such asamber and shale) should be washed and allowed to dry at roomtemperature before being rebagged in clean finds bags with aclean label. These finds should then be properly identified by aprofessional finds expert so a full list of artefacts can be insertedinto the report.
Fragile finds should be protected through use of plastazotepadding in a finds bag, or acid-free tissue in a crystal box.Silica gel may be required to dry out metalwork NOT found in waterlogged contexts. Amber and shale should not be allowed to dry out. See the book 'First Aid for Finds' for more information. Complete vessels should be lifted whole, with their contents.
Environmental SamplesEnvironmental samples are bulk samples of types of soil which archaeologists collect to beanalysed for recovery of carbonized remains and small objects. Features containing (black) burntmaterial are often sampled. A 20l sample is usually collected. Monolith samples may also betaken in monolith tins for the recovery of pollen (this is a very expensive procedure).
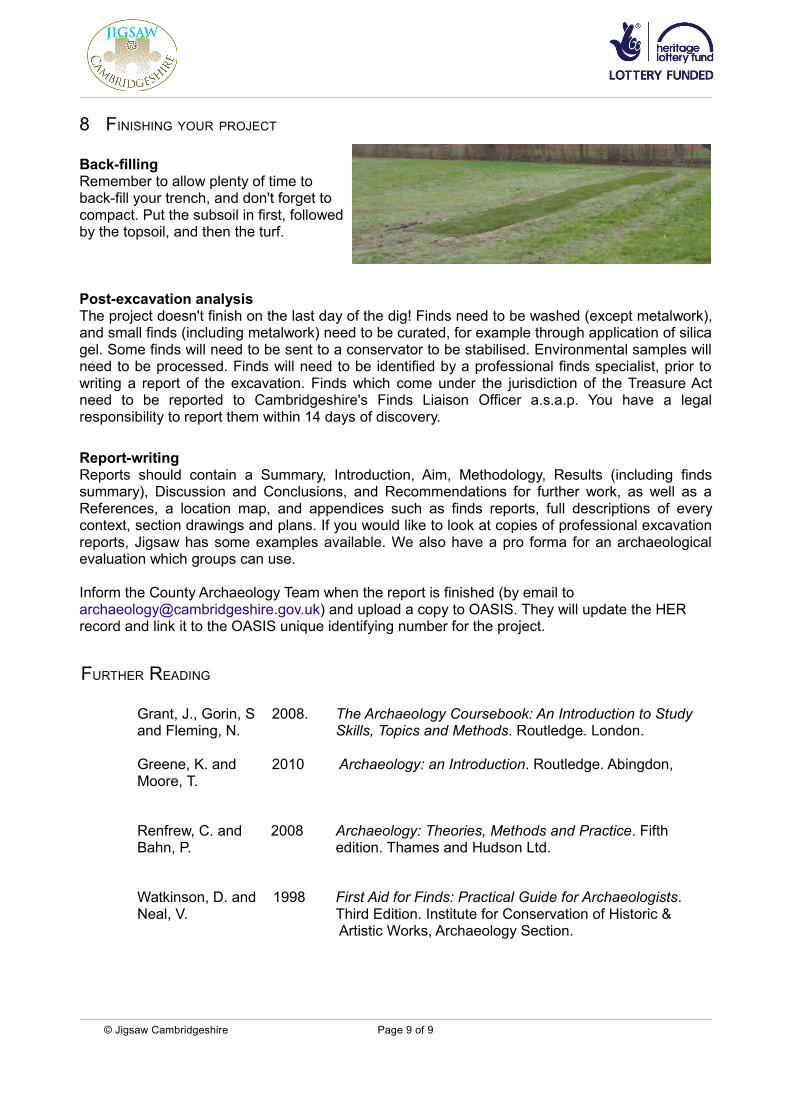
Back-fillingRemember to allow plenty of time toback-fill your trench, and don't forget tocompact. Put the subsoil in first, followedby the topsoil, and then the turf.
Post-excavation analysisThe project doesn't finish on the last day of the dig! Finds need to be washed (except metalwork),and small finds (including metalwork) need to be curated, for example through application of silicagel. Some finds will need to be sent to a conservator to be stabilised. Environmental samples willneed to be processed. Finds will need to be identified by a professional finds specialist, prior towriting a report of the excavation. Finds which come under the jurisdiction of the Treasure Actneed to be reported to Cambridgeshire's Finds Liaison Officer a.s.a.p. You have a legalresponsibility to report them within 14 days of discovery.
Report-writingReports should contain a Summary, Introduction, Aim, Methodology, Results (including findssummary), Discussion and Conclusions, and Recommendations for further work, as well as aReferences, a location map, and appendices such as finds reports, full descriptions of everycontext, section drawings and plans. If you would like to look at copies of professional excavationreports, Jigsaw has some examples available. We also have a pro forma for an archaeologicalevaluation which groups can use.
Inform the County Archaeology Team when the report is finished (by email to [email protected]) and upload a copy to OASIS. They will update the HER record and link it to the OASIS unique identifying number for the project.
FURTHER READING
Grant, J., Gorin, S 2008. The Archaeology Coursebook: An Introduction to Study and Fleming, N. Skills, Topics and Methods. Routledge. London.
Greene, K. and 2010 Archaeology: an Introduction. Routledge. Abingdon,Moore, T.
Renfrew, C. and 2008 Archaeology: Theories, Methods and Practice. FifthBahn, P. edition. Thames and Hudson Ltd.
Watkinson, D. and 1998 First Aid for Finds: Practical Guide for Archaeologists. Neal, V. Third Edition. Institute for Conservation of Historic &


![General Conditions - cce-inc Excavation and... · 2018-05-15 · Description of safe work practices and anticipated work inside the excavation / trench: Competent Person(s) ]v vu](https://static.documents.pub/doc/80x56/5e9a7fc05ae23a522944d2c2/general-conditions-cce-excavation-and-2018-05-15-description-of-safe-work.jpg)