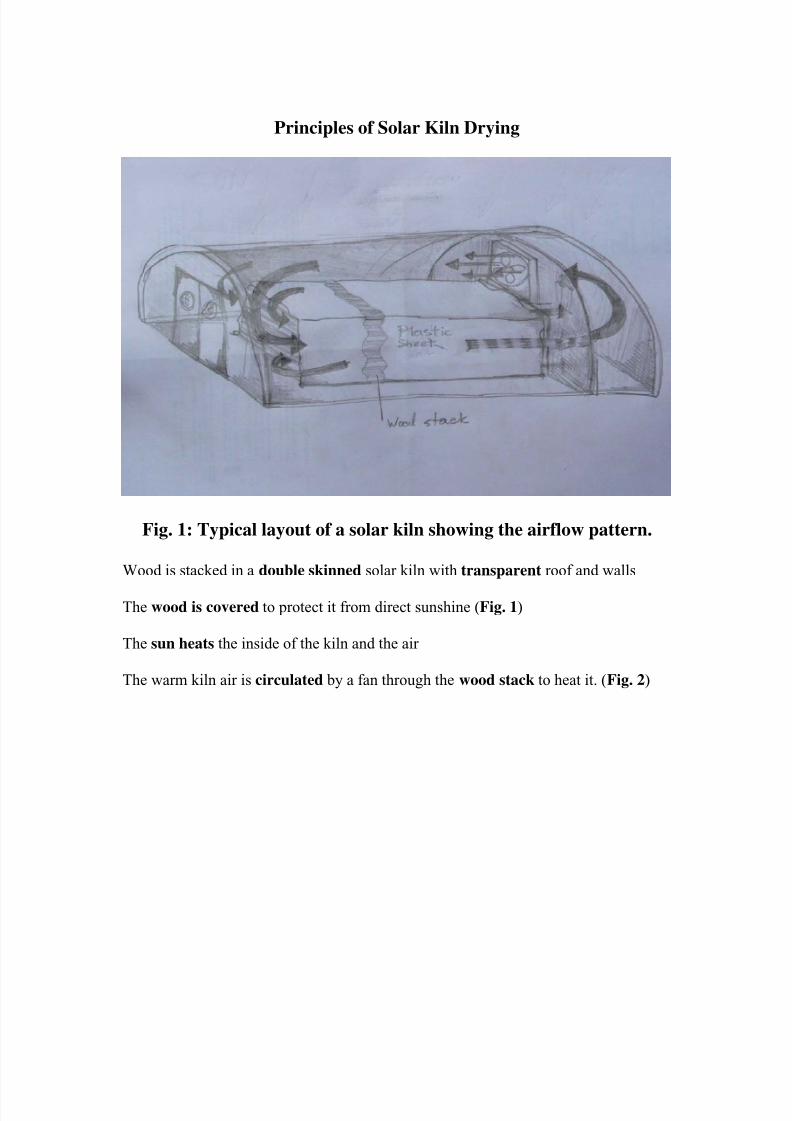
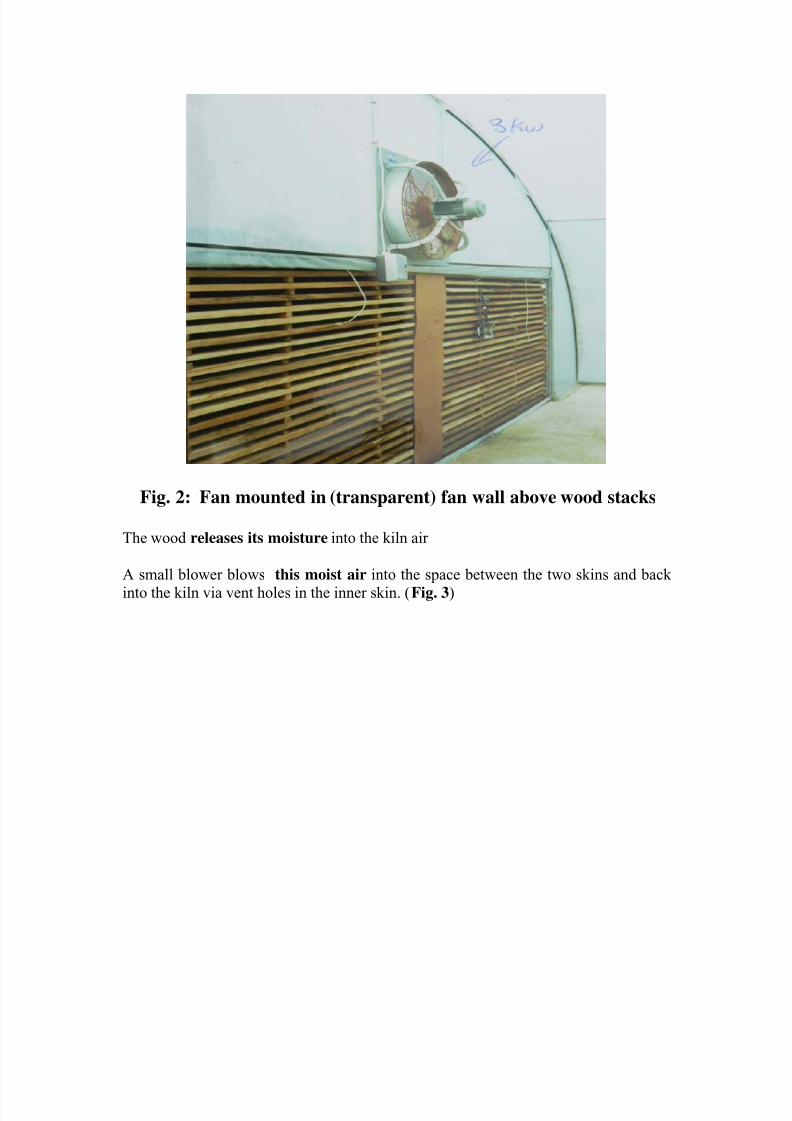
A Homebuilt Solar Kiln for Hardwoods Dieter Steinmann Drying Principles for Wood Wood is dried in a kiln in which the temperature (T) and the relative humidity (RH) can be accurately controlled. Green(wet) wood is dried at a low T and at a high RH As the wood moisture drops, T is gradually increased andRH is reducedThe wood moisture at any drying stage determines the T and RH values of the kiln air. See Table 1 Table 1: A Typical hardwood drying schedule Wood moisture content % Relative humidity % Temperature Deg. C Above 35 86 37 35 to 30 83 37 30 to 25 76 43 25 to 20 62 49 20 to 15 35 54 15 to final 18 65 The thicker the wood, the slower will be the drying process eg. If 25 mm thick wood uses 1 time unit, 100 mm thick wood will require 8 time units. The higher the wood density, the longer the drying time. High density hardwood, 200 mm thick can take up to 6 months to dry even in a commercial kiln, which explains the high cost per m 3 of thick, kiln dried wood. Wood is hygroscopic, which means that it absorbs or looses moisture to the surrounding air until it is in equilibrium with the air. This equilibrium changes as the T and the RH of the air changes. Woodswells and shrinks as it adsorbs and releases moisture from/to the air. Swelling/shrink differs in the 3 anatomical directions and for different wood species [See Table 2]
Wood is dried in a kiln in which the temperature (T) and the relative humidity (RH)
can be accurately controlled.
Green(wet) wood is dried at a low T and at a high RH
As the wood moisture drops, T is gradually increased and RH is reduced
The wood moisture at any drying stage determines the T and RH values of the kiln
air. See Table 1
Table 1: A Typical hardwood drying schedule
Wood moisture
content %
Relative humidity
%
Temperature Deg.
C
Above 35 86 37
35 to 30 83 37
30 to 25 76 43
25 to 20 62 49
20 to 15 35 54
15 to final 18 65
The thicker the wood, the slower will be the drying process eg.
If 25 mm thick wood uses 1 time unit, 100 mm thick wood will require 8 time units.
The higher the wood density, the longer the drying time.
High density hardwood, 200 mm thick can take up to 6 months to dry even in acommercial kiln, which explains the high cost per m3 of thick, kiln dried wood.
Wood is hygroscopic, which means that it absorbs or looses moisture to the
surrounding air until it is in equilibrium with the air. This equilibrium changes as the
T and the RH of the air changes.
Wood swells and shrinks as it adsorbs and releases moisture from/to the air.
Swelling/shrink differs in the 3 anatomical directions and for different wood species