66
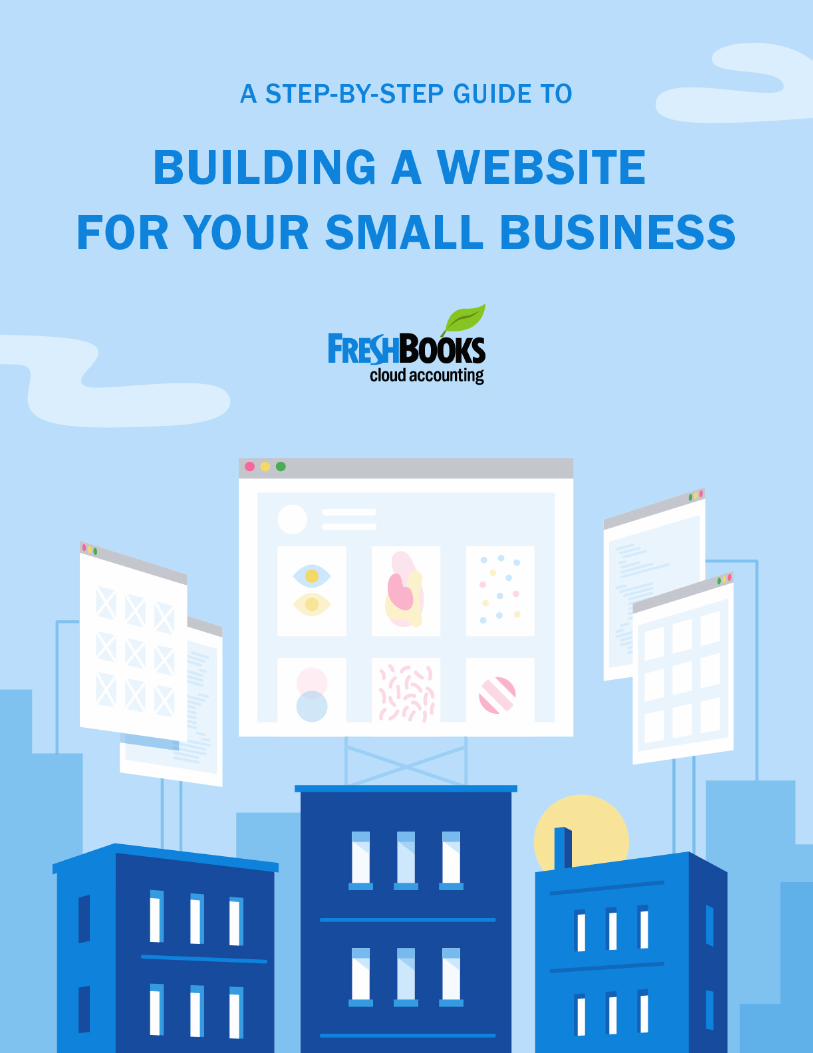
A STEP-BY-STEP GUIDE TO
Building a Website for Your Small Business
By Heather Hudson for FreshBooksIllustrated by Jesse Read
INTRODUCTION
Why a Small Business Website Matters 04
CHAPTER 1
Identify the Purpose of Your Website 09
CHAPTER 2
Choose & Register a Domain Name 15
CHAPTER 3
Choose a Content Management System and Web Host 20
CHAPTER 4
Identify & Organize Your Website Pages / Sitemap 28
CHAPTER 5
Gather Your Design Elements 35
CHAPTER 6
Choose Your Theme/Template 44
CHAPTER 7
Write the Content for Your Website Pages 50
CHAPTER 8
Test and Launch Your Website 57
CHAPTER 9
Develop a Maintenance Plan 63
Table of Contents
BUILDING A WEBSITE FOR YOUR SMALL BUSINESS
INTRODUCTION
Why a Small Business Website Matters
5
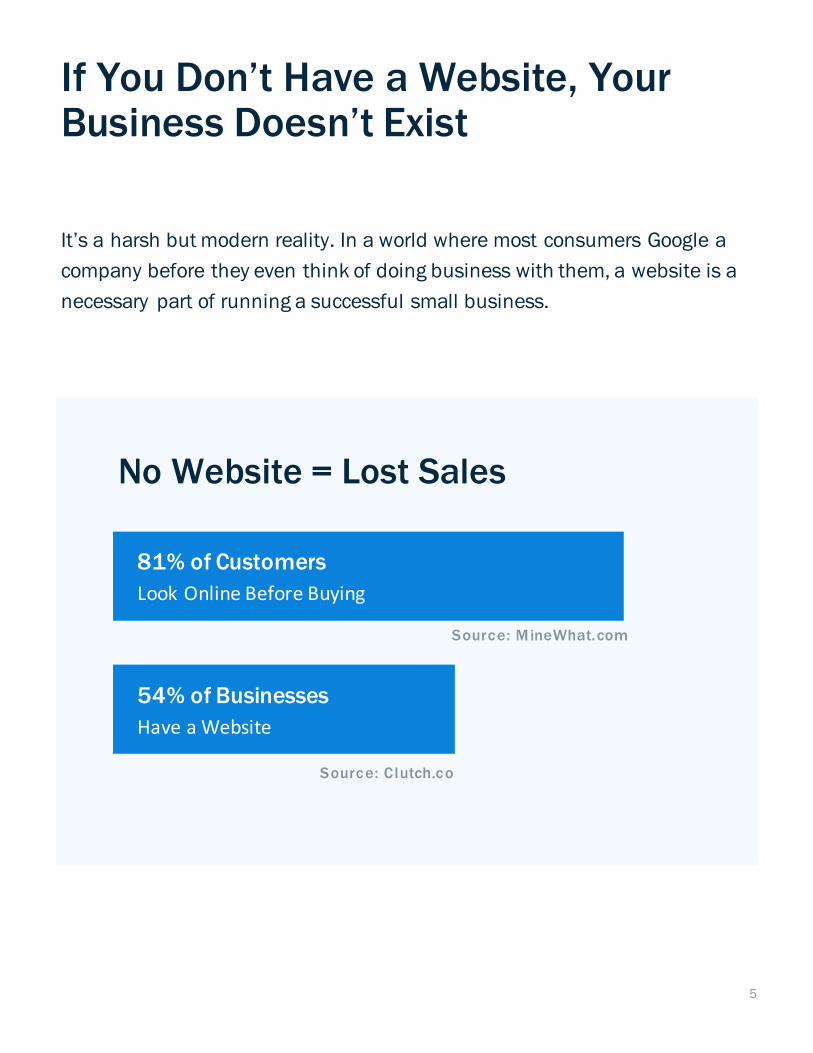
If You Don’t Have a Website, Your Business Doesn’t Exist
It’s a harsh but modern reality. In a world where most consumers Google a
company before they even think of doing business with them, a website is a
necessary part of running a successful small business.
81% of Customers
LookOnlineBeforeBuying
Source: MineWhat.com
Source: Clutch.co
54% of Businesses
HaveaWebsite
No Website = Lost Sales

6
5 Reasons Your Small Business Needs a Website
1. BUILD TRUST AND TRANSPARENCY
Many people don’t consider your business legitimate if you can’t be found
online.
2. MAKE IT EASY FOR CUSTOMERS TO CHOOSE YOU
More than 80% of people research online before buying anything. If you’re
not there, you’re not competing for their business.
3. MAKE IT SIMPLE FOR SATISFIED CUSTOMERS TO REFER YOU
Forget business cards—people trade in URLs when making referrals.
4. ADVERTISE 24/7
A website allows you to show your best work and reach people who would
otherwise never hear of you.
5. SAVE TIME AND INCREASE PRODUCTIVITY
Your website answers simple questions for your customers, allowing them
to feel informed and you to invest your time in what matters: running your
business.
7
If you have the budget, hiring a professional to help you with your website is
a great investment.
BUT NOT EVERY ENTREPRENEUR IS THERE YET
Don’t wait: A basic site demonstrates that you’re in business, have an
online presence and provides a place to display your work.
BUT…BUILDING A WEBSITE IS BEYOND MY SKILLS, RIGHT?
Nope! You don’t have to understand code, be an expert in graphic design or
have experience writing stirring copy to put together a website that speaks
to your ideal customers.
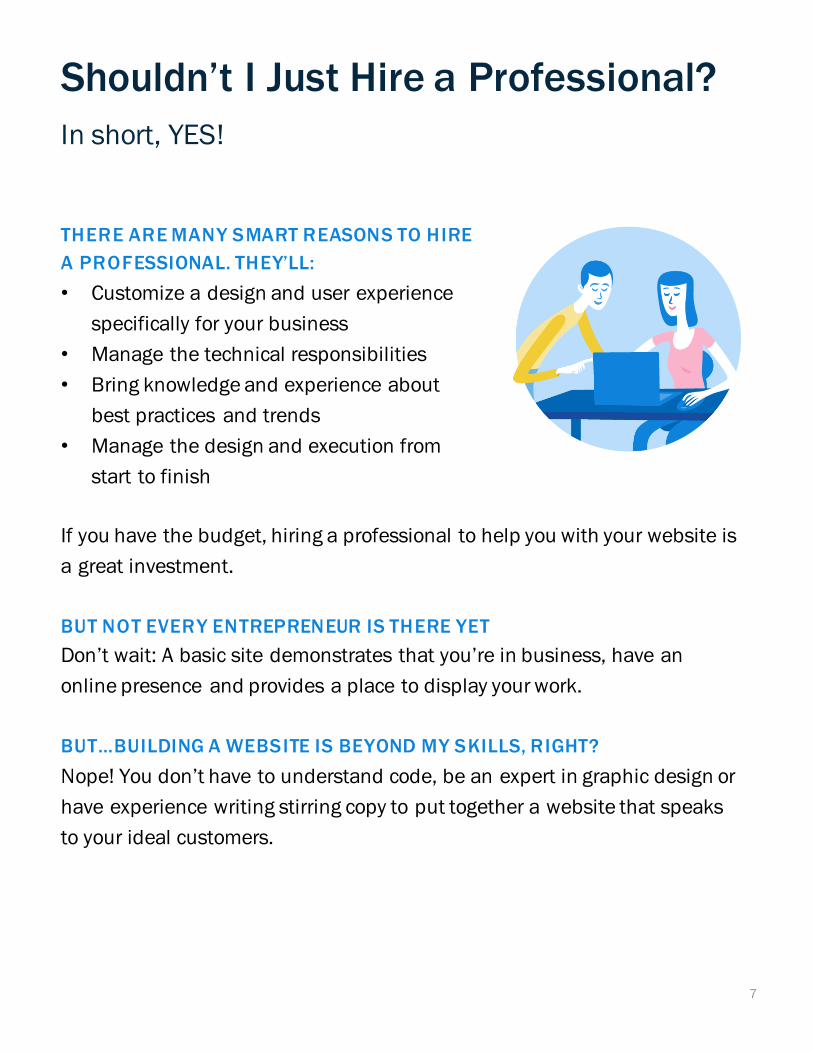
In short, YES!
THERE ARE MANY SMART REASONS TO HIRE
A PROFESSIONAL. THEY’LL:
• Customize a design and user experience
specifically for your business
• Manage the technical responsibilities
• Bring knowledge and experience about
best practices and trends
• Manage the design and execution from
start to finish
Shouldn’t I Just Hire a Professional?

8
Let’s Break This Down!
We’re going to walk you through 12 steps to create a website
from start to finish.
Step 1 Persona Building: Who Are Your Customers?
Step 2 Identify Your Business Value Proposition
Step 3 Identify What Customers Want from Your Website
Step 4 Choose & Register Your Domain Name
Step 5 Choose a Content Management System (CMS)
Step 6 Choose a Web Host
Step 7 Identify & Organize Your Website Pages / Sitemap
Step 8 Gather Your Design Elements
Step 9 Choose Your Theme/Template
Step 10 Write & Edit the Content for Your Website Pages
Step 11 QA - Test Your Website
Step 12 Launch!
CHAPTER 1
Identify the Purpose of Your Website
BUILDING A WEBSITE FOR YOUR SMALL BUSINESS
10
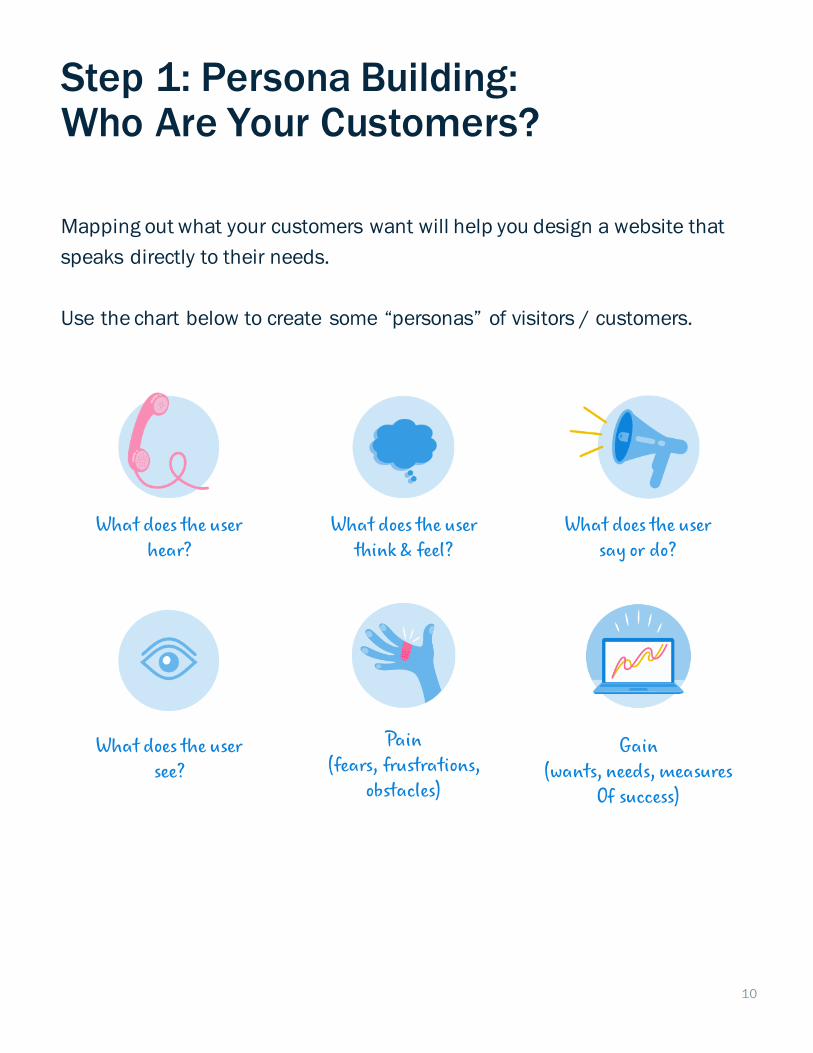
Step 1: Persona Building: Who Are Your Customers?
Mapping out what your customers want will help you design a website that
speaks directly to their needs.
Use the chart below to create some “personas” of visitors / customers.
What does the userhear?
What does the usersee?
What does the usersay or do?
Pain (fears, frustrations,
obstacles)
Gain (wants, needs, measures
Of success)
What does the userthink & feel?
11
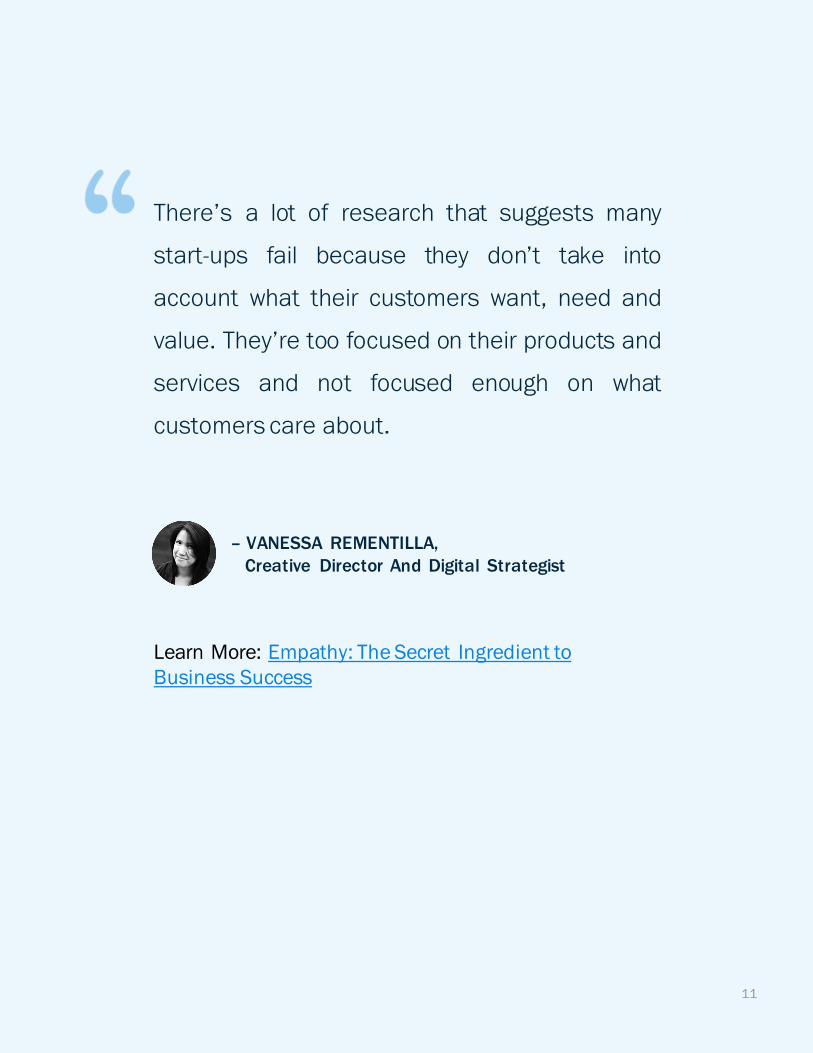
– VANESSA REMENTILLA,Creative Director And Digital Strategist
There’s a lot of research that suggests many
start-ups fail because they don’t take into
account what their customers want, need and
value. They’re too focused on their products and
services and not focused enough on what
customers care about.
Learn More: Empathy: The Secret Ingredient to Business Success
12
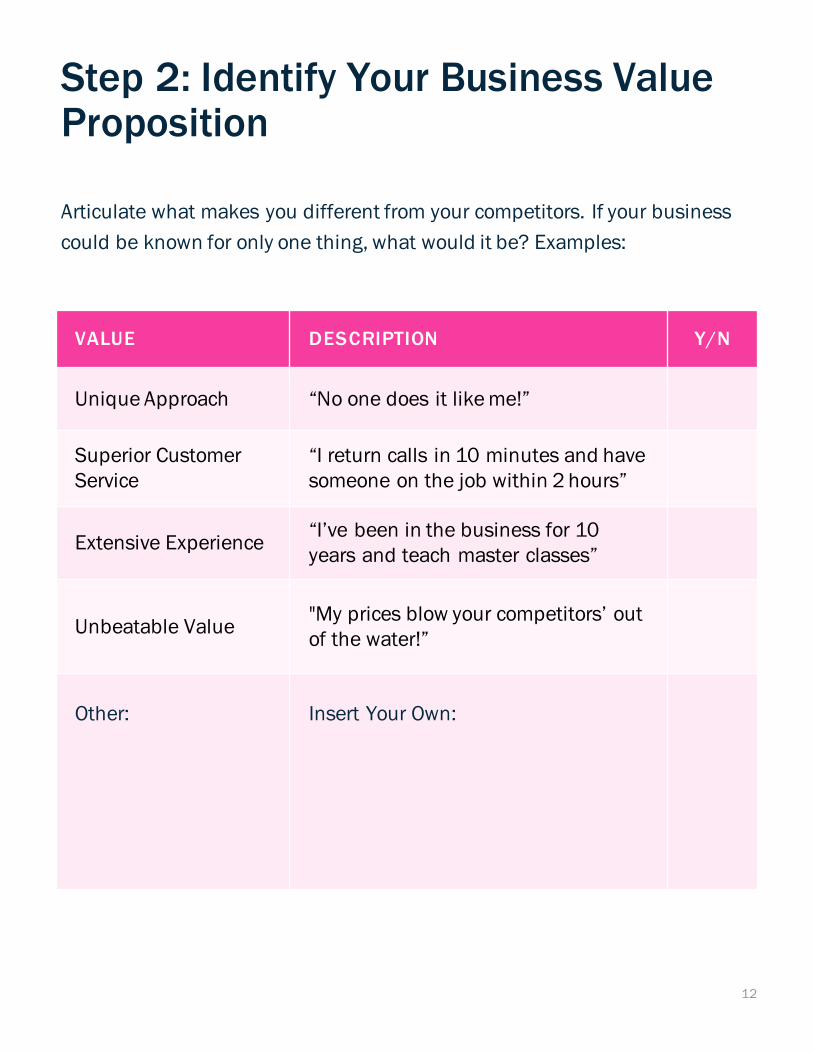
Step 2: Identify Your Business Value Proposition
Articulate what makes you different from your competitors. If your business
could be known for only one thing, what would it be? Examples:
VALUE DESCRIPTION Y/N
Unique Approach “No one does it like me!”
Superior Customer Service
“I return calls in 10 minutes and have someone on the job within 2 hours”
Extensive Experience“I’ve been in the business for 10 years and teach master classes”
Unbeatable Value"My prices blow your competitors’ out of the water!”
Other: Insert Your Own:
13
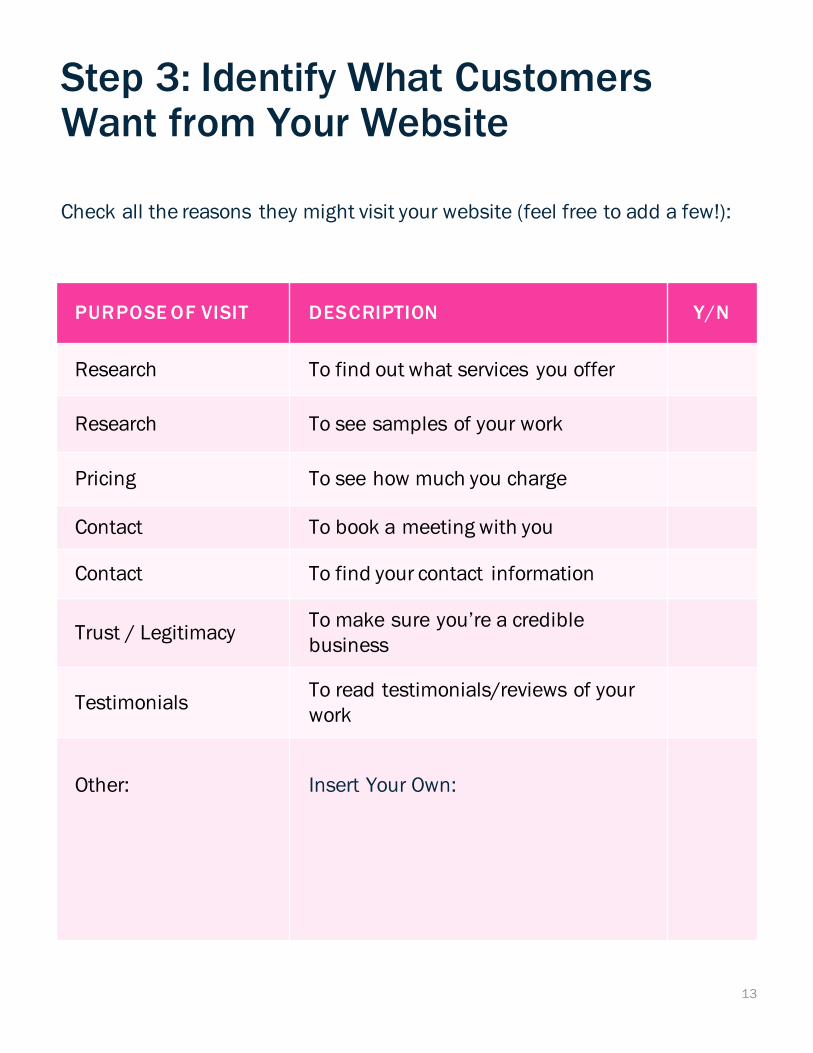
Step 3: Identify What Customers Want from Your Website
Check all the reasons they might visit your website (feel free to add a few!):
PURPOSE OF VISIT DESCRIPTION Y/N
Research To find out what services you offer
Research To see samples of your work
Pricing To see how much you charge
Contact To book a meeting with you
Contact To find your contact information
Trust / LegitimacyTo make sure you’re a credible business
TestimonialsTo read testimonials/reviews of your work
Other: Insert Your Own:

14
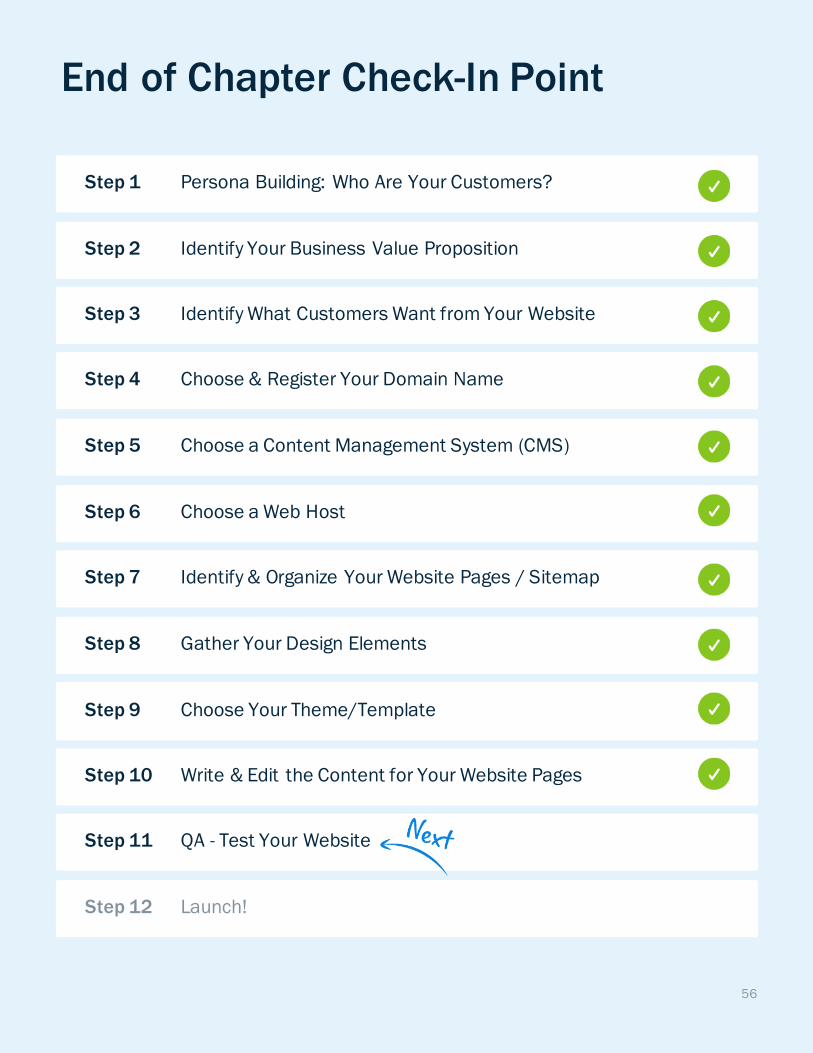
End of Chapter Check-In Point
Step 1 Persona Building: Who Are Your Customers?
Step 2 Identify Your Business Value Proposition
Step 3 Identify What Customers Want from Your Website
Step 4 Choose & Register Your Domain Name
Step 5 Choose a Content Management System (CMS)
Step 6 Choose a Web Host
Step 7 Identify & Organize Your Website Pages / Sitemap
Step 8 Gather Your Design Elements
Step 9 Choose Your Theme/Template
Step 10 Write & Edit the Content for Your Website Pages
Step 11 QA - Test Your Website
Step 12 Launch!
CHAPTER 2
Choose and Register a Domain Name
BUILDING A WEBSITE FOR YOUR SMALL BUSINESS
16
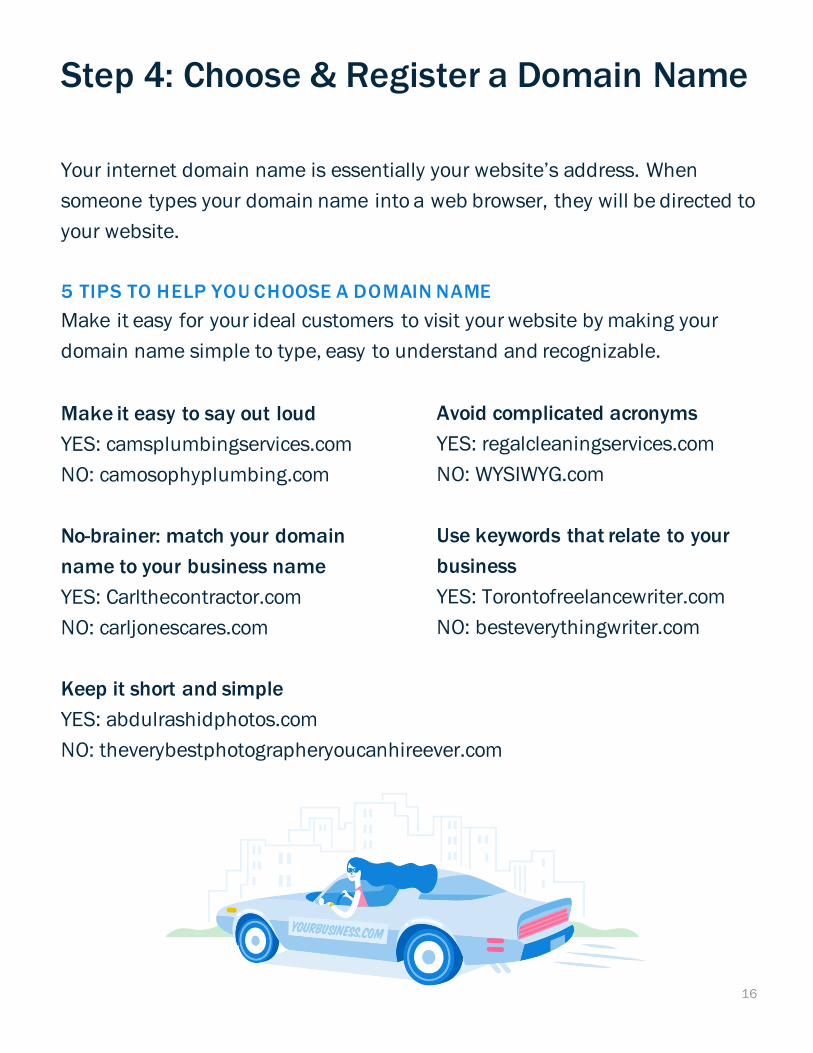
Step 4: Choose & Register a Domain Name
Your internet domain name is essentially your website’s address. When
someone types your domain name into a web browser, they will be directed to
your website.
5 TIPS TO HELP YOU CHOOSE A DOMAIN NAME
Make it easy for your ideal customers to visit your website by making your
domain name simple to type, easy to understand and recognizable.
Make it easy to say out loud
YES: camsplumbingservices.com
NO: camosophyplumbing.com
No-brainer: match your domain
name to your business name
YES: Carlthecontractor.com
NO: carljonescares.com
Keep it short and simple
YES: abdulrashidphotos.com
NO: theverybestphotographeryoucanhireever.com
Avoid complicated acronyms
YES: regalcleaningservices.com
NO: WYSIWYG.com
Use keywords that relate to your
business
YES: Torontofreelancewriter.com
NO: besteverythingwriter.com

17
– RAND FISHKIN, Moz
Make your domain name brandable: Brandable,
meaning when you hear the domain name, when
you hear yourself or someone else say it, does it
sound like a brand, or does it sound like a
generic? So that means that hyphens and
numbers are a real problem because they don't
make something sound like a brand. They make
it sound generic, or they make it sound strange.
Learn More: How to Choose a Domain Name
18
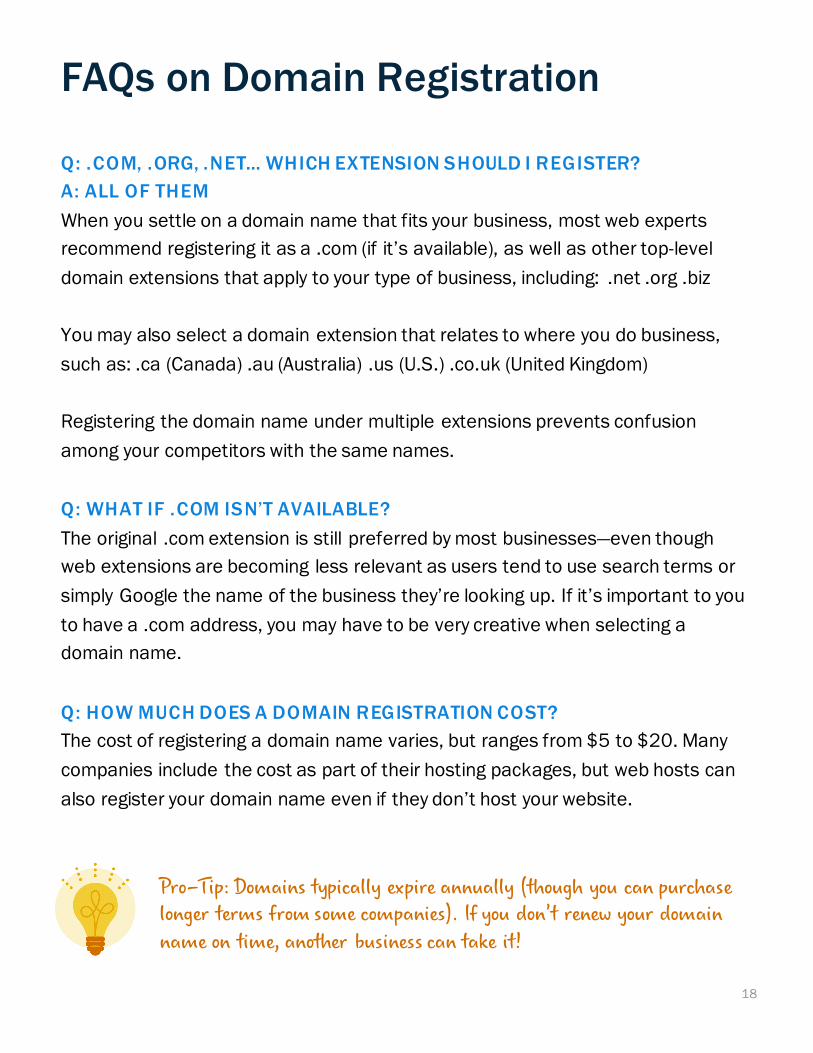
FAQs on Domain Registration
Q: .COM, .ORG, .NET… WHICH EXTENSION SHOULD I REGISTER?
A: ALL OF THEM
When you settle on a domain name that fits your business, most web experts
recommend registering it as a .com (if it’s available), as well as other top-level
domain extensions that apply to your type of business, including: .net .org .biz
You may also select a domain extension that relates to where you do business,
such as: .ca (Canada) .au (Australia) .us (U.S.) .co.uk (United Kingdom)
Registering the domain name under multiple extensions prevents confusion
among your competitors with the same names.
Q: WHAT IF .COM ISN’T AVAILABLE?
The original .com extension is still preferred by most businesses—even though
web extensions are becoming less relevant as users tend to use search terms or
simply Google the name of the business they’re looking up. If it’s important to you
to have a .com address, you may have to be very creative when selecting a
domain name.
Q: HOW MUCH DOES A DOMAIN REGISTRATION COST?
The cost of registering a domain name varies, but ranges from $5 to $20. Many
companies include the cost as part of their hosting packages, but web hosts can
also register your domain name even if they don’t host your website.
Pro-Tip: Domains typically expire annually (though you can purchase longer terms from some companies). If you don’t renew your domain name on time, another business can take it!
19
End of Chapter Check-In Point
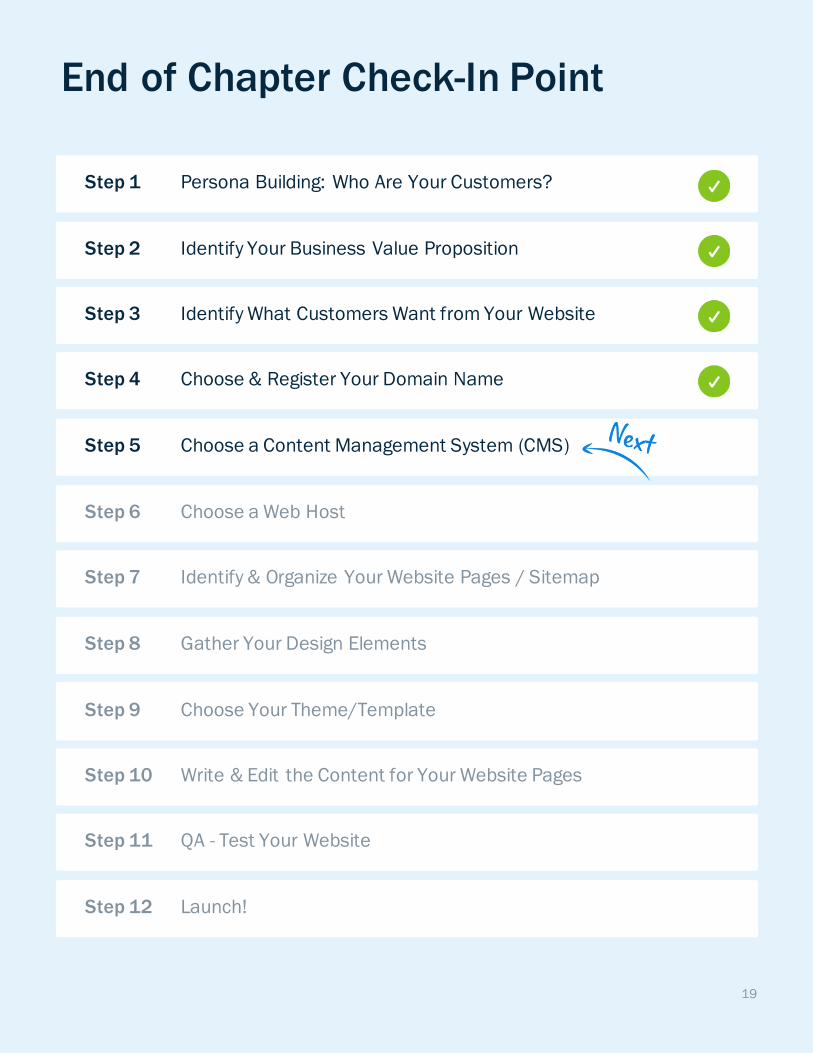
Step 1 Persona Building: Who Are Your Customers?
Step 2 Identify Your Business Value Proposition
Step 3 Identify What Customers Want from Your Website
Step 4 Choose & Register Your Domain Name
Step 5 Choose a Content Management System (CMS)
Step 6 Choose a Web Host
Step 7 Identify & Organize Your Website Pages / Sitemap
Step 8 Gather Your Design Elements
Step 9 Choose Your Theme/Template
Step 10 Write & Edit the Content for Your Website Pages
Step 11 QA - Test Your Website
Step 12 Launch!
CHAPTER 3
Choose a Content Management System and Web Host
BUILDING A WEBSITE FOR YOUR SMALL BUSINESS

21
Step 5: Choosing a Content Management System (CMS)
Don’t be scared! Yes, we’re getting technical-sounding terms up there, but
we’ll work through this together, we promise. If we were building a house,
this is the part where we would choose the foundation and hook up the
utilities.
• The CMS is the computer application that allows publishing, editing,
uploading, organizing and managing your content.
• CMSes range from the complex (you can code custom features into your
website) to the simple (you’re provided templates on which you upload
your files).

22
Features to Consider When Choosing a CMS:
ALL-IN-ONE PACKAGE?
CMS options such as Squarespace offer all-in-one solutions, including
domains, hosting, analytics and design templates. Responsive across all
media. Your CMS should produce a website that’s readable in all formats,
including tablet, mobile phone, laptop and desktop computer.
EASY (FOR YOU) TO USE
You should be able to navigate, upload, edit and manage your content and
images easily in the CMS interface. It’s important to find one that’s at your
technical level.
TEMPLATES THAT ARE SUITED TO YOUR BUSINESS
Browse the design options available to be sure there are options that will
optimally showcase your business. A photographer will likely choose a
portfolio-style template while a home services business might be better
served by a standard corporate look.
REASONABLE PRICE
Avoid paying for features and services you don’t need and won’t use. Simple
CMS packages can be found for around $10/month.
Pro-Tip: Our experts pshawed at using anything besides Squarespace. Their belief is that nothing can touch it in terms of ease of use, quality and price.
23
Some Popular Options
Most popular for its user-friendly design and eye-popping imagery, Squarespace is the leader of all-in-one website packages. If you’re a creative professional (writing, photography, graphic design, art, etc.), Squarespace offers incredible templates that will help showcase your work. However, if you’re looking for a simple design and want to include ecommerce, Squarespace may not be the best choice. Plan
includes: Website template, domain, hosting and analytics.
Economical, easy to use and equipped with a huge number of themes to choose
from, WordPress is an enormously popular CMS. (FreshBooks narrows it down
with 19 Free WordPress Themes For Every Kind of Freelancer.) With little
technical knowledge, you can do just about anything. SEO is made simple and
e-commerce is easy to add. But, WordPress is known for updating their software
frequently, which means you need to be on top of that too. Plus, customizing
themes can get costly and require finicky technical finesse. Plan includes: Website
template, domain, hosting and analytics.
Designed for small businesses, online stores and artists, Wix boasts free pre-built
layouts for several different industries. It allows you to move things around until
it’s “pixel perfect” and has functionality to add animated text and other elements.
Wix can be a bit pricey compared to other CMSes and once you choose your initial
template, you’re locked into it. Plan includes: Website template, domain and
Google Analytics integration.
24
This process is kind of like linking your mobile phone to a service provider. You’ll manage the look and feel and the way you use your website; your web hosting company will take make sure you have everything you need to keep your website live.
There are thousands of web hosting companies, ranging from the simple and free to the large and complex. You’ll need to consider your website’s needs and find the right fit for your business.
Step 6: Choosing a Web Host
Unless you’re comfortable hosting all of your website’s files on your own
server and managing their security, you’ll need a web hosting service. (That
is, if the CMS you chose does not provide this service.)

25
– KEZZ BRACEY (source)
Selecting a host is kind of a big deal, because
everything from the speed and stability of your
website, to its security and uptime can depend
on making a good choice. And if you pick a host
and set yourself up only to realize another host
would be better for you, migrating your site can
be a real pain in the neck.
Learn More: The (Seriously) Comprehensive Guide to Choosing a Web Host
26
Things to Consider When Choosing a Web Host
Pro-Tip: Walk away if the renewal cost is substantially larger than the hosting sign-up fee.
CHECK REVIEWS FOR SERVER RELIABILITY
Verify through several review sites that the web host provides stable service
that doesn’t crash regularly or have downtime.
BE SURE THEY OFFER SUFFICIENT STORAGE FOR YOUR FILES
Unless you’re planning an interactive website, the base package is usually fine. You can always add on if your site increases in scope.
TEST THE CONNECTION SPEED
Visit a few sites hosted by the company and see how quickly they load. Remember that most people don’t have the patience to wait more than a few seconds for a website to appear.
LOOK FOR FEATURES YOU NEED
You might want email addresses (Note: Make sure there isn’t a limit on mailbox capacity, domain name registration and some back-end tools for your Content Management System—see Step 1).
EXCELLENT CUSTOMER SERVICE
Do they provide 24-hour telephone or email technical support? This is crucial. Be wary of web hosts that provide a “support forum” in lieu of people who can answer your questions quickly.

27
End of Chapter Check-In Point
Step 1 Persona Building: Who Are Your Customers?
Step 2 Identify Your Business Value Proposition
Step 3 Identify What Customers Want from Your Website
Step 4 Choose & Register Your Domain Name
Step 5 Choose a Content Management System (CMS)
Step 6 Choose a Web Host
Step 7 Identify & Organize Your Website Pages / Sitemap
Step 8 Gather Your Design Elements
Step 9 Choose Your Theme/Template
Step 10 Write & Edit the Content for Your Website Pages
Step 11 QA - Test Your Website
Step 12 Launch!
CHAPTER 4
Identify & Organize Your Website Pages / Sitemap
BUILDING A WEBSITE FOR YOUR SMALL BUSINESS

29
Here’s where your deep reflection and hard
work from earlier comes back into play.
You’ll remember that you identified your
unique value proposition and the reasons
your ideal customers are visiting your website.
Now it’s time to create a sitemap that gives
your visitors the information they want—plus
the information you want them to have.
30
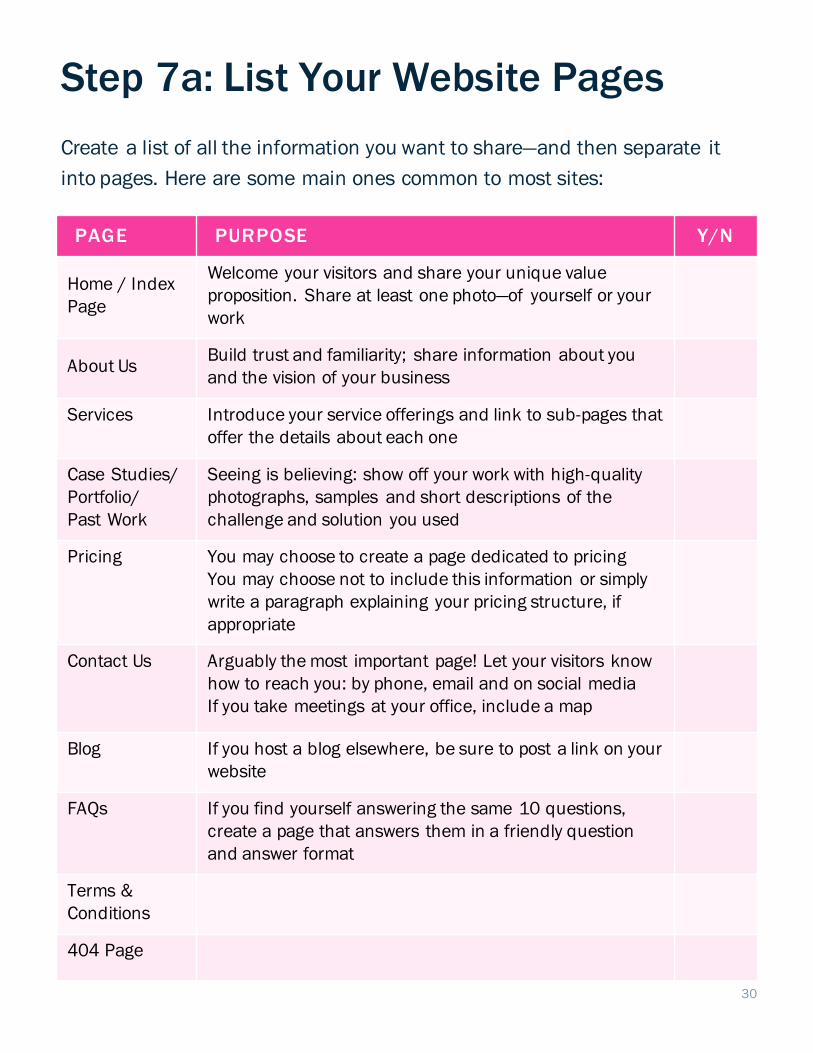
Step 7a: List Your Website Pages
Create a list of all the information you want to share—and then separate it
into pages. Here are some main ones common to most sites:
PAGE PURPOSE Y/N
Home / Index Page
Welcome your visitors and share your unique value proposition. Share at least one photo—of yourself or your work
About UsBuild trust and familiarity; share information about you and the vision of your business
Services Introduce your service offerings and link to sub-pages that offer the details about each one
Case Studies/Portfolio/Past Work
Seeing is believing: show off your work with high-quality photographs, samples and short descriptions of the challenge and solution you used
Pricing You may choose to create a page dedicated to pricingYou may choose not to include this information or simply write a paragraph explaining your pricing structure, if appropriate
Contact Us Arguably the most important page! Let your visitors know how to reach you: by phone, email and on social mediaIf you take meetings at your office, include a map
Blog If you host a blog elsewhere, be sure to post a link on your website
FAQs If you find yourself answering the same 10 questions, create a page that answers them in a friendly question and answer format
Terms & Conditions
404 Page
31
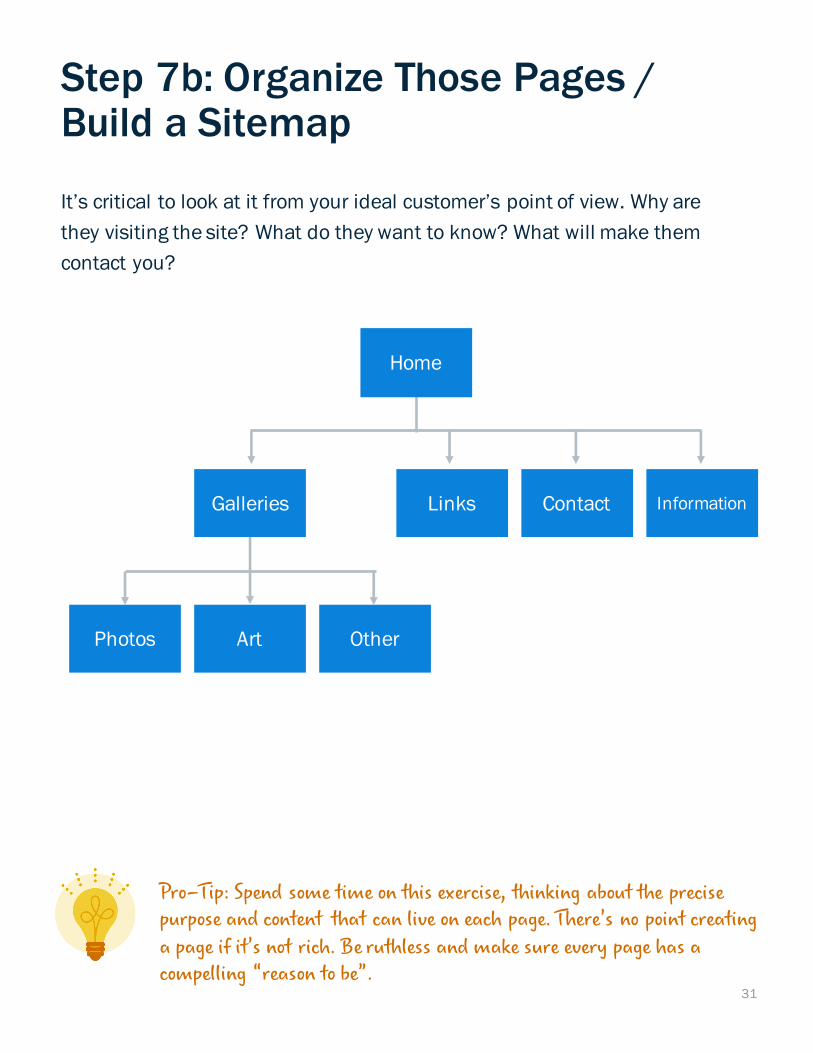
Step 7b: Organize Those Pages / Build a Sitemap
It’s critical to look at it from your ideal customer’s point of view. Why are
they visiting the site? What do they want to know? What will make them
contact you?
Pro-Tip: Spend some time on this exercise, thinking about the precise purpose and content that can live on each page. There’s no point creating a page if it’s not rich. Be ruthless and make sure every page has a compelling “reason to be”.
Links Contact Information
Photos Art Other
Home
Galleries
32
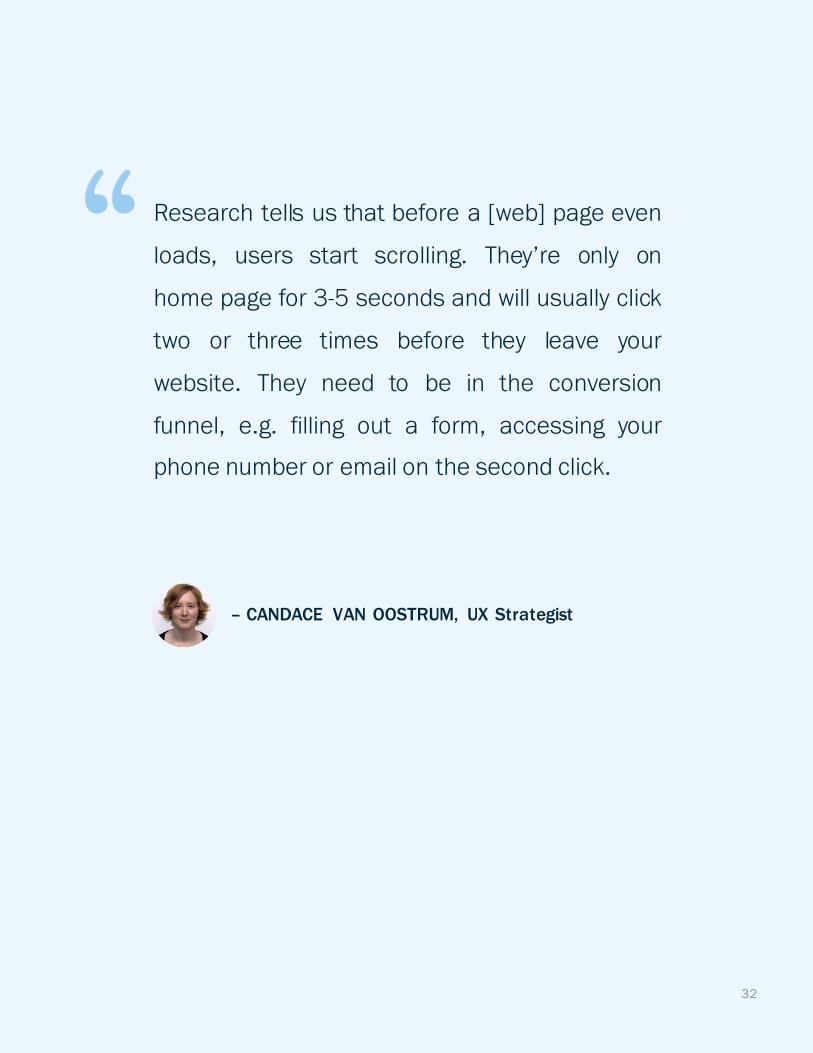
– CANDACE VAN OOSTRUM, UX Strategist
Research tells us that before a [web] page even
loads, users start scrolling. They’re only on
home page for 3-5 seconds and will usually click
two or three times before they leave your
website. They need to be in the conversion
funnel, e.g. filling out a form, accessing your
phone number or email on the second click.
33
End of Chapter Check-In Point
Step 1 Persona Building: Who Are Your Customers?
Step 2 Identify Your Business Value Proposition
Step 3 Identify What Customers Want from Your Website
Step 4 Choose & Register Your Domain Name
Step 5 Choose a Content Management System (CMS)
Step 6 Choose a Web Host
Step 7 Identify & Organize Your Website Pages / Sitemap
Step 8 Gather Your Design Elements
Step 9 Choose Your Theme/Template
Step 10 Write & Edit the Content for Your Website Pages
Step 11 QA - Test Your Website
Step 12 Launch!

CHAPTER 5
Gather Your Design Elements
BUILDING A WEBSITE FOR YOUR SMALL BUSINESS

36
Step 8a: Gather Your Design Elements
It goes without saying that you want your website to be a welcoming place for
your visitors. It should be pleasing to the eye, easy to navigate and visually
reflect the ethos of your brand.
Unless you have a background in graphic design—or have hired a
professional—our best advice is to keep it as clean and simple as possible.
A classic look without a lot of flashing gimmicks is what most people prefer in
a business website.
Pro-Tip: Even if you couldn’t afford a developer and designer to work on your entire website, you can still get portions of design-work handled by a professional… your logo, your website photography etc. are all good places to lean on others, especially if those tasks are outside your skill set!
37
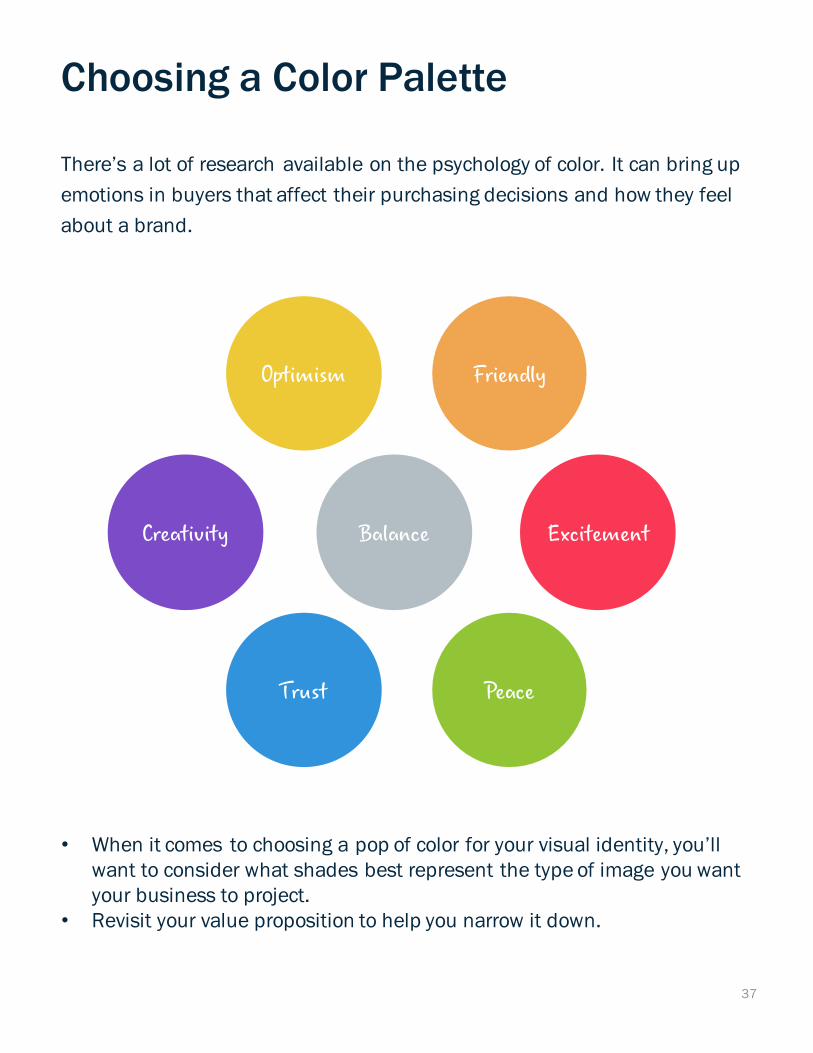
• When it comes to choosing a pop of color for your visual identity, you’ll want to consider what shades best represent the type of image you want your business to project.
• Revisit your value proposition to help you narrow it down.
Choosing a Color Palette
There’s a lot of research available on the psychology of color. It can bring up
emotions in buyers that affect their purchasing decisions and how they feel
about a brand.
Friendly
Trust
Balance
Optimism
Excitement
Peace
Creativity
38
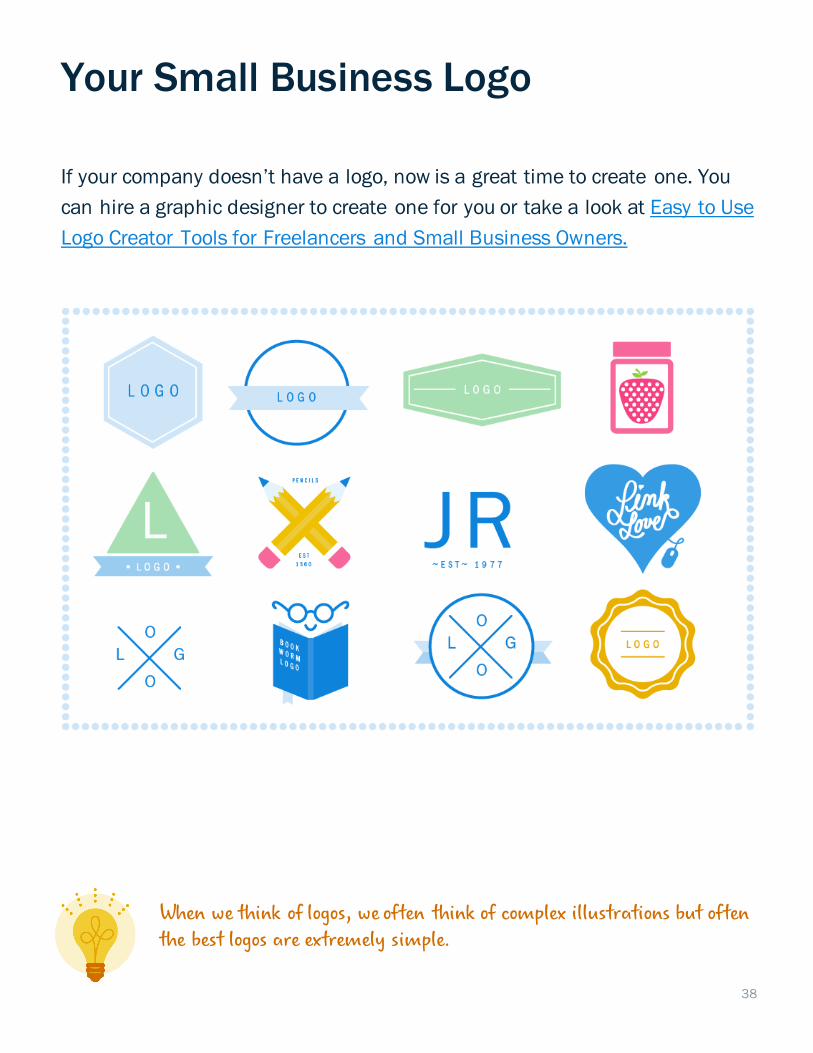
When we think of logos, we often think of complex illustrations but often the best logos are extremely simple.
Your Small Business Logo
If your company doesn’t have a logo, now is a great time to create one. You
can hire a graphic designer to create one for you or take a look at Easy to Use
Logo Creator Tools for Freelancers and Small Business Owners.
39
Pro-tip: Maintain display consistency across all browsers by using web-based fonts on your website. Google Fonts has an extensive collection to match your vision and style, and can be easily embedded onto your website.
Tips on Font Choice
It’s easy to get carried away with fonts. Our advice? Don’t do it. You want your
ideal customer to visit your site and not even notice the font. That means your
words and message are what’s shining through, not the lettering.
You can stick with classic fonts like Helvetica, Times New Roman or Palatino
or shop around for trendier types:
• The 10 Most Popular Sans-Serif Fonts
• The 41 Greatest Free Web Fonts
• The 200+ Best Modern Fonts Collection for 2017 (most are free)
40
Images add interest to an otherwise classically-designed (read: simple) page. Like color, they help incite emotion in visitors. When it comes to selecting images for your website, choose carefully.
ORIGINAL PHOTOGRAPHS
If you want to instill trust and familiarity with your visitors, be sure to post photographs of you and your team. You won’t regret hiring a professional
photographer to take high-quality head and group shots. (A wedding photo with your partner cropped out does more harm than good.)
If you take your own photographs of your work, be sure to use only high-resolution images. Anything fuzzy or out of focus looks unprofessional.
STOCK PHOTOSIf you’re camera shy or your business doesn’t lend itself to visuals, consider purchasing a few stock photographs to help give your web pages a visual lift.
GRAPHICS
If you have a complex business offering, it’s worth the investment to hire a graphic designer to create an infographic that visually explains it. If you want to use an image or infographic from another website, be sure to get permission and/or give credit with a link.
Learn More:
Images for Your Website
73 Websites to Find Amazing Royalty-Free Images
41
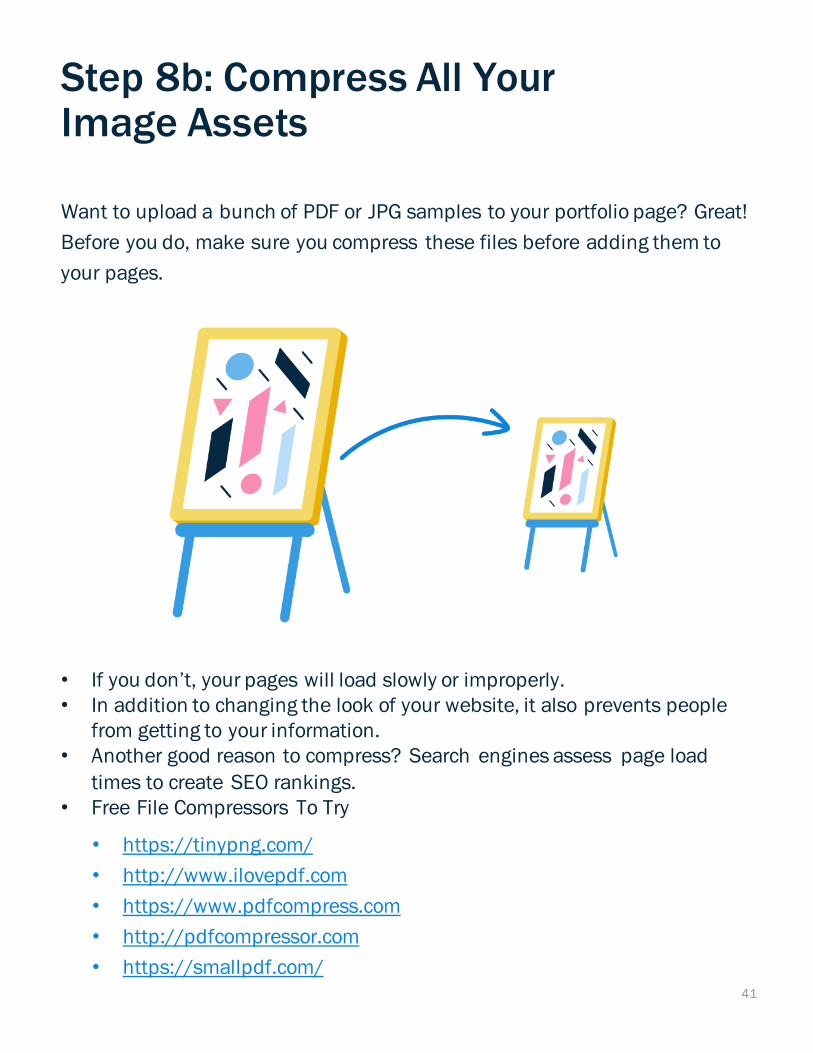
• If you don’t, your pages will load slowly or improperly.• In addition to changing the look of your website, it also prevents people
from getting to your information. • Another good reason to compress? Search engines assess page load
times to create SEO rankings.• Free File Compressors To Try
Step 8b: Compress All Your Image Assets
Want to upload a bunch of PDF or JPG samples to your portfolio page? Great!
Before you do, make sure you compress these files before adding them to
your pages.
• https://tinypng.com/
• http://www.ilovepdf.com
• https://www.pdfcompress.com
• http://pdfcompressor.com
• https://smallpdf.com/
42
– BECKY STERN, Web Designer
A good rule for images is to size them to be
twice as large as you want them, and then set
the dimensions once uploaded to the site.
For example, I would size my JPG or PNG to be
600 x 400 pixels. Then I would put it through an
online compressor. Then once on the site,
I would set it to 300 x 200 pixels. This makes
sure you have high quality crisp images that
don't slow down your site.
43
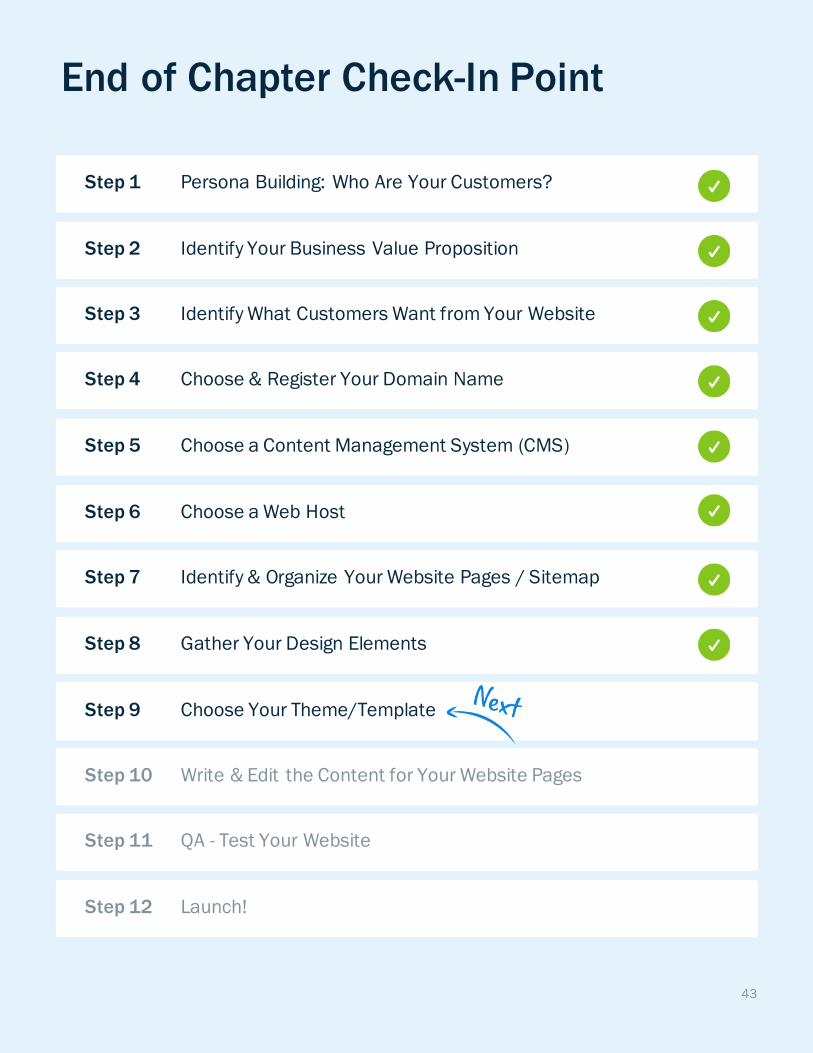
End of Chapter Check-In Point
Step 1 Persona Building: Who Are Your Customers?
Step 2 Identify Your Business Value Proposition
Step 3 Identify What Customers Want from Your Website
Step 4 Choose & Register Your Domain Name
Step 5 Choose a Content Management System (CMS)
Step 6 Choose a Web Host
Step 7 Identify & Organize Your Website Pages / Sitemap
Step 8 Gather Your Design Elements
Step 9 Choose Your Theme/Template
Step 10 Write & Edit the Content for Your Website Pages
Step 11 QA - Test Your Website
Step 12 Launch!
CHAPTER 6
Choose Your Theme/Template
BUILDING A WEBSITE FOR YOUR SMALL BUSINESS
45
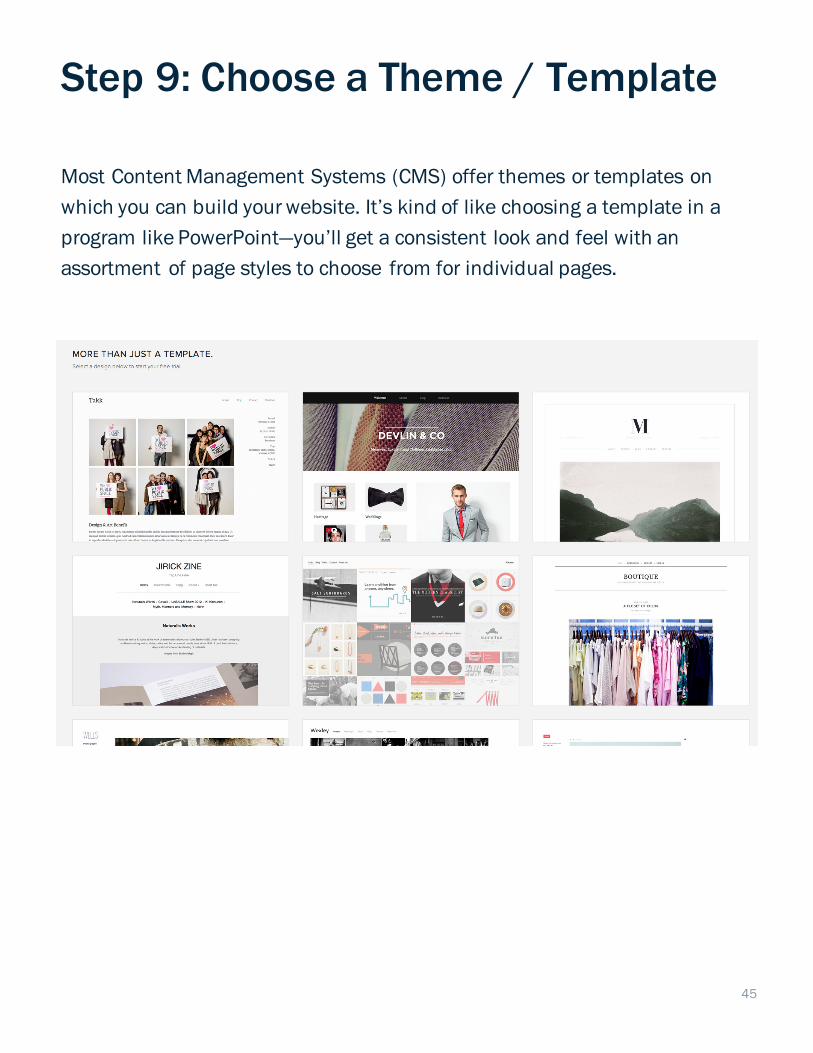
Step 9: Choose a Theme / Template
Most Content Management Systems (CMS) offer themes or templates on
which you can build your website. It’s kind of like choosing a template in a
program like PowerPoint—you’ll get a consistent look and feel with an
assortment of page styles to choose from for individual pages.
46
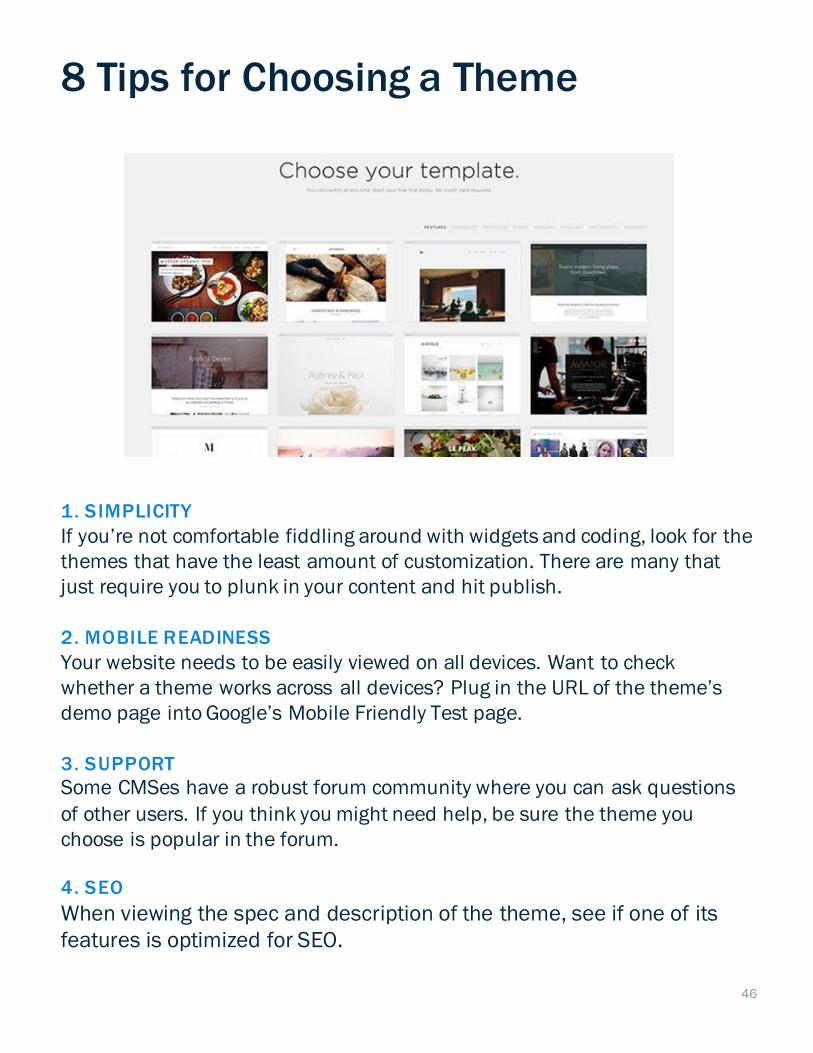
1. SIMPLICITY
If you’re not comfortable fiddling around with widgets and coding, look for the themes that have the least amount of customization. There are many that just require you to plunk in your content and hit publish.
2. MOBILE READINESS
Your website needs to be easily viewed on all devices. Want to check whether a theme works across all devices? Plug in the URL of the theme’s demo page into Google’s Mobile Friendly Test page.
3. SUPPORTSome CMSes have a robust forum community where you can ask questions of other users. If you think you might need help, be sure the theme you choose is popular in the forum.
4. SEO
When viewing the spec and description of the theme, see if one of its features is optimized for SEO.
8 Tips for Choosing a Theme
47
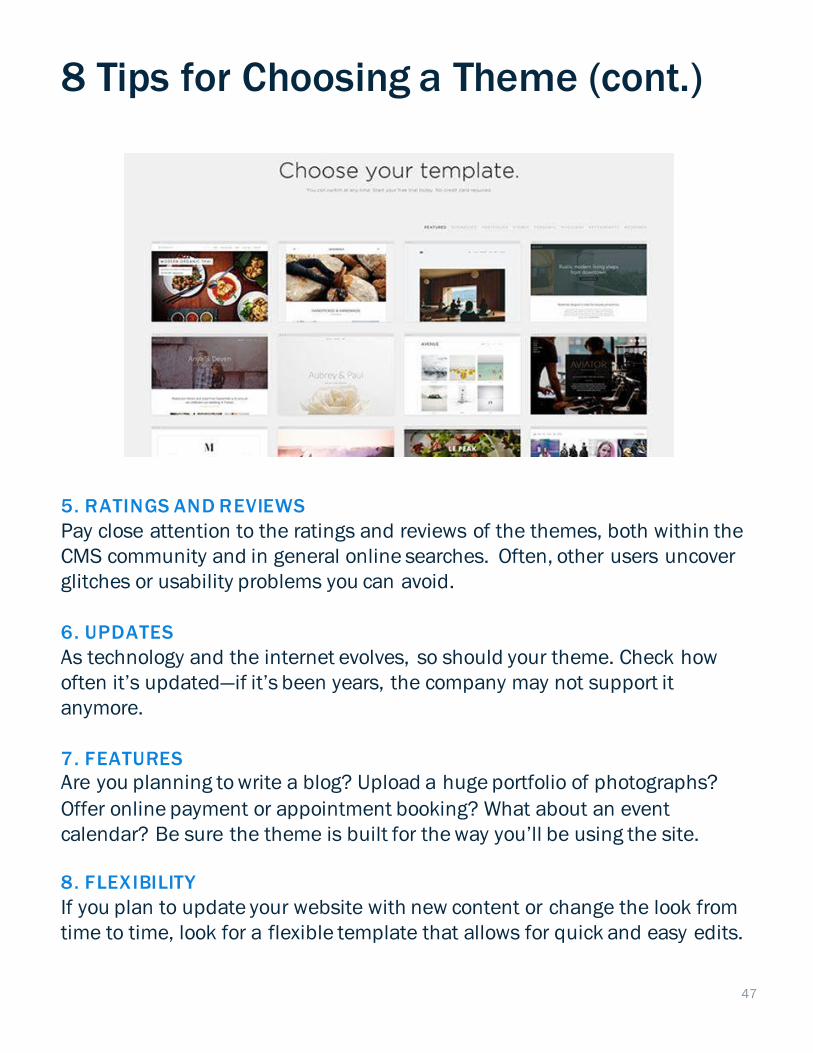
5. RATINGS AND REVIEWS
Pay close attention to the ratings and reviews of the themes, both within the CMS community and in general online searches. Often, other users uncover glitches or usability problems you can avoid.
6. UPDATES
As technology and the internet evolves, so should your theme. Check how often it’s updated—if it’s been years, the company may not support it anymore.
7. FEATURESAre you planning to write a blog? Upload a huge portfolio of photographs? Offer online payment or appointment booking? What about an event calendar? Be sure the theme is built for the way you’ll be using the site.
8. FLEXIBILITY
If you plan to update your website with new content or change the look from time to time, look for a flexible template that allows for quick and easy edits.
8 Tips for Choosing a Theme (cont.)
48
Or… Hire a Professional to Build a Theme for You
If the checklist makes you woozy, this would be a perfectly acceptable step to
consider hiring a professional. Many web developers and designers are happy
to work with CMS themes to create a semi-customized website. You would
provide them with all the information you’ve prepared up till now, plus the
content you create in Chapter 7.
Pro-Tip: Bringing on a professional at this stage will be more affordable than hiring one from the beginning and you’ll have the peace of mind of knowing the theme is right for your business.
49
End of Chapter Check-In Point
Step 1 Persona Building: Who Are Your Customers?
Step 2 Identify Your Business Value Proposition
Step 3 Identify What Customers Want from Your Website
Step 4 Choose & Register Your Domain Name
Step 5 Choose a Content Management System (CMS)
Step 6 Choose a Web Host
Step 7 Identify & Organize Your Website Pages / Sitemap
Step 8 Gather Your Design Elements
Step 9 Choose Your Theme/Template
Step 10 Write & Edit the Content for Your Website Pages
Step 11 QA - Test Your Website
Step 12 Launch!
CHAPTER 7
Write the Content for Your Website Pages
BUILDING A WEBSITE FOR YOUR SMALL BUSINESS
51
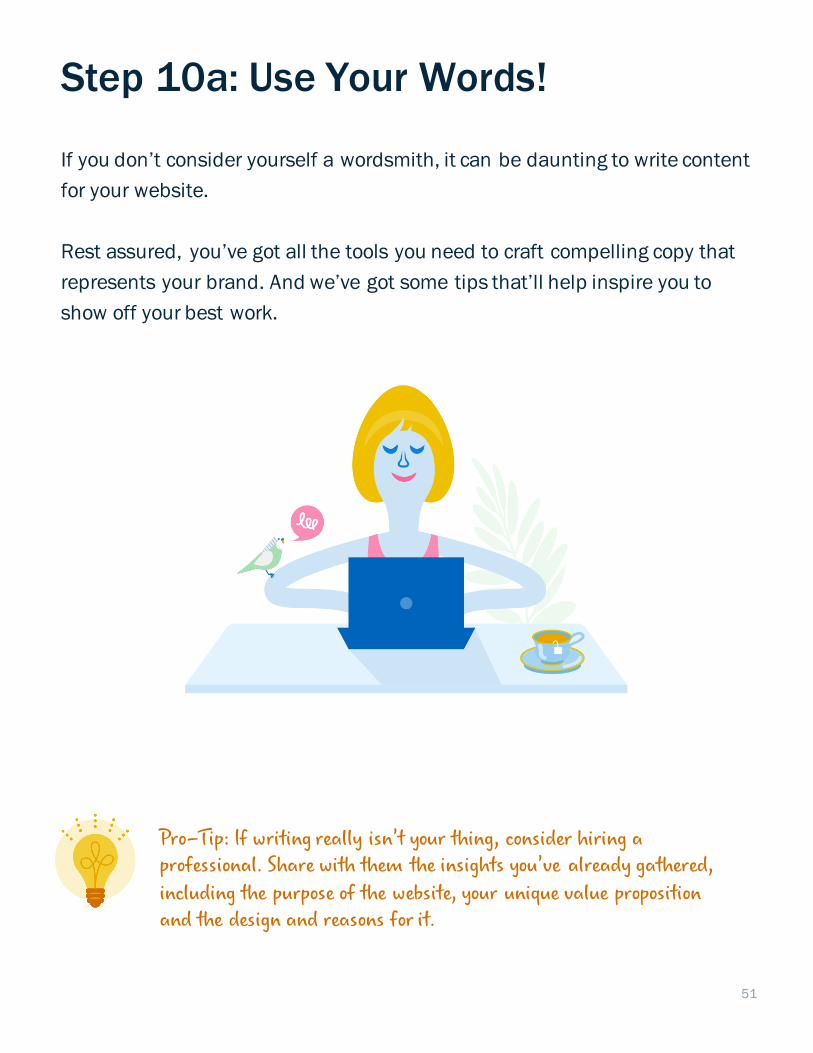
Pro-Tip: If writing really isn’t your thing, consider hiring a professional. Share with them the insights you’ve already gathered, including the purpose of the website, your unique value proposition and the design and reasons for it.
Step 10a: Use Your Words!
If you don’t consider yourself a wordsmith, it can be daunting to write content
for your website.
Rest assured, you’ve got all the tools you need to craft compelling copy that
represents your brand. And we’ve got some tips that’ll help inspire you to
show off your best work.

52
1. REVISIT YOUR WEBSITE’S PURPOSE & YOUR VALUE PROPOSITION
Avoid the angry stare of the blank page by going back to your notes from Chapter 1.
Remind yourself of:- Your website’s purpose- Why and how your visitors will use it- Your unique value proposition
Write some key words for each of these considerations so you have a jumping off point.
2. RESEARCH OTHER WEBSITES FOR TONE AND VOICE INSPIRATION
For inspiration, visit the websites and social media accounts of companies you admire. Make note of what attributes you like and why. While you’re at it, pop by some of your competitors’ websites and see how they communicate.
3. START WRITING
By now, you should have a good sense of who you are, what you want to communicate and—most importantly—what your audience wants to know about you. Take your key words and insights about the appropriate tone you want to create on your website and off you go!
Learn More:
Approaching Your Website Copy
Copywriting Mistakes to Avoid

53
BE CONSISTENT
Think of your website as a sales presentation to a customer. Keep the same tone of voice on all pages.
KEEP IT SIMPLE
Don’t let your key information get lost in a sea of words. Keep it short and simple.
USE SUBHEADINGS AND LISTS
People don’t like to read chunky paragraphs online. Give them the information they need in scannable form. Use headings. And if you’re listing more than three items, put them in a bulleted list.
INCLUDE A CALL TO ACTION (CTA) ON EVERY PAGE
In marketing-speak, a CTA is an instruction to your reader to do something. People like to know what is expected of them. CTAs like “Email me for a free quote” inspire action.
CONSIDER OPTIMIZING FOR SEARCH (SEO)
Consider the ways people might search your type of business and include those key words into your writing, e.g. “dog walker in Cleveland”. The content and key words you use on your pages will be indexed by Google, so the more often you say what you are, the better.
Pro-Tip: Don’t compromise the quality of your writing for the sake of SEO. Write like a person first.
Most Important Copywriting Tips

54
Step 10b: Get a Second Set of Eyes
Whether you hire a professional or call upon an eagle-eye employee,
colleague or friend, editing is important!
Ask them to look for things like spelling and grammatical errors, but also to
weigh in on whether you’re achieving what you set out to do:
My value proposition is ____________________. Is that clear?
The purpose of my website is to_____________________.
Have I achieved that?
Is the tone of voice consistent across all pages?
Is there anything you don’t understand?
Were you confused about any of the messages?
You might even give them a short list of information an ideal customer might
be look for and ask them how many clicks and how much time it took for
them to find answers.
55
A Next Level Content Strategy
Consider a blog: Google loves “content-rich” pages. You’ll appear more in
search results if your website is updated often and features relevant
information for readers.
– Jane Flanagan, Content Director
Content can start to feel fluffy if it’s not
grounded in strategy. You want to give it a
robust role to play in your business. Your
content strategy sets that scene for success.
Learn More: Your Small Business Needs a Content Strategy
And More: Building a Content Calendar
56
End of Chapter Check-In Point
Step 1 Persona Building: Who Are Your Customers?
Step 2 Identify Your Business Value Proposition
Step 3 Identify What Customers Want from Your Website
Step 4 Choose & Register Your Domain Name
Step 5 Choose a Content Management System (CMS)
Step 6 Choose a Web Host
Step 7 Identify & Organize Your Website Pages / Sitemap
Step 8 Gather Your Design Elements
Step 9 Choose Your Theme/Template
Step 10 Write & Edit the Content for Your Website Pages
Step 11 QA - Test Your Website
Step 12 Launch!
CHAPTER 8
Test and Launch Your Website
BUILDING A WEBSITE FOR YOUR SMALL BUSINESS
58
AVOID THE DREADED 404
The last thing you want is for a brand new prospect to be confronted with a glaring 404 Not Found Error or a web page that simply won’t load.
REMEMBER, TECHNOLOGY ISN’T PERFECT
Sometimes a website runs beautifully on one type of browser and completely fails on another. It’s best if you’re the one who finds errors or glitches—not your customers. Ask a few employees or friends to help you take a fine-toothed comb to your website.
Pro-Tip: Most of the time, you’ll find small tweaks that require quick fixes. But if you’re struggling with browser compatibility or mobile friendliness, you’ll need to consult with your CMS or web host for support.
Step 12: QA - Test Your Website
You’ve done it! All of your design elements are in place and your web pages
are singing with glorious copy. Well done! But wait—before you flip the switch
and declare your website “live”, it’s critical to test it thoroughly.
59
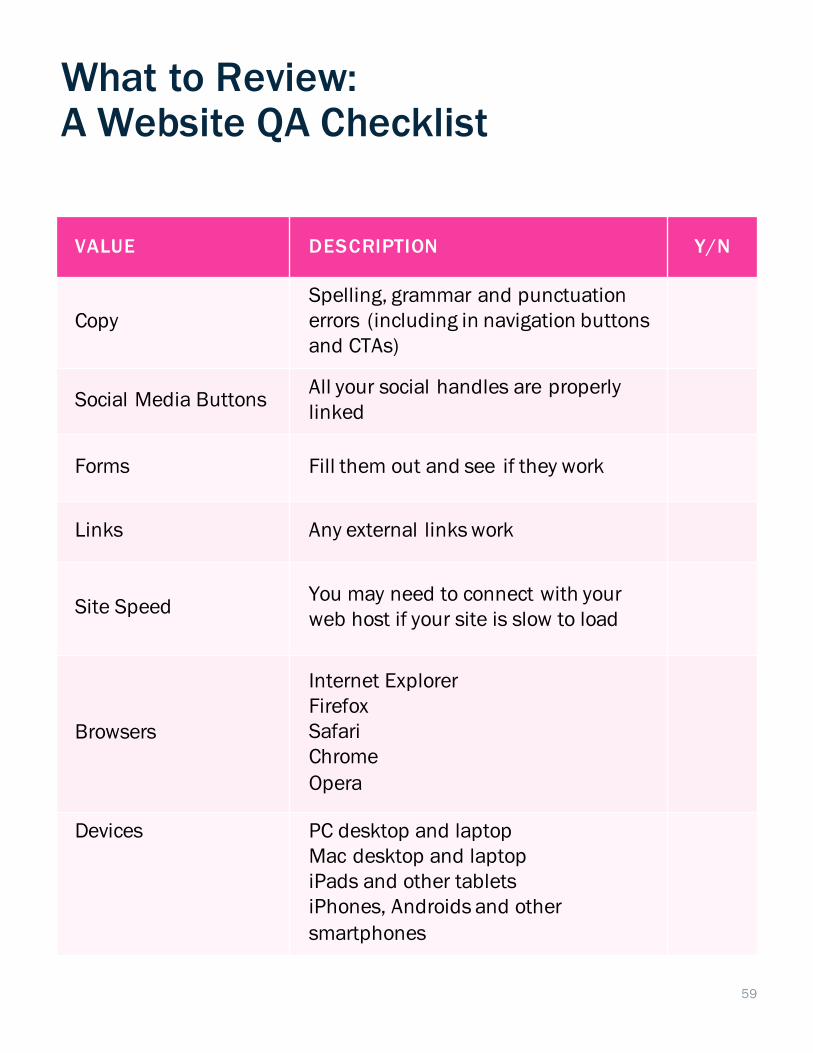
What to Review: A Website QA Checklist
VALUE DESCRIPTION Y/N
CopySpelling, grammar and punctuation errors (including in navigation buttons and CTAs)
Social Media ButtonsAll your social handles are properly linked
Forms Fill them out and see if they work
Links Any external links work
Site SpeedYou may need to connect with your web host if your site is slow to load
Browsers
Internet ExplorerFirefoxSafariChromeOpera
Devices PC desktop and laptopMac desktop and laptopiPads and other tabletsiPhones, Androids and other smartphones
60
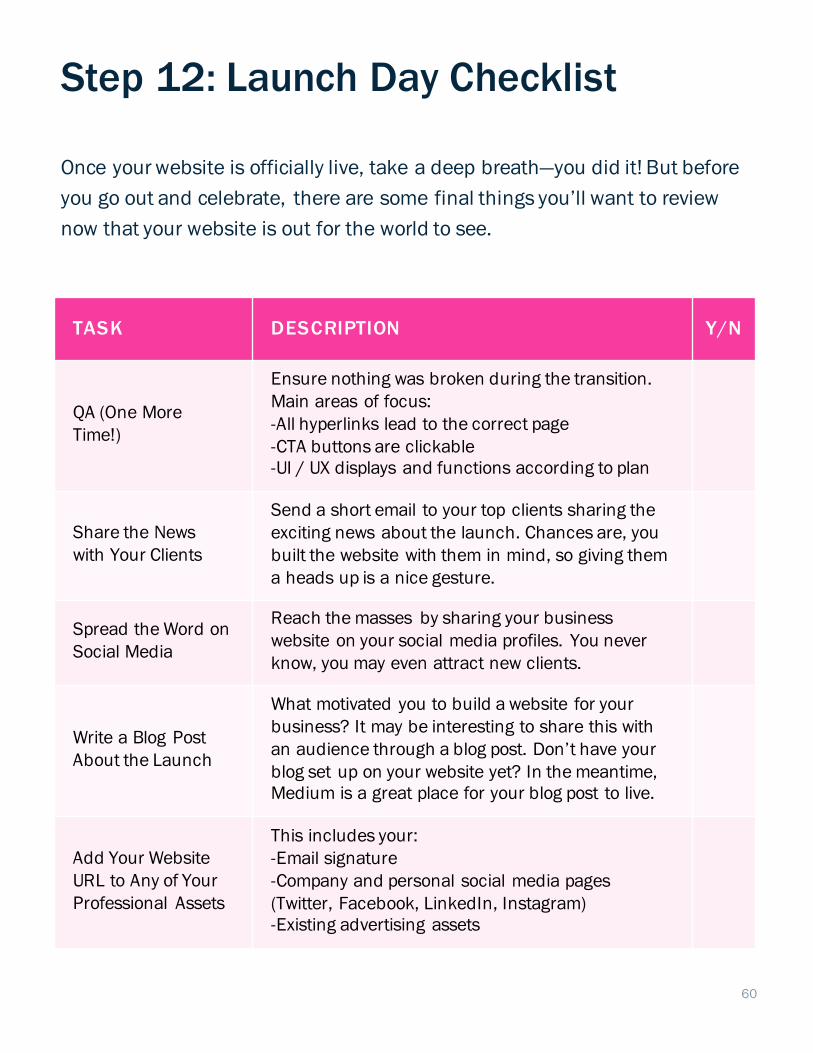
Step 12: Launch Day Checklist
Once your website is officially live, take a deep breath—you did it! But before
you go out and celebrate, there are some final things you’ll want to review
now that your website is out for the world to see.
TASK DESCRIPTION Y/N
QA (One More Time!)
Ensure nothing was broken during the transition. Main areas of focus:-All hyperlinks lead to the correct page-CTA buttons are clickable-UI / UX displays and functions according to plan
Share the News with Your Clients
Send a short email to your top clients sharing the exciting news about the launch. Chances are, you built the website with them in mind, so giving them a heads up is a nice gesture.
Spread the Word on Social Media
Reach the masses by sharing your business website on your social media profiles. You never know, you may even attract new clients.
Write a Blog Post About the Launch
What motivated you to build a website for your business? It may be interesting to share this with an audience through a blog post. Don’t have your blog set up on your website yet? In the meantime, Medium is a great place for your blog post to live.
Add Your Website URL to Any of Your Professional Assets
This includes your:-Email signature-Company and personal social media pages (Twitter, Facebook, LinkedIn, Instagram)-Existing advertising assets
61
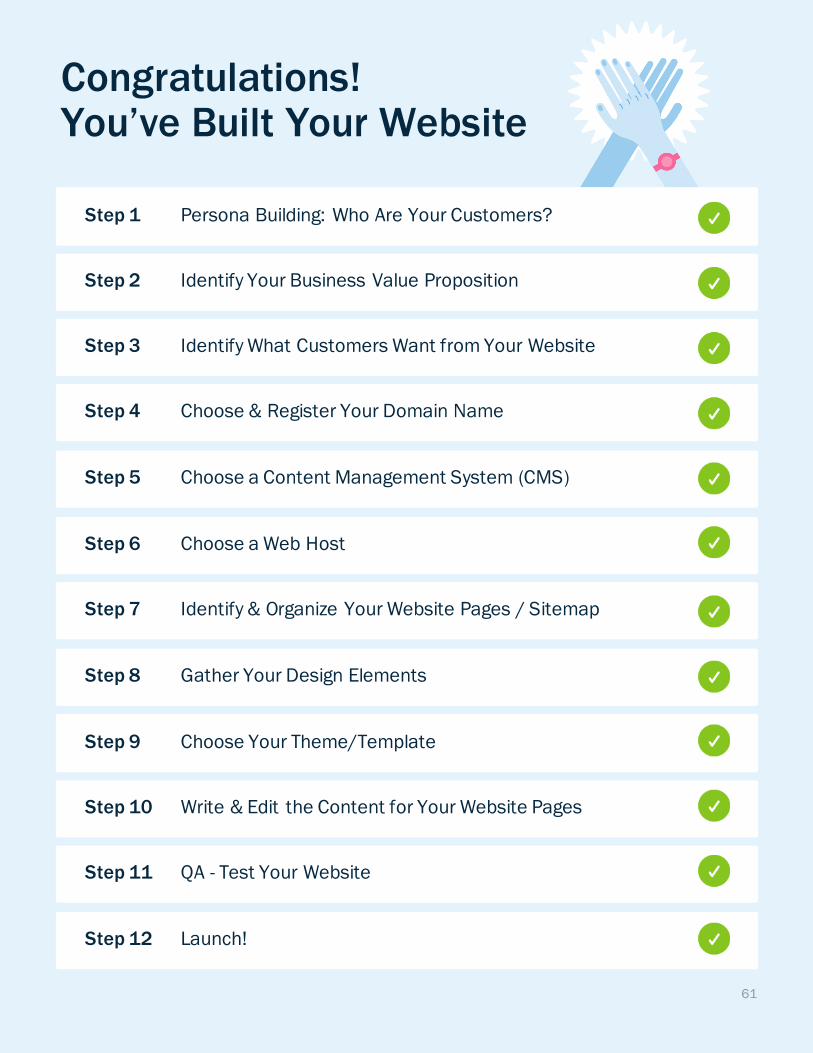
Congratulations! You’ve Built Your Website
Step 1 Persona Building: Who Are Your Customers?
Step 2 Identify Your Business Value Proposition
Step 3 Identify What Customers Want from Your Website
Step 4 Choose & Register Your Domain Name
Step 5 Choose a Content Management System (CMS)
Step 6 Choose a Web Host
Step 7 Identify & Organize Your Website Pages / Sitemap
Step 8 Gather Your Design Elements
Step 9 Choose Your Theme/Template
Step 10 Write & Edit the Content for Your Website Pages
Step 11 QA - Test Your Website
Step 12 Launch!
CHAPTER 9
Develop a Maintenance Plan
BUILDING A WEBSITE FOR YOUR SMALL BUSINESS
64
• Websites are like living creatures; they need to be fed and watered (in
their own technological way) in order to remain robust and relevant.
• Plus, Google loves handmade pages that are frequently updated.
• Keep your website at the top of the search index by tweaking your site on
a regular basis.
You Have a Website Now—Maintain It
Your website is actively doing the work of representing your business to
customers, prospects and the world at large. What a great feeling!
Before you skip off into the sunset, you should know—a website is not a “set it
and forget it” undertaking.
Pro-Tip: It’s so much easier to tweak & freshen things here and there rather than go through dramatic rebuilds every 5 years.
65
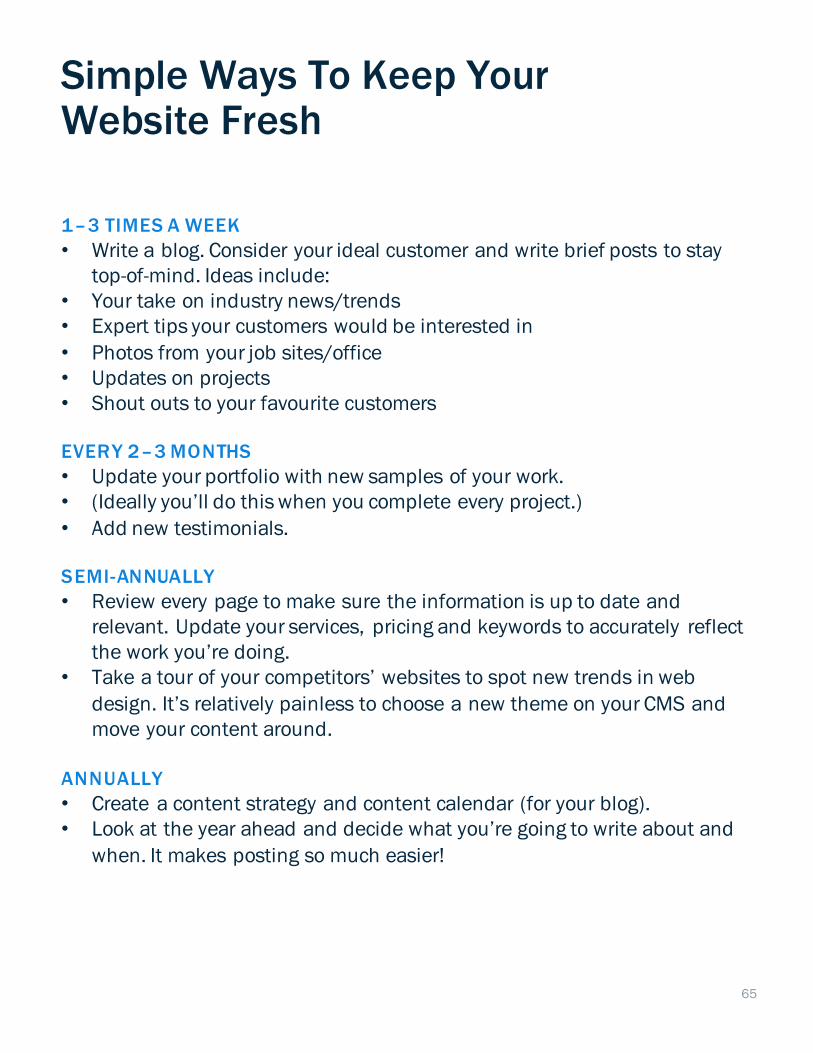
1–3 TIMES A WEEK
• Write a blog. Consider your ideal customer and write brief posts to stay top-of-mind. Ideas include:
• Your take on industry news/trends• Expert tips your customers would be interested in• Photos from your job sites/office• Updates on projects• Shout outs to your favourite customers
EVERY 2–3 MONTHS
• Update your portfolio with new samples of your work. • (Ideally you’ll do this when you complete every project.) • Add new testimonials.
SEMI-ANNUALLY
• Review every page to make sure the information is up to date and relevant. Update your services, pricing and keywords to accurately reflect the work you’re doing.
• Take a tour of your competitors’ websites to spot new trends in web design. It’s relatively painless to choose a new theme on your CMS and move your content around.
ANNUALLY
• Create a content strategy and content calendar (for your blog). • Look at the year ahead and decide what you’re going to write about and
when. It makes posting so much easier!
Simple Ways To Keep Your Website Fresh

66
For more small business advice, follow us on social media