June July 2016 ACROSPIRE IV Acrospire IV was designed by Charles Peel for Joe White and launched in Nov 1929, with a gaff rig as shown in the picture above. It was built in Melbourne as a flush deck International 9 Metre at 16.5m long with a beam of 2.9m, drawing 2.2m and weighing 13 tonne. The current custodian, Gary Martin of Boat Paints kindly related his adventures restoring Acrospire IV to ABBA members. Joe White was the owner of Joe White Distilleries who are still the biggest supplier of hops and barley to this day. Relatively recently, Gary met the stepson of Joe White. He was a young boy when Acrospire IV was launched and recounted his experiences of sailing on her for many years. He told Gary that launching Acrospire IV involved a horse drawn buggy carting the boat from the shipyard to a tree overhanging the Yarra River and using a block and tackle to lower it into the water. The gaff rig was replaced with a 21m spruce Bermudan rig within 2 months of it being launched. It remained this way until it was bought to WA and the South of Perth Yacht Club by Bob Moss in 1970. In Perth it was fitted with a cabin and an 18m aluminium mast.
Transcript
June July 2016
ACROSPIRE IV
Acrospire IV was designed by Charles Peel for Joe White and launched in Nov 1929, with a gaff rig as
shown in the picture above. It was built in Melbourne as a flush deck International 9 Metre at 16.5m long
with a beam of 2.9m, drawing 2.2m and weighing 13 tonne. The current custodian, Gary Martin of Boat
Paints kindly related his adventures restoring Acrospire IV to ABBA members.
Joe White was the owner of Joe White Distilleries who are still the biggest supplier of hops and barley to
this day. Relatively recently, Gary met the stepson of Joe White. He was a young boy when Acrospire IV
was launched and recounted his experiences of sailing on her for many years. He told Gary that launching
Acrospire IV involved a horse drawn buggy carting the boat from the shipyard to a tree overhanging the
Yarra River and using a block and tackle to lower it into the water.
The gaff rig was replaced with a 21m spruce Bermudan rig within 2 months of it being launched. It
remained this way until it was bought to WA and the South of Perth Yacht Club by Bob Moss in 1970. In
Perth it was fitted with a cabin and an 18m aluminium mast.
In the 70’s and 80’s, Acrospire IV competed in WA offshore events such as the Naturalist Return and the
Fremantle to Geraldton race. Around 1980, a new owner moved the boat to Fremantle and after some
seasons of racing, it was just left in its pen. In his job as a boat painter, Gary had an intimate knowledge
of Acrospire IV having maintained it for about 15 years from 1981.
In 2007, after seeing Acrospire IV silhouetted against the sun one morning, Gary was so taken with the
sight that he decided he must have this boat. It was soon his. The boat was derelict with bilge pumps
running continually. The runners had been kept tensioned for the last 10 years and had permanently
inverted the mast. The deck was so bad that Gary could manually lift the big winches and their long
securing bolts straight up through the rotten timbers. The 25mm hull planks were still in good condition
being made from New Zealand Kauri. Gary estimated that it would take more than $300,000 to restore
the vessel. Gary handed round a sample of the original deck which was made from planks of Victorian
Beech. This type of tree is now extinct. As the boat was built before ply was in common use, the thin
beech planks were joined and caulked to form the decking. As the deck wasn’t continually immersed,
the timbers shrank and when sailing through the waves, someone was continually manning the bilge
pumps to keep the hull dry.
Replacement of the rotten deck and removal of all the western red cedar deck beams for repair or
replacement as appropriate was not in Gary’s original estimate but he was beginning to discover the
scope of the task ahead of him. The quality of the workmanship and original boat building skills were
slowly being revealed as Gary was awakening to the importance of restoring this fine vessel to its former
glory no matter what. The new or repaired deck beams were treated with Everdure before replacement.
The carvel planking of the hull was made without caulking. The planks were fitted so well that the
expansion in the water was enough to ensure they sealed against each other. The boat was made
without power tools. Close fitting dovetailed joints and bronze screws were used instead of glues in its
construction. The 30 foot tapered keelson was made from one piece of timber that was shaped with an
adze. The keel contains about 6 tonne of lead, secured with 1 ½” brass (not bronze) bolts that were still
tight and were left untouched.
Gary’s knowledge and experience ensured that the hull was carefully sandblasted to remove all of the
paint without damaging the timber underneath.
The cabin that was added in the 70’s for offshore racing was removed. A new cabin was built from ½ ” ply
with ¼” tongue and groove western red cedar fitted both internally and externally. The cabin was slid
down over some uprights and screwed to them.
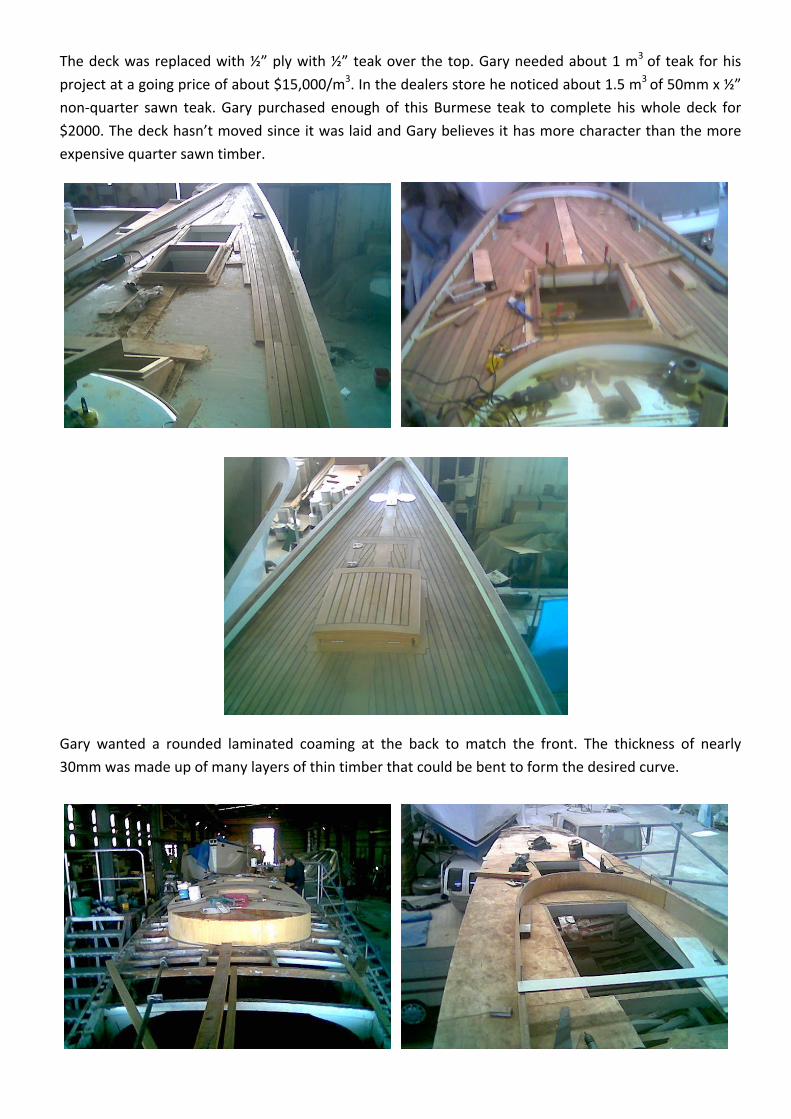
The deck was replaced with ½” ply with ½” teak over the top. Gary needed about 1 m3 of teak for his
project at a going price of about $15,000/m3. In the dealers store he noticed about 1.5 m3 of 50mm x ½”
non‐quarter sawn teak. Gary purchased enough of this Burmese teak to complete his whole deck for
$2000. The deck hasn’t moved since it was laid and Gary believes it has more character than the more
expensive quarter sawn timber.
Gary wanted a rounded laminated coaming at the back to match the front. The thickness of nearly
30mm was made up of many layers of thin timber that could be bent to form the desired curve.
There are ribs every 5” along its 54.5 foot length. 12 were replaced and 24 were sistered.
The traditional hatches were made with 25 mm Oroko also known as African Teak.
Gary and his sons spent a few weeks splining every hull plank with a router and filling the joints with an
epoxy filler that replicates the timber. The hull was glassed, gunwale to keel with 450 g/m2 double bias
cloth with 2 layers below the water and one layer above. This will ensure that the boat will last for a very
long time. When finished, you could still make out the imprint of each individual plank but also
benefiting from the stability of the epoxies.
Gary used a 1:1 mix of Hempel ProFiller epoxy fairing compound which was very easy to sand. He spent
thousands of hours on this project working 7 days a week for 2 years. This is the level of commitment to
get the high quality finish that Gary demanded.
Gary didn’t make any major decisions on the restoration for 3‐4 months until he knew what he wanted.
When he started in earnest, he had a plan in his head and knew where things would go. As an example,
he installed concealed wiring for LED lights early in the project when laminating the roof.
It was not until the various stages of Gary’s vision were completed and began forming the specific shape
Gary had in mind from the start that the boat builder stood back and could see where Gary was going
with the project. Gary’s vision had a budget, he just didn’t know what it was.
Gary said his window frames were “easy to do”. He obtained some 6mm laminated glass windows. Routed
out the ply to a matching template. Used a Sikaflex like mastic to secure the glass and the stainless
surrounds. These were secured with a screw at each end. They have proven to be leak free and the glass
easy to replace.
With marine engines, Gary learnt a valuable lesson. “Chinese engines don’t work”. As a deal for work done
by a boat builder, Gary was supplied with a 60hp, Chinese made, “Daihatsu” Diesel Engine. This was duly
fitted and lasted 2 hours. Gary went back to the person who supplied the first engine who said “would you
like another engine”. It took two days work to remove the old engine and fit the replacement. After 40
hour of operation, Gary decided to replace the oil filter but was told in no uncertain terms that the oil
filter sample that he had was not from a Daihatsu. Gary went back to the engine supplier to get a spare
filter element and was told that “they don’t have any spares. Would he like another engine”. Gary said no
and persevered with the second engine as he had to sail in a Mandurah Regatta. Motoring back at night,
the engine broke down off Garden Island and they were luckily able to be towed back by another
competitor. The next morning, the “Daihatsu” was removed again and dumped in pieces in the driveway
of original boat builder with words that can’t be repeated here. Gary bought a 75 hp Volvo engine which is
still going fine. He spoke highly of the dripless bearing that he now uses. It relies on a carbon block
running against a stainless steel surface with silicone rubber providing the sealing force.
Behind the two doors is the engine room where Gary made every effort to provide the best possible
access.
It was deliberately decided not to used too much timber to keep the interior feel light and airy. The
principle is darker colours to the bottom, lighter colours to the top. Gary generally kept the use of timber
below waist height with minimal timber above that level. Classic white rather than a bright white was
used to give a creamy appearance in keeping with the original colouring when modern day pigments
weren’t available.
The interior was predominantly edge routered pieces of Western Red Cedar, glued to the ply to look like
the original tongue and groove panelling. It is easy to get timber stained to look like new but the
challenge was to have it look like it was old stain. This took much time and numerous application,
removal then reapplication of the stain to get the desired effect.
Timber for the table, sink top and floor was American Red Oak from Masters. The table and sink top were
stained to bring out the grain and finished with clear 2 pack. There are many ply fascias secured with
Sikaflex and finished in white with Hempel MultiCoat satin.
The floor was Red oak on ply. The epoxy glue between the floor timbers was stained dark red to match
the darker parts of the timber. The teak stairs were made from timber left over from the deck.
This boat is a Bay Racer and not a Cruiser so there is no need to store lots of water etc on board as it was
only intended for day use or short overnight races.
SS inspection ports were fitted adjacent to the mast to allow the forward sections of the hull to be
inspected and allow adjustment of the chainplate. Gary burnt out many drill bits making a hole in the
ironwood keelson to take a bolt to secure the chainplate for the forestay. He was conscious of not putting too much tension in the rig and chose to fit a 7/8 rig with a bigger mainsail to get more drive aft
as originally designed. The boom length went from 5 metres to 8 metres. A one piece air‐craft grade
spruce mast with the desired flexibility and memory was going to cost $80k out of Alaska. Gary settled
for an aluminium mast for “only” $38k. As he says “When you love what you’ve got, you have to spend
what it costs.” Gary designed the aluminium rig which was made by Allspars in Brisbane and assembled
by Gary and his team in Perth.
White Dacron sails didn’t give the creamy look of yesteryear that Gary wanted so he used mylar with a
taffeta covering. He also wanted a cross cut main as this was how they were made in the early days.
The thirteen tonne old girl can do 8.5 knots at 29 degrees to windward with a reefed main and a No.3 jib
in 24 knots of breeze. She is still winning races. Gary spends 2 days every 6 months, maintaining the
varnish — and it shows.
Gary Martin kept telling us he was just a tradesman painter but he is a visionary craftsman with the
evidence to prove it. Many Thanks Gary.
The Coming Together of a Fast Farrier On Saturday, 2nd July, we all made a return trip to Ocean Reef to view Brent Ireland’s project, a Farrier
F32‐R folding trimaran. The “32” stands for its length in feet and the “R” indicates it is a racing version
which is laid up as a fibreglass/foam/fibreglass sandwich. As it is some five years since our first visit to
Brent’s project, your editor has reproduced a condensed version of Mike Beilby’s account of that visit and
included the photo below to provide some context for the progress that has been made in the intervening
years. This current stage is further described later in this write‐up.
As with Harry Speight ’s boat, it is laid up in a female mould using MDF shadows arranged on a building jig
but set up to construct the port half and then the starboard half, rather than top and bottom. Once one
half is completed (and this includes the appropriate deck‐half as well) and lifted out of the jig, the
shadows are rearranged and remounted on the frame so that they mirror‐image the original and are set
up for the opposite side. The system certainly guarantees symmetry. While still in the mould the inside is
easily fibreglassed and at the same time bulkheads and other things can be easily glassed in. Of course,
any temporary fastening of the foam core with screws has to be from the outside so that the inside is
clear for sheathing. When this is done the hull‐half is lifted out of the jig, the shadows dismantled and the
hull‐half rolled over the other way up and in Brent’s case lowered down onto the basic building frame.
Removing from the mould and turning over was largely a matter of muscle in Brent’s case. He got several
friends around and they lifted it and turned it over. It apparently only weighed 140kg and handling it
gently would have been the chief challenge. He also had a pair of hoisting tackles fixed to the roof of his
semi open shed for minor adjustments when he’s on his own. This is the stage Brent’s project was at,
after about two years of work, when we last visited in mid 2011. He had the port half ready for external
glassing after which he had to repeat this process to mould the starboard half of the hull/deck. In 2011,
Brent had also completed the amahs, or outer hulls, which we were able to view once again on this visit.
The foam used is Klegecell, a pinkish, fairly stiff closed‐cell product which means that water won’t
permeate through the foam should there be a fracture in the sheathing. In this case, it’s 12mm thick and
comes in sheets 2.4m x 1.2m. Brent cut the foam up into strips, mostly 30cm wide, using a knife. The
strips were then laid transversely around the hull, fastening where necessary with screws from the
outside. When building the foam version, the shadows of the jig are notched frequently to allow for quite
a few longitudinal stringers and to give more opportunity for fastening screws than is the case with the
timber version. Although the 30cm panels run around the hull, the result is amazingly smooth and fair.
Even at that early stage, it was apparent that the hull was going to need very little fairing‐in and there
were few gaps between panels. In just a few areas, white Qcells and resin made a filler to fill up spaces
and any really small gaps would have been filled with resin during the sheathing.
For those unfamiliar with Farrier trimarans, the shape is difficult to understand at first, especially while a
hull‐half is still on its side. Essentially the hull is normal beam across the deck and for above the waterline
accommodation. At the waterline it needs to come down to the beam normal for any lightweight racing
multihull. It does this with an arched concavity (when viewed from the outside) between the deck level
and the waterline. The same area on the inside is a convenient convexity on which to site bunks, seats,
etc. In the case of the 32, the main hull’s beam is about 9’, say 2.7m, even when folded, so Brent will need
a special permit to tow it on the road but it is towable.
Unlike a timber planking method, most of Brent’s foam was bent and laid in cold but some areas were
softened with heat first which probably made it possible to accommodate compound curves where
necessary. The resin used R80 Fibreglass International expoxy, with microballoons or Q‐cells mixed where
needed as a filler. The inside is sheathed with 450gsm fibreglass while 600gsm was used on the outside.
There are extra layers on the inside in all areas of high stress such as outrigger hinges, winches, etc.
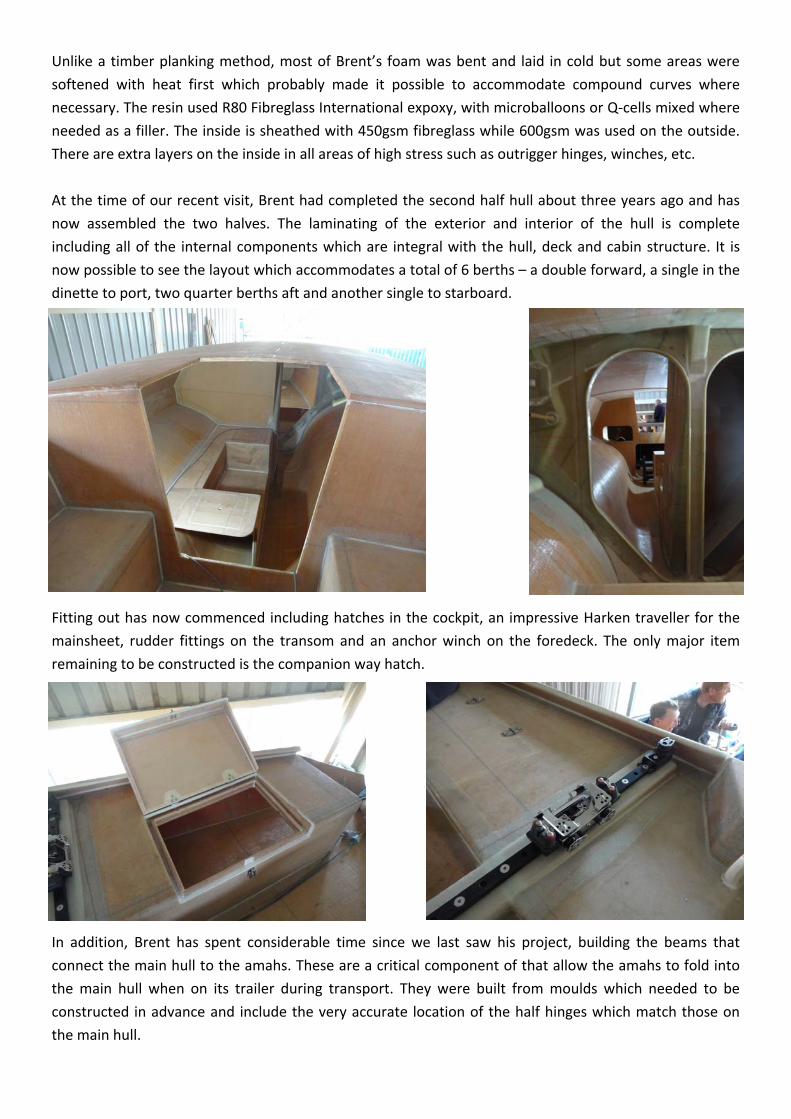
At the time of our recent visit, Brent had completed the second half hull about three years ago and has
now assembled the two halves. The laminating of the exterior and interior of the hull is complete
including all of the internal components which are integral with the hull, deck and cabin structure. It is
now possible to see the layout which accommodates a total of 6 berths – a double forward, a single in the
dinette to port, two quarter berths aft and another single to starboard.
Fitting out has now commenced including hatches in the cockpit, an impressive Harken traveller for the
mainsheet, rudder fittings on the transom and an anchor winch on the foredeck. The only major item
remaining to be constructed is the companion way hatch.
In addition, Brent has spent considerable time since we last saw his project, building the beams that
connect the main hull to the amahs. These are a critical component of that allow the amahs to fold into
the main hull when on its trailer during transport. They were built from moulds which needed to be
constructed in advance and include the very accurate location of the half hinges which match those on
the main hull.
Brent is now at a stage where he can start thinking about rig and auxiliary power. He is still researching
suppliers for his rig and sails but seems fairly certain that the power when required will be provided by a
20 HP Honda outboard with electric start and power trim facility.
He is also close enough to the finish with respect to the build process that he can quote some final figures
for some of the materials. He started the project with 55 sheets of 1200 x 1800 mm foam and 400 litres of
resin. The foam has done the job but Brent is now up to 500 litres of resin.
All those who attended enjoyed a very interesting visit to see how much has been achieved since our original visit back in 2011. Thanks to Brent for hosting this return Toolbox visit and making his workshop and the project available to us once again. __________________________________________________________________
ADMINISTRATION NOTES
ABBA COMMITTEE
President Ken Potts 0421 178 991
Sec/Treasurer Bruce Cadee 9259 0844
General Committee Rob Bingham 9246 0202
Ed Essers 0406 050 989
Harry Speight 9295 4518
Newsletter Editor Chris Davis 9387 5042
Library Rosemary Nayler 9455 1470
AUGUST TECHNICAL MEETING
Our next tech meeting will be on Wednesday 3rd August, as usual in the Heritage Room at South
of Perth Yacht Club, 7.30pm for an 8pm start.
This Technical Meeting presentation will be by ABBA member Mike Beanland. As members may know, Mike was instrumental in developing ABBA’s web site and has now hosted the site for the last three years through his company, Perth Boat School. Also, Mike is currently President of the Boating Industry Association (BIA). What most members probably don’t know is Mike owns the double ended, originally steam driven ferry, SS Perth (now MV Perth), which he is restoring at Henderson. Longer‐standing ABBA members will recall that he hosted ABBA’s December 2010 Toolbox visit to see her, and this time Mike has kindly agreed to make a technical presentation on her. His presentation will also recap her history and his involvement with her, since most of our current membership post‐dates the December 2010 Toolbox. On another matter, Mike recently suggested to the ABBA committee that there may be advantages in ABBA becoming an associate member of the BIA. Hence, we’ve invited Mike to make a brief presentation on the BIA Immediately before his technical presentation.
SEPTEMBER TOOLBOX VISIT Our Saturday 3rd September Toolbox Visit is a double header with our next Technical Meeting on Wednesday 5th October. Both will be hosted/presented by recent new member, Roberto Barros. Roberto is the founder of B & G Yacht Design, and at the toolbox we will be seeing one of his smaller designs, a Caravela 1.7 in construction. This is a stitch and glue dinghy, the plans for which are free from B & G Yacht Design. In 1964, Roberto designed a lightweight yacht which he built in a short time and at low cost. Since there were few designs for such boats, he began designing and building similar boats, which lead to a 40 year career producing light weight glass fibre custom cruising and racing yachts, initially from his base in Rio de Janeiro, Brazil. In the early 80’s, he was involved in the build of what was, at 140 ft, the largest cold moulded yacht to that date. In 1987, he started his yacht design business, Roberto Barros Yacht Design; very much a family affair, working with his daughter Astrid and her husband Luis Gouveia, both qualified naval architects. In May 2007, he and the team took the important step of transferring the main office to Perth, Western Australia, establishing a new company, B & G Yacht Design. Many of the company’s yacht and power boat designs are within the capabilities of typical amateur boat builders, and range in size from small designs, such as the Caravela 1.7, through to larger cruising boats. The Toolbox is an opportunity for inexperienced builders to discuss the practical side of building with Roberto, whilst members who are considering larger builds can talk to him about the pros and cons of different designs for amateur builders. The address is 13 Alison Rd, Attadale, 2.00 to 4.00 pm.
ADMINISTRATION NOTES (Cont’d) ABBA LOGO Members are reminded that Bruce Cadee has made arrangements with Shaun Luong of Image
Embroidery at 26 Tulloch Way, Canning Vale (Phone 9456 2324 Mobile 0403 250 389) for an embroidered
ABBA logo. The logo can be applied to your own clothing (assuming it can be accommodated in their
equipment) or to shirts, caps or hats purchased through Image Embroidery. Feel free to call in on Shaun
to look at the limited range of clothing he has on site or visit the following web sites to choose your
preferred style, size and colours. The weblinks below are only examples of the wide range available. Half
chest measurements are included on the web sites to help ensure you select the correct size. Ladies styles
are also available.
Clothing (excluding Logos)
Style 1300 – Aussie Pacific Mens Murray Polo, Navy/White/Ashe or White/Navy/Ashe ‐ $20.00 + GST each