Academic VPN Cheat Sheet This is a document that describes the steps to connect to the Academic VPN. This service allows remote users (generally faculty) to connect to the campus and obtain campus-only based services. Traffic will not return to the Internet via this VPN connection (this is not an anonymizing VPN). This VPN requires an App to operate. Setting up your VPN: ● Your Group is NMT ● Your Username is your 900# ● Your Password is your Academic Lab Password ● A Windows (Win7 and up), Macintosh (10.11 and up), and Linux (RedHat 6&7, Ubunto 16.04 LTS, and 18.04 LTS, and probably others) 1 ○ iPhones, iPads, and Android devices see directly below. Note for iPhone, iPad, Chromebook, and Android devices : you must download the “Cisco AnyConnect” 2 VPN client from your appropriate store for your device: Apple App Store or Google Play Store or Chromebook Web Store Summary of Steps to use the Academic VPN: ● Get the AnyConnect Client (via https://nmtvpn.nmt.edu, with Academic Lab account username/password) ● Install Client ● Connect to Academic VPN with the AnyConnect client (server is nmtvpn.nmt.edu) ● Login (to Group NMT) with your Academic Lab login and password. Detailed steps for Windows are contained in the following pages. Mac instructions are similar to the windows process. Linux instructions should be forthcoming. Appendix A contains information about Linux and Macintosh compatibility with the VPN client. Appendix B contains steps for iPhones, iPads, Android Devices and Chromebooks. 1 See the Appendix A for Mac and Linux Requirements 2 See Appendix B for more information on iDevices, Android devices and Chromebooks.
Transcript
Academic VPN Cheat Sheet This is a document that describes the steps to connect to the Academic VPN. This service allows remote users (generally faculty) to connect to the campus and obtain campus-only based services. Traffic will not return to the Internet via this VPN connection (this is not an anonymizing VPN). This VPN requires an App to operate. Setting up your VPN:
● Your Group is NMT ● Your Username is your 900# ● Your Password is your Academic Lab Password ● A Windows (Win7 and up), Macintosh (10.11 and up), and Linux (RedHat 6&7, Ubunto 16.04 LTS, and
18.04 LTS, and probably others) 1
○ iPhones, iPads, and Android devices see directly below.
Note for iPhone, iPad, Chromebook, and Android devices : you must download the “Cisco AnyConnect” 2
VPN client from your appropriate store for your device:
Apple App Store or Google Play Store or Chromebook Web Store
Summary of Steps to use the Academic VPN:
● Get the AnyConnect Client (via https://nmtvpn.nmt.edu, with Academic Lab account username/password)
● Install Client ● Connect to Academic VPN with the AnyConnect client (server is nmtvpn.nmt.edu) ● Login (to Group NMT) with your Academic Lab login and password.
Detailed steps for Windows are contained in the following pages. Mac instructions are similar to the windows process. Linux instructions should be forthcoming. Appendix A contains information about Linux and Macintosh compatibility with the VPN client. Appendix B contains steps for iPhones, iPads, Android Devices and Chromebooks.
1 See the Appendix A for Mac and Linux Requirements 2 See Appendix B for more information on iDevices, Android devices and Chromebooks.
Windows (shown here), Mac or Linux Client Download and installation: First we need to go to https://nmtvpn.nmt.edu with Chrome or Firefox ( never MS Edge , but Safari and Internet Explorer should work):
Set the Group to be NMT Use your 900# (eg 900123456) as the USERNAME. The password is your Academic Lab password So it might look something like this:
Then you should get the “Logged in Webpage” so you can download your VPN software. It should look like this. Select AnyConnect:
There may be a Brief (depending on the speed of your computer and Internet connection, not so brief) delay while it detects your system type (Windows/Linux/Mac/iPad/etc) then you should get this page. Select Download for <your system type>. In this case Download for Windows:
Once it is downloaded, you should install the software. So run the anyconnect installer that you just downloaded.
Once you start the installer you should see this (This is the windows version of the installer so your images may vary, but it should get you through).
Next you’ll see the License agreement. Accept and click Next:
Now click Install. After you do a Pop UP may appear to say “Do you really want to run this?” Click OK or otherwise proceed (say yes)
After the Popup that you proceeded on and the install completes you'll see something like this. Click Finish to complete your installation.
You are now down with the VPN installation.
Running the VPN software Connecting the VPN Find the Cisco Anyconnect Secure Mobility Client in: Windows: Your Start Menu Macintosh: In your Apps folder, Perhaps in a Cisco Directory. Run the Client. You should get something like this:
Enter in “nmtvpn.nmt.edu” into the text box and click “Connect”:
Select “NMT” for the Group (like before). Now enter your Academic Lab login information which is your 900# (eg 900123456) and your password in the appropriate fields:
For example:
Now click “OK” to connect. You should get a final dialog that looks like this:
Success! You have now connected your VPN.
Disconnecting the VPN: You should always disconnect the VPN when you are done with it. Not doing so may inhibit your ability to reconnect as you get a limited number of sessions. Also it is a security concern to leave your VPN running when you are not using it. To disconnect the VPN look for the AnyConnect icon in the icon bar in the lower left (or on a Mac it could be up on the top near the WiFi):
Right Click it and choose disconnect:
Appendix A - Compatibility for Linux / macOS Complete Cisco Release notes for AnyConnect v4.8 https://www.cisco.com/c/en/us/td/docs/security/vpn_client/anyconnect/anyconnect48/release/n otes/b_Release_Notes_AnyConnect_4_8.pdf https://www.cisco.com/c/en/us/td/docs/security/asa/compatibility/asa-vpn-compatibility.html#id_120239 AnyConnect Support for Linux Linux Requirements • TheSnap version ofFirefox is not supported by AnyConnect on Linux. Mozilla'sFirefox is the officially supported browser on Linux. • x86 instruction set. • 64-bit processor. • 32 MB RAM. • 20 MB hard disk space. • Superuser privileges are required for installation. • network-manager • libnm (libnm.so or libnm-glib.so) • libstdc++ users must have libstdc++.so.6(GLIBCXX_3.4) or higher, but below version 4. • Java 5 (1.5) or later. The only version that works for web installation is Sun Java. You must install Sun Java and configure your browser to use that instead of the default package. • zlib - to support SSL deflate compression • xterm - only required if you're doing initial deployment of AnyConnect via Weblaunch from ASA clientless portal. • gtk 2.24 • webkitgtk+ 2.10 or later, required only if you are using the AnyConnect embedded browser app • iptables 1.2.7a or later. • tun module supplied with kernel 2.4.21 or 2.6. AnyConnect Support for macOS macOS Requirements • AnyConnect requires 50MB of hard disk space. • To operate correctly with macOS, AnyConnect requires a minimum display resolution of 1024 by 640 pixels. macOS Guidelines AnyConnect 4.8 for macOS has been notarized, and installer disk images (dmg) have been stapled
Appendix B - Info iDevices, Android Devices and Chromebooks iPhone / iPad: This is the app you want (take the latest version, they are backward compatible generally). Download the App and run it.
Unless you had the software already, you should have no connections. Select the Connection (or in this case No Connections ) to add a new one:
Go ahead and add a connection:
Fill in the Description with NMTVPN and the Server Address with nmtvpn.nmt.edu and Save .
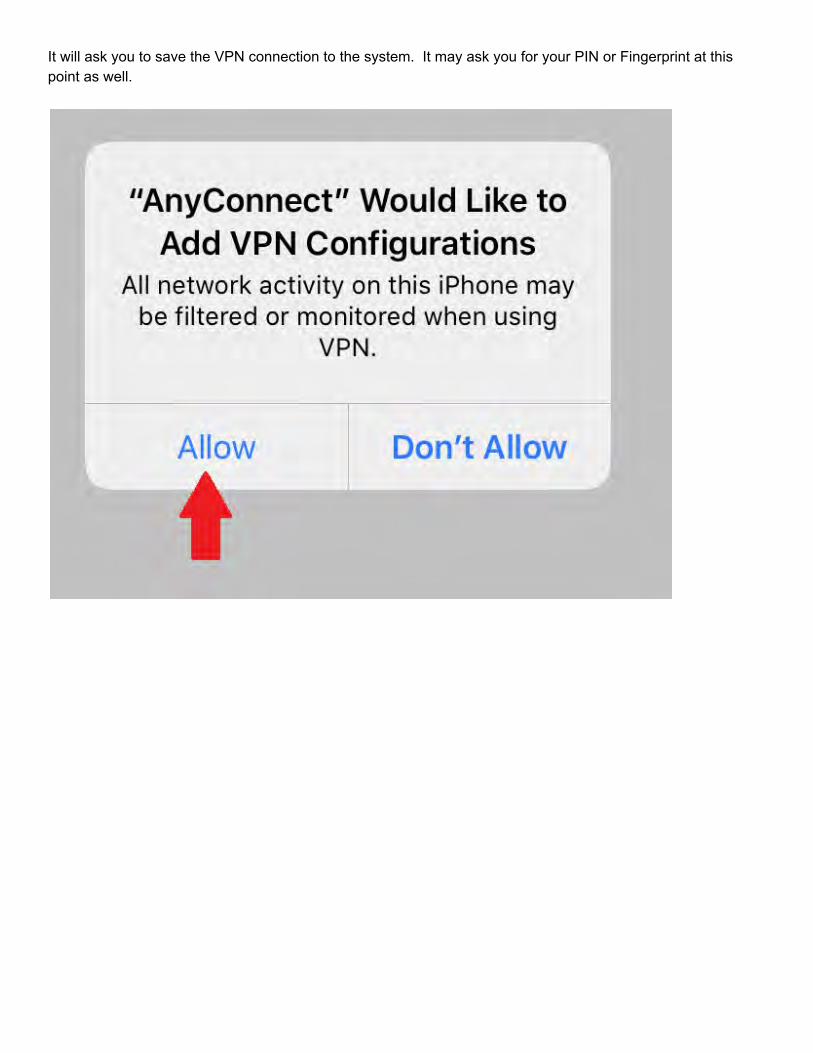
It will ask you to save the VPN connection to the system. It may ask you for your PIN or Fingerprint at this point as well.
You should now have an “Enabled” connection (with a check mark). You can now use it. Click Back .
You can now turn on the connection using the AnyConnect VPN slider.
It will now ask you for your Username and Password . Your Username is your 900#. Your Password is your Academic Lab password. Click Connect .
Assuming it all went well you should be connected:
You can use your VPN to access on-campus resources. Non-NMT resources are still accessed via your normal Internet connection (also known as Split Tunnel, if you care).
Remember you should always disconnect whenever you are not using NMT resources: Select the AnyConnect VPN slider to move to the OFF position:
You are now disconnected:
Android: FIrst Download the App:
Now create a connection by clicking on the Connections button:
Add a Connection:
Enter in NMTVPN in the Description / Name field. Enter nmtvpn.nmt.edu into the Server Address field. Click Done .
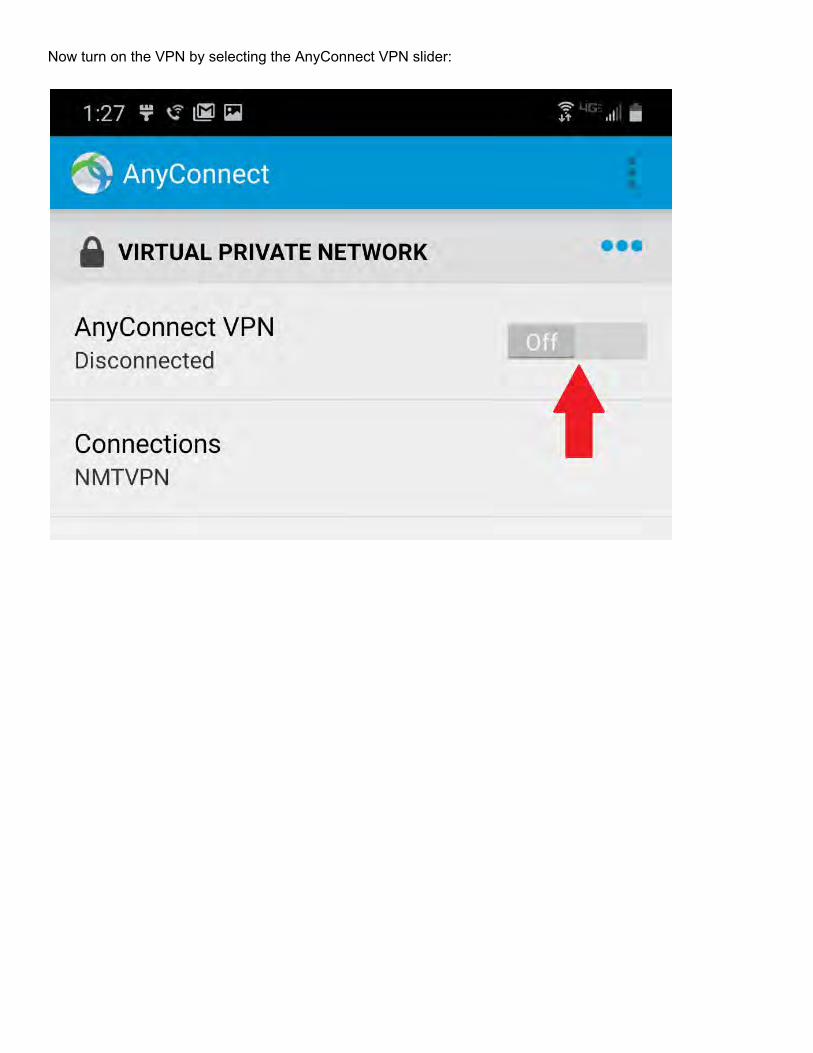
Now turn on the VPN by selecting the AnyConnect VPN slider:
It will now ask you for your Password . This is your Academic Lab password. Click Connect .
Confirm you want to start a VPN by clicking OK .
You should now be connected:
You can use your VPN to access on-campus resources. Non-NMT resources are still accessed via your normal Internet connection (also known as Split Tunnel, if you care).
To stop the VPN connection (which we recommend you do when you are not actively needing NMT resources) just click the On/Off slider again.
You should see it off now:
Chromebook: Installation and Setup Click the “Launcher” icon shaped like a circle in the lower left of your screen.
Click on the “Web Store” icon from the Launcher.
If you do not see the Web Store as an option, type “Web Store” in the search bar…
...and then click on the “Web Store” icon.
The Chrome browser will now bring up a website. In the search bar, type in “Cisco AnyConnect”...
...then hit the “Enter” button on your keyboard. Now click on the “Apps” button.
You should now see the Cisco AnyConnect app on the right.
Please make certain that the app you see is “Cisco AnyConnect” that is offered by Cisco System, Inc. Please do not click on or install any other app. Once you have verified that you see the correct app, click on the “Add to Chrome” button.
A window will pop up asking to add Cisco AnyConnect. Click the “Add app” button.
Once the AnyConnect app has installed, open the Launcher again (via the circle icon on the lower left. You should see the AnyConnect Icon now available. If you don’t see the icon, please search for “AnyConnect” in the search bar. Click on the “AnyConnect” icon.
AnyConnect will now initialize itself, please allow it a few minutes to configure.
Once the initialization has finished, click on “Add new connection”.
In the “Edit Connection” window, enter “NMTVPN” in the “Name” field, and “nmtvpn.nmt.edu” in the “Server Address” field.
Click “Save Changes” when done.
The installation and setup is now complete.
Signing into your VPN Click on the WiFi icon in the lower right hand corner of your screen.
Click on “VPN”.
Under Cisco AnyConnect, click “NMTVPN”.
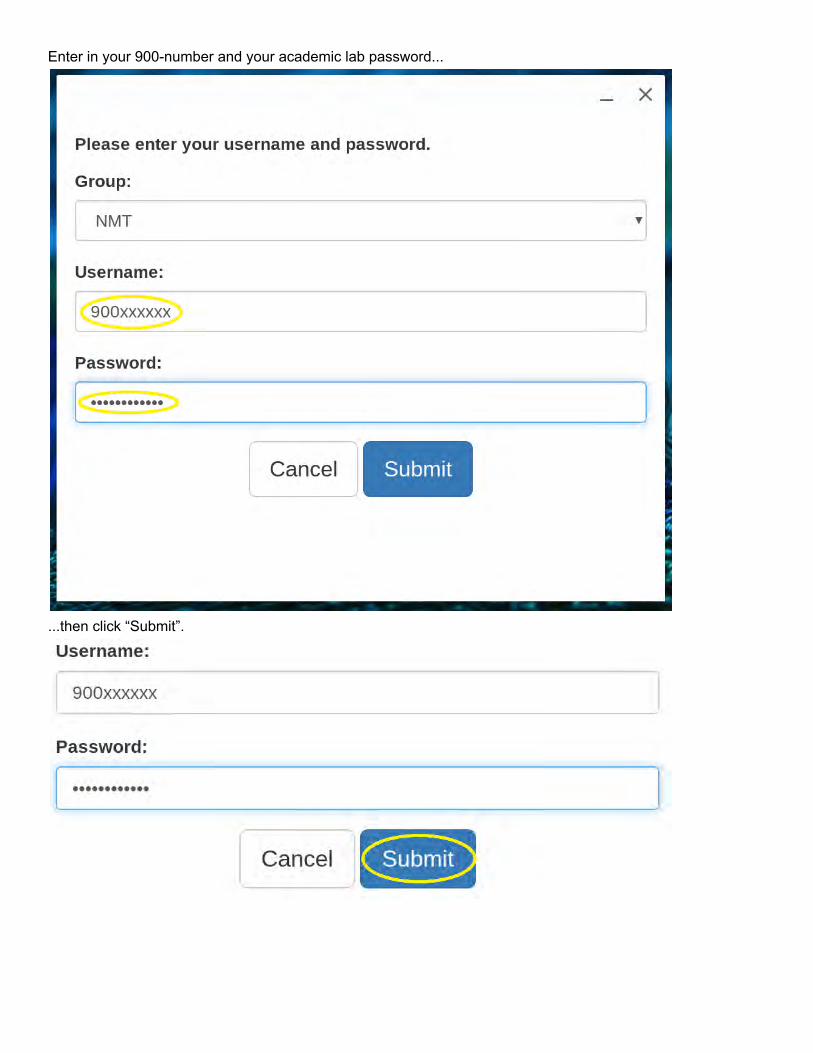
Enter in your 900-number and your academic lab password...
...then click “Submit”.
When you are successfully connected to the VPN, a key icon will be shown next to the WiFi icon in the lower right hand corner of your screen.
Disconnect from VPN Whenever you are finished using the VPN, before you put your Chromebook to sleep, please make sure to disconnect from the VPN to avoid potential complications. To disconnect, click on the WiFi icon in the lower right hand corner of your screen.
Click on “VPN” under the key in the blue cirlce.
Click on “Disconnect”.
You are now disconnected from the VPN. When you are disconnected from the VPN, the WiFi icon will no longer have the key next to it.