Activating AspxCodeGen 4.0 The first time you open AspxCodeGen 4 Professional Plus edition you will be presented with an activation form as shown in Figure 1. You will not be shown the activation form when using the Express edition. Figure 1 Activation Form You need to enter the Serial Number and Activation Code that we provided you in the respective text boxes. The Serial Number and Activation Code contains dashes “-”, make sure to include these dashes when entering them. Then click the Activate button. See Figure 2. Figure 2 If you enter an invalid Serial Number or Activation Code a warning pops up. When this happens, click the Ok button (See Figure 3), then re-enter the Serial Number and Activation Code Again. Figure 3 Invalid Serial Number or Activation Code If you enter a valid Serial Number and Activation Code, you will be presented with the main window of the application, see Figure 4. You will only see the activation form once. After that, you will always go straight to the main window.
Transcript
Activating AspxCodeGen 4.0
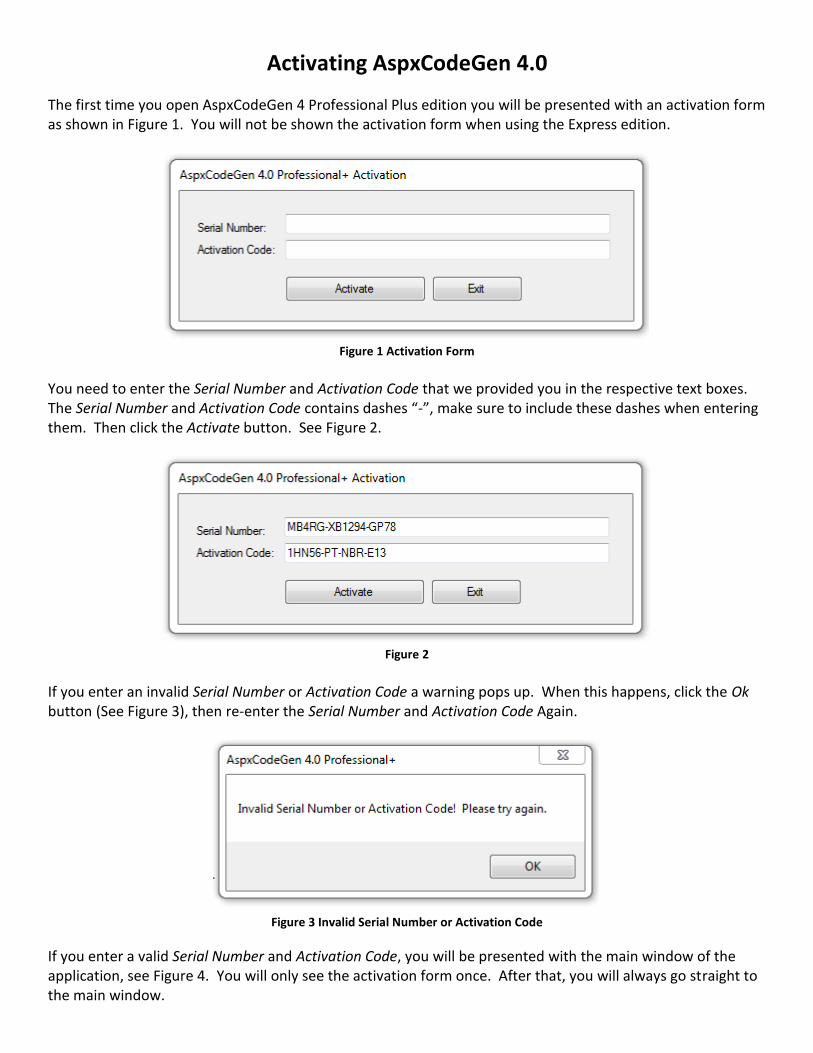
The first time you open AspxCodeGen 4 Professional Plus edition you will be presented with an activation form as shown in Figure 1. You will not be shown the activation form when using the Express edition.
Figure 1 Activation Form
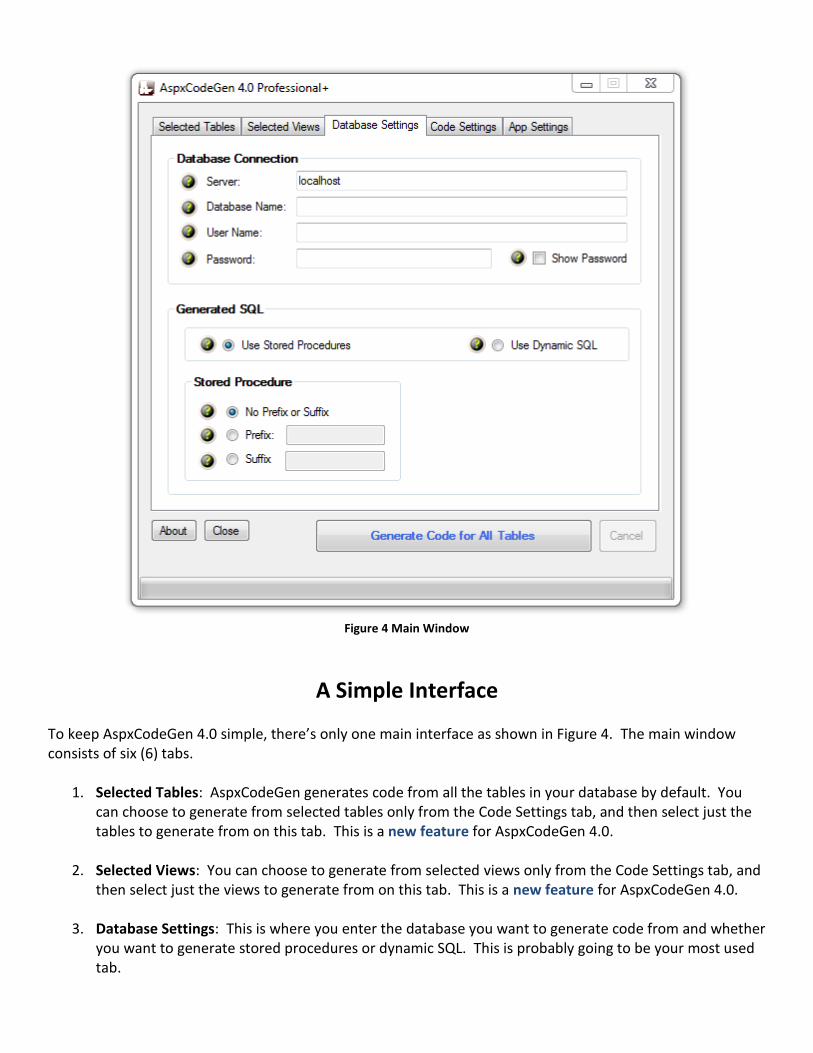
You need to enter the Serial Number and Activation Code that we provided you in the respective text boxes. The Serial Number and Activation Code contains dashes “-”, make sure to include these dashes when entering them. Then click the Activate button. See Figure 2.
Figure 2
If you enter an invalid Serial Number or Activation Code a warning pops up. When this happens, click the Ok button (See Figure 3), then re-enter the Serial Number and Activation Code Again.
Figure 3 Invalid Serial Number or Activation Code
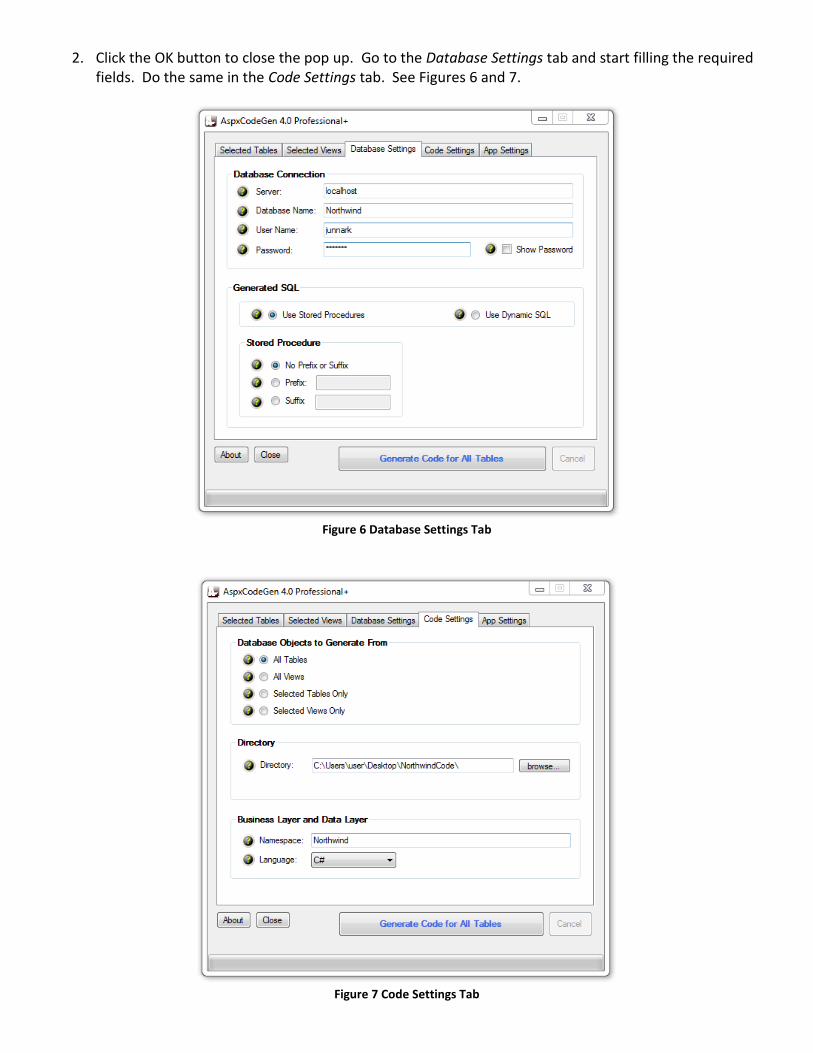
If you enter a valid Serial Number and Activation Code, you will be presented with the main window of the application, see Figure 4. You will only see the activation form once. After that, you will always go straight to the main window.
Figure 4 Main Window
A Simple Interface To keep AspxCodeGen 4.0 simple, there’s only one main interface as shown in Figure 4. The main window consists of six (6) tabs.
1. Selected Tables: AspxCodeGen generates code from all the tables in your database by default. You can choose to generate from selected tables only from the Code Settings tab, and then select just the tables to generate from on this tab. This is a new feature for AspxCodeGen 4.0.
2. Selected Views: You can choose to generate from selected views only from the Code Settings tab, and then select just the views to generate from on this tab. This is a new feature for AspxCodeGen 4.0.
3. Database Settings: This is where you enter the database you want to generate code from and whether
you want to generate stored procedures or dynamic SQL. This is probably going to be your most used tab.
4. Code Settings: You’ll find a selection here on where to generate your objects from: all tables, all views (new), selected tables (new), or selected views (new). This is also where you set the web site name, the root directory where you want the website to be generated, the namespace for your code, and most of all the language (either C# or VB.NET) you want the generated code to be in.
5. App Settings: These are application settings. Almost all generated code/web forms are overwritten
every time you use AspxCodeGen 4.0. However, you can choose not to overwrite some key files from here. You can also reset all settings to its original default from here. This is a new feature for AspxCodeGen 4.0.
That seems like a lot of features, you’re probably asking “where’s the One Click feature?” Since AspxCodeGen 4.0 remembers the last settings you used such as, e.g. server, database name, directory, namespace, language etc., the next time you open AspxCodeGen 4.0, you can just click the Generate… button, that simple.
A Quick Tour
Let’s learn how to generate ASP.NET 4.0 Web Forms, middle-tier, and data-tier codes using AspxCodeGen 4.0. We’re going to use Microsoft’s Northwind database for this demo. Please google and download it. Or you can use your own database, just follow the steps shown below.
1. Click the “Generate Code for All Tables” button. Notice that an error pops up showing us the required fields to fill. See Figure 5.
Figure 5 Error Message
2. Click the OK button to close the pop up. Go to the Database Settings tab and start filling the required fields. Do the same in the Code Settings tab. See Figures 6 and 7.
Figure 6 Database Settings Tab
Figure 7 Code Settings Tab
3. You can see the descriptions of each of these fields in the Complete Guide tutorial. For now, simply
hover over the Question Mark image if you need information from the respective fields. Note that I have a directory in my desktop named “NorthwindCode”.
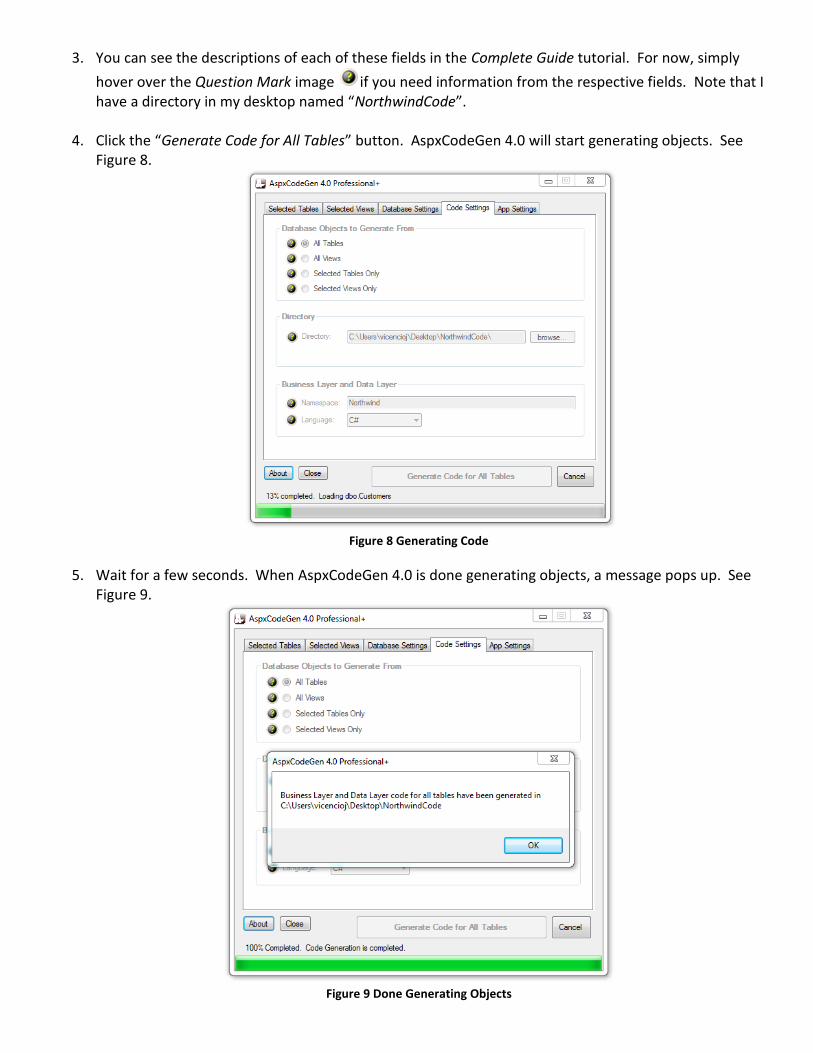
4. Click the “Generate Code for All Tables” button. AspxCodeGen 4.0 will start generating objects. See Figure 8.
Figure 8 Generating Code
5. Wait for a few seconds. When AspxCodeGen 4.0 is done generating objects, a message pops up. See Figure 9.
Figure 9 Done Generating Objects
6. Click the OK button to close the message. Then close AspxCodeGen 4.0 by clicking the Close button.
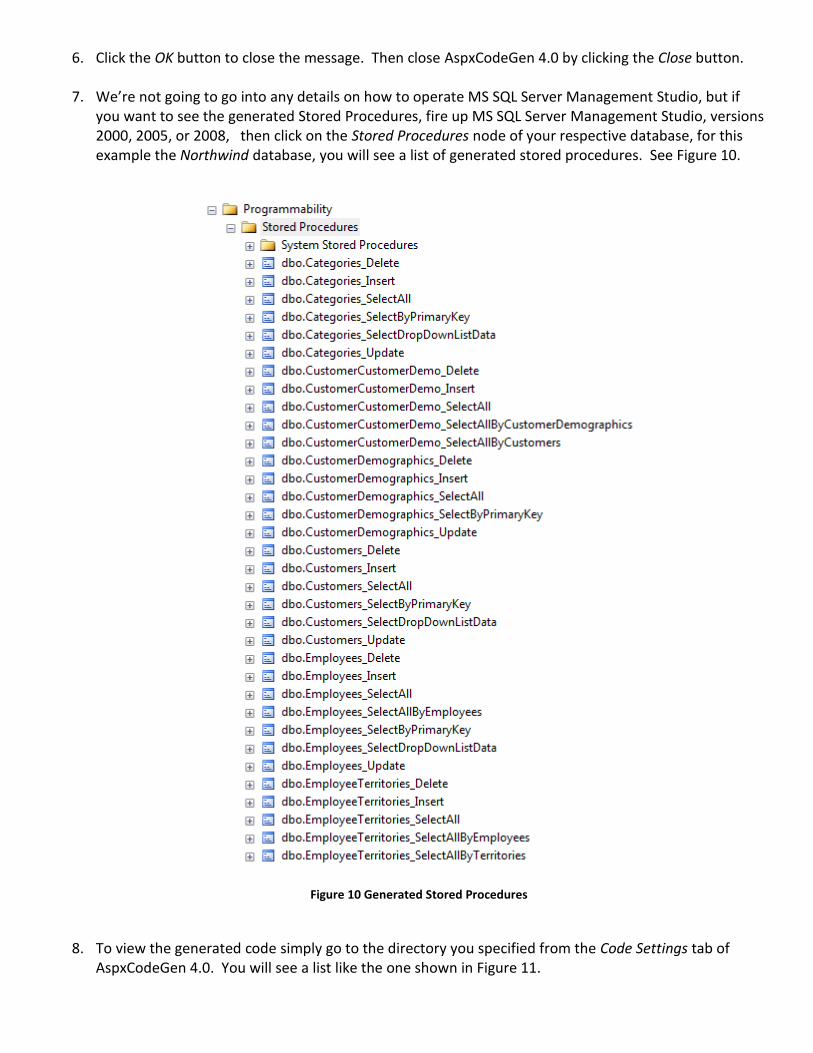
7. We’re not going to go into any details on how to operate MS SQL Server Management Studio, but if you want to see the generated Stored Procedures, fire up MS SQL Server Management Studio, versions 2000, 2005, or 2008, then click on the Stored Procedures node of your respective database, for this example the Northwind database, you will see a list of generated stored procedures. See Figure 10.
Figure 10 Generated Stored Procedures
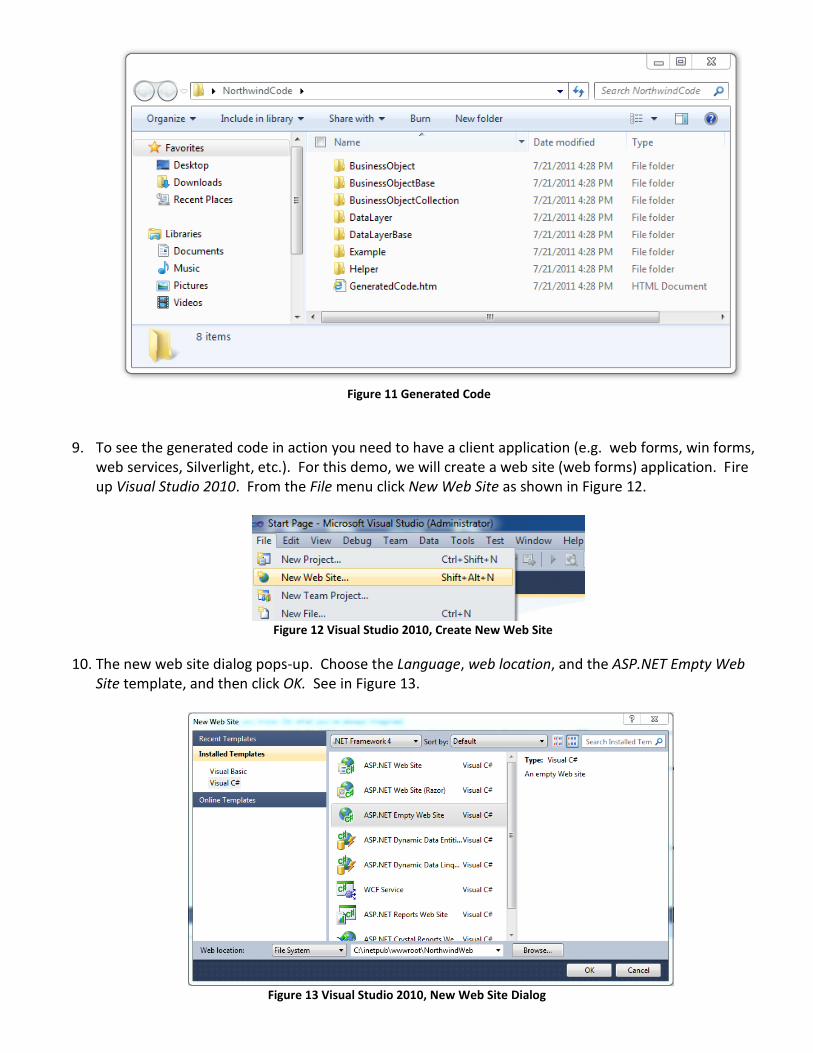
8. To view the generated code simply go to the directory you specified from the Code Settings tab of AspxCodeGen 4.0. You will see a list like the one shown in Figure 11.
Figure 11 Generated Code
9. To see the generated code in action you need to have a client application (e.g. web forms, win forms, web services, Silverlight, etc.). For this demo, we will create a web site (web forms) application. Fire up Visual Studio 2010. From the File menu click New Web Site as shown in Figure 12.
Figure 12 Visual Studio 2010, Create New Web Site
10. The new web site dialog pops-up. Choose the Language, web location, and the ASP.NET Empty Web Site template, and then click OK. See in Figure 13.
Figure 13 Visual Studio 2010, New Web Site Dialog
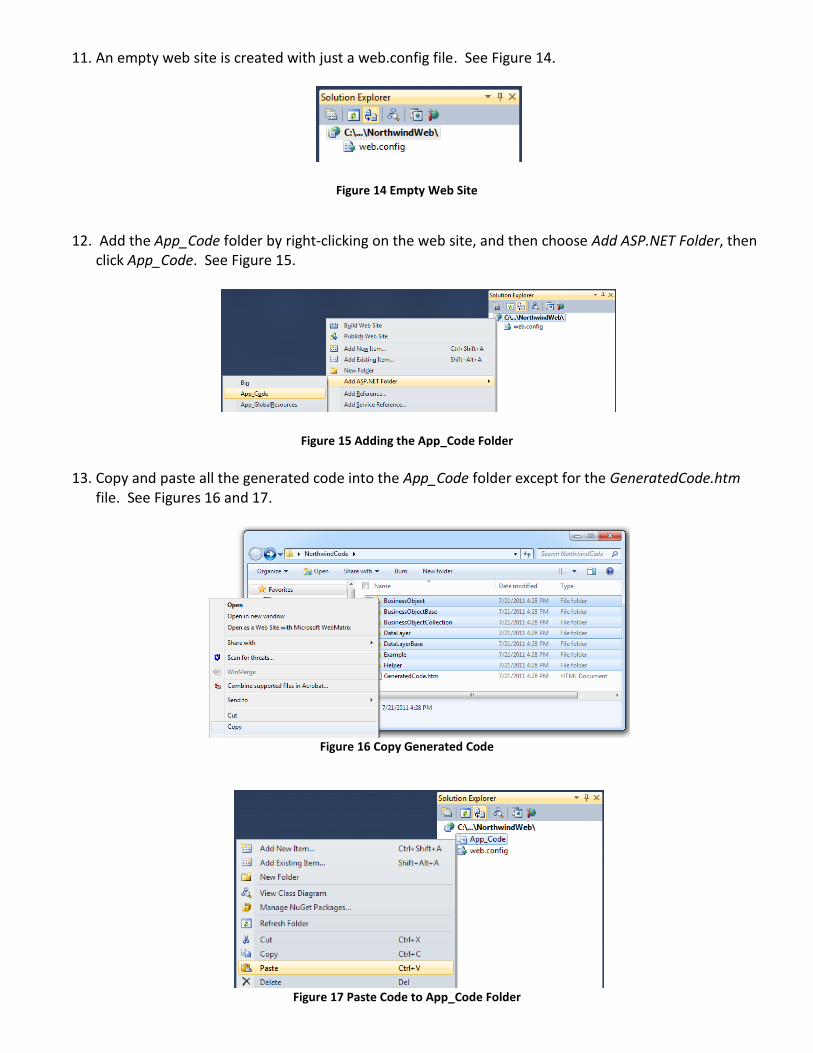
11. An empty web site is created with just a web.config file. See Figure 14.
Figure 14 Empty Web Site
12. Add the App_Code folder by right-clicking on the web site, and then choose Add ASP.NET Folder, then click App_Code. See Figure 15.
Figure 15 Adding the App_Code Folder
13. Copy and paste all the generated code into the App_Code folder except for the GeneratedCode.htm
file. See Figures 16 and 17.
Figure 16 Copy Generated Code
Figure 17 Paste Code to App_Code Folder
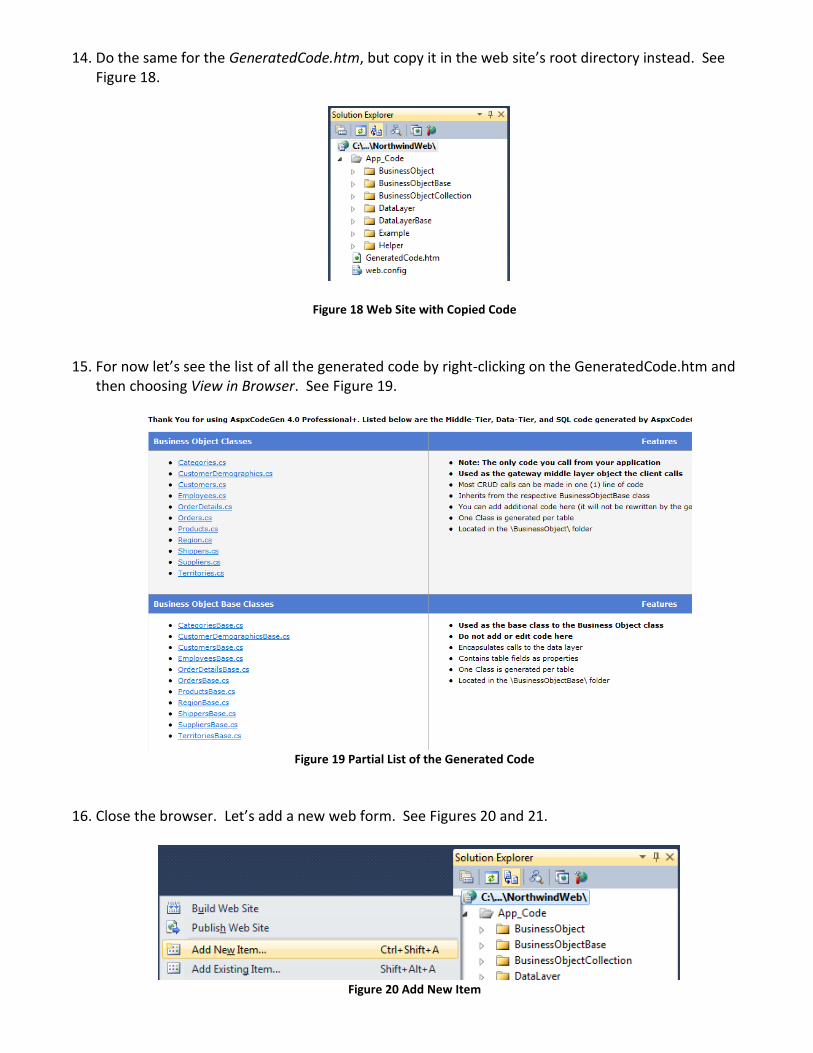
14. Do the same for the GeneratedCode.htm, but copy it in the web site’s root directory instead. See Figure 18.
Figure 18 Web Site with Copied Code
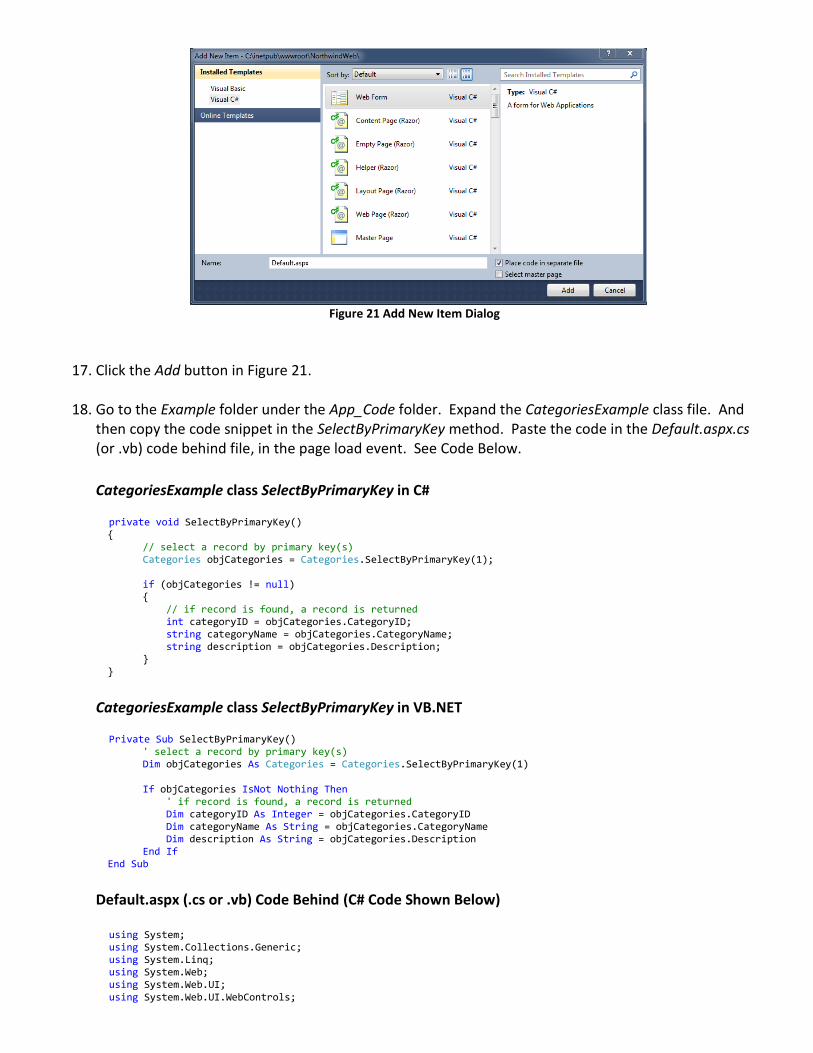
15. For now let’s see the list of all the generated code by right-clicking on the GeneratedCode.htm and then choosing View in Browser. See Figure 19.
Figure 19 Partial List of the Generated Code
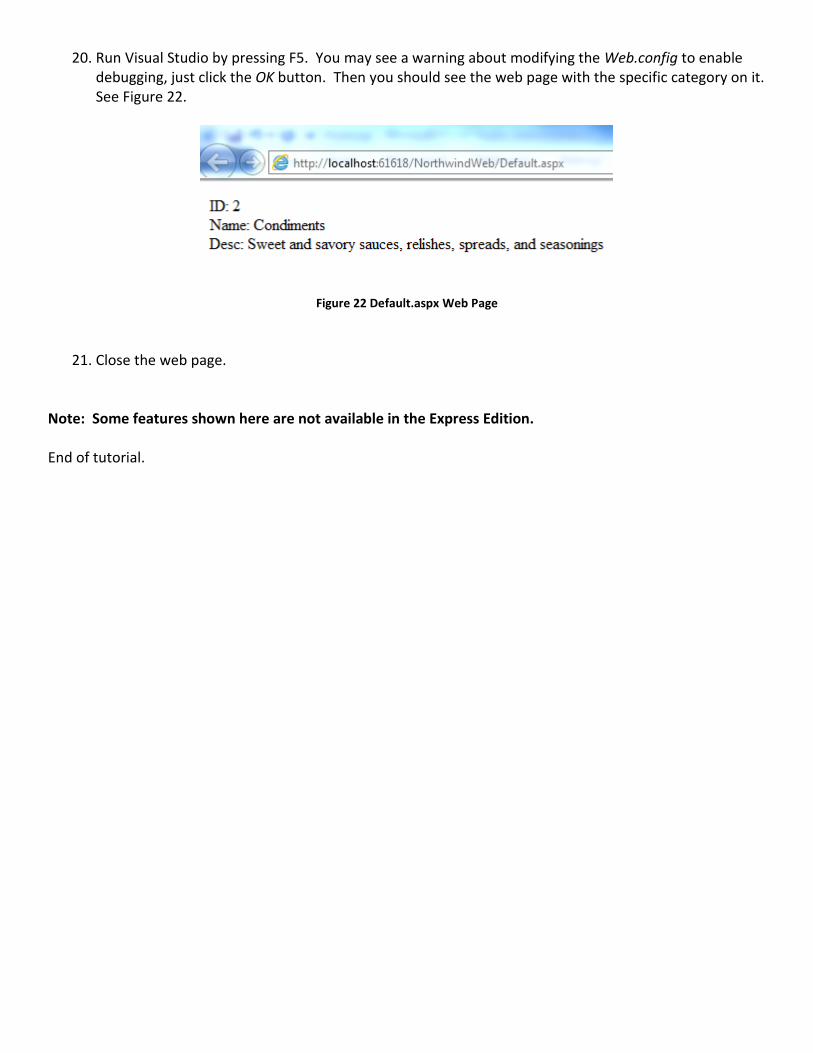
16. Close the browser. Let’s add a new web form. See Figures 20 and 21.
Figure 20 Add New Item
Figure 21 Add New Item Dialog
17. Click the Add button in Figure 21.
18. Go to the Example folder under the App_Code folder. Expand the CategoriesExample class file. And then copy the code snippet in the SelectByPrimaryKey method. Paste the code in the Default.aspx.cs (or .vb) code behind file, in the page load event. See Code Below.
CategoriesExample class SelectByPrimaryKey in C#
private void SelectByPrimaryKey() { // select a record by primary key(s) Categories objCategories = Categories.SelectByPrimaryKey(1); if (objCategories != null) { // if record is found, a record is returned int categoryID = objCategories.CategoryID; string categoryName = objCategories.CategoryName; string description = objCategories.Description; } }
CategoriesExample class SelectByPrimaryKey in VB.NET
Private Sub SelectByPrimaryKey() ' select a record by primary key(s) Dim objCategories As Categories = Categories.SelectByPrimaryKey(1) If objCategories IsNot Nothing Then ' if record is found, a record is returned Dim categoryID As Integer = objCategories.CategoryID Dim categoryName As String = objCategories.CategoryName Dim description As String = objCategories.Description End If End Sub
Default.aspx (.cs or .vb) Code Behind (C# Code Shown Below) using System;
using System.Collections.Generic; using System.Linq; using System.Web; using System.Web.UI; using System.Web.UI.WebControls;
public partial class _Default : System.Web.UI.Page { protected void Page_Load(object sender, EventArgs e) { // select a record by primary key(s) Categories objCategories = Categories.SelectByPrimaryKey(1); if (objCategories != null) { // if record is found, a record is returned int categoryID = objCategories.CategoryID; string categoryName = objCategories.CategoryName; string description = objCategories.Description; } } }
19. Make sure to add a reference to the Northwind.BusinessObject. And then change the code so that it can write the retrieved category on the page. See Code below.
In C# using System; using Northwind.BusinessObject; public partial class _Default : System.Web.UI.Page { protected void Page_Load(object sender, EventArgs e) { // select a record by primary key(s) Categories objCategories = Categories.SelectByPrimaryKey(1); if (objCategories != null) { // if record is found, a record is returned Response.Write("ID: " + objCategories.CategoryID + "<br/>"); Response.Write("Name: " + objCategories.CategoryName + "<br/>"); Response.Write("Desc: " + objCategories.Description); } } }
In VB.NET Imports System Imports Northwind.BusinessObject Partial Class _Default Inherits System.Web.UI.Page Protected Sub Page_Load(sender As Object, e As System.EventArgs) Handles Me.Load ' select a record by primary key(s) Dim objCategories As Categories = Categories.SelectByPrimaryKey(1) If objCategories IsNot Nothing Then ' if record is found, a record is returned Response.Write("ID: " & objCategories.CategoryID & "<br/>") Response.Write("ID: " & objCategories.CategoryName & "<br/>") Response.Write("ID: " & objCategories.Description) End If End Sub End Class
20. Run Visual Studio by pressing F5. You may see a warning about modifying the Web.config to enable debugging, just click the OK button. Then you should see the web page with the specific category on it. See Figure 22.
Figure 22 Default.aspx Web Page
21. Close the web page.
Note: Some features shown here are not available in the Express Edition. End of tutorial.