80
Administration Guide version 2.1.1* the KeyWatcher management system designed and produced by Argus Global, Australia

Administration Guide
version 2.1.1*
the KeyWatcher management system designed and produced by Argus Global, Australia

About the KeyPro Plus user guides
There are three KeyPro Plus user guides, each focussed on a key phase of using KeyPro Plus:
Installation Guide
covers installing KeyPro Plus, something you typically do only once per site.
Administration Guide
covers the configuration and administration activities you'll perform when you first set up your KeyPro Plus site, then occasionally as required for new KeyWatchers, key policies, and operators.
Operations Guide
covers the everyday activities you'll perform to manage your KeyWatcher inventory and its users
Copyright © Copyright 2015 Argus Global Pty Ltd. (ABN 42 138 440 230). Argus Global may have patents or pending patent applications, trademarks copyrights or other intellectual property rights covering subject matter in this document. The furnishing of this document does not give you any licence to these patents, trademarks, copyrights or other intellectual property rights. All Rights Reserved
Trademarks The following (where mentioned) are trademarks: Cornerstone, True Identity and True Identity Manager are registered trademarks of Argus Global Pty Ltd KeyWatcher, SmartKey, KeyWatcher Touch, Key-Pro and Key-Pro Software are trademarks of Morse Watchmans Incorporated
Confidentiality This document is classified Commercial in Confidence. It is subject to a confidentiality agreement between Argus Global Pty Ltd and its customers and partners. Its contents must not be divulged to third parties.
KeyPro Plus — Administration Guide version 2.1.1* 2

Contents
About KeyPro Plus .................................................................................................................................................. 6 Overview ............................................................................................................................................................ 6
KeyWatcher Configuration .................................................................................................................................. 8 Overview ............................................................................................................................................................ 8 KeyWatchers ...................................................................................................................................................... 9
KeyWatcher Touch licences ..................................................................................................................... 9 Add an Illuminated Box ............................................................................................................................ 10 Add a Touch Box ....................................................................................................................................... 12 Touch Server Settings Reference ........................................................................................................ 15 KeyWatcher Additional Settings Reference ..................................................................................... 16 Edit a KeyWatcher .................................................................................................................................... 19 Archive a KeyWatcher ............................................................................................................................. 20 Reactivate an archived KeyWatcher Illuminated .............................................................................. 21 Reactivate an archived KeyWatcher Touch ....................................................................................... 21 Swap out a faulty KeyWatcher Touch box .......................................................................................... 23 Move KeyWatcher Touch box to another Touch server .................................................................... 23 Change IP address of KeyWatcher Illuminated box .......................................................................... 24 Change IP address of Touch Server ...................................................................................................... 24 Change IP address of KeyWatcher Touch box ................................................................................... 24
Key Access Times ............................................................................................................................................ 25 Add or edit key access times .................................................................................................................. 25
SmartKeys ......................................................................................................................................................... 26 Edit SmartKeys ............................................................................................................................................ 26
Physical Keys (and Cuts) ............................................................................................................................... 28 Add or edit physical keys and cuts........................................................................................................ 28
Key Groups ....................................................................................................................................................... 30 Add or edit key groups............................................................................................................................. 30
Departments .................................................................................................................................................... 32 Edit department names ........................................................................................................................... 32
User Groups ...................................................................................................................................................... 33 Add or edit user groups............................................................................................................................ 33
KeyPro Plus — Administration Guide version 2.1.1* 3

About KeyPro Plus
System Configuration .......................................................................................................................................... 38 Overview .......................................................................................................................................................... 38 Operator Groups ............................................................................................................................................ 39
Add or edit an operator group .............................................................................................................. 39 View operators in an operator group ................................................................................................... 40 Delete operator group ............................................................................................................................. 40
Operators ......................................................................................................................................................... 41 Add or edit operators ............................................................................................................................... 41
Notification Recipients (Email Alarms) ........................................................................................................ 42 Add or edit notified recipients ................................................................................................................ 42
Scheduled Reports ......................................................................................................................................... 44 Add or edit scheduled reports ............................................................................................................... 44
Scheduled reports reference ................................................................................................................... 47 SMTP Gateway (for Emails from KeyPro Plus) ............................................................................................ 48
Edit SMTP gateway settings ..................................................................................................................... 48 Wiegand Formats ........................................................................................................................................... 49
Add or edit wiegand formats ................................................................................................................. 49 Reserved field names ............................................................................................................................... 51
Importing Data ..................................................................................................................................................... 52 Overview .......................................................................................................................................................... 52 Physical keys — CSV format ......................................................................................................................... 52
Physical keys — import file fields ............................................................................................................ 52 After importing physical keys and cuts ................................................................................................. 53 Physical keys — example ......................................................................................................................... 53
User data — CSV format ............................................................................................................................... 54 User data — import file fields ................................................................................................................. 54 Wiegand format fields .............................................................................................................................. 55 Before importing user data ..................................................................................................................... 55 After importing user data ........................................................................................................................ 55 User data — example ............................................................................................................................... 56
XML formats ..................................................................................................................................................... 57 XML example.............................................................................................................................................. 57
Import a file ...................................................................................................................................................... 58
Integration ............................................................................................................................................................. 59 Overview .......................................................................................................................................................... 59
User data ..................................................................................................................................................... 59 Integrated system version upgrades ..................................................................................................... 59
OnGuard Integration ..................................................................................................................................... 60 Keys not held access level ...................................................................................................................... 60 Single server site installation .................................................................................................................... 60 Before configuring OnGuard integration ......................................................................................... 60 Edit the OnGuard Integration settings .................................................................................................. 61 Synchronise OnGuard Integration ......................................................................................................... 63
KeyPro Plus — Administration Guide version 2.1.1* 4

About KeyPro Plus
Cardax/Gallagher Integration ..................................................................................................................... 64 Cardax/Gallagher installation ................................................................................................................ 64 Before configuring Cardax/Gallagher integration ........................................................................ 64 Add or edit Cardax/Gallagher Integration settings ........................................................................... 65 Synchronise Cardax/Gallagher Integration ......................................................................................... 67
Client Defaults ...................................................................................................................................................... 68 KeyPro Plus client defaults............................................................................................................................. 68
Set KeyPro Plus client defaults ................................................................................................................ 69
KeyWatcher Management ................................................................................................................................ 71 Browse KeyWatcher status ............................................................................................................................ 71 Retry KeyWatcher tasks ................................................................................................................................. 72 Manual Offline ................................................................................................................................................. 73
Take a KeyWatcher offline ...................................................................................................................... 73 Bring a KeyWatcher back online ........................................................................................................... 73
Request live key status update .................................................................................................................... 74 Sync keys .......................................................................................................................................................... 74 Rebuild KeyWatcher ...................................................................................................................................... 75 Resync times .................................................................................................................................................... 75
Maintenance Logs ............................................................................................................................................... 76 Browse KeyWatcher Log ............................................................................................................................... 76 Browse System Exception Log ...................................................................................................................... 77 Browse System Events Log ............................................................................................................................. 78 Browse Integrator Log .................................................................................................................................... 79
KeyPro Plus — Administration Guide version 2.1.1* 5

About KeyPro Plus
Overview KeyPro Plus is a client-server based application suite that manages Morse Watchman KeyWatcher electronic key safes (both Illuminated and Touch models) in a single system, optionally integrated with third-party access control systems.
A typical deployment (using one physical server) can be represented as follows:
The KeyPro Plus environment runs across an IP network and is made up of: a KeyPro Plus server an instance of either SQL server or SQL express at least one KeyPro Plus client running on a workstation
at least one network enabled KeyWatcher Illuminated or KeyWatcher Touch (KeyWatcher Touch requires at least one KeyWatcher Touch server).
KeyWatcher Illuminated
KeyPro Plus client workstation
network
*optional
Integration server*
KeyPro Plus server
SQL server
KeyWatcher Touch server
KeyWatcher Touch
KeyPro Plus — Administration Guide version 2.1.1* 6

About KeyPro Plus
on optional integration server for integrating KeyPro Plus with third party access Control systems such as Gallagher (formerly Cardax), Lenel OnGuard, or Johnson Controls P2000.
Operators use the KeyPro Plus client to manage KeyWatchers. Users (of keys) access the KeyWatchers in the usual manner and do not use KeyPro Plus directly.
If an SMTP gateway is configured, KeyPro Plus can email reports and alarms.
For the technical server and client workstation requirements, see the KeyPro Plus Technical Requirements document.
KeyPro Plus — Administration Guide version 2.1.1* 7

KeyWatcher Configuration
Overview
Use the KeyWatcher Admin tab to configure:
KeyWatchers including how KeyPro Plus connects to the KeyWatcher, default release and return methods, and which features are enabled
Key access times which define periods of time during which keys can be accessed
Smart keys including how individual SmartKeys are accessed, released, and returned.
Physical keys which uniquely identity key patterns and their cuts
Key Groups which manage SmartKeys that are used together or that are identical
Departments which optionally group users for the implementation of access polices
User groups which define permissions and access for groups of users, allowing simple access changes to be implemented for multiple users in one single update.
For more details on how KeyWatcher features control the way users access keys, refer to the Morse Watchmen documentation supplied with your KeyWatcher(s).
For information on using the KeyWatcher management features of the KeyWatcher Admin tab (as distinct from the configuration features covered in this chapter) see KeyWatcher Management on page 71.
To review the configuration of your whole site, use the configuration reports available on the Reporting tab. See the Operations Guide for details.
KeyPro Plus — Administration Guide version 2.1.1* 8
KeyWatcher Configuration
KeyWatchers
A KeyWatcher's settings determine how KeyPro Plus manages it and how users release and return keys. Some settings are available only if they are supported by the KeyWatcher's hardware and firmware or licence.
Because of different technical requirements, KeyPro Plus handles the adding of KeyWatcher Illuminated and KeyWatcher Touch boxes differently. However, once they are online in KeyPro Plus, from your perspective as an operator, KeyPro Plus handles both box types in exactly the same manner.
Your KeyPro Plus licence sets the maximum number of KeyWatchers that may be active in KeyPro Plus at any time.
KeyWatcher Touch licences Each KeyWatcher Touch server licenses the features available on the KeyWatcher Touch boxes that connect to it. Note this is a Morse Watchmen licence and is independent of your KeyPro Plus licence.
KeyPro Plus uses a copy of the Touch server licence to validate which features can be configured on the boxes connected to that Touch server (e.g. key release method, department access, key return method, secure return).
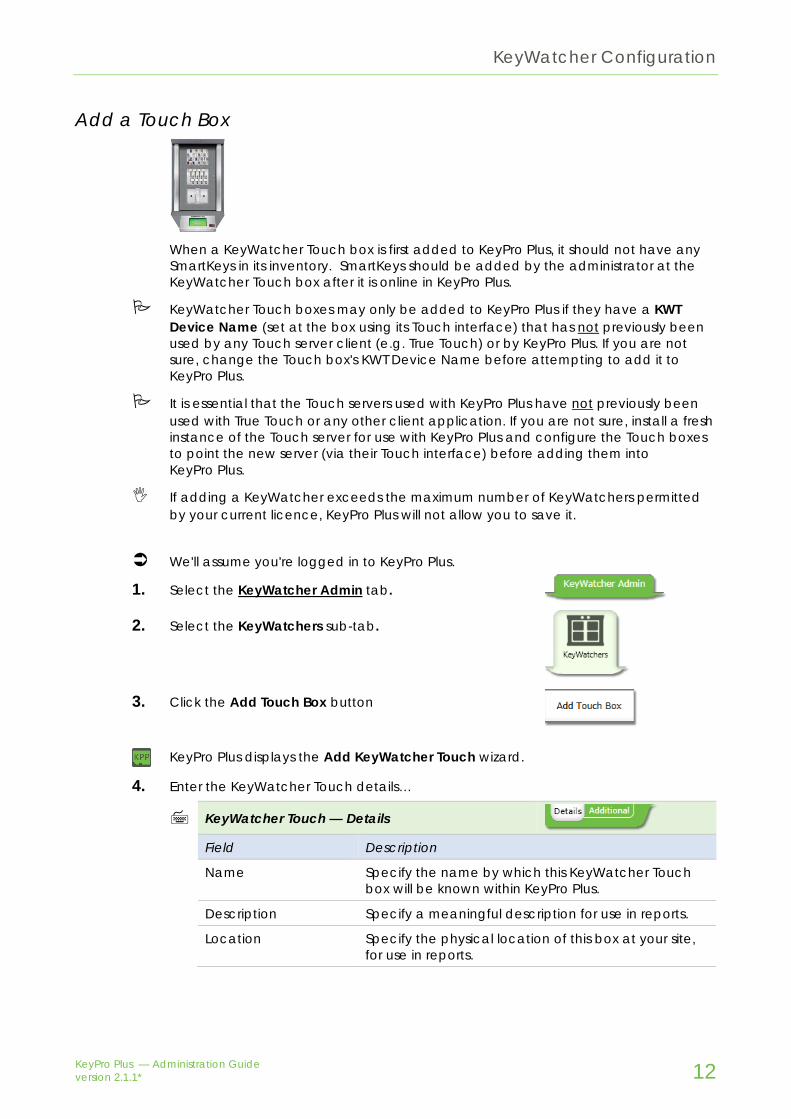
If KeyPro Plus cannot find or read the licence file for a particular Touch server, when you try to add or edit any KeyWatcher Touch connected to that server, KeyPro Plus displays a warning that some settings may not be available. For example
To ensure all licensed KeyWatcher Touch features are available to configure in KeyPro Plus, see the sections on adding new KeyWatcher Touch server and copying the KeyWatcher Touch licence in the Installation Guide.
KeyPro Plus — Administration Guide version 2.1.1* 9

KeyWatcher Configuration
Add an Illuminated Box
You may add a KeyWatcher Illuminated box to KeyPro Plus as soon as it is connected to your network. An administrator may add the SmartKey inventory to the box before or after the box has been added to KeyPro Plus.
If adding a KeyWatcher exceeds the maximum number of KeyWatchers permitted by your current licence, KeyPro Plus will not allow you to save it.
We'll assume you're logged in to KeyPro Plus.
1. Select the KeyWatcher Admin tab.
2. Select the KeyWatchers sub-tab.
3. Click the Add Illuminated Box button
KeyPro Plus displays the Add KeyWatcher wizard.
4. Enter the KeyWatcher details…
KeyWatcher — Details
Field Description
Name Specify the name by which this KeyWatcher Illuminated box will be known within KeyPro Plus.
Description Specify a meaningful description for use in reports.
Location Specify the physical location of this box at your site, for use in reports.
IP Address Specify the numeric IP address for the KeyWatcher. IP address and port are usually set at the serial-
to-ethernet device (e.g. Moxa) that connects the KeyWatcher to your network.
Port Specify the Port for connecting to the KeyWatcher (usually 3001).
Poll Interval Specify the interval in seconds between polling by KeyPro Plus of this KeyWatcher's logs. Shorter intervals typically mean the data held by KeyPro Plus (e.g. alarms, key status) will be more current. The default poll interval is 60 seconds.
Retry task interval Specify the interval KeyPro Plus should wait before retrying a failed task on the Illuminated box. The default is 10 minutes.
KeyPro Plus — Administration Guide version 2.1.1* 10

KeyWatcher Configuration
KeyWatcher — Details
Field Description
Serial Number Specify the KeyWatcher's serial number. Use the KeyWatcher's keypad menu to
access the serial number.
KeyWatcher Display
— Line 1 Specify the first line of text the KeyWatcher displays on its screen (maximum 16 characters).
— Line 2 Specify an optional second line of text (maximum 16 characters).
Administrator Access
— Access Pin Specify the access PIN for this KeyWatcher's administration user (user ID = 0). KeyPro Plus uses this PIN to connect to the KeyWatcher.
then click the Next button to continue to the next tab.
5. Enter the additional KeyWatcher settings…
KeyWatcher — Additional
For details on each additional field, see KeyWatcher Additional Settings Reference on page 16.
6. When you're done working on all tabs, click the Complete button, and Confirm.
KeyPro Plus updates its database and creates a number of tasks to add the KeyWatcher.
7. Use the KeyWatcher Admin screen to confirm the new KeyWatcher is online. For example:
8. Select the KeyWatcher you've just added…
then use the Tasks tab in the right-hand pane to monitor the status of the tasks created to add the KeyWatcher. For example:
KeyPro Plus — Administration Guide version 2.1.1* 11
KeyWatcher Configuration
Add a Touch Box
When a KeyWatcher Touch box is first added to KeyPro Plus, it should not have any SmartKeys in its inventory. SmartKeys should be added by the administrator at the KeyWatcher Touch box after it is online in KeyPro Plus.
KeyWatcher Touch boxes may only be added to KeyPro Plus if they have a KWT Device Name (set at the box using its Touch interface) that has not previously been used by any Touch server client (e.g. True Touch) or by KeyPro Plus. If you are not sure, change the Touch box's KWT Device Name before attempting to add it to KeyPro Plus.
It is essential that the Touch servers used with KeyPro Plus have not previously been used with True Touch or any other client application. If you are not sure, install a fresh instance of the Touch server for use with KeyPro Plus and configure the Touch boxes to point the new server (via their Touch interface) before adding them into KeyPro Plus.
If adding a KeyWatcher exceeds the maximum number of KeyWatchers permitted by your current licence, KeyPro Plus will not allow you to save it.
We'll assume you're logged in to KeyPro Plus.
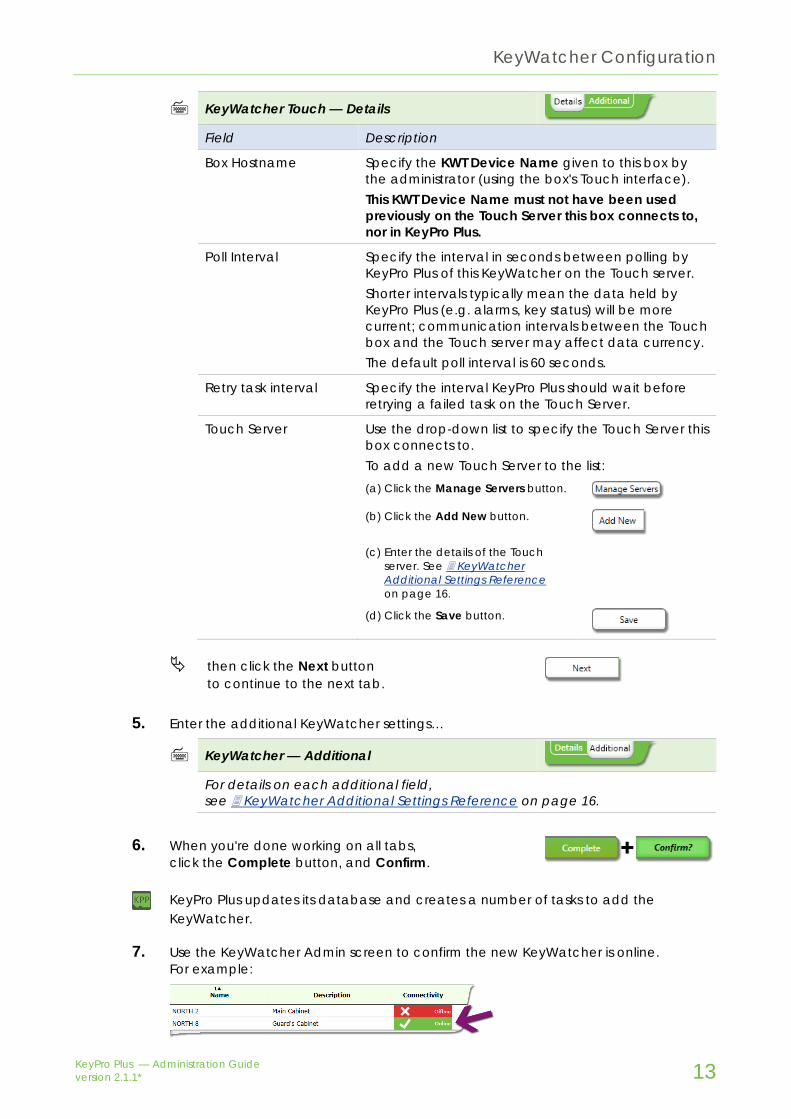
1. Select the KeyWatcher Admin tab.
2. Select the KeyWatchers sub-tab.
3. Click the Add Touch Box button
KeyPro Plus displays the Add KeyWatcher Touch wizard.
4. Enter the KeyWatcher Touch details…
KeyWatcher Touch — Details
Field Description
Name Specify the name by which this KeyWatcher Touch box will be known within KeyPro Plus.
Description Specify a meaningful description for use in reports.
Location Specify the physical location of this box at your site, for use in reports.
KeyPro Plus — Administration Guide version 2.1.1* 12
KeyWatcher Configuration
KeyWatcher Touch — Details
Field Description
Box Hostname Specify the KWT Device Name given to this box by the administrator (using the box's Touch interface). This KWT Device Name must not have been used previously on the Touch Server this box connects to, nor in KeyPro Plus.
Poll Interval Specify the interval in seconds between polling by KeyPro Plus of this KeyWatcher on the Touch server. Shorter intervals typically mean the data held by KeyPro Plus (e.g. alarms, key status) will be more current; communication intervals between the Touch box and the Touch server may affect data currency. The default poll interval is 60 seconds.
Retry task interval Specify the interval KeyPro Plus should wait before retrying a failed task on the Touch Server.
Touch Server Use the drop-down list to specify the Touch Server this box connects to. To add a new Touch Server to the list:
(a) Click the Manage Servers button. (b) Click the Add New button.
(c) Enter the details of the Touch
server. See KeyWatcher Additional Settings Reference on page 16.
(d) Click the Save button.
then click the Next button to continue to the next tab.
5. Enter the additional KeyWatcher settings…
KeyWatcher — Additional
For details on each additional field, see KeyWatcher Additional Settings Reference on page 16.
6. When you're done working on all tabs, click the Complete button, and Confirm.
KeyPro Plus updates its database and creates a number of tasks to add the KeyWatcher.
7. Use the KeyWatcher Admin screen to confirm the new KeyWatcher is online. For example:
KeyPro Plus — Administration Guide version 2.1.1* 13

KeyWatcher Configuration
8. Select the KeyWatcher you've just added…
then use the Tasks tab in the right-hand pane to monitor the status of the tasks created to add the KeyWatcher. For example:
Wait for the Build Key Watcher task to complete before proceeding. The Backup keys task will remain In Progress until you perform the next step.
9. At the Touch box, log in as an administrator and add the SmartKeys to the box.
It is recommended that you add SmartKeys one at a time in slot order.
KeyPro Plus automatically adds the SmartKey to its database.
Review the inventory using the SmartKeys sub-tab (see SmartKeys page 26)
KeyPro Plus — Administration Guide version 2.1.1* 14

KeyWatcher Configuration
Touch Server Settings Reference KeyPro Plus uses the following fields to configure a Touch Server.
To access these fields, click the Manage Servers button in the Add/Edit KeyWatcher Touch wizard (see Add a Touch Box on page 12 or Edit a KeyWatcher on page 19).
Touch Server
Field Description
Name Specify the name by which this Touch server will be known within KeyPro Plus. Based on this name, KeyPro Plus looks in the KeyPro Plus server directory for the corresponding Touch server licence. If it cannot find one, some settings will not be available to configure for any Touch boxes connected to this server (see KeyWatcher Touch licences on page 9).
Server Address Specify either a numeric IP address or a name DNS can resolve for the server on which the Touch Server runs
Port Specify the port for connecting to the Touch server (usually 3005)
Use Secure Socket Layer If checked, KeyPro Plus will use the secure socket layer when connecting to the Touch Server.
Do not use the secure socket layer unless you have confirmed it is supported by the Touch server version you have installed, that you are able to correctly configure it, and that you have correctly installed any current security certificates that may be required.
Windows Username Windows Password
Specify the Windows username and password for the Windows account KeyPro Plus should use when attempting to connect to the machine on which the Touch Server is running. This is the Windows account created when the Touch server was installed (usually called KWTouch).
Administration Username Administration Password
Specify the Touch Server Administration username and password KeyPro Plus should use when making requests of the Touch Server. The Touch server account for the administrator is created when the Touch server is installed. See the Touch documentation for the default settings.
Administration PIN Specify the PIN KeyPro Plus should set as the PIN for the Administration User (user ID = 0) on any of the Touch boxes connected to this Touch Server.
KeyPro Plus — Administration Guide version 2.1.1* 15

KeyWatcher Configuration
KeyWatcher Additional Settings Reference When adding a KeyWatcher or editing its settings, the following additional fields appear on a second tab in the add or edit wizard. The majority of these settings are the same for Touch boxes (if licensed) and Illuminated boxes.
KeyWatcher — Additional
Field Description
Time Zone Use the drop-down list to specify the current time-zone for this KeyWatcher. This should be set to the same time zone as the KeyPro Plus server machine (as set by Windows).
Time Format
Applies to Illuminated boxes only Use the drop-down list to specify the format this KeyWatcher should display times in 12 or 24 hour format.
Date Format Applies to Illuminated boxes only Use the drop-down list to specify the format this KeyWatcher should use for displaying dates.
Key Release Method Use the drop-down list to specify whether a user must enter a key number or a key name to release a key. The key release method should align to how your keys are labelled.
Key Return Method Use the drop-down list to specify how users must return keys to this KeyWatcher.
Method Description
Auto The KeyWatcher automatically selects the box for the key return. The user returns the key to a vacant slot in that box. Requires Random firmware (for Illuminated) or Random licence (for Touch).
Manual The user chooses the box for the key return then returns the key to a vacant slot within that box. Requires Random firmware for (Illuminated) or Random licence (for Touch).
Non Random
The KeyWatcher selects the box and illuminates the slot for the key return (using the key's original slot if available). Requires Non-Random firmware (for Illuminated) or Non-Random licence (for Touch).
If only one method is available, it cannot be edited. For KeyWatcher Touch boxes, the Touch server licence determines which methods are offered (see KeyWatcher Touch licences on page 9).
KeyPro Plus — Administration Guide version 2.1.1* 16

KeyWatcher Configuration
KeyWatcher — Additional
Field Description
Group Release Type Use the drop-down list to specify how Key Groups are released when requested by a user.
Type Description
All keys The KeyWatcher releases all keys belonging to the key group.
Next available
The KeyWatcher releases only one of the available keys belonging to the key group.
Individual key groups can be configured to override the group release type (see Key Groups on page 30).
Alarm Sound Use the drop-down list to specify whether the KeyWatcher sounds an audible alarm whenever it generates an alarm.
User Authentication Type
Use the drop-down list to specify how the KeyWatcher authenticates users.
Type Description
Keypad User must enter a four-digit user ID and a PIN.
Card reader or keypad
User must swipe a Wiegand card and, if "Card PIN Enabled" (see below), also enter a PIN. Alternatively, if Keypad Logon is NOT disabled for their user group (See User Groups on page 33), user may enter a four-digit user ID and a PIN For KeyWatchers with Wiegand card reader installed.
Relay input or keypad
User must be authenticated by the device attached to the relay input, and then enter a four-digit user ID and a PIN. For KeyWatchers with an authentication device of some kind wired to the KeyWatcher's Relay Input.
Relay Input, Card Reader and Keypad
User must be authenticated by the device attached to the relay input, then swipe a Wiegand card, and, if "Card PIN Enabled" (see below), also enter a PIN. Alternatively, if Keypad Logon is NOT disabled for their user group (See User Groups on page 33), user must be authenticated by the device attached to the relay input, and then enter a four-digit user ID and a PIN For KeyWatchers with an authentication device of some kind wired to the KeyWatcher's Relay Input AND a Wiegand card reader installed.
Door Sensor Applies to Illuminated boxes only If checked, the KeyWatcher generates an
alarm if the door is opened without user authentication (e.g. by using the door's physical key) or if the door is left open.
KeyPro Plus — Administration Guide version 2.1.1* 17
KeyWatcher Configuration
KeyWatcher — Additional
Field Description
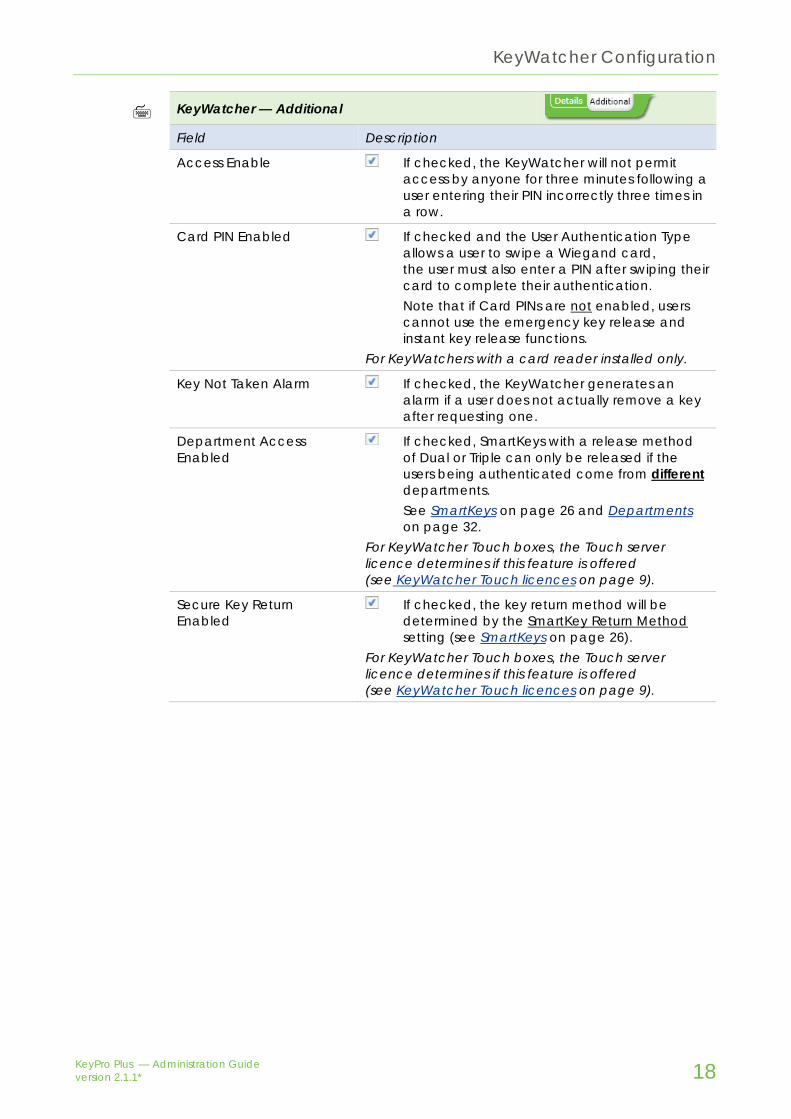
Access Enable If checked, the KeyWatcher will not permit access by anyone for three minutes following a user entering their PIN incorrectly three times in a row.
Card PIN Enabled If checked and the User Authentication Type allows a user to swipe a Wiegand card, the user must also enter a PIN after swiping their card to complete their authentication. Note that if Card PINs are not enabled, users cannot use the emergency key release and instant key release functions.
For KeyWatchers with a card reader installed only.
Key Not Taken Alarm If checked, the KeyWatcher generates an alarm if a user does not actually remove a key after requesting one.
Department Access Enabled
If checked, SmartKeys with a release method of Dual or Triple can only be released if the users being authenticated come from different departments. See SmartKeys on page 26 and Departments on page 32.
For KeyWatcher Touch boxes, the Touch server licence determines if this feature is offered (see KeyWatcher Touch licences on page 9).
Secure Key Return Enabled
If checked, the key return method will be determined by the SmartKey Return Method setting (see SmartKeys on page 26).
For KeyWatcher Touch boxes, the Touch server licence determines if this feature is offered (see KeyWatcher Touch licences on page 9).
KeyPro Plus — Administration Guide version 2.1.1* 18

KeyWatcher Configuration
Edit a KeyWatcher Once added to KeyPro Plus, the settings of both Illuminated and Touch boxes are edited the same way.
We'll assume you're logged in to KeyPro Plus.
1. Select the KeyWatcher Admin tab.
2. Select the KeyWatchers sub-tab.
3. Select a KeyWatcher then click the Edit button.
KeyPro Plus displays the relevant Edit KeyWatcher wizard (depending on the box type).
4. Edit the KeyWatcher details as required.
For KeyWatcher Details for an Illuminated box, see Add an Illuminated Box, step 4. on page 10.
For KeyWatcher Details for a Touch box, see Add a Touch Box, step 4 on page 12. If you also need to edit a Touch Server's details, use the Manage Servers button to access the Touch server list (see Touch Server Settings Reference on page 15).
then click the Next button to continue to the next tab.
5. Enter the additional KeyWatcher settings.
See KeyWatcher Additional Settings Reference on page 16.
6. When you're done working on all tabs, click the Complete button, and Confirm.
KeyPro Plus updates its database sends the updates to the KeyWatcher.
KeyPro Plus — Administration Guide version 2.1.1* 19

KeyWatcher Configuration
Archive a KeyWatcher Archiving a KeyWatcher removes it from management control by KeyPro Plus; it is the functional equivalent to deleting it. An archived KeyWatcher continues to function as a stand-alone box; any settings and users in its database at the time of archiving remain there.
When a KeyWatcher is archived, any access to its SmartKeys by way of User Groups or User overrides is removed and cannot be restored even it the KeyWatcher is re-activated.
Archiving a KeyWatcher Touch box does not archive the Touch Server details; they remain in the KeyPro Plus database even if the last KeyWatcher Touch box connected to that Touch server is archived.
We'll assume you're logged in to KeyPro Plus.
1. Select the KeyWatcher Admin tab.
2. Select the KeyWatchers sub-tab.
3. Select a KeyWatcher…
click the Archive button,
and confirm.
KeyPro Plus archives the KeyWatcher.
KeyPro Plus — Administration Guide version 2.1.1* 20
KeyWatcher Configuration
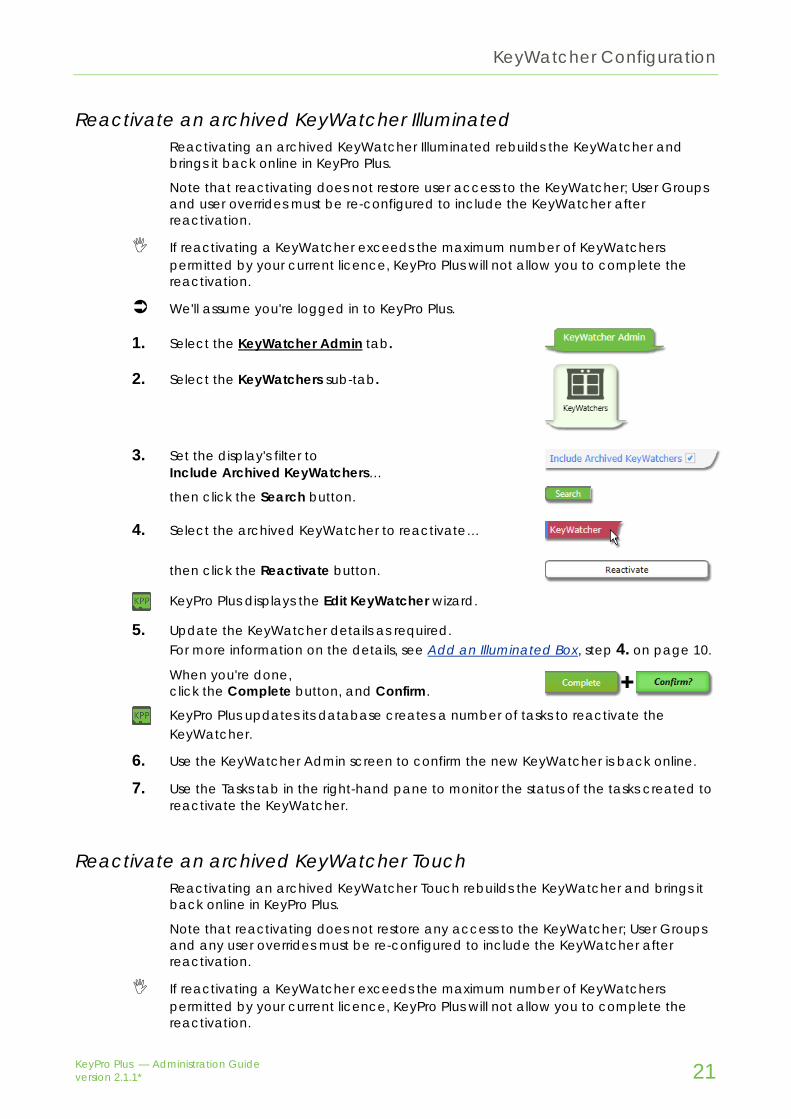
Reactivate an archived KeyWatcher Illuminated Reactivating an archived KeyWatcher Illuminated rebuilds the KeyWatcher and brings it back online in KeyPro Plus.
Note that reactivating does not restore user access to the KeyWatcher; User Groups and user overrides must be re-configured to include the KeyWatcher after reactivation.
If reactivating a KeyWatcher exceeds the maximum number of KeyWatchers permitted by your current licence, KeyPro Plus will not allow you to complete the reactivation.
We'll assume you're logged in to KeyPro Plus.
1. Select the KeyWatcher Admin tab.
2. Select the KeyWatchers sub-tab.
3. Set the display's filter to Include Archived KeyWatchers…
then click the Search button.
4. Select the archived KeyWatcher to reactivate…
then click the Reactivate button.
KeyPro Plus displays the Edit KeyWatcher wizard.
5. Update the KeyWatcher details as required. For more information on the details, see Add an Illuminated Box, step 4. on page 10.
When you're done, click the Complete button, and Confirm.
KeyPro Plus updates its database creates a number of tasks to reactivate the KeyWatcher.
6. Use the KeyWatcher Admin screen to confirm the new KeyWatcher is back online.
7. Use the Tasks tab in the right-hand pane to monitor the status of the tasks created to reactivate the KeyWatcher.
Reactivate an archived KeyWatcher Touch Reactivating an archived KeyWatcher Touch rebuilds the KeyWatcher and brings it back online in KeyPro Plus.
Note that reactivating does not restore any access to the KeyWatcher; User Groups and any user overrides must be re-configured to include the KeyWatcher after reactivation.
If reactivating a KeyWatcher exceeds the maximum number of KeyWatchers permitted by your current licence, KeyPro Plus will not allow you to complete the reactivation.
KeyPro Plus — Administration Guide version 2.1.1* 21
KeyWatcher Configuration
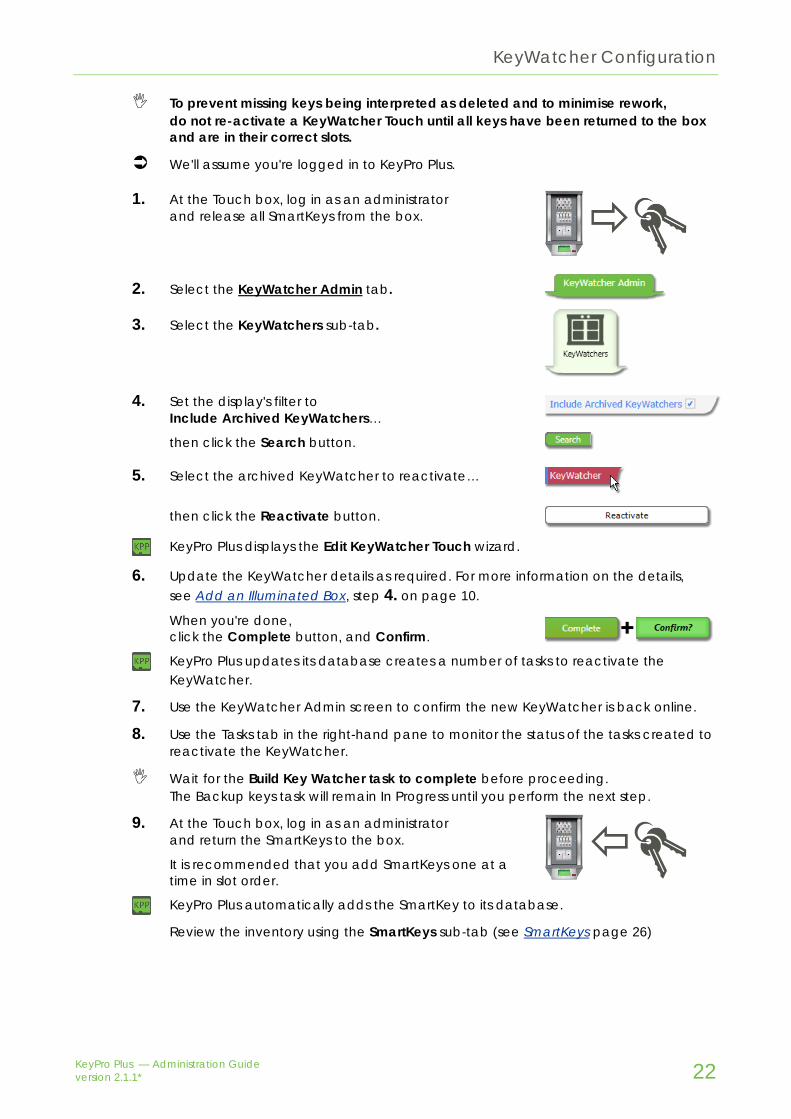
To prevent missing keys being interpreted as deleted and to minimise rework, do not re-activate a KeyWatcher Touch until all keys have been returned to the box and are in their correct slots.
We'll assume you're logged in to KeyPro Plus.
1. At the Touch box, log in as an administrator and release all SmartKeys from the box.
2. Select the KeyWatcher Admin tab.
3. Select the KeyWatchers sub-tab.
4. Set the display's filter to Include Archived KeyWatchers…
then click the Search button.
5. Select the archived KeyWatcher to reactivate…
then click the Reactivate button.
KeyPro Plus displays the Edit KeyWatcher Touch wizard.
6. Update the KeyWatcher details as required. For more information on the details, see Add an Illuminated Box, step 4. on page 10.
When you're done, click the Complete button, and Confirm.
KeyPro Plus updates its database creates a number of tasks to reactivate the KeyWatcher.
7. Use the KeyWatcher Admin screen to confirm the new KeyWatcher is back online.
8. Use the Tasks tab in the right-hand pane to monitor the status of the tasks created to reactivate the KeyWatcher.
Wait for the Build Key Watcher task to complete before proceeding. The Backup keys task will remain In Progress until you perform the next step.
9. At the Touch box, log in as an administrator and return the SmartKeys to the box.
It is recommended that you add SmartKeys one at a time in slot order.
KeyPro Plus automatically adds the SmartKey to its database.
Review the inventory using the SmartKeys sub-tab (see SmartKeys page 26)
KeyPro Plus — Administration Guide version 2.1.1* 22

KeyWatcher Configuration
Swap out a faulty KeyWatcher Touch box Use this procedure if you need to swap out a faulty or damaged KeyWatcher Touch box.
1. Remove all SmartKeys from the old box that you are replacing. This may need to be done manually (see the Touch box's documentation).
2. Swap out the old Touch box and replace with the new Touch box.
3. At the new Touch box, configure the box so its settings are the same as the old box. Give it the same KWT Device Name and point it to the same Touch server.
KeyPro Plus should detect the replacement box and show it as online.
4. At the new Touch box, log in as an administrator and return the SmartKeys to the box.
It is recommended that you add SmartKeys one at a time in slot order.
KeyPro Plus automatically adds the SmartKey to its database.
Review the inventory using the SmartKeys sub-tab (see SmartKeys page 26)
Move KeyWatcher Touch box to another Touch server To prevent missing keys being interpreted as deleted and to minimise rework,
do not move a KeyWatcher Touch box until all keys have been returned to the box.
1. At the Touch box, log in as an administrator and release all SmartKeys from the box.
2. In KeyPro Plus, edit the KeyWatcher Touch's details so it managed by the destination server (see Edit a KeyWatcher on page 19).
3. At the Touch box, point the KeyWatcher Touch to the destination server.
4. At the Touch box, log in as an administrator and return the SmartKeys to the box.
It is recommended that you add SmartKeys one at a time in slot order.
KeyPro Plus automatically adds the SmartKey to its database.
KeyPro Plus — Administration Guide version 2.1.1* 23

KeyWatcher Configuration
Change IP address of KeyWatcher Illuminated box 1. Change the IP address at the serial-to-ethernet device (e.g. Moxa) that connects
the KeyWatcher to your network.
KeyPro Plus will show the KeyWatcher Illuminated box as offline.
2. In KeyPro Plus, edit the KeyWatcher Illuminated details to reflect the new IP address (see Edit a KeyWatcher on page 19).
Once the IP address has been correctly updated with the new IP address, KeyPro Plus should show the KeyWatcher Illuminated box as online.
Change IP address of Touch Server 1. Change the IP address of the Touch Server.
KeyPro Plus will show any KeyWatcher Touch boxes connected to the Touch server as offline.
2. In KeyPro Plus, edit one of the KeyWatcher Touch's details to reflect the new IP address of the server (see Edit a KeyWatcher on page 19).
Once the Touch server record has been correctly updated with the new IP address, KeyPro Plus should show all Touch boxes connected to it as online.
Change IP address of KeyWatcher Touch box Please refer to your KeyWatcher Touch documentation on changing the IP address of a Touch box. Provided the host name of the Touch box does not change and the Touch server can still communicate with it, there is no impact on KeyPro Plus.
KeyPro Plus — Administration Guide version 2.1.1* 24

KeyWatcher Configuration
Key Access Times Key access times define periods of time during which keys can be accessed by a user or a user group. They make it easier to implement your key access policies.
Key Access Times are initially set at the user group level (see User Groups on page 33). Within a user group, they may also be overridden for a particular key group or SmartKey. A user's key access times default to those of their user group, but can be also overridden for a particular user at the user level, the key group level, or the smart key level (see the Operator Guide).
For example you might create a "business hours" and "all hours" key access time. All members of a user group might be assigned the standard business hours access, but you might override that access for the supervisor and grant them "all hours" access.
Add or edit key access times
We'll assume you're logged in to KeyPro Plus.
1. Select the KeyWatcher Admin tab.
2. Select the Key Access Times sub-tab.
3. Either click the Add button
Or select a key access time then click the Edit button.
KeyPro Plus displays the Key Access Time wizard.
4. Enter or edit a key access time…
Key Access Time
Field Description
Name Specify the name of this key access time for use within KeyPro Plus.
Description Specify a meaningful description for use in reports.
Name on KeyWatcher Specify a shorter name for display on the KeyWatcher (maximum 16 characters).
Start Time Specify the start time (on each day allowed) for the access period.
End Time Specify the end time for the access period.
Days allowed S M T W T F S Check the days of the week on which access is allowed within the specified period.
then click the Complete button, and Confirm.
KeyPro Plus updates the key access time details and sends updates to the relevant KeyWatchers.
KeyPro Plus — Administration Guide version 2.1.1* 25

KeyWatcher Configuration
SmartKeys SmartKeys are the electronically identifiable keys managed by a KeyWatcher.
Once added to a KeyWatcher, a SmartKey's configuration can be managed and edited are edited in KeyPro Plus.
When a KeyWatcher is rebuilt (see Rebuild KeyWatcher on page 75), the SmartKey configuration from KeyPro Plus is rebuilt in the KeyWatcher.
Access to SmartKeys is assigned to a user group (see User Groups on page 33) or as an override for an individual user (see the Operator Guide).
Edit SmartKeys
We'll assume you're logged in to KeyPro Plus.
1. Select the KeyWatcher Admin tab.
2. Select the Smart Keys sub-tab.
3. Select a SmartKey then click the Edit button.
KeyPro Plus displays the Smart Key wizard.
4. Edit a SmartKey…
Smart Key
Field Description
Name Specify the name of this SmartKey for use within KeyPro Plus.
Name in KeyWatcher Specify a shorter name for display on the KeyWatcher (maximum 16 characters).
Description Specify a meaningful description for use in reports.
Key Alarm After Time Of Day
— Enabled? If checked, KeyPro Plus generates an alarm if this key is not returned by the specified time of day.
— Time After checking Enabled, specify the time by which this key should be returned.
Key Alarm After Period
— Enabled? If checked, KeyPro Plus generates an alarm if this key is not returned within the specified period after it was removed.
Until the key is returned, an alarm is generated each time the specified period elapses. Unnecessarily short periods (e.g. 1 minute) can quickly generate a large number of alarms for a single overdue key.
KeyPro Plus — Administration Guide version 2.1.1* 26

KeyWatcher Configuration
Smart Key
Field Description
— Days After checking Enabled, specify the maximum number of days this key can be out for.
— Time After checking Enabled, specify the maximum time this key can be out for.
Key Release Method Use the drop-down list to specify how many users must be authenticated at the KeyWatcher before the key can be released (or returned). Only users with access to the key can be authenticated for its release (or return). If Department Access is enabled for this KeyWatcher, all users being authenticated for a release must belong to different departments. See KeyWatchers on page 9 and Departments on page 32. For KeyWatcher Touch boxes, the Touch server licence determines if the multi-user feature is available (see KeyWatcher Touch licences on page 9).
Key Return Method Use the drop-down list to specify which users must be authenticated at the KeyWatcher before the key can be returned. The number of users required for a return is the same as the key release method (unless "None" is selected as the method).
Method Description
None The key may be returned by any one authenticated user.
Full Secure The key must be returned by exactly the same user(s) to whom it was released,
Department Secure
The key must be returned by the first user to whom it was released, complemented by additional users from the same department.
Department The key must be returned by users from the same department as those to whom it was released.
Unsecure The key may be returned by any authenticated users.
Key Return Method can only be set if Secure Key Return is enabled for this KeyWatcher. Users may only participate in the return a key if they have access to it (unless they are a level 1 user).
then click the Complete button, and Confirm.
KeyPro Plus updates the SmartKey details and sends updates to the relevant KeyWatchers.
KeyPro Plus — Administration Guide version 2.1.1* 27
KeyWatcher Configuration
Physical Keys (and Cuts) A physical key uniquely identifies a particular key pattern corresponding to particular lock(s); it's not an actual key, but a logical entity that enables reporting on all potential access to a particular lock pattern across your site.
A cut uniquely identifies an actual instance of the physical key that you can use for opening locks. A specific cut is assigned to a SmartKey managed by a KeyWatcher.
It's good practice to name your physical keys and cuts in way that reflects their relationship. For example you might call a physical key "Room101" and its cuts "Room101-A", "Room101-B" and so on.
As it is for reporting purposes only, defining physical keys, cuts, and the status of a cut is optional.
Physical key and cut data can be imported into KeyPro Plus (see Importing Data on page 52).
Add or edit physical keys and cuts
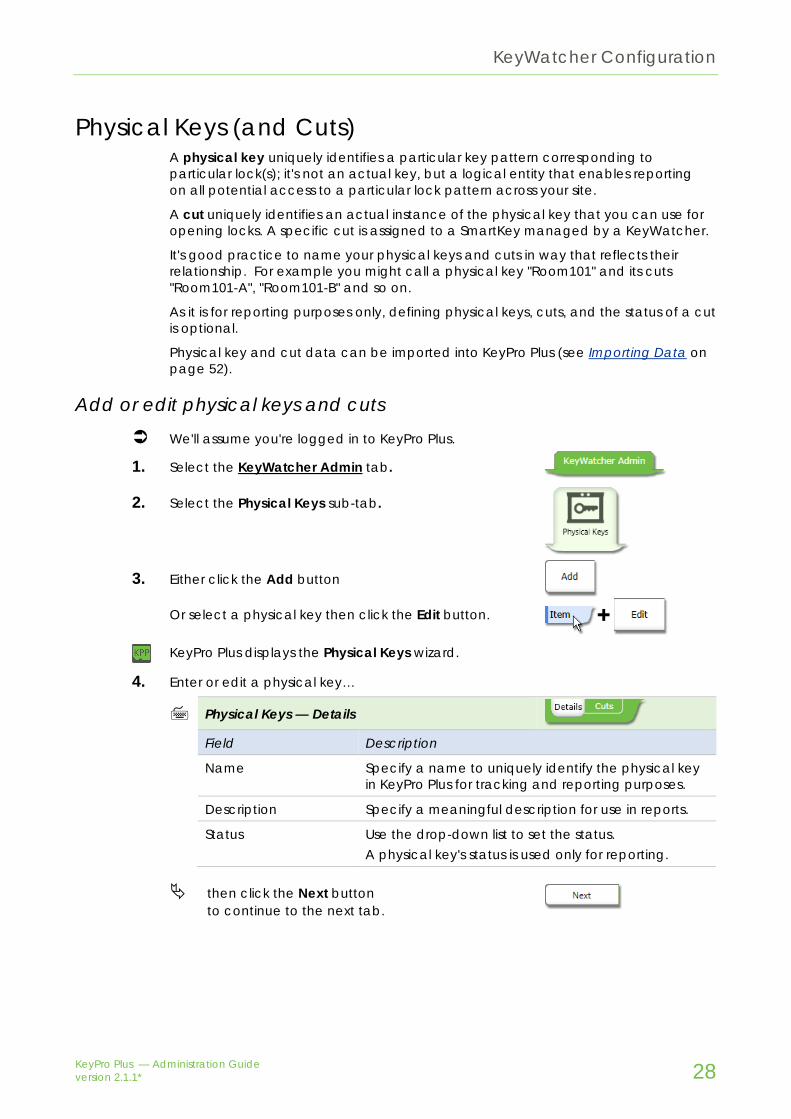
We'll assume you're logged in to KeyPro Plus.
1. Select the KeyWatcher Admin tab.
2. Select the Physical Keys sub-tab.
3. Either click the Add button
Or select a physical key then click the Edit button.
KeyPro Plus displays the Physical Keys wizard.
4. Enter or edit a physical key…
Physical Keys — Details
Field Description
Name Specify a name to uniquely identify the physical key in KeyPro Plus for tracking and reporting purposes.
Description Specify a meaningful description for use in reports.
Status Use the drop-down list to set the status. A physical key's status is used only for reporting.
then click the Next button to continue to the next tab.
KeyPro Plus — Administration Guide version 2.1.1* 28

KeyWatcher Configuration
5. Enter or modify the cuts for this physical key…
Physical Keys — Cuts
Description
KeyPro Plus displays a list of cuts for this physical key.
For example:
To add a cut: (a) Enter a Cut Name
(b) Use the pop-up to select a KeyWatcher, then the SmartKey this cut is assigned to.
For example:
(c) Click the Add button.
To edit a cut: (a) Select a cut
(b) Edit the details
(c) Click the Apply button.
To remove a cut: (a) Select a cut
(b) Click the Remove button.
6. When you're done working on all tabs, click the Complete button, and Confirm.
KeyPro Plus updates the physical key details.
KeyPro Plus — Administration Guide version 2.1.1* 29

KeyWatcher Configuration
Key Groups Key Groups make it easier to manage access to keys. They can be set up to manage a group of SmartKeys that are always used together (e.g. all the keys for the kitchen block) or a group of identical SmartKeys (i.e. multiple copies of the stores keys).
Access to a Key Group SmartKeys is assigned to a user group (see User Groups on page 33) or as an override for an individual user (see the Operator Guide).
If as user requests the release of a Key Group they do not specifically have access to, the KeyWatcher will release only those keys the user has access to.
Each KeyWatcher can store 250 key groups and each key group can include 100 keys. A SmartKey can be a member of more than one key group.
Add or edit key groups
We'll assume you're logged in to KeyPro Plus.
1. Select the KeyWatcher Admin tab.
2. Select the Key Groups sub-tab.
3. Either click the Add button
Or select a key group then click the Edit button.
KeyPro Plus displays the Key Groups wizard.
4. Enter or edit a key group…
Key Group — Details
Field Description
Name Specify the name of this key group for use within KeyPro Plus.
Key Group Number The number to of this Key Group in the KeyWatcher. The user enters this number to release the group. Key Group Number is set automatically.
Description Specify a meaningful description for use in reports.
Name in KeyWatcher Specify a shorter name for display on the KeyWatcher (maximum 16 characters).
KeyPro Plus — Administration Guide version 2.1.1* 30

KeyWatcher Configuration
Key Group — Details
Field Description
Group Release Type Use the drop-down list to specify how keys in this group are to be released.
Type Description
Global This key group will be released using the release type set for the KeyWatcher (see KeyWatcher Additional Settings Reference on page 16).
All keys The KeyWatcher releases all keys belonging to this key group. The user must remove all of the keys (or an alarm will be generated).
First key The KeyWatcher releases only one available key from the key group. The user takes only one key.
KeyWatcher Use the pop-up to select the KeyWatcher this key group is for.
then click the Next button to continue to the next tab.
5. Enter or edit the SmartKeys in this key group…
Key Group — Smart Keys
Field Action
SmartKeys added The upper pane shows the SmartKeys belonging to the key group. For example
To remove a SmartKey
from the key group, select it and click the Remove button.
SmartKeys available The lower pane shows the SmartKeys available in this KeyWatcher (but not belonging to the key group).
To add a SmartKey to the key group, select it and click the Add button.
6. When you're done working on all tabs, click the Complete button, and Confirm.
KeyPro Plus updates the key group details and sends updates to the relevant KeyWatchers.
KeyPro Plus — Administration Guide version 2.1.1* 31
KeyWatcher Configuration
Departments Departments allow users to be grouped for managing access to keys with dual or triple release and/or return methods.
If Department Access is enabled for a KeyWatcher, SmartKeys with a dual or triple release method are released only if the authenticated users are from different departments. Department requirements may also be configured for the return method. See KeyWatchers on page 9 and SmartKeys on page 26.
KeyWatcher Touch boxes must be licensed for the multi-user function for department related features to be configurable (see KeyWatcher Touch licences on page 9).
Departments can be assigned to a user group (see User Groups on page 33) or as an override for an individual user (see the Operator Guide).
KeyWatchers always have 16 departments available for use. KeyPro Plus allows those departments to be managed consistently across all KeyWatchers at your site.
Edit department names
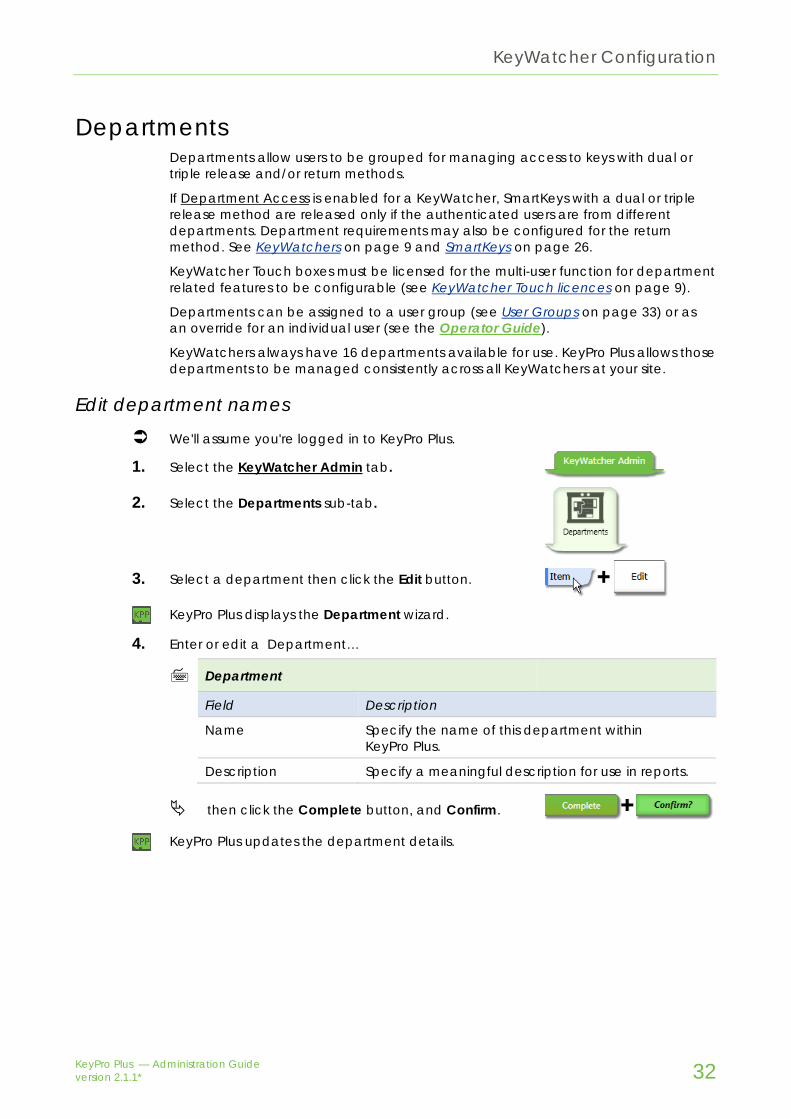
We'll assume you're logged in to KeyPro Plus.
1. Select the KeyWatcher Admin tab.
2. Select the Departments sub-tab.
3. Select a department then click the Edit button.
KeyPro Plus displays the Department wizard.
4. Enter or edit a Department…
Department
Field Description
Name Specify the name of this department within KeyPro Plus.
Description Specify a meaningful description for use in reports.
then click the Complete button, and Confirm.
KeyPro Plus updates the department details.
KeyPro Plus — Administration Guide version 2.1.1* 32

KeyWatcher Configuration
User Groups User groups allow you manage permissions and access to KeyWatchers, key groups, and SmartKeys for groups of users across all of the KeyWatchers at your site, regardless of whether they are Illuminated or Touch boxes.
All users in a user group share the same access and permissions unless you choose to specifically override them for a particular user. Changes to the user group (e.g. adding a new KeyWatcher) are automatically inherited by all users.
Each KeyWatcher in a user group can have up to 25 access items. Access items include: key groups SmartKeys assigned directly, not as part of a key group SmartKeys with a key access time assigned as part of key group.
User groups also manage permissions for instant key release and emergency releases, and the maximum number of keys released to each user at any one time.
User Groups set the default key access time for all access within the user group, but access times can be overridden for a particular key group or SmartKey. All users in the user group then inherit the override.
User groups can be used to manage multiple wiegand formats. This is especially useful during the rollout of a new card format, allowing users to be easily swapped from an old format user group to new format user group as the new cards are issued.
All user group settings (including KeyWatchers, key groups, SmartKeys, key access times, and any overrides) can be overridden for a particular user (see the Operator Guide).
Once created, user overrides always persist until they're specifically removed. For example, if you create a key access time override for a particular user for a particular SmartKey, the override remains in place even if you subsequently modifying that user's user group or the SmartKey's key group.
Add or edit user groups
We'll assume you're logged in to KeyPro Plus.
1. Select the KeyWatcher Admin tab.
2. Select the User Groups sub-tab.
3. Either click the Add button
Or select a user group then click the Edit button.
KeyPro Plus displays the User Groups wizard.
KeyPro Plus — Administration Guide version 2.1.1* 33
KeyWatcher Configuration
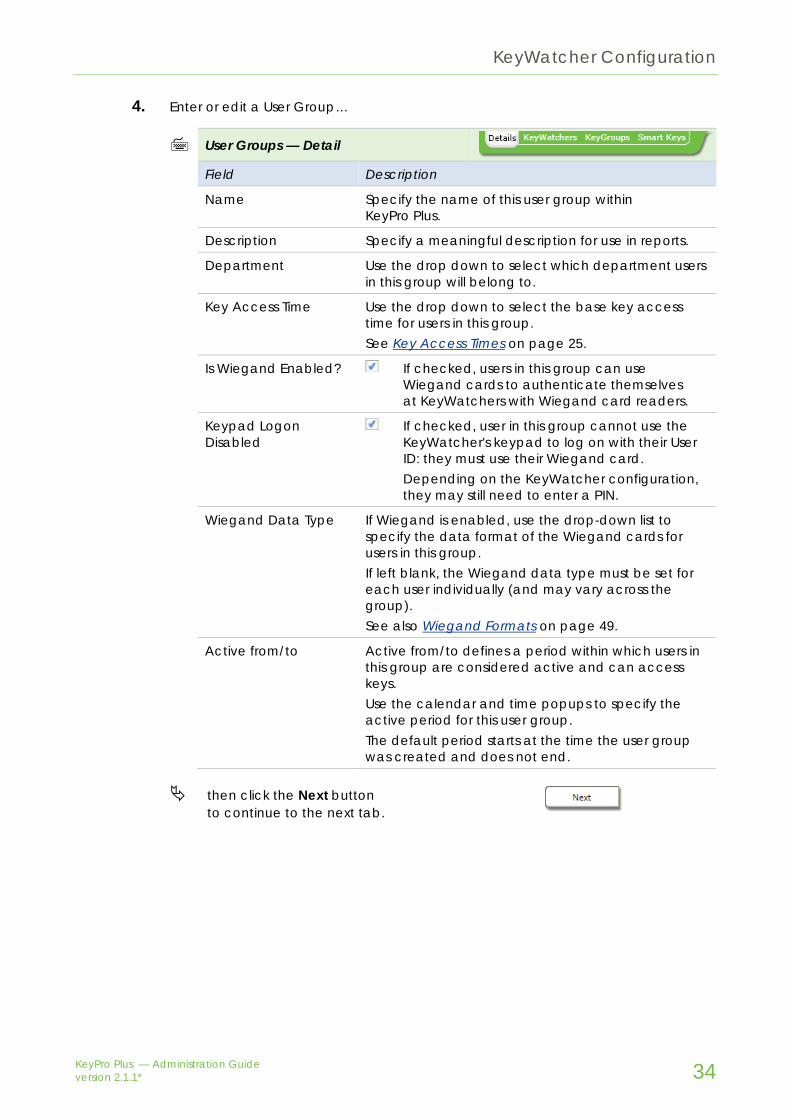
4. Enter or edit a User Group…
User Groups — Detail
Field Description
Name Specify the name of this user group within KeyPro Plus.
Description Specify a meaningful description for use in reports.
Department Use the drop down to select which department users in this group will belong to.
Key Access Time Use the drop down to select the base key access time for users in this group. See Key Access Times on page 25.
Is Wiegand Enabled? If checked, users in this group can use Wiegand cards to authenticate themselves at KeyWatchers with Wiegand card readers.
Keypad Logon Disabled
If checked, user in this group cannot use the KeyWatcher's keypad to log on with their User ID: they must use their Wiegand card. Depending on the KeyWatcher configuration, they may still need to enter a PIN.
Wiegand Data Type If Wiegand is enabled, use the drop-down list to specify the data format of the Wiegand cards for users in this group. If left blank, the Wiegand data type must be set for each user individually (and may vary across the group). See also Wiegand Formats on page 49.
Active from/to Active from/to defines a period within which users in this group are considered active and can access keys. Use the calendar and time popups to specify the active period for this user group. The default period starts at the time the user group was created and does not end.
then click the Next button to continue to the next tab.
KeyPro Plus — Administration Guide version 2.1.1* 34

KeyWatcher Configuration
5. Enter or edit the KeyWatchers that users in this group can access…
User Groups — KeyWatchers
Field Description
Added KeyWatchers
The upper pane shows the KeyWatchers that users in this group have access to. Select a KeyWatcher to edit the following access settings:
Field Description
All Key Access
If checked, users in this group can access all keys in this KeyWatcher
Emergency Release
If checked, users in this group can perform the emergency release of all keys in this KeyWatcher (by adding a "9" to the end of their PIN when logging in at the KeyWatcher)
Instant Key Release
If checked, users in this group can perform an instant key release of all keys they have access to at this KeyWatcher (by adding a "1" to the end of their PIN when logging in at the KeyWatcher)
Multiple Key Access
Specify the maximum number of keys that can be released to a user in this group at any one time. If set to zero, any number of available keys can be released to the user at one time.
To remove a KeyWatcher from the user group, select it and click the Remove button.
Available KeyWatchers
The lower pane shows the KeyWatchers available, but which user sin this group do not have access to.
To add a KeyWatcher from the user group, select it and click the Add button.
then click the Next button to continue to the next tab.
KeyPro Plus — Administration Guide version 2.1.1* 35

KeyWatcher Configuration
6. Enter or edit the key groups that users in this group can access…
User Groups — Key Groups
Field Description
KeyWatcher Filter Select a KeyWatcher from the list to add or remove key groups from. You cannot select a KeyWatcher here if all keys were made available to this user group (in step 5 above).
For example:
Key Groups
added from… The upper pane shows the key groups within the selected KeyWatcher that users in this group have access to.
To specify an override Key Access Time for the key group, select it from the drop down list.
For example
To remove access to a
key group, select it and click the Remove button.
Key Groups available in…
The lower pane shows the key groups available in this KeyWatcher (to which access has not been granted)
To add access to a key group, select it and click the Add button.
then click the Next button to continue to the next tab.
KeyPro Plus — Administration Guide version 2.1.1* 36

KeyWatcher Configuration
7. Enter or edit the SmartKeys that users in this group can access…
User Groups — Smart Keys
Field Description
KeyWatcher Filter Select a KeyWatcher from the list to add or remove SmartKeys groups from. You cannot select a KeyWatcher here if all keys were made available to this user group (in step 5 above).
For example:
SmartKeys added from…
The upper pane shows the SmartKey within the selected KeyWatcher that users in this group have access to.
To specify an override Key Access Time for the SmartKey, select it from the drop down list.
For example
To remove access to a
SmartKey, select it and click the Remove button.
SmartKeys available in…
The lower pane shows the SmartKeys available in this KeyWatcher (to which access has not been granted)
To add access to a SmartKey, select it and click the Add button.
SmartKeys belonging to key groups already assigned to this user group (in step 6 above) cannot be assigned here.
8. When you're done working on all tabs, then click the Complete button, and Confirm.
KeyPro Plus updates the user group details and sends updates to the relevant KeyWatchers.
Use the User Management tab to assign users to a user group (see the Operator Guide).
KeyPro Plus — Administration Guide version 2.1.1* 37

System Configuration
Overview
Use the System Admin tab to configure the following system features:
Operator Groups which define the functions operators can perform
Operators using the KeyPro Plus client application
Notification recipients who receive automatically generated emails when alarms occur
Scheduled reports which are automatically emailed according to the defined schedule
SMTP Gateway which KeyPro Plus uses to send emails
Wiegand formats which define the types of wiegand cards used at this site.
See also Importing Data on page 52 and Integration on page 59.
KeyPro Plus — Administration Guide version 2.1.1* 38

System Configuration
Operator Groups Operator Groups define the functions operators can perform in the KeyPro Plus client application. They specify which tasks (tabs) operators in the group can access, and whether that access permits reading, creating, updating, and/or deleting.
Operators are assigned to an operator group by using the Operators sub-tab (see Operators on page 41).
Any changes to an operator group affect all operators within the group.
At a minimum, there is always an Administrators operator group, which cannot be deleted.
Add or edit an operator group
We'll assume you're logged in to KeyPro Plus.
1. Select the System Admin tab.
2. Select the Operator Groups sub-tab.
3. Either click the Add button
Or select an operator group then click the Edit button.
KeyPro Plus displays the Operator Group wizard.
4. Enter or edit the Operator Group details…
Operator Group
Field Description
Name Enter a name for the operator group
Description Enter a description for the operator group
Check the boxes to grant Read, Create, Update, and/or Delete permissions for each task (tab).
Operator Group — Tasks
Field Description
SystemAdmin System Admin and Maintenance Logs tabs
LiveKeyMonitor Live data on the Key Monitor tab*
UserManagement User Management tab
KeyWatcherAdmin KeyWatcher Admin tab
HistoricKeyActivity Historic data on the Key Monitor tab*
Reports Reports tab
Alarms Alarms tab
KeyPro Plus — Administration Guide version 2.1.1* 39

System Configuration
*If only live or historic data is checked, the Key Monitor tab is renamed.
then click the Complete button, and Confirm.
KeyPro Plus updates the operator group.
View operators in an operator group
We'll assume you're logged in to KeyPro Plus.
1. Select the System Admin tab.
2. Select the Operator Groups sub-tab.
3. Select an operator group.
KeyPro Plus displays a pane showing the operators in the selected operator group. For example:
Delete operator group An operator group can only be deleted if it contains no operators.
We'll assume you're logged in to KeyPro Plus.
1. Select the System Admin tab.
2. Select the Operator Groups sub-tab.
3. Select an operator group… then click the Delete button.
4. Confirm the deletion by clicking the Yes button.
KeyPro Plus deletes the operator group.
KeyPro Plus — Administration Guide version 2.1.1* 40

System Configuration
Operators Operators are people who use the KeyPro Plus client application (as distinct from users who are people who use KeyWatchers to release or replace keys etc.).
Operators can log in using a KeyPro Plus user name or their Windows user name.
Each operator belongs to an operator group which determines the tasks they have access to and whether they can read, create, update and delete within each task (their "permissions").
Add or edit operators
We'll assume you're logged in to KeyPro Plus.
1. Select the System Admin tab.
2. Select the Operators sub-tab.
3. Either click the Add button
Or select an operator then click the Edit button.
KeyPro Plus displays the Operator wizard.
4. Enter or modify the Operator details…
Operator
Field Description
Is Windows Logon User If checked, the user does not need to enter credentials to log on to KeyPro Plus: their Windows domain and user name are used.
User Name Specify a user name for this operator. For a Windows Logon, specify domain\username.
Password If this operator is not a windows logon user, specify a password. Only operators with access to SystemAdmin can manage their own password.
First Name Specify the operator's first or given name.
Last name Specify the operator's last name or surname.
Preferred Name Optionally, specify the operator's preferred name.
Operator Group Use the drop-down list so choose the operator group for this operator. This will define the functions they can perform and the permissions they have.
then click the Complete button, and Confirm.
KeyPro Plus updates the operator.
KeyPro Plus — Administration Guide version 2.1.1* 41

System Configuration
Notification Recipients (Email Alarms) KeyPro Plus can be configured to email notification recipients when alarms are generated by the KeyPro Plus site. For example
Alarms can be filtered by AlarmType, UserGroup, and KeyWatcher. A notification recipient only receives emails for alarms that pass all of their applicable filters.
For example, a recipient receives a notification of an KeyOverdue alarm only if KeyOverdue alarms are selected and the alarm was generated by a selected KeyWatcher for a key taken by a user in a selected UserGroup.
A notification recipient does not have to be a user or operator in order to receive emails from KeyPro Plus.
KeyPro Plus cannot send emails unless its STMP gateway is correctly configured (see SMTP Gateway (for Emails from KeyPro Plus) on page 48) and online.
For a list of Alarm Types, see the Alarms chapter of the Operations Guide.
Add or edit notified recipients
We'll assume you're logged in to KeyPro Plus.
1. Select the System Admin tab.
2. Select the Notification Recipients sub-tab.
3. Either click the Add button
Or select an operator then click the Edit button.
KeyPro Plus displays the Notification Recipient wizard.
4. Enter or modify the notification recipient's details…
Notification Recipient — Details
Field Description
First Name Specify a first name for the email recipient (to go in the email's "To:" field).
Last Name Specify a last name for the email recipient (to go in the email's "To:" field).
Middle Name Specify an optional middle name.
Email Specify the recipient's full email address.
KeyPro Plus — Administration Guide version 2.1.1* 42
System Configuration
then click the Next button to continue to the next tab.
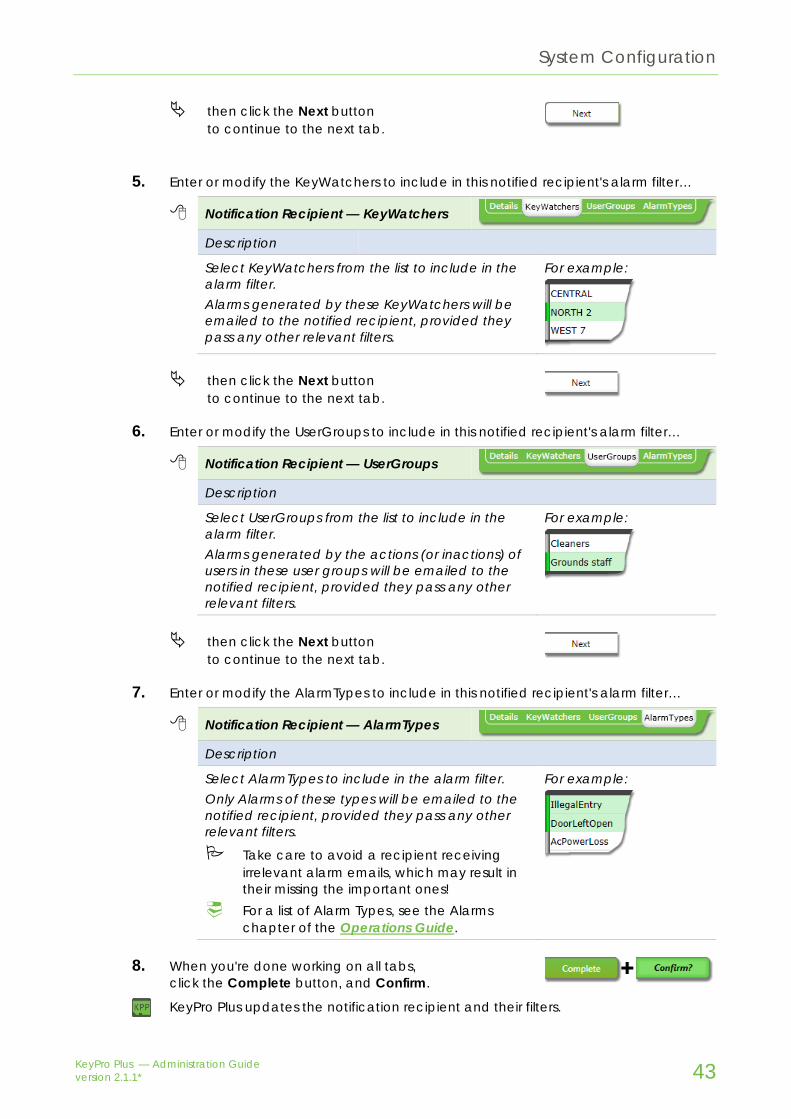
5. Enter or modify the KeyWatchers to include in this notified recipient's alarm filter…
Notification Recipient — KeyWatchers
Description
Select KeyWatchers from the list to include in the alarm filter. Alarms generated by these KeyWatchers will be emailed to the notified recipient, provided they pass any other relevant filters.
For example:
then click the Next button to continue to the next tab.
6. Enter or modify the UserGroups to include in this notified recipient's alarm filter…
Notification Recipient — UserGroups
Description
Select UserGroups from the list to include in the alarm filter. Alarms generated by the actions (or inactions) of users in these user groups will be emailed to the notified recipient, provided they pass any other relevant filters.
For example:
then click the Next button to continue to the next tab.
7. Enter or modify the AlarmTypes to include in this notified recipient's alarm filter…
Notification Recipient — AlarmTypes
Description
Select AlarmTypes to include in the alarm filter. Only Alarms of these types will be emailed to the notified recipient, provided they pass any other relevant filters.
Take care to avoid a recipient receiving irrelevant alarm emails, which may result in their missing the important ones!
For a list of Alarm Types, see the Alarms chapter of the Operations Guide.
For example:
8. When you're done working on all tabs, click the Complete button, and Confirm.
KeyPro Plus updates the notification recipient and their filters.
KeyPro Plus — Administration Guide version 2.1.1* 43

System Configuration
Scheduled Reports KeyPro Plus allows you to schedule the emailing of regular reports as PDFs or Excel files. An email recipient does not have to be a user or operator in order to receive emails from KeyPro Plus.
Add or edit scheduled reports
We'll assume you're logged in to KeyPro Plus.
1. Select the System Admin tab.
2. Select the Scheduled Reports sub-tab.
3. Either click the Add button
Or select an operator then click the Edit button.
KeyPro Plus displays the Scheduled Reports wizard.
4. Enter or modify the scheduled report details…
Scheduled Report — Details
Field Description
Name Specify a name for the report within KeyPro Plus. This will be used as the file name for the report (when attached to the email). It is not used within the report itself.
Description Specify a meaningful description for the report.
Schedule Use the drop-down list to select the report's schedule (i.e. how often it is run).
Schedule Time of Day Specify the time of day when the report should be run.
Scheduled Start Date Use the pop-up calendar to specify the date on which this report will start running. The start date defaults to today. For non-daily reports, the start date specifies the day of the week or month on which the report will run.
Scheduled End Date Optionally, use the pop-up calendar to specify an end date for this report. If specified the report will run up to and including this date. If not specified, the report will run indefinitely.
then click the Next button to continue to the next tab.
KeyPro Plus — Administration Guide version 2.1.1* 44

System Configuration
5. Enter or modify the criteria for the scheduled report…
Scheduled Report — Report Criteria
Field Description
Report Format Specify the format for the scheduled report to be delivered in:
Format Description
PDF Portable document format (PDF) Can be viewed with Adobe Reader
Excel Excel format. Can be viewed with Microsoft Excel.
Report Type Use the drop-down list to specify the report type. For details of the available reports, see Scheduled reports reference on page 47.
From Scheduled Time Offset
Specify the start of the reporting window relative to the time the report is run. Only data (e.g. events, alarms) that falls within the reporting window is included in the report. Typically, "From scheduled time offset" is set to the report's schedule and "To scheduled time offset" to zero, which means the reporting window runs from the end of the previous report until the moment this report is run. For example, a weekly report "from" a week ago "to" zero will contain a week of data.
To Scheduled Time Offset
Specify the end of the reporting window relative to the time the report is run.
Select report-specific Items to report on…
If required by your report type, select the items to report on.
(a) Enter some filter criteria to assist with finding the items you wish to report on (optional).
For example:
(b) Click the Search button to display some items to select.
(c) Select the items to report on. To select more than one item,
ctrl-click or shift-click. Use the buttons to select or
deselect all items. If there is more than one page of
items, use the paging features to access more items.
For example:
For details of the filter options for each report type, see Scheduled reports reference on page 47.
then click the Next button to continue to the next tab.
KeyPro Plus — Administration Guide version 2.1.1* 45

System Configuration
6. Enter or modify the email settings for the scheduled report…
Scheduled Report — Email Settings
Field Description
Email Subject Specify the reporting email's subject line.
Email Body Optionally, specify the text for the body of the reporting email.
Email Recipients Specify the recipients of your report.
To add a new email recipient:
(a) Click the Add Email Recipients button.
(b) Enter the new email recipient's details, then click the Add button.
(c) Select your newly added recipient, then click the Add to Scheduled Recipients List button.
To add a recipient (who is already receiving emails from KeyPro Plus):
(a) Click the Add Email Recipients button.
(b) Select a recipient from the list of Email Recipients displayed, then click the Add to Scheduled Recipients List button.
To remove a recipient:
(a) Select a recipient from the list of Email Recipients displayed,* then click the Remove Selected Recipients button.
then click the Next button to continue to the next tab.
7. Perform a test run of your report, if required…
Scheduled Report — Test Run
Description
Test run To perform a test run of your report:
(a) Click the Run Now button.
(b) Click the OK button to close the test result message
(c) Click the Close button to close the sample report.
Note that incorrect email addresses are not detected by KeyPro Plus but show up as undeliverable emails in the email account specified in the SMTP Gateway (see SMTP Gateway (for Emails from KeyPro Plus) on page 48).
KeyPro Plus — Administration Guide version 2.1.1* 46

System Configuration
8. When you're done working on all tabs, click the Complete button, and Confirm.
KeyPro Plus updates the scheduled report.
Scheduled reports reference The following report types can be scheduled in KeyPro Plus.
Report type Description Report details include… Must Specify…
Alarm History Report
All alarms that occurred within the reporting period
Alarm date/time, type, KeyWatcher, key, and user involved
All Activity Report All activities (events) that have occurred on all KeyWatchers within the reporting period
Log date/time, user involved, KeyWatcher and key, and Activity (event) message
Audit Report All activities performed in KeyPro Plus by the specified operators within the reporting period
Date/Time, operator, and a description of the activity
Operator(s)
Key Activity Report
All activities involving the specified keys within the reporting period
Log date/time, user involved, KeyWatcher and key, and Activity (event) message
SmartKey(s)
KeyWatcher Events Report
All activities (events) that have occurred on all KeyWatchers within the reporting period
Log date/time, user involved, KeyWatcher and key, and Activity (event) message
KeyWatcher(s)
User Activity Report
All activities performed on KeyWatchers by the specified users within the reporting period
User involved, Log date/time, KeyWatcher and key, and Activity (event) message
User(s)
User Group Activity Report
All activities performed on KeyWatchers by the users belonging to the specified user groups within the reporting period
User involved, Log date/time, KeyWatcher and key, and Activity (event) message
User group(s)
These reports can also be run on an ad hoc basis from the Reporting tab. See the Reporting chapter in the Operations Guide.
KeyPro Plus — Administration Guide version 2.1.1* 47

System Configuration
SMTP Gateway (for Emails from KeyPro Plus) KeyPro Plus uses the SMTP Gateway to email alarms and scheduled reports. This is typically the same SMTP gateway used for your organisation's email system.
Edit SMTP gateway settings
We'll assume you're logged in to KeyPro Plus.
1. Select the System Admin tab.
2. Select the System Configuration sub-tab.
3. Click the Edit button.
KeyPro Plus displays the System Configurations wizard.
4. Enter or modify the System Configurations details…
System Configurations — STMP Gateway
Field Description
SMTP Server Hostname Specify the name of your SMTP server.
Port Specify the port used to connect to your SMTP server. For SMTP servers this is usually port 25.
SMTP Server Credentials Required
Check this box is your SMTP server requires KeyPro Plus to supply credentials (log in) before it sends an email.
SMTP Server Credentials
— SMTP User Name
Specify the user name for KeyPro Plus to use when connecting to the SMTP server to send emails.
— SMTP User Password
Specify the password for KeyPro Plus to use when connecting to the SMTP server to send emails.
— Reset Password
If you're resetting (updating) a password you've previously saved, check the Reset Password box before entering the password.
SMTP Server Credential Account Email Address
— From Email Address
Specify the sender email address KeyPro Plus should send its emails from. For example: [email protected]
then click the Complete button, and Confirm.
KeyPro Plus updates the SMTP gateway details.
KeyPro Plus — Administration Guide version 2.1.1* 48

System Configuration
Wiegand Formats A wiegand format defines how to encode and interpret data on a particular type of wiegand card, allowing software to find the useful information such as the card ID.
Many common wiegand formats are already defined in KeyPro Plus. Additional formats can be defined here. User groups can be set up to manage multiple formats across a single site and migrations from one format to another (see User Groups on page 33).
Within KeyPro Plus, the format defines how the bit data on the card (a string of ones and noughts) is translated into fields that have a meaning for your business use of the card (e.g. a user ID). The fields defined by a wiegand format in KeyPro Plus appear on those user records to which that format is assigned (usually via a user group); the fields may also be matched to fields in an integrated system (e.g. Gallagher, OnGuard, P2000).
KeyPro Plus stores wiegand card data in its raw form (as a string of ones and noughts), not as the fields defined in the format. It is this raw data the KeyWatchers require to match users. This makes it important that any format you define accounts for all bits in the card data, including any hardcoded fields, so that KeyPro Plus can correctly create data strings that matches those on the cards.
For the necessary technical information on your Wiegand format, consult your card or access control system supplier.
Add or edit wiegand formats
We'll assume you're logged in to KeyPro Plus.
1. Select the System Admin tab.
2. Select the Wiegand Formats sub-tab.
3. Either click the Add button…
Or select a format then click the Edit button (you cannot edit formats already assigned to users).
KeyPro Plus displays the Wiegand Format wizard.
4. Enter or modify the format's basic details…
Details
Field Description
Card Format Name Specify the name for this format within KeyPro Plus.
Card Format Description
Specify a meaningful description.
Number of Bits Specify the number of bits of data for this format. This is determined by the physical specification of the wiegand card.
KeyPro Plus — Administration Guide version 2.1.1* 49

System Configuration
Details
Field Description
Fields Specify the fields for this format (as shown in step 5), taking care to account for all bits in the card data string.
For example:
5. Specify each field for this format as follows:
Details — For Each Field…
Wiegand Format Field Description
Field Name Specify the name for this field within KeyPro Plus. This name will be used in the User Details wizard and when mapping this field for an integration. DO NOT USE reserved field names for Wiegand Format fields (see Reserved field names on page 51),
Field Type Use the drop-down list to specify the type of data in this field. Field type defines what else must be specified for this field.
Field Type Description and further instructions…
Binary Binary field to be interpreted as an integer. Binary fields are the only fields that can be viewed or entered in KeyPro Plus or mapped to fields in an integration system.
Select the bits that make up this field in the Value mask.
Odd Parity or Even Parity
Parity bit. For odd parity, this bit is set to "1" if there is an odd number of bits set to "1" in the calculation mask. For even parity this bit is set to "1" if there is an even number of bits set to "1" in the calculation mask.
Select one bit from the Value Mask for this field, then select the bits used to calculate the parity bit from the Calculation Mask.
Hardcoded The value of this field never changes at this site.
Select the bits that make up this field in the Value mask, then enter the hard coded calculation value for this field.
Value mask Use the bit-map graphic to specify the bits that make up this field.
For example:
KeyPro Plus — Administration Guide version 2.1.1* 50

System Configuration
Details — For Each Field…
Wiegand Format Field Description
Override Min/Max Value, Min Value, and Max Value
For binary fields, you have the option of setting minimum and maximum values for this field when data is entered within KeyPro Plus. This may be useful if only a limited range of actual card values are available due to your site's card allocation. The override range must be between zero and the native maximum determined by the field length.
Calculation mask For parity fields, use the bit-map graphic to specify the bits used to calculate the parity.
For example:
Calculation value For hardcoded fields, enter the value for this field.
Repeat step 5 for each field in the format.
6. When you're done working on the format, then click the Complete button, and Confirm.
Reserved field names To avoid mapping conflicts when importing data or configuring an integration, DO NOT USE the following reserved field names for fields in Wiegand Formats:
First Name
Last Name
Middle Name
Preferred Name
Unique Identifier
User Group
User Level
Facility Code
User Code.
KeyPro Plus — Administration Guide version 2.1.1* 51

Importing Data
Overview KeyPro Plus can import user data and physical key data from files in CSV or XML format.
KeyPro Plus handles an import as an integration task. It matches imported records against its database, either updating existing records or creating new one.
Physical keys — CSV format In CSV format, each record (line) contains one or more fields separated by commas.
KeyPro Plus treats the first record (line) of the CSV file as a header record and any subsequent records as data to import.
Physical keys — import file fields Physical key import records may include the following fields:
Import Field Name Description
NAME Maps to the physical key record's Name field. KeyPro Plus uses NAME to match the import record against existing physical key records. If a match is found, the existing physical key record is updated, otherwise a new physical key record is created. Mandatory field.
DESCRIPTION Maps to the physical key record's Description field.
CUT* Maps to the cut record's Cut Name field. Cut name must be unique within the physical key. *Any field name starting with "CUT" is interpreted as a cut field. Cut field names must be unique; subsequent instances of the same field name are ignored. KeyPro Plus uses the CUT* fields (and NAME) to match each cut in the import record against existing cut records. If no match is found, a new cut record is created.
The header record (first record) must specify the field names for any fields included in the subsequent records. Field names are NOT case sensitive and can be specified in any order, provided that order is consistent within the file. Unrecognised field names are ignored.
KeyPro Plus — Administration Guide version 2.1.1* 52

Importing Data
If the mandatory field names are not specified, the file cannot be processed. Each record must contain each mandatory field to be processed.
After importing physical keys and cuts Use the Physical Keys sub-tab (under KeyWatchers) to review the imported data.
New physical keys are given a status of "current" and new cuts are given a status of "new".
Updated physical keys or cuts retain their existing status and SmartKey assignment.
Assign any new cuts of physical keys to the appropriate SmartKey.
See Physical Keys (and Cuts) on page 28 for related information.
Physical keys — example Consider the following physical key import file.
Name,Description,Cut_1,Cut_2,Cut_3,Cut_4,Cut_5 GR-Front,Garage Front Door,GRF001 GR-Side,Garage Side Door,GRS001,GRS002,GRS003 GR-Old
This file would result in the following physical key and cut records being created or updated in KeyPro Plus:
KeyPro Plus — Administration Guide version 2.1.1* 53
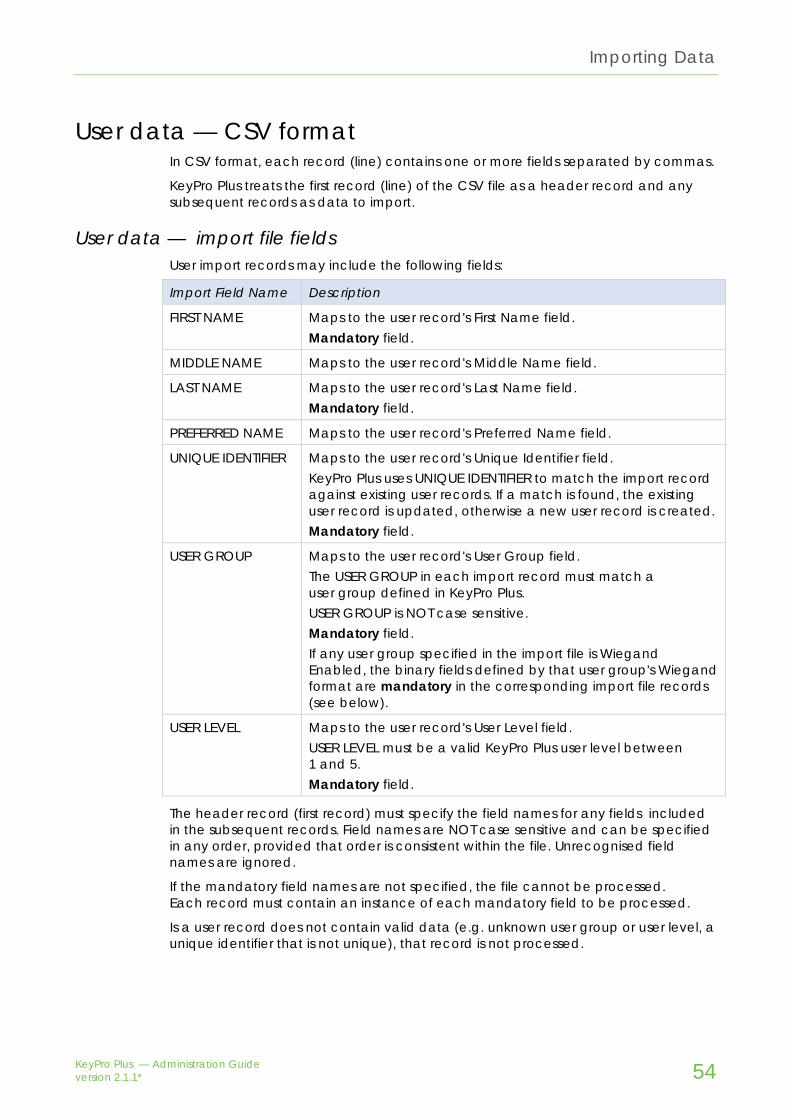
Importing Data
User data — CSV format In CSV format, each record (line) contains one or more fields separated by commas.
KeyPro Plus treats the first record (line) of the CSV file as a header record and any subsequent records as data to import.
User data — import file fields User import records may include the following fields:
Import Field Name Description
FIRST NAME Maps to the user record's First Name field. Mandatory field.
MIDDLE NAME Maps to the user record's Middle Name field.
LAST NAME Maps to the user record's Last Name field. Mandatory field.
PREFERRED NAME Maps to the user record's Preferred Name field.
UNIQUE IDENTIFIER Maps to the user record's Unique Identifier field. KeyPro Plus uses UNIQUE IDENTIFIER to match the import record against existing user records. If a match is found, the existing user record is updated, otherwise a new user record is created. Mandatory field.
USER GROUP Maps to the user record's User Group field. The USER GROUP in each import record must match a user group defined in KeyPro Plus. USER GROUP is NOT case sensitive. Mandatory field. If any user group specified in the import file is Wiegand Enabled, the binary fields defined by that user group's Wiegand format are mandatory in the corresponding import file records (see below).
USER LEVEL Maps to the user record's User Level field. USER LEVEL must be a valid KeyPro Plus user level between 1 and 5. Mandatory field.
The header record (first record) must specify the field names for any fields included in the subsequent records. Field names are NOT case sensitive and can be specified in any order, provided that order is consistent within the file. Unrecognised field names are ignored.
If the mandatory field names are not specified, the file cannot be processed. Each record must contain an instance of each mandatory field to be processed.
Is a user record does not contain valid data (e.g. unknown user group or user level, a unique identifier that is not unique), that record is not processed.
KeyPro Plus — Administration Guide version 2.1.1* 54

Importing Data
Wiegand format fields If the user group specified for a user record is "Wiegand Enabled", any binary wiegand format fields specified for the wiegand format become additional mandatory fields for that user record.
If your KeyPro Plus site uses more than one wiegand format, user records may have different mandatory fields depending on their user group's wiegand format.
To accommodate this in an import file, specify the field names for all of the wiegand format fields for the wiegand formats enabled for all of the user groups included in your import data. Then, for each record, include wiegand format field data for the wiegand format fields corresponding to the user group for that import record, leaving the other wiegand format fields blank.
See Wiegand Formats on page 49 and User Groups on page 33 for related information.
Before importing user data Before importing user data, ensure any user groups referenced in your import data are defined in KeyPro Plus. Also check which wiegand formats are defined for those user groups and make sure any binary fields specified in the wiegand format are included in your import file.
After importing user data Use the User Management tab to review the imported data.
New users have access to the KeyWatchers, key groups, and SmartKeys specified for their user group. They are assigned the default PIN and next available user ID for all KeyWatchers they have access to.
Updated users retain their existing overrides with the exception of KeyWatchers included in their user group that were removed by an override: these are restored when the user group is re-assigned during the import.
See the Operator Guide for related information on users.
KeyPro Plus — Administration Guide version 2.1.1* 55

Importing Data
User data — example Consider the following user data import file.
Unique Identifier,First Name,Last Name,User Group,User Level,Staff ID,Facility ID I-1001,Thomas,Barrow,STAFF,3,242, I-0002,Tom,Branson,OTHER,3,43,2 I-0003,Daisy,Mason,NO-CARD,3,,
For this example, assume the user groups are specified as follows:
STAFF uses a wiegand format that requires Staff ID
OTHER uses a wiegand format that requires Staff ID and Facility ID
NO-CARD is not wiegand enabled.
This file would result in three user records being created and updated in KeyPro Plus.
KeyPro Plus — Administration Guide version 2.1.1* 56
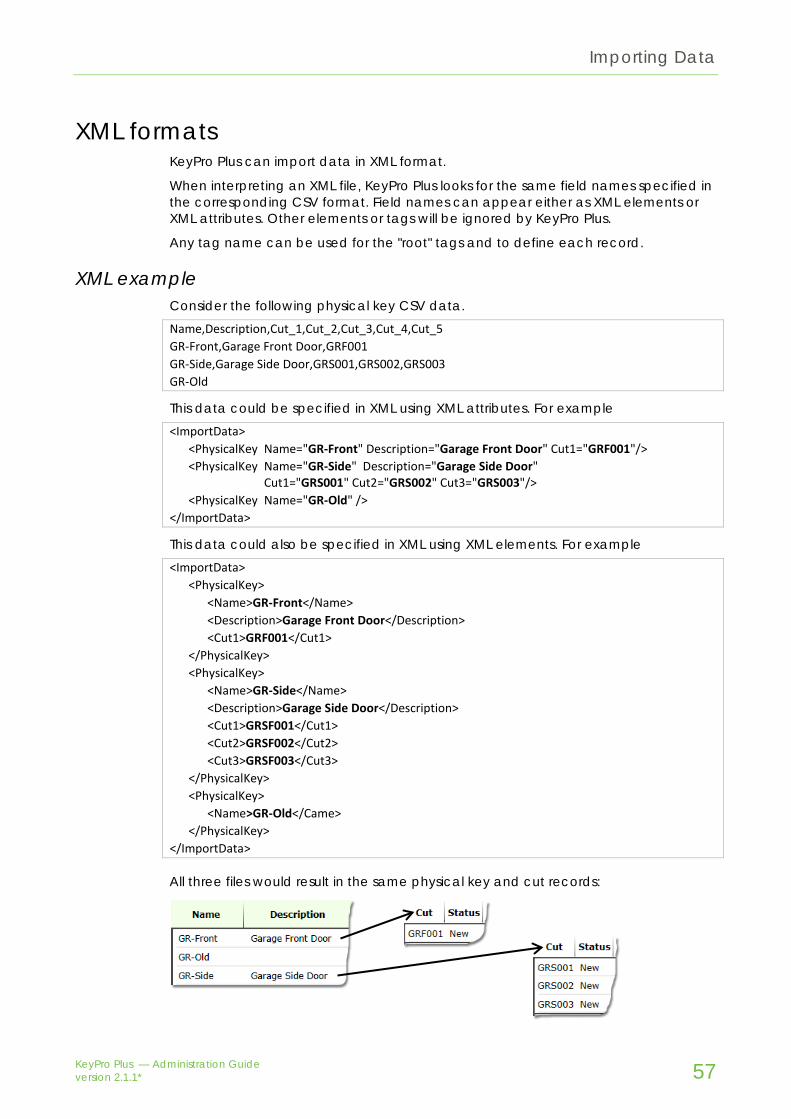
Importing Data
XML formats KeyPro Plus can import data in XML format.
When interpreting an XML file, KeyPro Plus looks for the same field names specified in the corresponding CSV format. Field names can appear either as XML elements or XML attributes. Other elements or tags will be ignored by KeyPro Plus.
Any tag name can be used for the "root" tags and to define each record.
XML example Consider the following physical key CSV data.
Name,Description,Cut_1,Cut_2,Cut_3,Cut_4,Cut_5 GR-Front,Garage Front Door,GRF001 GR-Side,Garage Side Door,GRS001,GRS002,GRS003 GR-Old
This data could be specified in XML using XML attributes. For example
<ImportData> <PhysicalKey Name="GR-Front" Description="Garage Front Door" Cut1="GRF001"/> <PhysicalKey Name="GR-Side" Description="Garage Side Door" Cut1="GRS001" Cut2="GRS002" Cut3="GRS003"/> <PhysicalKey Name="GR-Old" /> </ImportData>
This data could also be specified in XML using XML elements. For example
<ImportData> <PhysicalKey> <Name>GR-Front</Name> <Description>Garage Front Door</Description> <Cut1>GRF001</Cut1> </PhysicalKey> <PhysicalKey> <Name>GR-Side</Name> <Description>Garage Side Door</Description> <Cut1>GRSF001</Cut1> <Cut2>GRSF002</Cut2> <Cut3>GRSF003</Cut3> </PhysicalKey> <PhysicalKey> <Name>GR-Old</Came> </PhysicalKey> </ImportData>
All three files would result in the same physical key and cut records:
KeyPro Plus — Administration Guide version 2.1.1* 57
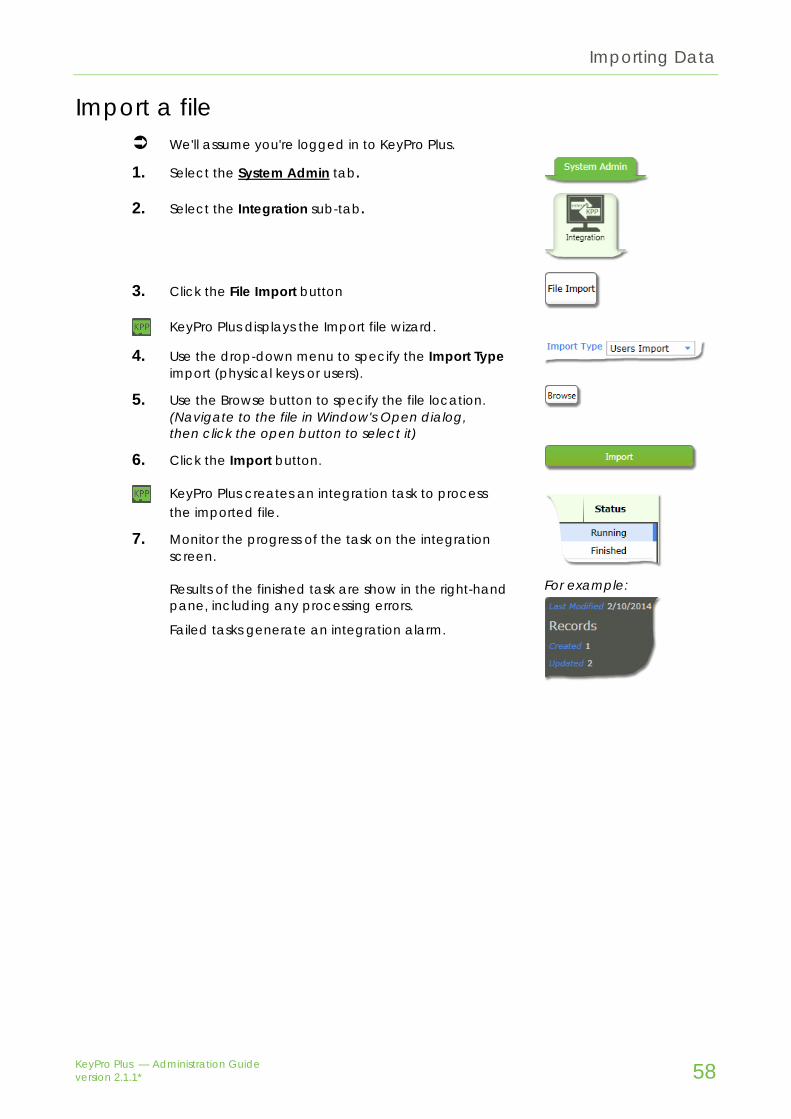
Importing Data
Import a file We'll assume you're logged in to KeyPro Plus.
1. Select the System Admin tab.
2. Select the Integration sub-tab.
3. Click the File Import button
KeyPro Plus displays the Import file wizard.
4. Use the drop-down menu to specify the Import Type import (physical keys or users).
5. Use the Browse button to specify the file location. (Navigate to the file in Window's Open dialog, then click the open button to select it)
6. Click the Import button.
KeyPro Plus creates an integration task to process the imported file.
7. Monitor the progress of the task on the integration screen.
Results of the finished task are show in the right-hand pane, including any processing errors.
Failed tasks generate an integration alarm.
For example:
KeyPro Plus — Administration Guide version 2.1.1* 58

Integration
Overview KeyPro Plus currently supports integration with the following access control systems:
OnGuard (by Lenel)
Cardax, now known as Gallagher.
KeyPro Plus downloads user data from the integrated systems and uploads alarms and other event (if supported); this is called synchronisation.
Synchronisation can be automatic (triggered automatically at regular intervals) or manual (triggered by an operator).
User data Users defined in the integrated system must be maintained in the integrated system. For these users, the user details in KeyPro Plus should be considered a copy only: the source of truth remains the integrated system. Updates to user details made in the integrated system are applied to the data in KeyPro Plus during synchronisation. Users defined in the integrated system cannot be deleted from KeyPro Plus.
Additional users may still be added and maintained in KeyPro Plus as usual. These users will be ignored by any integration activities.
Regardless of how users were added to KeyPro Plus, the monitoring and management of their access to keys is the same.
Integrated system version upgrades Be aware that version upgrades to the integrated system may have an impact on the integration with KeyPro Plus.
Before installing a version upgrade, please check with your KeyPro Plus supplier to ensure the new version is supported by KeyPro Plus.
KeyPro Plus — Administration Guide version 2.1.1* 59

Integration
OnGuard Integration For OnGuard integration, KeyPro Plus user groups are mapped to OnGuard access levels. When imported into KeyPro Plus, users established in OnGuard are automatically assigned to a KeyPro Plus user group according to the mapping rules defined in the integration settings.
Keys not held access level The "Keys not held" access level identifies users not currently holding keys. KeyPro Plus sends updates to OnGuard to keep the "keys not held" access level current.
When an integrated user removes keys from a KeyWatcher, KeyPro Plus sends a request to OnGuard to remove that user from the "keys not held" access level. When all keys held by that user have been returned, KeyPro Plus sends a request to OnGuard to restore that user to the "keys not held" access level.
The access level used for "keys not held" is configurable in KeyPro Plus.
Single server site installation If you are installing KeyPro Plus on the same server as OnGuard, configure the local Windows user account used by KeyPro Plus as follows:
link the KeyPro Plus Windows user account to an OnGuard user with sufficient permissions
grant the KeyPro Plus Windows user account access to the SQL server and KeyPro Plus database (if required)
set the user account for the Argus.KeyproPlus.Server Windows service to the KeyPro Plus Windows user account (then restart the service)
set the OnGuard configuration to "Login as Current User".
Before configuring OnGuard integration Check the following tasks have been completed before configuring an OnGuard integration in KeyPro Plus:
All KeyWatchers, SmartKeys, and key groups are configured in KeyPro Plus.
The Wiegand format for OnGuard users has been defined.
User Groups you intend to map to the OnGuard access levels have been configured. All mapped user groups must be wiegand enabled and using the same wiegand format.
A DataConduIT source has been established in OnGuard.
A DataConduIT device has been established in OnGuard for each KeyWatcher.
Any account access required so KeyPro Plus can connect to OnGuard has been established.
KeyPro Plus — Administration Guide version 2.1.1* 60

Integration
Edit the OnGuard Integration settings
We'll assume you're logged in to KeyPro Plus.
1. Select the System Admin tab.
2. Select the Integration sub-tab.
3. Click the OnGuard button (at the bottom of the screen)
KeyPro Plus displays the OnGuard Integration wizard.
4. Enter or modify the integration details…
OnGuard Integration — Details
Field Description
Server Specify either a numeric IP address or a name DNS can resolve for the OnGuard integration server.
Login as Current User If checked, KeyPro Plus uses the Windows credentials of the KeyPro Plus server to connect to the OnGuard integration server.
Windows User Name Windows Password
Specify the Windows user name and password for connecting to the OnGuard integration server (if "Login as current User" was not checked)
DataConduIT Source Specify the name of the DataConduIT source you have created in for KeyPro Plus (in OnGuard's System Administration).
User KeyWatchers Names as DataConduIT Devices
If checked, KeyPro Plus will send each KeyWatcher's alarms to the DataConduIT Device with the same name. You will need to create a DataConduIT Device (in OnGuard's System Administration) for each KeyWatcher.
Automatic Synchronisation
If checked, KeyPro Plus will automatically synchronise with OnGuard at the interval specified. If not, use the OnGuard button to synchronise manually.
Synchronization interval
Specify the interval in seconds between each automatic synchronisation with OnGuard.
5. Test that KeyPro Plus can connect to OnGuard by clicking the Test Server Login button.
Also test that KeyPro Plus can send an alarm to OnGuard by clicking the Test alarm button.
then click the Next button to continue to the next tab.
KeyPro Plus — Administration Guide version 2.1.1* 61

Integration
6. Enter or modify the mappings…
OnGuard Integration — Mappings
Field Description
Successful Connection Required
If KeyPro plus cannot connect to OnGuard, go back to step 4 and rectify the problem.
Access Level Mappings
For each OnGuard access level shown, select the corresponding user group.
For example:
Multi-Map User Group Specify the user group for those users with more than one OnGuard access level.
For example:
Archived User Group Specify a user group for users that have been deleted or have an OnGuard access level that cannot be mapped. If an archived user group is not specified, these users will be deleted from Keypro Plus.
For example:
Keys Not Held Access Level
Specify the OnGuard Access Level for integrated users who are not currently holding keys (see Keys not held access level on page 60) Do not map this access level to a user group.
Badge Type Specify the OnGuard badge type for users that will be integrated into KeyPro Plus. Users must have this badge type to be integrated into KeyPro Plus.
Wiegand Mappings
— Wiegand Data Type
Select the KeyPro Plus wiegand data type (format) for all integrated users.
For example:
— (Wiegand fields) Map each KeyPro Plus wiegand field to the
corresponding OnGuard user data field.
7. When you're done working on the format, then click the Complete button, and Confirm.
KeyPro Plus updates the integration settings and the OnGuard button now shows the synchronisation option
KeyPro Plus — Administration Guide version 2.1.1* 62

Integration
Synchronise OnGuard Integration Once configured, the OnGuard integration can be synchronised at any time (even if auto synchronisation is enabled).
We'll assume you're logged in to KeyPro Plus.
1. Select the System Admin tab.
2. Select the Integration sub-tab.
3. Click the OnGuard — Synchronize Now button…
then Confirm.
KeyPro Plus creates the relevant integration tasks.
4. Monitor the progress of the task on the integration screen.
Results of the finished task are show in the right-hand pane, including any processing errors.
Failed tasks generate an integration alarm.
KeyPro Plus — Administration Guide version 2.1.1* 63

Integration
Cardax/Gallagher Integration As of version 7, Cardax was rebranded as Gallagher. The KeyPro Plus interface still refers to Cardax, but the system it is connecting to is now called Gallagher. Any Cardax component (e.g. Cardax FT Command Server) is now referred to as a Gallagher component (e.g. Gallagher FT Command Server).
For Cardax/Gallagher integration, KeyPro Plus user groups are mapped to Gallagher access groups. When imported into KeyPro Plus, users established in Gallagher are automatically assigned to a KeyPro Plus user group according to the mapping rules defined in the integration settings.
Alarms and key events (releases and returns) sent by KeyPro Plus can be accessed via the event viewer in Gallagher.
Cardax/Gallagher installation KeyPro Plus uses the Gallagher FT Controller API to access the Gallagher FT Command Server.
If the KeyPro Plus server and the Gallagher FT Command Server are installed on SEPARATE machines, copy the Gallagher FT Command Centre licence file from the Gallagher machine to the Argus\KeyPro Plus Server directory. The licence file must be identical on both machines for KeyPro Plus to be able to connect to Gallagher.
If the KeyPro Plus server and the Gallagher FT Command Server are installed on the SAME machine, they both listen on the same IP port. Follow the instructions in the Gallagher FT Controller API Reference Guide to set an appropriate port for communications with KeyPro Plus.
Before configuring Cardax/Gallagher integration Check the following tasks have been completed before configuring an Cardax/Gallagher integration in KeyPro Plus:
All KeyWatchers, SmartKeys, and key groups are configured in KeyPro Plus.
The Wiegand format for Gallagher users has been defined.
User Groups you intend to map to the Gallagher access groups have been configured. All mapped user groups must be wiegand enabled and using the same wiegand format.
A External System has been defined within Gallagher.
External System Items for KeyWatcher events and alarms have been defined in Gallagher.
Any account access required so KeyPro Plus can connect to Gallagher has been established.
KeyPro Plus — Administration Guide version 2.1.1* 64
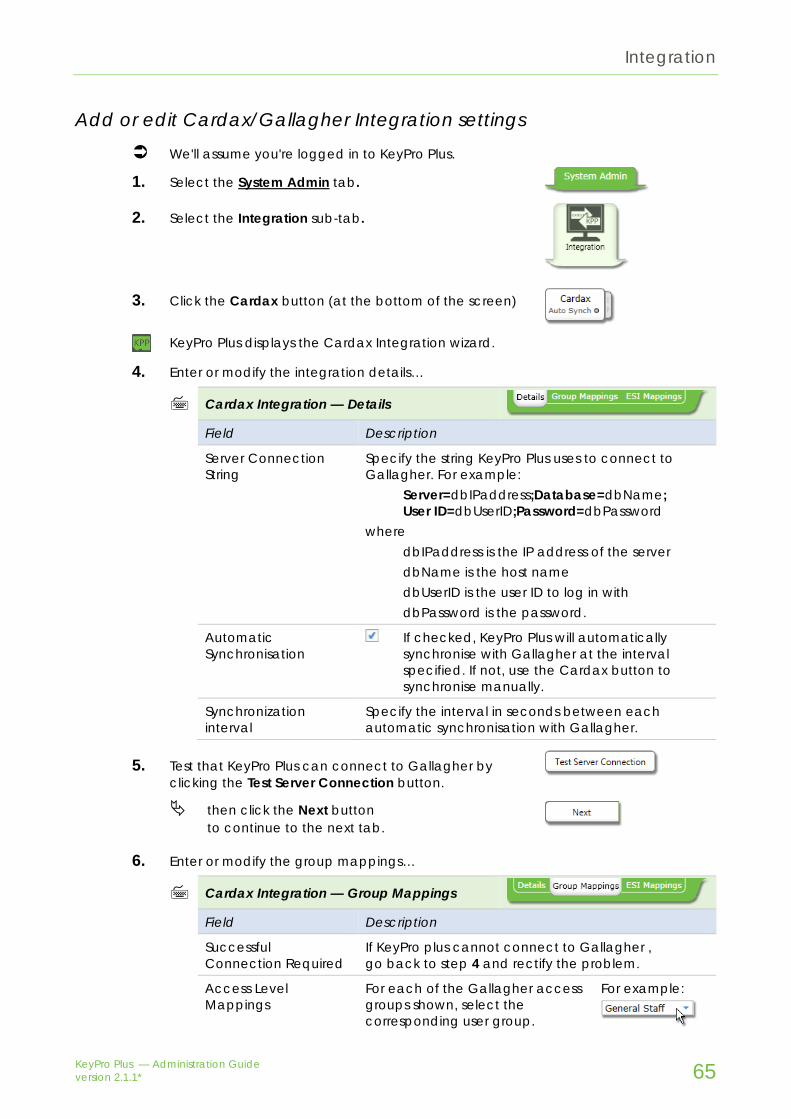
Integration
Add or edit Cardax/Gallagher Integration settings
We'll assume you're logged in to KeyPro Plus.
1. Select the System Admin tab.
2. Select the Integration sub-tab.
3. Click the Cardax button (at the bottom of the screen)
KeyPro Plus displays the Cardax Integration wizard.
4. Enter or modify the integration details…
Cardax Integration — Details
Field Description
Server Connection String
Specify the string KeyPro Plus uses to connect to Gallagher. For example:
Server=dbIPaddress;Database=dbName; User ID=dbUserID;Password=dbPassword
where dbIPaddress is the IP address of the server dbName is the host name dbUserID is the user ID to log in with dbPassword is the password.
Automatic Synchronisation
If checked, KeyPro Plus will automatically synchronise with Gallagher at the interval specified. If not, use the Cardax button to synchronise manually.
Synchronization interval
Specify the interval in seconds between each automatic synchronisation with Gallagher.
5. Test that KeyPro Plus can connect to Gallagher by clicking the Test Server Connection button.
then click the Next button to continue to the next tab.
6. Enter or modify the group mappings…
Cardax Integration — Group Mappings
Field Description
Successful Connection Required
If KeyPro plus cannot connect to Gallagher , go back to step 4 and rectify the problem.
Access Level Mappings
For each of the Gallagher access groups shown, select the corresponding user group.
For example:
KeyPro Plus — Administration Guide version 2.1.1* 65

Integration
Cardax Integration — Group Mappings
Field Description
Multi-Map User Group Specify the user group for those users with more than one Gallagher access group.
For example:
Archived User Group Specify a user group for users that have been deleted or have a Gallagher access group that cannot be mapped. If an archived user group is not specified, these users will be deleted from Keypro Plus.
For example:
Cardax Card Number Specify which Gallagher numbers are preferred.
Cardax Card Type Specify the Gallagher card type for users that will be integrated into KeyPro Plus. Users must have this card type to be integrated into KeyPro Plus.
Wiegand Mappings
— Wiegand Data Type
Select the KeyPro Plus wiegand data type (format) for all integrated users.
For example:
— (Wiegand fields) Map each KeyPro Plus wiegand field to the
corresponding Gallagher user data field.
Cardax Personal Data Type
If "Cardax Personal Details" is mapped to a wiegand field, specify the Gallagher personal data type that should be mapped to that field.
then click the Next button to continue to the next tab.
7. Enter or modify the ESI mappings…
Cardax Integration — ESI Mappings
Field Description
KPP External System Specify the name of the Gallagher External System (as specified in Gallagher ) that refers to KeyPro Plus.
Alarm Event Priority Specify the Gallagher event priority for alarms sent by KeyPro Plus to Cardax.
Key Event Priority Specify the Gallagher event priority for the key events sent by KeyPro Plus to Gallagher .
KeyWatcher External System Item Mappings
For each KeyWatcher defined in KeyPro Plus, specify an External System Item for Alarm Key Possession (key releases) No Key Possession (key returns).
KeyPro Plus — Administration Guide version 2.1.1* 66

Integration
8. When you're done working on the format, then click the Complete button, and Confirm.
KeyPro Plus updates the integration settings and the Cardax button now shows the synchronisation option
Synchronise Cardax/Gallagher Integration Once configured, the Cardax/Gallagher integration can be synchronised at any time (even if auto synchronisation is enabled).
We'll assume you're logged in to KeyPro Plus.
1. Select the System Admin tab.
2. Select the Integration sub-tab.
3. Click the Cardax — Synchronize Now button…
then Confirm.
KeyPro Plus creates the relevant integration tasks.
4. Monitor the progress of the task on the integration screen.
Results of the finished task are show in the right-hand pane, including any processing errors.
Failed tasks generate an integration alarm.
KeyPro Plus — Administration Guide version 2.1.1* 67

Client Defaults
KeyPro Plus client defaults KeyPro Plus includes a tool to set the default login credentials and host details shown by the client application each time it launches.
The defaults set by the tool apply only to the instance of the client application for which they were set. If there are no specifically set defaults, the client application uses the values from the last login attempt.
The tool also allows you to specify the phone and email for a local contact. This information is displayed on the Summary screen. For example:
KeyPro Plus — Administration Guide version 2.1.1* 68
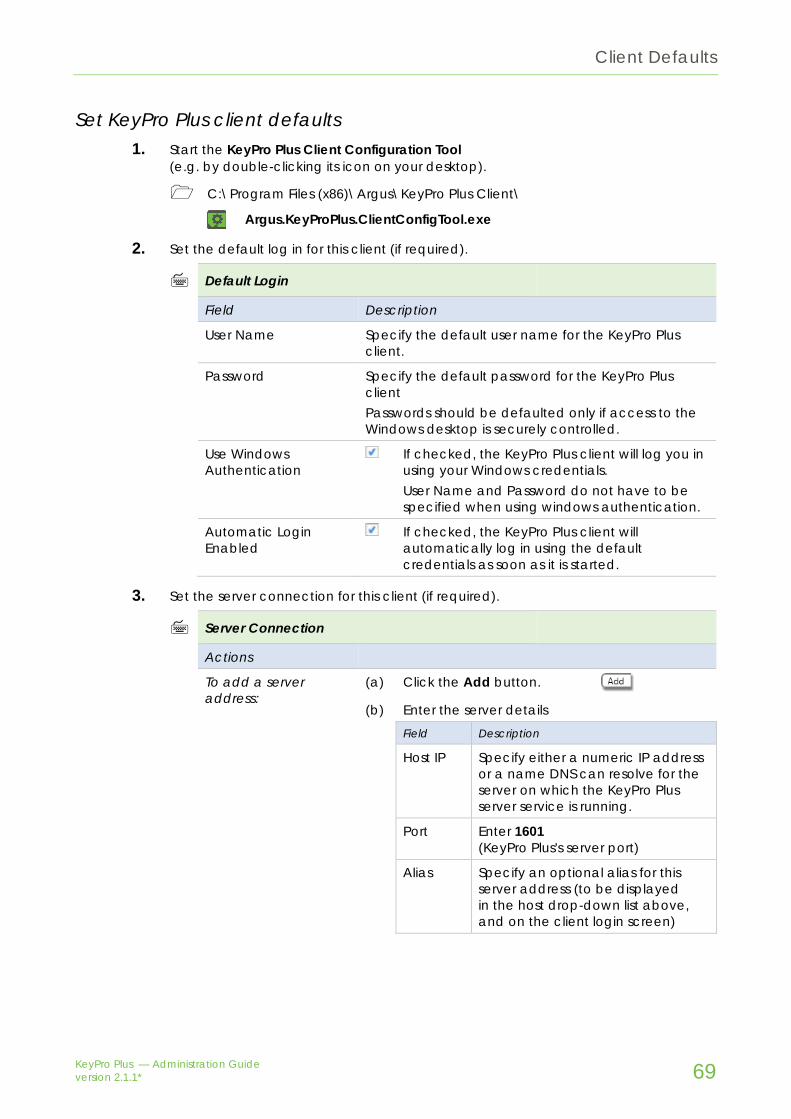
Client Defaults
Set KeyPro Plus client defaults 1. Start the KeyPro Plus Client Configuration Tool
(e.g. by double-clicking its icon on your desktop).
C:\Program Files (x86)\Argus\KeyPro Plus Client\
Argus.KeyProPlus.ClientConfigTool.exe
2. Set the default log in for this client (if required).
Default Login
Field Description
User Name Specify the default user name for the KeyPro Plus client.
Password Specify the default password for the KeyPro Plus client Passwords should be defaulted only if access to the Windows desktop is securely controlled.
Use Windows Authentication
If checked, the KeyPro Plus client will log you in using your Windows credentials. User Name and Password do not have to be specified when using windows authentication.
Automatic Login Enabled
If checked, the KeyPro Plus client will automatically log in using the default credentials as soon as it is started.
3. Set the server connection for this client (if required).
Server Connection
Actions
To add a server address:
(a) Click the Add button. (b) Enter the server details
Field Description
Host IP Specify either a numeric IP address or a name DNS can resolve for the server on which the KeyPro Plus server service is running.
Port Enter 1601 (KeyPro Plus's server port)
Alias Specify an optional alias for this server address (to be displayed in the host drop-down list above, and on the client login screen)
KeyPro Plus — Administration Guide version 2.1.1* 69
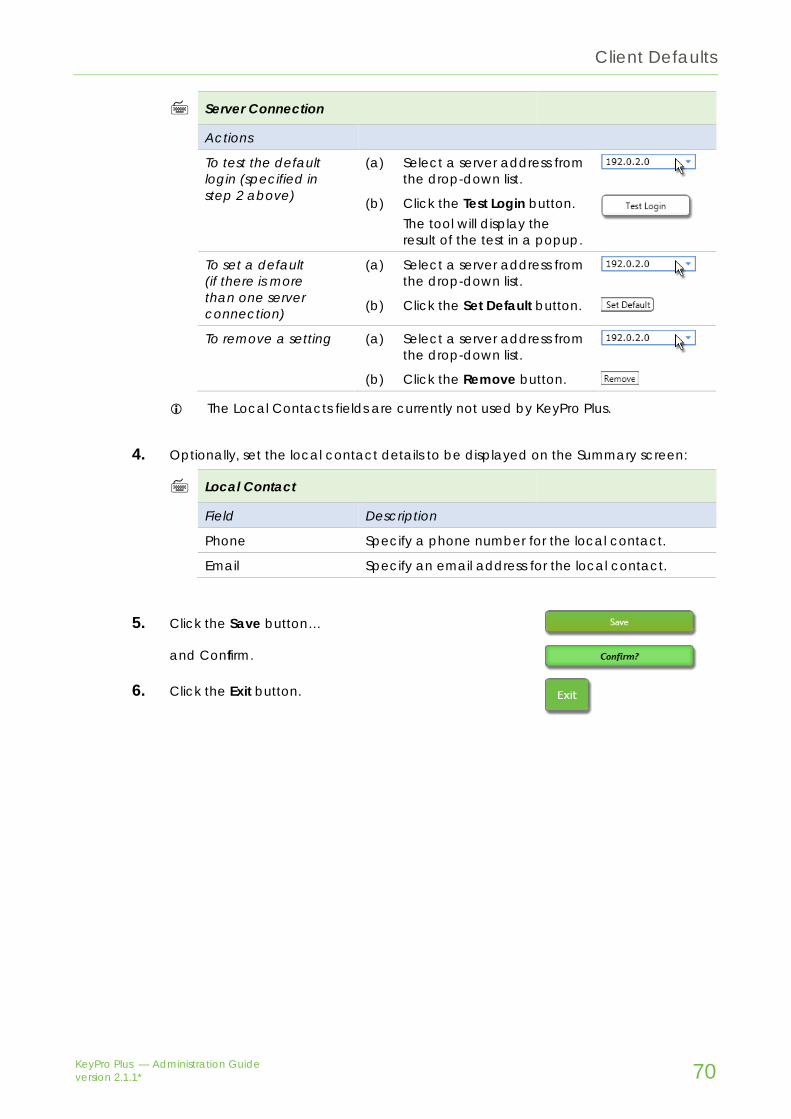
Client Defaults
Server Connection
Actions
To test the default login (specified in step 2 above)
(a) Select a server address from the drop-down list.
(b) Click the Test Login button. The tool will display the result of the test in a popup.
To set a default (if there is more than one server connection)
(a) Select a server address from the drop-down list.
(b) Click the Set Default button.
To remove a setting (a) Select a server address from the drop-down list.
(b) Click the Remove button.
The Local Contacts fields are currently not used by KeyPro Plus.
4. Optionally, set the local contact details to be displayed on the Summary screen:
Local Contact
Field Description
Phone Specify a phone number for the local contact.
Email Specify an email address for the local contact.
5. Click the Save button…
and Confirm.
6. Click the Exit button.
KeyPro Plus — Administration Guide version 2.1.1* 70

KeyWatcher Management
Browse KeyWatcher status The KeyWatchers screen shows the current connectivity of all KeyWatchers.
The currency of the data shown depends on each KeyWatcher's poll interval (typically a KeyWatcher is polled every 60 seconds). The Touch server's polling of the boxes connected to it may also impact data currency.
We'll assume you're logged in to KeyPro Plus.
1. Select the KeyWatcher Admin tab.
2. Select the KeyWatchers sub-tab.
KeyPro Plus displays the current status of all KeyWatchers. For example
KeyPro Plus — Administration Guide version 2.1.1* 71
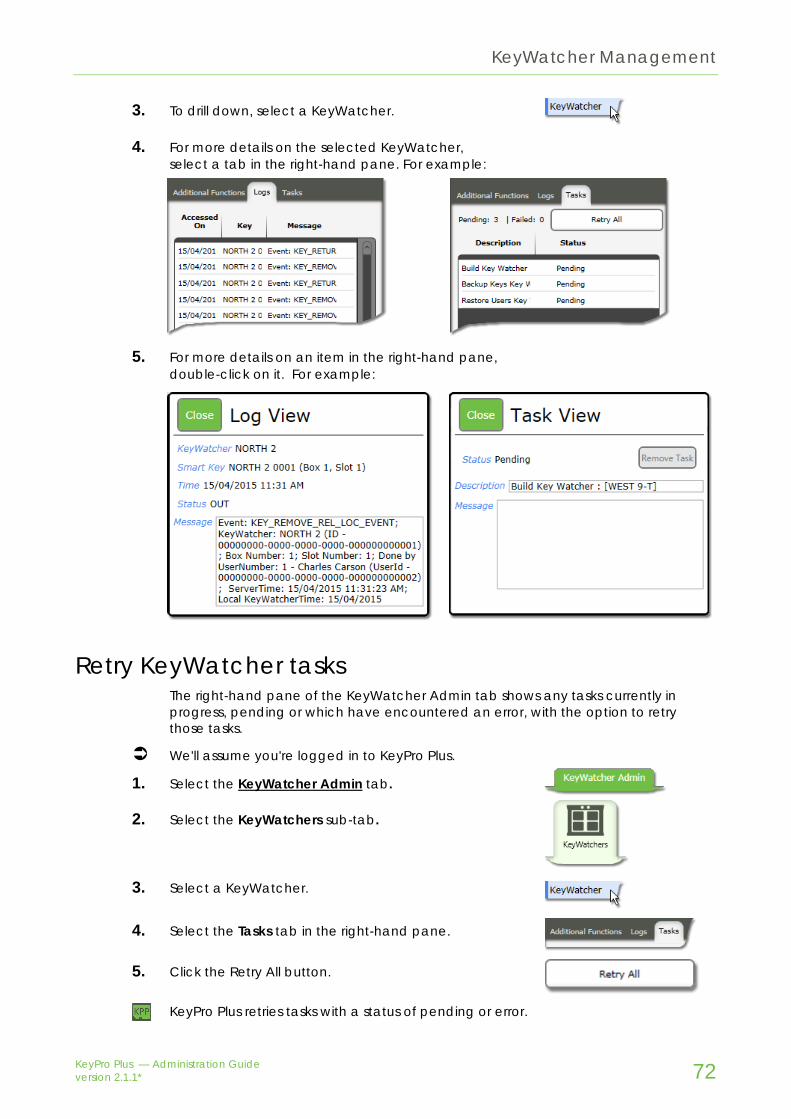
KeyWatcher Management
3. To drill down, select a KeyWatcher.
4. For more details on the selected KeyWatcher, select a tab in the right-hand pane. For example:
5. For more details on an item in the right-hand pane, double-click on it. For example:
Retry KeyWatcher tasks The right-hand pane of the KeyWatcher Admin tab shows any tasks currently in progress, pending or which have encountered an error, with the option to retry those tasks.
We'll assume you're logged in to KeyPro Plus.
1. Select the KeyWatcher Admin tab.
2. Select the KeyWatchers sub-tab.
3. Select a KeyWatcher.
4. Select the Tasks tab in the right-hand pane.
5. Click the Retry All button.
KeyPro Plus retries tasks with a status of pending or error.
KeyPro Plus — Administration Guide version 2.1.1* 72

KeyWatcher Management
Manual Offline Manual Offline takes a KeyWatcher offline so KeyPro Plus temporarily stops polling it and sending it updates. The KeyWatcher continues to operate as usual and users can continue to release and return keys.
Taking a KeyWatcher offline can be useful if you need to batch a large number of updates, especially during peak access periods.
Note that a KeyWatcher Touch can take up to six minutes to go offline.
Take a KeyWatcher offline
We'll assume you're logged in to KeyPro Plus.
1. Select the KeyWatcher Admin tab.
2. Select the KeyWatchers sub-tab.
3. Select a KeyWatcher.
4. Select the Additional Functions tab in the right-hand pane.
5. Click the Manual Offline On button…
And confirm you want to turn offline on.
KeyPro Plus takes the KeyWatcher offline and updates its connectivity status. For example:
Bring a KeyWatcher back online Note that a KeyWatcher Touch box can take up to six minutes to go offline.
We'll assume you're logged in to KeyPro Plus.
1. Select the KeyWatcher Admin tab.
2. Select the KeyWatchers sub-tab.
3. Select a KeyWatcher.
4. Select the Additional Functions tab in the right-hand pane.
5. Click the Manual Offline On button…
And confirm you want to turn offline off.
KeyPro Plus brings the KeyWatcher back online and updates its connectivity status.
KeyPro Plus — Administration Guide version 2.1.1* 73

KeyWatcher Management
Request live key status update Use the Request Live Key Status Update button to refresh the status of the keys in a particular KeyWatcher now. rather than waiting for the next poll to occur.
See the Operations Guide for information on monitoring keys.
We'll assume you're logged in to KeyPro Plus.
1. Select the KeyWatcher Admin tab.
2. Select the KeyWatchers sub-tab.
3. Select a KeyWatcher.
4. Select the Additional Functions tab in the right-hand pane.
5. Click the Request Live Key Status Update button.
KeyPro Plus refreshes its status for the keys in the selected KeyWatcher.
Sync keys Use the Sync Key button to synchronise both a KeyWatcher's SmartKey settings with KeyPro Plus and the status of the keys in KeyPro Plus. Typically this would only be required if unusual circumstances have resulted in KeyPro Plus not correctly showing the presence and/or status of all keys in a KeyWatcher.
See the Operations Guide for information on monitoring keys.
We'll assume you're logged in to KeyPro Plus.
1. Select the KeyWatcher Admin tab.
2. Select the KeyWatchers sub-tab.
3. Select a KeyWatcher.
4. Select the Additional Functions tab in the right-hand pane.
5. Click the Sync Key button… and confirm.
KeyPro Plus creates a Sync Keys task to restore the settings and update the status for the keys in the selected KeyWatcher.
Use the Tasks tab in the right-hand pane to monitor the progress of the task.
KeyPro Plus — Administration Guide version 2.1.1* 74

KeyWatcher Management
Rebuild KeyWatcher Use the Rebuild button to rebuild all settings in a KeyWatcher. This includes restoring all KeyWatcher, SmartKey, and User settings in a KeyWatcher.
We'll assume you're logged in to KeyPro Plus.
1. Select the KeyWatcher Admin tab.
2. Select the KeyWatchers sub-tab.
3. Select a KeyWatcher.
4. Select the Additional Functions tab in the right-hand pane.
5. Click the Rebuild button… and confirm.
KeyPro Plus updates its database and creates a number of tasks to rebuld the KeyWatcher.
Use the Tasks tab in the right-hand pane to monitor the progress of the tasks.
Resync times Use Resync Times to force all KeyWatcher Illuminated boxes to resynchronise their clocks with the KeyPro Plus server. KeyWatcher Touch boxes cannot be resynchronised; the Touch server keeps their clocks in sync with the server machine clock.
We'll assume you're logged in to KeyPro Plus.
1. Select the KeyWatcher Admin tab.
2. Select the KeyWatchers sub-tab.
3. Click the Resync Times button.
KeyPro Plus — Administration Guide version 2.1.1* 75

Maintenance Logs
Browse KeyWatcher Log The KeyWatcher log shows the events that have occurred at each KeyWatcher. Its main purpose is for troubleshooting.
We'll assume you're logged in to KeyPro Plus.
1. Select the Maintenance Logs tab.
2. Select the KeyWatcher Log sub-tab.
3. Optionally, set a filter for the events to be displayed
KeyPro Plus displays the events that pass the filter. For example
4. Use the paging buttons to browse the filtered data.
KeyPro Plus — Administration Guide version 2.1.1* 76

Maintenance Logs
Browse System Exception Log The System Exception log shows any exceptions from both the server and the client. Its main purpose is for troubleshooting.
We'll assume you're logged in to KeyPro Plus.
1. Select the Maintenance Logs tab.
2. Select the System Exception Log sub-tab.
3. Optionally, set a filter for the events to be displayed
KeyPro Plus displays the events that pass the filter. For example
4. Use the paging buttons to browse the filtered data.
5. To drill down, select an item.
KeyPro Plus displays additional information in the right-hand pane.
KeyPro Plus — Administration Guide version 2.1.1* 77

Maintenance Logs
Browse System Events Log The System Exception log shows system events such as services starting, stopping, or changing status. Its main purpose is for troubleshooting.
We'll assume you're logged in to KeyPro Plus.
1. Select the Maintenance Logs tab.
2. Select the System Events Log sub-tab.
3. Optionally, set a filter for the events to be displayed
KeyPro Plus displays the events that pass the filter. For example
4. Use the paging buttons to browse the filtered data.
5. To drill down, select an item.
KeyPro Plus displays additional information in the right-hand pane.
KeyPro Plus — Administration Guide version 2.1.1* 78

Maintenance Logs
Browse Integrator Log The System Exception log shows events triggered by an integrated system (e.g. user updates during synchronising). Its main purpose is for troubleshooting.
We'll assume you're logged in to KeyPro Plus.
1. Select the Maintenance Logs tab.
2. Select the Integrator Log sub-tab.
3. Optionally, set a filter for the events to be displayed
KeyPro Plus displays the events that pass the filter. For example
4. Use the paging buttons to browse the filtered data.
5. To drill down, select an item.
KeyPro Plus displays additional information in the right-hand pane.
KeyPro Plus — Administration Guide version 2.1.1* 79

`


![Cardax FT System Catalogue[1]](https://static.documents.pub/doc/80x56/55375f3255034634078b4caf/cardax-ft-system-catalogue1.jpg)


