201
Administration GUIDE SharePoint Server iDataAgent Published On: 11/19/2013 V10 Service Pack 4A Page 1 of 201
Administration GUIDE
SharePoint Server iDataAgent
Published On: 11/19/2013 V10 Service Pack 4A Page 1 of 201
Getting Started - SharePoint Server iDataAgent
Introduction
Key FeaturesFull Fidelity Backup and RecoverySimplified Backup and Recovery StrategyFast Backups/Recover for Content DatabaseProtect all SharePoint ComponentsRBS Aware Backup for Content DatabaseEfficient Job Management and ReportingBlock Level DeduplicationContent Indexing and Search
Terminology
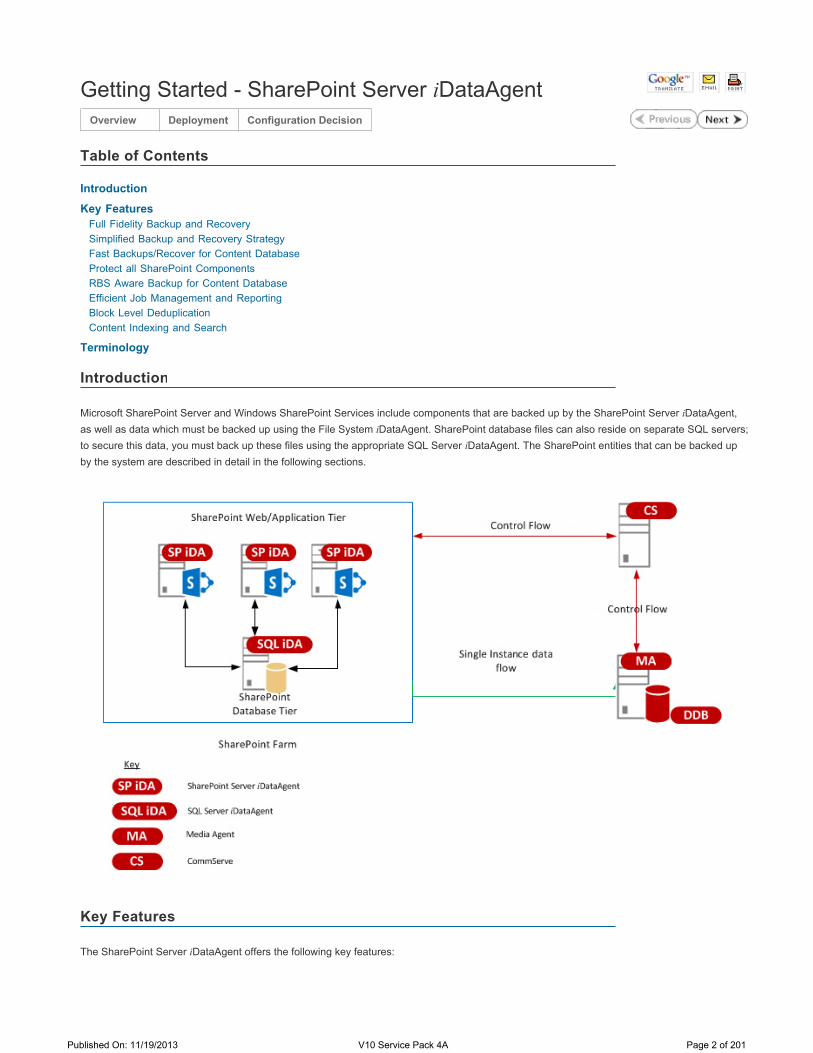
Microsoft SharePoint Server and Windows SharePoint Services include components that are backed up by the SharePoint Server iDataAgent, as well as data which must be backed up using the File System iDataAgent. SharePoint database files can also reside on separate SQL servers; to secure this data, you must back up these files using the appropriate SQL Server iDataAgent. The SharePoint entities that can be backed up by the system are described in detail in the following sections.
The SharePoint Server iDataAgent offers the following key features:
Overview Deployment Configuration Decision
Table of Contents
Introduction
Key Features
Published On: 11/19/2013 V10 Service Pack 4A Page 2 of 201

Full Fidelity Backup and Recovery
Document level backups allows capturing of system oriented metadata such based on parameters such as modified by or version information in a canned manner so that this backed up information can be brought back as it was backed up. In place merge options determines the current state of the target entities and intelligently determines what to restore. The customization on top of base template can also be seamlessly captured during backups.
Simplified Backup and Recovery Strategy
Prior to v10, there were many options to choose from within a particular level of protection. Also there were less number of choices/strategies which optimized each level of protection. The backup and restore procedures in v10 have simplified the overall offerings as well as complexities and therefore the iDataAgent is more resilient against failures.
Fast Backups/Recover for Content Database
Snapshot of Content databases allows for faster backups of the SharePoint data. By using the offline browse and IntelliSnap feature, the same granularity of data can be recovered quickly from a snapshot.
Protect all SharePoint Components
All entities in the File System or IIS related to SharePoint are protected along with all logical SharePoint components.
RBS Aware Backup for Content Database
Content database backups are fully RBS aware* and protect RBS blobs along with databases regardless of backup methods (streaming, VSS, or IntelliSnap).
*Support only Microsoft provided File Stream RBS provider.
Efficient Job Management and Reporting
You can view and verify the status of the backup and recovery operations from the Job Controller and Event Viewer windows within the CommCell Console. You can also track the status of the jobs using reports, which can be saved and easily distributed. Reports can be generated for different aspects of data management. You also have the flexibility to customize the reports to display only the required data and save them to any specified location in different formats. For example, you can create a backup job summary report to view at-a-glance the completed backup jobs. In addition, you can also schedule these reports to be generated and send them on email without user intervention.
Block Level Deduplication
Deduplication provides a smarter way of storing data by identifying and eliminating the duplicate items in a data protection operation.
Deduplication at the data block level compares blocks of data against each other. If an object (file, database, etc.) contains blocks of data that are identical to each other, then block level deduplication eliminates storing the redundant data and reduces the size of the object in storage. This way dramatically reduces the backup data copies on both the disk and tapes.
Content Indexing and Search
Content Indexing and Search enables users to content index their data and later search the data from a user-friendly web interface. The users can also perform restore operations or other advanced actions on the searched data.
The Windows File System documentation uses the following terminology:
Terminology
Client The computer in which the iDataAgent is installed and contains the data to be secured.
Agent A software module in the system that performs SharePoint data protection operations.
Backup Set A group of subclients which includes all of the data backed up by the iDataAgent.
The SharePoint data to be backed up.
Published On: 11/19/2013 V10 Service Pack 4A Page 3 of 201

Subclient
Published On: 11/19/2013 V10 Service Pack 4A Page 4 of 201
SharePoint Server iDataAgent - Release Highlights
New Features
Changes
Known Issues
Table of contents
New Features
New Feature Description Support/License/Service Pack
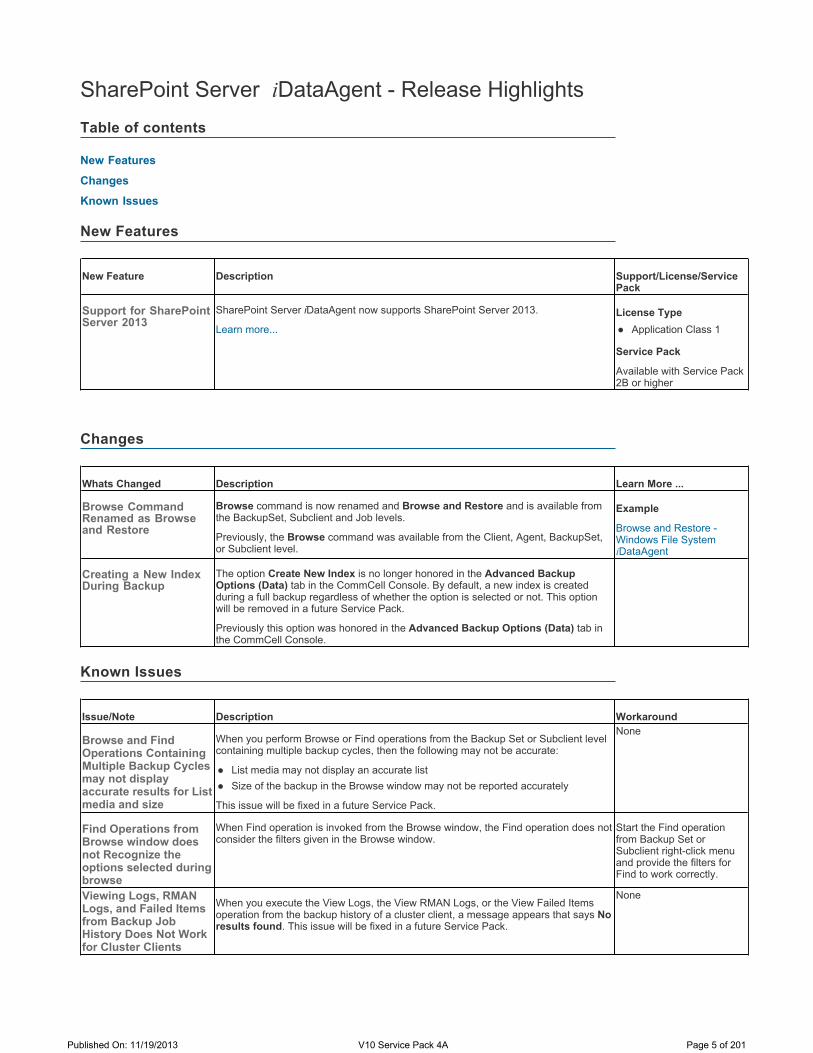
Support for SharePoint Server 2013
SharePoint Server iDataAgent now supports SharePoint Server 2013.
Learn more...License Type
Application Class 1
Service Pack
Available with Service Pack 2B or higher
Changes
Whats Changed Description Learn More ...
Browse Command Renamed as Browse and Restore
Browse command is now renamed and Browse and Restore and is available from the BackupSet, Subclient and Job levels.
Previously, the Browse command was available from the Client, Agent, BackupSet, or Subclient level.
Example
Browse and Restore -Windows File System iDataAgent
Creating a New Index During Backup
The option Create New Index is no longer honored in the Advanced Backup Options (Data) tab in the CommCell Console. By default, a new index is created during a full backup regardless of whether the option is selected or not. This option will be removed in a future Service Pack.
Previously this option was honored in the Advanced Backup Options (Data) tab in the CommCell Console.
Known Issues
Issue/Note Description Workaround
Browse and Find Operations Containing Multiple Backup Cycles may not display accurate results for List media and size
When you perform Browse or Find operations from the Backup Set or Subclient level containing multiple backup cycles, then the following may not be accurate:
List media may not display an accurate list Size of the backup in the Browse window may not be reported accurately
This issue will be fixed in a future Service Pack.
None
Find Operations from Browse window does not Recognize the options selected during browse
When Find operation is invoked from the Browse window, the Find operation does not consider the filters given in the Browse window.
Start the Find operation from Backup Set or Subclient right-click menu and provide the filters for Find to work correctly.
Viewing Logs, RMAN Logs, and Failed Items from Backup Job History Does Not Work for Cluster Clients
When you execute the View Logs, the View RMAN Logs, or the View Failed Items operation from the backup history of a cluster client, a message appears that says No results found. This issue will be fixed in a future Service Pack.
None
Published On: 11/19/2013 V10 Service Pack 4A Page 5 of 201

System Requirements - SharePoint Server iDataAgent
The following requirements are for the SharePoint Server iDataAgent:
708 MB minimum of hard disk space for installing the software.
500 MB of free disk space is required for log directory.
An appropriate amount of temporary space must be allotted in the Job Results folder to accommodate staging of the SharePoint Service Application Databases, Site Collections and subsites. Calculated based on the size of the largest Service Application Database, 5 largest site collections and 5 largest subsites in the Farm.
All Windows-compatible processors supported
The File System iDataAgent will be automatically installed during installation of this software, if it is not already installed. For System Requirements specific to the File System iDataAgent, refer to System Requirements - Microsoft Windows File System iDataAgent.
.NET Framework
.NET Framework 4.0 is automatically installed. Note that .NET Framework 4.0 can co-exist with other versions of this software.
Microsoft Visual C++
System Requirements Supported Features License Requirements
ApplicationMicrosoft Windows SharePoint Services version 3.0 up to the latest Service PackMicrosoft Office SharePoint Server 2007 up to the latest Service PackMicrosoft Office Forms Server 2007 up to the latest Service PackMicrosoft Office Project Server 2007 up to the latest Service PackMicrosoft Search Server 2008 up to the latest Service PackMicrosoft Search Server 2008 Express up to the latest Service PackMicrosoft SharePoint Server 2010 Microsoft FAST Search Server 2010Microsoft Search Server 2010Microsoft Office Project Server 2010Microsoft SharePoint 2010 Standard and EnterpriseMicrosoft SharePoint Foundation 2010 Microsoft Search Server 2010 ExpressMicrosoft SharePoint Server 2013
Operating System
Windows Server 2012Microsoft Windows Server 2012 Editions
Windows Server 2008Microsoft Windows Server 2008 32-bit and x64 Editions*
*Core Editions not supported
WindowsMicrosoft Windows Server 2003 32-bit and x64 Editions* with a minimum of Service Pack 2
* Special configuration considerations apply. See Installing 32-bit Components on a Microsoft Windows x64 Platform for more information.
Hard Drive
Processor
Miscellaneous
Published On: 11/19/2013 V10 Service Pack 4A Page 6 of 201

Microsoft Visual C++ 2010 and 2008 Redistributable Packages are automatically installed. Note that these Visual C++ Redistributable Packages can co-exist with other versions of this software.
DISCLAIMER
Minor revisions and/or service packs that are released by application and operating system vendors are supported by our software but may not be individually listed in our System Requirements. We will provide information on any known caveat for the revisions and/or service packs. In some cases, these revisions and/or service packs affect the working of our software. Changes to the behavior of our software resulting from an application or operating system revision/service pack may be beyond our control. The older releases of our software may not support the platforms supported in the current release. However, we will make every effort to correct the behavior in the current or future releases when necessary. Please contact your Software Provider for any problem with a specific application or operating system.
Additional considerations regarding minimum requirements and End of Life policies from application and operating system vendors are also applicable
Published On: 11/19/2013 V10 Service Pack 4A Page 7 of 201
Getting Started - SharePoint Server iDataAgent
On the SharePoint farm, install the software on the Application Server with Search Service Application. The Application Server should have the same custom configurations as that of the Front End Web Servers.
The computer will be added as a client in the CommCell as soon as the installation completes successfully.
The software installation may require a system reboot if a pending rename operation from a previously installed application is found in the operating system, hence, plan your installation at a convenient time.
Prerequisites
The user (generally the domain account) selected during the SharePoint Server Agent installation will be used to run Communications Service (GxCVD) and Client Event Manager (GxEvMgrC) and would requires the following account privileges:
Local administrative rights
FARM administrator rights
Full permission to Data Protection Suite registry key
SP Shell administrator permissions
Full control under Policy for Web Application for every Web Application
SQL System Admin Server Role for the instance where SharePoint Databases resides
Site Administrator permissions for all Site Collections
The following accounts must have full permissions to the Job Results and Log Files folders:
Data Protection Suite Services account
SQL Server Services account for the SharePoint instance
SharePoint Services Timer account
All Web Application Pools accounts
System Requirements
Verify that the computer in which you wish to install the software satisfies the minimum requirements specified in System Requirements.
Download Software Packages
Download the latest software package to perform the install.
Overview Deployment Configuration Decision
Where to Install
Planning Your Installation
Before You Begin
Installation
The software can be installed using one of the following methods:
Method 1: Remote Install Using CommCell Console
Use this procedure to install remotely on a client computer.
Method 2: Interactive Install - Standard
Use this procedure to directly install the software from the installation package or a network drive.
Method 3: Interactive Install - Custom
Published On: 11/19/2013 V10 Service Pack 4A Page 8 of 201

To install software from the CommCell Console:
1. Open CommCell Console:
Click Start and point to All Programs.
Click HDPS .
Click Backup and Recovery Administrative Console.
2. From the CommCell Browser, click Tools | Add/Remove Software | Install Software.
3. Click Next.
4. Click Next.
Use this procedure to install the software by specifying installation settings and options.
Method 1: Install Software from CommCell Console
Published On: 11/19/2013 V10 Service Pack 4A Page 9 of 201

5. Click Manually Select Computers.
Click Next.
6. Enter the fully qualified domain name of the client computer.
For example: mycomputer.mydomain.mycompany.comClick Next.
Do not use space and the following characters when specifying the Host Name:
\|`~!_@#$%^&*()+=<>/?,[]{}:;'"
Published On: 11/19/2013 V10 Service Pack 4A Page 10 of 201

7. Choose one of the following:
Click Next if you want to use the default cache location
Click Override Software Cache and specify a new location in the Software Cache box and then click Next
8. Specify the User Name and Password that must be used to access the client computer, and then click Next.
The software cache is the location from where the remote install program installs the software. This screen will not appear if the remote cache is not configured. For more information, see Managing Cache - Remote Cache.
The user must be an Administrator or a member of the Administrator group on that computer. Account information is required while performing remote installs for the first time on a client. For subsequent remote installs on that client, click Next without specifying the account information.
Published On: 11/19/2013 V10 Service Pack 4A Page 11 of 201
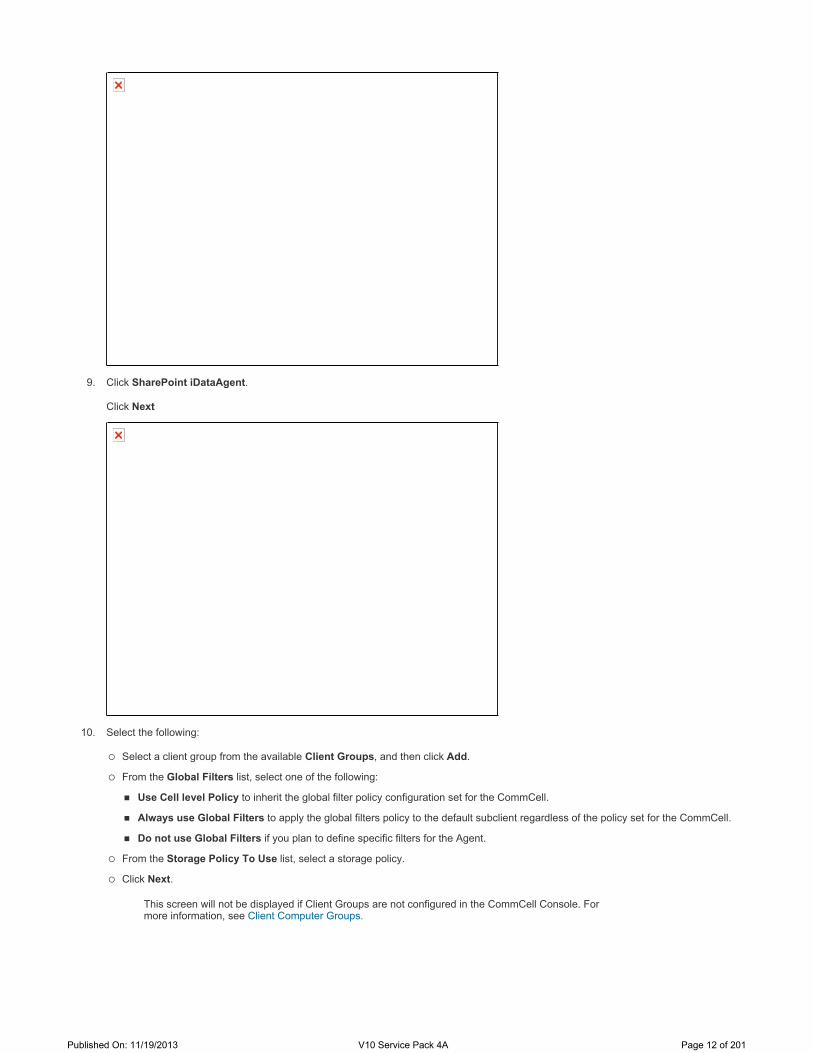
9. Click SharePoint iDataAgent.
Click Next
10. Select the following:
Select a client group from the available Client Groups, and then click Add.
From the Global Filters list, select one of the following:
Use Cell level Policy to inherit the global filter policy configuration set for the CommCell.
Always use Global Filters to apply the global filters policy to the default subclient regardless of the policy set for the CommCell.
Do not use Global Filters if you plan to define specific filters for the Agent.
From the Storage Policy To Use list, select a storage policy.
Click Next.
This screen will not be displayed if Client Groups are not configured in the CommCell Console. For more information, see Client Computer Groups.
Published On: 11/19/2013 V10 Service Pack 4A Page 12 of 201

11. In the Server Name box, enter the name of the SharePoint Server.
Click Change.
12. Type the login credentials for the SharePoint Farm Administrator and click OK.
13. Click Next.
Published On: 11/19/2013 V10 Service Pack 4A Page 13 of 201
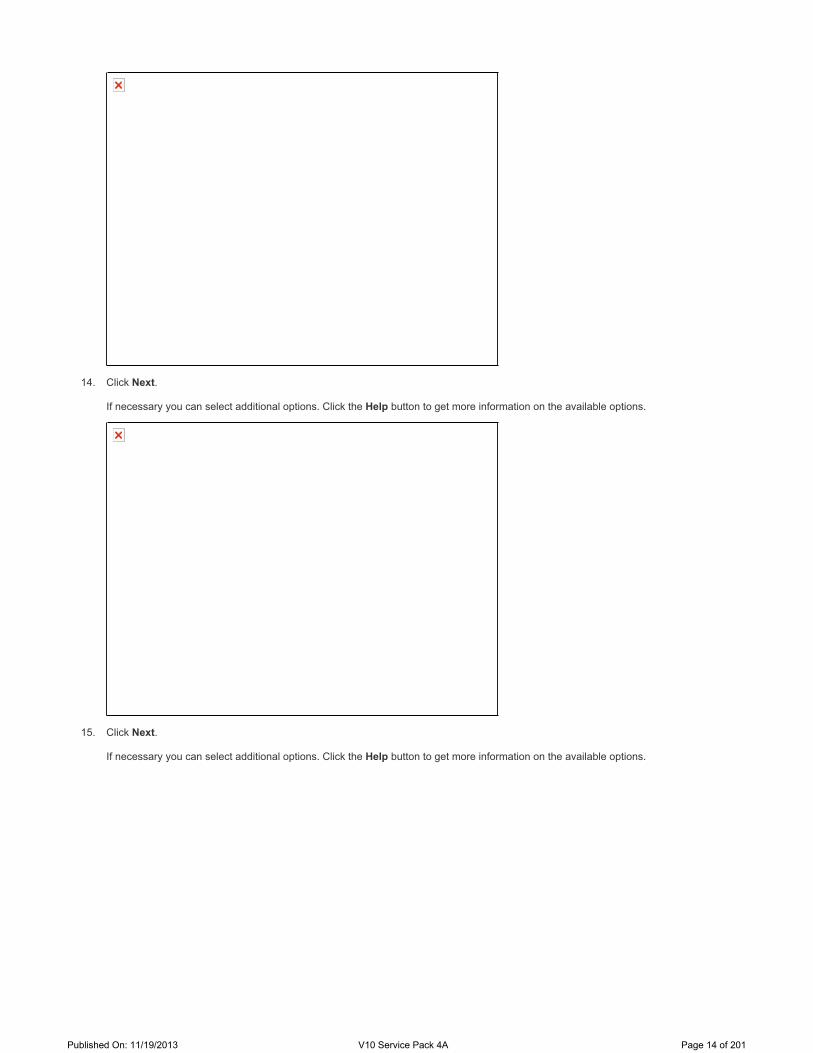
14. Click Next.
If necessary you can select additional options. Click the Help button to get more information on the available options.
15. Click Next.
If necessary you can select additional options. Click the Help button to get more information on the available options.
Published On: 11/19/2013 V10 Service Pack 4A Page 14 of 201
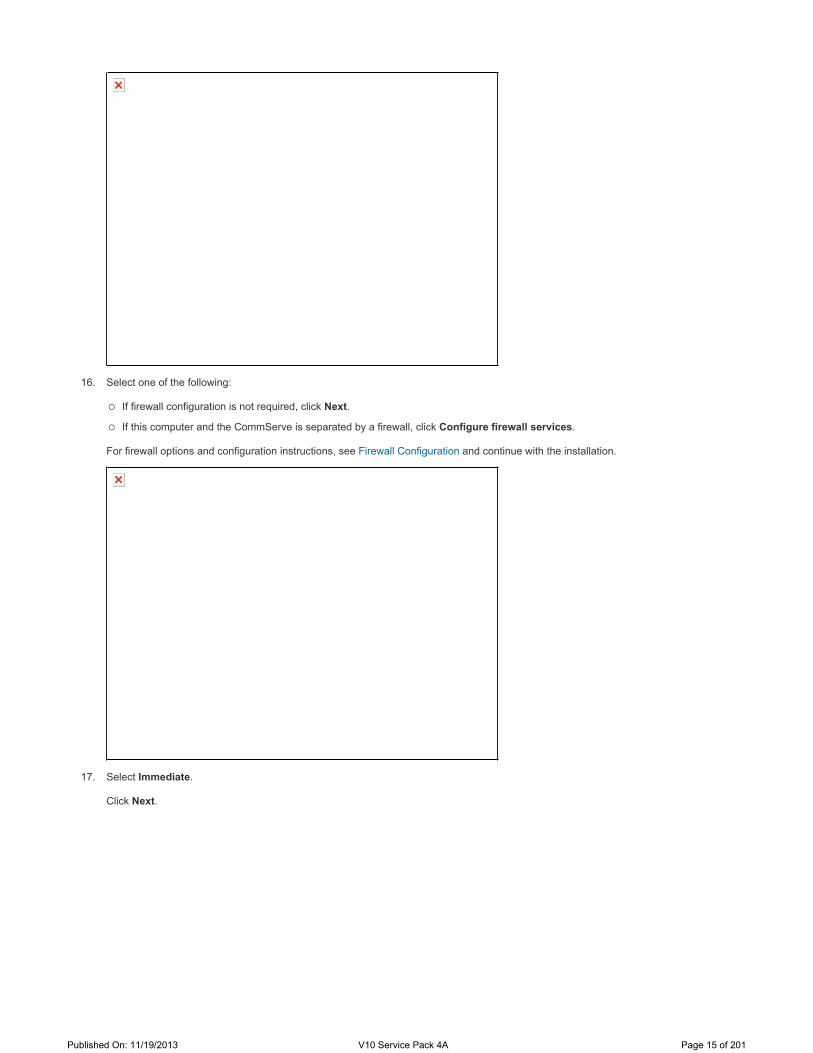
16. Select one of the following:
If firewall configuration is not required, click Next.
If this computer and the CommServe is separated by a firewall, click Configure firewall services.
For firewall options and configuration instructions, see Firewall Configuration and continue with the installation.
17. Select Immediate.
Click Next.
Published On: 11/19/2013 V10 Service Pack 4A Page 15 of 201
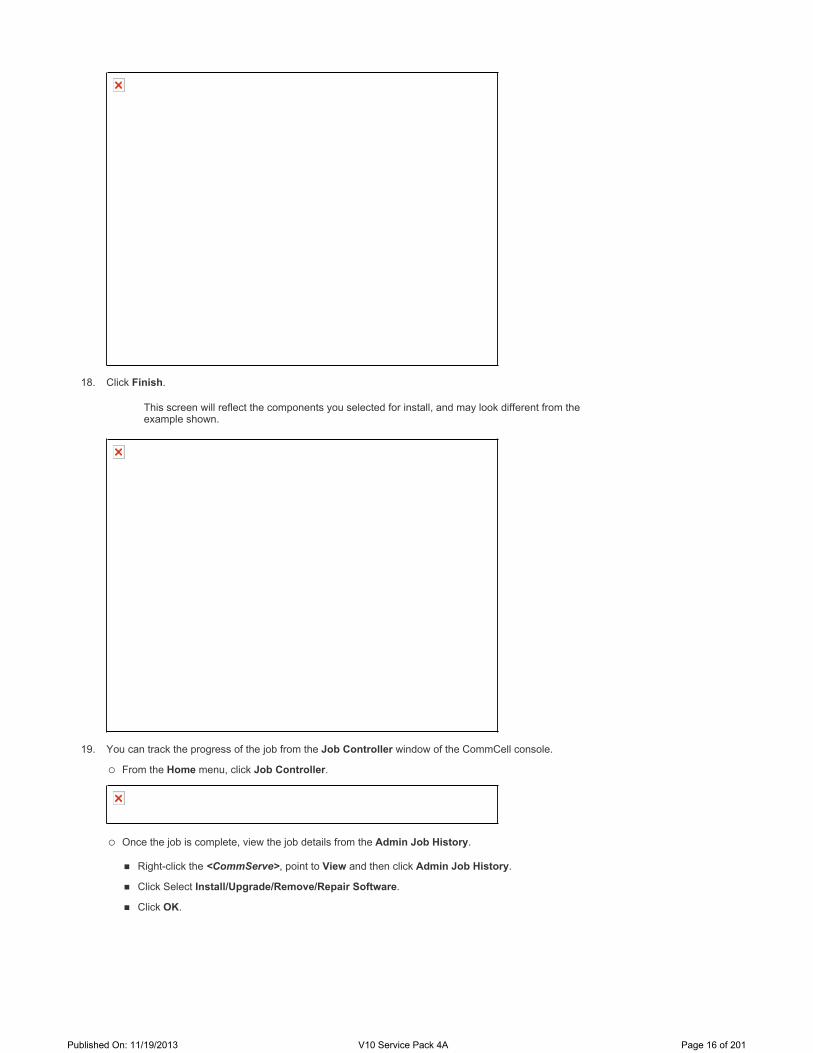
18. Click Finish.
19. You can track the progress of the job from the Job Controller window of the CommCell console.
From the Home menu, click Job Controller.
Once the job is complete, view the job details from the Admin Job History.
Right-click the <CommServe>, point to View and then click Admin Job History.
Click Select Install/Upgrade/Remove/Repair Software.
Click OK.
This screen will reflect the components you selected for install, and may look different from the example shown.
Published On: 11/19/2013 V10 Service Pack 4A Page 16 of 201
You can view the following by right-clicking the job:
Details of the job
Option to Resubmit the job
Events associated with the job
Logs associated with the job
Option to send the Logs associated with the job
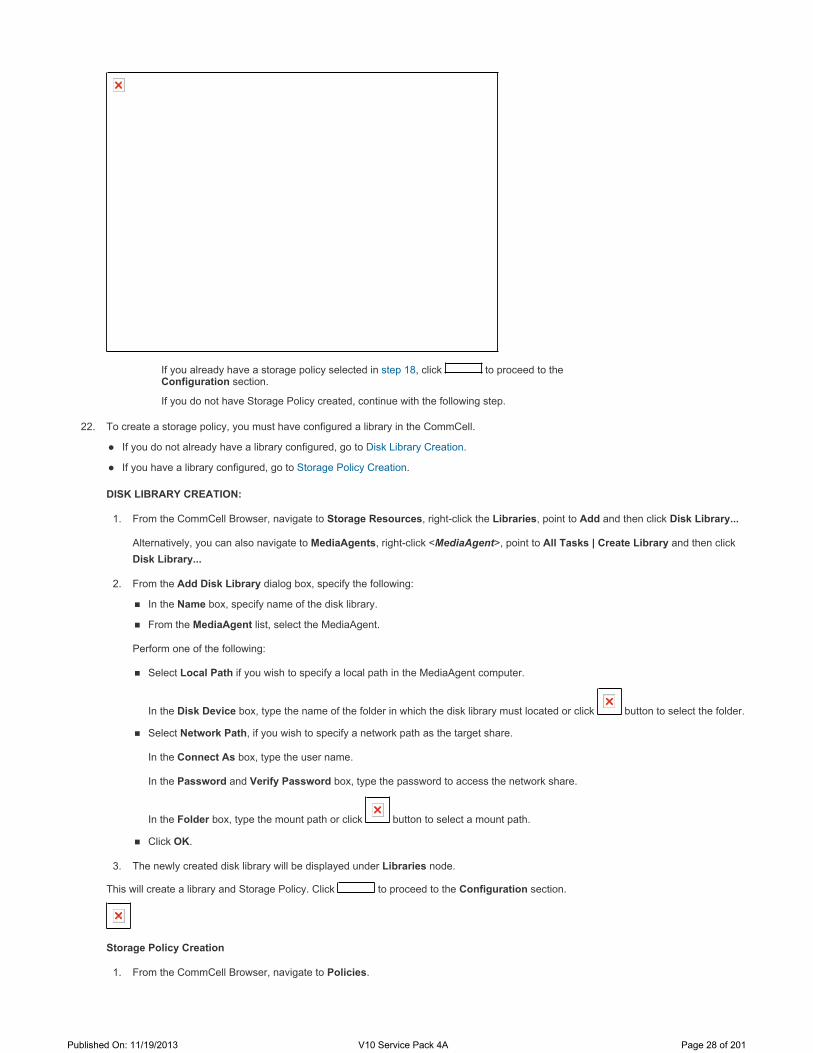
20. To create a storage policy, you must have configured a library in the CommCell.
If you do not already have a library configured, go to Disk Library Creation.
If you have a library configured, go to Storage Policy Creation.
DISK LIBRARY CREATION:
1. From the CommCell Browser, navigate to Storage Resources, right-click the Libraries, point to Add and then click Disk Library...
Alternatively, you can also navigate to MediaAgents, right-click <MediaAgent>, point to All Tasks | Create Library and then click Disk Library...
2. From the Add Disk Library dialog box, specify the following:
In the Name box, specify name of the disk library.
From the MediaAgent list, select the MediaAgent.
Perform one of the following:
Select Local Path if you wish to specify a local path in the MediaAgent computer.
Published On: 11/19/2013 V10 Service Pack 4A Page 17 of 201
In the Disk Device box, type the name of the folder in which the disk library must located or click button to select the folder.
Select Network Path, if you wish to specify a network path as the target share.
In the Connect As box, type the user name.
In the Password and Verify Password box, type the password to access the network share.
In the Folder box, type the mount path or click button to select a mount path.
Click OK.
3. The newly created disk library will be displayed under Libraries node.
This will create a library and Storage Policy. Click to proceed to the Configuration section.
Storage Policy Creation
1. From the CommCell Browser, navigate to Policies.
2. Right-click the Storage Policies and then click New Storage Policy.
3. Follow the prompts displayed in the Storage Policy Wizard. The required options are mentioned below:
Select the Storage Policy type as Data Protection and Archiving and click Next.
Enter the name in the Storage Policy Name box and click Next.
From the Library list, click the name of a disk library to which the primary copy should be associated and then click Next.
Ensure that you select a library attached to a MediaAgent operating in the current release.
From the MediaAgent list, click the name of a MediaAgent that will be used to create the primary copy and then click Next.
For the device streams and the retention criteria information, click Next to accept default values.
Select Yes to enable deduplication for the primary copy.
From the MediaAgent list, click the name of the MediaAgent that will be used to host the Deduplication Database (DDB).
In the Location box, type the name of the folder in which the DDB must be located or click the Browse button to select the folder and then click Next.
Review the details and click Finish to create the Storage Policy.
This will create a storage policy. Click to proceed to the Configuration section.
Published On: 11/19/2013 V10 Service Pack 4A Page 18 of 201
Several additional options are available for remotely installing the software from CommCell Console, refer to Install Software from the CommCell Console (Remote Install) for more information.
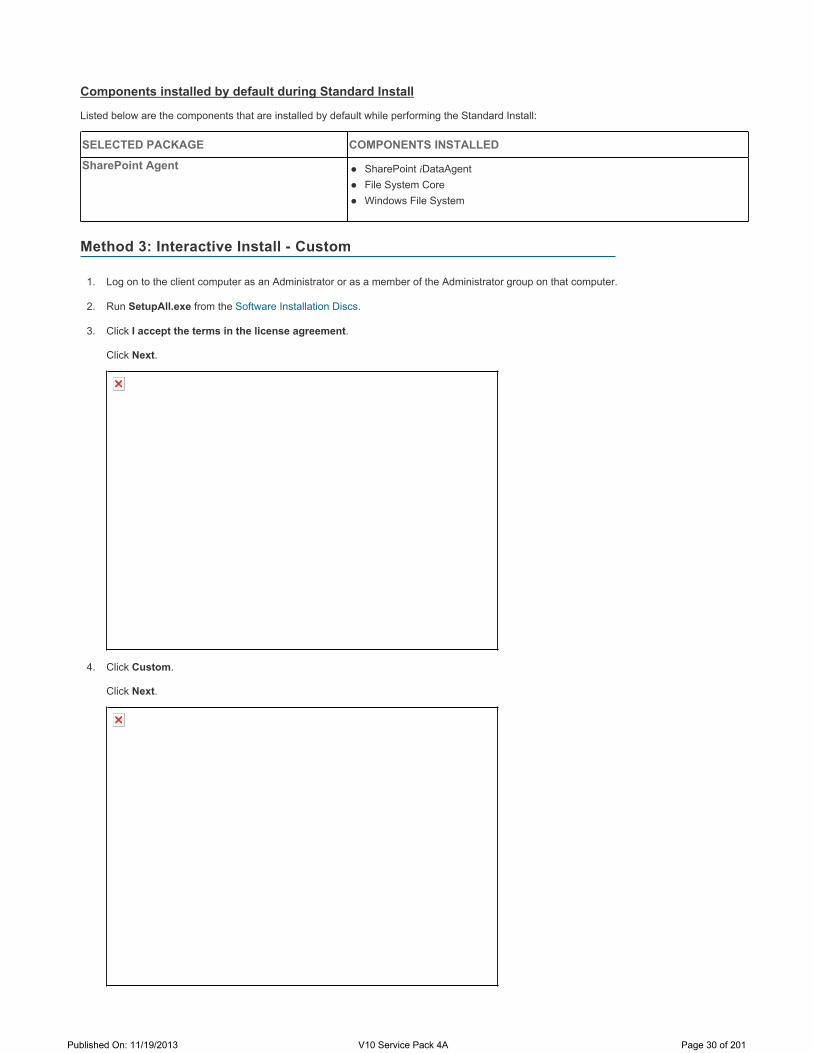
1. Log on to the client computer as an Administrator or as a member of the Administrator group on that computer.
2. Run SetupAll.exe from the Software Installation Discs.
3. Click I accept the terms in the license agreement.
Click Next.
4. Click Standard.
Click Next.
Method 2: Interactive Install - Standard
Published On: 11/19/2013 V10 Service Pack 4A Page 19 of 201
5. Click Join an Existing CommCell.
Click Next.
6. Click SharePoint.
Click Next.
Published On: 11/19/2013 V10 Service Pack 4A Page 20 of 201
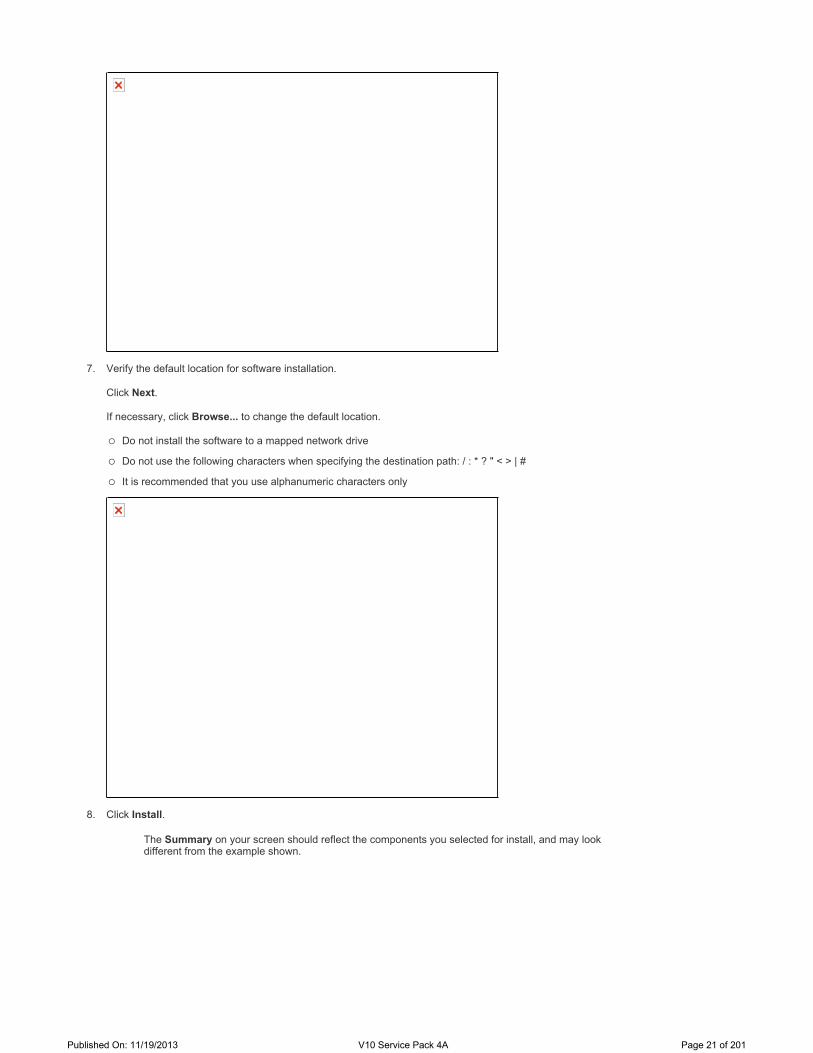
7. Verify the default location for software installation.
Click Next.
If necessary, click Browse... to change the default location.
Do not install the software to a mapped network drive
Do not use the following characters when specifying the destination path: / : * ? " < > | #
It is recommended that you use alphanumeric characters only
8. Click Install.
The Summary on your screen should reflect the components you selected for install, and may look different from the example shown.
Published On: 11/19/2013 V10 Service Pack 4A Page 21 of 201

9. Click Yes.
10. Click Reboot Now.
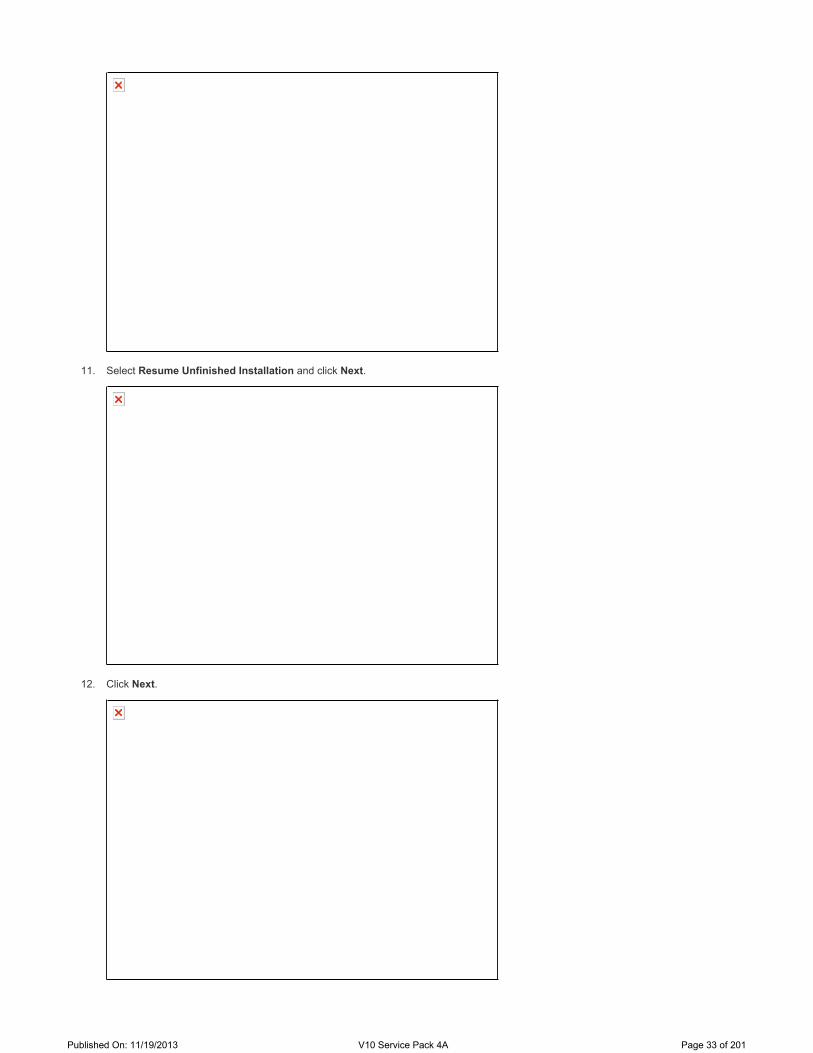
11. Select Resume Unfinished Installation and click Next.
Published On: 11/19/2013 V10 Service Pack 4A Page 22 of 201

12. Click Next.
13. Select one of the following:
If firewall configuration is not required, click Next.
If this computer and the CommServe is separated by a firewall, click Configure firewall services.
For firewall options and configuration instructions, see Firewall Configuration and continue with the installation.
Published On: 11/19/2013 V10 Service Pack 4A Page 23 of 201
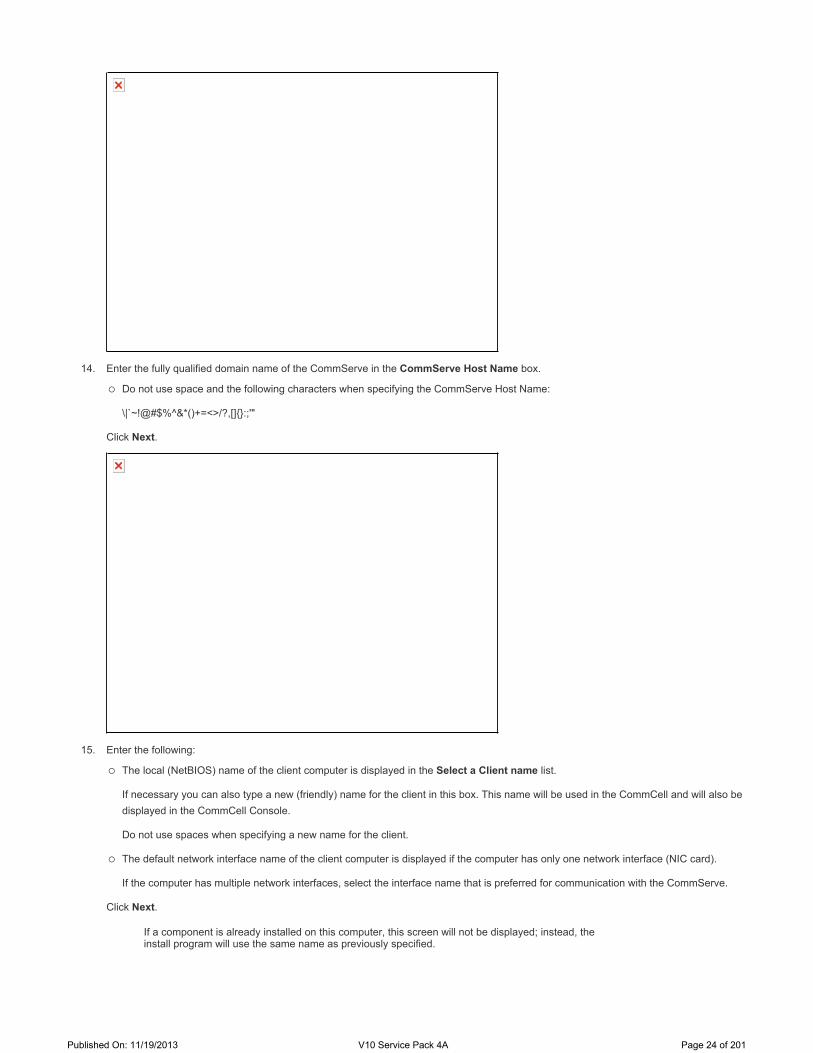
14. Enter the fully qualified domain name of the CommServe in the CommServe Host Name box.
Do not use space and the following characters when specifying the CommServe Host Name:
\|`~!@#$%^&*()+=<>/?,[]{}:;'"
Click Next.
15. Enter the following:
The local (NetBIOS) name of the client computer is displayed in the Select a Client name list.
If necessary you can also type a new (friendly) name for the client in this box. This name will be used in the CommCell and will also be displayed in the CommCell Console.
Do not use spaces when specifying a new name for the client.
The default network interface name of the client computer is displayed if the computer has only one network interface (NIC card).
If the computer has multiple network interfaces, select the interface name that is preferred for communication with the CommServe.
Click Next.
If a component is already installed on this computer, this screen will not be displayed; instead, the install program will use the same name as previously specified.
Published On: 11/19/2013 V10 Service Pack 4A Page 24 of 201
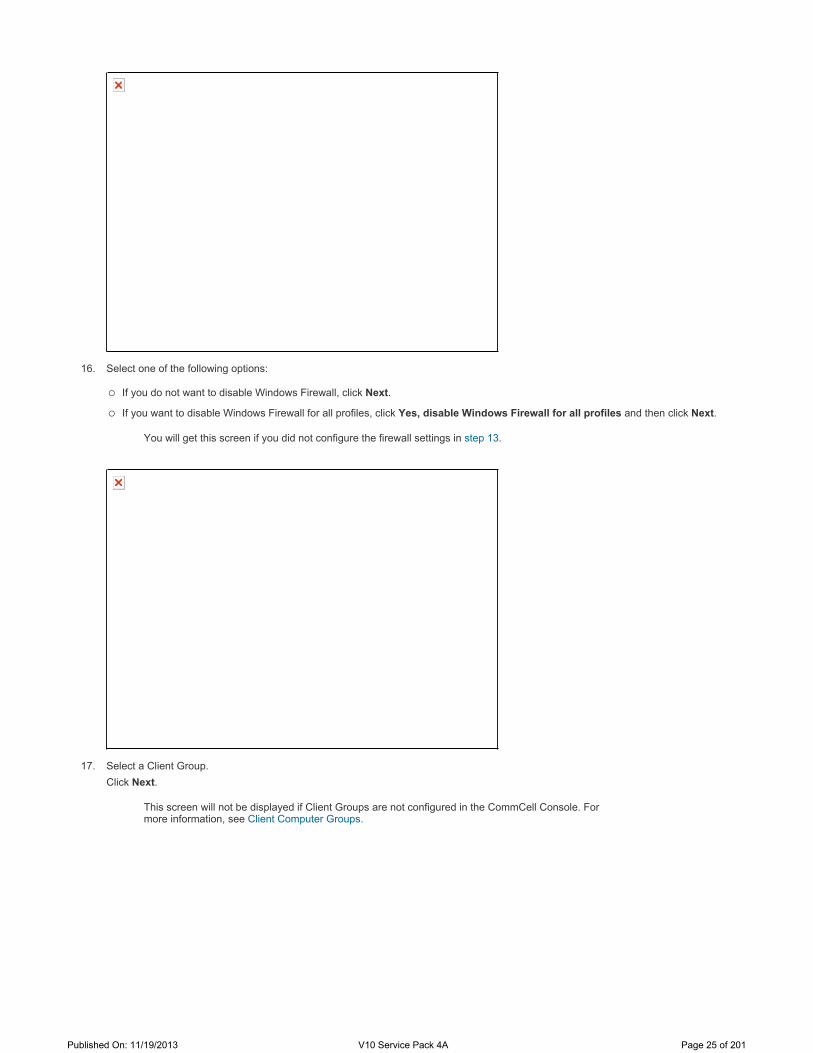
16. Select one of the following options:
If you do not want to disable Windows Firewall, click Next.
If you want to disable Windows Firewall for all profiles, click Yes, disable Windows Firewall for all profiles and then click Next.
17. Select a Client Group.Click Next.
You will get this screen if you did not configure the firewall settings in step 13.
This screen will not be displayed if Client Groups are not configured in the CommCell Console. For more information, see Client Computer Groups.
Published On: 11/19/2013 V10 Service Pack 4A Page 25 of 201
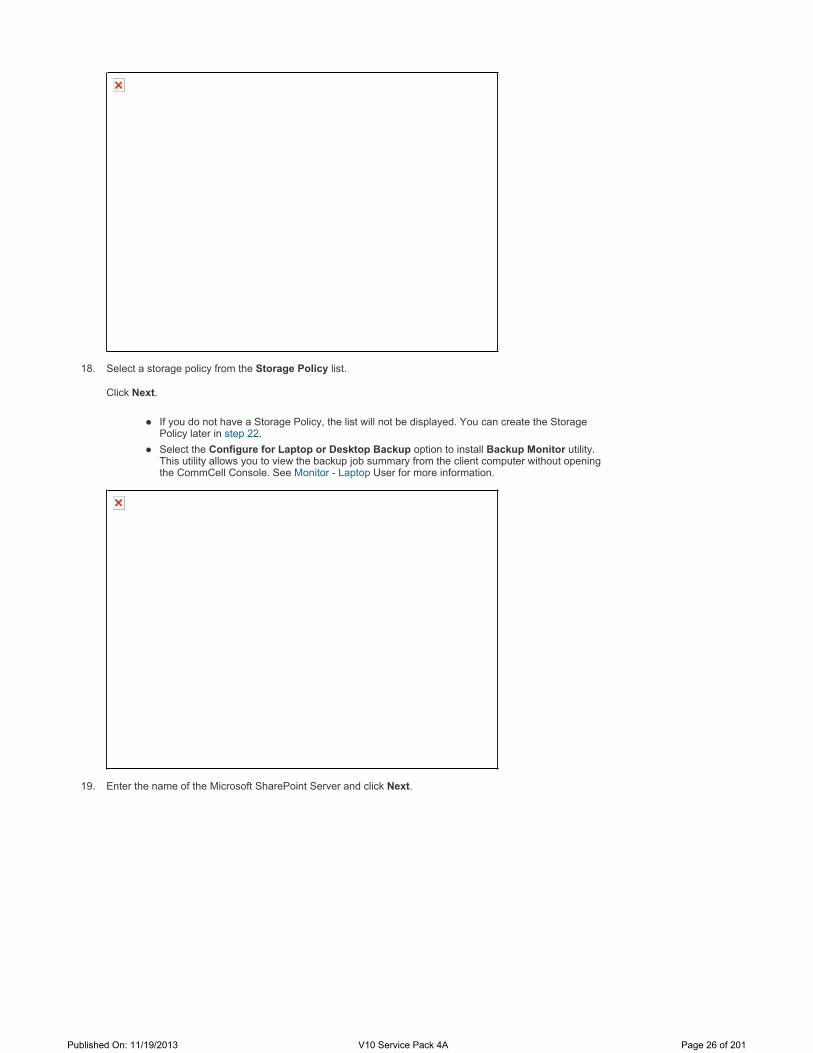
18. Select a storage policy from the Storage Policy list.
Click Next.
19. Enter the name of the Microsoft SharePoint Server and click Next.
If you do not have a Storage Policy, the list will not be displayed. You can create the Storage Policy later in step 22. Select the Configure for Laptop or Desktop Backup option to install Backup Monitor utility. This utility allows you to view the backup job summary from the client computer without opening the CommCell Console. See Monitor - Laptop User for more information.
Published On: 11/19/2013 V10 Service Pack 4A Page 26 of 201
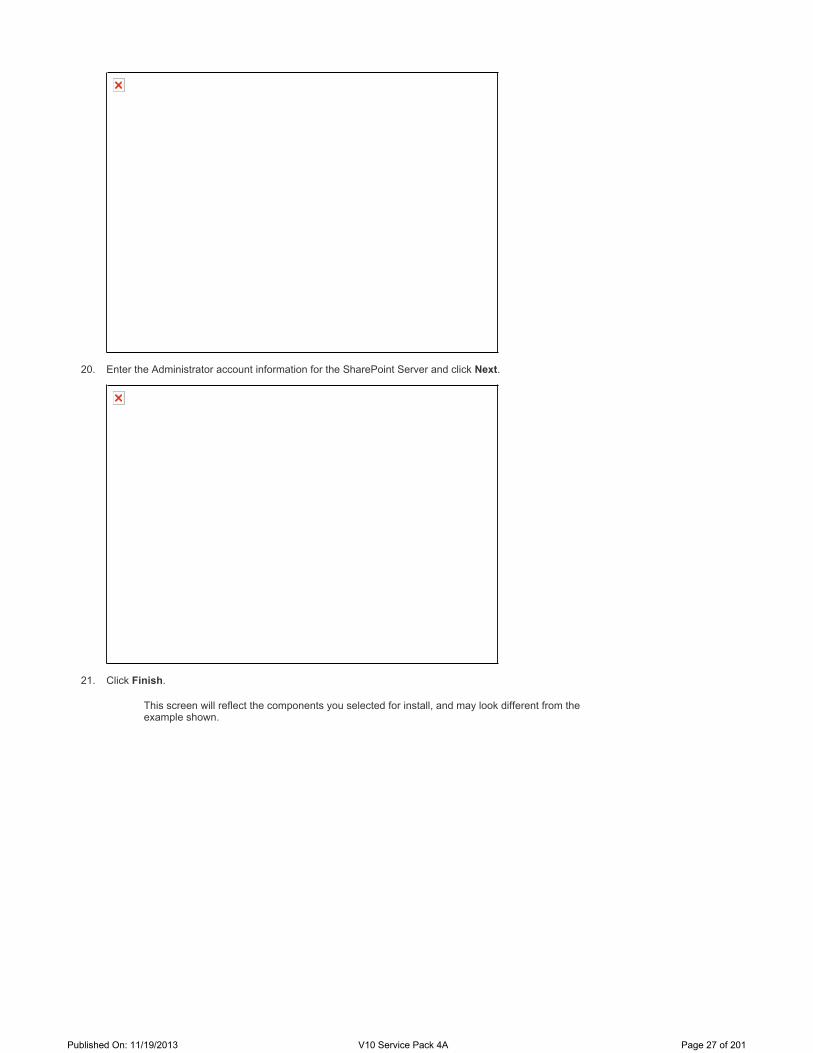
20. Enter the Administrator account information for the SharePoint Server and click Next.
21. Click Finish.
This screen will reflect the components you selected for install, and may look different from the example shown.
Published On: 11/19/2013 V10 Service Pack 4A Page 27 of 201
22. To create a storage policy, you must have configured a library in the CommCell.
If you do not already have a library configured, go to Disk Library Creation.
If you have a library configured, go to Storage Policy Creation.
DISK LIBRARY CREATION:
1. From the CommCell Browser, navigate to Storage Resources, right-click the Libraries, point to Add and then click Disk Library...
Alternatively, you can also navigate to MediaAgents, right-click <MediaAgent>, point to All Tasks | Create Library and then click Disk Library...
2. From the Add Disk Library dialog box, specify the following:
In the Name box, specify name of the disk library.
From the MediaAgent list, select the MediaAgent.
Perform one of the following:
Select Local Path if you wish to specify a local path in the MediaAgent computer.
In the Disk Device box, type the name of the folder in which the disk library must located or click button to select the folder.
Select Network Path, if you wish to specify a network path as the target share.
In the Connect As box, type the user name.
In the Password and Verify Password box, type the password to access the network share.
In the Folder box, type the mount path or click button to select a mount path.
Click OK.
3. The newly created disk library will be displayed under Libraries node.
This will create a library and Storage Policy. Click to proceed to the Configuration section.
Storage Policy Creation
1. From the CommCell Browser, navigate to Policies.
If you already have a storage policy selected in step 18, click to proceed to the Configuration section.
If you do not have Storage Policy created, continue with the following step.
Published On: 11/19/2013 V10 Service Pack 4A Page 28 of 201
2. Right-click the Storage Policies and then click New Storage Policy.
3. Follow the prompts displayed in the Storage Policy Wizard. The required options are mentioned below:
Select the Storage Policy type as Data Protection and Archiving and click Next.
Enter the name in the Storage Policy Name box and click Next.
From the Library list, click the name of a disk library to which the primary copy should be associated and then click Next.
Ensure that you select a library attached to a MediaAgent operating in the current release.
From the MediaAgent list, click the name of a MediaAgent that will be used to create the primary copy and then click Next.
For the device streams and the retention criteria information, click Next to accept default values.
Select Yes to enable deduplication for the primary copy.
From the MediaAgent list, click the name of the MediaAgent that will be used to host the Deduplication Database (DDB).
In the Location box, type the name of the folder in which the DDB must be located or click the Browse button to select the folder and then click Next.
Review the details and click Finish to create the Storage Policy.
This will create a storage policy. Click to proceed to the Configuration section.
Default Options Selected During Standard Install
Listed below are the default options that are automatically selected while performing the Standard Install.
OPTION ENABLED /
DISABLED
DESCRIPTION
Add programs to the Windows Firewall Exclusion List Disabled This option allows you to add Data Protection Suite programs to the Windows Firewall exclusion list.
This option is not selected.Global Filter Options Enabled This option is used to filter out specific directories or
files from the backups within the CommCell. The filters are set using the Control Panel in the CommCell Console and, if enabled, they will be effective for the default subclient.
Cell level policy is automatically selected.
Published On: 11/19/2013 V10 Service Pack 4A Page 29 of 201
Components installed by default during Standard Install
Listed below are the components that are installed by default while performing the Standard Install:
1. Log on to the client computer as an Administrator or as a member of the Administrator group on that computer.
2. Run SetupAll.exe from the Software Installation Discs.
3. Click I accept the terms in the license agreement.
Click Next.
4. Click Custom.
Click Next.
SELECTED PACKAGE COMPONENTS INSTALLED
SharePoint Agent SharePoint iDataAgent File System Core Windows File System
Method 3: Interactive Install - Custom
Published On: 11/19/2013 V10 Service Pack 4A Page 30 of 201

5. Click Select components to install on this computer and click Next.
6. Expand SharePoint, and then click SharePoint iDataAgent.
Click Next.
7. Verify the default location for software installation.
Click Next.
If necessary, click Browse... to change the default location.
Do not install the software to a mapped network drive
Do not use the following characters when specifying the destination path: / : * ? " < > | #
It is recommended that you use alphanumeric characters only
Published On: 11/19/2013 V10 Service Pack 4A Page 31 of 201

8. Click Install.
9. Click Yes.
10. Click Reboot Now.
The Summary on your screen should reflect the components you selected for install, and may look different from the example shown.
Published On: 11/19/2013 V10 Service Pack 4A Page 32 of 201
11. Select Resume Unfinished Installation and click Next.
12. Click Next.
Published On: 11/19/2013 V10 Service Pack 4A Page 33 of 201

13. Select one of the following:
If firewall configuration is not required, click Next.
If this computer and the CommServe is separated by a firewall, click Configure firewall services.
For firewall options and configuration instructions, see Firewall Configuration and continue with the installation.
14. Enter the fully qualified domain name of the CommServe in the CommServe Host Name box.
Do not use space and the following characters when specifying the CommServe Host Name:
\|`~!@#$%^&*()+=<>/?,[]{}:;'"
Click Next.
15. Enter the following:
The local (NetBIOS) name of the client computer is displayed in the Select a Client name list.
If necessary you can also type a new (friendly) name for the client in this box. This name will be used in the CommCell and will also be displayed in the CommCell Console.
Do not use spaces when specifying a new name for the client.
The default network interface name of the client computer is displayed if the computer has only one network interface (NIC card).
If the computer has multiple network interfaces, select the interface name that is preferred for communication with the CommServe.
Published On: 11/19/2013 V10 Service Pack 4A Page 34 of 201
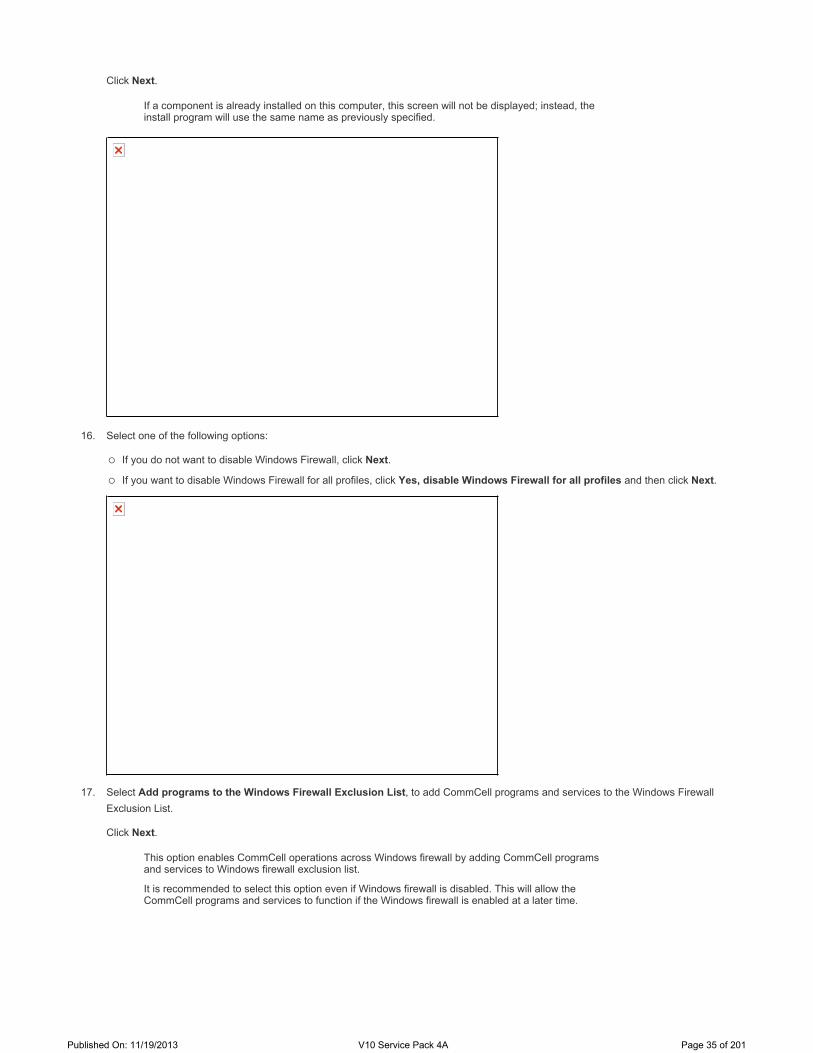
Click Next.
16. Select one of the following options:
If you do not want to disable Windows Firewall, click Next.
If you want to disable Windows Firewall for all profiles, click Yes, disable Windows Firewall for all profiles and then click Next.
17. Select Add programs to the Windows Firewall Exclusion List, to add CommCell programs and services to the Windows Firewall Exclusion List.
Click Next.
If a component is already installed on this computer, this screen will not be displayed; instead, the install program will use the same name as previously specified.
This option enables CommCell operations across Windows firewall by adding CommCell programs and services to Windows firewall exclusion list.
It is recommended to select this option even if Windows firewall is disabled. This will allow the CommCell programs and services to function if the Windows firewall is enabled at a later time.
Published On: 11/19/2013 V10 Service Pack 4A Page 35 of 201
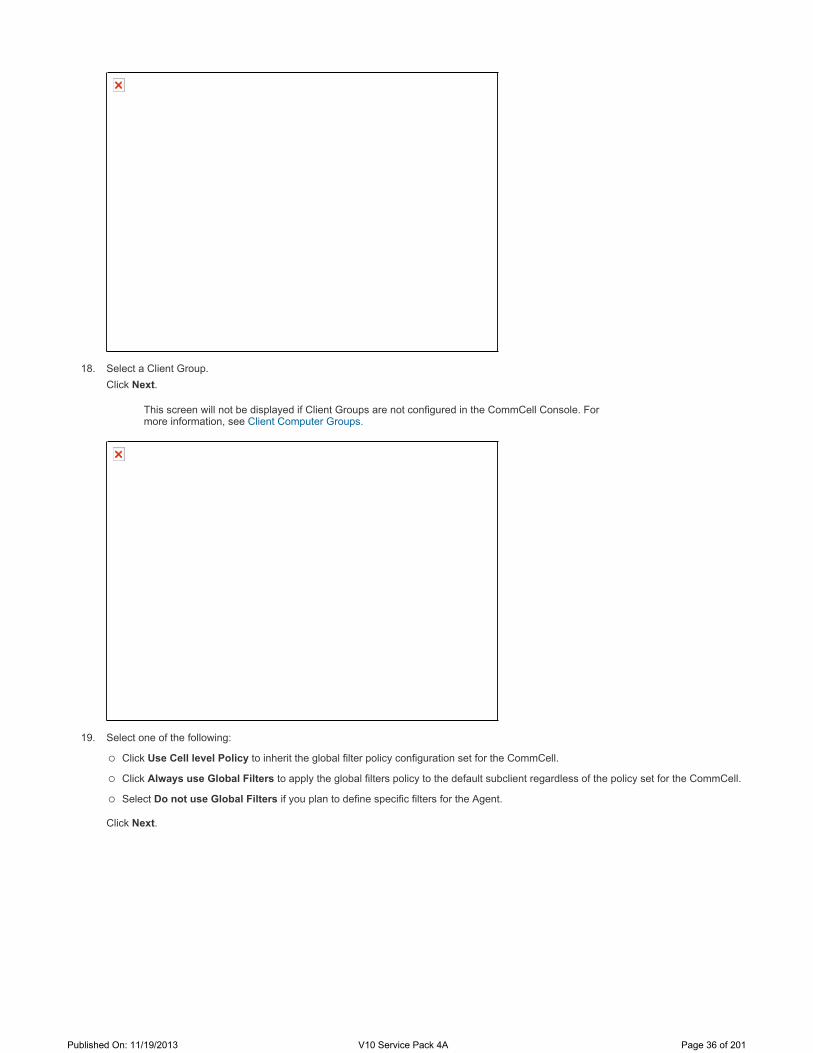
18. Select a Client Group.Click Next.
19. Select one of the following:
Click Use Cell level Policy to inherit the global filter policy configuration set for the CommCell.
Click Always use Global Filters to apply the global filters policy to the default subclient regardless of the policy set for the CommCell.
Select Do not use Global Filters if you plan to define specific filters for the Agent.
Click Next.
This screen will not be displayed if Client Groups are not configured in the CommCell Console. For more information, see Client Computer Groups.
Published On: 11/19/2013 V10 Service Pack 4A Page 36 of 201

20. Select a storage policy from the Storage Policy list.
Click Next.
21. Enter the name of the Microsoft SharePoint Server and click Next.
If you do not have a Storage Policy, the list will not be displayed. You can create the Storage Policy later in step 24. Select the Configure for Laptop or Desktop Backup option to install Backup Monitor utility. This utility allows you to view the backup job summary from the client computer without opening the CommCell Console. See Monitor - Laptop User for more information.
Published On: 11/19/2013 V10 Service Pack 4A Page 37 of 201
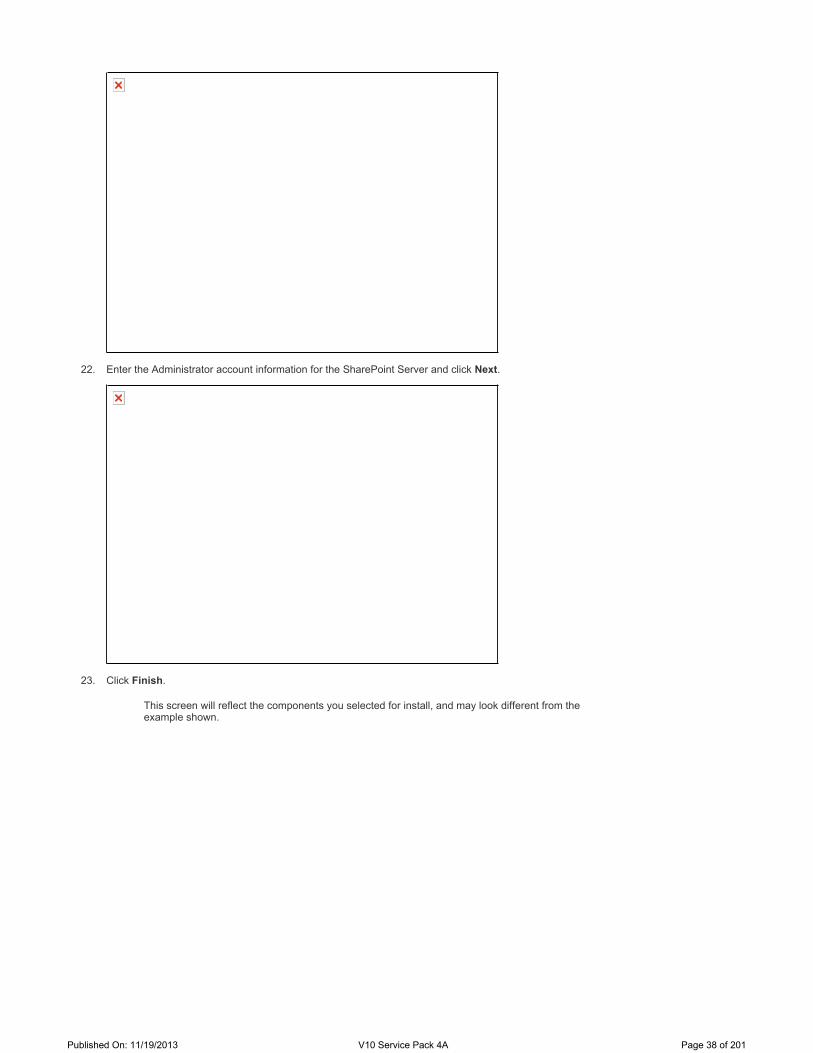
22. Enter the Administrator account information for the SharePoint Server and click Next.
23. Click Finish.
This screen will reflect the components you selected for install, and may look different from the example shown.
Published On: 11/19/2013 V10 Service Pack 4A Page 38 of 201

24. To create a storage policy, you must have configured a library in the CommCell.
If you do not already have a library configured, go to Disk Library Creation.
If you have a library configured, go to Storage Policy Creation.
DISK LIBRARY CREATION:
1. From the CommCell Browser, navigate to Storage Resources, right-click the Libraries, point to Add and then click Disk Library...
Alternatively, you can also navigate to MediaAgents, right-click <MediaAgent>, point to All Tasks | Create Library and then click Disk Library...
2. From the Add Disk Library dialog box, specify the following:
In the Name box, specify name of the disk library.
From the MediaAgent list, select the MediaAgent.
Perform one of the following:
Select Local Path if you wish to specify a local path in the MediaAgent computer.
In the Disk Device box, type the name of the folder in which the disk library must located or click button to select the folder.
Select Network Path, if you wish to specify a network path as the target share.
In the Connect As box, type the user name.
In the Password and Verify Password box, type the password to access the network share.
In the Folder box, type the mount path or click button to select a mount path.
Click OK.
3. The newly created disk library will be displayed under Libraries node.
This will create a library and Storage Policy. Click to proceed to the Configuration section.
Storage Policy Creation
1. From the CommCell Browser, navigate to Policies.
If you already have a storage policy selected in step 20, click to proceed to the Configuration section.
If you do not have Storage Policy created, continue with the following step.
Published On: 11/19/2013 V10 Service Pack 4A Page 39 of 201
2. Right-click the Storage Policies and then click New Storage Policy.
3. Follow the prompts displayed in the Storage Policy Wizard. The required options are mentioned below:
Select the Storage Policy type as Data Protection and Archiving and click Next.
Enter the name in the Storage Policy Name box and click Next.
From the Library list, click the name of a disk library to which the primary copy should be associated and then click Next.
Ensure that you select a library attached to a MediaAgent operating in the current release.
From the MediaAgent list, click the name of a MediaAgent that will be used to create the primary copy and then click Next.
For the device streams and the retention criteria information, click Next to accept default values.
Select Yes to enable deduplication for the primary copy.
From the MediaAgent list, click the name of the MediaAgent that will be used to host the Deduplication Database (DDB).
In the Location box, type the name of the folder in which the DDB must be located or click the Browse button to select the folder and then click Next.
Review the details and click Finish to create the Storage Policy.
This will create a storage policy. Click to proceed to the Configuration section.
25. If you have installed on a clustered computer, make sure to install the software on all the physical nodes and then follow the steps described in Cluster Configuration.
Custom Package
Create a compact software package for quick deployment to multiple clients.
Decoupled Install
Install the software first and later register the client in the CommCell.
Remote Install
Deploy the software from CommCell Console on multiple clients.
Installing Restore only Agents
Additional Installation Methods
Published On: 11/19/2013 V10 Service Pack 4A Page 40 of 201

Setup a client in the CommCell for restore purposes.
Silent Install
Deploy the software silently on multiple clients.
Published On: 11/19/2013 V10 Service Pack 4A Page 41 of 201

Getting Started - SharePoint Server iDataAgent
The following backup sets are supported for SharePoint Server iDataAgent. Configure these backup sets as needed, based on your SharePoint environment and restore needs. Click the name of a backup set to continue.
Overview Deployment Configuration Decision
BACKUP SET TYPE DESCRIPTION
Database Added by default during deployment. Items that are visible in the Central Administration under Farm Backup such as Farm Configuration Database, Web Application, Service Applications etc are backed up.
Ensure to exclude the SharePoint Services Applications from SQL Server backups, which are being backed up using the SharePoint Server iDataAgent.
Document This Backup Set is added by default during deployment. It backups up components like lists, document libraries etc.
The following components are not backed up using the Document Backup Set and therefore it is recommended to use Site Collection Backup set:
Alerts, Workflows, Recycle Bin and Events.Site Collection Must be created under SharePoint Server iDataAgent. Use for backing up and restoring an entire site
collection. This backup set provides faster backups than the document backup set, but it cannot restore individual items.
Published On: 11/19/2013 V10 Service Pack 4A Page 42 of 201
Getting Started - SharePoint Server iDataAgent- Database
The default subclient will backup the complete farm, therefore it is recommended to configure a user-defined subclient and assign a database to run your first backup.
1. From the CommCell Browser, navigate to <Client> | SharePoint Server | Databases.
Right-click Databases | All Tasks and click New Subclient.
2. In the General tab, enter the <Subclient Name>.
3. Click the Content tab.
Click the Browse button.
Click to select a <Database>.
Click Add and then click Close.
Configuration Backup Restore
Ensure to exclude the SharePoint Services Applications from SQL Server backups, which are
Published On: 11/19/2013 V10 Service Pack 4A Page 43 of 201

4. Click the Storage Device tab.
Select the Storage Policy from the drop down list.
Click Ok.
5. Perform the following steps to create a storage policy.
a. Click Create Storage Policy.
b. Follow the prompts displayed in the Storage Policy Wizard. The required options are mentioned below:
being backed up using the SharePoint Server iDataAgent.
If you do not have a Storage Policy created, follow the steps given below to create a Storage Policy.
Published On: 11/19/2013 V10 Service Pack 4A Page 44 of 201
i. Select the Storage Policy type as Data Protection and Archiving and click Next.
ii. Enter the name in the Storage Policy Name box and click Next.
iii. From the Library list, click the name of a disk library to which the primary copy should be associated and then click Next.
Ensure that you select a library attached to a MediaAgent operating in the current release.
iv. From the MediaAgent list, click the name of a MediaAgent that will be used to create the primary copy and then click Next.
v. For the device streams and the retention criteria information, click Next to accept default values.
vi. Select Yes to enable deduplication for the primary copy.
vii. From the MediaAgent list, click the name of the MediaAgent that will be used to host the Deduplication database (DDB).
In the Location box, type the name of the folder in which the DDB must be located or click the Browse to select the folder, and then click Next.
viii. Review the details and click Finish to create the Storage Policy.
Return to Step 4 to associate the Storage Policy to the subclient.
Published On: 11/19/2013 V10 Service Pack 4A Page 45 of 201
Getting Started - SharePoint Server iDataAgent - Database
Follow the steps given below to perform the first backup:
1. From the CommCell Console navigate to Client Computers | <Client> | SharePoint Server, and then click Databases.
In the right-pane, right-click the <Newly Created Subclient> and click Backup.
2. Ensure under Select Backup Type, Full is selected.
Under Job Initiation, Immediate is selected.
Click Ok.
3. In the Job Controller tab, track the process of your backup job.
Wait until the job has completed before you perform the next steps.
4. In the Databases tab, right-click <Newly Created Subclient>, and then click Backup History.
Configuration Backup Restore
Published On: 11/19/2013 V10 Service Pack 4A Page 46 of 201
\
5. In the Backup History Filter dialog box, click OK.
6. In the Backup History tab, right-click the backup job to view the following job details:
Items that failed during the job
Items that succeeded during the job
Details of the job
Events of the job
Log files of the job
Media associated with the job
Published On: 11/19/2013 V10 Service Pack 4A Page 47 of 201

Published On: 11/19/2013 V10 Service Pack 4A Page 48 of 201
Getting Started - SharePoint Server iDataAgent - Database
Restoring your backed up data is crucial, therefore you should perform a restore operation immediately after your first full backup.
1. From the CommCell Console navigate to Client Computers | <Client> | SharePoint Server, and then click Databases.
In the right-pane, right-click the <Newly Created Subclient> and click Browse and Restore.
2. Click View Content.
3. In the left pane of the Client tab, expand Databases, click to select the backed up database and click Recover All Selected.
4. Click the Web Application tab and enter the password.
Click Ok.
Configuration Backup Restore
Published On: 11/19/2013 V10 Service Pack 4A Page 49 of 201
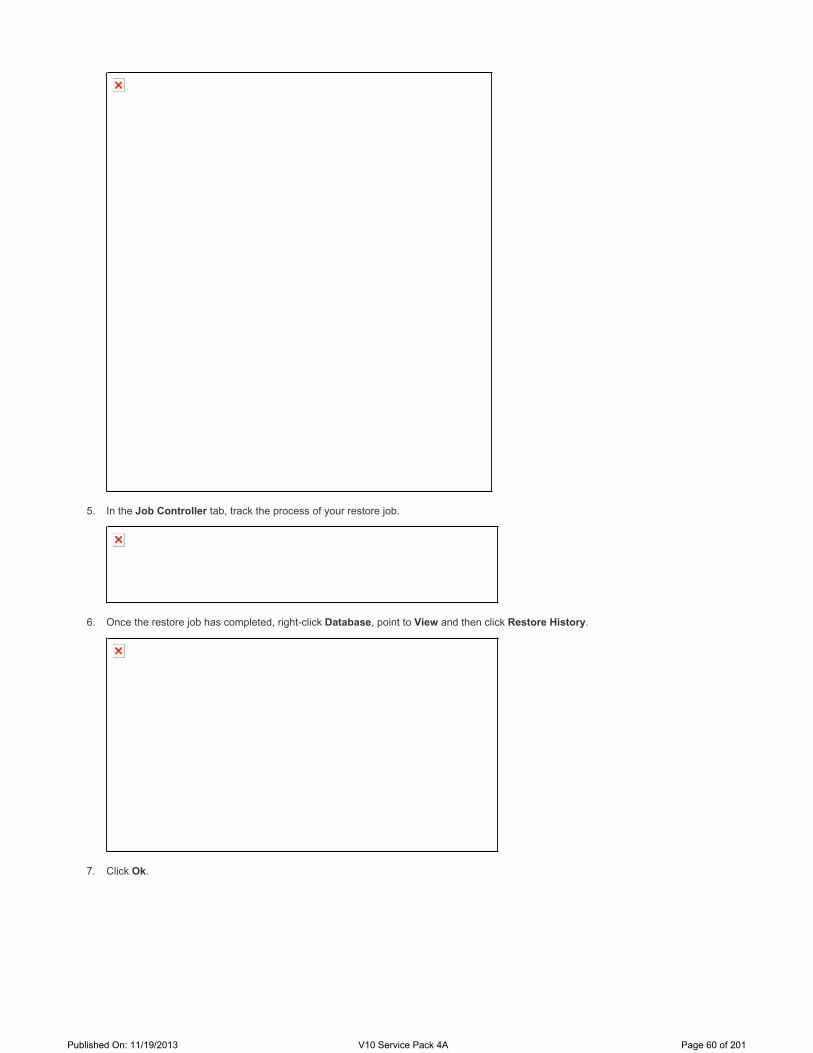
5. In the Job Controller tab, track the process of your restore job.
6. Once the restore job has completed, right-click Database, point to View and then click Restore History.
7. Click Ok.
Published On: 11/19/2013 V10 Service Pack 4A Page 50 of 201

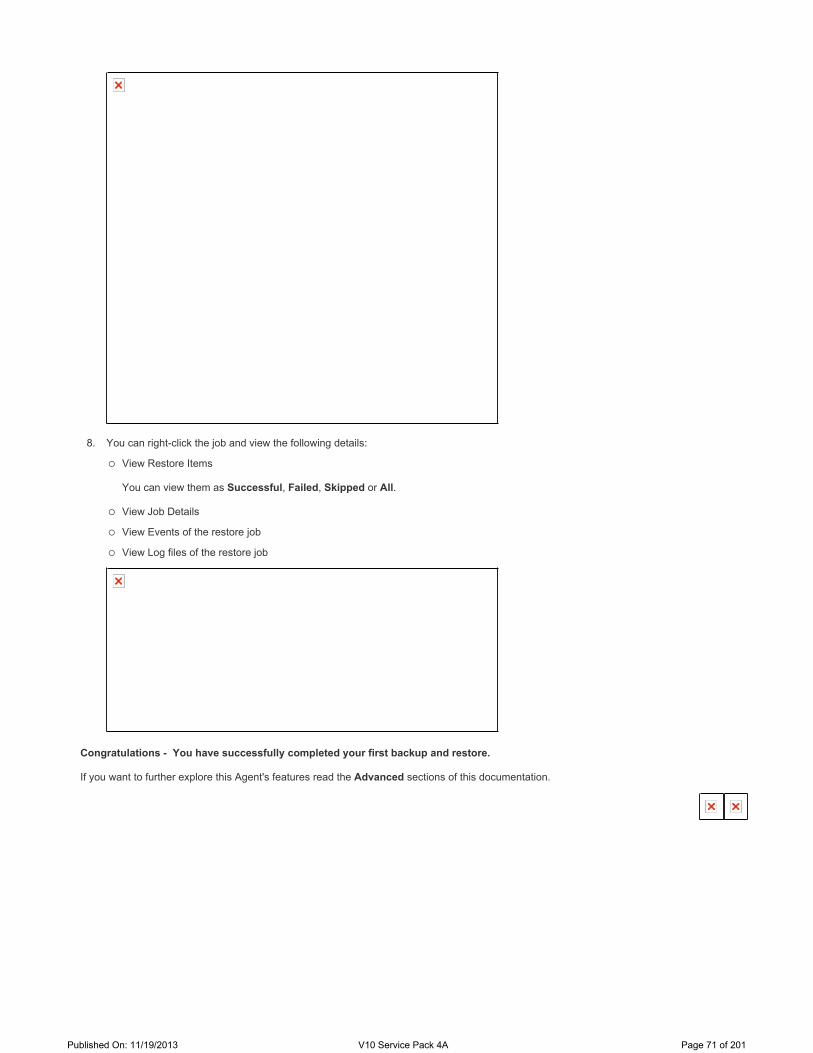
8. You can right-click the job and view the following details:
View Restore Items
You can view them as Successful, Failed, Skipped or All.
View Job Details
View Events of the restore job
View Log files of the restore job
Congratulations - You have successfully completed your first backup and restore.
If you want to further explore this Agent's features read the Advanced sections of this documentation.
Published On: 11/19/2013 V10 Service Pack 4A Page 51 of 201
Getting Started - SharePoint Server iDataAgent -Documents
The default subclient will backup all document folders, therefore it is recommended to configure a user-defined subclient and assign a document library to run your first backup.
1. From the CommCell Browser, navigate to <Client> | SharePoint Server | Document.
Right-click Document | All Tasks and click New Subclient.
2. In the General tab, enter the <Subclient Name>.
Configuration Backup Restore
Published On: 11/19/2013 V10 Service Pack 4A Page 52 of 201

3. Click the Content tab.
Click the Browse button.
Click to select a <Library>.
Click Add and then click Close.
4. Click the Storage Device tab.
Select the Storage Policy from the drop down list.
Click Ok.
If you do not have a Storage Policy created, follow the steps given below to create a Storage Policy.
Published On: 11/19/2013 V10 Service Pack 4A Page 53 of 201

5. Perform the following steps to create a storage policy.
a. Click Create Storage Policy.
b. Follow the prompts displayed in the Storage Policy Wizard. The required options are mentioned below:
i. Select the Storage Policy type as Data Protection and Archiving and click Next.
ii. Enter the name in the Storage Policy Name box and click Next.
iii. From the Library list, click the name of a disk library to which the primary copy should be associated and then click Next.
Ensure that you select a library attached to a MediaAgent operating in the current release.
iv. From the MediaAgent list, click the name of a MediaAgent that will be used to create the primary copy and then click Next.
v. For the device streams and the retention criteria information, click Next to accept default values.
vi. Select Yes to enable deduplication for the primary copy.
vii. From the MediaAgent list, click the name of the MediaAgent that will be used to host the Deduplication database (DDB).
In the Location box, type the name of the folder in which the DDB must be located or click the Browse to select the folder, and then click Next.
viii. Review the details and click Finish to create the Storage Policy.
Return to Step 4 to associate the Storage Policy to the subclient.
Published On: 11/19/2013 V10 Service Pack 4A Page 54 of 201
Published On: 11/19/2013 V10 Service Pack 4A Page 55 of 201
Getting Started - SharePoint Server iDataAgent -Documents
Follow the steps given below to perform the first backup:
1. From the CommCell Console navigate to Client Computers | <Client> | SharePoint Server, and then click Document.
In the right-pane, right-click the <Newly Created Subclient> and click Backup.
2. Select Full under Select Backup Type.
Under Job Initiation, Immediate is selected.
Click Ok.
3. In the Job Controller tab, track the process of your backup job.
Wait until the job has completed before you perform the next steps.
4. In the Documents tab, right-click <Newly Created Subclient>, and then click Backup History.
Configuration Backup Documents Restore
Published On: 11/19/2013 V10 Service Pack 4A Page 56 of 201
\
5. In the Backup History Filter dialog box, click OK.
6. In the Backup History tab, right-click the backup job to view the following job details:
Items that failed during the job
Items that succeeded during the job
Details of the job
Events of the job
Log files of the job
Media associated with the job
Published On: 11/19/2013 V10 Service Pack 4A Page 57 of 201

Published On: 11/19/2013 V10 Service Pack 4A Page 58 of 201
Getting Started - SharePoint Server iDataAgent-Documents
Restoring your backed up data by following the steps given below:
1. From the CommCell Console navigate to Client Computers | <Client> | SharePoint Server, and click Document.
In the right-pane, right-click the <Newly Created Subclient> and click Browse and Restore.
2. Click View Content.
3. In the left pane of the Client tab, expand Documents, click to select the backed up documents and click Recover All Selected.
4. Click Ok.
Configuration Backup Restore
Published On: 11/19/2013 V10 Service Pack 4A Page 59 of 201
5. In the Job Controller tab, track the process of your restore job.
6. Once the restore job has completed, right-click Database, point to View and then click Restore History.
7. Click Ok.
Published On: 11/19/2013 V10 Service Pack 4A Page 60 of 201

8. You can right-click the job and view the following details:
View Restore Items
You can view them as Successful, Failed, Skipped or All.
View Job Details
View Events of the restore job
View Log files of the restore job
Congratulations - You have successfully completed your first backup and restore.
If you want to further explore this Agent's features read the Advanced sections of this documentation.
Published On: 11/19/2013 V10 Service Pack 4A Page 61 of 201
Getting Started - SharePoint Server iDataAgent - Site Collection
It is recommended to configure a user-defined Site Collection backup set and create a user-defined subclient to run your first Site Collection backup.
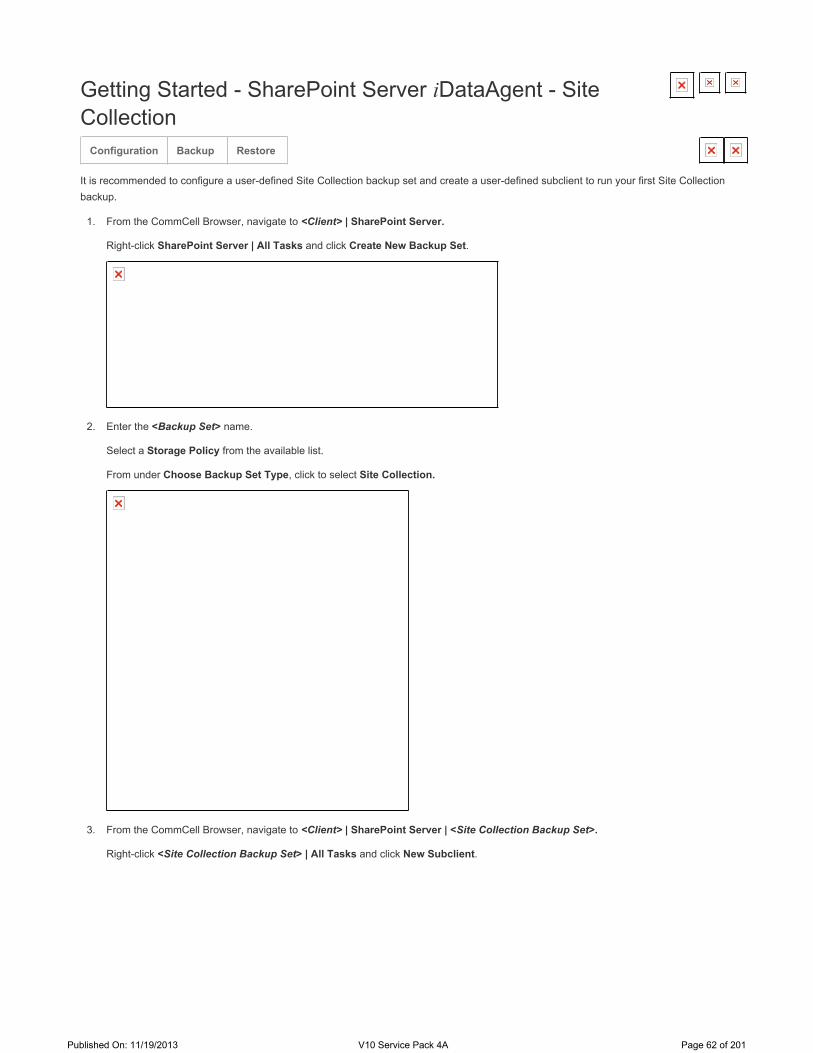
1. From the CommCell Browser, navigate to <Client> | SharePoint Server.
Right-click SharePoint Server | All Tasks and click Create New Backup Set.
2. Enter the <Backup Set> name.
Select a Storage Policy from the available list.
From under Choose Backup Set Type, click to select Site Collection.
3. From the CommCell Browser, navigate to <Client> | SharePoint Server | <Site Collection Backup Set>.
Right-click <Site Collection Backup Set> | All Tasks and click New Subclient.
Configuration Backup Restore
Published On: 11/19/2013 V10 Service Pack 4A Page 62 of 201
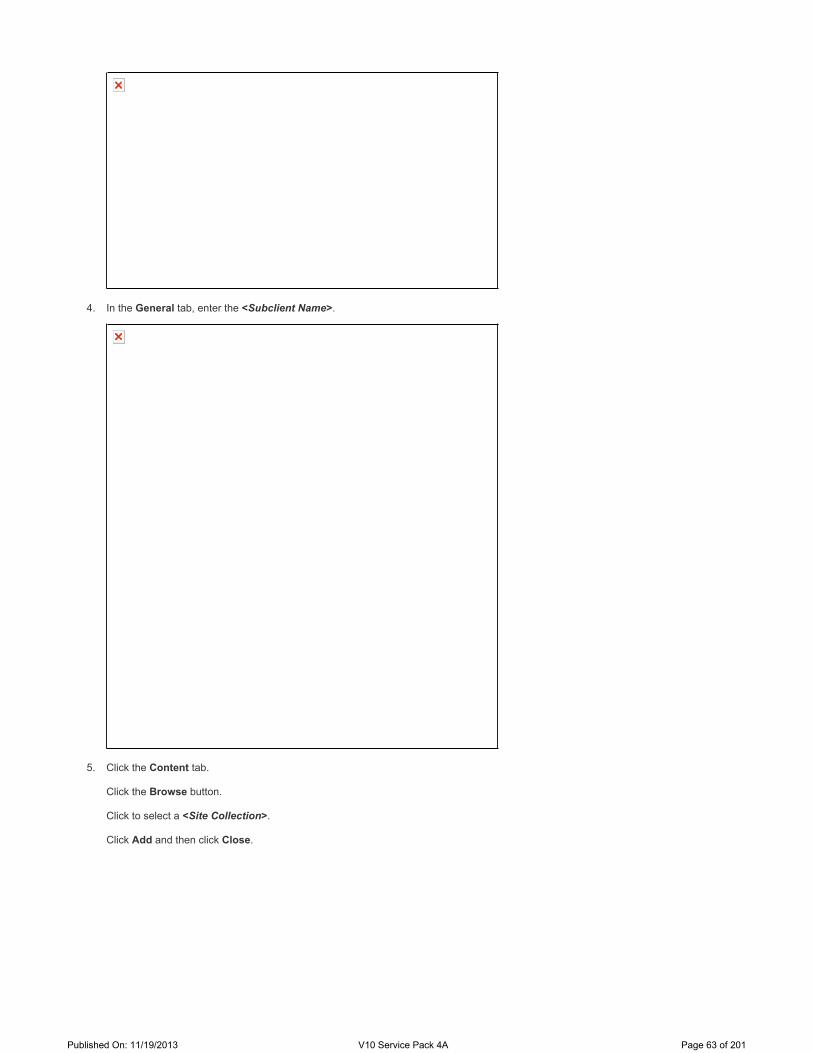
4. In the General tab, enter the <Subclient Name>.
5. Click the Content tab.
Click the Browse button.
Click to select a <Site Collection>.
Click Add and then click Close.
Published On: 11/19/2013 V10 Service Pack 4A Page 63 of 201
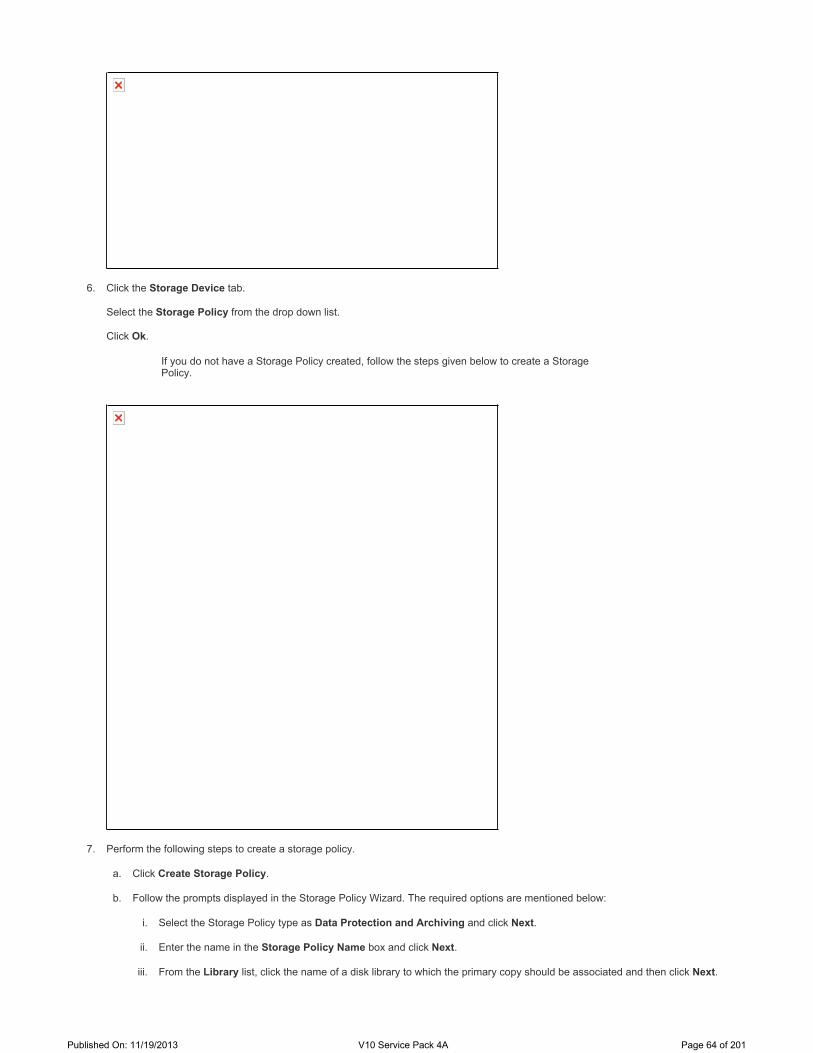
6. Click the Storage Device tab.
Select the Storage Policy from the drop down list.
Click Ok.
7. Perform the following steps to create a storage policy.
a. Click Create Storage Policy.
b. Follow the prompts displayed in the Storage Policy Wizard. The required options are mentioned below:
i. Select the Storage Policy type as Data Protection and Archiving and click Next.
ii. Enter the name in the Storage Policy Name box and click Next.
iii. From the Library list, click the name of a disk library to which the primary copy should be associated and then click Next.
If you do not have a Storage Policy created, follow the steps given below to create a Storage Policy.
Published On: 11/19/2013 V10 Service Pack 4A Page 64 of 201
Ensure that you select a library attached to a MediaAgent operating in the current release.
iv. From the MediaAgent list, click the name of a MediaAgent that will be used to create the primary copy and then click Next.
v. For the device streams and the retention criteria information, click Next to accept default values.
vi. Select Yes to enable deduplication for the primary copy.
vii. From the MediaAgent list, click the name of the MediaAgent that will be used to host the Deduplication database (DDB).
In the Location box, type the name of the folder in which the DDB must be located or click the Browse to select the folder, and then click Next.
viii. Review the details and click Finish to create the Storage Policy.
Return to Step 6 to associate the Storage Policy to the subclient.
Published On: 11/19/2013 V10 Service Pack 4A Page 65 of 201
Getting Started - SharePoint Server iDataAgent - Site Collection
Follow the steps given below to perform the first backup:
1. From the CommCell Console navigate to Client Computers | <Client> | SharePoint Server, and then click <Site Collection Backup Set>.
In the right-pane, right-click the <Newly Created Subclient> and click Backup.
2. Ensure that Full is selected under Select Backup Type.
Ensure that under Job Initiation, Immediate is selected.
Click Ok.
3. In the Job Controller tab, track the process of your backup job.
Wait until the job has completed before you perform the next steps.
4. In the Site Collection tab, right-click <Newly Created Subclient>, and then click Backup History.
Configuration Backup Restore
Published On: 11/19/2013 V10 Service Pack 4A Page 66 of 201

\
5. In the Backup History Filter dialog box, click OK.
6. In the Backup History tab, right-click the backup job to view the following job details:
Items that failed during the job
Items that succeeded during the job
Details of the job
Events of the job
Log files of the job
Media associated with the job
Published On: 11/19/2013 V10 Service Pack 4A Page 67 of 201

Published On: 11/19/2013 V10 Service Pack 4A Page 68 of 201
Getting Started - SharePoint Server iDataAgent - Site Collection
Restoring your backed up data is crucial, therefore you should perform a restore operation immediately after your first full backup.
1. From the CommCell Console navigate to Client Computers | <Client> | SharePoint Server, and then click <Site Collection Backup Set>.
In the right-pane, right-click the <Newly Created Subclient> and click Browse and Restore.
2. Click View Content.
3. In the left pane of the Client tab, expand Site, click to select the backed up site and click Recover All Selected.
4. Click Ok.
Configuration Backup Restore
Published On: 11/19/2013 V10 Service Pack 4A Page 69 of 201
5. In the Job Controller tab, track the process of your restore job.
6. Once the restore job has completed, right-click Site Collection Backup Set, point to View and then click Restore History.
7. Click Ok.
Published On: 11/19/2013 V10 Service Pack 4A Page 70 of 201
8. You can right-click the job and view the following details:
View Restore Items
You can view them as Successful, Failed, Skipped or All.
View Job Details
View Events of the restore job
View Log files of the restore job
Congratulations - You have successfully completed your first backup and restore.
If you want to further explore this Agent's features read the Advanced sections of this documentation.
Published On: 11/19/2013 V10 Service Pack 4A Page 71 of 201
Advanced Configuration - SharePoint Server iDataAgent -Databases
The Microsoft SharePoint Server iDataAgent uses the following logical entities to manage backup and restore operations from the CommCell Console.
Agent
Facilitates SharePoint database and document discovery.
Table of Contents
SharePoint 2013 SharePoint 2010 Search Server 2008 SharePoint 2007Microsoft Search Server 2013 Microsoft SharePoint Foundation 2010
SharePoint Server 2010 (Standard and Enterprise)
Microsoft Office Project Server 2010
Fast Search Server 2010 for SharePoint
Microsoft Search Server 2010
Microsoft Search Server 2010 Express
Microsoft Search Server 2008
Microsoft Search Server 2008 Express
Microsoft Office SharePoint Server (MOSS) 2007
Microsoft Office Project Server 2007
Microsoft Office Forms Server 2007
Understanding the CommCell Console
Creating User-Defined Backup Sets
Creating User-Defined Subclients
Setting Object Identity for Out-of-Place Restores
Configuring Backups for Windows SharePoint Services (WSS) Environments
Configuring Backups for Content Databases
Configuring Pre/Post Processing for Backups
Setting up Pre/Post ProcessesSetting Post Backup Processes to Run During Failures
Configuring User AccountsAt the Agent Level
Modifying an Agent, Backup Set, or Subclient
Deleting an Agent, Backup Set, or Subclient
Deleting an AgentDeleting a Backup SetDeleting a Subclient
Understanding the CommCell Console
Creating User-Defined Backup Sets
Creating User-Defined Subclients
Setting Object Identity for Out-of-Place Restores
Configuring Backups for Windows SharePoint Services (WSS) Environments
Configuring Backups for Content Databases
Configuring Pre/Post Processing for Backups
Setting up Pre/Post ProcessesSetting Post Backup Processes to Run During Failures
Configuring User Accounts
At the Agent Level
Modifying an Agent, Backup Set, or Subclient
Deleting an Agent, Backup Set, or Subclient
Deleting an AgentDeleting a Backup SetDeleting a Subclient
Understanding the CommCell Console
Published On: 11/19/2013 V10 Service Pack 4A Page 72 of 201

Database Backup Set
Defines the entities and information that are required to back up entire databases.
Document Backup Set
Defines all files and folders on the SharePoint server so that you can restore individual SharePoint files without restoring the entire database.
Site Collection Backup Set
Defines all the Site Collections that you can backup without backing up the entire database.
Subclient
Defines the contents of a backup operation, depending on whether the backup set includes databases or documents on the SharePoint server.
You can create user-defined backup sets that contain any number of databases that exist within the SharePoint server. You can use a Databases backup set to group SharePoint databases and database components into separate entities with their own unique backup schedules. For example, this is useful if you need to back up databses more frequently than others.
To create a Databases backup set:
1. From the CommCell Browser, expand Client Computers | <Client>.
2. Right-click SharePoint Server, point to All Tasks, and then click Create New Backup Set.
3. In the New Backup Set Name box, type a name.
4. In the Choose Backup Set Type section, select SharePoint Server Database.
5. From the Storage Policy list, click a storage policy name.
6. Click OK.
Creating User-defined Backup Sets
When you create a user-defined backup set, the contents of the user-defined backup set will be excluded from the Default backup set.
Creating User-Defined Subclients
Published On: 11/19/2013 V10 Service Pack 4A Page 73 of 201
In many cases, large databases might contain portions of data that require more frequent backups than others. For example, tables that consist of records that are entered on a daily basis might require nightly backups, whereas tables that consist of records that are entered on a quarterly basis might require only monthly backups. You can create different subclients in order to assign different backup schedules to certain entities and to group entities for restore operations. Databases subclients can include the following:
Configuration databases
Service applications
Windows SharePoint Services Web applications
Service application proxies
To create a user-defined Databases subclient:
1. From the CommCell Browser, navigate to Client Computers | <Client> | SharePoint Server.
2. Right-click Databases, point to All Tasks, and then click New Subclient.
3. In the Subclient Name box, type a name for the subclient.
4. Click the Storage Device tab.
5. On the Data Storage Policy sub-tab in the Storage Policy list, click a storage policy name.
6. Click the Contents tab and then click Configure.
7. In the Add/Modify Subclient Content dialog box, select the databases or other entities that you want to include in the subclient.
8. In the Change all selected data types to list, select the name of the subclient that you entered in step 3.
9. Click OK.
10. Click OK.
By default during an Out-of-Place restore the object identity is not retained. However, you can configure this additional setting to retain the object identity of a SharePoint site's URL. Follow the steps given below to set the additional settings:
1. From the CommCell Browser, navigate to Client Computers.
2. Right-click the <Client> and then click Properties.
3. On the Client Computer Properties dialog box, click Advanced.
4. Click the Additional Settings tab.
When you create a user-defined subclient, the contents of the user-defined subclient will be excluded from the Default subclient.
Setting Object Identity for Out-of-Place Restores
Published On: 11/19/2013 V10 Service Pack 4A Page 74 of 201
5. Click Add.
6. In the Name box, type bSiteImportRetainObjectIdentity. The Category and Type details will be automatically populated.
Alternatively, you can click Lookup and search for the additional setting using the Find box.
7. In the Value field, enter 1 to enable.
8. Click OK.
If you want to back up a SharePoint Database in a Windows SharePoint Services (WSS) environment, where the instance name of the Windows Internal Database is in the format, MachineName\Microsoft##SSEE, set the following options:
1. In SQL Server Configuration Manager|Protocols for <MachineName\Microsoft##SSEE>, change the Hide Instance flag to No.
2. In SQL Server Configuration Manager | SQLServer 2005 Services, run the SQL Server Browser service.
3. In SQL Server Configuration Manager|Protocols for <MachineName\Microsoft##SSEE>, set Named Pipes to active.
By default the Content databases are excluded from backups operation. We recommend to use the SQL Server iDataAgent to backup the Content Databases. However, you can configure to backup the content databases using the SharePoint Server iDataAgent as follows:
1. From the CommCell Browser, navigate to Client Computers |<Client>
2. Right-click SharePoint Server and then click Properties.
3. Clear the Exclude Content Databases checkbox.
4. Click Ok.
Configuring Backups for Windows SharePoint Services (WSS) Environments
Configuring Backups for Content Databases
Published On: 11/19/2013 V10 Service Pack 4A Page 75 of 201
You can add and modify Pre/Post processes for a subclient. These are batch files or shell scripts that you can run before or after certain job phases. For example, you can use an echo command to check the level of a backup. Similarly, you can include a case statement within a script to run specific operations based on the level of the backup job.
A Save As Script file can also be run as a pre/post process, if you include the absolute path of the associated input file in the script file.
Setting up Pre/Post Processes
1. From the CommCell Browser, expand Client Computers | <Client> | SharePoint Server, and then click <Backup Set>.
2. In the <Backup Set> tab, right-click the <Subclient>, and then click Properties.
3. In the Subclient Properties dialog box, click the Pre/Post Process tab.
4. To set up a Pre Backup process, next to the PreBackup process box, click Browse, and then select a process.
5. Click OK to save your selection.
Configuring Pre/Post Processing for Backups
Published On: 11/19/2013 V10 Service Pack 4A Page 76 of 201

6. To set up a Post Backup process, next to the PostBackup process box, click Browse, and then select a process.
7. Click OK to save your selection.
8. Click OK.
Setting Post Backup Processes to Run During Failures
By default, a specified post process command is executed only on successful completion of the backup operation or if the job is killed. Use the following steps to run a post process even if the backup operation did not complete successfully. For example, this may be useful to bring a database online or release a snapshot.
1. From the CommCell Browser, expand Client Computers | <Client> | SharePoint Server, and then click <Backup Set>.
2. In the <Backup Set> tab, right-click the <Subclient>, and then click Properties.
3. In the Subclient Properties dialog box, click the Pre/Post Process tab.
Published On: 11/19/2013 V10 Service Pack 4A Page 77 of 201

4. To set up a Post Backup process, next to the PostBackup process box, click Browse, and then select a process.
5. Click OK to save your selection.
6. Select Run Post Backup Process for all attempts.
7. Click OK.
The SharePoint Server iDataAgent and SharePoint Archiver require a user account that has sufficient privileges for the software to:
Log on to the file server to access the data.
Create and modify the SharePoint database.
Perform backup and restore operations.
The SharePoint Agents require an user account with the following privileges:
Member of the local Administrator Group.
Member of the SharePoint Administrator Group.
SharePoint Server Farm Administrator
System Administrator role on the SQL Server Instance.
SP Shell Administrator permissions.
This account must have "Log on as Service" permissions to ensure the Communication (CVD) Services will start.
Also, Web Application Pools users must have read access to the following location: [hkey_local_machine]\[software]\[CommVault Systems Registry].
Additional accounts should be established by the SharePoint database administrator.
Initially, the SharePoint Administrator account credentials is provided during the Agent installation. You can subsequently change the user account at the Agent level.
At the Agent Level
You can change the following user accounts:
the Administrative Account
Configuring User Accounts
Refer to the Knowledge Base article Galaxy Service Account User Information for Windows 2003 and Window Server 2003 clients available from the Maintenance Advantage web site.
Published On: 11/19/2013 V10 Service Pack 4A Page 78 of 201
the SSO Administrator Account for the service on the associated SharePoint Portal server
Use the following steps to change the Administrator account:
1. From the CommCell Browser, navigate to Client Computers | <Client>.
2. Right-click Sharepoint Server and click Properties.
3. Click Change Account.
4. Type the SharePoint Administrator user name in the SharePoint Administrator Account box.
5. Type the password in Password box and retype it in the Confirm Password box.
6. Click OK.
Use the following steps to change the SSO Administrator account:
1. From the CommCell Browser, navigate to Client Computers | <Client>.
2. Right-click Sharepoint Server and click Properties.
3. Click Change Account.
4. Type the SharePoint SSO user name in the SharePoint SSO Account box.
5. Type the password in Password field and retype it in the Confirm Password box.
6. Click OK.
Published On: 11/19/2013 V10 Service Pack 4A Page 79 of 201
The following table describes the properties that can configured from the agent, backup set and subclient levels.
Modifying an Agent, Backup Set, or Subclient
OPTION DESCRIPTION RELATED TOPICS
Configuring the SharePoint iDataAgent for a Server Farm Deployment
This operation applies to server farm environments. You must configure the SharePoint Server iDataAgent to recognize remote SQL Servers.
You must install the Windows and SQL iDataAgents on the remote SQL Server to protect its data; the SharePoint iDataAgent will not do so. Ensure that backups of the SharePoint Server and the remote SQL Server are scheduled to run at about the same time.
1. From the CommCell Browser, navigate to Client Computers | Client
2. Right-click SharePoint Server, and then click Properties.
3. On the General tab, select SQL Databases hosted on a remote SQL Server.
4. Click OK. Configuring the SharePoint Server iDataAgent for Single Sign-On Service
If the SharePoint Server is configured to use the Single Sign-on Service, then the administrator account for this service must be entered in the SharePoint Server iDataAgent properties before any backups are run.
1. From the CommCell Browser, navigate to Client Computers | Client
2. Right-click SharePoint Server, and then click Properties.
3. On the General tab, under SSO Account, click Change Account.
The Change SharePoint SSO Account dialog box appears.
4. In the SharePoint SSO Account box, enter the SSO user name.
5. In the Password box, enter the associated password.
6. In Confirm Password box, enter the password again.
7. Click OK.
Published On: 11/19/2013 V10 Service Pack 4A Page 80 of 201
8. Click OK. Changing Storage Policies
You can modify the storage policies in any of the following situations: To include a different media for the backup operation. To use a storage policy with a different retention criteria.
You can change the storage policies from the subclient level.
1. From the CommCell Browser, right-click the subclient.
2. Click Properties.
3. Click Storage Device.
4. Select the Storage policy from the drop-down menu.
5. Click OK.
Refer to Storage Policies.
Renaming a Subclient You can rename backup sets and subclients.
Renaming BackupSet:
1. From the CommCell Bowser, navigate to Client Computers | <Client> | File System.
2. Right-click the <Backup Set>, and then click Properties.
3. In the Backup Set box, type a name.
4. Click OK.
Renaming subclient:
1. From the CommCell Browser, navigate to Client Computers | <Client> | File System | <Backup Set>.
2. Right-click the <user-defined Subclient>, and then click Properties.
3. In the Subclient Name box, type a name.
4. Click OK. Setting Data Transfer Options
You can efficiently configure the available resources for transferring data secured by data protection operations from the subclient level. This includes the following:
Enable or disable Data Compression either on the client or the MediaAgent. Configure the transfer of data in the network using the options for Network Bandwidth Throttling and Network Agents.
You can configure the data transfer options.
1. From the CommCell Browser, expand Client Computers | <Client> | SharePoint Server, and then click <Backup Set>.
2. In the <Backup Set> tab, right-click the <Subclient>, and then click Properties.
3. Click the Storage Device tab.
4. Click the Data Transfer Option tab.
5. Choose the appropriate software compression option for this subclient.
6. Select the Throttle Network Bandwidth check box, and set the required bandwidth.
7. Click OK.
Refer to Data Compressionand Network Bandwidth Throttling.
Viewing Data Paths You can view the data paths associated with the primary storage policy copy of the selected storage policy or incremental storage policy. You can also modify the data paths including their priority from the subclient level.
1. From the CommCell Browser, expand Client Computers | <Client> | SharePoint Server, and then click <Backup Set>.
2. In the <Backup Set> tab, right-click the <Subclient>, and then click Properties.
3. Click the Storage Device tab.
4. In the Storage Policy list, click a storage policy name.
5. Click Data Paths. Configuring Activity Control
You can enable backup operations from both the agent and subclient level. However, you can enable restore operations only from the agent level.
1. From the CommCell Browser, expand Client Computers | <Client> | SharePoint Server, and then click <Backup Set>.
2. In the <Backup Set> tab, right-click the <Subclient>, and then click Properties.
Refer to Activity Control.
Published On: 11/19/2013 V10 Service Pack 4A Page 81 of 201

The following sections describe the steps involved in deleting an agent, instance, or subclient.
Deleting an Agent
You need to uninstall or DeConfigure the agent software from the client computer before deleting from CommCell Browser. After you delete the client software, you can either leave the corresponding data intact for appropriate action or you can remove the data immediately. If you choose to remove the data immediately, you must delete the agent from the CommCell Browser. If you delete the agent, all of the agent's data is irretrievably lost.
You cannot delete an agent while operations for that agent are running.
1. From the CommCell Browser, navigate to Client Computers | <Client>.
2. Right-click the <Agent>, and then click Delete.
3. A confirmation message is displayed with the following message:
This operation will permanently delete the data backed up from this level and it cannot be restored.
4. Click OK to continue with the deletion operation or click No to abort the deletion.
Deleting a Backup Set
Consider the following before deleting a Backup Set:
3. Click the Activity Control tab, and then configure the option. To activate backup operations, select Enable Backup. To disable backup operations, clear Enable Backup.
4. Click OK. Configuring Data Encryption Data encryption must be enabled at the client level before you can configure data
encryption at the subclient level. You can configure data encryption from the subclient level.
1. From the CommCell Browser, expand Client Computers | <Client> | SharePoint Server, and then click <Backup Set>.
2. In the <Backup Set> tab, right-click the <Subclient>, and then click Properties.
3. In the Subclient Properties dialog box, click the Encryption tab.
4. Select one of the following encryption options. To disable data encryption, select None. To encrypt data on the media only, select Media Only (MediaAgent side). To encrypt data on the network and on the media, select Network and Media (Agent Side). to encrypt data on the network, and then decrypt data on the media, select Network Only (Agent Encrypts, MediaAgent Decrypts).
5. Click OK. CommCell Configuration Report
The CommCell Configuration Report provides the properties of the CommServe, MediaAgents, clients, agents, subclients, and storage policies within the CommCell based on the selected filter criteria.
1. On the CommCell Console menu bar, select the Reports tab, and then click the button for the report that you want to run.
The Report Selection dialog box appears.
2. From the Reports pane, select CommCell Configuration, and then click Run.
The report appears in your default Web browser.
Refer to CommCell Configuration Report.
Deleting an Agent, Backup Set, or Subclientt
When you delete an instance or backupset, the associated data is logically deleted and you can no longer access the corresponding data from CommCell Console for recovery purposes.
Refer to the troubleshooting article on Recovering Data Associated with Deleted Clients and Storage Policies for information on how to recover data if you accidentally delete an entity.
Published On: 11/19/2013 V10 Service Pack 4A Page 82 of 201
You cannot delete a default Backup Set.
Schedules associated with the Backup Set are also automatically deleted.
1. From the CommCell Browser, navigate to Client Computers | <Client> | <Agent>.
2. Right-click the <Backup Set>, and then click Delete.
3. A confirmation message is displayed, asking if you want to delete the Backup Set.
Click No to cancel the deletion and retain the Backupset, or click Yes to continue the deletion.
Deleting a Subclient
Consider the following before deleting a subclient:
You cannot delete a default subclient.
Schedules associated with the subclient are also automatically deleted.
1. From the CommCell Browser, navigate to Client Computers | <Client> | <Agent> | <Backup Set>.
2. Right-click the <subclient> that you want to delete, and then click Delete.
3. A confirmation message is displayed, asking if you want to delete the subclient.
Click No to cancel the deletion and retain the subclient, or click Yes to continue the deletion.
Keywords
Published On: 11/19/2013 V10 Service Pack 4A Page 83 of 201

Advanced Backup – Databases – SharePoint Server iDataAgent
Full Backups
Differential Backups
Scheduling a Backup
Managing JobsConfigure Job Restartability for an Individual JobControlling Jobs
Additional Options
Full backups provide the most comprehensive protection of data. To perform a full backup:
1. In the CommCell Browser, expand Client Computers | <Client> | SharePoint Server, and then click Databases.
2. In the Databases tab, right-click a <Subclient>, and then click Backup.
3. In the Backup Options dialog box, select Full, and then click OK.
In the Job Controller tab, you can track the progress of the job. When the backup has completed, the Job Controller displays Completed.
When SharePoint is configured in a Server Farm configuration, SQL databases must be backed up using the SQL iDataAgent. For more information, see Advanced Backup – SQL Server iDataAgent.
A differential backup contains only the data that is new or has been changed since the last full backup. Differential backups consume less media and use less resources than full backups. Differential backups are cumulative. This means that each differential backup contains all changes accumulated since the last full backup. Each successive differential backup contains all the changes from the previous differential backup.
1. In the CommCell Browser, expand Client Computers | <Client> | SharePoint Server, and then click Databases.
Table of contents
Full Backups
Differential Backups
Published On: 11/19/2013 V10 Service Pack 4A Page 84 of 201
2. In the Databases tab, right-click <Subclient>, and then click Backup.
3. In the Backup Options dialog box, select Differential, and then click OK.
In the Job Controller tab, you can track the progress of the job. When the backup has completed, the Job Controller displays Completed.
Follow the steps below to schedule a backup:
1. In the CommCell Browser, expand Client Computers | <Client> | SharePoint Server, and then click Databases.
2. In the Databases tab, right-click a <Subclient>, and then click Backup.
Scheduling a Backup
Published On: 11/19/2013 V10 Service Pack 4A Page 85 of 201

3. In the Backup Options dialog box, select Schedule, and then click Configure.
4. In the Schedule Name box, enter a name for the schedule, and then select the appropriate scheduling options.
For example:
Select Weekly, and then change the Start Time to 9:00 PM.
5. Click OK to close the Schedule Details dialog box.
6. Click OK to close the Backup Options dialog box.
The backup job will execute according to the options that you selected.
Configure Job Restartability for an Individual Job
1. In the CommCell Browser, expand Client Computers | <Client> | SharePoint Server, and then click Databases.
A tab for Databases appears in the CommCell Console.
2. Right-click a <Subclient>, and then click Backup.
3. Click Advanced.
4. In the Advanced Backup Options dialog box, click the Job Retry tab.
5. Select Enable Total Running Time and specify the maximum elapsed time before a job can be restarted or killed.
Select Kill Running Jobs When Total Running Time Expires to kill the job after reaching the maximum elapsed time.
6. Select Enable Number Of Retries and specify the number of retries.
7. Click OK.
8. Click OK to close the Backup Options dialog box.
Managing Jobs
Published On: 11/19/2013 V10 Service Pack 4A Page 86 of 201
Controlling Jobs
The following controls are available for running jobs in the Job Controller window:
Suspending a Job
1. From the Job Controller of the CommCell Console, right-click the job and select Suspend.
2. The job status may change to Suspend Pending for a few moments while the operation completes. The job status then changes to Suspended.
Resuming a Job
1. From the Job Controller of the CommCell Console, right-click the job and select Resume.
2. As the Job Manager attempts to restart the job, the job status changes to Waiting, Pending, or Running.
Killing a Job
1. From the Job Controller of the CommCell Console, right-click the job and select Kill.
2. Click Yes when the confirmation prompt appears if you are sure you want to kill the job. The job status may change to Kill Pending for a few moments while the operation completes. Once completed, the job status will change to Killed and it will be removed from the Job Controller window after five minutes.
The following table describes the available additional options to further refine your backup operations:
SuspendTemporarily stops a job. A suspended job is not terminated; it can be restarted at a later time.
ResumeResumes a job and returns the status to Waiting, Pending, Queued, or Running. The status depends on the availability of resources, the state of the Operation Windows, or the Activity Control setting.
KillTerminates a job.
Additional Options
OPTION DESCRIPTION RELATED TOPICS
Startup Options Refer to Job Priority and
Published On: 11/19/2013 V10 Service Pack 4A Page 87 of 201
The Startup Options are used by the Job Manager to set priority for resource allocation. This is useful to give higher priority to certain jobs. You can set the priority as follows:
1. In the CommCell Browser, expand Client Computers | <Client> | SharePoint Server, and then click Databases.
2. Right-click the Subclient in the right pane and click Backup.
3. Click Advanced and click Startup tab.
4. Select the Change Priority checkbox.
5. Enter a priority number - 0 is the highest priority and 999 is the lowest priority.
6. Select the Start up in suspended State check box to start the job in a suspended state.
7. Click OK.
Priority Precedence.
Alerts This option enables users or user groups to get automatic notification on the status of the data protection job. Follow the steps given below to set up the criteria to raise notifications/alerts:
1. In the CommCell Browser, expand Client Computers | <Client> | SharePoint Server, and then click Databases.
2. Right-click the Subclient in the right pane and click Backup.
3. Click Advanced and select the Alert tab.
4. Click Add Alert.
5. From the Add Alert Wizard dialog box, select the required threshold and notification criteria and click Next.
6. Select the required notification types and click Next.
7. Select the recipients and click Next.
8. Click Finish.
9. Click OK.
Refer to Alerts.
Command Line Backups
Command Line Interface enables you to perform backups or restore from the command line. The commands can be executed from the command line or can be integrated into scripts.
You can also generate command line scripts for specific operations from the CommCell Browser using the Save As Script option.
Refer to Command Line Interface.
CommCell Readiness Report
The CommCell Readiness Report provides you with vital information such as connectivity and readiness of the Client, MediaAgent, and CommServe. It is useful to run this report before performing a backup or a recovery operation. Follow the steps given below to generate the report:
1. On the CommCell Console menu bar, select the Reports tab.
2. Click Readiness.
The Report Selection dialog box appears.
3. If necessary, select Reports | CommServer | CommCell Readiness in the left pane.
4. Select the Computers tab, and then click Modify below the Computers list.
5. In the dialog box that appears, clear Include All Client Computers and All Client Groups.
6. Select the appropriate client from the Exclude list, and then click Include >.
7. Click OK.
8. Select the MediaAgent tab, and then clear Include All MediaAgents.
9. Select the appropriate MediaAgent from the Exclude list, and then click Include >.
10. Click Run.
The report appears in your default Web browser.
Refer to CommCell Readiness Report.
Backup Job Summary Report
The Backup Job Summary Report provides you with information about all of the backup jobs that are run in last 24 hours for a specific subclient. You can get information such as status, time, data size, and so on for each backup job. It is useful to run this report after performing the backup. Follow the steps given below to generate the report:
Refer to Backup Job Summary Report.
Published On: 11/19/2013 V10 Service Pack 4A Page 88 of 201
1. On the CommCell Console menu bar, select the Reports tab.
2. Click Summary.
The Report Selection dialog box appears.
3. If necessary, select Reports | Jobs | Job Summary in the left pane.
4. On the General tab, select Data Management.
5. Select the Computers tab.
6. Select Subclient, and then select the Edit sub tab.
7. Navigate to Client Computers | <Client> | File System | Backup Set | <Subclient>.
8. Click Run.
The report appears in your default Web browser.Data Path Options Data Protection operations use a default Library, MediaAgent, Drive Pool, and Drive
as the Data Path. You can use this option to change the data path if the default data path is not available. Follow the steps given below to change the default data path:
1. In the CommCell Browser, expand Client Computers | <Client> | SharePoint Server, and then click Databases.
2. Right-click the Subclient in the right pane and click Backup.
3. Click Advanced and select the Data Path tab.
4. Select the MediaAgent and Library.
5. Select the Drive Pool and Drive for tape library.
6. Click OK.
Refer to Change Data Path.
Start New Media The Start New Media option enables you to start the data protection operation on a new media. This feature provides control over where the data physically resides. Use the following steps to start the data protection operation on a new media:
1. In the CommCell Browser, expand Client Computers | <Client> | SharePoint Server, and then click Databases.
2. Right-click the Subclient in the right pane and click Backup.
3. Click Advanced and select the Media tab.
4. Select the Start New Media check box.
5. Click OK.
Refer to Start New Media.
Mark Media Full on Success This option marks the media as full, two minutes after the successful completion of
the data protection job. This option prevents another job from writing to this media. Follow the steps given below:
1. In the CommCell Browser, expand Client Computers | <Client> | SharePoint Server, and then click Databases.
2. Right-click the Subclient in the right pane and click Backup.
3. Click Advanced and select Media tab.
4. Select the Mark Media Full on Success check box.
5. Click OK.
Refer to Export Media.
Allow Other Schedules to Use Media Set The Allow Other Schedules to use Media Set option allows jobs that are part of the
schedule or schedule policy and using the specific storage policy to start a new media. It also prevents other jobs from writing to the same set of media.
1. In the CommCell Browser, expand Client Computers | <Client> | SharePoint Server, and then click Databases.
2. Right-click the Subclient in the right pane and click Backup.
3. Click Advanced and select the Media tab.
4. Select the Allow Other Schedules To Use Media Set check box.
5. Click OK.
Refer to Creating an Exportable Media Set.
Extended Data Retention This option allows you to extend the expiration date of a specific job. This will override
the default retention set at the corresponding storage policy copy. Follow the steps given below to extend the expiration date:
Refer to Extended Retention Rules.
Published On: 11/19/2013 V10 Service Pack 4A Page 89 of 201
1. In the CommCell Browser, expand Client Computers | <Client> | SharePoint Server, and then click Databases.
2. Right-click the Subclient in the right pane and click Backup.
3. Click Advanced and select the Media tab.
4. Select one of the following options: Infinite - Select this option to extend the expiration date by infinite number of days Number of day - Select this option to specify the number of days to extend the expiration date and then enter the number of days.
5. Click OK. Vault Tracker This feature provides the facility to manage media that is removed from a library and
stored in offsite locations. Depending on your VaultTracker setup, select the required options. Use the following steps to access and select the VaultTracker options.
1. In the CommCell Browser, expand Client Computers | <Client> | SharePoint Server, and then click Databases.
2. Right-click the Subclient in the right pane and click Backup.
3. Click Advanced and select the VaultTracking tab.
4. Select the required options.
5. Click OK.
Refer to Vault Tracker or Vault Tracker Enterprise.
Published On: 11/19/2013 V10 Service Pack 4A Page 90 of 201

Advanced Restore - Databases - SharePoint Server iDataAgent
Restore Browse and Restore Offline Restore
Table of Contents
SharePoint 2013 SharePoint 2010 Search Server 2008 SharePoint 2007Microsoft Search Server 2013 Microsoft SharePoint Foundation
2010
SharePoint Server 2010 (Standard and Enterprise)
Microsoft Office Project Server 2010
Fast Search Server 2010 for SharePoint
Microsoft Search Server 2010
Microsoft Search Server 2010 Express
Microsoft Search Server 2008
Microsoft Search Server 2008 Express
Microsoft Office SharePoint Server (MOSS) 2007
Microsoft Office Project Server 2007
Microsoft Office Forms Server 2007
Restoring a WSS Web Application
To the Same ConfigurationTo a New Configuration
Restoring a Service Application and Corresponding Proxies
To the Same ConfigurationTo a New Configuration
Restoring Application Registry Service
To the Same ConfigurationTo a New Configuration
Restoring Microsoft SQL Server Reporting Services Diagnostics Service
To the Same ConfigurationTo a New Configuration
Restoring Microsoft SharePoint Server Diagnostics Service
To the Same ConfigurationTo a New Configuration
Restoring Microsoft SharePoint Foundation Diagnostics Service
To the Same ConfigurationTo a New Configuration
Restoring SharePoint Foundation Help Search
To the Same ConfigurationTo a New Configuration
Restoring Info Path FormsTo the Same ConfigurationTo a New Configuration
Restoring Global Search Settings
To the Same Configuration
Restoring a WSS Web Application
To the Same ConfigurationTo a New Configuration
Restoring a Search Server Shared Service Provider
To the Same ConfigurationTo a New Configuration
Scheduling a Restore
Managing Restore JobsControlling Jobs
Additional Restore Options
Restoring a WSS Web Application
To the Same ConfigurationTo a New Configuration
Restoring a Shared Service Provider
To the Same ConfigurationTo a New Configuration
Restoring a Single Sign-on Database
To the Same Configuration To a New Configuration
Scheduling a Restore
Managing Restore JobsControlling Jobs
Additional Restore Options
Published On: 11/19/2013 V10 Service Pack 4A Page 91 of 201
To the Same Configuration
To restore WSS Web Application to the same client:
1. In the CommCell Browser, expand Client Computers | <Client> | SharePoint Server.
2. Right-click <Databases Backup Set>, point to All Tasks, and then click Browse and Restore.
3. In the Browse and Restore Options dialog box, click View Content.
The Client browse tab lists all of the latest data that was backed up.
4. From the Client browse tab, expand the WSS Web Application node, select the required Web Application or only Content database, and then click Recover all Selected.
5. Click on the Web Application tab.
6. Double-click the Login Name and Password to change the user account details of the Web Application Pool account.
7. From the Restore Options dialog box, click OK.
To a New Configuration
To restore a WSS Web Application Database to a different client:
1. In the CommCell Browser, expand Client Computers | <Client> | SharePoint Server.
2. Right-click <Databases Backup Set>, point to All Tasks, and then click Browse and Restore.
3. In the Browse and Restore Options dialog box, click View Content.
The Client browse tab lists all of the latest data that was backed up.
4. From the Client browse tab, expand the WSS Web Application node, select Web Application, and then click Recover all Selected.
5. On the General tab, select New Configuration and optionally from the Destination client list, select the client to which you want to
To a New Configuration
Resorting SharePoint Server State Service
To the Same ConfigurationTo a New Configuration
Resorting SharePoint Server State Service Proxy
To the Same ConfigurationTo a New Configuration
Scheduling a Restore
Managing Restore JobsControlling Jobs
Additional Restore Options
To a New Configuration
Resorting SharePoint Server State Service
To the Same ConfigurationTo a New Configuration
Resorting SharePoint Server State Service Proxy
To the Same ConfigurationTo a New Configuration
Scheduling a Restore
Managing Restore JobsControlling Jobs
Additional Restore Options
Restoring a Windows SharePoint Services (WSS) Web Application
Published On: 11/19/2013 V10 Service Pack 4A Page 92 of 201

restore.
6. Click on the Web Application tab and optionally modify the Web Application name and the URL.
7. Double-click the Login Name and Password to change the user account details of the Web Application Pool account.
8. Click OK.
To the Same Configuration
Set the SQL Server Instance Service Account and SharePoint 2010 Timer Service Account to Local System. Once the restore operation is finished, you can switch the settings back to the previous accounts (e.g., Network Service).
To restore Service Application to the same destination:
1. In the CommCell Browser, expand Client Computers | <Client> | SharePoint Server.
2. Right-click <Databases Backup Set>, point to All Tasks, and then click Browse and Restore.
3. In the Browse and Restore Options dialog box, click View Content.
The Client browse tab lists all of the latest data that was backed up.
4. From Client browse tab, expand Shared Services | Shared Services Applications, select the appropriate <Service Application> and then click Recover All Selected.
5. Double-click the Login Name and Password to change the user account details.
6. Click OK.
Once the restore completes, follow the steps given below to restore the Service Application Proxy.
1. In the CommCell Browser, expand Client Computers | <Client> | SharePoint Server.
2. Right-click <Databases Backup Set>, point to All Tasks, and then click Browse and Restore.
3. In the Browse and Restore Options dialog box, click View Content.
The Client browse tab lists all of the latest data that was backed up.
4. From Client browse tab, expand Shared Services | Shared Services Proxies, select the appropriate <Service Application Proxy> and then click Recover All Selected.
5. Click OK.
Restoring a Service Application and Corresponding Proxies
Published On: 11/19/2013 V10 Service Pack 4A Page 93 of 201

To a New Configuration
Before You Begin
Set the SQL Server Instance Service Account and SharePoint 2010 Timer Service Account to Local System. Once the restore operation is finished, you can switch the settings back to the previous accounts (e.g., Network Service).
To restore a Service Application to a new configuration:
1. In the CommCell Browser, expand Client Computers | <Client> | SharePoint Server.
2. Right-click <Databases Backup Set>, point to All Tasks, and then click Browse and Restore.
3. In the Browse and Restore Options dialog box, click View Content.
The Client browse tab lists all of the latest data that was backed up.
4. From Client browse tab, expand Shared Services | Shared Services Applications, select the appropriate <Service Application> and then click Recover All Selected.
5. On the General tab, select New Configuration and optionally from the Destination client list, select the client to which you want to restore.
6. Service applications with databases will display the Database tab, where Database Server, Database Name and Database files location may be modified.
7. On the Service Application tab, double-click the Login Name and Password to change the user account details. Optionally you can also modify the Service Name.
8. Click OK.
Once the restore completes, follow the steps given below to restore the Service Application Proxy.
1. In the CommCell Browser, expand Client Computers | <Client> | SharePoint Server.
2. Right-click <Databases Backup Set>, point to All Tasks, and then click Browse and Restore.
3. In the Browse and Restore Options dialog box, click View Content.
The Client browse tab lists all of the latest data that was backed up.
4. From Client browse tab, expand Shared Services | Shared Services Proxies, select the appropriate <Service Application Proxy> and then click Recover All Selected.
5. On the General tab, select New Configuration and optionally from the Destination client list, select the client to which you want to restore.
6. Optionally you can modify the Service Name on the Service Application Proxy tab.
7. Click OK.
Published On: 11/19/2013 V10 Service Pack 4A Page 94 of 201

To the Same Configuration
1. In the CommCell Browser, expand Client Computers | <Client> | SharePoint Server.
2. Right-click <Databases Backup Set>, point to All Tasks, and then click Browse and Restore.
3. In the Browse and Restore Options dialog box, click View Content.
The Client browse tab lists all of the latest data that was backed up.
4. From the Client browse tab, select Application Registry Services, and then click Recover all Selected.
5. Click the Database tab and verify the Database Server name and the Database Name.
6. Click the Service Application tab and enter the Password.
7. Click the Service Application Proxy tab and verify the Service Name.
8. Click Ok.
To a New Configuration
1. In the CommCell Browser, expand Client Computers | <Client> | SharePoint Server.
2. Right-click <Databases Backup Set>, point to All Tasks, and then click Browse and Restore.
3. In the Browse and Restore Options dialog box, click View Content.
The Client browse tab lists all of the latest data that was backed up.
4. From the Client browse tab, select Application Registry Services, and then click Recover all Selected.
5. On the General tab, select New Configuration and optionally from the Destination client list, select the client to which you want to restore.
Restoring Application Registry Service
Published On: 11/19/2013 V10 Service Pack 4A Page 95 of 201

6. Click the Database tab and verify the Database Server name and the Database Name.
7. Click the Service Application tab and enter the Password.
8. Click the Service Application Proxy tab and verify the Service Name.
9. Click Ok.
To the Same Configuration
1. In the CommCell Browser, expand Client Computers | <Client> | SharePoint Server.
2. Right-click <Databases Backup Set>, point to All Tasks, and then click Browse and Restore.
3. In the Browse and Restore Options dialog box, click View Content.
The Client browse tab lists all of the latest data that was backed up.
4. From the Client browse tab, select Microsoft SQL Server Reporting Services Diagnostics Service, and then click Recover all Selected.
5. Click Ok.
To a New Configuration
1. In the CommCell Browser, expand Client Computers | <Client> | SharePoint Server.
2. Right-click <Databases Backup Set>, point to All Tasks, and then click Browse and Restore.
3. In the Browse and Restore Options dialog box, click View Content.
Restoring Microsoft SQL Server Reporting Services Diagnostics Service
Published On: 11/19/2013 V10 Service Pack 4A Page 96 of 201
The Client browse tab lists all of the latest data that was backed up.
4. From the Client browse tab, select Microsoft SQL Server Reporting Services Diagnostics Service, and then click Recover all Selected.
5. On the General tab, select New Configuration and optionally from the Destination client list, select the client to which you want to restore.
6. Click Ok.
To the Same Configuration
1. In the CommCell Browser, expand Client Computers | <Client> | SharePoint Server.
2. Right-click <Databases Backup Set>, point to All Tasks, and then click Browse and Restore.
3. In the Browse and Restore Options dialog box, click View Content.
The Client browse tab lists all of the latest data that was backed up.
4. From the Client browse tab, select Microsoft SharePoint Server Diagnostics Service, and then click Recover all Selected.
5. Click Ok.
To a New Configuration
Restoring Microsoft SharePoint Server Diagnostics Service
Published On: 11/19/2013 V10 Service Pack 4A Page 97 of 201
1. In the CommCell Browser, expand Client Computers | <Client> | SharePoint Server.
2. Right-click <Databases Backup Set>, point to All Tasks, and then click Browse and Restore.
3. In the Browse and Restore Options dialog box, click View Content.
The Client browse tab lists all of the latest data that was backed up.
4. From the Client browse tab, select Microsoft SharePoint Server Diagnostics Service, and then click Recover all Selected.
5. On the General tab, select New Configuration and optionally from the Destination client list, select the client to which you want to restore.
6. Click Ok.
To the Same Configuration
1. In the CommCell Browser, expand Client Computers | <Client> | SharePoint Server.
2. Right-click <Databases Backup Set>, point to All Tasks, and then click Browse and Restore.
3. In the Browse and Restore Options dialog box, click View Content.
The Client browse tab lists all of the latest data that was backed up.
4. From the Client browse tab, select Microsoft SharePoint Foundation Diagnostics Service, and then click Recover all Selected.
5. Click Ok.
Restoring Microsoft SharePoint Foundation Diagnostics Service
Published On: 11/19/2013 V10 Service Pack 4A Page 98 of 201
To a New Configuration
1. In the CommCell Browser, expand Client Computers | <Client> | SharePoint Server.
2. Right-click <Databases Backup Set>, point to All Tasks, and then click Browse and Restore.
3. In the Browse and Restore Options dialog box, click View Content.
The Client browse tab lists all of the latest data that was backed up.
4. From the Client browse tab, select Microsoft SharePoint Foundation Diagnostics Service, and then click Recover all Selected.
5. On the General tab, select New Configuration and optionally from the Destination client list, select the client to which you want to restore.
6. Click Ok.
To the Same Configuration
1. In the CommCell Browser, expand Client Computers | <Client> | SharePoint Server.
2. Right-click <Databases Backup Set>, point to All Tasks, and then click Browse and Restore.
3. In the Browse and Restore Options dialog box, click View Content.
Restoring SharePoint Foundation Help Search
Published On: 11/19/2013 V10 Service Pack 4A Page 99 of 201
The Client browse tab lists all of the latest data that was backed up.
4. From the Client browse tab, select SharePoint Foundation Help Search, and then click Recover all Selected.
5. Click the Database tab and verify the Database Server name and the Database Name.
6. Click Ok.
To a New Configuration
1. In the CommCell Browser, expand Client Computers | <Client> | SharePoint Server.
2. Right-click <Databases Backup Set>, point to All Tasks, and then click Browse and Restore.
3. In the Browse and Restore Options dialog box, click View Content.
The Client browse tab lists all of the latest data that was backed up.
4. From the Client browse tab, select SharePoint Foundation Help Search, and then click Recover all Selected.
5. On the General tab, select New Configuration and optionally from the Destination client list, select the client to which you want to restore.
6. Click the Database tab and verify the Database Server name and the Database Name.
7. Click Ok.
Restoring Info Path Forms
Published On: 11/19/2013 V10 Service Pack 4A Page 100 of 201

To the Same Configuration
1. In the CommCell Browser, expand Client Computers | <Client> | SharePoint Server.
2. Right-click <Databases Backup Set>, point to All Tasks, and then click Browse and Restore.
3. In the Browse and Restore Options dialog box, click View Content.
The Client browse tab lists all of the latest data that was backed up.
4. From the Client browse tab, select Info Path Forms, and then click Recover all Selected.
5. Click the Database tab and verify the Database Server name and the Database Name.
6. Click Ok.
To a New Configuration
1. In the CommCell Browser, expand Client Computers | <Client> | SharePoint Server.
2. Right-click <Databases Backup Set>, point to All Tasks, and then click Browse and Restore.
3. In the Browse and Restore Options dialog box, click View Content.
The Client browse tab lists all of the latest data that was backed up.
4. From the Client browse tab, select Info Path Forms, and then click Recover all Selected.
5. On the General tab, select New Configuration and optionally from the Destination client list, select the client to which you want to restore.
6. Click the Database tab and verify the Database Server name and the Database Name.
7. Click Ok.
Published On: 11/19/2013 V10 Service Pack 4A Page 101 of 201

To the Same Configuration
1. In the CommCell Browser, expand Client Computers | <Client> | SharePoint Server.
2. Right-click <Databases Backup Set>, point to All Tasks, and then click Browse and Restore.
3. In the Browse and Restore Options dialog box, click View Content.
The Client browse tab lists all of the latest data that was backed up.
4. From the Client browse tab, select Global Search Settings, and then click Recover all Selected.
5. Click the Database tab and verify the Database Server name and the Database Name.
6. Click Ok.
To a New Configuration
1. In the CommCell Browser, expand Client Computers | <Client> | SharePoint Server.
2. Right-click <Databases Backup Set>, point to All Tasks, and then click Browse and Restore.
3. In the Browse and Restore Options dialog box, click View Content.
The Client browse tab lists all of the latest data that was backed up.
Restoring Global Search Settings
Published On: 11/19/2013 V10 Service Pack 4A Page 102 of 201
4. From the Client browse tab, select Global Search Settings, and then click Recover all Selected.
5. On the General tab, select New Configuration and optionally from the Destination client list, select the client to which you want to restore.
6. Click the Database tab and verify the Database Server name and the Database Name.
7. Click Ok.
To the Same Configuration
1. In the CommCell Browser, expand Client Computers | <Client> | SharePoint Server.
2. Right-click <Databases Backup Set>, point to All Tasks, and then click Browse and Restore.
3. In the Browse and Restore Options dialog box, click View Content.
The Client browse tab lists all of the latest data that was backed up.
4. From the Client browse tab, select SharePoint State Server Services, and then click Recover all Selected.
5. Click the Database tab and verify the Database Server name and the Database Name.
6. Click the Service Application tab and enter the Password.
7. Click Ok.
To a New Configuration
1. In the CommCell Browser, expand Client Computers | <Client> | SharePoint Server.
Resorting SharePoint Server State Service
Published On: 11/19/2013 V10 Service Pack 4A Page 103 of 201

2. Right-click <Databases Backup Set>, point to All Tasks, and then click Browse and Restore.
3. In the Browse and Restore Options dialog box, click View Content.
The Client browse tab lists all of the latest data that was backed up.
4. From the Client browse tab, select SharePoint State Server Services, and then click Recover all Selected.
5. On the General tab, select New Configuration and optionally from the Destination client list, select the client to which you want to restore.
6. Click the Database tab and verify the Database Server name and the Database Name.
7. Click the Service Application tab and enter the Password.
8. Click Ok.
To the Same Configuration
1. In the CommCell Browser, expand Client Computers | <Client> | SharePoint Server.
2. Right-click <Databases Backup Set>, point to All Tasks, and then click Browse and Restore.
3. In the Browse and Restore Options dialog box, click View Content.
The Client browse tab lists all of the latest data that was backed up.
4. From the Client browse tab, select SharePoint Server State Service Proxy, and then click Recover all Selected.
5. Click the Database tab and verify the Database Server name and the Database Name.
6. Click the Service Application tab and enter the Password.
7. Click the Service Application Proxy tab and verify the Service Name.
8. Click Ok.
Resorting SharePoint Server State Service Proxy
Published On: 11/19/2013 V10 Service Pack 4A Page 104 of 201
To a New Configuration
1. In the CommCell Browser, expand Client Computers | <Client> | SharePoint Server.
2. Right-click <Databases Backup Set>, point to All Tasks, and then click Browse and Restore.
3. In the Browse and Restore Options dialog box, click View Content.
The Client browse tab lists all of the latest data that was backed up.
4. From the Client browse tab, select SharePoint Server State Service Proxy, and then click Recover all Selected.
5. On the General tab, select New Configuration and optionally from the Destination client list, select the client to which you want to restore.
6. Click the Database tab and verify the Database Server name and the Database Name.
7. Click the Service Application tab and enter the Password.
8. Click the Service Application Proxy tab and verify the Service Name.
9. Click Ok.
To the Same Configuration
To restore a Search Server Shared Service Provider:
1. In the CommCell Browser, expand Client Computers | <Client> | SharePoint Server.
2. Right-click <Databases Backup Set>, point to All Tasks, and then click Browse and Restore.
3. In the Browse and Restore Options dialog box, click View Content.
The Client browse tab lists all of the latest data that was backed up.
4. From the Client browse tab, select Shared Services Provider, and then click Recover all Selected.
5. Click OK.
6. Set the restored Shared Services Provider as default, and then re-associate it with the WSS Web Application, if applicable.
7. If you created a Shared Services Provider for temporal usage, delete it.
Restoring a Search Server Shared Service Provider
Published On: 11/19/2013 V10 Service Pack 4A Page 105 of 201
To a New Configuration
The following option applies only to data that was backed up from a single server environment in which SQL databases were backed up with the SharePoint Server iDataAgent. If the data was backed up from a server farm environment, use the SQL Server iDataAgent to restore the files to a different location.
Before You Begin
Restore the WSS Web Application that hosted the Shared Services Provider. For instructions, see Restoring a Windows SharePoint Services (WSS) Web Application Content Database.
To restore a Search Server Shared Service Provider to a different client:
1. In the CommCell Browser, expand Client Computers | <Client> | SharePoint Server.
2. Right-click <Databases Backup Set>, point to All Tasks, and then click Browse and Restore.
3. In the Browse and Restore Options dialog box, click View Content.
The Client browse tab lists all of the latest data that was backed up.
4. From the Client browse tab, select Shared Service Provider, and then click Recover all Selected.
The Restore Options dialog box appears.
5. On the General tab, select New Configuration and optionally from the Destination client list, select the client to which you want to restore.
6. Click the Search Shared DB tab.
7. In the Database files location on the destination server box, enter the location where you want to save the files.
8. In the Log files location on the database server box, enter a location where you want to save the log files.
9. Click the Shared Service Provider DB tab.
10. In the Database files location on the destination server box, enter the location where you want to save the files.
11. In the Log files location on the database server box, enter a location where you want to save the log files.
12. Click the Search Index Server tab.
13. In the Index File Location box, enter a location where you want to save the index file.
14. Click OK.
Published On: 11/19/2013 V10 Service Pack 4A Page 106 of 201

To the Same Configuration
Before You Begin
It is recommended to restore all the components of Share Service Provider in a single job and not select individual components during restores.
To restore a Shared Service Provider:
1. In the CommCell Browser, expand Client Computers | <Client> | SharePoint Server.
2. Right-click <Databases Backup Set>, point to All Tasks, and then click Browse and Restore.
3. In the Browse and Restore Options dialog box, click View Content.
The Client browse tab lists all of the latest data that was backed up.
4. From Client browse tab, select <Shared Services Provider>, and then click Recover All Selected.
5. Click the Web Application tab and enter the Password.
6. Click the Shared Service Provider tab and enter the Password.
7. Click the User Profile Application tab and verify the Server Name.
8. Click OK.
To a New Configuration
The following option applies only to data that was backed up from a single server environment in which SQL databases were backed up with the SharePoint Server iDataAgent. If the data was backed up from a server farm environment, use the SQL Server iDataAgent to restore the files to a different location.
Restoring a Shared Service Provider
Published On: 11/19/2013 V10 Service Pack 4A Page 107 of 201
Before You Begin
It is recommended to restore all the components of Share Service Provider in a single job and not select individual components during restores.
To restore a Shared Service Provider to a different client:
1. In the CommCell Browser, expand Client Computers | <Client> | SharePoint Server.
2. Right-click <Databases Backup Set>, point to All Tasks, and then click Browse and Restore.
3. In the Browse and Restore Options dialog box, click View Content.
The Client browse tab lists all of the latest data that was backed up.
4. From Client browse tab, select <Shared Services Provider>, and then click Recover All Selected.
5. On the General tab, select New Configuration.
6. Click the Database tab and enter the Database Server path and the Database Name.
7. Click the Web Application tab and enter the Web Application name, URL, Login Name and the Password.
8. Click the Shared Service Provider tab and enter the Login name and the Password.
9. Click the Search Index tab and enter the Server Name and the Directory Location.
10. Click the User Profile Application tab and verify the Server Name.
11. Click OK.
To the Same Configuration
To restore a Single Sign-on Database:
1. In the CommCell Browser, expand Client Computers | <Client> | SharePoint Server.
2. Right-click <Databases Backup Set>, point to All Tasks, and then click Browse and Restore.
3. In the Browse and Restore Options dialog box, click View Content.
The Client browse tab lists all of the latest data that was backed up.
4. From the Client browse tab, select Single Sign-on Database, and then click Recover All Selected.
5. Click OK.
Restoring a Single Sign-on Database
Published On: 11/19/2013 V10 Service Pack 4A Page 108 of 201
To a New Configuration
The following option applies only to data that was backed up from a single server environment in which SQL databases were backed up with the SharePoint Server iDataAgent. If the data was backed up from a server farm environment, use the SQL Server iDataAgent to restore the files to a different location.
1. In the CommCell Browser, expand Client Computers | <Client> | SharePoint Server.
2. Right-click <Databases Backup Set>, point to All Tasks, and then click Browse and Restore.
3. In the Browse and Restore Options dialog box, click View Content.
The Client browse tab lists all of the latest data that was backed up.
4. From the Client browse tab, select Single Sign-on Database, and then click Recover All Selected.
5. On the General tab, select New Configuration and optionally from the Destination client list, select the client to which you want to restore.
6. In the Destination client list, select the client to which you want to restore.
7. Click the Database tab. It displays the Database Server Name and the Database Name.
8. Optionally, in case of a cross machine restore, Browse and select the Database file location on the Destination Server.
9. Click OK.
Published On: 11/19/2013 V10 Service Pack 4A Page 109 of 201
To schedule a restore:
1. In the CommCell Browser, expand Client Computers | <Client> | SharePoint Server.
2. Right-click <Databases Backup Set>, point to All Tasks, and then click Browse and Restore.
3. In the Browse and Restore Options dialog box, click View Content.
The Client browse tab lists all of the latest data that was backed up.
4. In the Client browse tab, select the database that you want to restore, and then click Recover All Selected.
5. In the Restore Options dialog box, click the Job Initiation tab.
6. Select Schedule, and then click Configure.
7. In the Schedule Name box, enter a name for the schedule.
8. Select the frequency with which you want the job to run, and then enter the corresponding date and time information.
9. Click OK.
10. Click OK.
Scheduling a Restore
Published On: 11/19/2013 V10 Service Pack 4A Page 110 of 201

Controlling Jobs
The following controls are available for running jobs in the Job Controller window:
Suspending a Job
1. From the Job Controller of the CommCell Console, right-click the job and select Suspend.
2. The job status may change to Suspend Pending for a few moments while the operation completes. The job status then changes to Suspended.
Resuming a Job
1. From the Job Controller of the CommCell Console, right-click the job and select Resume.
2. As the Job Manager attempts to restart the job, the job status changes to Waiting, Pending, or Running.
Killing a Job
1. From the Job Controller of the CommCell Console, right-click the job and select Kill.
2. Click Yes when the confirmation prompt appears if you are sure you want to kill the job. The job status may change to Kill Pending for a few moments while the operation completes. Once completed, the job status will change to Killed and it will be removed from the Job Controller window after five minutes.
Managing Restore Jobs
SuspendTemporarily stops a job. A suspended job is not terminated; it can be restarted at a later time.
ResumeResumes a job and returns the status to Waiting, Pending, Queued, or Running. The status depends on the availability of resources, the state of the Operation Windows, or the Activity Control setting.
KillTerminates a job.
Additional Restore Options
OPTION DESCRIPTION RELATED TOPICS
Skip Errors and Continue This option enables you to to continue the restore job regardless of media errors and
create a file that lists the full path names of the files that failed to get restored. Follow the steps given below to set this option:
1. In the CommCell Browser, expand Client Computers | <Client> | SharePoint Server.
Published On: 11/19/2013 V10 Service Pack 4A Page 111 of 201

2. Right-click <Backup Set>, point to All Tasks, and then click Browse and Restore.
3. In the Restore Options dialog box, click View Content.
The Client browse tab lists all of the latest data that was backed up.
4. In the Client tab, select the items that you want to restore, and then click Recover All Selected.
5. In the Restore Options dialog box, click Advanced.
6. In the Advanced Restore Options dialog box, click General.
7. On the General tab, select the Skip errors and continue check box.
8. Click OK. Startup Options The Startup Options are used by the Job Manager to set priority for resource
allocation. This is useful to give higher priority to certain jobs. You can set the priority as follows:
1. In the CommCell Browser, expand Client Computers | <Client> | SharePoint Server.
2. Right-click <Backup Set>, point to All Tasks, and then click Browse and Restore.
3. In the Restore Options dialog box, click View Content.
The Client browse tab lists all of the latest data that was backed up.
4. In the Client tab, select the items that you want to restore, and then click Recover All Selected.
5. In the Restore Options dialog box, click Advanced.
6. In the Advanced Restore Options dialog box, click Startup.
7. On the Startup tab, select Change Priority.
8. Enter a priority number - 0 is the highest priority and 999 is the lowest priority.
9. Select the Start up in suspended State check box to start the job in a suspended state.
10. Click OK.
Refer to Job Priority and Priority Precedence.
Copy Precedence By default, the system retrieves data from the storage policy copy with the lowest copy precedence. If the data was pruned from the primary copy, the system automatically retrieves data from the other copies of the storage policy in the lowest copy precedence to highest copy precedence order. Once the data is found, it is retrieved, and no further copies are checked.
You can retrieve data from a specific storage policy copy (Synchronous Copy or Selective Copy). If data does not exist in the specified copy, the data retrieve operation fails even if the data exists in another copy of the same storage policy. Follow the steps given below to retrieve the data from a a specific storage policy copy:
1. In the CommCell Browser, expand Client Computers | <Client> | SharePoint Server.
2. Right-click <Backup Set>, point to All Tasks, and then click Browse and Restore.
3. In the Restore Options dialog box, click View Content.
The Client browse tab lists all of the latest data that was backed up.
4. In the Client tab, select the items that you want to restore, and then click Recover All Selected.
5. In the Restore Options dialog box, click Advanced.
6. In the Advanced Restore Options dialog box, click Copy Precedence.
7. On the Copy Precedence tab, select the Restore from copy precedencecheck box.
8. Enter the copy precedence number.
9. Click OK.
Refer to Recovering Your Data from Copies.
Data Path Options The data recovery operations use a default Library, MediaAgent, Drive Pool, and Drive as the Data Path. You can use this option to change the data path if the default data path is not available. Follow the steps given below to change the default data
Refer to Change Data Path.
Published On: 11/19/2013 V10 Service Pack 4A Page 112 of 201

path:
1. In the CommCell Browser, expand Client Computers | <Client> | SharePoint Server.
2. Right-click <Backup Set>, point to All Tasks, and then click Browse and Restore.
3. In the Restore Options dialog box, click View Content.
The Client browse tab lists all of the latest data that was backed up.
4. In the Client tab, select the items that you want to restore, and then click Recover All Selected.
5. In the Restore Options dialog box, click Advanced.
6. In the Advanced Restore Options dialog box, click the Data Path tab.
7. Do any of the following to change the default data path: In the Use MediaAgent list, select the name of a MediaAgent. In the User Library list, select the name of a library. For tape library, in the Use Drive Pool list, select the name of a drive pool. For tape library, in the Use Drive list, select the name of a drive.
8. Click OK. Browse Options These options allow you to restore deleted items or data that was backed up before a
specific time, after a specific time, or during a specific time range.
1. In the CommCell Browser, expand Client Computers | <Client> | SharePoint Server.
2. Right-click <Backup Set>, point to All Tasks, and then click Browse and Restore.
3. In the Restore Options dialog box, click View Content.
The Client browse tab lists all of the latest data that was backed up.
4. In the Client tab, select the items that you want to restore, and then click Recover All Selected.
5. In the Restore Options dialog box, click Advanced.
6. In the Advanced Restore Options dialog box, click the Browse Options tab.
7. To restore deleted items, select Restore deleted items.
8. To restore items that were backed up during a specific time, select Specify Time Range.
9. From the Time Zone list, select a time zone.
10. Do any of the following to specify a time: To restore items that were backed up after a specific time, select Start Time, and then enter a date and time. To restore items that were backed up before a specific time, select End Time, and then enter a date and time. To restore items that were backed up during a specific time range, select both Start Time and End Time, and then enter the dates and times.
11. Click OK. Alerts This option enables users or user groups to get automatic notification on the status of
the data recovery job. Follow the steps given below to set up the criteria to raise notifications/alerts:
1. In the CommCell Browser, expand Client Computers | <Client> | SharePoint Server.
2. Right-click <Backup Set>, point to All Tasks, and then click Browse and Restore.
3. In the Restore Options dialog box, click View Content.
The Client browse tab lists all of the latest data that was backed up.
4. In the Client tab, select the items that you want to restore, and then click Recover All Selected.
5. In the Restore Options dialog box, click Advanced.
6. In the Advanced Restore Options dialog box, click Alerts.
Refer to Alerts and Notifications.
Published On: 11/19/2013 V10 Service Pack 4A Page 113 of 201
7. Click Add Alert.
8. From the Add Alert Wizard dialog box, select the required threshold and notification criteria and click Next.
9. Select the required notification types and click Next.
10. Select the recipients and click Next.
11. Click Finish.
12. Click OK. Command Line Restores
Command Line Interface enables you to perform backups or restore from the command line. The commands can be executed from the command line or can be integrated into scripts.
You can also generate command line scripts for specific operations from the CommCell Browser using the Save As Script option.
Refer to Command Line Interface.
CommCell Readiness Report
The CommCell Readiness Report provides you with vital information such as connectivity and readiness of the Client, MediaAgent, and CommServe. It is useful to run this report before performing a backup or a recovery operation. Follow the steps given below to generate the report:
1. On the CommCell Console menu bar, select the Reports tab.
2. Click Readiness.
The Report Selection dialog box appears.
3. If necessary, select Reports | CommServer | CommCell Readiness in the left pane.
4. Select the Computers tab, and then click Modify below the Computers list.
5. In the dialog box that appears, clear Include All Client Computers and All Client Groups.
6. Select the appropriate client from the Exclude list, and then click Include >.
7. Click OK.
8. Select the MediaAgent tab, and then clear Include All MediaAgents.
9. Select the appropriate MediaAgent from the Exclude list, and then click Include >.
10. Click Run.
The report appears in your default Web browser.
Refer to CommCell Readiness Report.
Restore Job Summary Report The Restore Job Summary Report provides you with information about all the data
recovery jobs that are run in last 24 hours for a specific client and agent. You can get information such as failure reason, failed objects, job options, and so on. It is useful to run this report after performing the restore. Follow the steps given below to generate the report:
1. On the CommCell Console menu bar, select the Reports tab.
2. Click Summary.
The Report Selection dialog box appears.
3. If necessary, select Reports | Jobs | Job Summary in the left pane.
4. On the General tab, select Data Recovery Jobs.
5. Select the Computers tab.
6. Select the appropriate client and the appropriate agent.
7. Click Run.
The report appears in your default Web browser.
Refer to Restore Job Summary Report.
Published On: 11/19/2013 V10 Service Pack 4A Page 114 of 201

Advanced Configuration - SharePoint Server iDataAgent -Documents
The Microsoft SharePoint Server iDataAgent uses the following logical entities to manage backup and restore operations from the CommCell Console.
Agent
Facilitates SharePoint database and document discovery.
Database Backup Set
Defines the entities and information that are required to back up entire databases.
Table of Contents
SharePoint 2013 SharePoint 2010 Search Server 2008 SharePoint 2007Microsoft Search Server 2013 Microsoft SharePoint Foundation
2010
SharePoint Server 2010 (Standard and Enterprise)
Microsoft Office Project Server 2010
Fast Search Server 2010 for SharePoint
Microsoft Search Server 2010
Microsoft Search Server 2010 Express
Microsoft Search Server 2008
Microsoft Search Server 2008 Express
Microsoft Office SharePoint Server (MOSS) 2007
Microsoft Office Project Server 2007
Microsoft Office Forms Server 2007
Understanding the CommCell Console
Creating User-Defined Backup Sets
Creating User-Defined Subclients
Setting Object Identity for Out-of-Place Restores
Configuring Filters for Backups
Filtering Files from a BackupConfiguring Exclusions to FiltersDeleting a Filter
Configuring Pre/Post Processing for Backups
Setting up Pre/Post ProcessesSetting Post Backup Processes to Run During Failures
Configuring User AccountsAt the Agent Level
Modifying an Agent, Backup Set, or Subclient
Deleting an Agent, Backup Set, or Subclient
Deleting an AgentDeleting a Backup SetDeleting a Subclient
Understanding the CommCell Console
Creating User-Defined Backup Sets
Creating User-Defined Subclients
Setting Object Identity for Out-of-Place Restores
Configuring Filters for Backups
Filtering Files from a BackupConfiguring Exclusions to FiltersDeleting a Filter
Configuring Pre/Post Processing for Backups
Setting up Pre/Post ProcessesSetting Post Backup Processes to Run During Failures
Configuring User AccountsAt the Agent Level
Modifying an Agent, Backup Set, or Subclient
Deleting an Agent, Backup Set, or Subclient
Deleting an AgentDeleting a Backup SetDeleting a Subclient
Understanding the CommCell Console
Published On: 11/19/2013 V10 Service Pack 4A Page 115 of 201
Document Backup Set
Defines all files and folders on the SharePoint server so that you can restore individual SharePoint files without restoring the entire database.
Site Collection Backup Set
Defines all the Site Collections that you can backup without backing up the entire database.
Subclient
Defines the contents of a backup operation, depending on whether the backup set includes databases or documents on the SharePoint server.
You can create user-defined backup sets that contain any number of documents that exist within the SharePoint server. You can use a Documents backup set to group SharePoint libraries, list into separate entities with their own unique backup schedules. For example, this is useful if you need to back up some documents more frequently than others.
To create a Documents backup set:
1. From the CommCell Browser, expand Client Computers | <Client>.
2. Right-click SharePoint Server, point to All Tasks, and then click Create New Backup Set.
3. In the New Backup Set Name box, type a name.
4. In the Choose Backup Set Type section, select Document Level.
5. From the Storage Policy list, click a storage policy name.
6. Click OK.
Creating User-defined Backup Sets
Published On: 11/19/2013 V10 Service Pack 4A Page 116 of 201

You can create subclients for the Documents backup set in order to assign different backup schedules to certain files and folders and to group files and folders for restore operations. You can also use a Documents subclient to restore individual documents or folders from the SharePoint server without having to restore the entire database. This is useful if you need to quickly restore a single file or folder.
To create a user-defined Documents subclient:
1. From the CommCell Browser, navigate to Client Computers | <Client> | SharePoint Server.
2. Right-click Documents, point to All Tasks, and then click New Subclient.
3. In the Subclient Name box, type a name.
4. Click the Storage Device tab.
5. On the Data Storage Policy sub-tab in the Storage Policy list, select a storage policy name.
6. Click the Content tab and then click Browse.
7. In the Browsing dialog box, select the folder or file that you want to back up, and then click Add.
8. Click Close.
9. Click OK.
Creating User-Defined Subclients
When you create a user-defined subclient, the contents of the user-defined subclient will be excluded from the Default subclient.
Published On: 11/19/2013 V10 Service Pack 4A Page 117 of 201
By default during an Out-of-Place restore the object identity is not retained. However, you can configure this additional setting to retain the object identity of a SharePoint site's URL. Follow the steps given below to set the additional settings:
1. From the CommCell Browser, navigate to Client Computers.
2. Right-click the <Client> and then click Properties.
3. On the Client Computer Properties dialog box, click Advanced.
4. Click the Additional Settings tab.
5. Click Add.
6. In the Name box, type bSiteImportRetainObjectIdentity. The Category and Type details will be automatically populated.
Alternatively, you can click Lookup and search for the additional setting using the Find box.
7. In the Value field, enter 1 to enable.
8. Click OK.
Setting Object Identity for Out-of-Place Restores
Published On: 11/19/2013 V10 Service Pack 4A Page 118 of 201
Prior to backups, you can set filters to prevent specific library folder or list folder. You should run a full backup after adding failed files to the filter in order to remove them.
Filtering Files from a Backup
1. From the CommCell Browser, expand Client Computers | <Client> | SharePoint Server, and then click <Backup Set>.
2. In the <Backup Set> tab, right-click the <Subclient>, and then click Properties.
3. In the Subclient Properties dialog box, click the Filters tab.
4. Next to the Exclude these folders box, click Browse.
5. In the Browe dialog box, select the sites that you want to exclude.
6. Click Add.
7. Click Close.
8. Click OK.
Configuring Filters for Backups
Published On: 11/19/2013 V10 Service Pack 4A Page 119 of 201
Configuring Exclusions to Filters
Once you set the filters, you can also provide exceptions for the filters. library folder or list folder added to the exception list will be included in thebackup operations.
1. From the CommCell Browser, expand Client Computers | <Client> | SharePoint Server, and then click <Backup Set>.
2. In the <Backup Set> tab, right-click the <Subclient>, and then click Properties.
3. In the Subclient Properties dialog box, click the Filters tab.
4. Next to the Except for these files/folders box, click Browse.
5. In the Browe dialog box, select the sites that you want to create the exception for exclusion.
6. Click Add.
7. Click Close.
8. Click OK.
Published On: 11/19/2013 V10 Service Pack 4A Page 120 of 201

Deleting a Filter
You can remove a filter by deleting it from the exclusion list. Data will not be backed up in a differential backup for a subclient after a filter is removed. Whenever you delete an entry from the exclusion filter, check if the exceptions list contains any entries that are children of the deleted data. If so, you should delete them, since they no longer need to be listed. The system automatically deletes any exceptions that are children of a deleted exclusion unless you used wildcard expressions in the exclusion path.
1. From the CommCell Browser, expand Client Computers | <Client> | SharePoint Server, and then click <Backup Set>.
2. In the <Backup Set> tab, right-click the <Subclient>, and then click Properties.
3. In the Subclient Properties dialog box, click the Filters tab.
4. In the Exclude these folders box, select the filter that you want to delete.
5. Click Delete.
The filter is removed from the list.
6. Click OK.
Published On: 11/19/2013 V10 Service Pack 4A Page 121 of 201

You can add and modify Pre/Post processes for a subclient. These are batch files or shell scripts that you can run before or after certain job phases. For example, you can use an echo command to check the level of a backup. Similarly, you can include a case statement within a script to run specific operations based on the level of the backup job.
A Save As Script file can also be run as a pre/post process, if you include the absolute path of the associated input file in the script file.
Setting up Pre/Post Processes
1. From the CommCell Browser, expand Client Computers | <Client> | SharePoint Server, and then click <Backup Set>.
2. In the <Backup Set> tab, right-click the <Subclient>, and then click Properties.
3. In the Subclient Properties dialog box, click the Pre/Post Process tab.
4. To set up a Pre Backup process, next to the PreBackup process box, click Browse, and then select a process.
5. Click OK to save your selection.
Configuring Pre/Post Processing for Backups
Published On: 11/19/2013 V10 Service Pack 4A Page 122 of 201

6. To set up a Post Backup process, next to the PostBackup process box, click Browse, and then select a process.
7. Click OK to save your selection.
8. Click OK.
Setting Post Backup Processes to Run During Failures
By default, a specified post process command is executed only on successful completion of the backup operation or if the job is killed. Use the following steps to run a post process even if the backup operation did not complete successfully. For example, this may be useful to bring a database online or release a snapshot.
1. From the CommCell Browser, expand Client Computers | <Client> | SharePoint Server, and then click <Backup Set>.
2. In the <Backup Set> tab, right-click the <Subclient>, and then click Properties.
3. In the Subclient Properties dialog box, click the Pre/Post Process tab.
Published On: 11/19/2013 V10 Service Pack 4A Page 123 of 201
4. To set up a Post Backup process, next to the PostBackup process box, click Browse, and then select a process.
5. Click OK to save your selection.
6. Select Run Post Backup Process for all attempts.
7. Click OK.
The SharePoint Server iDataAgent and SharePoint Archiver require a user account that has sufficient privileges for the software to:
Log on to the file server to access the data.
Create and modify the SharePoint database.
Perform backup and restore operations.
The SharePoint Agents require an user account with the following privileges:
Member of the local Administrator Group.
Member of the SharePoint Administrator Group.
SharePoint Server Farm Administrator
System Administrator role on the SQL Server Instance.
SP Shell Administrator permissions.
This account must have "Log on as Service" permissions to ensure the Communication (CVD) Services will start.
Also, Web Application Pools users must have read access to the following location: [hkey_local_machine]\[software]\[CommVault Systems Registry].
Additional accounts should be established by the SharePoint database administrator.
Initially, the SharePoint Administrator account credentials is provided during the Agent installation. You can subsequently change the user account at the Agent level.
At the Agent Level
You can change the following user accounts:
the Administrative Account
Configuring User Accounts
Refer to the Knowledge Base article Galaxy Service Account User Information for Windows 2003 and Window Server 2003 clients available from the Maintenance Advantage web site.
Published On: 11/19/2013 V10 Service Pack 4A Page 124 of 201

the SSO Administrator Account for the service on the associated SharePoint Portal server
Use the following steps to change the Administrator account:
1. From the CommCell Browser, navigate to Client Computers | <Client>.
2. Right-click Sharepoint Server and click Properties.
3. Click Change Account.
4. Type the SharePoint Administrator user name in the SharePoint Administrator Account box.
5. Type the password in Password box and retype it in the Confirm Password box.
6. Click OK.
Use the following steps to change the SSO Administrator account:
1. From the CommCell Browser, navigate to Client Computers | <Client>.
2. Right-click Sharepoint Server and click Properties.
3. Click Change Account.
4. Type the SharePoint SSO user name in the SharePoint SSO Account box.
5. Type the password in Password field and retype it in the Confirm Password box.
6. Click OK.
Published On: 11/19/2013 V10 Service Pack 4A Page 125 of 201
The following table describes the properties that can configured from the agent, backup set and subclient levels.
Modifying an Agent, Backup Set, or Subclient
OPTION DESCRIPTION RELATED TOPICS
Configuring the SharePoint iDataAgent for a Server Farm Deployment
This operation applies to server farm environments. You must configure the SharePoint Server iDataAgent to recognize remote SQL Servers.
You must install the Windows and SQL iDataAgents on the remote SQL Server to protect its data; the SharePoint iDataAgent will not do so. Ensure that backups of the SharePoint Server and the remote SQL Server are scheduled to run at about the same time.
1. From the CommCell Browser, navigate to Client Computers | Client
2. Right-click SharePoint Server, and then click Properties.
3. On the General tab, select SQL Databases hosted on a remote SQL Server.
4. Click OK. Configuring the SharePoint Server iDataAgent for Single Sign-On Service
If the SharePoint Server is configured to use the Single Sign-on Service, then the administrator account for this service must be entered in the SharePoint Server iDataAgent properties before any backups are run.
1. From the CommCell Browser, navigate to Client Computers | Client
2. Right-click SharePoint Server, and then click Properties.
3. On the General tab, under SSO Account, click Change Account.
The Change SharePoint SSO Account dialog box appears.
4. In the SharePoint SSO Account box, enter the SSO user name.
5. In the Password box, enter the associated password.
6. In Confirm Password box, enter the password again.
Published On: 11/19/2013 V10 Service Pack 4A Page 126 of 201

7. Click OK.
8. Click OK. Releasing Topology Manager Lock
You can release topology manager for backups and restores at the agent level.
1. From the CommCell Browser, navigate to Client Computers | Client
2. Right-click SharePoint Server, and then click Properties.
The SharePoint Server Properties dialog box appears.
3. On the General tab, select If topology manager is locked during backup/restore, force its release.
4. Click OK.
Changing Storage Policies
You can modify the storage policies in any of the following situations: To include a different media for the backup operation. To use a storage policy with a different retention criteria.
You can change the storage policies from the subclient level.
1. From the CommCell Browser, right-click the subclient.
2. Click Properties.
3. Click Storage Device.
4. Select the Storage policy from the drop-down menu.
5. Click OK.
Refer to Storage Policies.
Renaming a Subclient You can rename backup sets and subclients.
Renaming BackupSet:
1. From the CommCell Bowser, navigate to Client Computers | <Client> | File System.
2. Right-click the <Backup Set>, and then click Properties.
3. In the Backup Set box, type a name.
4. Click OK.
Renaming subclient:
1. From the CommCell Browser, navigate to Client Computers | <Client> | File System | <Backup Set>.
2. Right-click the <user-defined Subclient>, and then click Properties.
3. In the Subclient Name box, type a name.
4. Click OK. Setting Data Transfer Options
You can efficiently configure the available resources for transferring data secured by data protection operations from the subclient level. This includes the following:
Enable or disable Data Compression either on the client or the MediaAgent. Configure the transfer of data in the network using the options for Network Bandwidth Throttling and Network Agents.
You can configure the data transfer options.
1. From the CommCell Browser, expand Client Computers | <Client> | SharePoint Server, and then click <Backup Set>.
2. In the <Backup Set> tab, right-click the <Subclient>, and then click Properties.
3. Click the Storage Device tab.
4. Click the Data Transfer Option tab.
5. Choose the appropriate software compression option for this subclient.
6. Select the Throttle Network Bandwidth check box, and set the required bandwidth.
7. Click OK.
Refer to Data Compressionand Network Bandwidth Throttling.
Viewing Data Paths You can view the data paths associated with the primary storage policy copy of the selected storage policy or incremental storage policy. You can also modify the data paths including their priority from the subclient level.
1. From the CommCell Browser, expand Client Computers | <Client> | SharePoint Server, and then click <Backup Set>.
Published On: 11/19/2013 V10 Service Pack 4A Page 127 of 201
The following sections describe the steps involved in deleting an agent, instance, or subclient.
Deleting an Agent
2. In the <Backup Set> tab, right-click the <Subclient>, and then click Properties.
3. Click the Storage Device tab.
4. In the Storage Policy list, click a storage policy name.
5. Click Data Paths. Configuring Activity Control
You can enable backup operations from both the agent and subclient level. However, you can enable restore operations only from the agent level.
1. From the CommCell Browser, expand Client Computers | <Client> | SharePoint Server, and then click <Backup Set>.
2. In the <Backup Set> tab, right-click the <Subclient>, and then click Properties.
3. Click the Activity Control tab, and then configure the option. To activate backup operations, select Enable Backup. To disable backup operations, clear Enable Backup.
4. Click OK.
Refer to Activity Control.
Configuring User Security
You can configure user security from the agent or subclient level.
You can perform the following functions:
Identify the user groups to which this CommCell object is associated. Associate this object with a user group. Disassociate this object from a user group.
1. From the CommCell Browser, expand Client Computers | <Client> | SharePoint Server, and then click <Backup Set>.
2. In the <Backup Set> tab, right-click the <Subclient>, and then click Properties.
3. Click the Security tab.
Refer to User Administration and Security.
Configuring Data Encryption Data encryption must be enabled at the client level before you can configure data
encryption at the subclient level. You can configure data encryption from the subclient level.
1. From the CommCell Browser, expand Client Computers | <Client> | SharePoint Server, and then click <Backup Set>.
2. In the <Backup Set> tab, right-click the <Subclient>, and then click Properties.
3. In the Subclient Properties dialog box, click the Encryption tab.
4. Select one of the following encryption options. To disable data encryption, select None. To encrypt data on the media only, select Media Only (MediaAgent side). To encrypt data on the network and on the media, select Network and Media (Agent Side). to encrypt data on the network, and then decrypt data on the media, select Network Only (Agent Encrypts, MediaAgent Decrypts).
5. Click OK. CommCell Configuration Report
The CommCell Configuration Report provides the properties of the CommServe, MediaAgents, clients, agents, SRM agents, subclients, and storage policies within the CommCell based on the selected filter criteria.
1. On the CommCell Console menu bar, select the Reports tab, and then click the button for the report that you want to run.
The Report Selection dialog box appears.
2. From the Reports pane, select CommCell Configuration, and then click Run.
The report appears in your default Web browser.
Refer to CommCell Configuration Report.
Deleting an Agent, Backup Set, or Subclientt
When you delete an instance or backupset, the associated data is logically deleted and you can no longer access the corresponding data from CommCell Console for recovery purposes.
Published On: 11/19/2013 V10 Service Pack 4A Page 128 of 201

You need to uninstall or DeConfigure the agent software from the client computer before deleting from CommCell Browser. After you delete the client software, you can either leave the corresponding data intact for appropriate action or you can remove the data immediately. If you choose to remove the data immediately, you must delete the agent from the CommCell Browser. If you delete the agent, all of the agent's data is irretrievably lost.
You cannot delete an agent while operations for that agent are running.
1. From the CommCell Browser, navigate to Client Computers | <Client>.
2. Right-click the <Agent>, and then click Delete.
3. A confirmation message is displayed with the following message:
This operation will permanently delete the data backed up from this level and it cannot be restored.
4. Click OK to continue with the deletion operation or click No to abort the deletion.
Deleting a Backup Set
Consider the following before deleting a Backup Set:
You cannot delete a default Backup Set.
Schedules associated with the Backup Set are also automatically deleted.
1. From the CommCell Browser, navigate to Client Computers | <Client> | <Agent>.
2. Right-click the <Backup Set>, and then click Delete.
3. A confirmation message is displayed, asking if you want to delete the Backup Set.
Click No to cancel the deletion and retain the Backupset, or click Yes to continue the deletion.
Deleting a Subclient
Consider the following before deleting a subclient:
You cannot delete a default subclient.
Schedules associated with the subclient are also automatically deleted.
1. From the CommCell Browser, navigate to Client Computers | <Client> | <Agent> | <Backup Set>.
2. Right-click the <subclient> that you want to delete, and then click Delete.
3. A confirmation message is displayed, asking if you want to delete the subclient.
Click No to cancel the deletion and retain the subclient, or click Yes to continue the deletion.
Keywords
Published On: 11/19/2013 V10 Service Pack 4A Page 129 of 201
Advanced Backup – Documents – SharePoint Server iDataAgent
Full Backups
Incremental Backups
Differential Backups
Synthetic Full BackupsRunning Synthetic Full BackupsRunning an Incremental Backup Before or After a Synthetic Full BackupVerifying Synthetic Full BackupsIgnoring Errors in Synthetic Full BackupsAccelerated Synthetic Full Backups (DASH Full)
Scheduling a Backup
Managing JobsConfigure Job Restartability for an Individual JobControlling Jobs
Additional Options
Full backups provide the most comprehensive protection of data. To perform a full backup:
1. In the CommCell Browser, expand Client Computers | <Client> | SharePoint Server, and then click Documents.
2. In the Documents tab, right-click <Subclient>, and then click Backup.
3. In the Backup Options dialog box, select Full, and then click OK.
In the Job Controller tab, you can track the progress of the job. When the backup has completed, the Job Controller displays Completed.
When SharePoint is configured in a Server Farm configuration, SQL databases must be backed up using the SQL iDataAgent. For more information, see Advanced Backup – SQL Server iDataAgent.
An incremental backup contains only data that is new or has changed since the last backup, regardless of the type. On average, incremental backups consume less media and use less resources than full backups.
The illustration clarifies the nature of full and incremental backups.
Follow steps given below to perform an incremental backup:
Table of contents
Full Backups
Incremental Backups
Published On: 11/19/2013 V10 Service Pack 4A Page 130 of 201
1. In the CommCell Browser, expand Client Computers | <Client> | SharePoint Server, and then click Documents.
2. In the Documents tab, right-click <Subclient>, and then click Backup.
3. In the Backup Options dialog box, select Incremental, select Backup Latest Version, and then click OK.
In the Job Controller tab, you can track the progress of the job. When the backup has completed, the Job Controller displays Completed.
When SharePoint is configured in a Server Farm configuration, SQL databases must be backed up using the SQL iDataAgent. For more information, see Advanced Backup – SQL Server iDataAgent.
A differential backup contains only the data that is new or has been changed since the last full backup. Differential backups consume less media and use less resources than full backups. Differential backups are cumulative. This means that each differential backup contains all changes accumulated since the last full backup. Each successive differential backup contains all the changes from the previous differential backup.
1. In the CommCell Browser, expand Client Computers | <Client> | SharePoint Server, and then click Documents.
2. In the Documents tab, right-click <Subclient>, and then click Backup.
Differential Backups
Published On: 11/19/2013 V10 Service Pack 4A Page 131 of 201
3. In the Backup Options dialog box, select Differential, select Backup Latest Version, and then click OK.
In the Job Controller tab, you can track the progress of the job. When the backup has completed, the Job Controller displays Completed.
When SharePoint is configured in a Server Farm configuration, SQL databases must be backed up using the SQL iDataAgent. For more information, see Advanced Backup – SQL Server iDataAgent.
A synthetic full backup is a synthesized backup, created from the most recent full backup and subsequent incremental and/or differential backups. The resulting synthetic full backup is identical to a full backup for the subclient.
Unlike full, incremental, and differential backups, a synthetic full backup does not actually transfer data from a client computer to the backup media. Therefore, they do not use any resources on the client computer.
Synthetic full backups are media-based; they read backup data from one media and simultaneously write (restore) the result to the new active media within the same media group. As a result, synthetic full backups require that at least two media drives for the same storage policy be available at the time the job is started. Synthetic full backups cannot be performed on subclients where the storage policy is associated with a stand-alone drive.
Running Synthetic Full Backups
Synthetic full backups can either be started manually or scheduled to occur at regular intervals. Do not concurrently run more than one synthetic full backup, especially synthetic full backups with multiple streams.
1. In the CommCell Browser, expand Client Computers | <Client> | SharePoint Server, and then click Documents.
A tab for Documents appears in the CommCell Console.
2. Right click the <Subclient> and click Backup.
3. From the Backup Options window, select Synthetic Full for Backup Type.
4. Select Immediate for Job Initiation.
5. Click OK.
You can track the progress of the backup job from the Job Controller. When the backup has completed, the Job Controller displays Completed.
Synthetic Full Backups
Published On: 11/19/2013 V10 Service Pack 4A Page 132 of 201
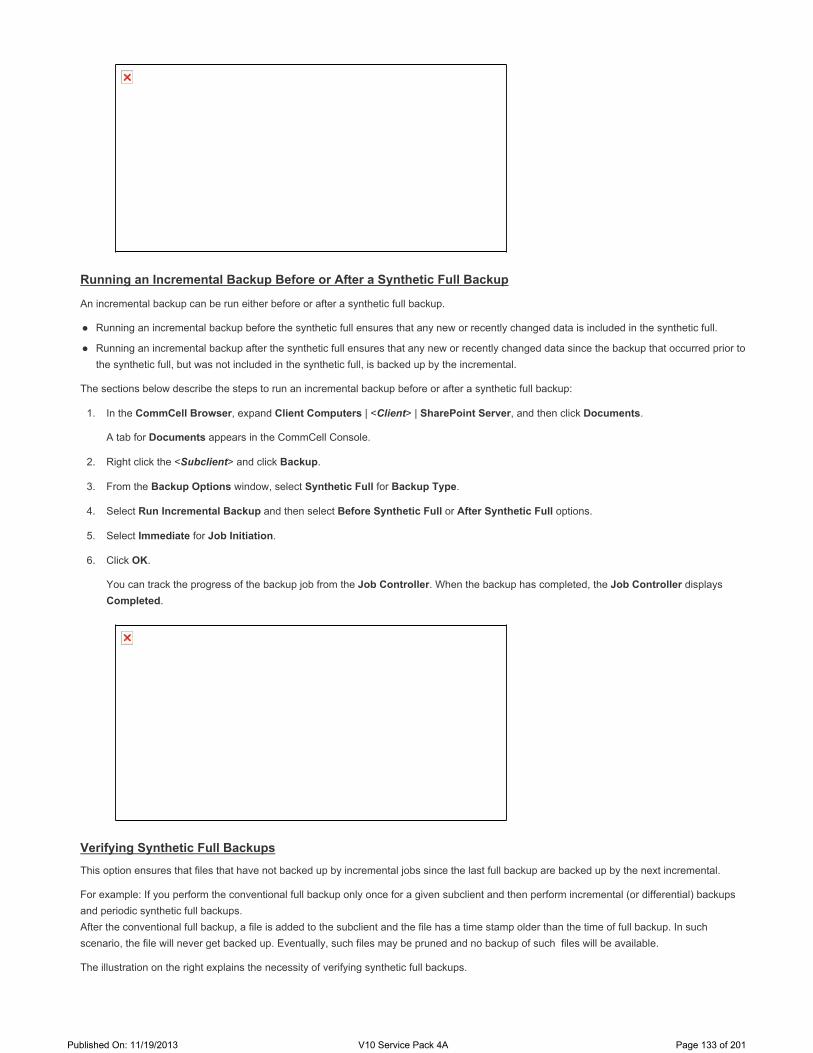
Running an Incremental Backup Before or After a Synthetic Full Backup
An incremental backup can be run either before or after a synthetic full backup.
Running an incremental backup before the synthetic full ensures that any new or recently changed data is included in the synthetic full.
Running an incremental backup after the synthetic full ensures that any new or recently changed data since the backup that occurred prior to the synthetic full, but was not included in the synthetic full, is backed up by the incremental.
The sections below describe the steps to run an incremental backup before or after a synthetic full backup:
1. In the CommCell Browser, expand Client Computers | <Client> | SharePoint Server, and then click Documents.
A tab for Documents appears in the CommCell Console.
2. Right click the <Subclient> and click Backup.
3. From the Backup Options window, select Synthetic Full for Backup Type.
4. Select Run Incremental Backup and then select Before Synthetic Full or After Synthetic Full options.
5. Select Immediate for Job Initiation.
6. Click OK.
You can track the progress of the backup job from the Job Controller. When the backup has completed, the Job Controller displays Completed.
Verifying Synthetic Full Backups
This option ensures that files that have not backed up by incremental jobs since the last full backup are backed up by the next incremental.
For example: If you perform the conventional full backup only once for a given subclient and then perform incremental (or differential) backups and periodic synthetic full backups. After the conventional full backup, a file is added to the subclient and the file has a time stamp older than the time of full backup. In such scenario, the file will never get backed up. Eventually, such files may be pruned and no backup of such files will be available.
The illustration on the right explains the necessity of verifying synthetic full backups.
Published On: 11/19/2013 V10 Service Pack 4A Page 133 of 201
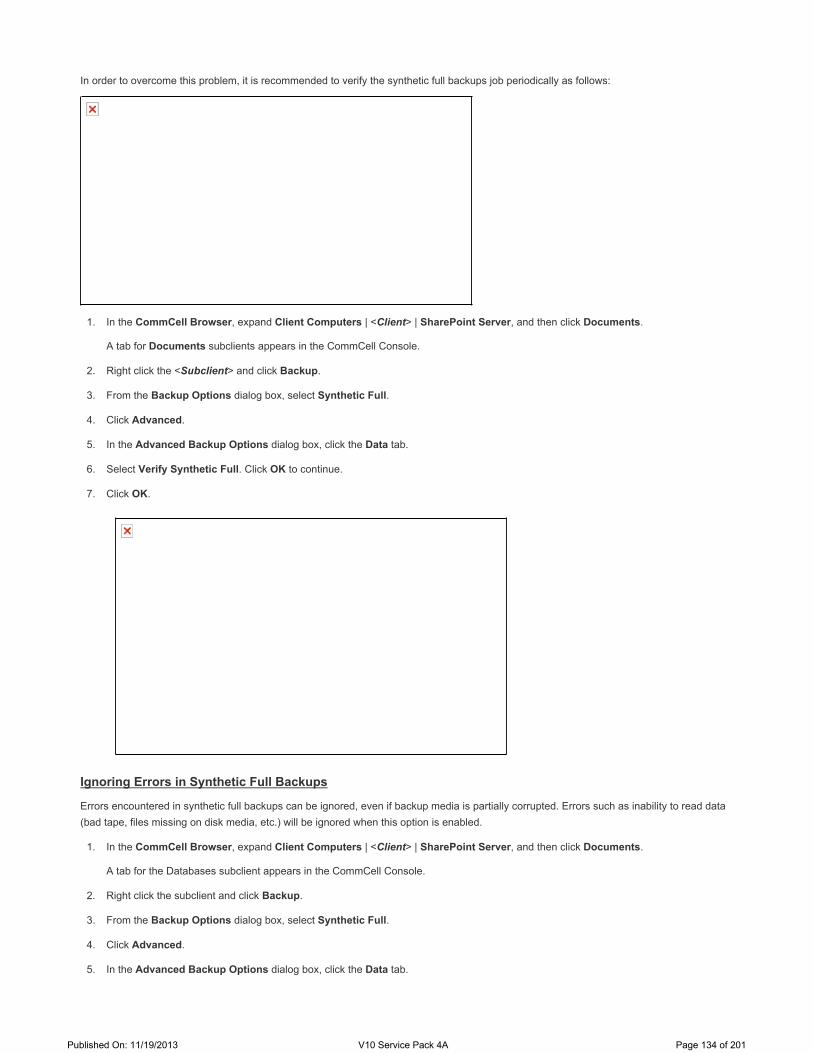
In order to overcome this problem, it is recommended to verify the synthetic full backups job periodically as follows:
1. In the CommCell Browser, expand Client Computers | <Client> | SharePoint Server, and then click Documents.
A tab for Documents subclients appears in the CommCell Console.
2. Right click the <Subclient> and click Backup.
3. From the Backup Options dialog box, select Synthetic Full.
4. Click Advanced.
5. In the Advanced Backup Options dialog box, click the Data tab.
6. Select Verify Synthetic Full. Click OK to continue.
7. Click OK.
Ignoring Errors in Synthetic Full Backups
Errors encountered in synthetic full backups can be ignored, even if backup media is partially corrupted. Errors such as inability to read data (bad tape, files missing on disk media, etc.) will be ignored when this option is enabled.
1. In the CommCell Browser, expand Client Computers | <Client> | SharePoint Server, and then click Documents.
A tab for the Databases subclient appears in the CommCell Console.
2. Right click the subclient and click Backup.
3. From the Backup Options dialog box, select Synthetic Full.
4. Click Advanced.
5. In the Advanced Backup Options dialog box, click the Data tab.
Published On: 11/19/2013 V10 Service Pack 4A Page 134 of 201

6. Select Verify Synthetic Full and then select Ignore Error in Synthetic Full.
7. Click OK to close the Advanced Backup Options dialog box.
8. Click OK .
Accelerated Synthetic Full Backups (DASH Full)
When a storage policy copy is deduplicated, synthetic full backups can be created in an accelerated mode to significantly reduce the copy duration. This is done by identifying and transferring the data signatures (instead of the data itself) to the target wherever possible.
For instructions on how to perform an accelerated synthetic full backup see DASH Full - Accelerated Synthetic Full Backups.
Follow the steps below to schedule a backup:
1. In the CommCell Browser, expand Client Computers | <Client> | SharePoint Server, and then click Documents.
2. In the Documents tab, right-click a <Subclient>, and then click Backup.
3. In the Backup Options dialog box, select Schedule, and then click Configure.
4. In the Schedule Name box, enter a name for the schedule, and then select the appropriate scheduling options.
For example:
Select Weekly, and then change the Start Time to 9:00 PM.
5. Click OK to close the Schedule Details dialog box.
6. Click OK to close the Backup Options dialog box.
7. The backup job will execute according to the options that you selected.
Scheduling a Backup
Published On: 11/19/2013 V10 Service Pack 4A Page 135 of 201
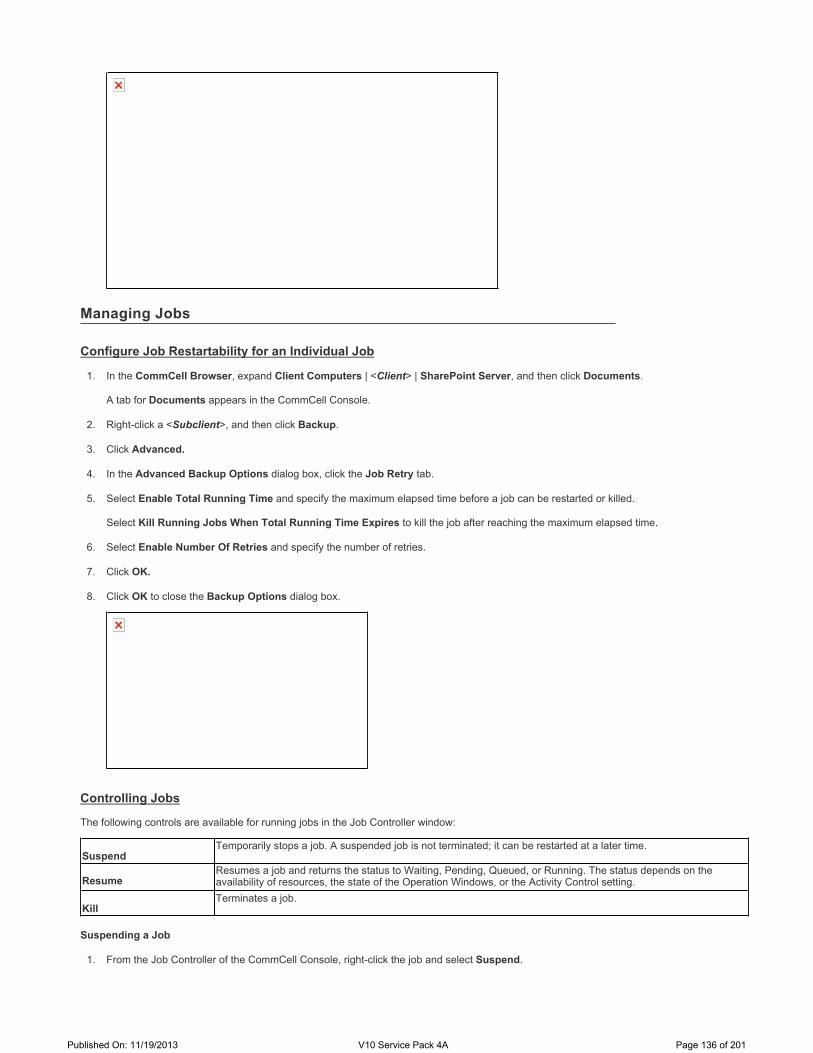
Configure Job Restartability for an Individual Job
1. In the CommCell Browser, expand Client Computers | <Client> | SharePoint Server, and then click Documents.
A tab for Documents appears in the CommCell Console.
2. Right-click a <Subclient>, and then click Backup.
3. Click Advanced.
4. In the Advanced Backup Options dialog box, click the Job Retry tab.
5. Select Enable Total Running Time and specify the maximum elapsed time before a job can be restarted or killed.
Select Kill Running Jobs When Total Running Time Expires to kill the job after reaching the maximum elapsed time.
6. Select Enable Number Of Retries and specify the number of retries.
7. Click OK.
8. Click OK to close the Backup Options dialog box.
Controlling Jobs
The following controls are available for running jobs in the Job Controller window:
Suspending a Job
1. From the Job Controller of the CommCell Console, right-click the job and select Suspend.
Managing Jobs
SuspendTemporarily stops a job. A suspended job is not terminated; it can be restarted at a later time.
ResumeResumes a job and returns the status to Waiting, Pending, Queued, or Running. The status depends on the availability of resources, the state of the Operation Windows, or the Activity Control setting.
KillTerminates a job.
Published On: 11/19/2013 V10 Service Pack 4A Page 136 of 201
2. The job status may change to Suspend Pending for a few moments while the operation completes. The job status then changes to Suspended.
Resuming a Job
1. From the Job Controller of the CommCell Console, right-click the job and select Resume.
2. As the Job Manager attempts to restart the job, the job status changes to Waiting, Pending, or Running.
Killing a Job
1. From the Job Controller of the CommCell Console, right-click the job and select Kill.
2. Click Yes when the confirmation prompt appears if you are sure you want to kill the job. The job status may change to Kill Pending for a few moments while the operation completes. Once completed, the job status will change to Killed and it will be removed from the Job Controller window after five minutes.
The following table describes the available additional options to further refine your backup operations:
Additional Options
OPTION DESCRIPTION RELATED TOPICS
Startup Options The Startup Options are used by the Job Manager to set priority for resource allocation. This is useful to give higher priority to certain jobs. You can set the priority as follows:
1. In the CommCell Browser, expand Client Computers | <Client> | SharePoint Server, and then click Documents.
2. Right-click the Subclient in the right pane and click Backup.
3. Click Advanced and click Startup tab.
4. Select the Change Priority checkbox.
5. Enter a priority number - 0 is the highest priority and 999 is the lowest priority.
6. Select the Start up in suspended State check box to start the job in a suspended state.
7. Click OK.
Refer to Job Priority and Priority Precedence.
Alerts This option enables users or user groups to get automatic notification on the status of the data protection job. Follow the steps given below to set up the criteria to raise notifications/alerts:
1. In the CommCell Browser, expand Client Computers | <Client> | SharePoint Server, and then click Documents.
2. Right-click the Subclient in the right pane and click Backup.
3. Click Advanced and select the Alert tab.
4. Click Add Alert.
5. From the Add Alert Wizard dialog box, select the required threshold and notification criteria and click Next.
6. Select the required notification types and click Next.
7. Select the recipients and click Next.
8. Click Finish.
9. Click OK.
Refer to Alerts.
Command Line Backups
Command Line Interface enables you to perform backups or restore from the command line. The commands can be executed from the command line or can be integrated into scripts.
You can also generate command line scripts for specific operations from the CommCell Browser using the Save As Script option.
Refer to Command Line Interface.
CommCell Readiness Report
The CommCell Readiness Report provides you with vital information such as connectivity and readiness of the Client, MediaAgent, and CommServe. It is useful to run this report before performing a backup or a recovery operation. Follow the steps given below to generate the report:
Refer to CommCell Readiness Report.
Published On: 11/19/2013 V10 Service Pack 4A Page 137 of 201

1. On the CommCell Console menu bar, select the Reports tab.
2. Click Readiness.
The Report Selection dialog box appears.
3. If necessary, select Reports | CommServer | CommCell Readiness in the left pane.
4. Select the Computers tab, and then click Modify below the Computers list.
5. In the dialog box that appears, clear Include All Client Computers and All Client Groups.
6. Select the appropriate client from the Exclude list, and then click Include >.
7. Click OK.
8. Select the MediaAgent tab, and then clear Include All MediaAgents.
9. Select the appropriate MediaAgent from the Exclude list, and then click Include >.
10. Click Run.
The report appears in your default Web browser.Backup Job Summary Report
The Backup Job Summary Report provides you with information about all of the backup jobs that are run in last 24 hours for a specific subclient. You can get information such as status, time, data size, and so on for each backup job. It is useful to run this report after performing the backup. Follow the steps given below to generate the report:
1. On the CommCell Console menu bar, select the Reports tab.
2. Click Summary.
The Report Selection dialog box appears.
3. If necessary, select Reports | Jobs | Job Summary in the left pane.
4. On the General tab, select Data Management.
5. Select the Computers tab.
6. Select Subclient, and then select the Edit sub tab.
7. Navigate to Client Computers | <Client> | File System | Backup Set | <Subclient>.
8. Click Run.
The report appears in your default Web browser.
Refer to Backup Job Summary Report.
Data Path Options Data Protection operations use a default Library, MediaAgent, Drive Pool, and Drive as the Data Path. You can use this option to change the data path if the default data path is not available. Follow the steps given below to change the default data path:
1. In the CommCell Browser, expand Client Computers | <Client> | SharePoint Server, and then click Documents.
2. Right-click the Subclient in the right pane and click Backup.
3. Click Advanced and select the Data Path tab.
4. Select the MediaAgent and Library.
5. Select the Drive Pool and Drive for tape library.
6. Click OK.
Refer to Change Data Path.
Start New Media The Start New Media option enables you to start the data protection operation on a new media. This feature provides control over where the data physically resides. Use the following steps to start the data protection operation on a new media:
1. In the CommCell Browser, expand Client Computers | <Client> | SharePoint Server, and then click Documents.
2. Right-click the Subclient in the right pane and click Backup.
3. Click Advanced and select the Media tab.
4. Select the Start New Media check box.
5. Click OK.
Refer to Start New Media.
Mark Media Full on Success This option marks the media as full, two minutes after the successful completion of
the data protection job. This option prevents another job from writing to this media.
Refer to Export Media.
Published On: 11/19/2013 V10 Service Pack 4A Page 138 of 201
Follow the steps given below:
1. In the CommCell Browser, expand Client Computers | <Client> | SharePoint Server, and then click Documents.
2. Right-click the Subclient in the right pane and click Backup.
3. Click Advanced and select Media tab.
4. Select the Mark Media Full on Success check box.
5. Click OK. Allow Other Schedules to Use Media Set The Allow Other Schedules to use Media Set option allows jobs that are part of the
schedule or schedule policy and using the specific storage policy to start a new media. It also prevents other jobs from writing to the same set of media.
1. In the CommCell Browser, expand Client Computers | <Client> | SharePoint Server, and then click Documents.
2. Right-click the Subclient in the right pane and click Backup.
3. Click Advanced and select the Media tab.
4. Select the Allow Other Schedules To Use Media Set check box.
5. Click OK.
Refer to Creating an Exportable Media Set.
Extended Data Retention This option allows you to extend the expiration date of a specific job. This will override
the default retention set at the corresponding storage policy copy. Follow the steps given below to extend the expiration date:
1. In the CommCell Browser, expand Client Computers | <Client> | SharePoint Server, and then click Documents.
2. Right-click the Subclient in the right pane and click Backup.
3. Click Advanced and select the Media tab.
4. Select one of the following options: Infinite - Select this option to extend the expiration date by infinite number of days Number of day - Select this option to specify the number of days to extend the expiration date and then enter the number of days.
5. Click OK.
Refer to Extended Retention Rules.
Vault Tracker This feature provides the facility to manage media that is removed from a library and stored in offsite locations. Depending on your VaultTracker setup, select the required options. Use the following steps to access and select the VaultTracker options.
1. In the CommCell Browser, expand Client Computers | <Client> | SharePoint Server, and then click Documents.
2. Right-click the Subclient in the right pane and click Backup.
3. Click Advanced and select the VaultTracking tab.
4. Select the required options.
5. Click OK.
Refer to Vault Tracker or Vault Tracker Enterprise.
Published On: 11/19/2013 V10 Service Pack 4A Page 139 of 201
Advanced Restore - SharePoint Server iDataAgent-Documents
You can restore items at the library level and lower, including columns, alerts, libraries, lists, and views.
In-Place Restore Method
1. In the CommCell Browser, expand Client Computers | <Client> | SharePoint Server.
2. Right-click Documents, point to All Tasks, and then click Browse and Restore.
3. Click View Content.
4. In the Client browse tab, click <Documents>, and select the documents that have to be restored.
4. From the Client browse tab, select the items that you want to restore.
5. Click Recover All Selected.
6. By default, if the restored document already exists on the destination, it will be skipped from the restore operation. However, you can optionally select any one of the following options:
Unconditional Overwrite: Select this option to overwrite the existing document with the document that has been restored.
Merge: Select this option to merge an existing version of a Library or List level in a version library. Example: In case there are three versions of a document and version two is deleted. During a restore selecting the merge option and then selecting version two will merge the deleted version back in the sequence.
Restore Browse and Restore
Table of Contents
SharePoint 2013 SharePoint 2010 Search Server 2008 SharePoint 2007Microsoft Search Server 2013 Microsoft SharePoint Foundation
2010
SharePoint Server 2010 (Standard and Enterprise)
Microsoft Office Project Server 2010
Fast Search Server 2010 for SharePoint
Microsoft Search Server 2010
Microsoft Search Server 2010 Express
Microsoft Search Server 2008
Microsoft Search Server 2008 Express
Microsoft Office SharePoint Server (MOSS) 2007
Microsoft Office Project Server 2007
Microsoft Office Forms Server 2007
Restoring DocumentsIn-Place Restore MethodRestoring Documents to a Different Folder on the Same ClientOut-of-Place Restore Method
Listing Media
Scheduling a Restore
Managing Restore JobsControlling Jobs
Additional Restore Options
Restoring DocumentsIn-Place Restore MethodRestoring Documents to a Different Folder on the Same ClientOut-of-Place Restore Method
Listing Media
Scheduling a Restore
Managing Restore JobsControlling Jobs
Additional Restore Options
Restoring DocumentsIn-Place Restore MethodRestoring Documents to a Different Folder on the Same ClientOut-of-Place Restore Method
Listing Media
Scheduling a Restore
Managing Restore JobsControlling Jobs
Additional Restore Options
Restoring DocumentsIn-Place Restore MethodRestoring Documents to a Different Folder on the Same ClientOut-of-Place Restore Method
Listing Media
Scheduling a Restore
Managing Restore JobsControlling Jobs
Additional Restore Options
Restoring Documents
Published On: 11/19/2013 V10 Service Pack 4A Page 140 of 201

Append: Select this option to add a new version of the document in a version library. Example: In case there are three versions of a document and version two is deleted. During a restore selecting the append option and then selecting version two will add the version as version four at the end of the version sequence.
7. Click OK.
Restoring Documents to a Different Folder on the Same Client
1. In the CommCell Browser, expand Client Computers | <Client> | SharePoint Server.
2. Right-click Documents, point to All Tasks, and then click Browse and Restore.
3. Click View Content.
4. In the Client browse tab, click <Documents>, and select the documents that have to be restored.
4. From the Client browse tab, select the items that you want to restore.
5. Click Recover All Selected.
6. Clear Restore to same folder.
7. In the Specify destination path box, enter the location to which you want to restore the documents.
8. By default, if the restored document already exists on the destination, it will be skipped from the restore operation. However, you can optionally select any one of the following options:
Unconditional Overwrite: Select this option to overwrite the existing document with the document that has been restored.
Merge: Select this option to merge an existing version of a Library or List level in a version library. Example: In case there are three versions of a document and version two is deleted. During a restore selecting the merge option and then selecting version two will merge the deleted version back in the sequence.
Append: Select this option to add a new version of the document in a version library. Example: In case there are three versions of a document and version two is deleted. During a restore selecting the append option and then selecting version two will add the version as version four at the end of the version sequence.
9. Click OK.
Published On: 11/19/2013 V10 Service Pack 4A Page 141 of 201
Out-of-Place Restore Method
For out-of-place restores, subsites will be restored as subsites. If the Site URL path is similar to the original one for out-of-place restore operations, set additional settings dImportRetainObjectIdentity to 1 in order to retain the original object identity.
1. In the CommCell Browser, expand Client Computers | <Client> | SharePoint Server.
2. Right-click Documents, point to All Tasks, and then click Browse and Restore.
3. Click View Content.
4. In the Client browse tab, click <Documents>, and select the documents that have to be restored.
4. From the Client browse tab, select the items that you want to restore.
5. Click Recover All Selected.
6. In the Destination Client list, select a client name.
7. By default, if the restored document already exists on the destination, it will be skipped from the restore operation. However, you can optionally select any one of the following options:
Unconditional Overwrite: Select this option to overwrite the existing document with the document that has been restored.
Merge: Select this option to merge an existing version of a Library or List level in a version library. Example: In case there are three versions of a document and version two is deleted. During a restore selecting the merge option and then selecting version two will merge the deleted version back in the sequence.
Append: Select this option to add a new version of the document in a version library. Example: In case there are three versions of a document and version two is deleted. During a restore selecting the append option and then selecting version two will add the version as version four at the end of the version sequence.
8. Click OK.
Published On: 11/19/2013 V10 Service Pack 4A Page 142 of 201
Before restoring any file or folder, you can review all the media that is associated with the selected data. Use this option to ensure that the media required to restore the selected data is available. You can also predict the total size of the data that you want to restore. Follow the steps given below to display the media and the size:
1. In the CommCell Browser, expand Client Computers | <Client> | SharePoint Server.
2. Right-click Documents, point to All Tasks, and then click Browse and Restore.
3. Click View Content.
4. In the Client browse tab, click <Documents>, and select the documents that have to be restored.
5. Select the data that you want to restore and click List Media and Size.
6. Click OK.
The media associated with the selected data is displayed. If required, you can recall the required media from the export location.
You can restore folders and documents at the library level and lower.
To schedule a restore:
1. In the CommCell Browser, expand Client Computers | <Client> | SharePoint Server.
2. Right-click Documents, point to All Tasks, and then click Browse and Restore.
3. Click View Content.
4. In the Client browse tab, click <Documents>, and select the documents that have to be restored.
Listing Media
Scheduling a Restore
Published On: 11/19/2013 V10 Service Pack 4A Page 143 of 201

4. From the Client browse tab, select the folders or documents that you want to restore, and then click Recover All Selected.
5. In the Restore Options dialog box, click the Job Initiation tab.
6. Select Schedule, and then click Configure.
7. In the Schedule Name box, enter a name for the schedule.
8. Select the frequency with which you want the job to run, and then enter the corresponding date and time information.
9. Click OK.
10. Click OK.
Controlling Jobs
The following controls are available for running jobs in the Job Controller window:
Suspending a Job
1. From the Job Controller of the CommCell Console, right-click the job and select Suspend.
2. The job status may change to Suspend Pending for a few moments while the operation completes. The job status then changes to Suspended.
Resuming a Job
1. From the Job Controller of the CommCell Console, right-click the job and select Resume.
2. As the Job Manager attempts to restart the job, the job status changes to Waiting, Pending, or Running.
Killing a Job
1. From the Job Controller of the CommCell Console, right-click the job and select Kill.
2. Click Yes when the confirmation prompt appears if you are sure you want to kill the job. The job status may change to Kill Pending for a few moments while the operation completes. Once completed, the job status will change to Killed and it will be removed from the Job Controller window after five minutes.
Managing Restore Jobs
SuspendTemporarily stops a job. A suspended job is not terminated; it can be restarted at a later time.
ResumeResumes a job and returns the status to Waiting, Pending, Queued, or Running. The status depends on the availability of resources, the state of the Operation Windows, or the Activity Control setting.
KillTerminates a job.
Additional Restore Options
OPTION DESCRIPTION RELATED TOPICS
Skip Errors and Continue This option enables you to to continue the restore job regardless of media errors and
create a file that lists the full path names of the files that failed to get restored. Follow the steps given below to set this option:
1. In the CommCell Browser, expand Client Computers | <Client> | SharePoint
Published On: 11/19/2013 V10 Service Pack 4A Page 144 of 201
Server.
2. Right-click <Backup Set>, point to All Tasks, and then click Browse and Restore.
3. In the Restore Options dialog box, click View Content.
The Client browse tab lists all of the latest data that was backed up.
4. In the Client tab, select the items that you want to restore, and then click Recover All Selected.
5. In the Restore Options dialog box, click Advanced.
6. In the Advanced Restore Options dialog box, click General.
7. On the General tab, select the Skip errors and continue check box.
8. Click OK. Startup Options The Startup Options are used by the Job Manager to set priority for resource
allocation. This is useful to give higher priority to certain jobs. You can set the priority as follows:
1. In the CommCell Browser, expand Client Computers | <Client> | SharePoint Server.
2. Right-click <Backup Set>, point to All Tasks, and then click Browse and Restore.
3. In the Restore Options dialog box, click View Content.
The Client browse tab lists all of the latest data that was backed up.
4. In the Client tab, select the items that you want to restore, and then click Recover All Selected.
5. In the Restore Options dialog box, click Advanced.
6. In the Advanced Restore Options dialog box, click Startup.
7. On the Startup tab, select Change Priority.
8. Enter a priority number - 0 is the highest priority and 999 is the lowest priority.
9. Select the Start up in suspended State check box to start the job in a suspended state.
10. Click OK.
Refer to Job Priority and Priority Precedence.
Copy Precedence By default, the system retrieves data from the storage policy copy with the lowest copy precedence. If the data was pruned from the primary copy, the system automatically retrieves data from the other copies of the storage policy in the lowest copy precedence to highest copy precedence order. Once the data is found, it is retrieved, and no further copies are checked.
You can retrieve data from a specific storage policy copy (Synchronous Copy or Selective Copy). If data does not exist in the specified copy, the data retrieve operation fails even if the data exists in another copy of the same storage policy. Follow the steps given below to retrieve the data from a a specific storage policy copy:
1. In the CommCell Browser, expand Client Computers | <Client> | SharePoint Server.
2. Right-click <Backup Set>, point to All Tasks, and then click Browse and Restore.
3. In the Restore Options dialog box, click View Content.
The Client browse tab lists all of the latest data that was backed up.
4. In the Client tab, select the items that you want to restore, and then click Recover All Selected.
5. In the Restore Options dialog box, click Advanced.
6. In the Advanced Restore Options dialog box, click Copy Precedence.
7. On the Copy Precedence tab, select the Restore from copy precedencecheck box.
8. Enter the copy precedence number.
9. Click OK.
Refer to Recovering Your Data from Copies.
Data Path Options The data recovery operations use a default Library, MediaAgent, Drive Pool, and Drive as the Data Path. You can use this option to change the data path if the default
Refer to Change Data Path.
Published On: 11/19/2013 V10 Service Pack 4A Page 145 of 201
data path is not available. Follow the steps given below to change the default data path:
1. In the CommCell Browser, expand Client Computers | <Client> | SharePoint Server.
2. Right-click <Backup Set>, point to All Tasks, and then click Browse and Restore.
3. In the Restore Options dialog box, click View Content.
The Client browse tab lists all of the latest data that was backed up.
4. In the Client tab, select the items that you want to restore, and then click Recover All Selected.
5. In the Restore Options dialog box, click Advanced.
6. In the Advanced Restore Options dialog box, click the Data Path tab.
7. Do any of the following to change the default data path: In the Use MediaAgent list, select the name of a MediaAgent. In the User Library list, select the name of a library. For tape library, in the Use Drive Pool list, select the name of a drive pool. For tape library, in the Use Drive list, select the name of a drive.
8. Click OK. Browse Options These options allow you to restore deleted items or data that was backed up before a
specific time, after a specific time, or during a specific time range.
1. In the CommCell Browser, expand Client Computers | <Client> | SharePoint Server.
2. Right-click <Backup Set>, point to All Tasks, and then click Browse and Restore.
3. In the Restore Options dialog box, click View Content.
The Client browse tab lists all of the latest data that was backed up.
4. In the Client tab, select the items that you want to restore, and then click Recover All Selected.
5. In the Restore Options dialog box, click Advanced.
6. In the Advanced Restore Options dialog box, click the Browse Options tab.
7. To restore deleted items, select Restore deleted items.
8. To restore items that were backed up during a specific time, select Specify Time Range.
9. From the Time Zone list, select a time zone.
10. Do any of the following to specify a time: To restore items that were backed up after a specific time, select Start Time, and then enter a date and time. To restore items that were backed up before a specific time, select End Time, and then enter a date and time. To restore items that were backed up during a specific time range, select both Start Time and End Time, and then enter the dates and times.
11. Click OK. Alerts This option enables users or user groups to get automatic notification on the status of
the data recovery job. Follow the steps given below to set up the criteria to raise notifications/alerts:
1. In the CommCell Browser, expand Client Computers | <Client> | SharePoint Server.
2. Right-click <Backup Set>, point to All Tasks, and then click Browse and Restore.
3. In the Restore Options dialog box, click View Content.
The Client browse tab lists all of the latest data that was backed up.
4. In the Client tab, select the items that you want to restore, and then click Recover All Selected.
5. In the Restore Options dialog box, click Advanced.
6. In the Advanced Restore Options dialog box, click Alerts.
Refer to Alerts.
Published On: 11/19/2013 V10 Service Pack 4A Page 146 of 201

7. Click Add Alert.
8. From the Add Alert Wizard dialog box, select the required threshold and notification criteria and click Next.
9. Select the required notification types and click Next.
10. Select the recipients and click Next.
11. Click Finish.
12. Click OK. Command Line Restores
Command Line Interface enables you to perform backups or restore from the command line. The commands can be executed from the command line or can be integrated into scripts.
You can also generate command line scripts for specific operations from the CommCell Browser using the Save As Script option.
Refer to Command Line Interface.
CommCell Readiness Report
The CommCell Readiness Report provides you with vital information such as connectivity and readiness of the Client, MediaAgent, and CommServe. It is useful to run this report before performing a backup or a recovery operation. Follow the steps given below to generate the report:
1. On the CommCell Console menu bar, select the Reports tab.
2. Click Readiness.
The Report Selection dialog box appears.
3. If necessary, select Reports | CommServer | CommCell Readiness in the left pane.
4. Select the Computers tab, and then click Modify below the Computers list.
5. In the dialog box that appears, clear Include All Client Computers and All Client Groups.
6. Select the appropriate client from the Exclude list, and then click Include >.
7. Click OK.
8. Select the MediaAgent tab, and then clear Include All MediaAgents.
9. Select the appropriate MediaAgent from the Exclude list, and then click Include >.
10. Click Run.
The report appears in your default Web browser.
Refer to CommCell Readiness Report.
Restore Job Summary Report The Restore Job Summary Report provides you with information about all the data
recovery jobs that are run in last 24 hours for a specific client and agent. You can get information such as failure reason, failed objects, job options, and so on. It is useful to run this report after performing the restore. Follow the steps given below to generate the report:
1. On the CommCell Console menu bar, select the Reports tab.
2. Click Summary.
The Report Selection dialog box appears.
3. If necessary, select Reports | Jobs | Job Summary in the left pane.
4. On the General tab, select Data Recovery Jobs.
5. Select the Computers tab.
6. Select the appropriate client and the appropriate agent.
7. Click Run.
The report appears in your default Web browser.
Refer to Restore Job Summary Report.
Published On: 11/19/2013 V10 Service Pack 4A Page 147 of 201
Advanced Configuration - Site Collection - SharePoint Server iDataAgent
The Microsoft SharePoint Server iDataAgent uses the following logical entities to manage backup and restore operations from the CommCell Console.
Agent
Facilitates SharePoint database and document discovery.
Database Backup Set
Defines the entities and information that are required to back up entire databases.
Document Backup Set
Table of Contents
SharePoint 2013 SharePoint 2010 Search Server 2008 SharePoint 2007Microsoft Search Server 2013 Microsoft SharePoint Foundation
2010
SharePoint Server 2010 (Standard and Enterprise)
Microsoft Office Project Server 2010
Fast Search Server 2010 for SharePoint
Microsoft Search Server 2010
Microsoft Search Server 2010 Express
Microsoft Search Server 2008
Microsoft Search Server 2008 Express
Microsoft Office SharePoint Server (MOSS) 2007
Microsoft Office Project Server 2007
Microsoft Office Forms Server 2007
Understanding the CommCell Console
Creating User-Defined Backup Sets
Creating User-Defined Subclients
Configuring Filters for Backups
Filtering Files from a BackupConfiguring Exclusions to FiltersDeleting a Filter
Configuring Pre/Post Processing for Backups
Setting up Pre/Post ProcessesSetting Post Backup Processes to Run During Failures
Modifying an Agent, Backup Set, or Subclient
Deleting an Agent, Backup Set, or Subclient
Deleting an AgentDeleting a Backup SetDeleting a Subclient
Understanding the CommCell Console
Creating User-Defined Backup Sets
Creating User-Defined Subclients
Configuring Filters for BackupsFiltering Files from a BackupConfiguring Exclusions to FiltersDeleting a Filter
Configuring Pre/Post Processing for Backups
Setting up Pre/Post ProcessesSetting Post Backup Processes to Run During Failures
Modifying an Agent, Backup Set, or Subclient
Deleting an Agent, Backup Set, or Subclient
Deleting an AgentDeleting a Backup SetDeleting a Subclient
Understanding the CommCell Console
Creating User-Defined Backup Sets
Creating User-Defined Subclients
Configuring Filters for Backups
Filtering Files from a BackupConfiguring Exclusions to FiltersDeleting a Filter
Configuring Pre/Post Processing for Backups
Setting up Pre/Post ProcessesSetting Post Backup Processes to Run During Failures
Modifying an Agent, Backup Set, or Subclient
Deleting an Agent, Backup Set, or Subclient
Deleting an AgentDeleting a Backup SetDeleting a Subclient
Understanding the CommCell Console
Published On: 11/19/2013 V10 Service Pack 4A Page 148 of 201
Defines all files and folders on the SharePoint server so that you can restore individual SharePoint files without restoring the entire database.
Site Collection Backup Set
Defines all the Site Collections that you can backup without backing up the entire database.
Subclient
Defines the contents of a backup operation, depending on whether the backup set includes databases or documents on the SharePoint server.
You can create user-defined backup sets that contain any number of sites that exist within the SharePoint server. You can use a Site Collection backup set to group SharePoint site collections and individual sites into separate entities with their own unique backup schedules. For example, this is useful if you need to back up some sites more frequently than others.
To create a SharePoint Server Site Collection backup set:
1. From the CommCell Browser, expand Client Computers | <Client>.
2. Right-click SharePoint Server, point to All Tasks, and then click Create New Backup Set.
3. In the New Backup Set Name box, enter a name.
4. In the Choose Backup Set Type section, select SharePoint Server Site Collection.
5. From the Storage Policy list, click a storage policy name.
6. Click OK.
Creating User-defined Backup Sets
When you create a user-defined backup set, the contents of the user-defined backup set will be excluded from the Default backup set.
Published On: 11/19/2013 V10 Service Pack 4A Page 149 of 201
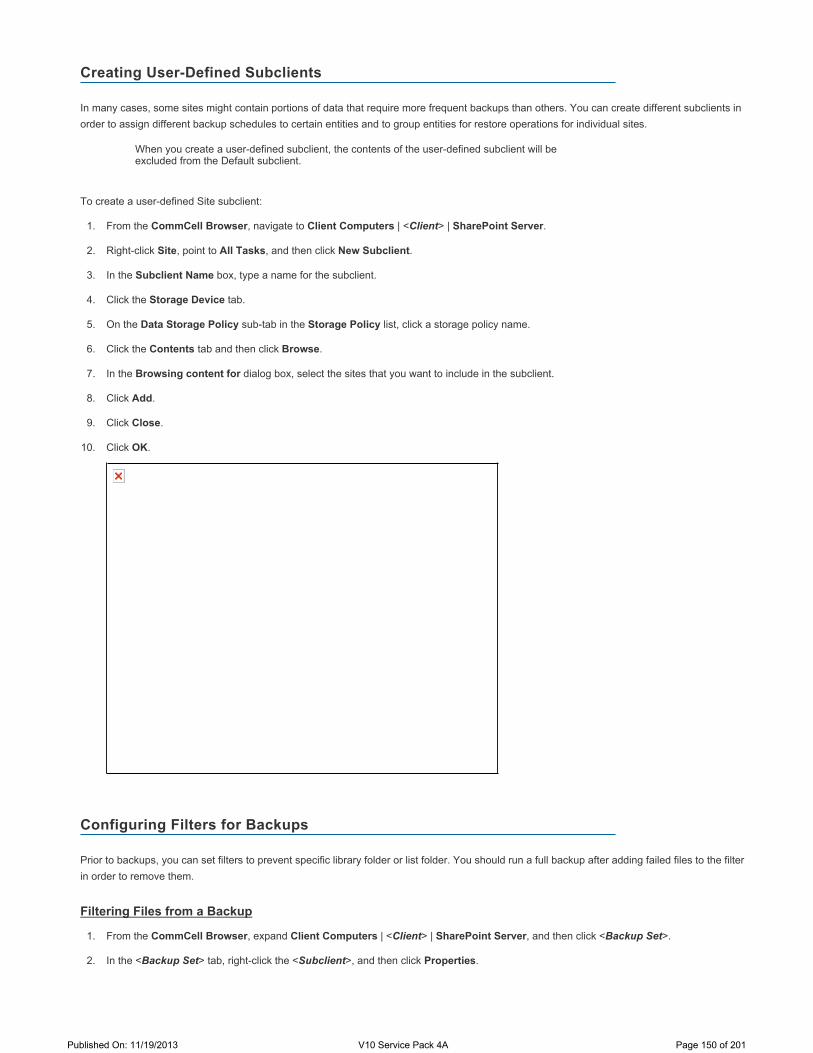
In many cases, some sites might contain portions of data that require more frequent backups than others. You can create different subclients in order to assign different backup schedules to certain entities and to group entities for restore operations for individual sites.
To create a user-defined Site subclient:
1. From the CommCell Browser, navigate to Client Computers | <Client> | SharePoint Server.
2. Right-click Site, point to All Tasks, and then click New Subclient.
3. In the Subclient Name box, type a name for the subclient.
4. Click the Storage Device tab.
5. On the Data Storage Policy sub-tab in the Storage Policy list, click a storage policy name.
6. Click the Contents tab and then click Browse.
7. In the Browsing content for dialog box, select the sites that you want to include in the subclient.
8. Click Add.
9. Click Close.
10. Click OK.
Prior to backups, you can set filters to prevent specific library folder or list folder. You should run a full backup after adding failed files to the filter in order to remove them.
Filtering Files from a Backup
1. From the CommCell Browser, expand Client Computers | <Client> | SharePoint Server, and then click <Backup Set>.
2. In the <Backup Set> tab, right-click the <Subclient>, and then click Properties.
Creating User-Defined Subclients
When you create a user-defined subclient, the contents of the user-defined subclient will be excluded from the Default subclient.
Configuring Filters for Backups
Published On: 11/19/2013 V10 Service Pack 4A Page 150 of 201
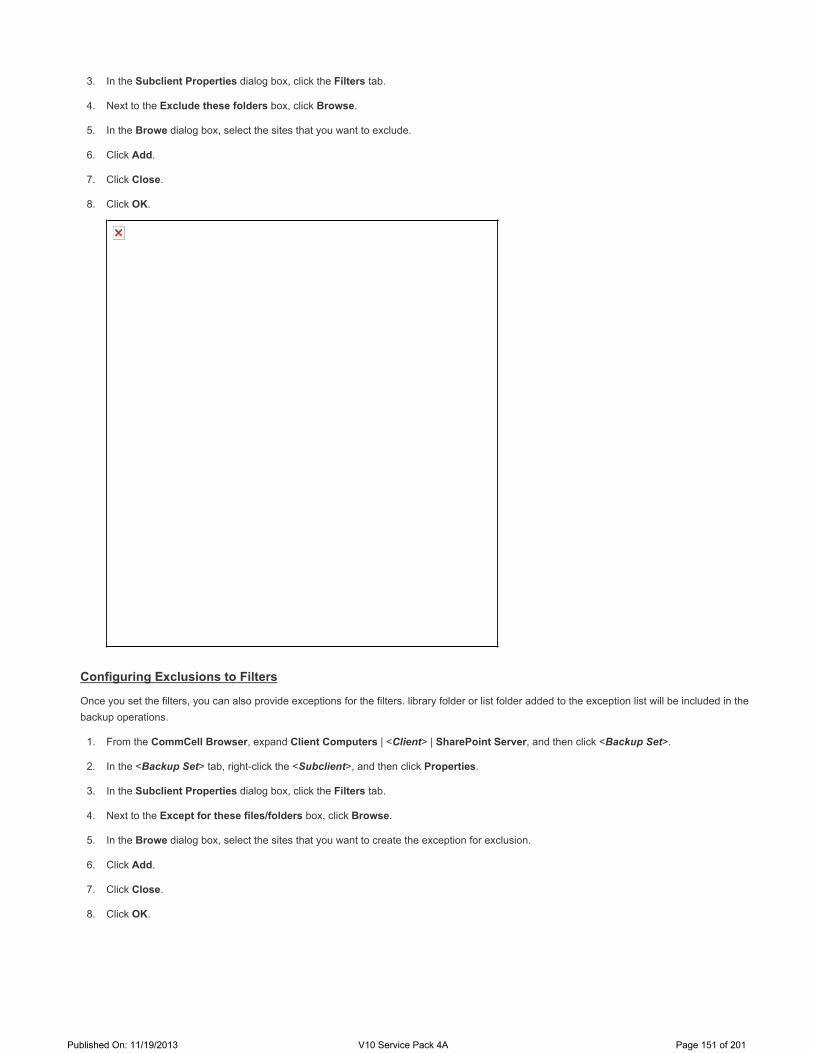
3. In the Subclient Properties dialog box, click the Filters tab.
4. Next to the Exclude these folders box, click Browse.
5. In the Browe dialog box, select the sites that you want to exclude.
6. Click Add.
7. Click Close.
8. Click OK.
Configuring Exclusions to Filters
Once you set the filters, you can also provide exceptions for the filters. library folder or list folder added to the exception list will be included in thebackup operations.
1. From the CommCell Browser, expand Client Computers | <Client> | SharePoint Server, and then click <Backup Set>.
2. In the <Backup Set> tab, right-click the <Subclient>, and then click Properties.
3. In the Subclient Properties dialog box, click the Filters tab.
4. Next to the Except for these files/folders box, click Browse.
5. In the Browe dialog box, select the sites that you want to create the exception for exclusion.
6. Click Add.
7. Click Close.
8. Click OK.
Published On: 11/19/2013 V10 Service Pack 4A Page 151 of 201

Deleting a Filter
You can remove a filter by deleting it from the exclusion list. Data will not be backed up in a differential backup for a subclient after a filter is removed. Whenever you delete an entry from the exclusion filter, check if the exceptions list contains any entries that are children of the deleted data. If so, you should delete them, since they no longer need to be listed. The system automatically deletes any exceptions that are children of a deleted exclusion unless you used wildcard expressions in the exclusion path.
1. From the CommCell Browser, expand Client Computers | <Client> | SharePoint Server, and then click <Backup Set>.
2. In the <Backup Set> tab, right-click the <Subclient>, and then click Properties.
3. In the Subclient Properties dialog box, click the Filters tab.
4. In the Exclude these folders box, select the filter that you want to delete.
5. Click Delete.
The filter is removed from the list.
6. Click OK.
Published On: 11/19/2013 V10 Service Pack 4A Page 152 of 201

You can add and modify Pre/Post processes for a subclient. These are batch files or shell scripts that you can run before or after certain job phases. For example, you can use an echo command to check the level of a backup. Similarly, you can include a case statement within a script to run specific operations based on the level of the backup job.
A Save As Script file can also be run as a pre/post process, if you include the absolute path of the associated input file in the script file.
Setting up Pre/Post Processes
1. From the CommCell Browser, expand Client Computers | <Client> | SharePoint Server, and then click <Backup Set>.
2. In the <Backup Set> tab, right-click the <Subclient>, and then click Properties.
3. In the Subclient Properties dialog box, click the Pre/Post Process tab.
4. To set up a Pre Backup process, next to the PreBackup process box, click Browse, and then select a process.
5. Click OK to save your selection.
Configuring Pre/Post Processing for Backups
Published On: 11/19/2013 V10 Service Pack 4A Page 153 of 201
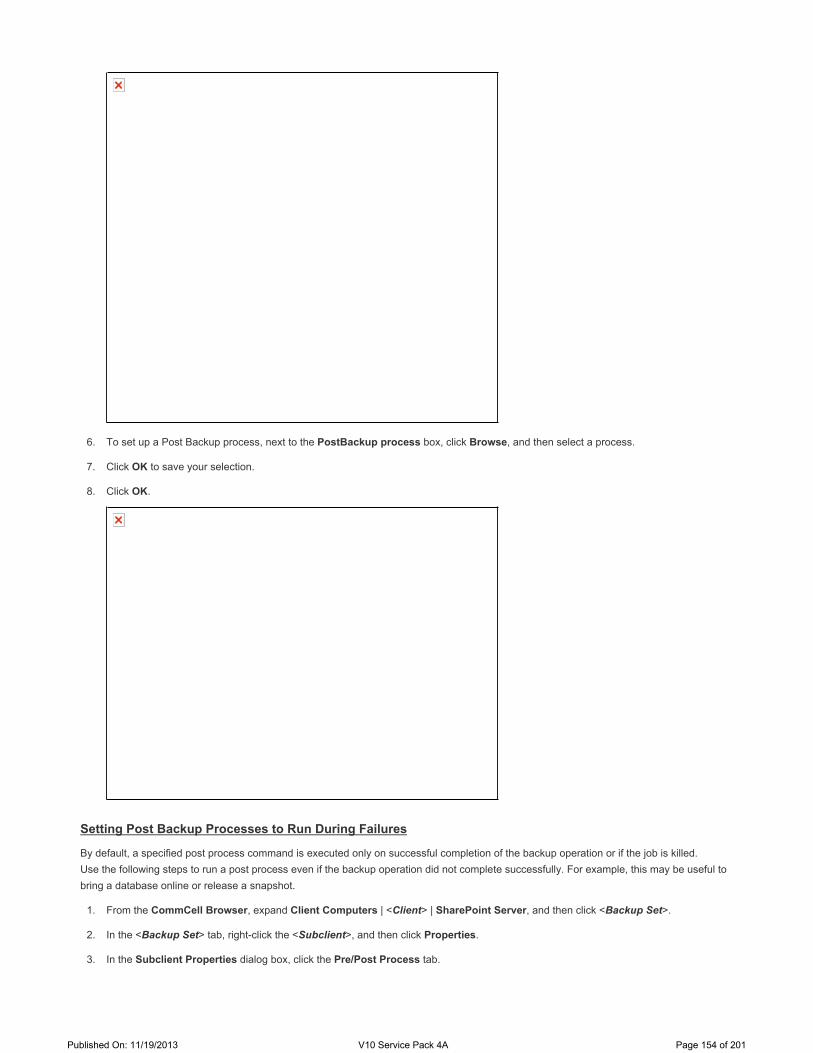
6. To set up a Post Backup process, next to the PostBackup process box, click Browse, and then select a process.
7. Click OK to save your selection.
8. Click OK.
Setting Post Backup Processes to Run During Failures
By default, a specified post process command is executed only on successful completion of the backup operation or if the job is killed. Use the following steps to run a post process even if the backup operation did not complete successfully. For example, this may be useful to bring a database online or release a snapshot.
1. From the CommCell Browser, expand Client Computers | <Client> | SharePoint Server, and then click <Backup Set>.
2. In the <Backup Set> tab, right-click the <Subclient>, and then click Properties.
3. In the Subclient Properties dialog box, click the Pre/Post Process tab.
Published On: 11/19/2013 V10 Service Pack 4A Page 154 of 201

4. To set up a Post Backup process, next to the PostBackup process box, click Browse, and then select a process.
5. Click OK to save your selection.
6. Select Run Post Backup Process for all attempts.
7. Click OK.
The following table describes the properties that can configured from the agent, backup set and subclient levels.
Modifying an Agent, Backup Set, or Subclient
OPTION DESCRIPTION RELATED TOPICS
Configuring the SharePoint iDataAgent for a Server Farm Deployment
This operation applies to server farm environments. You must configure the SharePoint Server iDataAgent to recognize remote SQL Servers.
You must install the Windows and SQL iDataAgents on the remote SQL Server to protect its data; the SharePoint iDataAgent will not do so. Ensure that backups of the SharePoint Server and the remote SQL Server are scheduled to run at about the same time.
1. From the CommCell Browser, navigate to Client Computers | Client
2. Right-click SharePoint Server, and then click Properties.
3. On the General tab, select SQL Databases hosted on a remote SQL Server.
4. Click OK. Configuring the SharePoint Server iDataAgent for Single Sign-On Service
If the SharePoint Server is configured to use the Single Sign-on Service, then the administrator account for this service must be entered in the SharePoint Server iDataAgent properties before any backups are run.
1. From the CommCell Browser, navigate to Client Computers | Client
2. Right-click SharePoint Server, and then click Properties.
3. On the General tab, under SSO Account, click Change Account.
The Change SharePoint SSO Account dialog box appears.
4. In the SharePoint SSO Account box, enter the SSO user name.
5. In the Password box, enter the associated password.
6. In Confirm Password box, enter the password again.
7. Click OK.
8. Click OK. Releasing Topology Manager Lock
You can release topology manager for backups and restores at the agent level.
1. From the CommCell Browser, navigate to Client Computers | Client
2. Right-click SharePoint Server, and then click Properties.
Published On: 11/19/2013 V10 Service Pack 4A Page 155 of 201
The SharePoint Server Properties dialog box appears.
3. On the General tab, select If topology manager is locked during backup/restore, force its release.
4. Click OK.
Changing Storage Policies
You can modify the storage policies in any of the following situations: To include a different media for the backup operation. To use a storage policy with a different retention criteria.
You can change the storage policies from the subclient level.
1. From the CommCell Browser, right-click the subclient.
2. Click Properties.
3. Click Storage Device.
4. Select the Storage policy from the drop-down menu.
5. Click OK.
Refer to Storage Policies.
Renaming a Subclient You can rename backup sets and subclients.
Renaming BackupSet:
1. From the CommCell Bowser, navigate to Client Computers | <Client> | File System.
2. Right-click the <Backup Set>, and then click Properties.
3. In the Backup Set box, type a name.
4. Click OK.
Renaming subclient:
1. From the CommCell Browser, navigate to Client Computers | <Client> | File System | <Backup Set>.
2. Right-click the <user-defined Subclient>, and then click Properties.
3. In the Subclient Name box, type a name.
4. Click OK. Setting Data Transfer Options
You can efficiently configure the available resources for transferring data secured by data protection operations from the subclient level. This includes the following:
Enable or disable Data Compression either on the client or the MediaAgent. Configure the transfer of data in the network using the options for Network Bandwidth Throttling and Network Agents.
You can configure the data transfer options.
1. From the CommCell Browser, expand Client Computers | <Client> | SharePoint Server, and then click <Backup Set>.
2. In the <Backup Set> tab, right-click the <Subclient>, and then click Properties.
3. Click the Storage Device tab.
4. Click the Data Transfer Option tab.
5. Choose the appropriate software compression option for this subclient.
6. Select the Throttle Network Bandwidth check box, and set the required bandwidth.
7. Click OK.
Refer to Data Compressionand Network Bandwidth Throttling.
Viewing Data Paths You can view the data paths associated with the primary storage policy copy of the selected storage policy or incremental storage policy. You can also modify the data paths including their priority from the subclient level.
1. From the CommCell Browser, expand Client Computers | <Client> | SharePoint Server, and then click <Backup Set>.
2. In the <Backup Set> tab, right-click the <Subclient>, and then click Properties.
3. Click the Storage Device tab.
4. In the Storage Policy list, click a storage policy name.
5. Click Data Paths. Configuring Activity You can enable backup operations from both the agent and subclient level. However, Refer to Activity Control.
Published On: 11/19/2013 V10 Service Pack 4A Page 156 of 201

The following sections describe the steps involved in deleting an agent, instance, or subclient.
Deleting an Agent
You need to uninstall or DeConfigure the agent software from the client computer before deleting from CommCell Browser. After you delete the client software, you can either leave the corresponding data intact for appropriate action or you can remove the data immediately. If you choose to remove the data immediately, you must delete the agent from the CommCell Browser. If you delete the agent, all of the agent's data is irretrievably lost.
Control you can enable restore operations only from the agent level.
1. From the CommCell Browser, expand Client Computers | <Client> | SharePoint Server, and then click <Backup Set>.
2. In the <Backup Set> tab, right-click the <Subclient>, and then click Properties.
3. Click the Activity Control tab, and then configure the option. To activate backup operations, select Enable Backup. To disable backup operations, clear Enable Backup.
4. Click OK. Configuring User Security
You can configure user security from the agent or subclient level.
You can perform the following functions:
Identify the user groups to which this CommCell object is associated. Associate this object with a user group. Disassociate this object from a user group.
1. From the CommCell Browser, expand Client Computers | <Client> | SharePoint Server, and then click <Backup Set>.
2. In the <Backup Set> tab, right-click the <Subclient>, and then click Properties.
3. Click the Security tab.
Refer to User Administration and Security.
Configuring Data Encryption Data encryption must be enabled at the client level before you can configure data
encryption at the subclient level. You can configure data encryption from the subclient level.
1. From the CommCell Browser, expand Client Computers | <Client> | SharePoint Server, and then click <Backup Set>.
2. In the <Backup Set> tab, right-click the <Subclient>, and then click Properties.
3. In the Subclient Properties dialog box, click the Encryption tab.
4. Select one of the following encryption options. To disable data encryption, select None. To encrypt data on the media only, select Media Only (MediaAgent side). To encrypt data on the network and on the media, select Network and Media (Agent Side). to encrypt data on the network, and then decrypt data on the media, select Network Only (Agent Encrypts, MediaAgent Decrypts).
5. Click OK. CommCell Configuration Report
The CommCell Configuration Report provides the properties of the CommServe, MediaAgents, clients, agents, SRM agents, subclients, and storage policies within the CommCell based on the selected filter criteria.
1. On the CommCell Console menu bar, select the Reports tab, and then click the button for the report that you want to run.
The Report Selection dialog box appears.
2. From the Reports pane, select CommCell Configuration, and then click Run.
The report appears in your default Web browser.
Refer to CommCell Configuration Report.
Deleting an Agent, Backup Set, or Subclientt
When you delete an instance or backupset, the associated data is logically deleted and you can no longer access the corresponding data from CommCell Console for recovery purposes.
Refer to the troubleshooting article on Recovering Data Associated with Deleted Clients and Storage Policies for information on how to recover data if you accidentally delete an entity.
Published On: 11/19/2013 V10 Service Pack 4A Page 157 of 201
You cannot delete an agent while operations for that agent are running.
1. From the CommCell Browser, navigate to Client Computers | <Client>.
2. Right-click the <Agent>, and then click Delete.
3. A confirmation message is displayed with the following message:
This operation will permanently delete the data backed up from this level and it cannot be restored.
4. Click OK to continue with the deletion operation or click No to abort the deletion.
Deleting a Backup Set
Consider the following before deleting a Backup Set:
You cannot delete a default Backup Set.
Schedules associated with the Backup Set are also automatically deleted.
1. From the CommCell Browser, navigate to Client Computers | <Client> | <Agent>.
2. Right-click the <Backup Set>, and then click Delete.
3. A confirmation message is displayed, asking if you want to delete the Backup Set.
Click No to cancel the deletion and retain the Backupset, or click Yes to continue the deletion.
Deleting a Subclient
Consider the following before deleting a subclient:
You cannot delete a default subclient.
Schedules associated with the subclient are also automatically deleted.
1. From the CommCell Browser, navigate to Client Computers | <Client> | <Agent> | <Backup Set>.
2. Right-click the <subclient> that you want to delete, and then click Delete.
3. A confirmation message is displayed, asking if you want to delete the subclient.
Click No to cancel the deletion and retain the subclient, or click Yes to continue the deletion.
Keywords
Published On: 11/19/2013 V10 Service Pack 4A Page 158 of 201

Advanced Backup – Site Collection – SharePoint Server iDataAgent
Full Backups
Scheduling a Backup
Managing JobsConfigure Job Restartability for an Individual JobControlling Jobs
Additional Options
Full backups provide the most comprehensive protection of data. To perform a full backup:
1. In the CommCell Browser, expand Client Computers | <Client> | SharePoint Server, and then click Site.
2. In the Site tab, right-click a <Subclient>, and then click Backup.
3. In the Backup Options dialog box, select Full, and then click OK.
In the Job Controller tab, you can track the progress of the job. When the backup has completed, the Job Controller displays Completed.
Follow the steps below to schedule a backup:
1. In the CommCell Browser, expand Client Computers | <Client> | SharePoint Server, and then click Site.
2. In the Site tab, right-click a <Subclient>, and then click Backup.
Table of contents
Full Backups
Scheduling a Backup
Published On: 11/19/2013 V10 Service Pack 4A Page 159 of 201
3. In the Backup Options dialog box, select Schedule, and then click Configure.
4. In the Schedule Name box, enter a name for the schedule, and then select the appropriate scheduling options.
For example:
Select Weekly, and then change the Start Time to 9:00 PM.
Published On: 11/19/2013 V10 Service Pack 4A Page 160 of 201

5. Click OK to close the Schedule Details dialog box.
6. Click OK to close the Backup Options dialog box.
The backup job will execute according to the options that you selected.
Configure Job Restartability for an Individual Job
1. In the CommCell Browser, expand Client Computers | <Client> | SharePoint Server, and then click Site.
A tab for Site appears in the CommCell Console.
2. Right-click a <Subclient>, and then click Backup.
3. Click Advanced.
4. In the Advanced Backup Options dialog box, click the Job Retry tab.
5. Select Enable Total Running Time and specify the maximum elapsed time before a job can be restarted or killed.
Select Kill Running Jobs When Total Running Time Expires to kill the job after reaching the maximum elapsed time.
6. Select Enable Number Of Retries and specify the number of retries.
7. Click OK.
8. Click OK to close the Backup Options dialog box.
Managing Jobs
Published On: 11/19/2013 V10 Service Pack 4A Page 161 of 201

Controlling Jobs
The following controls are available for running jobs in the Job Controller window:
Suspending a Job
1. From the Job Controller of the CommCell Console, right-click the job and select Suspend.
2. The job status may change to Suspend Pending for a few moments while the operation completes. The job status then changes to Suspended.
Resuming a Job
1. From the Job Controller of the CommCell Console, right-click the job and select Resume.
2. As the Job Manager attempts to restart the job, the job status changes to Waiting, Pending, or Running.
Killing a Job
1. From the Job Controller of the CommCell Console, right-click the job and select Kill.
2. Click Yes when the confirmation prompt appears if you are sure you want to kill the job. The job status may change to Kill Pending for a few moments while the operation completes. Once completed, the job status will change to Killed and it will be removed from the Job Controller window after five minutes.
The following table describes the available additional options to further refine your backup operations:
SuspendTemporarily stops a job. A suspended job is not terminated; it can be restarted at a later time.
ResumeResumes a job and returns the status to Waiting, Pending, Queued, or Running. The status depends on the availability of resources, the state of the Operation Windows, or the Activity Control setting.
KillTerminates a job.
Additional Options
OPTION DESCRIPTION RELATED TOPICS
Startup Options The Startup Options are used by the Job Manager to set priority for resource allocation. This is useful to give higher priority to certain jobs. You can set the priority as follows:
1. In the CommCell Browser, expand Client Computers | <Client> | SharePoint Server, and then click Databases.
2. Right-click the Subclient in the right pane and click Backup.
Refer to Job Priority and Priority Precedence.
Published On: 11/19/2013 V10 Service Pack 4A Page 162 of 201

3. Click Advanced and click Startup tab.
4. Select the Change Priority checkbox.
5. Enter a priority number - 0 is the highest priority and 999 is the lowest priority.
6. Select the Start up in suspended State check box to start the job in a suspended state.
7. Click OK. Alerts This option enables users or user groups to get automatic notification on the status of
the data protection job. Follow the steps given below to set up the criteria to raise notifications/alerts:
1. In the CommCell Browser, expand Client Computers | <Client> | SharePoint Server, and then click Databases.
2. Right-click the Subclient in the right pane and click Backup.
3. Click Advanced and select the Alert tab.
4. Click Add Alert.
5. From the Add Alert Wizard dialog box, select the required threshold and notification criteria and click Next.
6. Select the required notification types and click Next.
7. Select the recipients and click Next.
8. Click Finish.
9. Click OK.
Refer to Alerts.
Command Line Backups
Command Line Interface enables you to perform backups or restore from the command line. The commands can be executed from the command line or can be integrated into scripts.
You can also generate command line scripts for specific operations from the CommCell Browser using the Save As Script option.
Refer to Command Line Interface.
CommCell Readiness Report
The CommCell Readiness Report provides you with vital information such as connectivity and readiness of the Client, MediaAgent, and CommServe. It is useful to run this report before performing a backup or a recovery operation. Follow the steps given below to generate the report:
1. On the CommCell Console menu bar, select the Reports tab.
2. Click Readiness.
The Report Selection dialog box appears.
3. If necessary, select Reports | CommServer | CommCell Readiness in the left pane.
4. Select the Computers tab, and then click Modify below the Computers list.
5. In the dialog box that appears, clear Include All Client Computers and All Client Groups.
6. Select the appropriate client from the Exclude list, and then click Include >.
7. Click OK.
8. Select the MediaAgent tab, and then clear Include All MediaAgents.
9. Select the appropriate MediaAgent from the Exclude list, and then click Include >.
10. Click Run.
The report appears in your default Web browser.
Refer to CommCell Readiness Report.
Backup Job Summary Report
The Backup Job Summary Report provides you with information about all of the backup jobs that are run in last 24 hours for a specific subclient. You can get information such as status, time, data size, and so on for each backup job. It is useful to run this report after performing the backup. Follow the steps given below to generate the report:
1. On the CommCell Console menu bar, select the Reports tab.
2. Click Summary.
The Report Selection dialog box appears.
3. If necessary, select Reports | Jobs | Job Summary in the left pane.
4. On the General tab, select Data Management.
Refer to Backup Job Summary Report.
Published On: 11/19/2013 V10 Service Pack 4A Page 163 of 201
5. Select the Computers tab.
6. Select Subclient, and then select the Edit sub tab.
7. Navigate to Client Computers | <Client> | File System | Backup Set | <Subclient>.
8. Click Run.
The report appears in your default Web browser.Data Path Options Data Protection operations use a default Library, MediaAgent, Drive Pool, and Drive
as the Data Path. You can use this option to change the data path if the default data path is not available. Follow the steps given below to change the default data path:
1. In the CommCell Browser, expand Client Computers | <Client> | SharePoint Server, and then click Databases.
2. Right-click the Subclient in the right pane and click Backup.
3. Click Advanced and select the Data Path tab.
4. Select the MediaAgent and Library.
5. Select the Drive Pool and Drive for tape library.
6. Click OK.
Refer to Change Data Path.
Start New Media The Start New Media option enables you to start the data protection operation on a new media. This feature provides control over where the data physically resides. Use the following steps to start the data protection operation on a new media:
1. In the CommCell Browser, expand Client Computers | <Client> | SharePoint Server, and then click Databases.
2. Right-click the Subclient in the right pane and click Backup.
3. Click Advanced and select the Media tab.
4. Select the Start New Media check box.
5. Click OK.
Refer to Start New Media.
Mark Media Full on Success This option marks the media as full, two minutes after the successful completion of
the data protection job. This option prevents another job from writing to this media. Follow the steps given below:
1. In the CommCell Browser, expand Client Computers | <Client> | SharePoint Server, and then click Databases.
2. Right-click the Subclient in the right pane and click Backup.
3. Click Advanced and select Media tab.
4. Select the Mark Media Full on Success check box.
5. Click OK.
Refer to Export Media.
Allow Other Schedules to Use Media Set The Allow Other Schedules to use Media Set option allows jobs that are part of the
schedule or schedule policy and using the specific storage policy to start a new media. It also prevents other jobs from writing to the same set of media.
1. In the CommCell Browser, expand Client Computers | <Client> | SharePoint Server, and then click Databases.
2. Right-click the Subclient in the right pane and click Backup.
3. Click Advanced and select the Media tab.
4. Select the Allow Other Schedules To Use Media Set check box.
5. Click OK.
Refer to Creating an Exportable Media Set.
Extended Data Retention This option allows you to extend the expiration date of a specific job. This will override
the default retention set at the corresponding storage policy copy. Follow the steps given below to extend the expiration date:
1. In the CommCell Browser, expand Client Computers | <Client> | SharePoint Server, and then click Databases.
2. Right-click the Subclient in the right pane and click Backup.
3. Click Advanced and select the Media tab.
4. Select one of the following options: Infinite - Select this option to extend the expiration date by infinite number of
Refer to Extended Retention Rules.
Published On: 11/19/2013 V10 Service Pack 4A Page 164 of 201

days Number of day - Select this option to specify the number of days to extend the expiration date and then enter the number of days.
5. Click OK. Vault Tracker This feature provides the facility to manage media that is removed from a library and
stored in offsite locations. Depending on your VaultTracker setup, select the required options. Use the following steps to access and select the VaultTracker options.
1. In the CommCell Browser, expand Client Computers | <Client> | SharePoint Server, and then click Databases.
2. Right-click the Subclient in the right pane and click Backup.
3. Click Advanced and select the VaultTracking tab.
4. Select the required options.
5. Click OK.
Refer to Vault Tracker or Vault Tracker Enterprise.
Published On: 11/19/2013 V10 Service Pack 4A Page 165 of 201
Advanced Restore - SharePoint Server iDataAgent - Site Collection
In-Place Restore Method
Before You Begin
Delete the existing site collection or choose to overwrite all URLs during the restore procedure.
Create temporary space under the Job Results folder for staging Site Collections.
To restore a site collection to the same client:
1. In the CommCell Browser, expand Client Computers | <Client> | SharePoint Server.
2. Right-click <Site Collection Backup Set>, point to All Tasks, and then click Browse and Restore.
3. In the Restore Options dialog box, click View Content.
The Client browse tab lists all of the latest data that was backed up.
4. In the Client browse tab, click <Site Collection Backup Set>, and select the Site Collections that have to be restored.
5. Click Recover All Selected.
6. If you have already deleted the existing site collection, continue to step 8.
7. If you have not deleted the existing site collection, in the Restore Options dialog box, click Unconditional Overwrite.
8. Click OK.
When Unconditional Overwrite is selected, the existing sites are deleted and then restored.
Restore Browse and Restore
Table of Contents
SharePoint 2013 SharePoint 2010 Search Server 2008 SharePoint 2007Microsoft Search Server 2013
Microsoft SharePoint Foundation 2010
SharePoint Server 2010 (Standard and Enterprise)
Microsoft Office Project Server 2010
Fast Search Server 2010 for SharePoint
Microsoft Search Server 2010
Microsoft Search Server 2010 Express
Microsoft Search Server 2008
Microsoft Search Server 2008 Express
Microsoft Office SharePoint Server (MOSS) 2007
Microsoft Office Project Server 2007
Microsoft Office Forms Server 2007
Restoring a Site Collection
In-Place Restore MethodOut-of-Place Restore Method
Scheduling a Restore
Managing Restore Jobs
Controlling Jobs
Additional Restore Options
Restoring a Site CollectionIn-Place Restore MethodOut-of-Place Restore Method
Scheduling a Restore
Managing Restore JobsControlling Jobs
Additional Restore Options
Restoring a Site CollectionIn-Place Restore MethodOut-of-Place Restore Method
Scheduling a Restore
Managing Restore JobsControlling Jobs
Additional Restore Options
Restoring a Site CollectionIn-Place Restore MethodOut-of-Place Restore Method
Scheduling a Restore
Managing Restore JobsControlling Jobs
Additional Restore Options
Restoring a Site Collection
Published On: 11/19/2013 V10 Service Pack 4A Page 166 of 201
Out-of-Place Restore Method
Before You Begin
Delete the existing site collection or choose to overwrite all URLs during the restore procedure.
Create temporary space under the Job Results folder for staging Site Collections, Portal Indexes, and SharePoint metadata.
To restore a site collection to a different client:
1. In the CommCell Browser, expand Client Computers | <Client> | SharePoint Server.
2. Right-click <Site Collection Backup Set>, point to All Tasks, and then click Browse and Restore.
3. In the Restore Options dialog box, click View Content.
The Client browse tab lists all of the latest data that was backed up.
4. In the Client browse tab, click <Site Collection Backup Set>, and select the Site Collections that have to be restored.
5. Click Recover All Selected.
The Restore Options dialog box appears.
6. From the Destination client list, select the client to which you want to restore the site collection.
In case, you are manually appending an existing site collection location ensure that the path is in the following format:
http://WebAppUrl\/sites/OOP_testsite
Where:
http://WebAppUrl\ is the Existing Web Application.
/sites/OOP_testsite is the appended path where the restore will take place.
In case of a host-named site collection, the path should be in the following format:
http://v4-ss-rbs:80\http://host-named1.local:80
or
http://cwhh.common.local:333\http://named.test:333
or
http://cwhh.common.local:333\http://named.test:333/sites/NJ
Where:
http://v4-ss-rbs:80 and http://cwhh.common.local:333 are the Existing Web Application.
http://host-named1.local:80, http://named.test:333 and http://named.test:333/sites/NJ are the host-named site collections.
7. Optionally to restore the Site Collection to a particular database, click Store Site Collections in specified Database and enter the following details:
Database Server name
Database name
Published On: 11/19/2013 V10 Service Pack 4A Page 167 of 201

8. Optionally click Add new user to site to specify the user credentials of the administrator who has access to the Site Collection.
9. Click OK.
To schedule a restore:
1. In the CommCell Browser, expand Client Computers | <Client> | SharePoint Server.
2. Right-click <Databases Backup Set>, point to All Tasks, and then click Browse and Restore.
3. In the Browse and Restore Options dialog box, click View Content.
The Client browse tab lists all of the latest data that was backed up.
4. In the Client browse tab, select the Site Collection that you want to restore, and then click Recover All Selected.
5. In the Restore Options dialog box, click the Job Initiation tab.
6. Select Schedule, and then click Configure.
7. In the Schedule Name box, enter a name for the schedule.
8. Select the frequency with which you want the job to run, and then enter the corresponding date and time information.
9. Click OK.
10. Click OK.
Controlling Jobs
The following controls are available for running jobs in the Job Controller window:
Suspending a Job
Scheduling a Restore
Managing Restore Jobs
SuspendTemporarily stops a job. A suspended job is not terminated; it can be restarted at a later time.
ResumeResumes a job and returns the status to Waiting, Pending, Queued, or Running. The status depends on the availability of resources, the state of the Operation Windows, or the Activity Control setting.
KillTerminates a job.
Published On: 11/19/2013 V10 Service Pack 4A Page 168 of 201
1. From the Job Controller of the CommCell Console, right-click the job and select Suspend.
2. The job status may change to Suspend Pending for a few moments while the operation completes. The job status then changes to Suspended.
Resuming a Job
1. From the Job Controller of the CommCell Console, right-click the job and select Resume.
2. As the Job Manager attempts to restart the job, the job status changes to Waiting, Pending, or Running.
Killing a Job
1. From the Job Controller of the CommCell Console, right-click the job and select Kill.
2. Click Yes when the confirmation prompt appears if you are sure you want to kill the job. The job status may change to Kill Pending for a few moments while the operation completes. Once completed, the job status will change to Killed and it will be removed from the Job Controller window after five minutes.
Additional Restore Options
OPTION DESCRIPTION RELATED TOPICS
Skip Errors and Continue This option enables you to to continue the restore job regardless of media errors and
create a file that lists the full path names of the files that failed to get restored. Follow the steps given below to set this option:
1. In the CommCell Browser, expand Client Computers | <Client> | SharePoint Server.
2. Right-click <Backup Set>, point to All Tasks, and then click Browse and Restore.
3. In the Restore Options dialog box, click View Content.
The Client browse tab lists all of the latest data that was backed up.
4. In the Client tab, select the items that you want to restore, and then click Recover All Selected.
5. In the Restore Options dialog box, click Advanced.
6. In the Advanced Restore Options dialog box, click General.
7. On the General tab, select the Skip errors and continue check box.
8. Click OK. Startup Options The Startup Options are used by the Job Manager to set priority for resource
allocation. This is useful to give higher priority to certain jobs. You can set the priority as follows:
1. In the CommCell Browser, expand Client Computers | <Client> | SharePoint Server.
2. Right-click <Backup Set>, point to All Tasks, and then click Browse and Restore.
3. In the Restore Options dialog box, click View Content.
The Client browse tab lists all of the latest data that was backed up.
4. In the Client tab, select the items that you want to restore, and then click Recover All Selected.
5. In the Restore Options dialog box, click Advanced.
6. In the Advanced Restore Options dialog box, click Startup.
7. On the Startup tab, select Change Priority.
8. Enter a priority number - 0 is the highest priority and 999 is the lowest priority.
9. Select the Start up in suspended State check box to start the job in a suspended state.
10. Click OK.
Refer to Job Priority and Priority Precedence.
Copy Precedence By default, the system retrieves data from the storage policy copy with the lowest Refer to Recovering Your
Published On: 11/19/2013 V10 Service Pack 4A Page 169 of 201
copy precedence. If the data was pruned from the primary copy, the system automatically retrieves data from the other copies of the storage policy in the lowest copy precedence to highest copy precedence order. Once the data is found, it is retrieved, and no further copies are checked.
You can retrieve data from a specific storage policy copy (Synchronous Copy or Selective Copy). If data does not exist in the specified copy, the data retrieve operation fails even if the data exists in another copy of the same storage policy. Follow the steps given below to retrieve the data from a a specific storage policy copy:
1. In the CommCell Browser, expand Client Computers | <Client> | SharePoint Server.
2. Right-click <Backup Set>, point to All Tasks, and then click Browse and Restore.
3. In the Restore Options dialog box, click View Content.
The Client browse tab lists all of the latest data that was backed up.
4. In the Client tab, select the items that you want to restore, and then click Recover All Selected.
5. In the Restore Options dialog box, click Advanced.
6. In the Advanced Restore Options dialog box, click Copy Precedence.
7. On the Copy Precedence tab, select the Restore from copy precedencecheck box.
8. Enter the copy precedence number.
9. Click OK.
Data from Copies.
Data Path Options The data recovery operations use a default Library, MediaAgent, Drive Pool, and Drive as the Data Path. You can use this option to change the data path if the default data path is not available. Follow the steps given below to change the default data path:
1. In the CommCell Browser, expand Client Computers | <Client> | SharePoint Server.
2. Right-click <Backup Set>, point to All Tasks, and then click Browse and Restore.
3. In the Restore Options dialog box, click View Content.
The Client browse tab lists all of the latest data that was backed up.
4. In the Client tab, select the items that you want to restore, and then click Recover All Selected.
5. In the Restore Options dialog box, click Advanced.
6. In the Advanced Restore Options dialog box, click the Data Path tab.
7. Do any of the following to change the default data path: In the Use MediaAgent list, select the name of a MediaAgent. In the User Library list, select the name of a library. For tape library, in the Use Drive Pool list, select the name of a drive pool. For tape library, in the Use Drive list, select the name of a drive.
8. Click OK.
Refer to Change Data Path.
Browse Options These options allow you to restore deleted items or data that was backed up before a specific time, after a specific time, or during a specific time range.
1. In the CommCell Browser, expand Client Computers | <Client> | SharePoint Server.
2. Right-click <Backup Set>, point to All Tasks, and then click Browse and Restore.
3. In the Restore Options dialog box, click View Content.
The Client browse tab lists all of the latest data that was backed up.
4. In the Client tab, select the items that you want to restore, and then click Recover All Selected.
5. In the Restore Options dialog box, click Advanced.
6. In the Advanced Restore Options dialog box, click the Browse Options tab.
7. To restore deleted items, select Restore deleted items.
Published On: 11/19/2013 V10 Service Pack 4A Page 170 of 201
8. To restore items that were backed up during a specific time, select Specify Time Range.
9. From the Time Zone list, select a time zone.
10. Do any of the following to specify a time: To restore items that were backed up after a specific time, select Start Time, and then enter a date and time. To restore items that were backed up before a specific time, select End Time, and then enter a date and time. To restore items that were backed up during a specific time range, select both Start Time and End Time, and then enter the dates and times.
11. Click OK. Alerts This option enables users or user groups to get automatic notification on the status of
the data recovery job. Follow the steps given below to set up the criteria to raise notifications/alerts:
1. In the CommCell Browser, expand Client Computers | <Client> | SharePoint Server.
2. Right-click <Backup Set>, point to All Tasks, and then click Browse and Restore.
3. In the Restore Options dialog box, click View Content.
The Client browse tab lists all of the latest data that was backed up.
4. In the Client tab, select the items that you want to restore, and then click Recover All Selected.
5. In the Restore Options dialog box, click Advanced.
6. In the Advanced Restore Options dialog box, click Alerts.
7. Click Add Alert.
8. From the Add Alert Wizard dialog box, select the required threshold and notification criteria and click Next.
9. Select the required notification types and click Next.
10. Select the recipients and click Next.
11. Click Finish.
12. Click OK.
Refer to Alerts.
Command Line Restores
Command Line Interface enables you to perform backups or restore from the command line. The commands can be executed from the command line or can be integrated into scripts.
You can also generate command line scripts for specific operations from the CommCell Browser using the Save As Script option.
Refer to Command Line Interface.
CommCell Readiness Report
The CommCell Readiness Report provides you with vital information such as connectivity and readiness of the Client, MediaAgent, and CommServe. It is useful to run this report before performing a backup or a recovery operation. Follow the steps given below to generate the report:
1. On the CommCell Console menu bar, select the Reports tab.
2. Click Readiness.
The Report Selection dialog box appears.
3. If necessary, select Reports | CommServer | CommCell Readiness in the left pane.
4. Select the Computers tab, and then click Modify below the Computers list.
5. In the dialog box that appears, clear Include All Client Computers and All Client Groups.
6. Select the appropriate client from the Exclude list, and then click Include >.
7. Click OK.
8. Select the MediaAgent tab, and then clear Include All MediaAgents.
9. Select the appropriate MediaAgent from the Exclude list, and then click Include >.
10. Click Run.
The report appears in your default Web browser.
Refer to CommCell Readiness Report.
Published On: 11/19/2013 V10 Service Pack 4A Page 171 of 201

Restore Job Summary Report The Restore Job Summary Report provides you with information about all the data
recovery jobs that are run in last 24 hours for a specific client and agent. You can get information such as failure reason, failed objects, job options, and so on. It is useful to run this report after performing the restore. Follow the steps given below to generate the report:
1. On the CommCell Console menu bar, select the Reports tab.
2. Click Summary.
The Report Selection dialog box appears.
3. If necessary, select Reports | Jobs | Job Summary in the left pane.
4. On the General tab, select Data Recovery Jobs.
5. Select the Computers tab.
6. Select the appropriate client and the appropriate agent.
7. Click Run.
The report appears in your default Web browser.
Refer to Restore Job Summary Report.
Published On: 11/19/2013 V10 Service Pack 4A Page 172 of 201
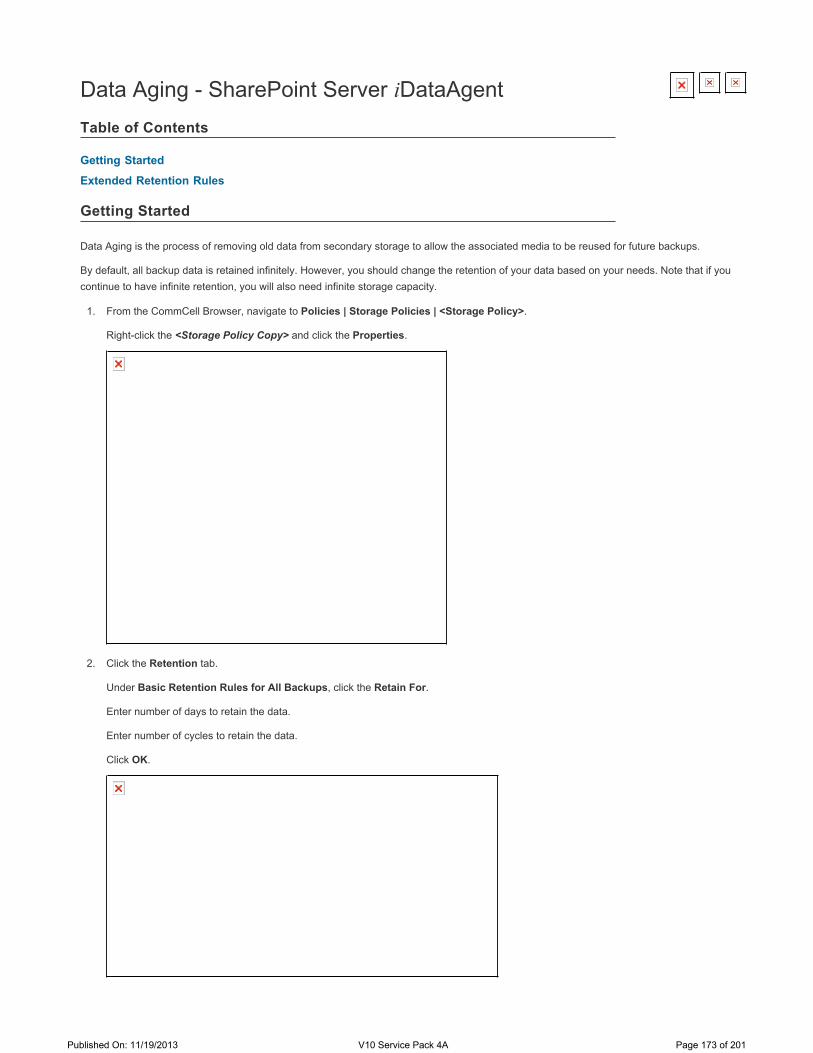
Data Aging - SharePoint Server iDataAgent
Getting Started
Extended Retention Rules
Data Aging is the process of removing old data from secondary storage to allow the associated media to be reused for future backups.
By default, all backup data is retained infinitely. However, you should change the retention of your data based on your needs. Note that if you continue to have infinite retention, you will also need infinite storage capacity.
1. From the CommCell Browser, navigate to Policies | Storage Policies | <Storage Policy>.
Right-click the <Storage Policy Copy> and click the Properties.
2. Click the Retention tab.
Under Basic Retention Rules for All Backups, click the Retain For.
Enter number of days to retain the data.
Enter number of cycles to retain the data.
Click OK.
Table of Contents
Getting Started
Published On: 11/19/2013 V10 Service Pack 4A Page 173 of 201
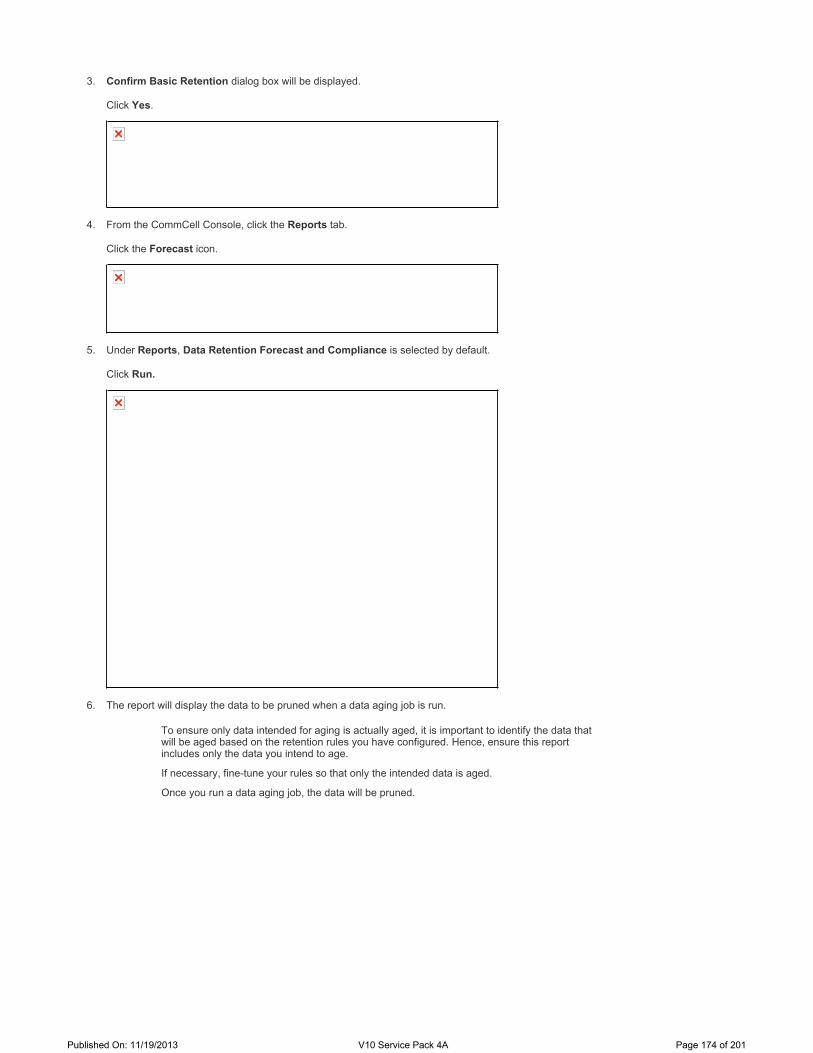
3. Confirm Basic Retention dialog box will be displayed.
Click Yes.
4. From the CommCell Console, click the Reports tab.
Click the Forecast icon.
5. Under Reports, Data Retention Forecast and Compliance is selected by default.
Click Run.
6. The report will display the data to be pruned when a data aging job is run.
To ensure only data intended for aging is actually aged, it is important to identify the data that will be aged based on the retention rules you have configured. Hence, ensure this report includes only the data you intend to age.
If necessary, fine-tune your rules so that only the intended data is aged.
Once you run a data aging job, the data will be pruned.
Published On: 11/19/2013 V10 Service Pack 4A Page 174 of 201

7. From the CommCell Console, right click the <CommServe> icon, point to All Tasks and then click Data Aging.
8. Under Job Initiation, by default Immediate is selected to run the job immediately.
Click OK.
9. You can track the progress of the job from the Job Controller window. When the job is completed, in the Job Controller the Status will be displayed as Completed.
Published On: 11/19/2013 V10 Service Pack 4A Page 175 of 201
Make sure that the job completes successfully. If the job did not complete successfully, rerun the job.
Extended retention rules allow you to keep specific full (or synthetic full) backups for longer periods of time.
Extended retention rules can be used in the following circumstances:
If you have a single drive tape library
If you want to create a hierarchical retention scheme (grandfather-father-son tape rotation)
In all other cases, it is recommended that the Auxiliary Copy feature be used for extended storage as it actually creates another physical copy of the data, thereby reducing the risk of data loss due to media failure.
Understanding Extended Retention Rules
Extended retention allows you to retain a specific full (or synthetic full) backup for an additional period of time. For example, you may want to retain your monthly full backups for 90 days.
Extended retention rules allow you to define three additional "extended" retention periods for full (or synthetic full) backups. For example:
You may want to retain your weekly full backups for 30 days.
You may want to retain your monthly full backup for 90 days.
You may want to retain your yearly full backup for 365 days.
A backup job will be selected for extended retention based on its start time. For example: If a backup job starts at 11:55 pm on August 31st and ends at 1 am on September 1st, then it will be selected as the last full backup for the month of August and will be picked up for extended retention.
Setting Up Extended Retention Rules
Use the following steps for setting up the extended retention rules:
1. Right-click the storage policy copy and click Properties.
2. Click the Retention tab.
3. Set the basic retention rules by clicking Retain for and entering the number of days and cycles appropriate for your organization.
4. Set the extended retention rules as follows:
a. Click the For button.
b. Enter the number of Days Total to retain the backup.
c. Click the Keep drop-down list, and select the desired backup criteria (e.g., Monthly Full, Weekly Full).
d. Click the Grace Days drop-down list and select the number of days (e.g., 2).
This allows you to consider the additional number of days along with the Extended Retention rule. For example, if the last full backup job fails with in the defined extended retention criteria, then the next full backup job that ran in the specified grace days will be selected for retention.
5. Repeat Step 4 to configure additional extended retention.
6. Click OK.
Extended Retention Rules
Published On: 11/19/2013 V10 Service Pack 4A Page 176 of 201
Advanced Topics
Data Aging - AdvancedProvides comprehensive information on additional Data Aging capabilities.
Published On: 11/19/2013 V10 Service Pack 4A Page 177 of 201
Additional Operations - SharePoint Server iDataAgent
Audit Trail
Auxiliary Copy
Online Help Links
Operating System and Application Upgrades
Operation Window
Schedule Policy
Storage Policy
Uninstalling Components
Erase Data
The Audit Trail feature allows you to track the operations of users who have access to the CommCell. This capability is useful if a detrimental operation was performed in the CommCell and the source of that operation needs to be determined.
Audit Trail tracks operations according to four severity levels:
Critical: This level records operations that will result in imminent loss of data.
High: This level records operations that may result in loss of data.
Medium: This level records changes to the general configuration of one or more entities. Such changes may produce unintended results when operations are performed.
Low: This level records changes to status, addition of entities, and other operations that have minimal impact on existing CommCell functions.
To set Audit Trail retention periods:
1. From the Home tab in the CommCell Console, click Control Panel. The Control Panel dialog box appears.
2. From the Monitoring options, click Audit Trail.
3. From the Audit Trail dialog box, select the desired retention time (in days) for each severity level.
4. Click OK.
For details, see Audit Trail.
An auxiliary copy operation allows you to create secondary copies of data associated with data protection operations, independent of the original copy.
1. Expand the Policies node, right-click storage policy for which you want to perform an auxiliary copy, click All Tasks, and then click Run Auxiliary Copy.
2. If you are starting the auxiliary copy operation from the CommServe level, select the storage policy for which you wish to perform the auxiliary copy.
3. If the source copy is configured with a shared library, select the Source MediaAgent for the auxiliary copy.
4. Click OK to start the auxiliary copy operation. A progress bar displays the progress of the operation.
Table of contents
Audit Trail
Auxiliary Copy
If you are starting the auxiliary copy operation from the Storage Policy level, the Storage Policy field is already populated with the name of the Storage Policy you selected.
Published On: 11/19/2013 V10 Service Pack 4A Page 178 of 201
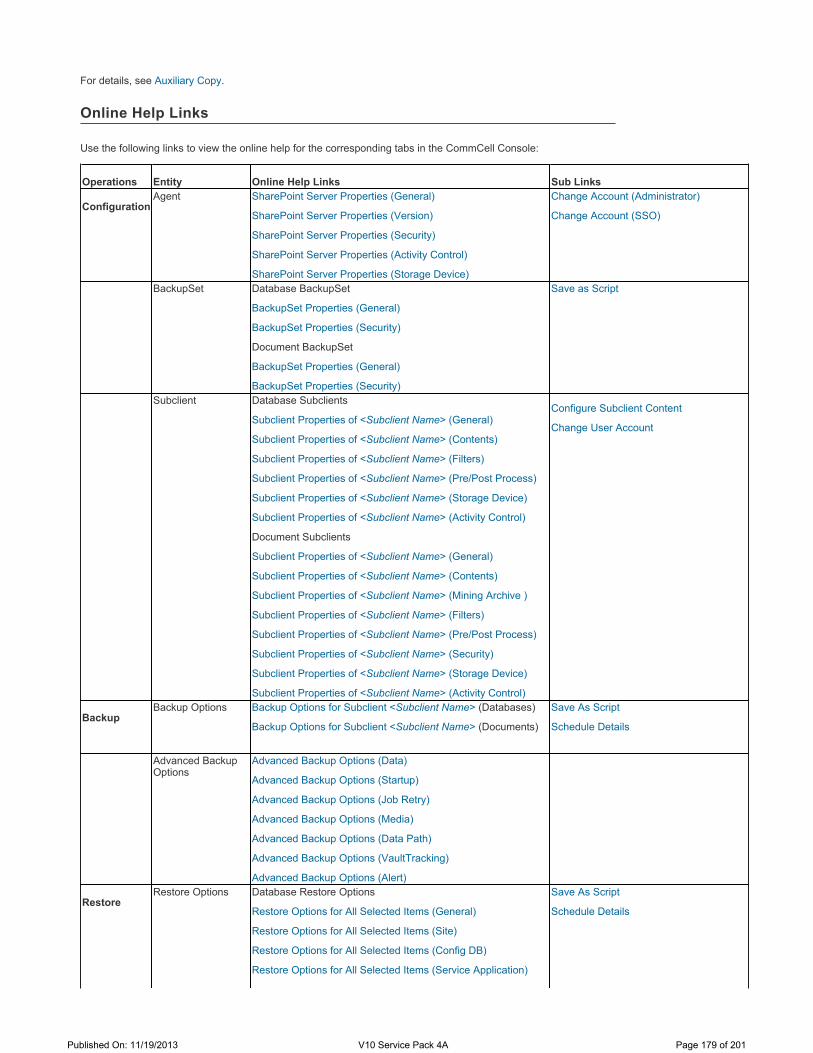
For details, see Auxiliary Copy.
Use the following links to view the online help for the corresponding tabs in the CommCell Console:
Online Help Links
Operations Entity Online Help Links Sub Links
ConfigurationAgent SharePoint Server Properties (General)
SharePoint Server Properties (Version)
SharePoint Server Properties (Security)
SharePoint Server Properties (Activity Control)
SharePoint Server Properties (Storage Device)
Change Account (Administrator)
Change Account (SSO)
BackupSet Database BackupSet
BackupSet Properties (General)
BackupSet Properties (Security)
Document BackupSet
BackupSet Properties (General)
BackupSet Properties (Security)
Save as Script
Subclient Database Subclients
Subclient Properties of <Subclient Name> (General)
Subclient Properties of <Subclient Name> (Contents)
Subclient Properties of <Subclient Name> (Filters)
Subclient Properties of <Subclient Name> (Pre/Post Process)
Subclient Properties of <Subclient Name> (Storage Device)
Subclient Properties of <Subclient Name> (Activity Control)
Document Subclients
Subclient Properties of <Subclient Name> (General)
Subclient Properties of <Subclient Name> (Contents)
Subclient Properties of <Subclient Name> (Mining Archive )
Subclient Properties of <Subclient Name> (Filters)
Subclient Properties of <Subclient Name> (Pre/Post Process)
Subclient Properties of <Subclient Name> (Security)
Subclient Properties of <Subclient Name> (Storage Device)
Subclient Properties of <Subclient Name> (Activity Control)
Configure Subclient Content
Change User Account
BackupBackup Options Backup Options for Subclient <Subclient Name> (Databases)
Backup Options for Subclient <Subclient Name> (Documents)
Save As Script
Schedule Details
Advanced Backup Options
Advanced Backup Options (Data)
Advanced Backup Options (Startup)
Advanced Backup Options (Job Retry)
Advanced Backup Options (Media)
Advanced Backup Options (Data Path)
Advanced Backup Options (VaultTracking)
Advanced Backup Options (Alert)
RestoreRestore Options Database Restore Options
Restore Options for All Selected Items (General)
Restore Options for All Selected Items (Site)
Restore Options for All Selected Items (Config DB)
Restore Options for All Selected Items (Service Application)
Save As Script
Schedule Details
Published On: 11/19/2013 V10 Service Pack 4A Page 179 of 201
Operating system upgrades are only supported when upgrading from one version of an OS to a different version of the same OS (e.g., Win2003 to Win2008). The two methods of upgrading are:
Seamless Upgrade - This involves uninstalling the Agent software, upgrading the operating system, and then re-installing the Agent software.
Full OS Replacement - This involves performing a clean install of a new version of the OS, re-installing any application software, then re-installing the CommServe, MediaAgent, and/or Agent software.
For Full OS Replacement, the client computer must be configured to have the CommServe, MediaAgent, and/or Client software re-installed to the same location, the same Fully Qualified Domain Name or short domain name, the same partitions, disk drive format (FAT, NTFS, et. al.), and IP configuration as previously.
Use the following strategy to upgrade the operating system software:
Identify the computers you want to upgrade and the CommCell components installed on each of these computers.
Choose the type of upgrade procedure you want to use on each computer: seamless or full replacement.
CommServe, MediaAgent, and Client computers can be upgraded in any order.
For details, see Operating System and Application Upgrades.
For SharePoint Database Backup Sets:
After the Application Upgrade of SharePoint Server, all content will be auto-discovered into the default subclient. Backup for other subclients may fail because they have no content. It is recommended to perform a manual discovery and assign content to proper subclients after the Application Upgrade of SharePoint Server
By default, all operations in the CommCell can run for 24 hours. To prevent certain operations from running during certain periods of the day, you can define operation rules so that these operations are disabled during those times.
When operation rules are configured, operations that are started within the time window specified will go to a queued (as opposed to pending) state. Once the time window specified in the operation rule has elapsed, these queued or running operations will resume automatically.
1. In the CommCell Browser, right-click the appropriate entity, click All Tasks, and then click Operation Window.
2. Click Add.
3. From the Operation Window dialog box:
Enter the name of the rule in the Name field.
Restore Options for All Selected Items (Windows SharePoint Services Web Application)
Restore Options for All Selected Items (Service Application Proxy)
Restore Options for All Selected Items (Job Initiation)
Document Restore Options
Restore Options for All Selected Items (General)
Restore Options for All Selected Items (Job Initiation)Advanced Restore Options
Advanced Restore Options (General)
Advanced Restore Options (Startup)
Advanced Restore Options (Copy Precedence)
Advanced Restore Options (Data Path)
Advanced Restore Options (Alert)
Operating System and Application Upgrades
If it is necessary to remove Agent software to facilitate an operating system or application upgrade, do not delete the icon for the Agent from the CommCell Console, or all associated backed up data will be lost.
Operation Window
Published On: 11/19/2013 V10 Service Pack 4A Page 180 of 201
Select either an administration, data protection (either full or non-full), and/or a data recovery operation from the Operations pane.
4. Click OK.
For details, see Operation Window.
An agent specific data protection schedule policy can be used as a scheduling template for data protection operations for the SharePoint Server agents in a CommCell.
This type of data protection policy is useful when there are many clients or subclients within the CommCell that require same schedules for specific data protection operations. Additionally this policy provides the ability to granularly define advanced data protection options specific to the SharePoint agent.
Use the steps given below to create a data protection schedule policy:
1. From the CommCell Browser, navigate to Policies.
2. Right-click Schedule Policies and click New Schedule Policy.
3. Type a name for the schedule policy in the Name box.
4. From the Agent Type list, expand SharePoint and select Protected Documents.
5. Type an appropriate description in the Description box.
6. Click Add.
7. Type a name in the Schedule Name box and select the appropriate scheduling options.
8. Click the Backup Options tab and select the type of backup and other options that apply to your environment.
Optionally, you can click Advanced to define advanced backup options for the agent.
9. Click OK.
10. Click the Associations tab.
11. Select the client computer or client groups that you want to associate with the schedule policy. You can also associate the schedule policy to a specific Agent, backup set or subclient of a client computer by expanding the client node.
12. Click OK.
Schedule Policy
Published On: 11/19/2013 V10 Service Pack 4A Page 181 of 201

A Storage policy defines the data lifecycle management rules for protected data. Storage policies map data from its original location to a physical storage media and determine its retention period.
1. From the CommCell Browser, navigate to Policies.
2. Right-click Storage Policies, and then click New Storage Policy.
3. Click Next.
4. Select Data Protection and Archiving to create a regular storage policy or CommServe Disaster Recovery Backup to backup the CommServe database and click Next.
5. In the Storage Policy Name box, specify the name of the storage policy, and then click Next.
6. From the Library list, select a library for the primary copy, and then click
7. From the MediaAgent list, select the MediaAgent, and then click Next.
8. Enter number of data streams and set the retention period for the policy, and then click Next.
9. Click Next.
10. From the MediaAgent Name list, select the MediaAgent.
11. In the Location box, type or click Browse to your designated deduplication database location, and then click Next.
Storage Policy
Published On: 11/19/2013 V10 Service Pack 4A Page 182 of 201

12. Confirm your selections, and then click Finish.
For details, see Storage Policy.
You can uninstall the components using one of the following method:
Method 1: Uninstall Components Using the CommCell Console
1. From the CommCell Browser, right-click the desired Client Computer and click All Tasks -> Add/Remove Software and click Uninstall Software.
2. Uninstall Software Options dialog will appear.
3. In the Uninstall Software tab, select Uninstall All to uninstall all the software packages.
4. In the Job Initiation tab, select Immediate to run the job immediately.
You can track the progress of the job from the Job Controller or Event Viewer.
Method 2: Uninstall Components from Add or Remove Programs
1. Click the Start button on the Windows task bar and then click Control Panel.
2. Double-click Add/Remove Programs.
For Windows Vista/Windows 2008, click Uninstall a Program in the Control Panel.
3. Click Remove to uninstall the components in the following sequence:
1. <Agent>
2. File System iDataAgent
3. Base Software
For details, see Uninstalling Components.
See Erase Backed Up Data - SharePoint Server iDataAgent.
Back to Top
Uninstalling Components
Method 1: Uninstall Components Using the CommCell Console
Method 2: Uninstall Components from Add or Remove Programs
Erase Data
Advanced TopicsProvides comprehensive information about additional capabilities for the following features:
Audit TrailAuxiliary CopyLicense AdministrationLicense Usage by CapacityOperation WindowSchedule PolicyStorage PoliciesUninstalling Components
Published On: 11/19/2013 V10 Service Pack 4A Page 183 of 201
Offline Restore - SharePoint Server iDataAgent
Overview
PrerequisitesLicense RequirementsSupported VersionsClient Requirements
Configuring Offline Mining
Offline Browse and Restore of Documents
Offline Browse and Restore of Site Collections
SharePoint Offline browse and restore allows you to browse and recover data from a granular level of a file, library, sub site or a Site Collection. This is especially useful in cases where there is not a granular level backup available that contains the data to be recovered. This procedure requires availability of a Content Database attached to a SQL Server.
The following are prerequisites to using this feature:
License Requirements
The SharePoint Offline Mining Tools require the Offline Mining Enabler for SharePoint license.
Supported Versions
SharePoint Sever 2010
SharePoint Server 2013
Client Requirements
The source client machine must have:
Microsoft SQL Server with an attached Content Database.
The destination client machine must have:
SharePoint Server iDataAgent
You can configure to mine an offline Content Database by following the steps given below:
1. In the CommCell Browser, expand Client Computers | <Client> | SharePoint Server.
2. Right-click SharePoint Server and click Properties.
3. On the General tab select Enable Offline Mining.
4. Click Ok.
Restore Browse and Restore Offline Restore
Table of contents
Overview
Prerequisites
Configuring Offline Mining
Published On: 11/19/2013 V10 Service Pack 4A Page 184 of 201
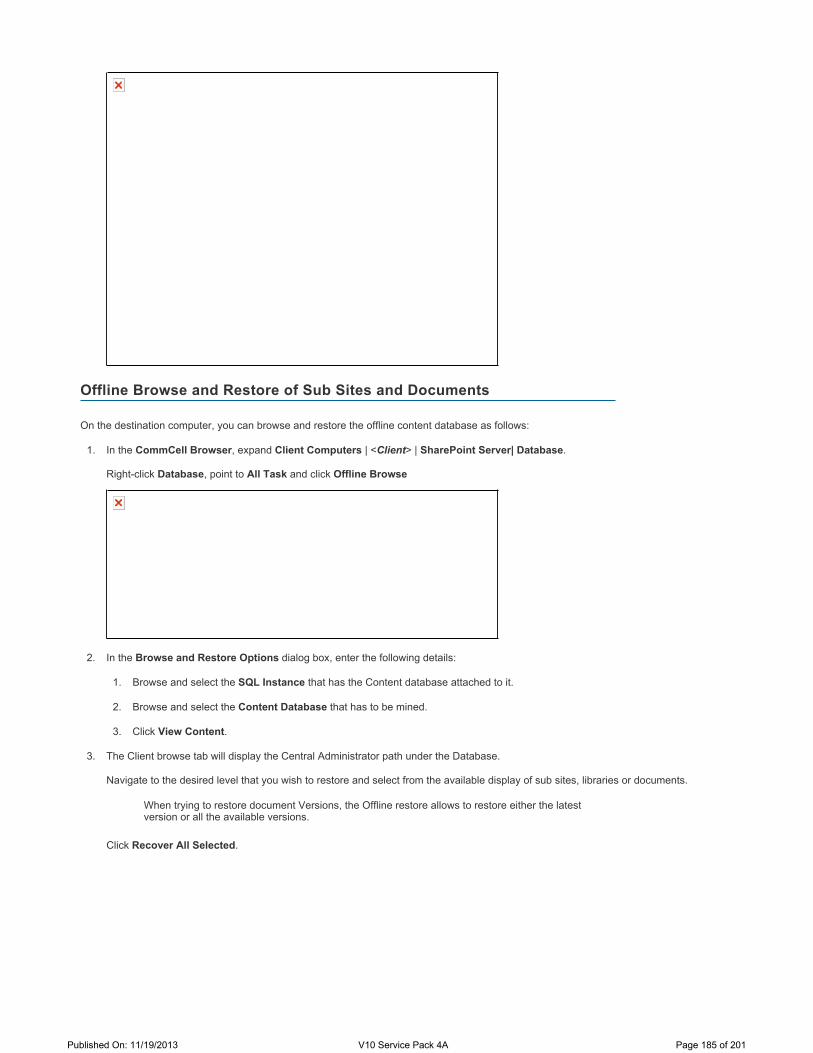
On the destination computer, you can browse and restore the offline content database as follows:
1. In the CommCell Browser, expand Client Computers | <Client> | SharePoint Server| Database.
Right-click Database, point to All Task and click Offline Browse
2. In the Browse and Restore Options dialog box, enter the following details:
1. Browse and select the SQL Instance that has the Content database attached to it.
2. Browse and select the Content Database that has to be mined.
3. Click View Content.
3. The Client browse tab will display the Central Administrator path under the Database.
Navigate to the desired level that you wish to restore and select from the available display of sub sites, libraries or documents.
Click Recover All Selected.
Offline Browse and Restore of Sub Sites and Documents
When trying to restore document Versions, the Offline restore allows to restore either the latest version or all the available versions.
Published On: 11/19/2013 V10 Service Pack 4A Page 185 of 201
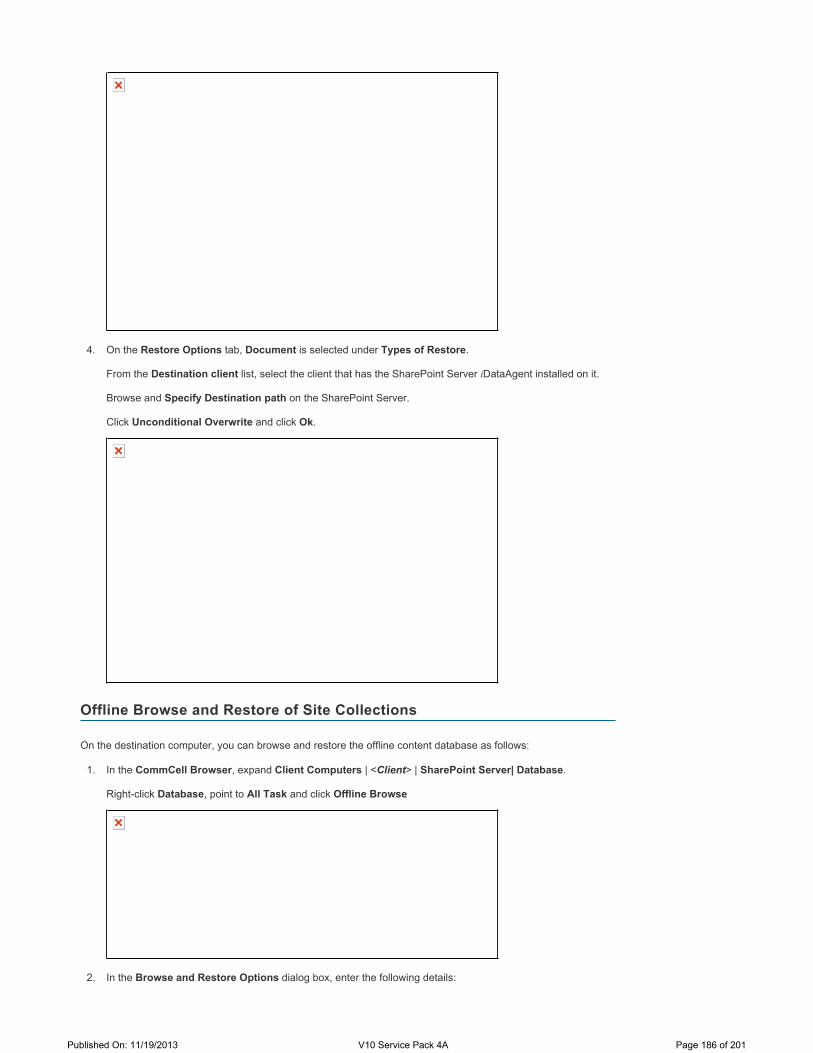
4. On the Restore Options tab, Document is selected under Types of Restore.
From the Destination client list, select the client that has the SharePoint Server iDataAgent installed on it.
Browse and Specify Destination path on the SharePoint Server.
Click Unconditional Overwrite and click Ok.
On the destination computer, you can browse and restore the offline content database as follows:
1. In the CommCell Browser, expand Client Computers | <Client> | SharePoint Server| Database.
Right-click Database, point to All Task and click Offline Browse
2. In the Browse and Restore Options dialog box, enter the following details:
Offline Browse and Restore of Site Collections
Published On: 11/19/2013 V10 Service Pack 4A Page 186 of 201
1. Browse and select the SQL Instance that has the Content database attached to it.
2. Browse and select the Content Database that has to be mined.
3. Click View Content.
3. The Client browse tab will display the Central Administrator path under the Database.
Navigate to the desired Site Collection.
Click Recover All Selected.
4. On the Restore Options tab, Document is selected under Types of Restore.
From the Destination client list, select the client that has the SharePoint Server iDataAgent installed on it.
Browse and Specify Destination path on the SharePoint Server.
Click Unconditional Overwrite.
Optionally to restore the Site Collection to a particular database, click Store Site Collections in specified Database and enter the following details:
Database Server name
Database name
Optionally click Add new user to site to specify the user credentials of the administrator who has access to the Site Collection.
Click Ok.
Published On: 11/19/2013 V10 Service Pack 4A Page 187 of 201

Published On: 11/19/2013 V10 Service Pack 4A Page 188 of 201
Add-On Components - Offline Database Restore
If you want to browse and recover individual SharePoint files, rather than an entire database, you can use the SharePoint Offline Mining feature. With this feature, you can back up SharePoint document and picture libraries to an offline database, and then restore individual files to the active SharePoint site through the CommCell Console. There are several methods for creating an offline SharePoint database including out-of-place restore, replication, and manual restore. Offline database restores cannot be performed on SharePoint 2010 setups.
This method consists of the following steps:
1. Ensure that the source and destination computers satisfy the prerequisites.
2. Create an offline copy of the SharePoint database.
3. Mine and restore documents from the offline copy to the active SharePoint database.
Before creating the offline copy, ensure that the source and destination clients satisfy the following requirements:
License Requirements
You must back up a subclient of the SharePoint Server Configuration Database on the source computer, and then restore it to a dump file. Next, you must manually copy the dump file to the destination computer, and then restore using a SQL Server application, such as SQL Server Management Studio.
Performing a Backup
Follow these steps to perform a backup of the Database backup set:
1. In the CommCell Browser, expand Client Computers | <Client> | SharePoint Server, and then click Databases.
2. In the Databases tab, right-click a <Subclient>, and then click Backup.
3. In the Backup Options dialog box, select Full, and then click OK.
In the Job Controller tab, you can track the progress of the job. When the backup has completed, the Job Controller displays Completed.
Manual Restore Method
Prerequisites
SOURCE COMPUTER DESTINATION COMPUTEREnsure that the following are installed on the computer:
SharePoint Server application SharePoint Server iDataAgent (optional) SQL Server iDataAgent
Ensure that the following are installed on the computer: SharePoint Server iDataAgent SQL Server iDataAgent
AGENT/COMPONENT LICENSE TYPE
Microsoft SharePoint Server Application Class 1
Creating an Offline Copy of the Database
Published On: 11/19/2013 V10 Service Pack 4A Page 189 of 201
Restoring the Configuration Database to a SQL Dump File
Follow these steps to restore the Configuration Database, and then save it to a dump file:
1. In the CommCell Browser, expand Client Computers | <Client> | SharePoint Server.
2. Right-click Databases, point to All Tasks, and then click Browse Backup Data.
3. In the Browse Options dialog box, click OK.
4. In the Client browse tab, select Configuration Database, and then click Recover All Selected.
5. In the Restore Options dialog box, click Restore SQL Db to, and then enter a location in which to save the .dmp file.
Copying the SQL Dump File to the Destination Computer
Follow these steps to copy the dump file to the destination computer and then restore using a SQL Server Application:
Once you have restored the .dmp file, you can browse and restore files from the SharePoint database on the destination computer with the SharePoint Server iDataAgent.
1. Copy the .dmp file that you just created on the source computer and paste it to a location on the destination computer.
2. Restore the .dmp file on the destination computer using a SQL Server Application, such as SQL Server Management Studio.
Mining and Restoring from the Offline Copy
Published On: 11/19/2013 V10 Service Pack 4A Page 190 of 201

1. In the CommCell Browser, expand Client Computers | <Client> | SharePoint Server.
2. Right-click Documents, point to All Tasks, and then click Browse Backup Data.
In the Browse Options dialog box, select Browse data from SQL.
Published On: 11/19/2013 V10 Service Pack 4A Page 191 of 201
3. In the SQL Instance box, enter the location of the SQL Server on which the SharePoint databases that you recovered reside.
Next to the User Account box, click Edit, and then enter the user name and password of an account that has access to the SQL server.
In the Configure Database box, enter the location of the SharePoint Configuration database on the destination computer.
Click OK.
A Client browse tab appears in the CommCell Console.
In the Client browse tab, select the documents that you want to restore, and then click Recover All Selected.
The Restore Options dialog box appears.
4. In Destination client list, click the name of the original source computer on which the live SharePoint database resides, and then click OK.
The documents are restored to the active SharePoint database.
Published On: 11/19/2013 V10 Service Pack 4A Page 192 of 201

Published On: 11/19/2013 V10 Service Pack 4A Page 193 of 201

Best Practices - SharePoint Server iDataAgent
Backing Up Large Site Collections
For SharePoint 2010 versions, a Site Collection that is 100 gigabytes (GB) or smaller can successfully be backed up and restored using a DataBase Backup Set Site Collection level backup and restore. For a Site Collection that is larger than 100 gigabytes (GB), you need to backup and restore using a Content Database level backup and restore. For more information, see Advanced Restore - SharePoint Server iDataAgent.
Re-configuring Default Subclient Content
We recommend that you do not re-configure the content of a default subclient because this would disable its capability to serve as a catch-all entity for client data. As a result, some data will not get backed up or scanned.
Performing Backups after Changing File Filters and Exceptions
Performing a full backup after changing filters or exceptions is recommended. Since Incremental backups only back up data that has been modified since the last backup, previously filtered files whose filters are now removed, will not be backed up unless they have been modified since that last backup. To back up previously filtered files that have not been modified but whose filters have been removed since the last backup, you need to run a Full backup.
Backing Up A Remote SQL Database With The SharePoint Server iDataAgent
If you are upgrading from Data Protection Suite 9.0 to Data Protection Suite 10.0, you should not start backing up remote SQL databases with the SharePoint Server iDataAgent.
Enhance SharePoint Server iDataAgent data protection performance
To enhance the data protection performance of the agent it is recommended to configure multiple Network Interface Cards (NIC) on the Application Server.
For example if there are 2 NICs configured on the Application Server 1 would be used for pulling the data from the SQL server. Whereas, the second NIC would be used for sending the data to the MediaAgent.
Published On: 11/19/2013 V10 Service Pack 4A Page 194 of 201

Frequently Asked Questions - SharePoint Server iDataAgent
General
Libraries and Library Items
Lists and List Items
Can I individually restore list resource type/ resource or reservations?
To restore sites created using a Room Equipment Reservations template, it is recommended to Restore a SharePoint Server Site Collection from the database backup set level. Restoring individual lists, such as Resources, Reservations, and Resource Type is not supported unless the site and lists exist and they are restored in the following order:
Items from List Resource Type
Items from List Resources
Items from List Reservations
Why am I Unable to Backup Data that was Created Using a Third Party Feature?
It is recommended to verify if the particular third party feature is currently installed. If it has been uninstalled then backup is not supported for the data, which was created using the third party feature.
Why Are Documents in the CommCell Console a Different Size than the Same Documents in the SharePoint User Interface?
While browsing documents in CommCell Console, the size of documents may not match the size that appears in the SharePoint Server User Interface. This is due to metadata being backed up with the document, which artificially could increase its size.
What do I do when I upgrade the SharePoint Server to a newer version
The system automatically detects and displays the newer version in the CommCell Console after the next backup runs.
When does a Non-Full Backup Automatically get Converted to a Full Backup?
A non-full backup is automatically converted to a full backup in the following situations:
First backup of the subclient.
Re-associating a subclient to another storage policy.
Promote a secondary storage policy copy that is not synchronized with a primary copy (for all the subclients of a storage policy).
If a backup job within the most recent backup cycle is pruned or disabled from a primary copy.
CommCell Migration operation.
Are There Size Limits on Site Collection Restores?
You can restore site collections up to 15 GB with site collection backups from WSS v3, MOSS 2007, Project Server 2007, Forms Server 2007, and Search Server 2007. You can restore site collections up to 100 GB with site collection backups from SharePoint Server 2010, SharePoint 2010 Foundation, Project Server 2010 and Search Server 2010.
Are Cross-Application Restores Supported?
No. Cross-application restores of databases between different versions of SharePoint Servers are not supported. Also, restore operations across clients with different Windows SharePoint Services (WSS) Service Pack levels are not supported.
Table of Contents
General
Published On: 11/19/2013 V10 Service Pack 4A Page 195 of 201

Can I Restore SharePoint Data to a Different Client?
Yes, as long as the destination client meets the following criteria:
Resides in the same CommCell as the client whose data was backed up.
Has the SharePoint Server iDataAgent installed and operational.
SharePoint Server version is the same as that of the source client.
Either in the same domain as the original server, or in a domain that has the proper trust relationship established both with the original domain, as well as all of the domains with which the original server’s domain had trust relationships.
What Happens When a New Subclient Has the Same Name as a Deleted Subclient?
In cases where a new subclient is created with the same name as a deleted subclient, the system will append a Unix time stamp to the deleted subclient's name in data protection job history reports and views to distinguish the two subclients. For example, subclientname_1104257351.
I am using SharePoint 2007, and I am unable to see Alternate Access Mapping for the non-default zones?
Backup and restore of Web Application's Alternate Access Mapping is not supported for SP2007.
It is recommended that you document the Alternate Access Mapping (AAM) settings.
In order to do this, export your AAM settings to a text file by using the command stsadm -o enumalternatedomains.
Back up the text file by using the File System iDataAgent. For example:
Write the AAM settings for the Contoso site to a text file on drive C. stsadm -o enumalternatedomains -url http://contoso:1234 > c:\aambackup.txt
Why Is the Index Cache Larger in Size in V10 as Compared to the Index Cache that was Created in the Previous Version?
In the previous version, meta data of each folder was stored in the Index Cache. Whereas, in V10 meta data of each file is stored in the Index Cache. Therefore, with an increase in the number of files that are being backed up the size of the index cache will increase too.
For example, Index size for a site with 5 libraries each with 5000 files in the previous version and V10 :
Is SharePoint VSS writer the only backup method to protect SharePoint Database/Farm?
The SharePoint VSS writer supports Content database and Search Service Applications backups. All other SharePoint components can be protected without the VSS writer. By default the Content databases are excluded from the SharePoint database backup operation. We recommend to use the SQL Server iDataAgent to backup the Content Databases.
After upgrading from V9 to V10, why am I unable to view database backups during browse and restore?
In order to browse through the data that was backed up in V9, specify the End Time (which is a date /time before the completion of upgrade) in the Restore Options window. For details see, Browse and Restore Data Before a Specified Backup Time.
How Do I Prevent ASPX and Master Page Errors During a Restore?
Under the MSSharepointDocAgent section, create an additional setting for DWORD dImportRetainObjectIdentity with a value of ‘0’.
After running a restore from the Commcell Console, ensure that you recreate the AAM.
V 9 Index Size V10 Index SizeIndex size: 10.9 MB Index size: 34.6 MB
Libraries and Library Itemss
Lists and List Items
Published On: 11/19/2013 V10 Service Pack 4A Page 196 of 201

Can I Restore List Items to a Different List?
List items can only be restored to Lists of the same type. Restore of a List may fail if restored to a site that does not have that list template type. For example, some Meeting Workspaces have lists that are specific to the Meeting Workspace, so these cannot be restored to a Document Workspace or a Team Site. List template keywords from Knowledge Base site might not exist on Non-English setup.
Is SharePoint DB Restore of Configuration Database and content database of the Central administration supported?
No. Backups of Farm configuration databases and Central admin web applications and their databases are allowed. Restoring of those components is not supported. Such backups can be useful for troubleshooting because they can be used to compare with the present state of the components by using SQL Server tools. For more information, see the following MSDN article: http://msdn.microsoft.com/en-us/library/cc264321(v=office.14).aspx
Published On: 11/19/2013 V10 Service Pack 4A Page 197 of 201
Troubleshooting Backup - SharePoint Server iDataAgent
If a backslash ('\') character is present in a List item name, it cannot be backed up. To successfully back up the List item, it is recommended to rename the item without the backslash.
Problem
This may occur when SQL Server iDataAgent is configured to backup all SharePoint Databases. However, the SharePoint Server iDataAgent also backups up the Service Applications databases for SharePoint. Therefore the SQL Server iDataAgent Transaction Log backups may fail with SQL Chain error message.
Solution
If SharePoint Services Applications are backed up using SharePoint Server iDataAgent then the corresponding Service Application databases should be excluded from SQL Server backup.
Problem
Document backups and Offline Mining restore operations may fail with the above mentioned error.
Solution
By default a SQL Database Snapshot is created when a SharePoint Document backup begins and also during Offline Mining restore all data is retrieved directly from this database snapshot. The snapshot is deleted automatically when the backup or the Offline Mining restore completes.
In case of document backup and Offline Mining restore failures change the value of bUseSQLSnapshot to 0, if the database server hosting the content database supports database snapshots for example SQL Server Enterprise and SQL Server Developer Editions.
1. From the CommCell Browser, navigate to Client Computers.
2. Right-click the <Client> and then click Properties.
3. On the Client Computer Properties dialog box, click Advanced.
4. Click the Additional Settings tab.
5. Click Add.
6. In the Name box, type bUseSQLSnapshot.
7. The Category and Type details will be automatically populated.
8. Alternatively, you can click Lookup and search for the additional setting using the Find box.
9. In the Value field, enter 0.
10. Click OK.
11. Restart the services on the client computer.
Backup Restore
Library Backup Failures
" SQL Chain Error" Message Displayed While Running a Transaction Log Backup
Error Message: "Exception of type 'Cobalt.ErrorException' "
Published On: 11/19/2013 V10 Service Pack 4A Page 198 of 201
Troubleshooting Restore - SharePoint Server iDataAgent
Problem
Web Application that uses Host Headers (with SSL bindings) is restored without the Host header bindings during a Web Application restore.
Solution
To resolve this issue follow the steps given below:
1. Create the Web Application that has the Host Header bindings.
2. Log on to CommCell Console and use the Databases Backupset restore the Content Databases for the Web Application that uses Host Headers (with SSL bindings).
Symptom
In a disaster recovery scenario, use the following procedure to recover data associated with the following entities:
Deleted storage policy
Deleted client, agent, backup set or instance
Before You Begin
This procedure can be performed when the following are available:
You have a Disaster Recovery Backup that contains information on the entity that you are trying to restore. For example, if you wish to recover a storage policy (and the data associated with the storage policy) that was accidentally deleted, you must have a copy of the disaster recovery backup that was performed before deleting the storage policy.
Media containing the data you wish to recover is available and not overwritten.
If a CommCell Migration license was available in the CommServe when the disaster recovery backup was performed, no additional licenses are required. If not, obtain the following licenses:
IP Address Change license
CommCell Migration license
See License Administration for more details.
A standby computer, which is used temporarily to build a CommServe.
Resolution
Recovering Deleted Data
1. Locate the latest Disaster Recovery Backup that contains the information on the entity (storage policy, client, agent, backup set or instance) you are trying to restore.
Check the Phase 1 destination for the DR Set or use Restore by Jobs for CommServe DR Data to restore the data.
If the job was pruned and you know the media containing the Disaster Recovery Backup, you can move the media in the Overwrite Protect Media Pool. See Accessing Aged Data for more information. You can then restore the appropriate DR Set associated with the job as described in Restore by Jobs for CommServe DR Data.
If the job is pruned and you do not know the media containing the Disaster Recovery Backup, you can do one of the following:
If you regularly run and have copies of the Data on Media and Aging Forecast report, you can check them to see if the appropriate
Backup Restore
Host Header Associated with a Web Application is Not Restored Correctly for SharePoint 2007
Recovering data associated with deleted clients and storage policies
Published On: 11/19/2013 V10 Service Pack 4A Page 199 of 201

media is available.
If you do not have an appropriate report, and know the media that contains the DR Backup, catalog the media using Media Explorer. Once the cataloging process is completed, details of the data available in the media are displayed.
2. On a standby computer, install the CommServe software. For more information on installing the CommServe, see Install the CommServe.
3. Restore the CommServe database using the CommServe Disaster Recovery Tool from the Disaster Recovery Backup described in Step 1. (See CommServe Disaster Recovery Tool - Getting Started for step-by-step instructions.)
4. Verify and ensure that the HDPS Client Event Manager HDPS Communications Service (EvMgrS) is running.
5. If you did not have a CommCell Migration license available in the CommServe when the disaster recovery backup was performed, apply the IP Address Change license and the CommCell Migration license on the standby CommServe. See Activate Licenses for step-by-step instructions.
6. Export the data associated with the affected clients from the standby CommServe as described in Export Data from the Source CommCell.
7. Import the exported data to the main CommServe as described in Import Data on the Destination CommCell.
This brings back the entity in the CommServe database and the entity is visible in the CommCell Browser. (Press F5 to refresh the CommCell Browser if the entity is not displayed after a successful merge.)
8. If you have additional data that was backed up after the disaster recovery backup and before the deletion of the entity, use the procedure described in Import Metadata from a Tape Media to obtain the necessary information.
9. You can now browse and restore the data from the appropriate entity.
When you start the Command Line Interface to capture data, use the name of the standby CommServe in the -commcell argument.
As a precaution, mark media (tape media) associated with the source CommCell as READ ONLY before performing a data recovery operation in the destination CommCell.
Published On: 11/19/2013 V10 Service Pack 4A Page 200 of 201

© 1997-2013 CommVault Systems Inc. All rights reserved.This document may not be copied or further distributed, in whole or in part, without written permission from CommVault Systems Inc.
Published On: 11/19/2013 V10 Service Pack 4A Page 201 of 201


