38
ADOBE WEAVER WEB DESIGN
| Date post: | 29-Dec-2015 |
| Category: |
Documents |
| Upload: | eugenia-flowers |
| View: | 220 times |
| Download: | 2 times |
A D O B E W E AV E R
WEB DESIGN

2
START THE DW

3
WORKSPACE LAYOUTApplication Bar
Document Toolbar
Document Window
Workspace Switcher
Property Inspector
GroupPanel
4
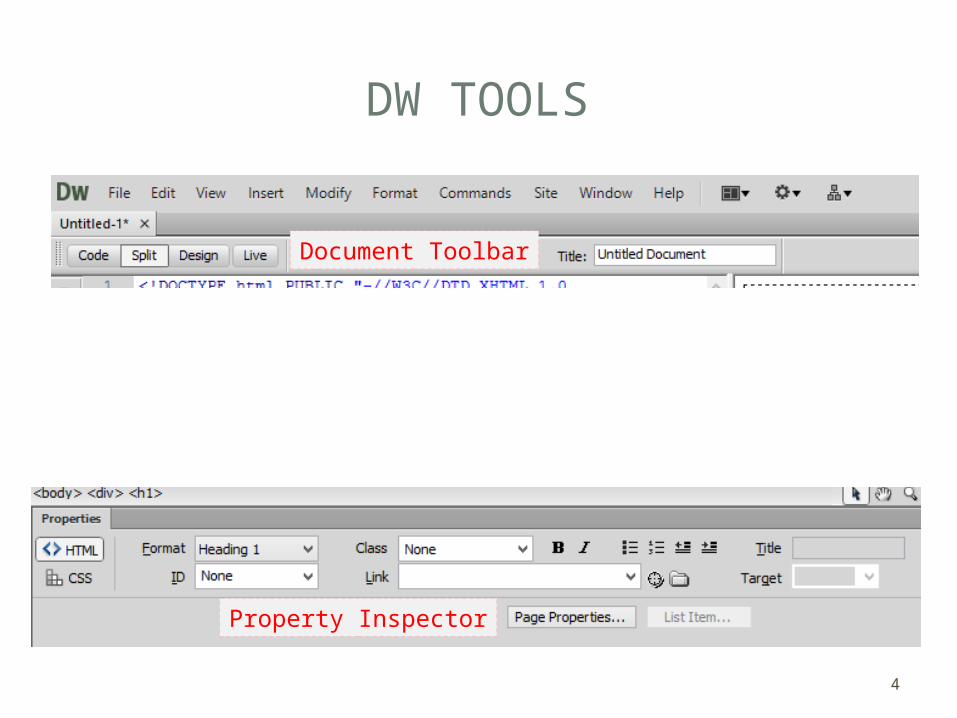
DW TOOLS
Property Inspector
Document Toolbar
5
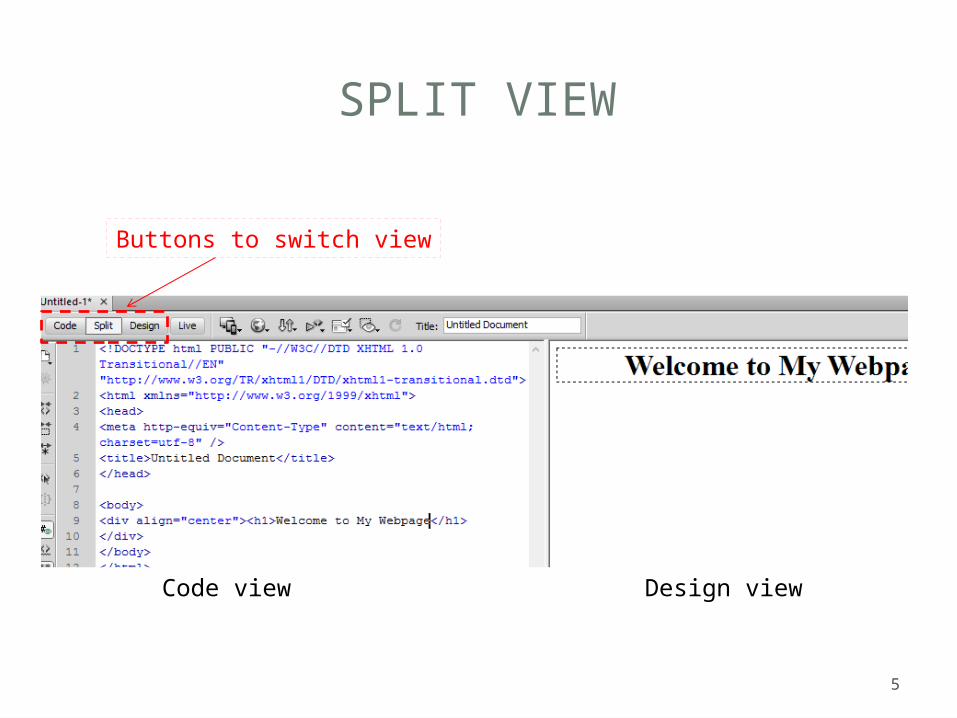
SPLIT VIEW
Code view Design view
Buttons to switch view

6
INSERT PANEL
Select groups of objectsTo be inserted

7
SET PAGE PROPERTIES
• Click button “Page Properties..” in property inspector• or
• Click on Menu “Modify -> Page Properties”
Background,Text, and Link Colors
8
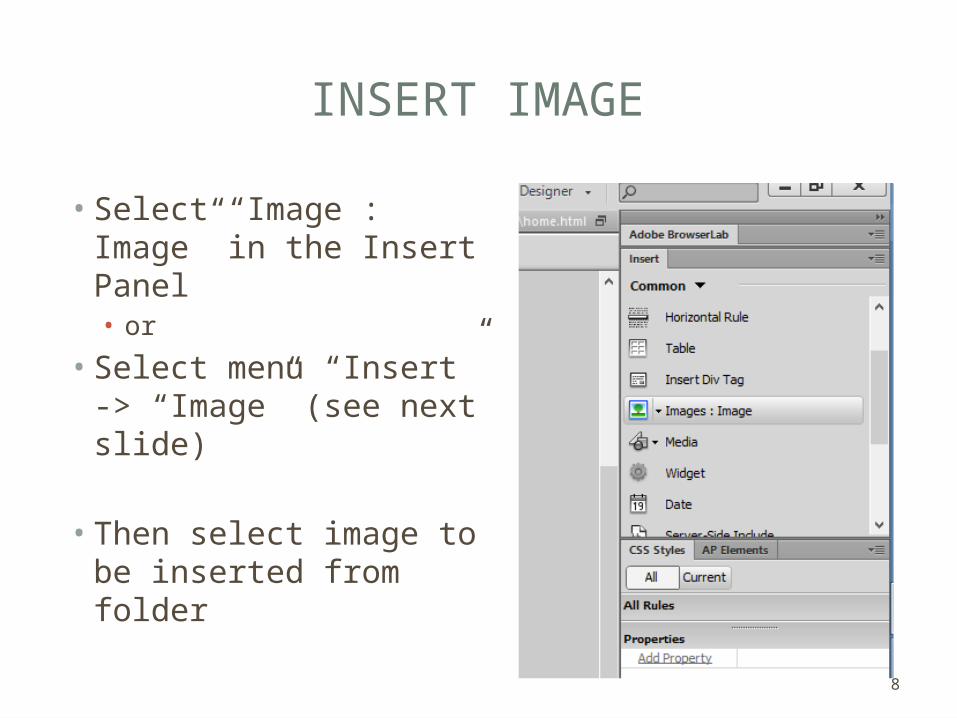
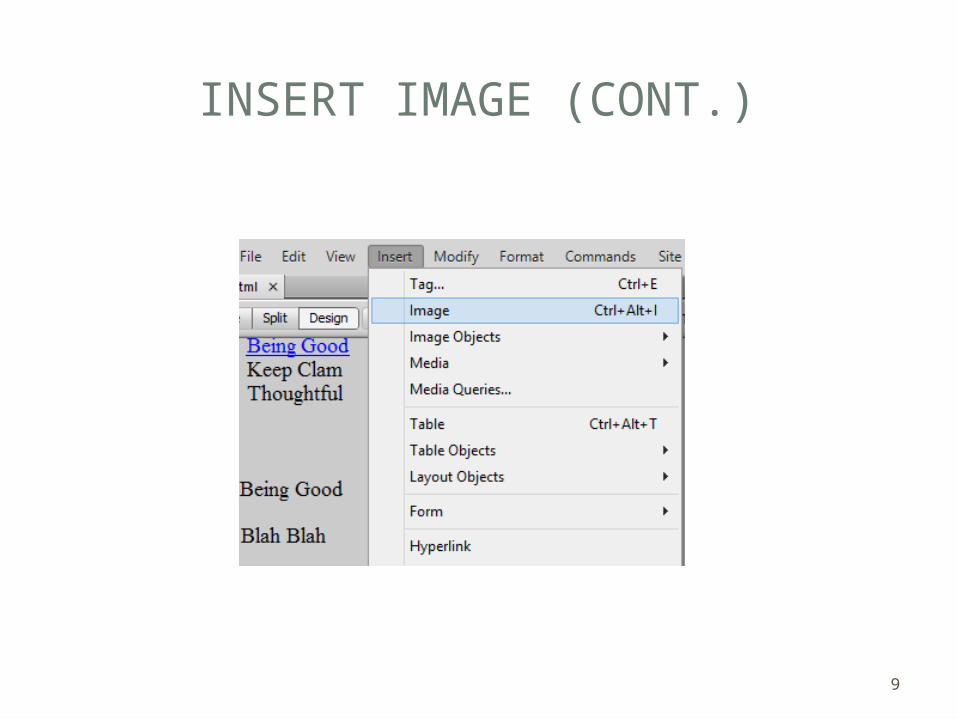
INSERT IMAGE
• Select “Image : Image” in the Insert Panel • or
• Select menu “Insert” -> “Image” (see next slide)
• Then select image to be inserted from folder
9
INSERT IMAGE (CONT.)

10
CREATE ROLLOVER IMAGE
• Select menu “Insert” -> “Image Objects” -> “Rollover Image”• We can also select it from the Insert Panel
11
CREATE ROLLOVER IMAGE (CONT.)
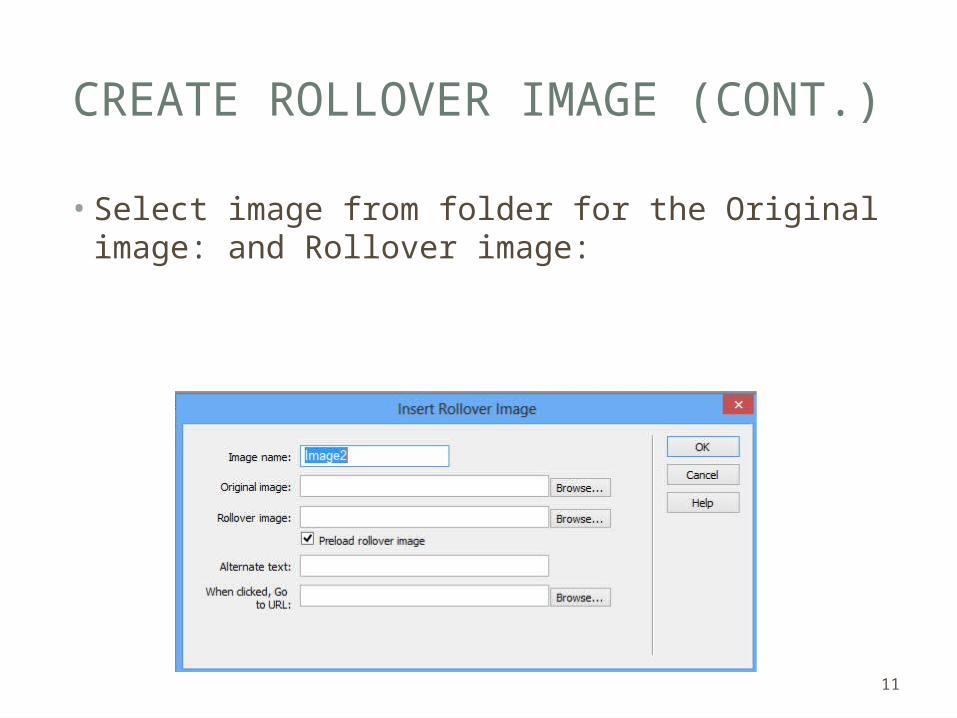
• Select image from folder for the Original image: and Rollover image:

12
HOW TO MAKE A LINK
• Select text or image we want to make a like• Click on “Hyperlink” in the Insert Panel
13
EXTERNAL LINK
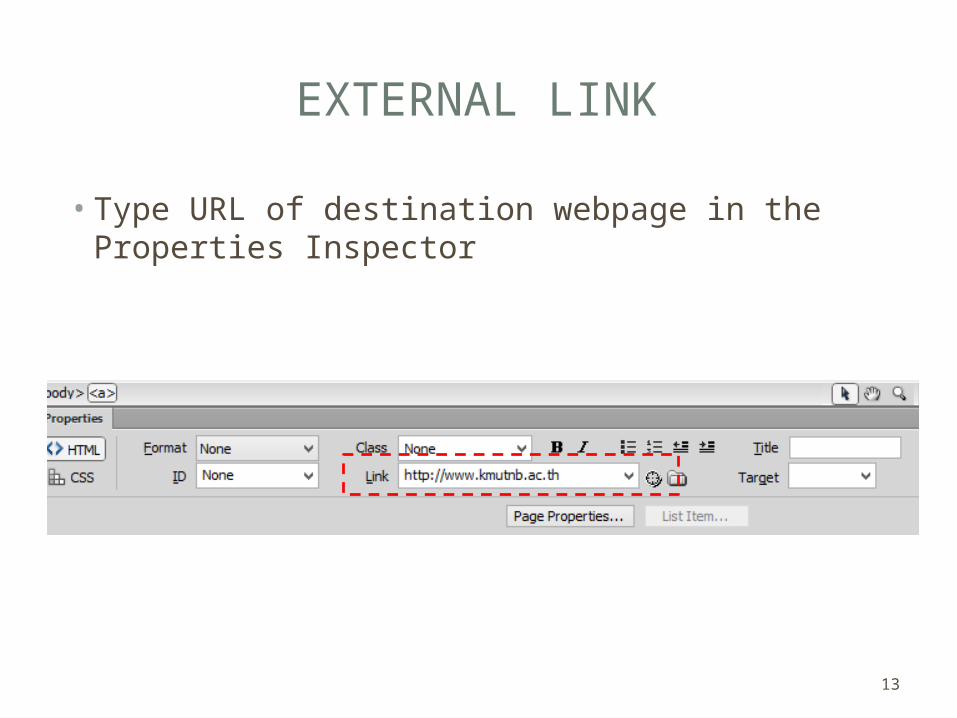
• Type URL of destination webpage in the Properties Inspector

14
MAKE A LINK
• Select text or image we want to make a like• Right click, a pop menu will appear, select
“Make Link”
15
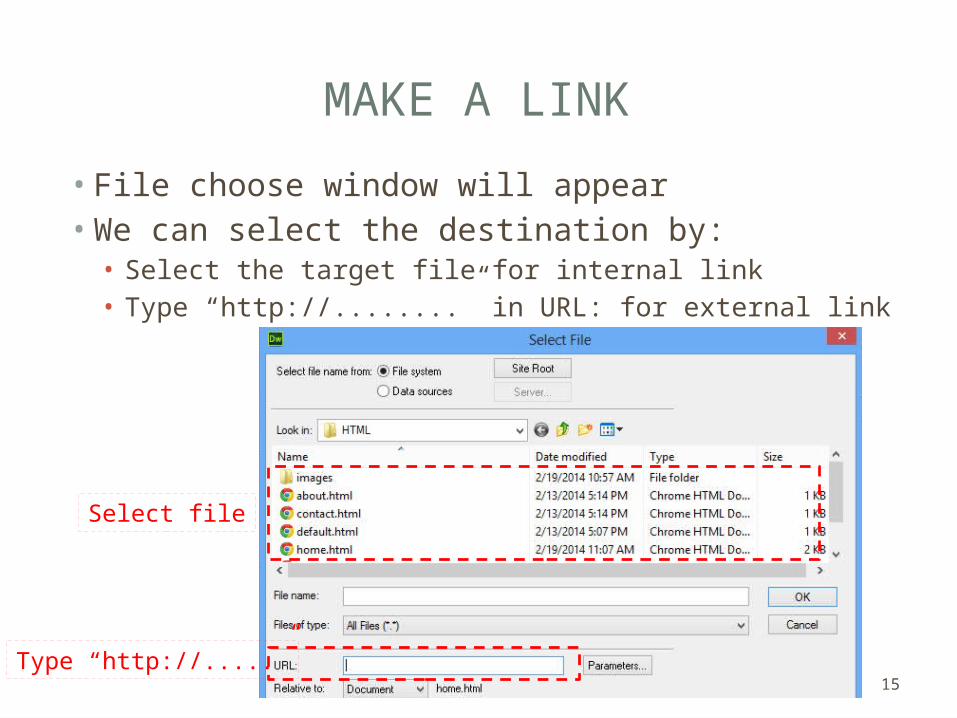
MAKE A LINK
• File choose window will appear• We can select the destination by:• Select the target file for internal link• Type “http://........” in URL: for external link
Select file
Type “http://.....”

16
MAKE AN INTERNAL LINK
• Select “Text” or “picture” we want to make a link
• Drag “Link target” button to destination
17
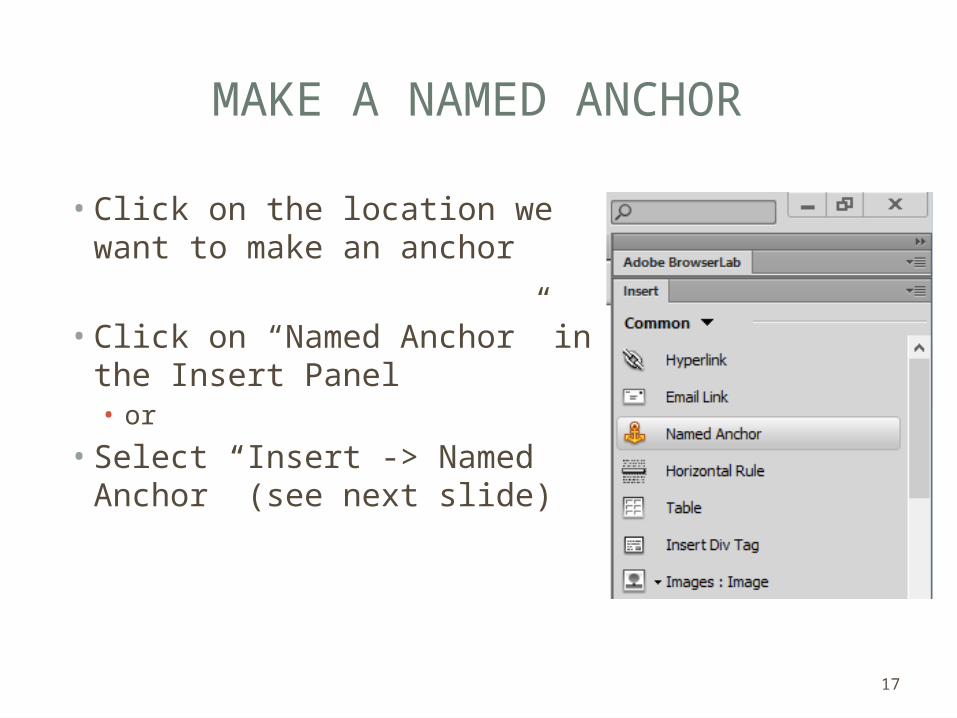
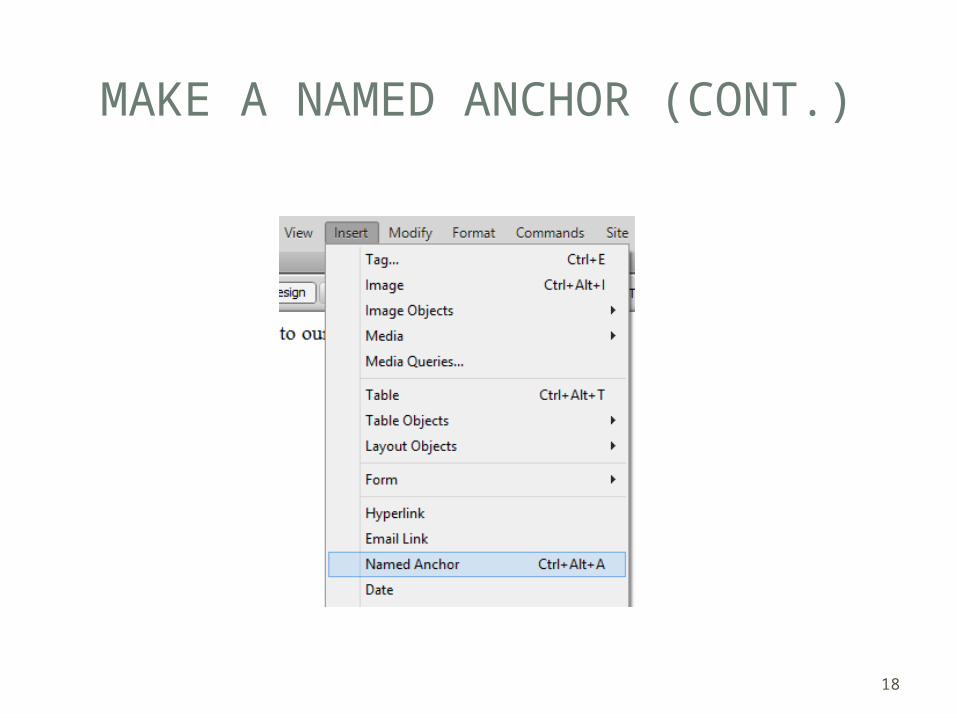
MAKE A NAMED ANCHOR
• Click on the location we want to make an anchor
• Click on “Named Anchor” in the Insert Panel• or
• Select “Insert -> Named Anchor” (see next slide)
18
MAKE A NAMED ANCHOR (CONT.)

19
TYPE NAMED ANCHOR
• Type in text we want to make an anchor
20
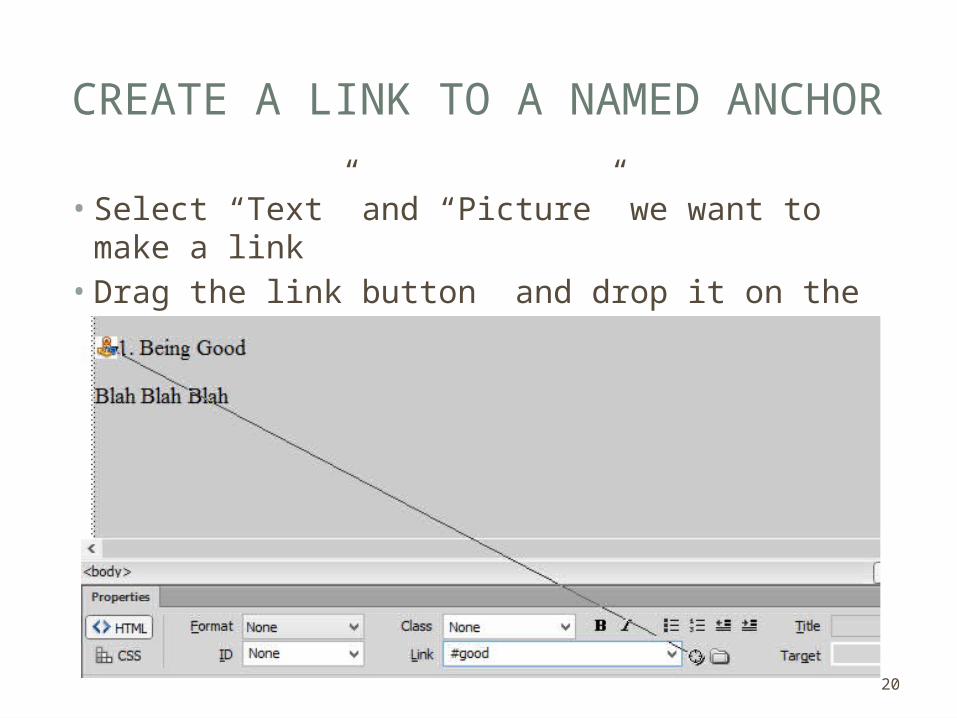
CREATE A LINK TO A NAMED ANCHOR
• Select “Text” and “Picture” we want to make a link• Drag the link button and drop it on the targeted
named anchor
21
IMAGE MAP
• Image map allows us to create links on a given image
• We can use basic geometric shapes (such as rectangle, circle, or polygon) to create a link area
• After we have created a shape on a given image, we can create a link just like what we create a link from a text
22
IMAGE MAP
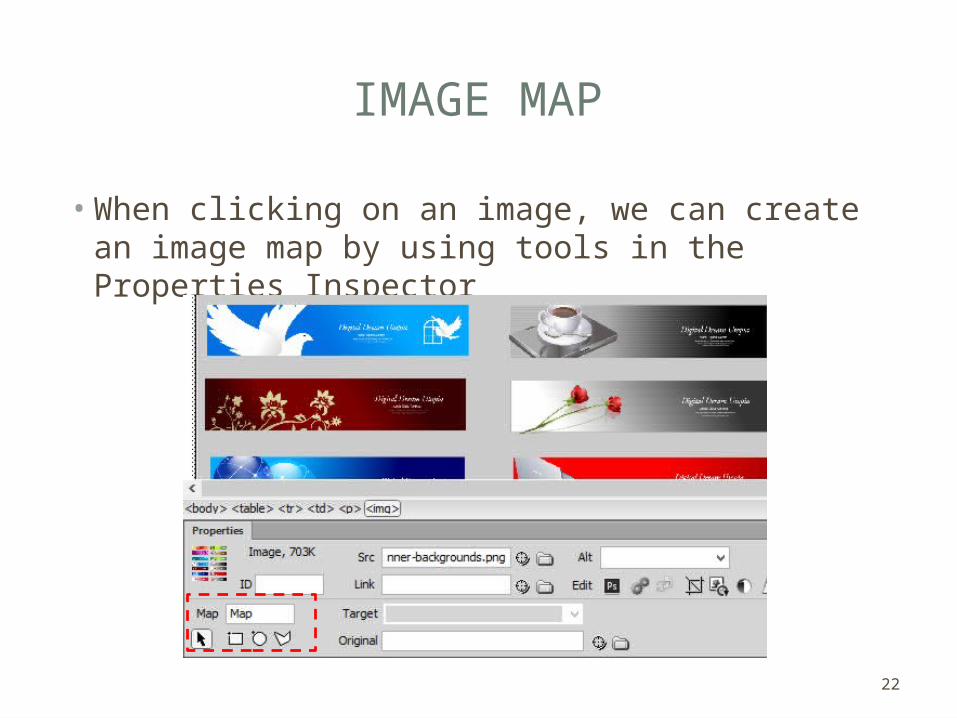
• When clicking on an image, we can create an image map by using tools in the Properties Inspector

23
IMAGE MAP (CONT.)
• We can also create an image map by clicking on the triangle menu on the “Image : Image” in the Insert Panel
24
CREATE A LINK USING IMAGE MAP
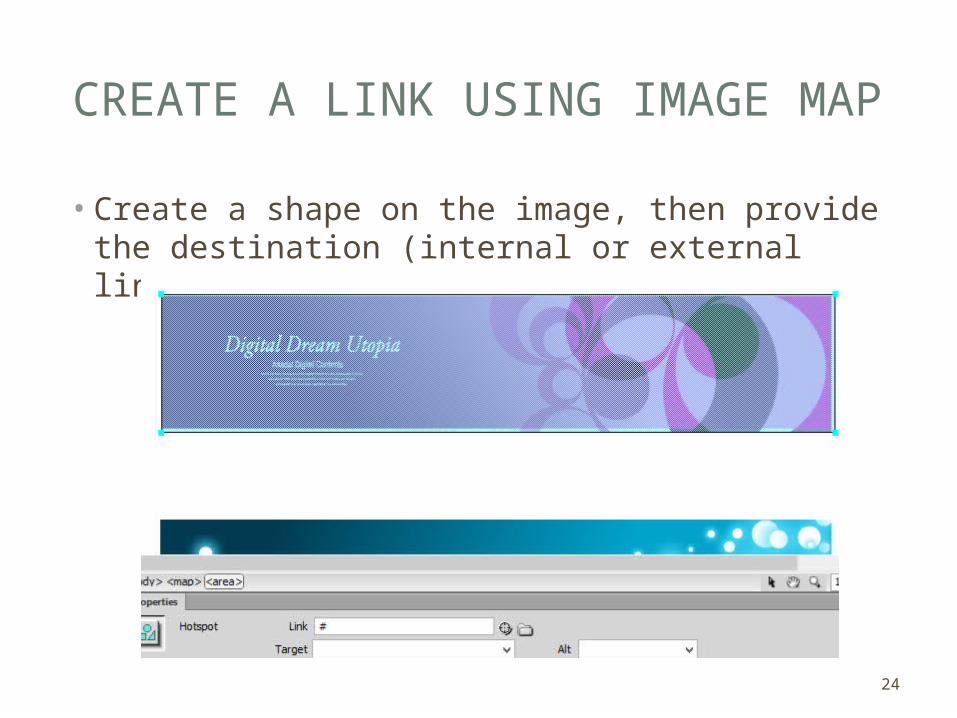
• Create a shape on the image, then provide the destination (internal or external link)

A D O B E W E AV E R
EXAMPLE OF HOW TO CREATE A WEB PAGE

26
EXAMPLE OF HOW TO CREATE A WEB PAGE
• Create a working folder (New site)
• Create a web layout using Table (or using <div>)
• Fill in the Title Area (using Banner)
• Create links in the Menu Area
• Fill in the Footer Area
• Create contents in the Content Area
27
CREATE A LOCAL WEB FOLDER
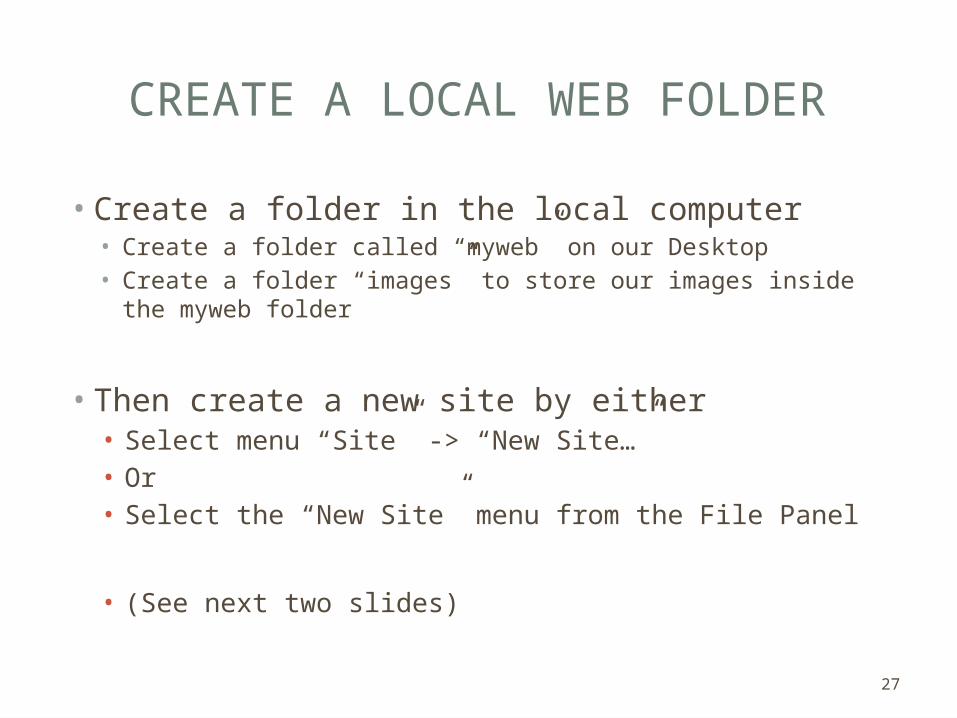
• Create a folder in the local computer• Create a folder called “myweb” on our Desktop• Create a folder “images” to store our images inside the myweb
folder
• Then create a new site by either• Select menu “Site” -> “New Site…”• Or• Select the “New Site” menu from the File Panel
• (See next two slides)

28
CREATE A NEW WORKING FOLDER (1)
• Select menu “Site” -> “New Site…”

29
CREATE A NEW WORKING FOLDER (2)
1
3
2

30
SETUP MY SITE
• Enter the Site Name: xxxxx• Click on folder button to select our Folder
31
SELECT WORKING FOLDER
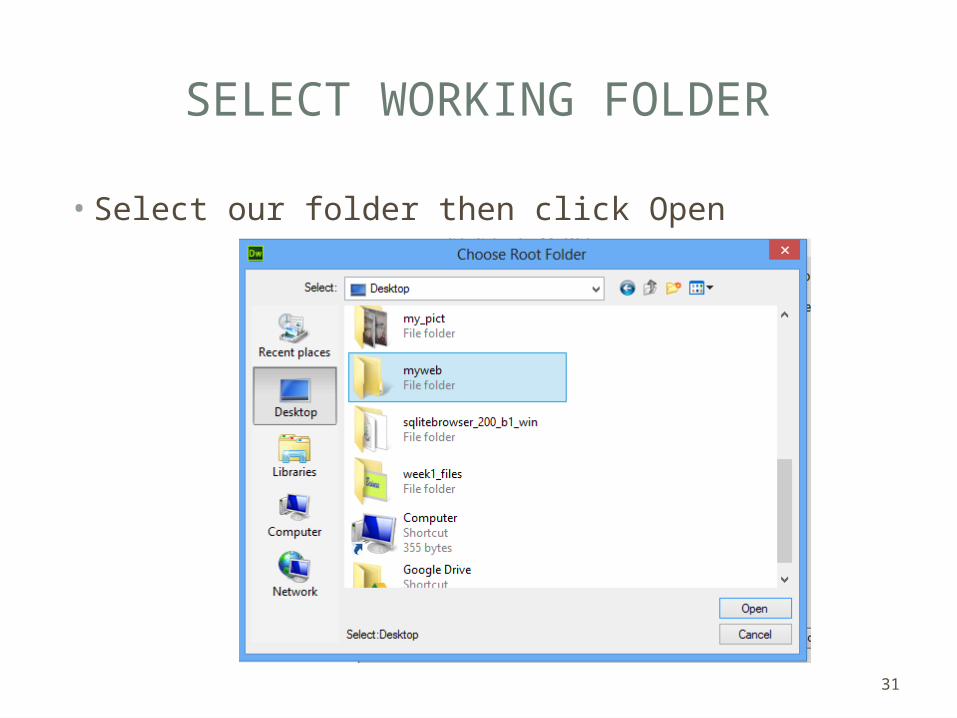
• Select our folder then click Open

32
SIMPLE WEB LAYOUT
Title Area (Banner)
Menu Area
Content Area
Footer Area

33
CREATE LAYOUT USING TABLE
• We can insert a table by either• Select menu “Insert” -> “Table” or select “Table” from
Insert Panel
Insert Panel

34
SET TABLE PROPERTIES
• Set Rows: 4, Columns: 1, Width: 1000 or other value that fits our page design, and Border Thickness: 0

35
INSERT BANNER
• Insert an image in the Title Area
• Insert the banner image by either select menu “Insert” -> “Image” or select “Image : Image” from the Insert Panel
36
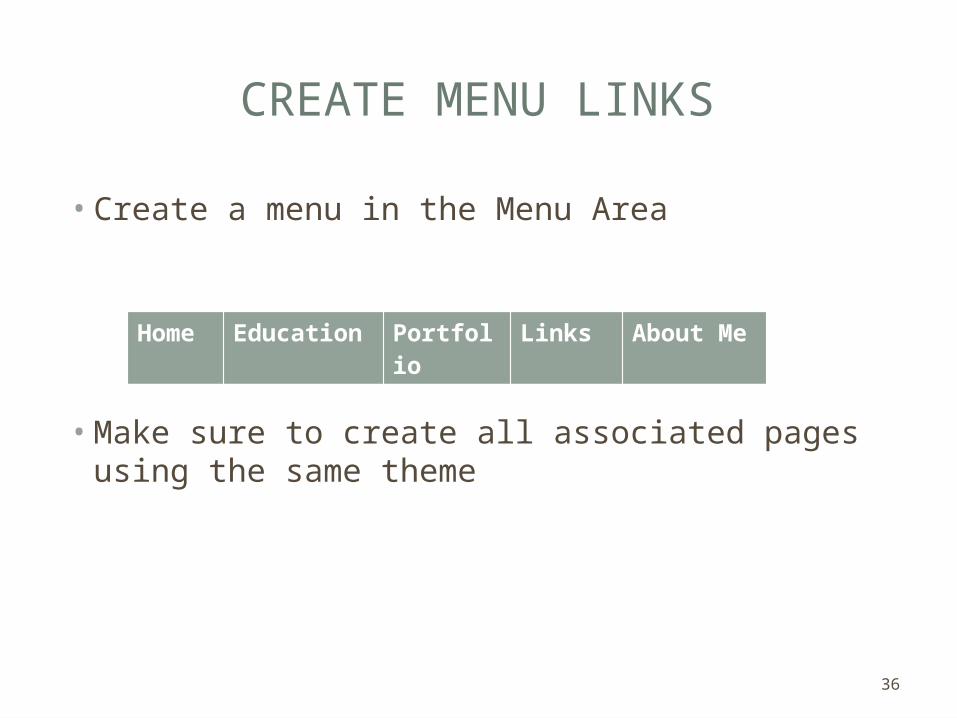
CREATE MENU LINKS
• Create a menu in the Menu Area
• Make sure to create all associated pages using the same theme
Home
Education Portfolio
Links About Me
37
CREATE CONTENTS
• We can add all the contents, for example text, table, picture, chart, etc. in this area

38
CREATE FOOTER
• Footer can be a place where we can add contact information or some sort of Copyright, etc.
1518 Pracharat 1 Road,Wongsawang, Bangsue, Bangkok 10800


![Introduction - interoperability.blob.core.windows.netinteroperability.blob.core.windows.net/...160715.docx · Web view[MS-DWSS]: Document Workspace Web Service Protocol. Intellectual](https://static.documents.pub/doc/80x56/5aa00fa57f8b9a8e178d872a/introduction-viewms-dwss-document-workspace-web-service-protocol-intellectual.jpg)

