21
ENGINEERING SOFTWARE DEVELOPMENT MADE EASY www.amcbridge.com AMC Bridge confidential. For internal use only CADtoEarth™ for Autodesk® Revit® User Guide (March 2019)

ENGINEERING SOFTWARE DEVELOPMENT MADE EASY
www.amcbridge.com AMC Bridge confidential. For internal use only
CADtoEarth™ for Autodesk® Revit® User Guide
(March 2019)

CADtoEarth™ for Autodesk® Revit® User Guide
Copyright © 2019 AMC Bridge AMC Bridge confidential. For internal use only
2
Contents:
Welcome to CADtoEarth ...................................................................................................................................................... 3
What is CADtoEarth ........................................................................................................................................................ 3
CADtoEarth for Autodesk Revit .......................................................................................................................................... 3
Introduction ................................................................................................................................................................... 3
Requirements ................................................................................................................................................................. 4
Getting Started ............................................................................................................................................................... 4
User Interface ................................................................................................................................................................. 4 CADtoEarth Site ......................................................................................................................................................... 8 Export Model ............................................................................................................................................................. 9 Get Surface .............................................................................................................................................................. 10 About ...................................................................................................................................................................... 11
CADtoEarth web application ............................................................................................................................................ 12
Introduction ................................................................................................................................................................. 12
Requirements ............................................................................................................................................................... 12
Getting Started ............................................................................................................................................................. 12
Cesium task pane ......................................................................................................................................................... 14 Storage .................................................................................................................................................................... 15 Model control .......................................................................................................................................................... 16 Drawing mode ......................................................................................................................................................... 17 Upload model .......................................................................................................................................................... 19 Create 3D PDF ......................................................................................................................................................... 20
About AMC Bridge ........................................................................................................................................................... 21
CADtoEarth™ for Autodesk® Revit® User Guide
Copyright © 2019 AMC Bridge AMC Bridge confidential. For internal use only
3
Welcome to CADtoEarth This document contains guidelines aimed to describe the formal steps of how to use CADtoEarth™ for Autodesk® Revit® with CADtoEarth web application. It provides help materials that assist you in using all application and technology demonstration functions.
What is CADtoEarth
CADtoEarth is a family of innovative technology demonstrations of linking popular CAD modeling software packages with Cesium®, a geospatial 3D mapping platform. The solution offers various functions, including an ability to:
• Upload a model directly from a modeling session into Cesium. • Import a section of the Earth surface directly from Cesium into a modeling session. • Position a 3D structure on the imported surface within a modeling session and subsequently upload it back to Cesium. • Perform the same operations on 2D objects in a modeling environment and Cesium.
CADtoEarth for Autodesk Revit
Introduction
CADtoEarth for Autodesk Revit is a technology demonstration of establishing a bidirectional connection between Autodesk Revit and Cesium. Using the Forge platform, CADtoEarth is integrated with Autodesk360 cloud service allowing users to better collaborate on projects. With CADtoEarth for Autodesk Revit, you can:
• Import a surface section from Cesium into the Revit modeling session.
• Get information about the building layer from Cesium.
• Place the selected 3D structure on the imported surface in Revit modeling session, and then upload it back to Cesium.
• Upload a 3D structure directly from the Revit modeling session into Cesium.
• Convert a 3D structure to 3D PDF.
• Log in using Facebook, LinkedIn, Google or Autodesk credentials.
CADtoEarth™ for Autodesk® Revit® User Guide
Copyright © 2019 AMC Bridge AMC Bridge confidential. For internal use only
4
Requirements
CADToEarth for Autodesk Revit requires the following software to be installed:
• Windows 7, 8.1, or 10
• Autodesk® Revit® 2019
Getting Started
To get started with CADToEarth for Autodesk Revit, launch Autodesk® Revit® 2019, select a Revit model,
and click the CADtoEarth AddIn tab on the Revit ribbon.
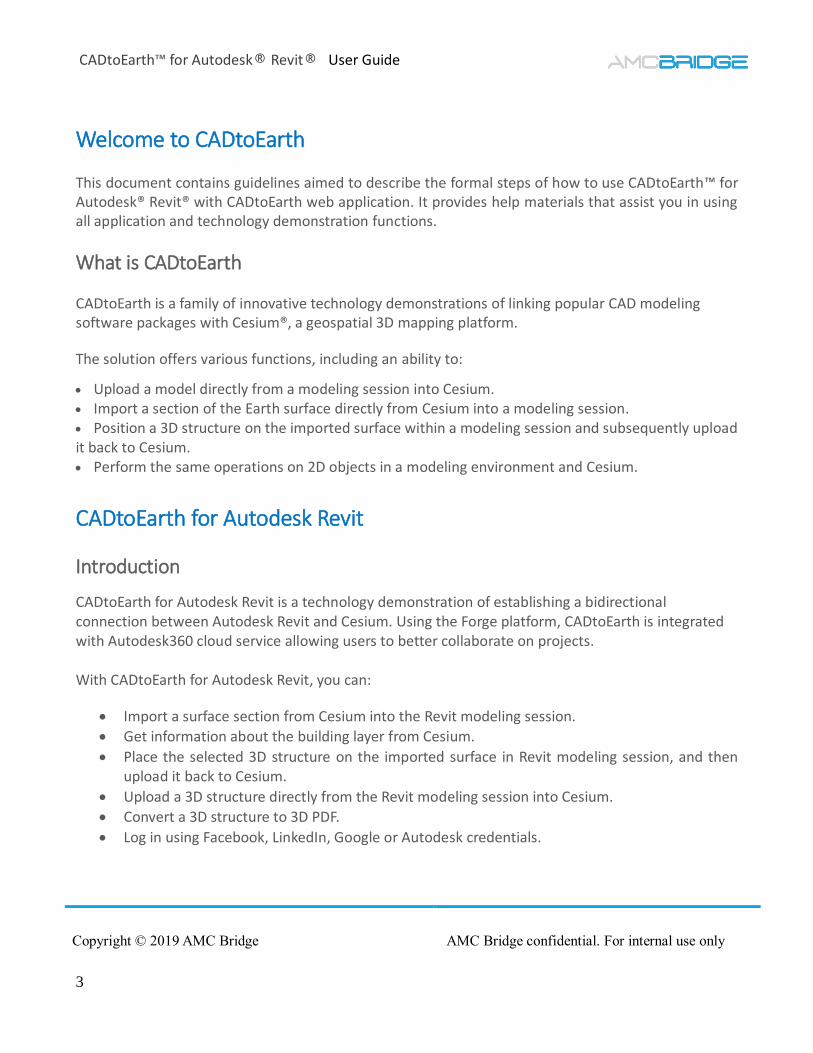
User Interface
The CADtoEarth AddIn tab contains a toolbar with the following buttons: Log In/Out, CADtoEarth
Site, Export Model, Get Surface, About (see Fig. 1).
Figure 1.
Log In/Out CADtoEarth implements a client-server system, where CADtoEarth AddIn is a client that sends a request to the server that returns a response. To communicate, you need to log in to CADtoEarth AddIn with your account credentials. To log in
1) Click Log In (see Fig. 2). 2) Enter your username and password. 3) Select the Remember me checkbox if you want to automatically log in to the CADtoEarth
AddIn every time you open Autodesk Revit. 4) Click OK.
Note: If you don’t have an account, go to the Don’t have an account? link to sign up.

CADtoEarth™ for Autodesk® Revit® User Guide
Copyright © 2019 AMC Bridge AMC Bridge confidential. For internal use only
5
Figure 2. •
To authorize with Facebook
1) Click the Facebook button. 2) In the Facebook Log in dialog (see Fig. 3), enter the email or phone number and password for
your Facebook account. 3) Click Log In.
Figure 3.

CADtoEarth™ for Autodesk® Revit® User Guide
Copyright © 2019 AMC Bridge AMC Bridge confidential. For internal use only
6
To authorize with LinkedIn 1) Click the LinkedIn button.
2) In the LinkedIn Log in dialog (see Fig. 4), enter the email or phone number and password for your LinkedIn account.
3) Click Sign In.
Figure 4.
To authorize with Google 1) Click the Google button. 2) In the Sign in with Google dialog (see Fig. 5), click Next.

CADtoEarth™ for Autodesk® Revit® User Guide
Copyright © 2019 AMC Bridge AMC Bridge confidential. For internal use only
7
Figure 5.
To authorize with Autodesk
1) Click the Autodesk button. 2) In the Autodesk Log in dialog (see Fig. 6), click Allow.

CADtoEarth™ for Autodesk® Revit® User Guide
Copyright © 2019 AMC Bridge AMC Bridge confidential. For internal use only
8
Figure 6.
Once you logged in, the other CADtoEarth AddIn buttons will be enabled and you will have the full access to the CADtoEarth features (see Fig. 7).
Figure 7.
CADtoEarth Site
Click the CADtoEarth Site button to display the CADtoEarth web application in a new tab of the web browser (see Fig. 8).

CADtoEarth™ for Autodesk® Revit® User Guide
Copyright © 2019 AMC Bridge AMC Bridge confidential. For internal use only
9
Figure 8.
Export Model The Export Model button is used to export the currently opened model in Revit to Cesium and upload the resulting file to the CADtoEarth cloud service. To export a model
1) Click Export Model (see Fig.9). 2) Fill in the Longitude and Latitude fields with certain values to bind the origin of the model to
some geographical location.
Note: By default, the Longitude and Latitude fields are set to 0. Leave them as is to choose the model location on the Earth after export.

CADtoEarth™ for Autodesk® Revit® User Guide
Copyright © 2019 AMC Bridge AMC Bridge confidential. For internal use only
10
Figure 9.
3) Select the Upload the model on the server after export checkbox if you want to automatically upload the generated file directly to the CADtoEarth cloud service. Leave the Upload the model on the server after export checkbox deselected if you want to save the resulting .gltf file on your computer without uploading it to the CADtoEarth cloud service.
4) Enter a model name in the Model name field. 5) Click OK.
Get Surface
One of the unique features of CADtoEarth is the ability to import certain parts of the Earth surface into CAD application. Click the Get Surface button and follow the instructions given in the Drawing mode section. Once everything is done, a part of the Earth surface captured using the CADtoEarth task pane tools will be imported into the current Revit modeling session (see Fig. 10).

CADtoEarth™ for Autodesk® Revit® User Guide
Copyright © 2019 AMC Bridge AMC Bridge confidential. For internal use only
11
Figure 10.
If some curves were sketched in Cesium prior to surface capturing, those curves will be brought in along with the surface, which may be useful, for example, to bring the outlines of buildings along with the surfaces they are located on.
About The About button opens a dialog with information about the current version of CADtoEarth for Autodesk Revit and the link to the website of the technology developer (see Fig. 11).
Figure 11.

CADtoEarth™ for Autodesk® Revit® User Guide
Copyright © 2019 AMC Bridge AMC Bridge confidential. For internal use only
12
CADtoEarth web application
Introduction
The CADtoEarth web application allows you to: • Capture a certain part of the Earth surface from Cesium. • Provide a personal storage for every CADtoEarth account, where the 3D models will be placed. • Provide a set of tools that will help you manage your 3D models. You can move, rotate and
scale your 3D structures to fit the surrounding area. • Share your 3D models with other CADtoEarth users. • Choose the models to be placed at startup. It can be useful when you work with a set of 3D
models. • Generate PDF with 3D model(s).
Integrated with Autodesk Forge and Google Drive, it provides more opportunities for managing your own data.
Requirements To run the CADtoEarth web application, you will be required to have Internet connection and a web browser. Right now, CADtoEarth supports the following web browsers:
• Mozilla Firefox 67.0 or newer • Google Chrome 73.0 or newer
Getting Started
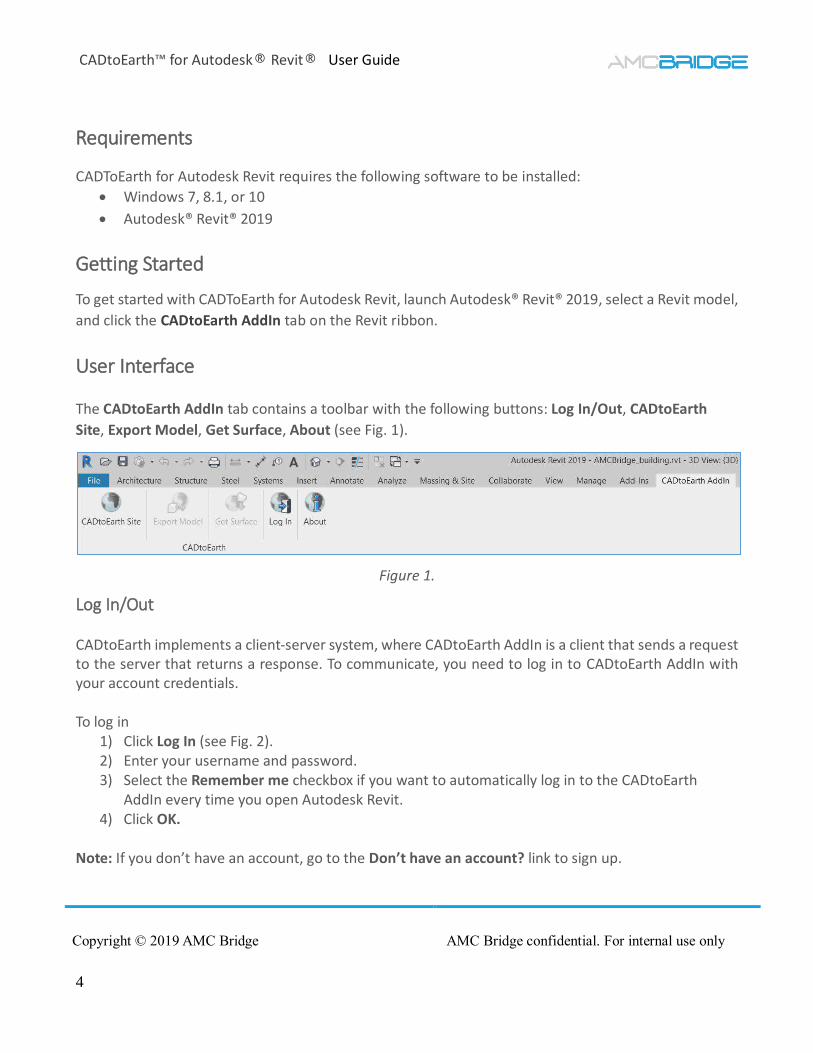
To start working with the CADtoEarth web application, sign up for a CADtoEarth account to link up your CAD environment to Cesium. The account is completely free. To register, follow the steps below.
1) In the browser address bar, type https://cadtoearth-advanced.amcbridge.com 2) In the Registration dialog, click Sign Up (see Fig.12).
CADtoEarth™ for Autodesk® Revit® User Guide
Copyright © 2019 AMC Bridge AMC Bridge confidential. For internal use only
13
Figure 12.
3) Enter your email, password, first name, and last name into the form. 4) Select the I agree Data Privacy Policy checkbox. 5) Click Sign Up to complete the registration.
Note: Enter your email to be able to recover your account if you forget the account credentials. We require no personal information to simplify the account creation experience.
6) Once signing up is finished, enter your credentials, and click Sign In (see Fig. 13).

CADtoEarth™ for Autodesk® Revit® User Guide
Copyright © 2019 AMC Bridge AMC Bridge confidential. For internal use only
14
Figure 13.
Note: You can also register to the CADtoEarth web application using your Facebook, LinkedIn, Autodesk, and Google accounts.
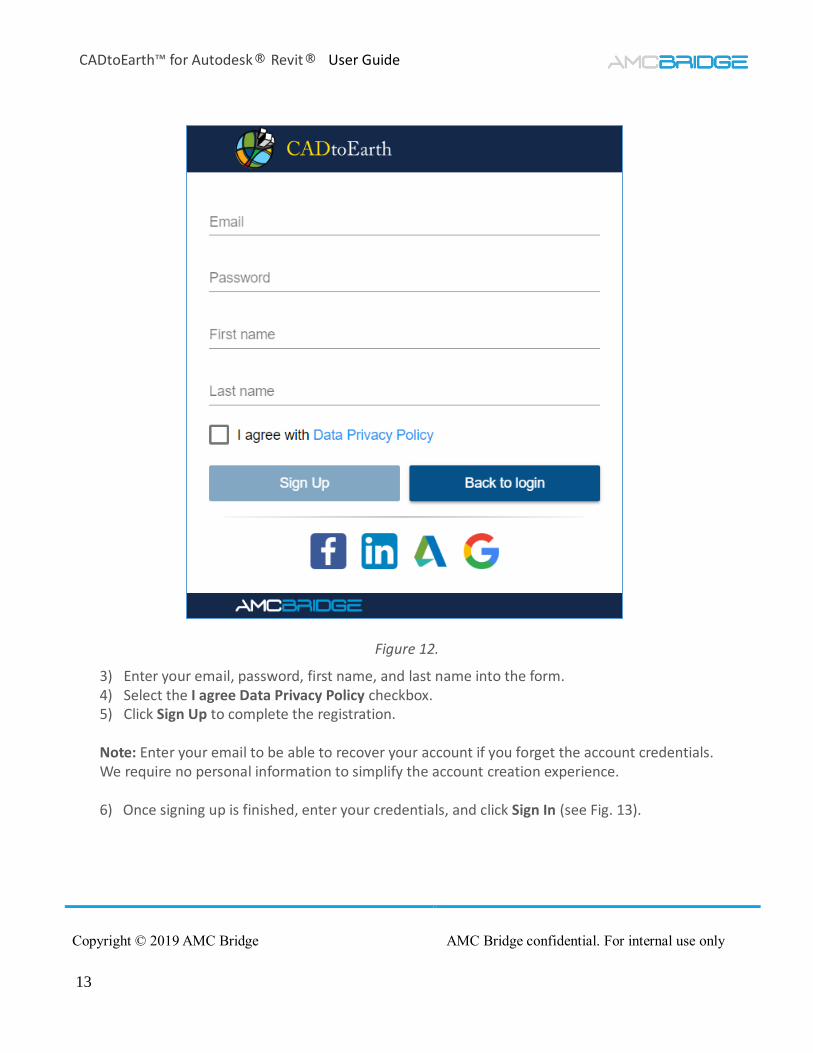
Cesium task pane The application provides access to Cesium, a cross-platform virtual globe for visualizing dynamic data in
space.
Click the expand icon on the left to see the Cesium task pane. It consists of the Storage, Model
control, Drawing mode, Upload model tabs and the Create 3D PDF button (see Fig. 14).
CADtoEarth™ for Autodesk® Revit® User Guide
Copyright © 2019 AMC Bridge AMC Bridge confidential. For internal use only
15
Figure 14.
Storage After exporting, the models will be uploaded directly to the CADtoEarth server. You can view the uploaded models either in the Private storage (Private folder) or in the External one (Autodesk, Google Drive). By default, the storage is determined by the platform you choose to sign in to the site. However, you can easily change it.
Private storage If you sign in with your personal account credentials, via LinkedIn or Facebook, all data will be automatically saved to your private folder. In the Private storage you will find the list of models that were exported or uploaded by you. The total storage size provided for each user is limited to 100Mb. The uploaded data is stored for 1 month since the moment of uploading. If it is not relocated to any available external storage, it will be removed.
External storage
If you sign in with your Autodesk or Google account credentials, all data will automatically be saved to the External storage which is represented by Autodesk Forge and Google Drive. Moreover, you can move your projects from the Private storage into the External one.
CADtoEarth™ for Autodesk® Revit® User Guide
Copyright © 2019 AMC Bridge AMC Bridge confidential. For internal use only
16
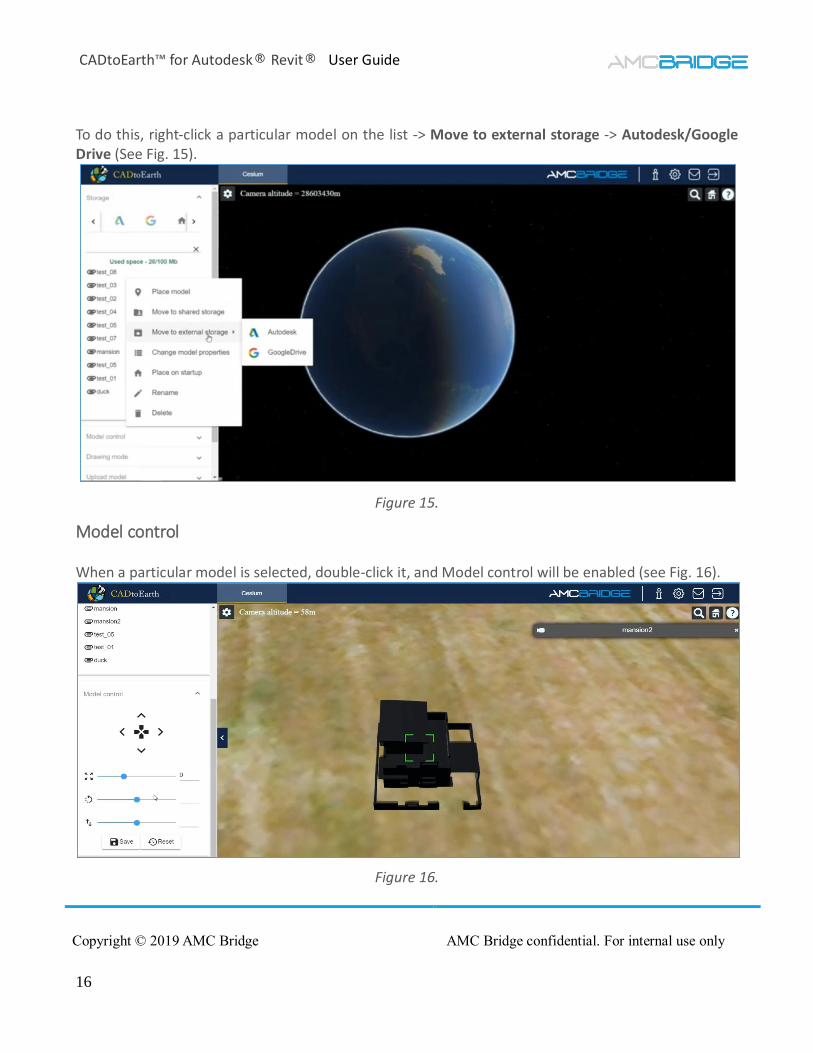
To do this, right-click a particular model on the list -> Move to external storage -> Autodesk/Google Drive (See Fig. 15).
Figure 15.
Model control When a particular model is selected, double-click it, and Model control will be enabled (see Fig. 16).
Figure 16.

CADtoEarth™ for Autodesk® Revit® User Guide
Copyright © 2019 AMC Bridge AMC Bridge confidential. For internal use only
17
Model control allows to you to interact with the model using the following buttons (see Table 1). Table 1: The Model control buttons
Icon Description
Enables you to move the model to different sides along the selected surface. Tip: Click any arrow to move the model to a certain distance. Click and hold any arrow to drag the model along the surface.
Enables you to change the model scale.
Enables you to change the model angle.
Enables you to change the model attitude.
Enables you to save the model after modifications.
Enables you to reset parameters of the model.
Drawing mode The Drawing mode is a specific mode that allows you to select a certain surface for its further export to the Revit modelling session (see Fig. 17). The Drawing mode is available when the altitude is not higher than 740 meters.

CADtoEarth™ for Autodesk® Revit® User Guide
Copyright © 2019 AMC Bridge AMC Bridge confidential. For internal use only
18
Figure 17.
Once the Drawing mode is turned on, the drawing tools will be enabled (see Table 2). Table 2: The drawing tools
Icon Name Description
Add Enables you to add another polyline.
Edit Enables you to edit.
Undo Enables to undo the previous change.
Close polyline Enables you to close polyline.
Clear Enables to clear all polylines from the Earth.
To draw a surface, follow the steps below (see Fig. 18).
1) Enable the Drawing mode. 2) Select the starting point of the surface and draw three curves in a form of a square. The fourth
curve will be drawn automatically when you click Close polyline. 3) Select the Building layer information checkbox to see the buildings located on the selected

CADtoEarth™ for Autodesk® Revit® User Guide
Copyright © 2019 AMC Bridge AMC Bridge confidential. For internal use only
19
surface. Note: If there are more than 100 buildings on the selected surface, the information on building layer won’t be displayed. 4) Click Save surface.
Figure 18.
Upload model Using this tab, you can upload a particular .gltf or .glb file containing a model from your computer (see Fig. 19).

CADtoEarth™ for Autodesk® Revit® User Guide
Copyright © 2019 AMC Bridge AMC Bridge confidential. For internal use only
20
Figure 19.
To upload a model, follow the step below.
• Specify Latitude and Longitude of the desired location or leave these fields empty to select the location later.
• Enter a file name.
• Select the storage for a model from the drop-down list.
• Click Choose file to select a model.
• Click Upload.
Once the model is uploaded, it will be reflected in the project tree. To place it on the Earth
1) Right-click the model in the project tree. 2) Select Place model.
Create 3D PDF You can easily convert the resulting 3D view into 3D PDF using the Create 3D PDF button. Once you captured the surface, click Create 3D PDF, and the surface with placed 3D buildings will be converted into 3D PDF. Note: Only 3D models generated by the family of CADtoEarth technology demonstrations could be converted into 3D PDF.

CADtoEarth™ for Autodesk® Revit® User Guide
Copyright © 2019 AMC Bridge AMC Bridge confidential. For internal use only
21
About AMC Bridge
AMC Bridge is a vendor of choice for software development services in the areas of computer aided design, engineering, manufacturing and construction. Since 1999 we have been delivering solutions for CAD, CAE, CAM, PDM, BIM and PLM applications. For over 15 years we have participated in the development of commercial software products and custom solutions for the engineering markets based on the variety of platforms from desktop and web to mobile and clouds.
AMC Bridge helps to improve engineering process overhead by the development of 3D and 2D modeling software products, data, document and community management technologies, CAD data interoperability, and many other aspects of software development for the engineering markets.
Feel free to use wide experience of AMC Bridge team to find out all features and intricacies of software development process. Contact us any time and we will do our best to turn your ideas into reality. 303 Wyman Street, Suite 300 Waltham, MA 02451, USA +1 866-575-4791 www.amcbridge.com For all online inquiries, please contact: [email protected] Technical Support: [email protected]


