Aldec Active-HDL Tutorial – Part 1 171 Appendix A Aldec Active-HDL Tutorial – Part 1 Start the program by double-clicking the Active-HDL 7.1 icon on the desktop. Select Create new workspace and click OK. Browse to the directory where you want to store the project, type gates for the workspace name and click OK.
Transcript
Aldec Active-HDL Tutorial – Part 1
171
Appendix A
Aldec Active-HDL Tutorial – Part 1
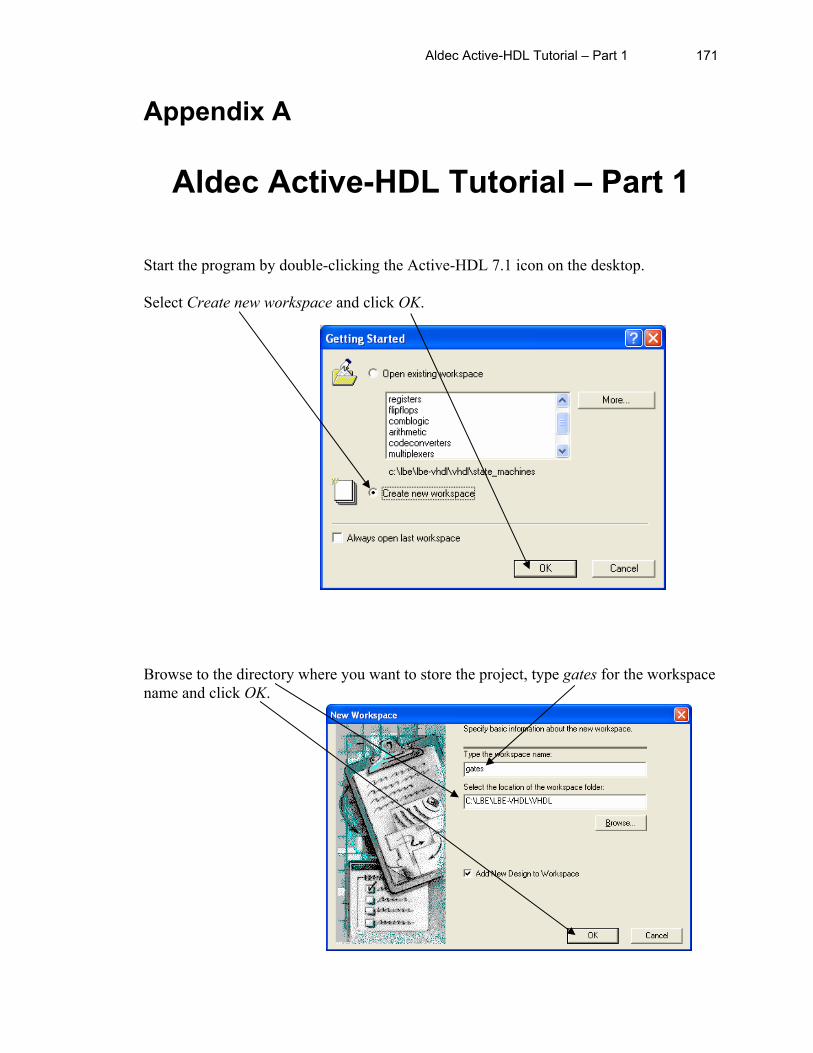
Start the program by double-clicking the Active-HDL 7.1 icon on the desktop. Select Create new workspace and click OK. Browse to the directory where you want to store the project, type gates for the workspace name and click OK.
Appendix A 172
Select Create an Empty Design with Design Flow and click Next. Click Flow Settings Select HDL Synthesis Select Xilinx ISE/WebPack 8.1 XST VHDL/Verilog
Press Select
Aldec Active-HDL Tutorial – Part 1
173
Select Implementation
Choose Xilinx ISE/WebPack 8.1 Press Select Select Xilinx SPARTAN3 for Family
Click Ok
Appendix A 174
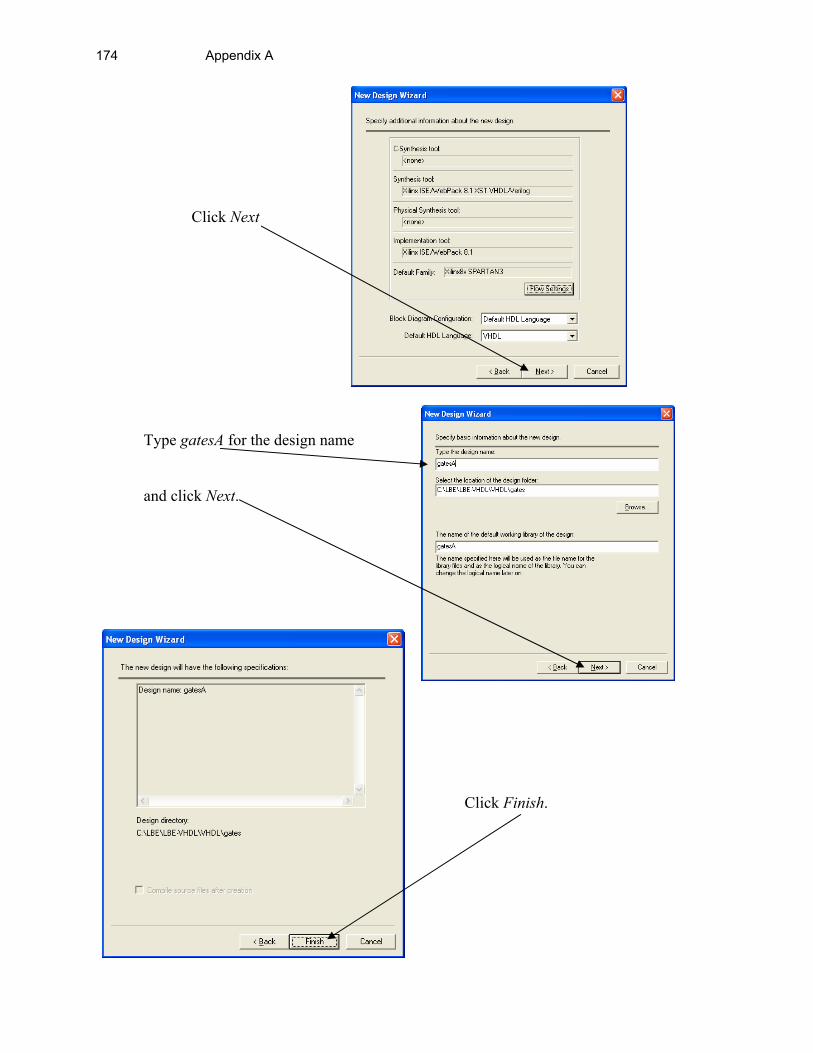
Click Next
Type gatesA for the design name
and click Next.
Click Finish.
Aldec Active-HDL Tutorial – Part 1
175
Click on HDE. Select VHDL and Click OK. Click Next. Type gates2 and click Next.
Appendix A 176
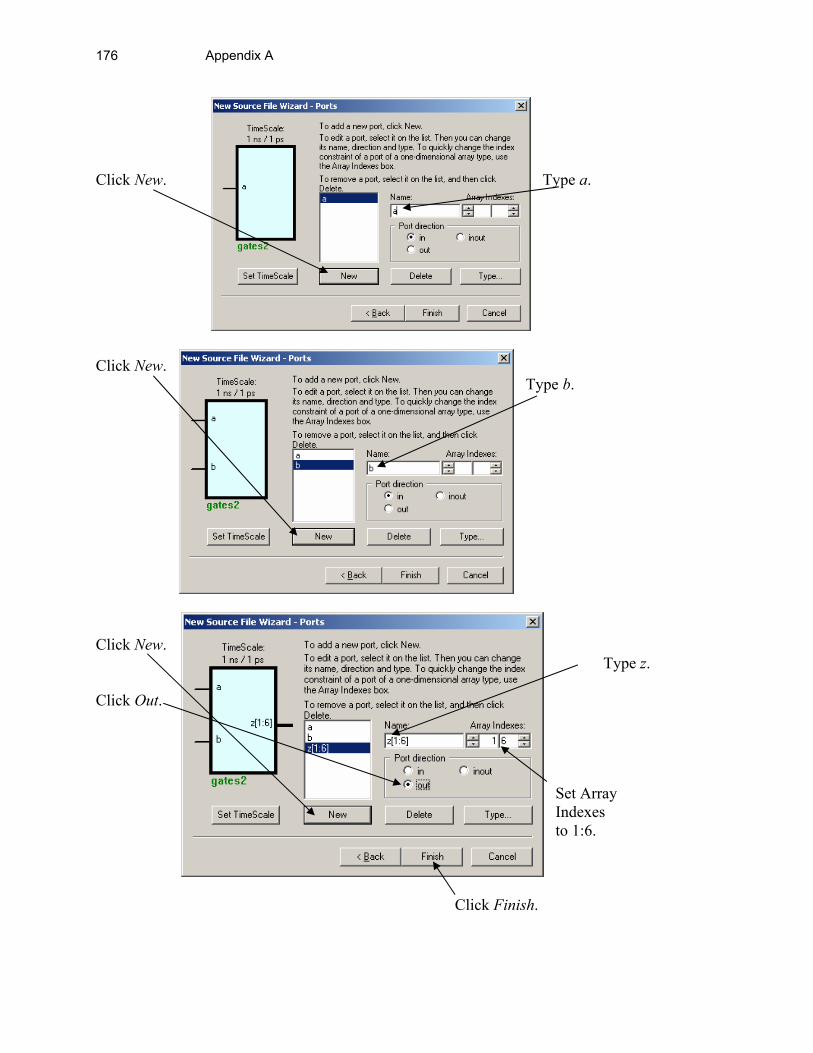
Click New. Type a. Click New. Type b. Click New. Type z. Click Out.
Set Array Indexes
to 1:6. Click Finish.
Aldec Active-HDL Tutorial – Part 1
177
This will generate a VHDL template with the input and output signals filled in. Add your name as author and type Behavior of 2-input gates as the description.
Note that the entity has been completed for you (see Listing 1.1 in Example 1). Click Save
Type in these six assignment statements (see Listing 1 of Example 1)
Click on + and then Right-click on gates2.vhd and select Compile
1
2
3
Appendix A 178
Click Choose, select gates2 as the top-level design, and click Add.
Click design flow and then Click options
Click here to select design Select gates2.vhd and Click Ok
Click Ok
Aldec Active-HDL Tutorial – Part 1
179
Click Use Default Waveform Click Ok
Click functional simulation
The waveform window will automatically come up with the simulation already initialized. Make sure order is a, b, z (grab and drag if necessary). Right-click on a and select Stimulators.
Appendix A 180
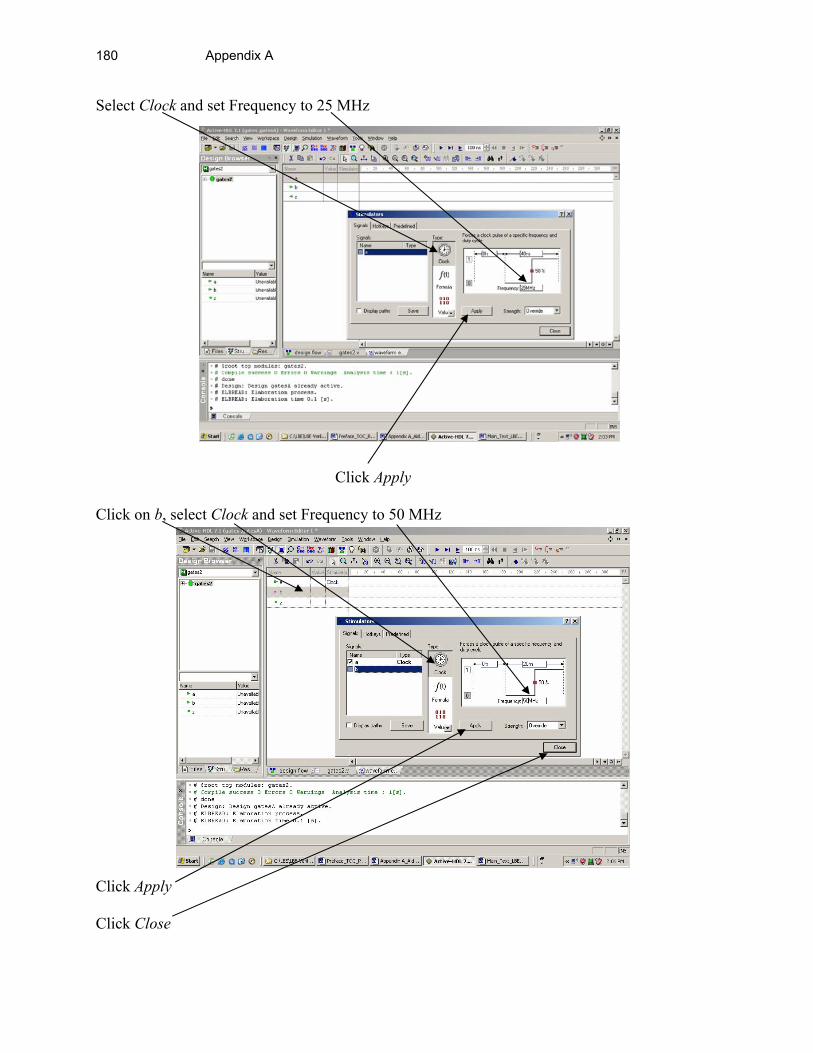
Select Clock and set Frequency to 25 MHz
Click Apply
Click on b, select Clock and set Frequency to 50 MHz Click Apply Click Close
Aldec Active-HDL Tutorial – Part 1
181
Set simulation time to 200 ns Click here to run simulation Click + sign to show all elements of z. Print out the waveform by selecting File -> Print from the menu bar.
Study the waveform for various magnifications. Click design flow Click synthesis options
Appendix A 182
Pull down menu and select gates2 for Top-level Unit.
Click Ok. Click synthesis
After synthesis is complete, click Close.
Select 3S200ft256 for Device from pull down
Check VHDL
Aldec Active-HDL Tutorial – Part 1
183
Click Tools Click PACE
Select Spartan3…..XC3S200…..FT256. Click Ok. Click Ok
Select File->New…
Click Browse… and select your gates2.vhd file
Click
Appendix A 184
Type in the pin numbers for the two left-most slide switches for a and b and the six right-most LEDs for the values of z(1:6).
Click Save and then click Ok Click implementation options
Close the window
Aldec Active-HDL Tutorial – Part 1
185
Select 3s200ft256
Check VHDL Select Custom constraint
Browse and select the file gates2.ucf that you just created
Click Ok.
Select Translate and check Allow Unmatched LOC Constraints.
Select BitStream and uncheck Do Not Run Bitgen.
Click Ok
Appendix A 186
Click implementation
When implementation is complete click Close.
Click Analysis and click iMPACT options
Aldec Active-HDL Tutorial – Part 1
187
Click Finish
Select create a new project and click OK
Browse and locate gates2.bit, select it, and click Open.
Appendix A 188
Click OK Right-click the Spartan3 chip and select Program….
Click Bypass to bypass Prom in the
Aldec Active-HDL Tutorial – Part 1
189
After downloading the .bit file, Program Succeeded will be displayed. Close the iMPACT window and click Yes. Your program is now running on the board.