This document will show you how to connect, read (backup) your existing map, write (flash) a new map and perform a TPS reset. This uses the Windows versions, but Mac & Linux versions function the same. All types of ECU use the same version of GuzziDiag Copy & paste the link into your browser for your operating system: Windows: https://www.von-der-salierburg.de/download/GuzziDiag/GuzziDiag_V0.48.zip Linux 32 bit: https://www.von-der-salierburg.de/download/GuzziDiag/GuzziDiag_V0.48.tgz Linux 64 bit: http://www.von-der-salierburg.de/download/GuzziDiag/GuzziDiag_V0.48_x64.tgz Mac: http://www.griso.org/GuzziDiag_V0.46.app.zip For the V7 & V9 Single Throttle Body MIU G3: Windows: http://www.von-der-salierburg.de/download/GuzziDiag/IAWMIUG3Reader_V0.05.zip http://www.von-der-salierburg.de/download/GuzziDiag/IAWMIUG3Writer_V0.06.zip Linux 32 bit: http://www.von-der-salierburg.de/download/GuzziDiag/IAWMIUG3Reader_V0.04.tgz http://www.von-der-salierburg.de/download/GuzziDiag/IAWMIUG3Writer_V0.03.tgz Linux 64 bit: http://www.von-der-salierburg.de/download/GuzziDiag/IAWMIUG3Reader_V0.04_x64.tgz http://www.von-der-salierburg.de/download/GuzziDiag/IAWMIUG3Writer_V0.03_x64.tgz Mac: http://www.von-der-salierburg.de/download/GuzziDiag/IAWMIUG3Reader_V0.04.app.zip http://www.von-der-salierburg.de/download/GuzziDiag/IAWMIUG3Writer_V0.03.app.zip Each is a standalone program that works independently of each other and does not require any extra software. You will also need the two cables. They are available from various resellers on the net. Lonelec is the best source on the net. They sell a kit that inlcudes both cables and is guaranteed to work Get it here: http://www.lonelec.co.uk/index.php?main_page=product_info&cPath=14&products_id=50 Do not use the drivers that come with the cables. Download the drivers from here: Windows: https://www.griso.org/CDM21228_Setup.zip Mac: http://www.ftdichip.com/Drivers/VCP/MacOSX/FTDIUSBSerialDriver_v2_3.dmg Linux doesn't require drivers.
Transcript
This document will show you how to connect, read (backup) your existing map, write (flash) a new map and perform a TPS reset. This uses the Windows versions, but Mac & Linux versions function the same.
All types of ECU use the same version of GuzziDiag
Copy & paste the link into your browser for your operating system:
Each is a standalone program that works independently of each other and does not require any extra software.
You will also need the two cables. They are available from various resellers on the net.Lonelec is the best source on the net. They sell a kit that inlcudes both cables and is guaranteed to work
Get it here: http://www.lonelec.co.uk/index.php?main_page=product_info&cPath=14&products_id=50
Do not use the drivers that come with the cables. Download the drivers from here:
1. The OBD2 KKL 16 pin to USB cable with the FTDI chip.
2. The Fiat 3 Pin to 16 pin Adapter
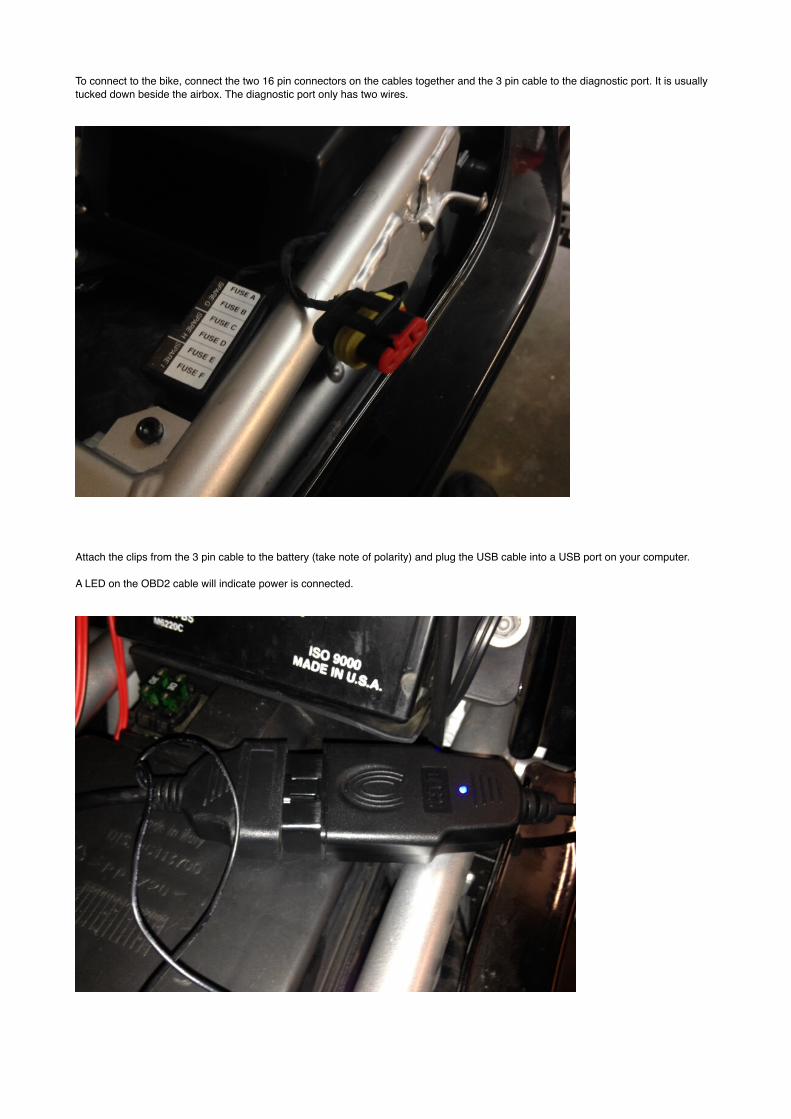
To connect to the bike, connect the two 16 pin connectors on the cables together and the 3 pin cable to the diagnostic port. It is usually tucked down beside the airbox. The diagnostic port only has two wires.
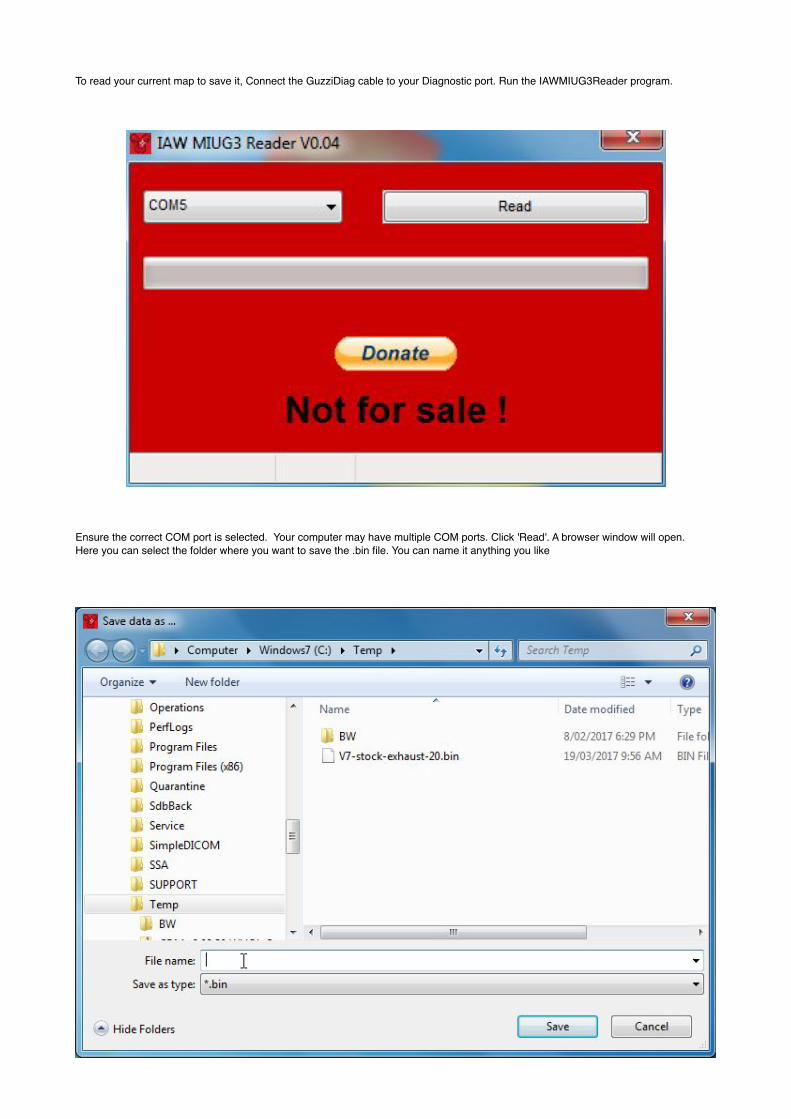
Attach the clips from the 3 pin cable to the battery (take note of polarity) and plug the USB cable into a USB port on your computer.
A LED on the OBD2 cable will indicate power is connected.
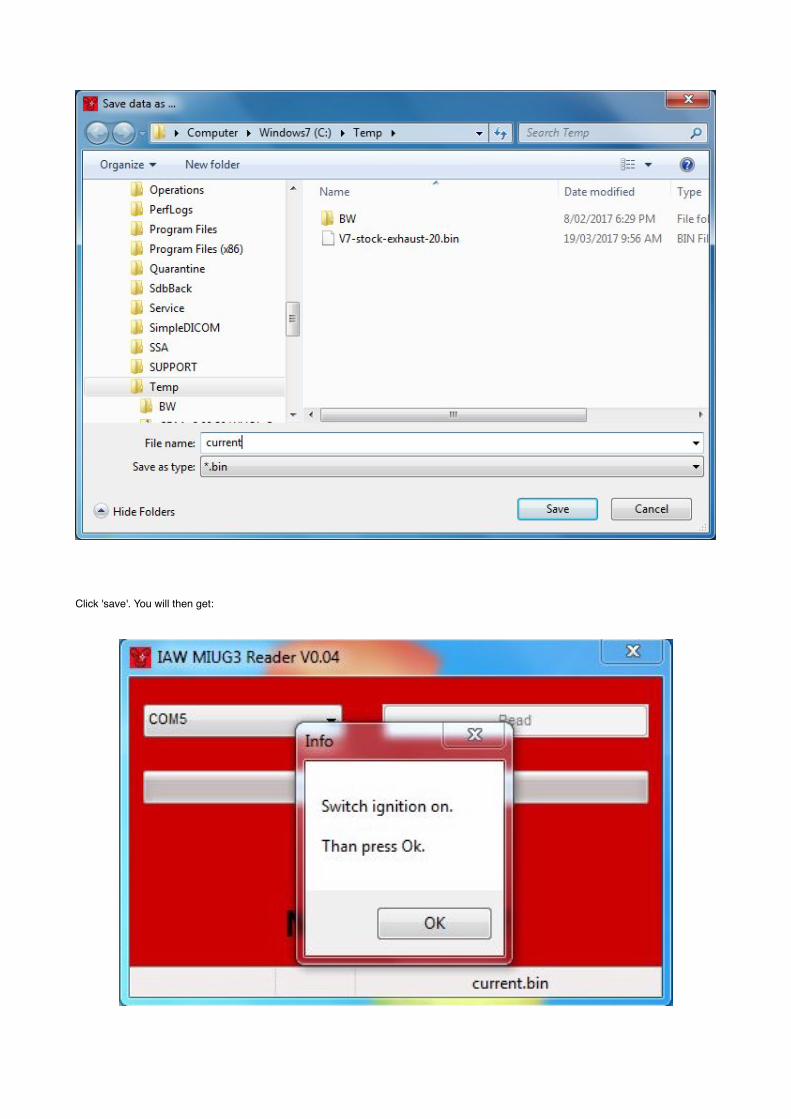
To read your current map to save it, Connect the GuzziDiag cable to your Diagnostic port. Run the IAWMIUG3Reader program.
Ensure the correct COM port is selected. Your computer may have multiple COM ports. Click 'Read'. A browser window will open.Here you can select the folder where you want to save the .bin file. You can name it anything you like
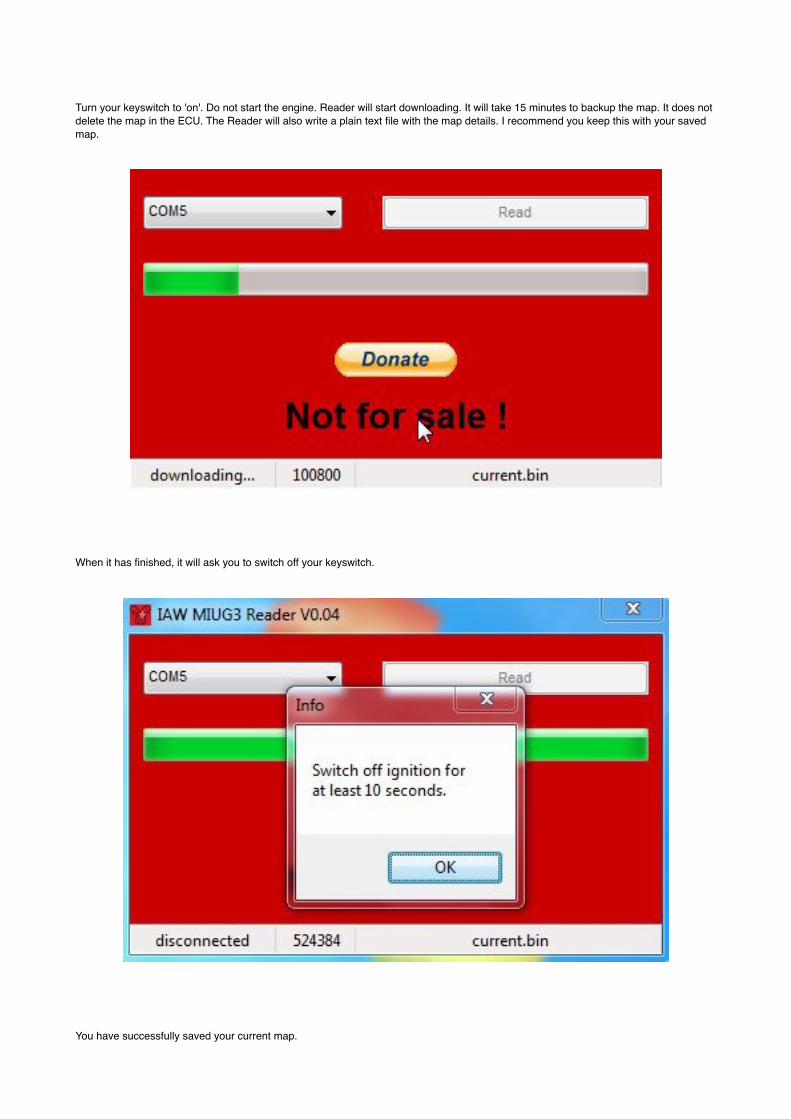
Click 'save'. You will then get:
Turn your keyswitch to 'on'. Do not start the engine. Reader will start downloading. It will take 15 minutes to backup the map. It does not delete the map in the ECU. The Reader will also write a plain text file with the map details. I recommend you keep this with your saved map.
When it has finished, it will ask you to switch off your keyswitch.
You have successfully saved your current map.
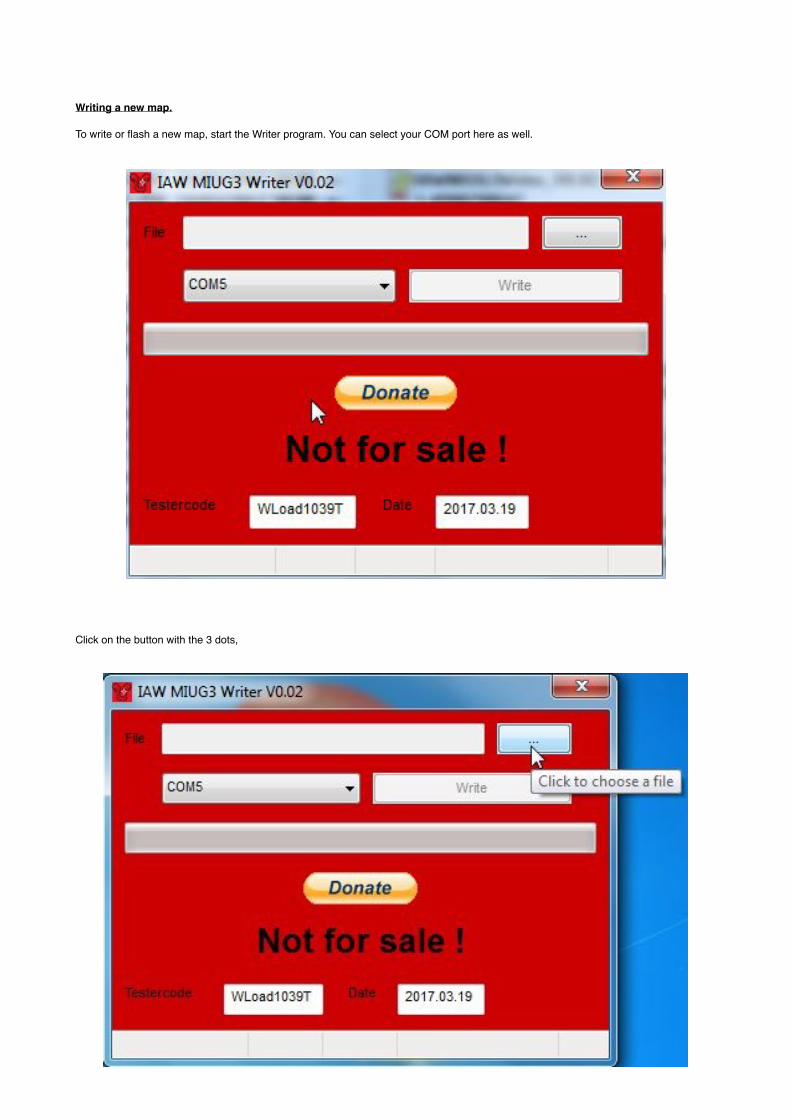
Writing a new map.
To write or flash a new map, start the Writer program. You can select your COM port here as well.
Click on the button with the 3 dots,
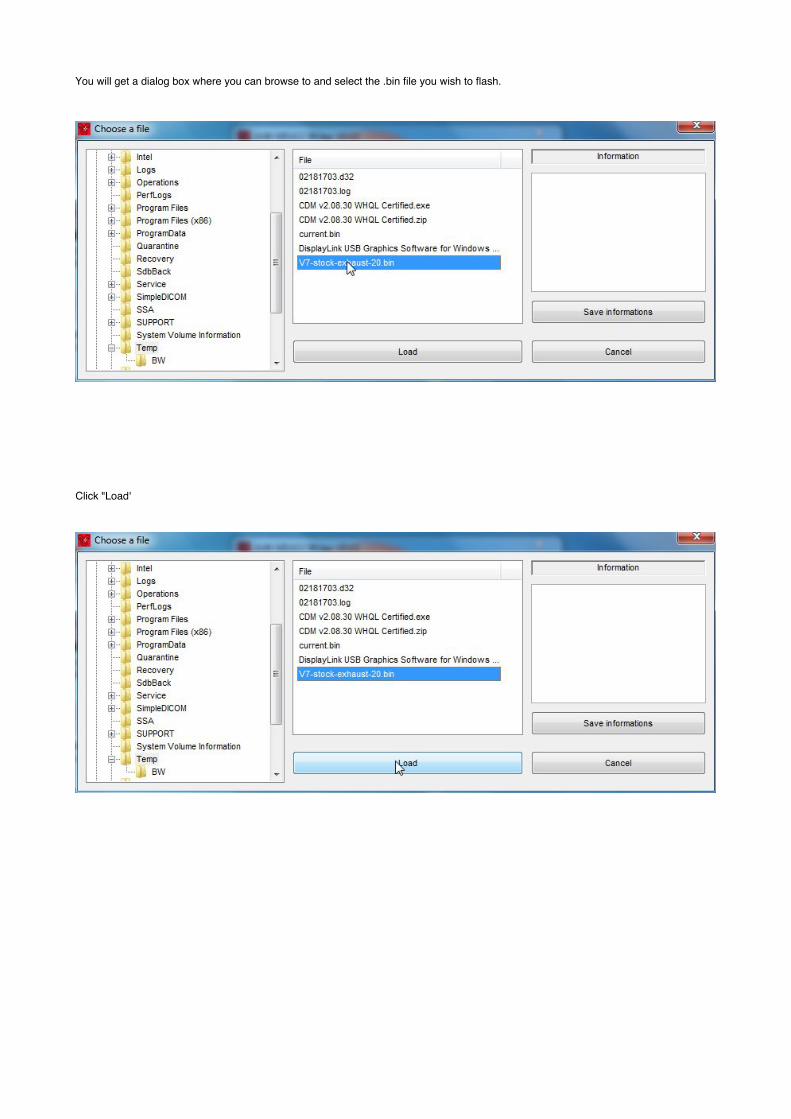
You will get a dialog box where you can browse to and select the .bin file you wish to flash.
Click "Load'
To start the process, click 'Write'
Note: In the bottom right-hand corner is the checksum of the bin file. If I send you a map, it will have the checksum as part of the file name. If it is different, do not flash it. You can also edit the 'Testercode' and install date. This data will indicate to anyone using the official service software the operator and date the map was installed. If you use the 'tester' and date from the text file saved when you saved your original map, no one will know it's been remapped.
You will be asked to switch on your keyswitch again. It will start the upload. It takes 5 minutes.
It will then change to 'programming' as it writes the file to the ECU. It will confirm programming was successful. Click 'OK' and switch off your keyswitch. Here's a little video of a map upload: http://youtu.be/ZAi1N3ZFhHA
Relearn the throttle and reset the autolearning parameters.
After loading a map, we will now relearn the throttle. We will also reset the 'autolearning parameters' (fuel trims).
Start the main GuzziDiag program.
Click 'File' -> 'Preferences' to configure the software. It only needs to be done once.The GuzziDiag settings dialog box opens. Here you can select language, COM port and bike type. For the V7 I, II, & III, I recommend you select 'V7 Stone' as your bike type. Click the X to close, when done.
Next we want to connect to the ECU, so click 'File' -> 'Connect'. It will ask you to switch on your keyswitch and click 'OK'
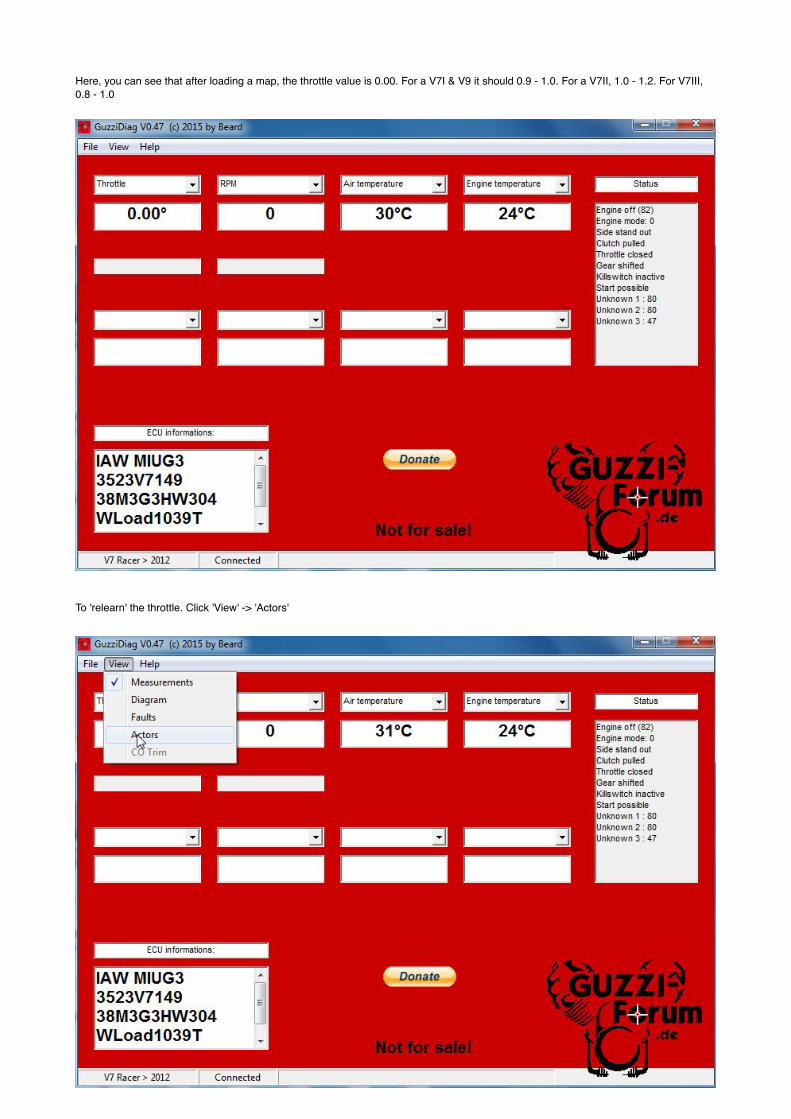
Select values to read from the drop down boxes. Here I have chosen 'Throttle', 'RPM', 'Air temperature' and 'Engine temperature'. When loading a new map, always make sure that 'Throttle' is one of the values'.
Here, you can see that after loading a map, the throttle value is 0.00. For a V7I & V9 it should 0.9 - 1.0. For a V7II, 1.0 - 1.2. For V7III, 0.8 - 1.0
To 'relearn' the throttle. Click 'View' -> 'Actors'
From the Actors menu, select one of the drop-down menu items. Select 'Throttle Self Learning'
Next, click 'Start'.
You will get confirmation. Click 'Ok'.
To reset the autolearning parameters, select 'Reset autolearning parameters' from the drop-down menu. Click 'Start', then 'OK'.
Next, click 'View' -> 'Measurements' to return to the main menu. Throttle value now reads 0.9. Remember, for V7I or V9, it can 0.9 - 1.0. For V7II, 1.0 - 1.2. V7III, 0.8 - 1.0.