13
APC Switched PDU Driver Installation and Usage Guide Revision: 3.0 Date: Monday, July 10, 2017 Authors: Alan Chow
APC Switched PDU Driver
Installation and Usage Guide
Revision: 3.0 Date: Monday, July 10, 2017 Authors: Alan Chow
Page | 2
Contents Overview ................................................................................................................................................................................. 2
Features .................................................................................................................................................................................. 3
Change Log .............................................................................................................................................................................. 4
Important Notice..................................................................................................................................................................... 4
Driver Installation .................................................................................................................................................................... 4
Adding the driver to your project ........................................................................................................................................... 5
Licencing .................................................................................................................................................................................. 9
Summary ............................................................................................................................................................................. 9
STEP 1 - Creating your project on driverCentral ................................................................................................................. 9
STEP 2 –Purchase driver licence ....................................................................................................................................... 11
STEP 3 – Install and activate the driverCentral cloud driver ............................................................................................. 12
STEP 4 – Install Chowmain driver ...................................................................................................................................... 13
Overview APC’s Switched PDU’s allow you to control the power of devices in your customer’s rack. This is extremely useful for
energy saving and remote troubleshooting.
Integration into Control4 enables Control4 to do emergency shutdowns on low or high voltage levels or if the total
power consumption is exceeding or lower than expected. This ensures that the health of your customer’s expensive
rack based equipment is maintained.
You may need to reboot a device that has locked up. Sending a technician onsite can be expensive. This driver will
enable you to reboot a device remotely via 4sight. An even better solution would be to integrate it with the Chowmain
free ‘Ping’ driver you can have Control4 automatically monitor devices and have the APC driver automatically reboot
the device.
Page | 3
Features Dynamically import outlets
o Detects how many outlets are present on the unit
o Imports the names of each outlet into the driver’s connections
Auto import device details into properties page
o Unit Name
o Contact Details
o Location
o Up Time
o Model Number
o Present Outlets
o Switched Outlets
o Metered Outlets
o Max Current
Auto poll for device power consumption (once every 30 seconds). Available in properties page and in Control4
variables.
o Total Current Power Consumption (in watts)
o Total Energy Consumption since birth (in kWh)
o Phase 1, 2 & 3 Voltage (in volts)
o Phase 1, 2 & 3 Current (in amps)
o Phase 1, 2 & 3 Power (in watts)
Auto poll for outlet states
* On / Off / Toggle for all outlets (once every 30 seconds or when triggered by Control4)
Page | 4
Change Log JUL 24 2014 – Initial Release
Important Notice This driver has been developed for Control4 OS version 2.6.0. It is recommended that you test out this driver using the
free 48 hour trial prior to purchase.
This driver has been built for APC OS (AOS) version 5.1.4 for the 8XXX range of devices. It may work for older versions of
OS but it is recommended that you test out this driver using the free 48 hour trial prior to purchase. This driver will not
work on the 7XXX series of devices.
Note when this driver is connected no other connections can be made via telnet or the web server to the device. You
can change the IP address in the driver to disconnect the driver from the device. Re-enter the IP address to reconnect
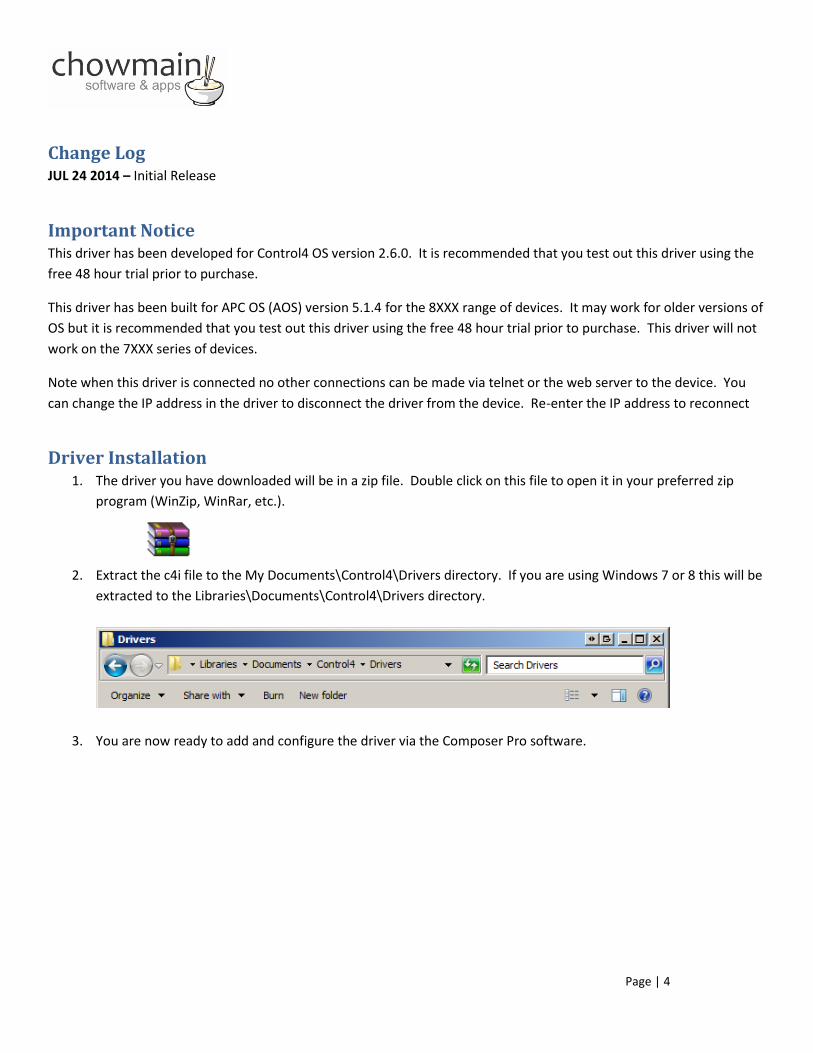
Driver Installation 1. The driver you have downloaded will be in a zip file. Double click on this file to open it in your preferred zip
program (WinZip, WinRar, etc.).
2. Extract the c4i file to the My Documents\Control4\Drivers directory. If you are using Windows 7 or 8 this will be
extracted to the Libraries\Documents\Control4\Drivers directory.
3. You are now ready to add and configure the driver via the Composer Pro software.

Page | 5
Adding the driver to your project IMPORTANT – Before undertaking the installation of the driver please follow the licencing steps outlined at the end of
this document.
1. Launch the Composer Pro application and connect to your project
2. In the ‘System Design’ page select the ‘Search’ tab on the right hand side.
3. Select ‘APC’ as the manufacturer.
4. Double click on the ‘APC Switched PDU’ driver to add it to your project
5. Highlight the ‘APC Switched PDU’ driver on the left hand side.
6. Enter in the IP address, username and password for the device.
Note: When this driver is connected no other connections can be made via telnet or the web server to the
device. You can change the IP address in the driver to disconnect the driver from the device. Re-enter the IP
address to reconnect.
Page | 6
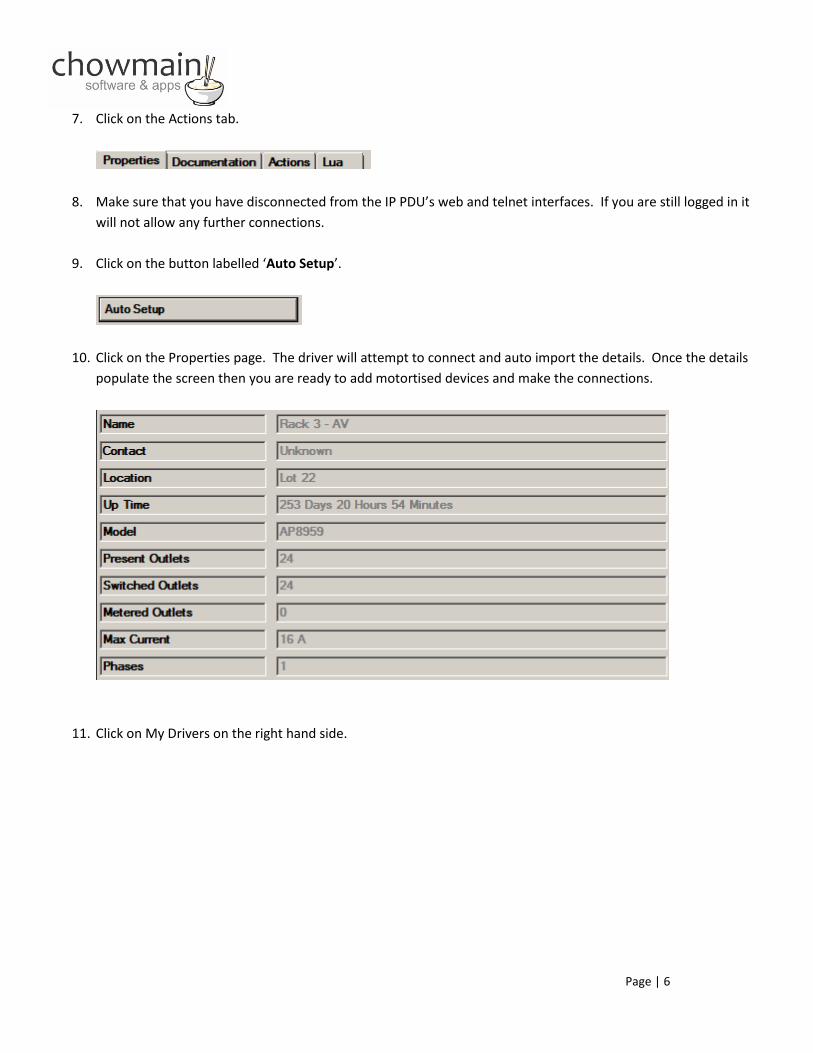
7. Click on the Actions tab.
8. Make sure that you have disconnected from the IP PDU’s web and telnet interfaces. If you are still logged in it
will not allow any further connections.
9. Click on the button labelled ‘Auto Setup’.
10. Click on the Properties page. The driver will attempt to connect and auto import the details. Once the details
populate the screen then you are ready to add motortised devices and make the connections.
11. Click on My Drivers on the right hand side.

Page | 7
12. Under Motorisation double click on the device type you want to use (note this will be the icon for your device).
13. In the motorised device properties make sure that it is set to hold type and not pulse type.
14. Click on the Connections tab.
15. Highlight driver on the left hand side.
Page | 8
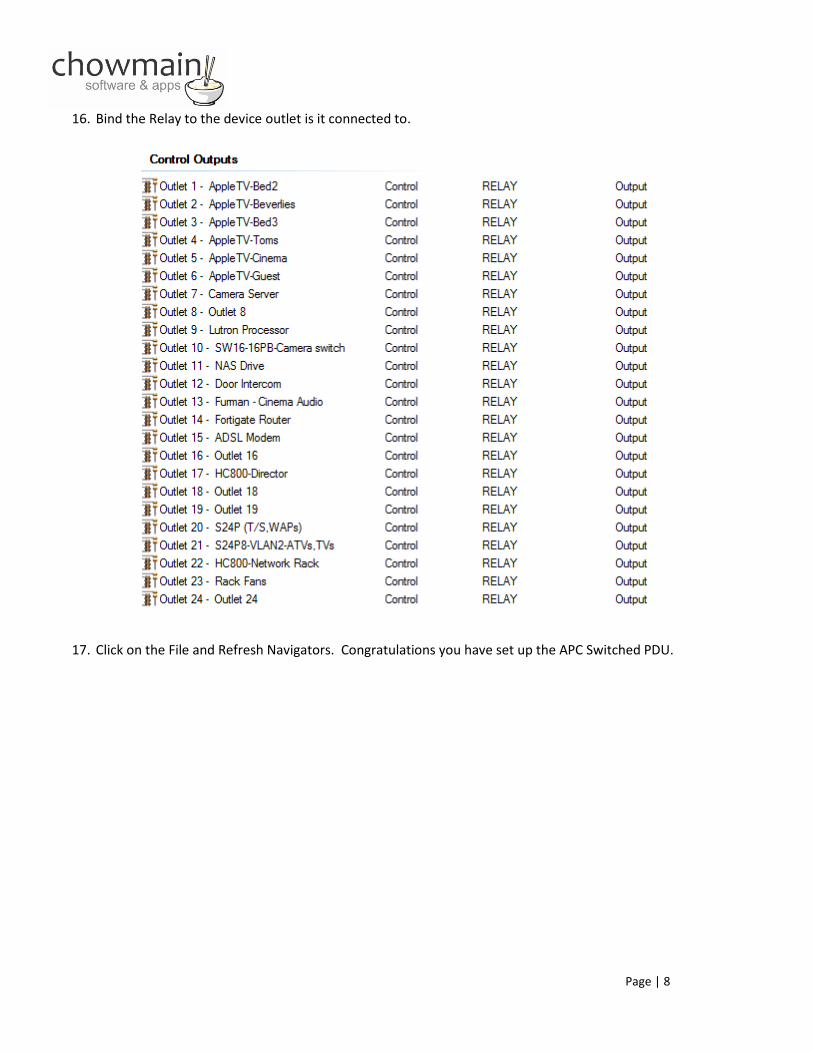
16. Bind the Relay to the device outlet is it connected to.
17. Click on the File and Refresh Navigators. Congratulations you have set up the APC Switched PDU.
Page | 9
Licencing Chowmain drivers require a valid licence to use the driver. Drivers can be purchased from our distributor driverCentral
however all Chowmain drivers come with a 7 day trial. We recommend that prior to purchasing a driver that you test
the driver out to ensure that it will work with your hardware and will meet your requirements. The licencing procedure
is broken down into 4 steps. A summary of the steps are below along however we have also provided detailed steps if
the summary is not sufficient.
Summary 1. Create your project on the driverCentral.io website (This will generate a specific token which you will
use in the next step)
2. Download, install and activate the driverCentral cloud driver in your project (Only once per project. Use the token generated in step 1)
3. (Optional) To try a driver, simply download it and install it in your project
4. To purchase a driver:
a. On driverCentral, purchase a license and register it to your project
b. If the driver is not already installed in your project, download it and install it
c. If necessary, use the cloud driver’s Action: “Check Drivers” to force licence download to the project.
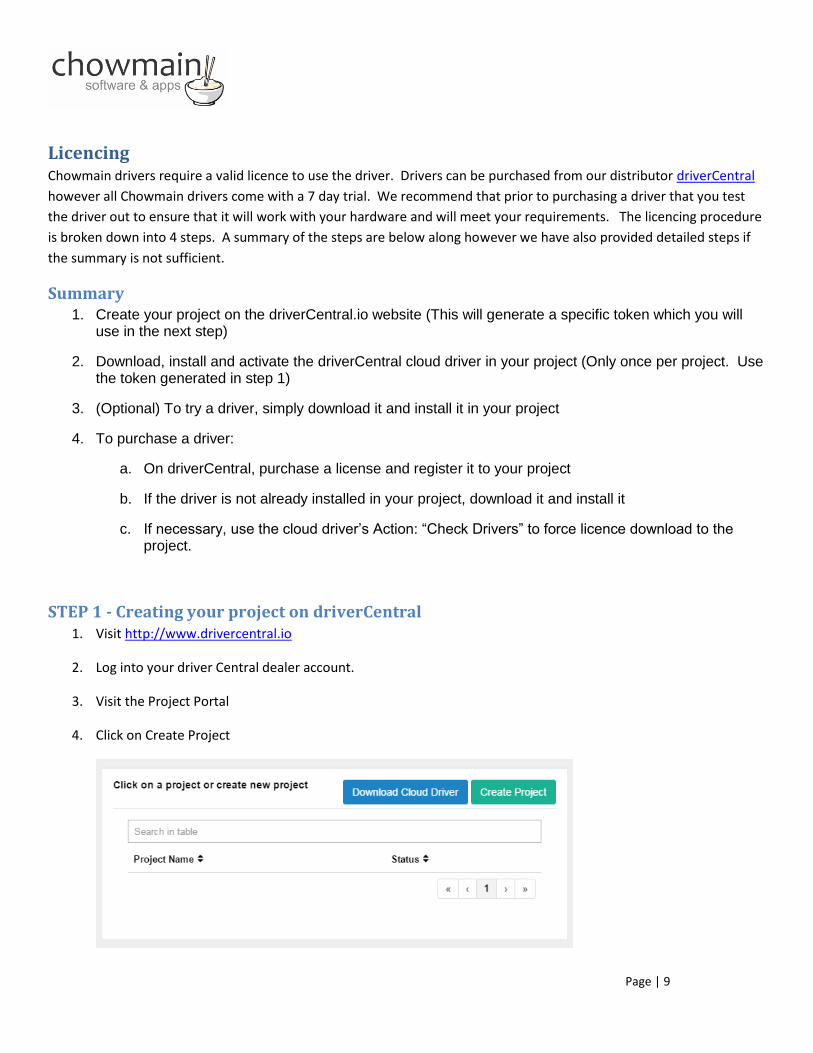
STEP 1 - Creating your project on driverCentral 1. Visit http://www.drivercentral.io
2. Log into your driver Central dealer account.
3. Visit the Project Portal
4. Click on Create Project
Page | 10
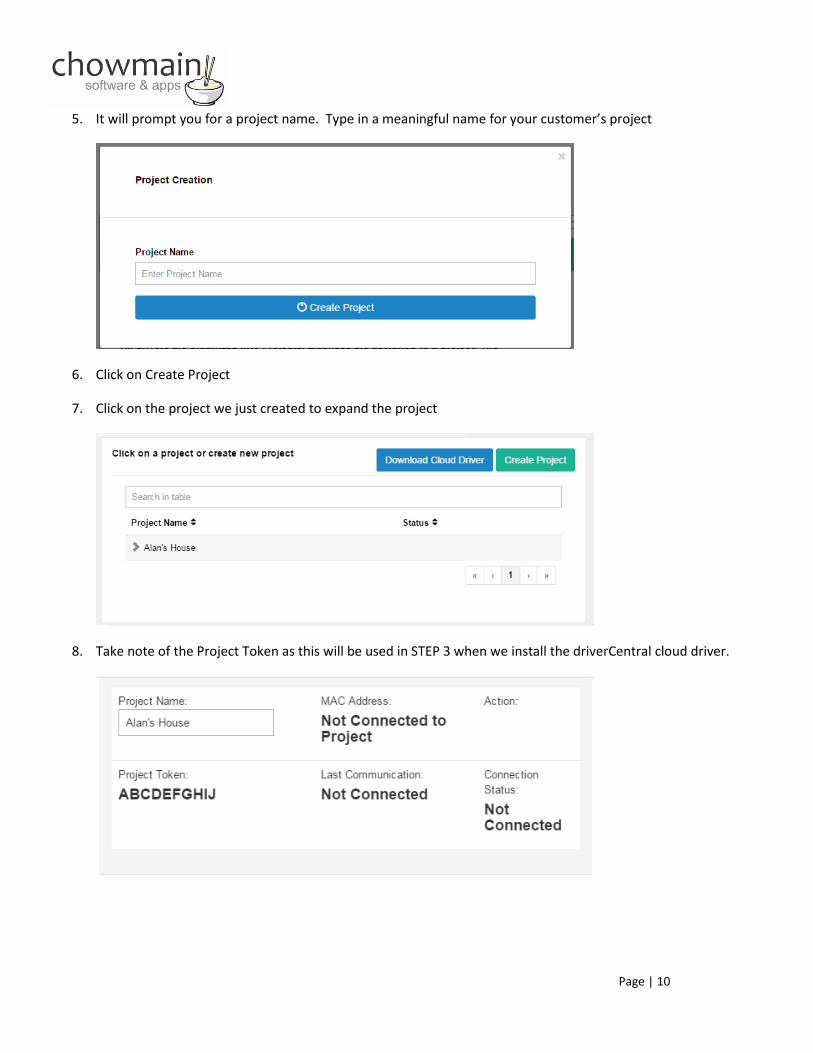
5. It will prompt you for a project name. Type in a meaningful name for your customer’s project
6. Click on Create Project
7. Click on the project we just created to expand the project
8. Take note of the Project Token as this will be used in STEP 3 when we install the driverCentral cloud driver.
Page | 11
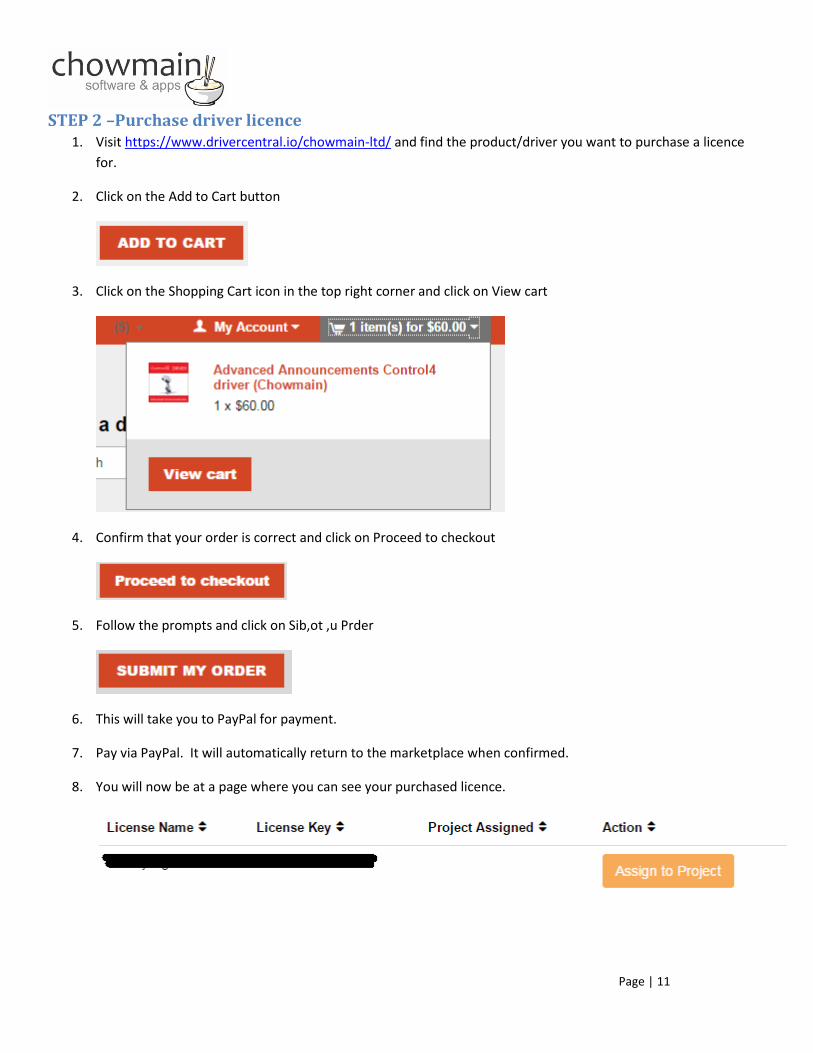
STEP 2 –Purchase driver licence 1. Visit https://www.drivercentral.io/chowmain-ltd/ and find the product/driver you want to purchase a licence
for.
2. Click on the Add to Cart button
3. Click on the Shopping Cart icon in the top right corner and click on View cart
4. Confirm that your order is correct and click on Proceed to checkout
5. Follow the prompts and click on Sib,ot ,u Prder
6. This will take you to PayPal for payment.
7. Pay via PayPal. It will automatically return to the marketplace when confirmed.
8. You will now be at a page where you can see your purchased licence.
Page | 12
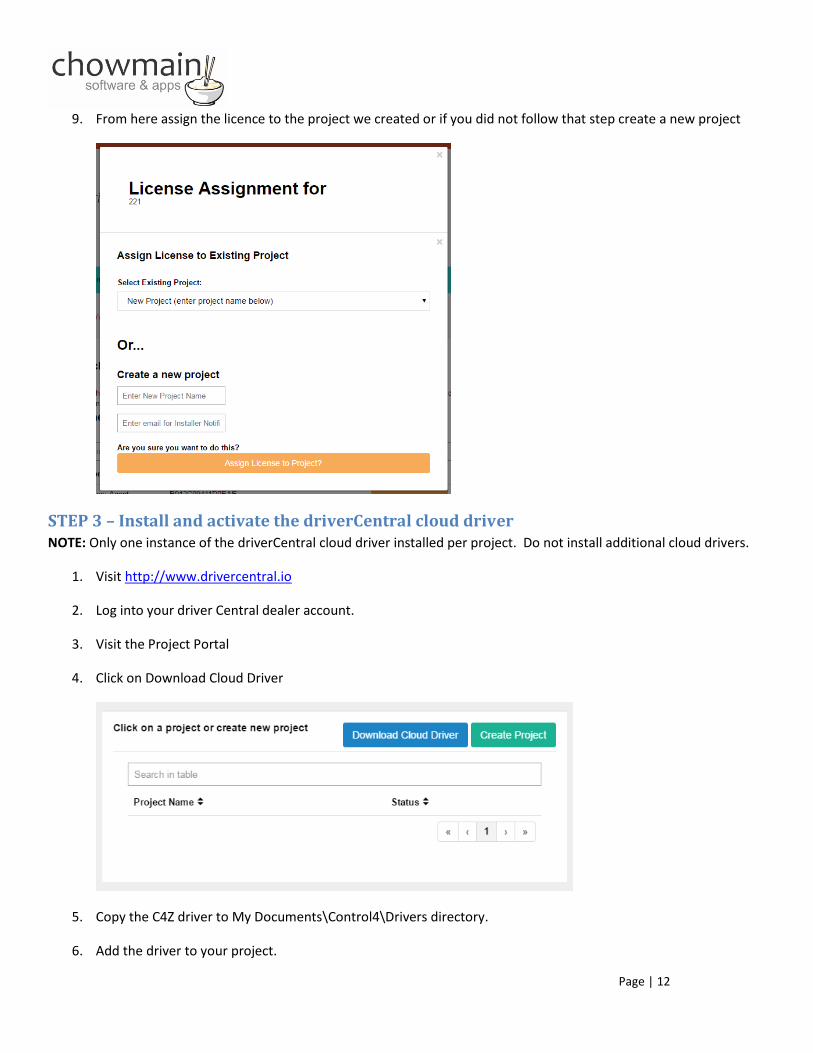
9. From here assign the licence to the project we created or if you did not follow that step create a new project
STEP 3 – Install and activate the driverCentral cloud driver NOTE: Only one instance of the driverCentral cloud driver installed per project. Do not install additional cloud drivers.
1. Visit http://www.drivercentral.io
2. Log into your driver Central dealer account.
3. Visit the Project Portal
4. Click on Download Cloud Driver
5. Copy the C4Z driver to My Documents\Control4\Drivers directory.
6. Add the driver to your project.
Page | 13
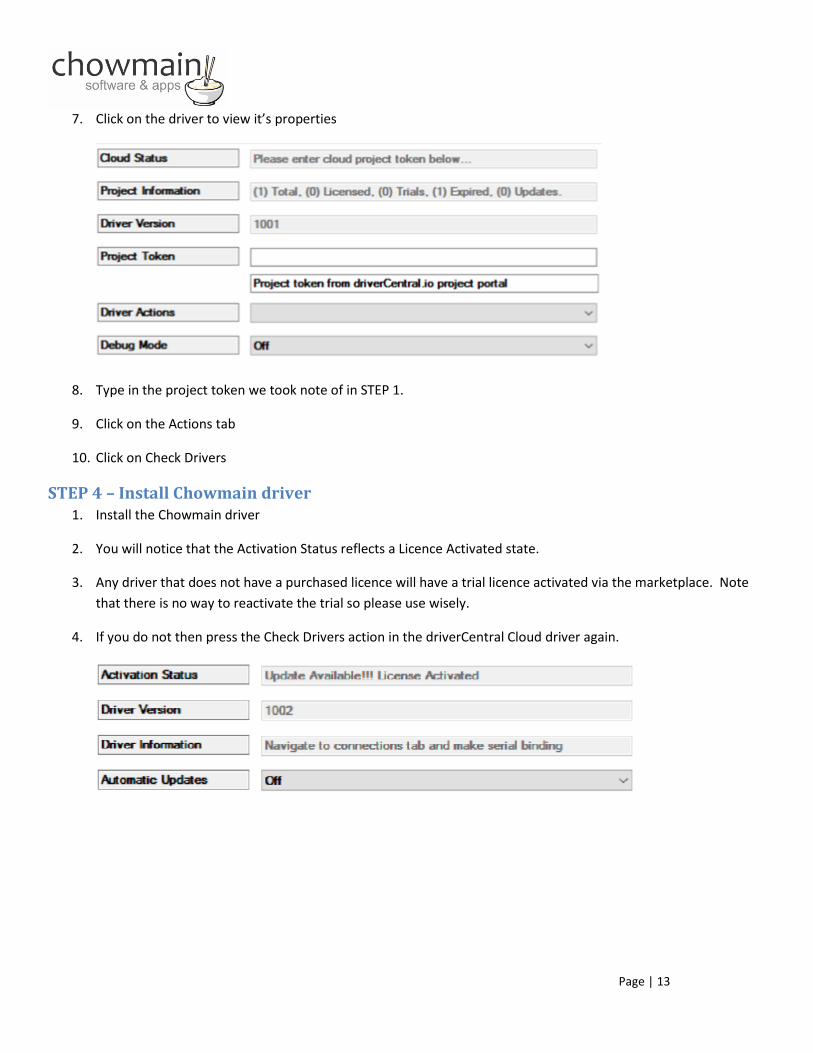
7. Click on the driver to view it’s properties
8. Type in the project token we took note of in STEP 1.
9. Click on the Actions tab
10. Click on Check Drivers
STEP 4 – Install Chowmain driver 1. Install the Chowmain driver
2. You will notice that the Activation Status reflects a Licence Activated state.
3. Any driver that does not have a purchased licence will have a trial licence activated via the marketplace. Note
that there is no way to reactivate the trial so please use wisely.
4. If you do not then press the Check Drivers action in the driverCentral Cloud driver again.


