LYM; Reviewed:
SPOC 2/17/2014
Solution & Interoperability Test Lab Application Notes
©2014 Avaya Inc. All Rights Reserved.
1 of 23
VoiceKey-AAEP
Avaya Solution & Interoperability Test Lab
Application Notes for VoiceKey with Avaya Aura® Experience Portal 6.0 and Avaya Aura® Communication
Manager 6.3 – Issue 1.0
Abstract
These Application Notes describe the configuration steps required for VoiceKey to
successfully interoperate with Avaya Aura® Experience Portal, Avaya Aura® Communication
Manager and Avaya Aura® Session Manager. VoiceKey is a voice verification platform that
processed voice samples and compared it to the voice etalon of a specific user that has been
recorded before.
Information in these Application Notes has been obtained through DevConnect compliance
testing and additional technical discussions. Testing was conducted via the DevConnect
Program at the Avaya Solution and Interoperability Test Lab.
LYM; Reviewed:
SPOC 2/17/2014
Solution & Interoperability Test Lab Application Notes
©2014 Avaya Inc. All Rights Reserved.
2 of 23
VoiceKey-AAEP
1. Introduction These Application Notes describe the configuration steps required for VoiceKey to successfully
interoperate with Avaya Aura® Experience Portal, Avaya Aura® Communication Manager and
Avaya Aura® Session Manager. The VoiceKey is a voice verification platform that processes
voice samples and compares it to the voice etalon of a specific user that has been previously
recorded
The VoiceKey platform consists of:
1) VoiceKey SRV, basically a HTTP server handling the following functions:
Building a voice model by means of speech samples recorded by users
Comparing one voice model to another
2) IVR application module (Apache Tomcat server, Database)
2. General Test Approach The general test approach is to place calls manually to Avaya Aura® Experience Portal running
VXML applications that uses the VoiceKey solution. VXML scripts are hosted on the VoiceKey
platform that runs on Apache Tomcat. VoiceKey is a simply a voice verification server that pass
the results back to the VXML script. Hence, it does not depend on the type of Text-to- Speech
(TTS) or Automatic Speech Recognition (ASR) server used in a solution. In this Compliance
Testing pre-recorded voice prompts are installed on the VoiceKey platform.
DevConnect Compliance Testing is conducted jointly by Avaya and DevConnect members. The
jointly-defined test plan focuses on exercising APIs and/or standards-based interfaces pertinent
to the interoperability of the tested products and their functionalities. DevConnect Compliance
Testing is not intended to substitute full product performance or feature testing performed by
DevConnect members, nor is it to be construed as an endorsement by Avaya of the suitability or
completeness of a DevConnect member’s solution.
2.1. Interoperability Compliance Testing
This Interoperability Compliance Test included feature and serviceability testing. The feature
testing focused on placing calls to Avaya Experience Portal that ran Voice XML scripts in
English that uses the VoiceKey to compare Voice Samples previously stored. The compliance
test focused on placing calls to verify the accuracy of VoiceKey analysis and handling of failure
conditions.
The serviceability testing focused on verifying the ability of VoiceKey to recover from adverse
conditions such as rebooting of VoiceKey and Avaya Experience Portal 6.0 and disconnecting
the LAN cables to the VoiceKey Server.
2.2. Test Results
All test cases passed. Avaya Aura® Experience Portal 6.0 was successful in running applications
that use the VoiceKey in voice verification.
LYM; Reviewed:
SPOC 2/17/2014
Solution & Interoperability Test Lab Application Notes
©2014 Avaya Inc. All Rights Reserved.
3 of 23
VoiceKey-AAEP
2.3. Support
For technical support on Speech Technology Center contact:
Telephone : +7 (812) 325-8848
Fax : +7 (812) 327-9297
Web : http://speechpro.com/support_form
Email: [email protected]
LYM; Reviewed:
SPOC 2/17/2014
Solution & Interoperability Test Lab Application Notes
©2014 Avaya Inc. All Rights Reserved.
4 of 23
VoiceKey-AAEP
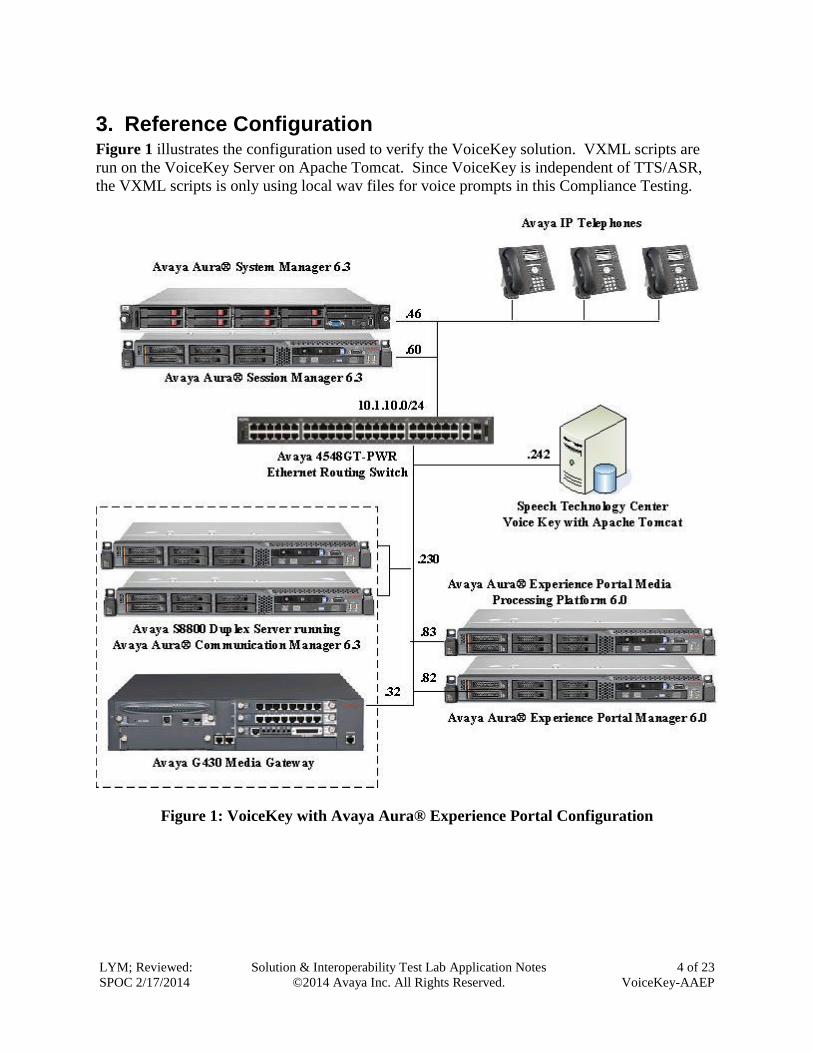
3. Reference Configuration Figure 1 illustrates the configuration used to verify the VoiceKey solution. VXML scripts are
run on the VoiceKey Server on Apache Tomcat. Since VoiceKey is independent of TTS/ASR,
the VXML scripts is only using local wav files for voice prompts in this Compliance Testing.
Figure 1: VoiceKey with Avaya Aura® Experience Portal Configuration
LYM; Reviewed:
SPOC 2/17/2014
Solution & Interoperability Test Lab Application Notes
©2014 Avaya Inc. All Rights Reserved.
5 of 23
VoiceKey-AAEP
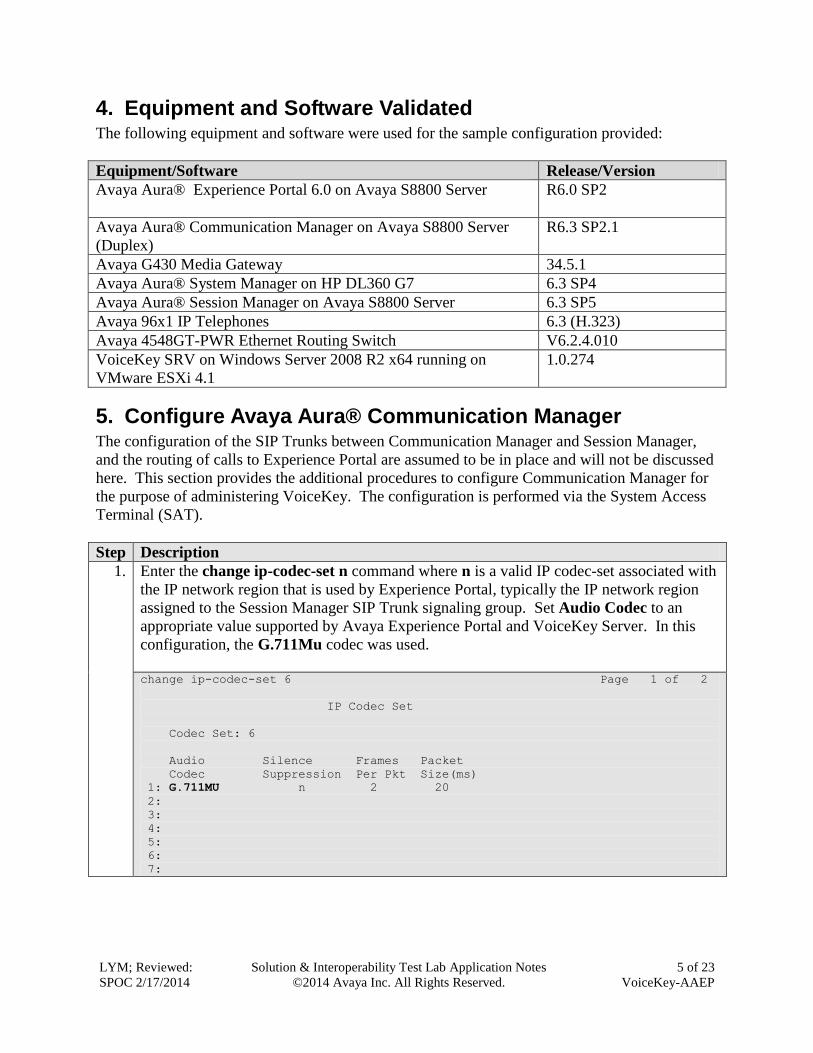
4. Equipment and Software Validated The following equipment and software were used for the sample configuration provided:
Equipment/Software Release/Version
Avaya Aura® Experience Portal 6.0 on Avaya S8800 Server R6.0 SP2
Avaya Aura® Communication Manager on Avaya S8800 Server
(Duplex)
R6.3 SP2.1
Avaya G430 Media Gateway 34.5.1
Avaya Aura® System Manager on HP DL360 G7 6.3 SP4
Avaya Aura® Session Manager on Avaya S8800 Server 6.3 SP5
Avaya 96x1 IP Telephones 6.3 (H.323)
Avaya 4548GT-PWR Ethernet Routing Switch V6.2.4.010
VoiceKey SRV on Windows Server 2008 R2 x64 running on
VMware ESXi 4.1
1.0.274
5. Configure Avaya Aura® Communication Manager The configuration of the SIP Trunks between Communication Manager and Session Manager,
and the routing of calls to Experience Portal are assumed to be in place and will not be discussed
here. This section provides the additional procedures to configure Communication Manager for
the purpose of administering VoiceKey. The configuration is performed via the System Access
Terminal (SAT).
Step Description
1. Enter the change ip-codec-set n command where n is a valid IP codec-set associated with
the IP network region that is used by Experience Portal, typically the IP network region
assigned to the Session Manager SIP Trunk signaling group. Set Audio Codec to an
appropriate value supported by Avaya Experience Portal and VoiceKey Server. In this
configuration, the G.711Mu codec was used.
change ip-codec-set 6 Page 1 of 2
IP Codec Set
Codec Set: 6
Audio Silence Frames Packet
Codec Suppression Per Pkt Size(ms)
1: G.711MU n 2 20
2:
3:
4:
5:
6:
7:
LYM; Reviewed:
SPOC 2/17/2014
Solution & Interoperability Test Lab Application Notes
©2014 Avaya Inc. All Rights Reserved.
6 of 23
VoiceKey-AAEP
6. Configure Avaya Aura® Experience Portal The initial administration of Avaya Experience Portal and the configuration of the SIP VoIP
Connection to Session Manager are assumed to be in place and will not be discussed here. This
section covers the additional procedures of Avaya Experience Portal that is required for the
purpose of administering VoiceKey. The following steps will be covered:
Configuring the VoIP audio format
Adding applications
Step Description
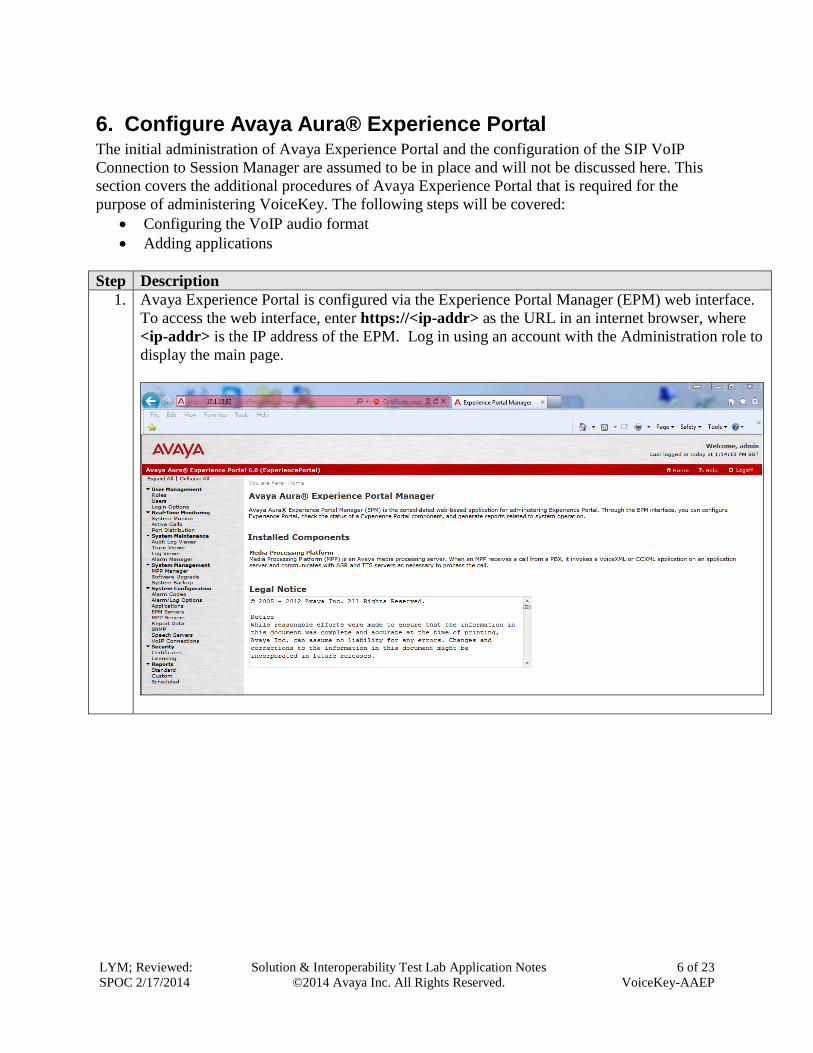
1. Avaya Experience Portal is configured via the Experience Portal Manager (EPM) web interface.
To access the web interface, enter https://<ip-addr> as the URL in an internet browser, where
<ip-addr> is the IP address of the EPM. Log in using an account with the Administration role to
display the main page.
LYM; Reviewed:
SPOC 2/17/2014
Solution & Interoperability Test Lab Application Notes
©2014 Avaya Inc. All Rights Reserved.
7 of 23
VoiceKey-AAEP
Step Description
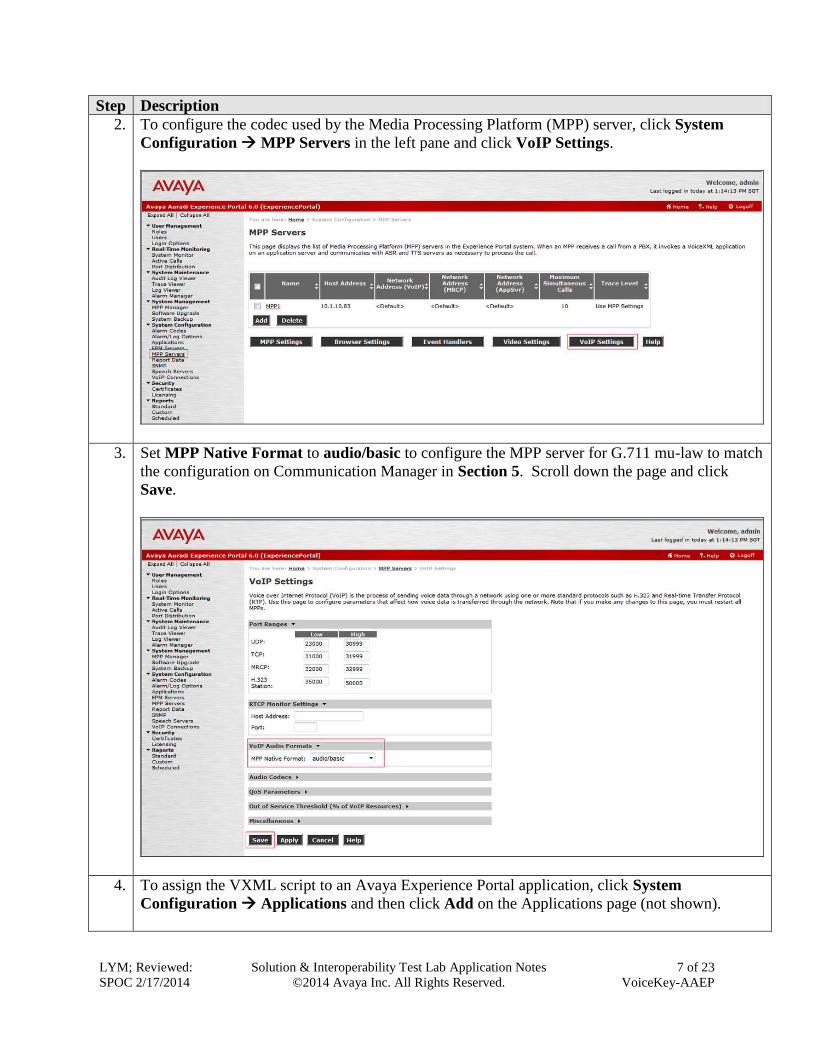
2. To configure the codec used by the Media Processing Platform (MPP) server, click System
Configuration MPP Servers in the left pane and click VoIP Settings.
3. Set MPP Native Format to audio/basic to configure the MPP server for G.711 mu-law to match
the configuration on Communication Manager in Section 5. Scroll down the page and click
Save.
4. To assign the VXML script to an Avaya Experience Portal application, click System
Configuration Applications and then click Add on the Applications page (not shown).
LYM; Reviewed:
SPOC 2/17/2014
Solution & Interoperability Test Lab Application Notes
©2014 Avaya Inc. All Rights Reserved.
8 of 23
VoiceKey-AAEP
Step Description
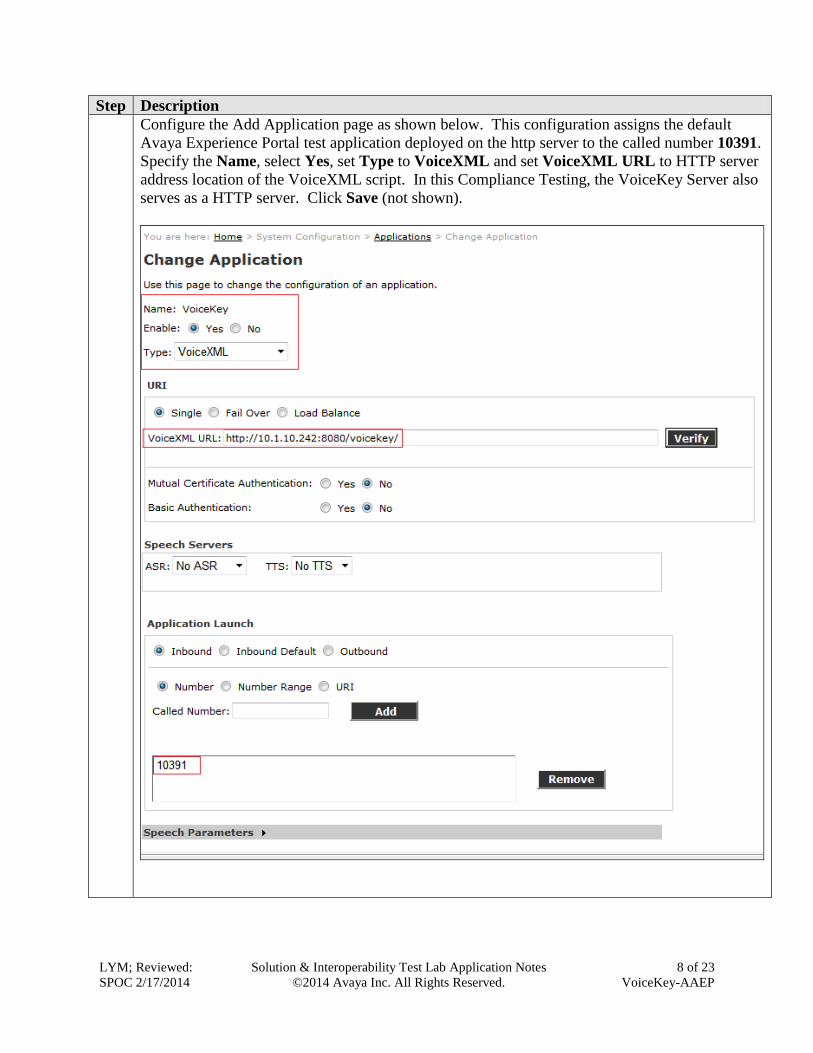
Configure the Add Application page as shown below. This configuration assigns the default
Avaya Experience Portal test application deployed on the http server to the called number 10391.
Specify the Name, select Yes, set Type to VoiceXML and set VoiceXML URL to HTTP server
address location of the VoiceXML script. In this Compliance Testing, the VoiceKey Server also
serves as a HTTP server. Click Save (not shown).
LYM; Reviewed:
SPOC 2/17/2014
Solution & Interoperability Test Lab Application Notes
©2014 Avaya Inc. All Rights Reserved.
9 of 23
VoiceKey-AAEP
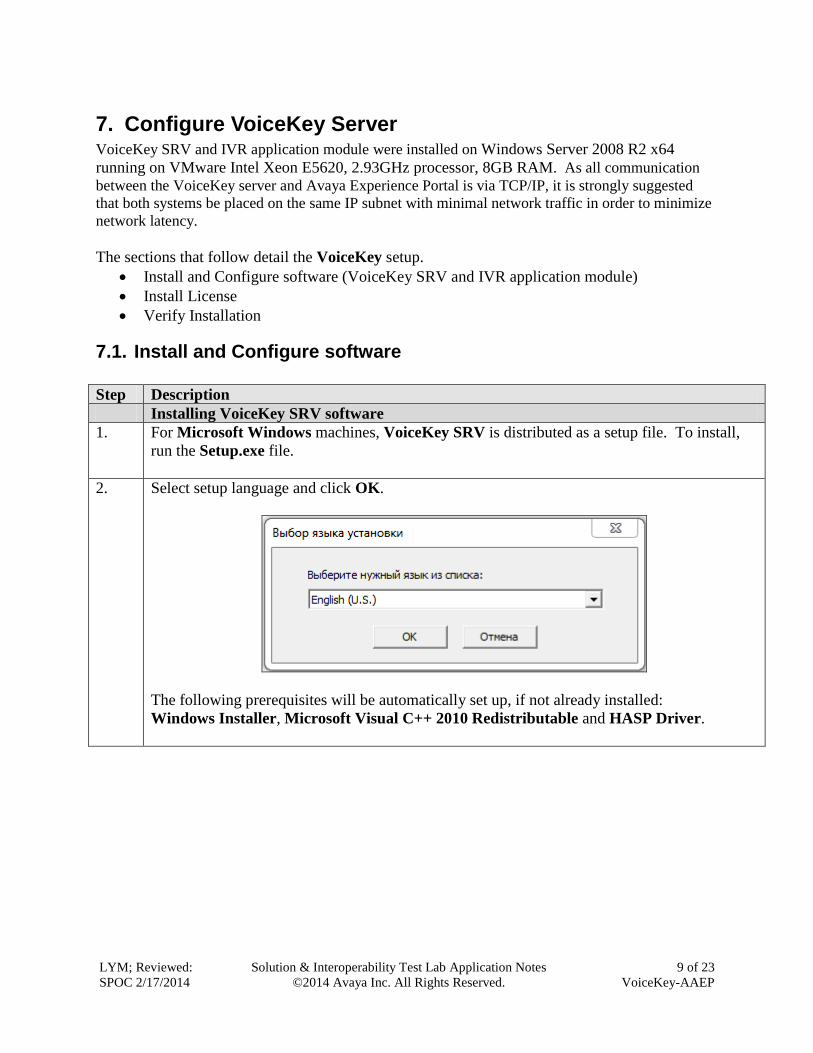
7. Configure VoiceKey Server VoiceKey SRV and IVR application module were installed on Windows Server 2008 R2 x64
running on VMware Intel Xeon E5620, 2.93GHz processor, 8GB RAM. As all communication
between the VoiceKey server and Avaya Experience Portal is via TCP/IP, it is strongly suggested
that both systems be placed on the same IP subnet with minimal network traffic in order to minimize
network latency.
The sections that follow detail the VoiceKey setup.
Install and Configure software (VoiceKey SRV and IVR application module)
Install License
Verify Installation
7.1. Install and Configure software
Step Description
Installing VoiceKey SRV software
1. For Microsoft Windows machines, VoiceKey SRV is distributed as a setup file. To install,
run the Setup.exe file.
2. Select setup language and click OK.
The following prerequisites will be automatically set up, if not already installed:
Windows Installer, Microsoft Visual C++ 2010 Redistributable and HASP Driver.
LYM; Reviewed:
SPOC 2/17/2014
Solution & Interoperability Test Lab Application Notes
©2014 Avaya Inc. All Rights Reserved.
10 of 23
VoiceKey-AAEP
Step Description
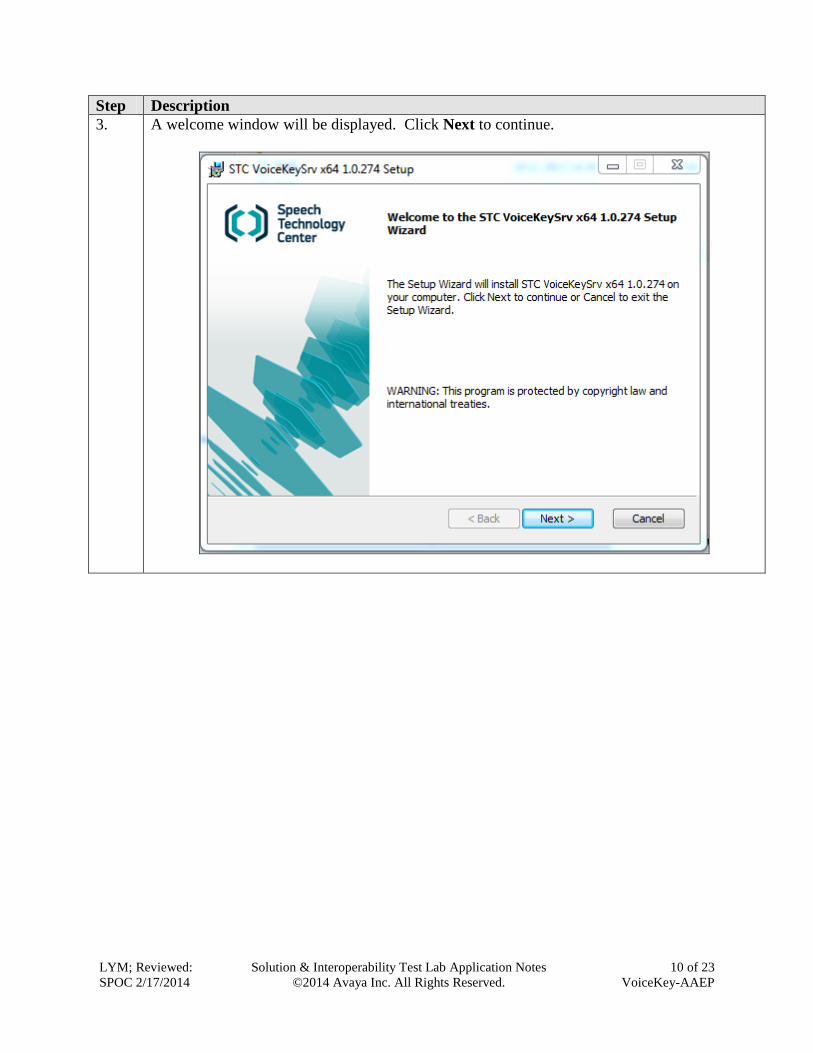
3. A welcome window will be displayed. Click Next to continue.
LYM; Reviewed:
SPOC 2/17/2014
Solution & Interoperability Test Lab Application Notes
©2014 Avaya Inc. All Rights Reserved.
11 of 23
VoiceKey-AAEP
Step Description
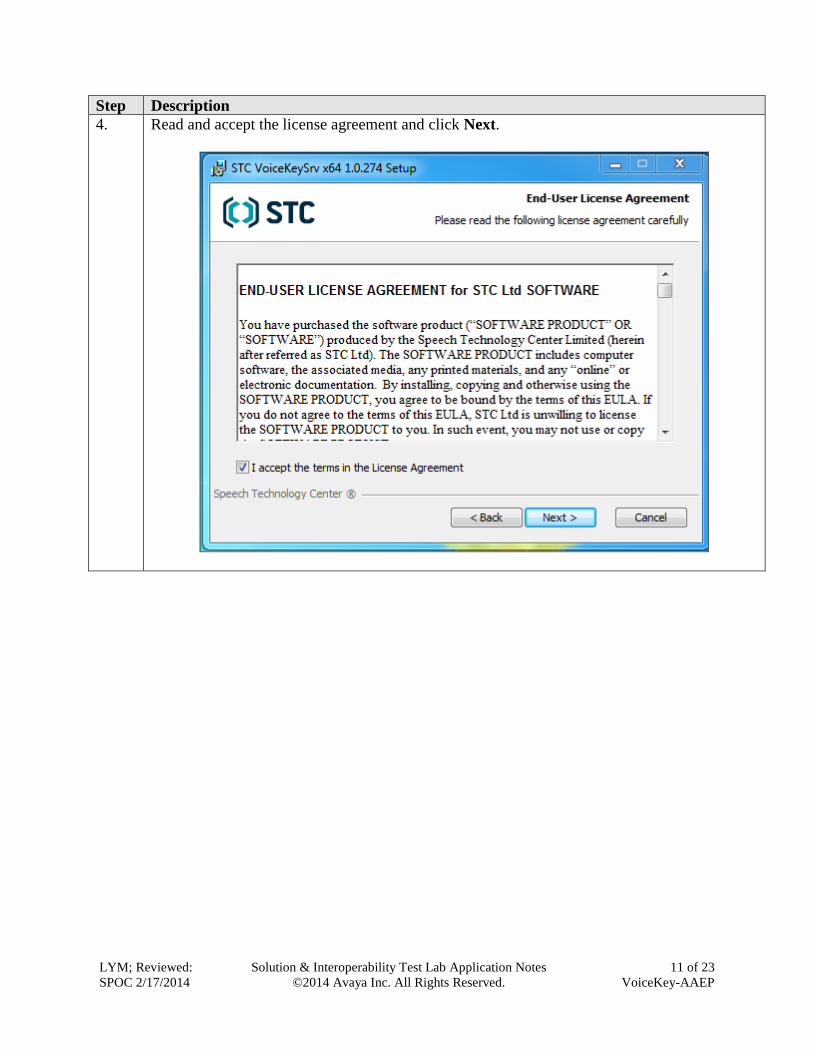
4. Read and accept the license agreement and click Next.
LYM; Reviewed:
SPOC 2/17/2014
Solution & Interoperability Test Lab Application Notes
©2014 Avaya Inc. All Rights Reserved.
12 of 23
VoiceKey-AAEP
Step Description
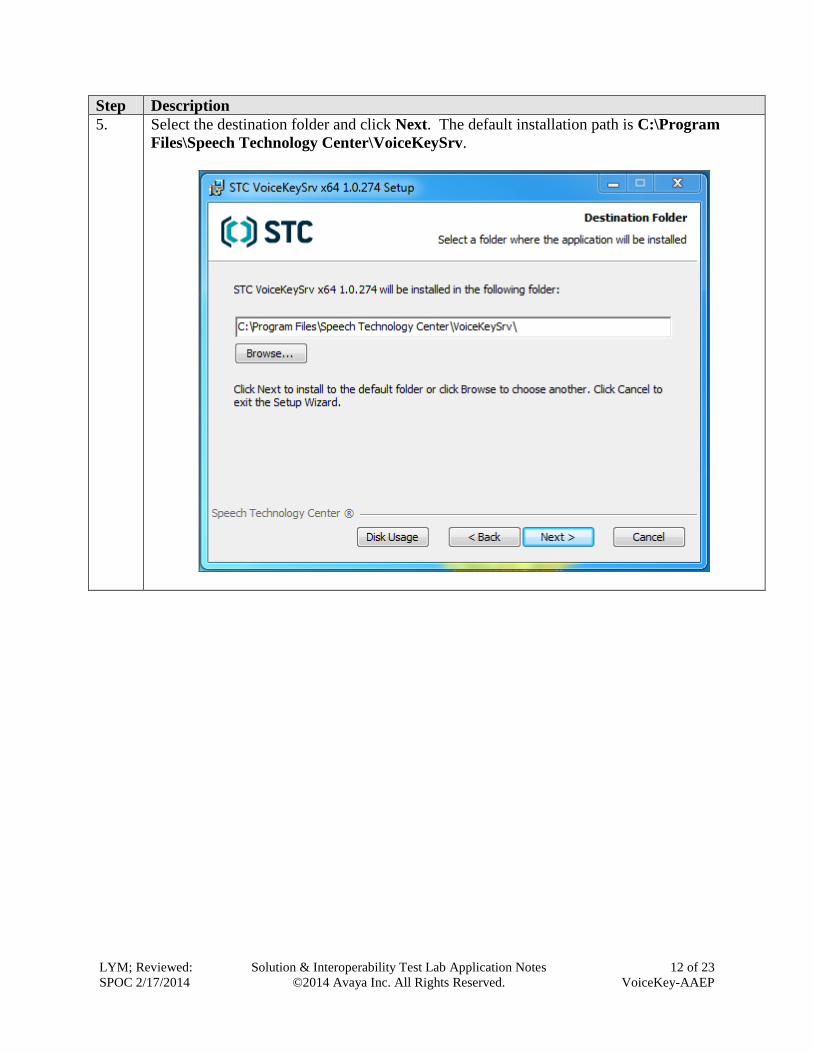
5. Select the destination folder and click Next. The default installation path is C:\Program
Files\Speech Technology Center\VoiceKeySrv.
LYM; Reviewed:
SPOC 2/17/2014
Solution & Interoperability Test Lab Application Notes
©2014 Avaya Inc. All Rights Reserved.
13 of 23
VoiceKey-AAEP
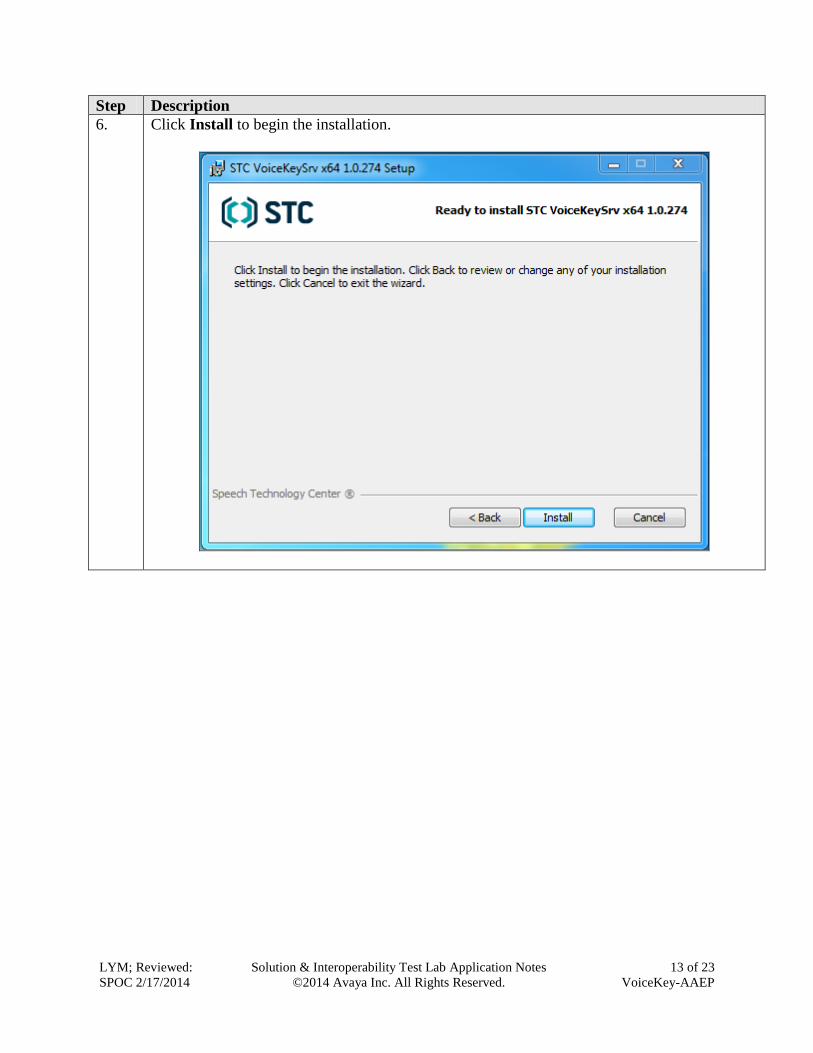
Step Description
6. Click Install to begin the installation.
LYM; Reviewed:
SPOC 2/17/2014
Solution & Interoperability Test Lab Application Notes
©2014 Avaya Inc. All Rights Reserved.
14 of 23
VoiceKey-AAEP
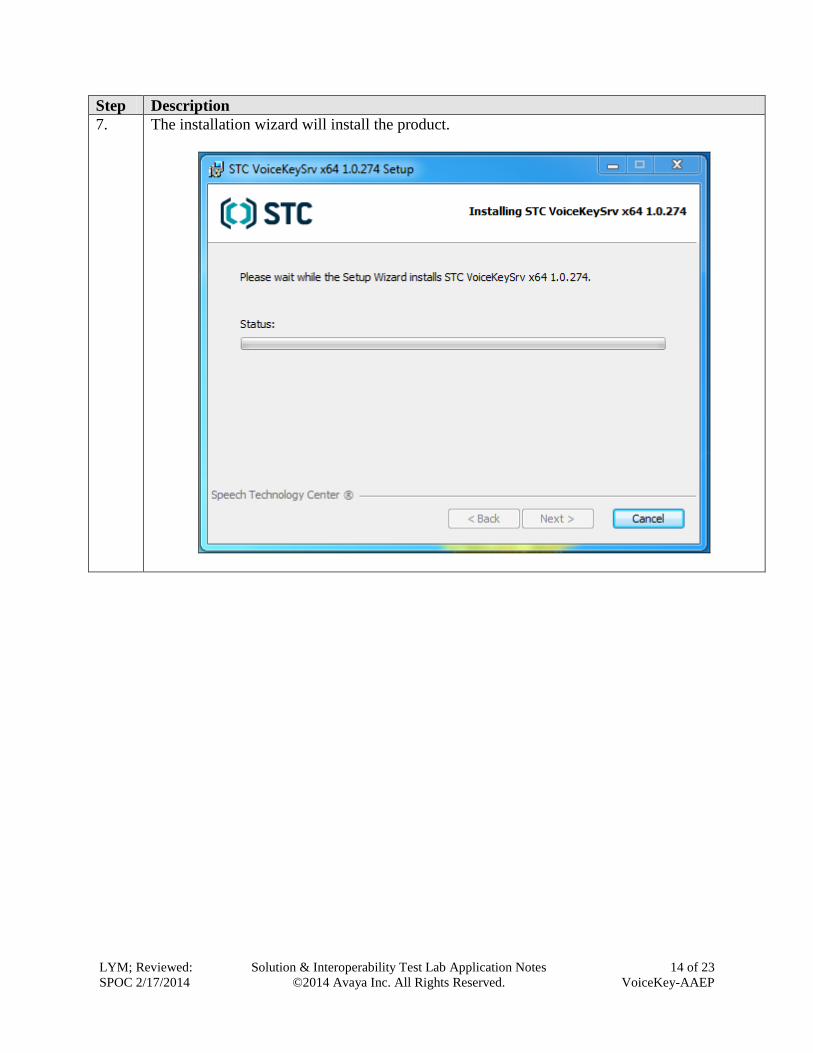
Step Description
7. The installation wizard will install the product.
LYM; Reviewed:
SPOC 2/17/2014
Solution & Interoperability Test Lab Application Notes
©2014 Avaya Inc. All Rights Reserved.
15 of 23
VoiceKey-AAEP
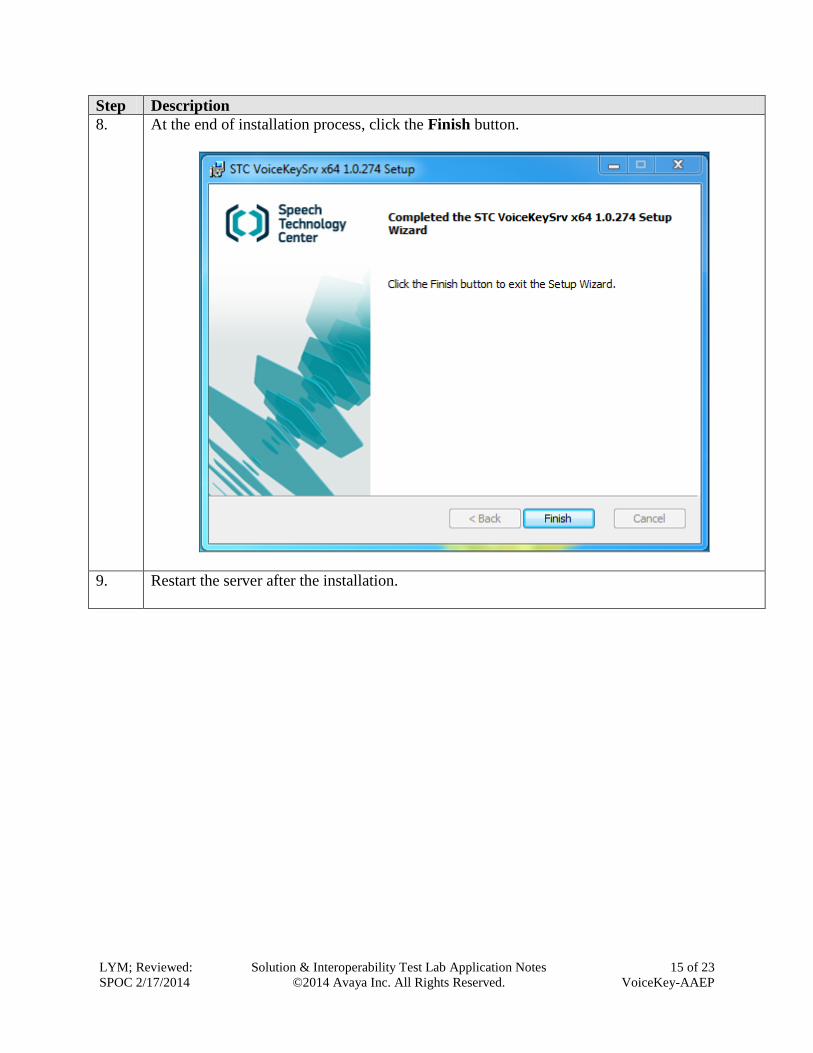
Step Description
8. At the end of installation process, click the Finish button.
9. Restart the server after the installation.
LYM; Reviewed:
SPOC 2/17/2014
Solution & Interoperability Test Lab Application Notes
©2014 Avaya Inc. All Rights Reserved.
16 of 23
VoiceKey-AAEP
Configuring VoiceKey Srv software
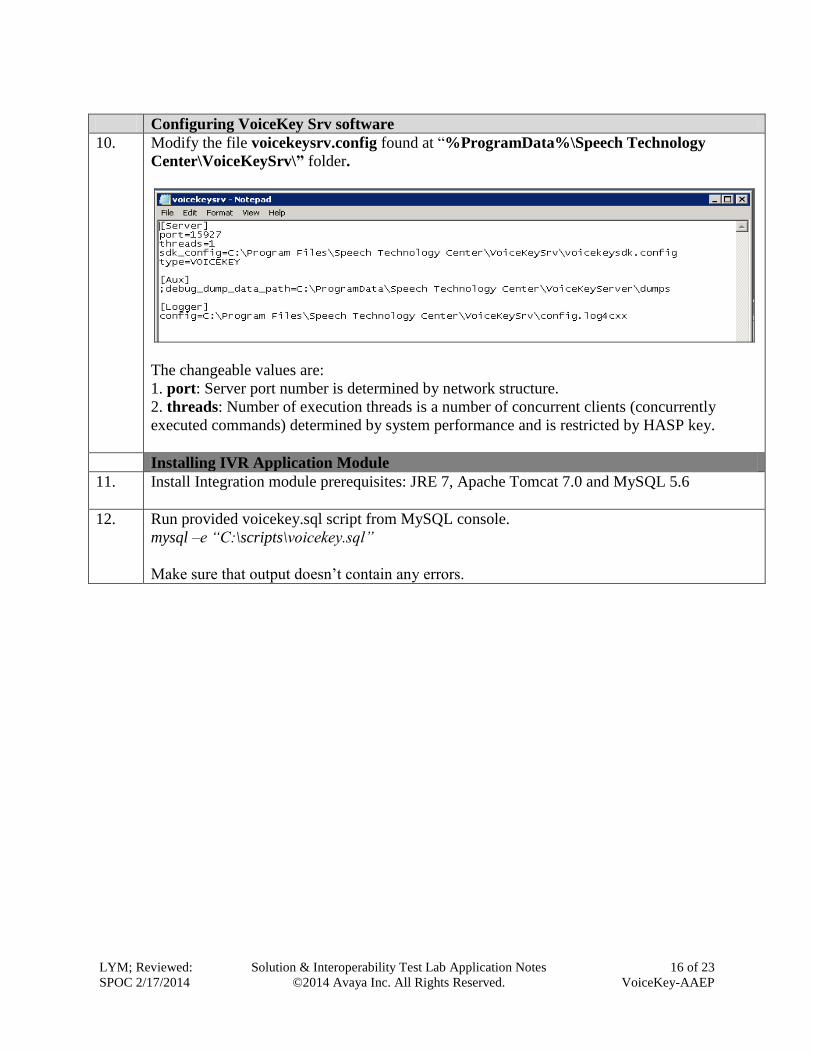
10. Modify the file voicekeysrv.config found at “%ProgramData%\Speech Technology
Center\VoiceKeySrv\” folder.
The changeable values are:
1. port: Server port number is determined by network structure.
2. threads: Number of execution threads is a number of concurrent clients (concurrently
executed commands) determined by system performance and is restricted by HASP key.
Installing IVR Application Module
11. Install Integration module prerequisites: JRE 7, Apache Tomcat 7.0 and MySQL 5.6
12. Run provided voicekey.sql script from MySQL console.
mysql –e “C:\scripts\voicekey.sql”
Make sure that output doesn’t contain any errors.
LYM; Reviewed:
SPOC 2/17/2014
Solution & Interoperability Test Lab Application Notes
©2014 Avaya Inc. All Rights Reserved.
17 of 23
VoiceKey-AAEP
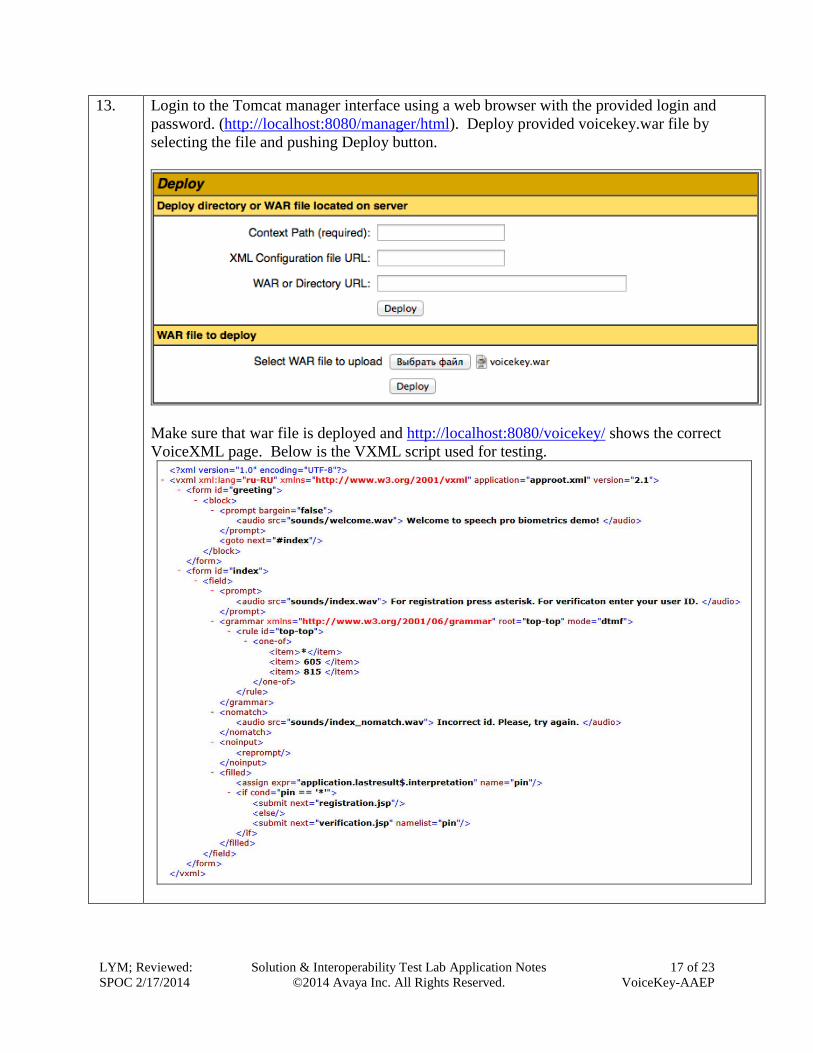
13. Login to the Tomcat manager interface using a web browser with the provided login and
password. (http://localhost:8080/manager/html). Deploy provided voicekey.war file by
selecting the file and pushing Deploy button.
Make sure that war file is deployed and http://localhost:8080/voicekey/ shows the correct
VoiceXML page. Below is the VXML script used for testing.
LYM; Reviewed:
SPOC 2/17/2014
Solution & Interoperability Test Lab Application Notes
©2014 Avaya Inc. All Rights Reserved.
18 of 23
VoiceKey-AAEP
7.2. Install License
After installing the software, the next step is to install the license file.
Step Description
Installing VoiceKey SRV License
1. Run the license file from the command line with -i option. The full path to the file must
be specified.
2. Wait while the installation completes.
3. At the end of installation process click OK.
7.3. Verify Installation
Step Description
1. To verify that VoiceKey solution is running, go to Start All Programs Administrative
Tools Services. Confirm the STC VoiceKeySrv Status Mode is Started.
LYM; Reviewed:
SPOC 2/17/2014
Solution & Interoperability Test Lab Application Notes
©2014 Avaya Inc. All Rights Reserved.
19 of 23
VoiceKey-AAEP
Step Description
2. The performance status can be verified by sending a GET request through entering the following
into the browser address bar “http://localhost:15927/server_config”.
LYM; Reviewed:
SPOC 2/17/2014
Solution & Interoperability Test Lab Application Notes
©2014 Avaya Inc. All Rights Reserved.
20 of 23
VoiceKey-AAEP
8. Verification Steps This section provides the verification steps that may be performed to verify that Avaya
Experience Portal can run VoiceXML applications that use VoiceKey for voice verification.
Step Description
1. From the EPM web interface, click MPP Manager on the left pane. On the MPP
Manager page, verify that the MPP server is Online and Running.
LYM; Reviewed:
SPOC 2/17/2014
Solution & Interoperability Test Lab Application Notes
©2014 Avaya Inc. All Rights Reserved.
21 of 23
VoiceKey-AAEP
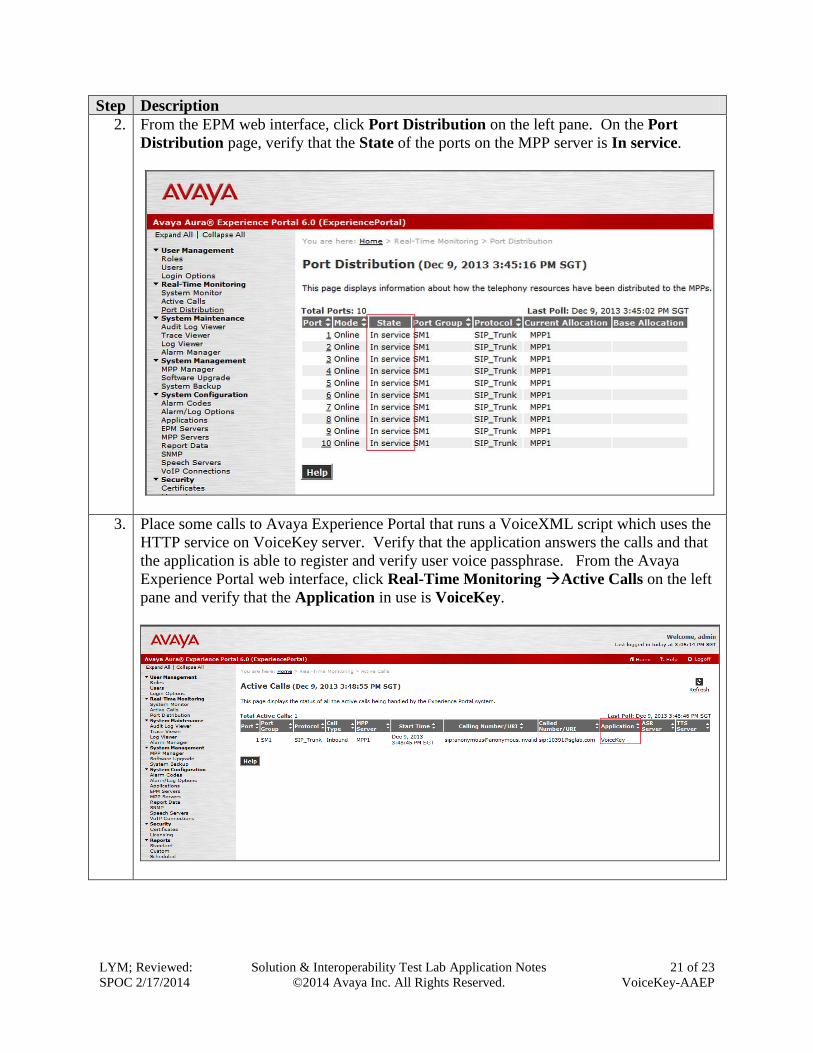
Step Description
2. From the EPM web interface, click Port Distribution on the left pane. On the Port
Distribution page, verify that the State of the ports on the MPP server is In service.
3. Place some calls to Avaya Experience Portal that runs a VoiceXML script which uses the
HTTP service on VoiceKey server. Verify that the application answers the calls and that
the application is able to register and verify user voice passphrase. From the Avaya
Experience Portal web interface, click Real-Time Monitoring Active Calls on the left
pane and verify that the Application in use is VoiceKey.
LYM; Reviewed:
SPOC 2/17/2014
Solution & Interoperability Test Lab Application Notes
©2014 Avaya Inc. All Rights Reserved.
22 of 23
VoiceKey-AAEP
9. Conclusion These Application Notes describe the compliance-tested configuration used to validate Avaya
Aura® Experience Portal 6.0 with VoiceKey. All test cases were completed successfully.
10. Additional References The following documents are available at http://support.avaya.com.
[1] Administering Avaya Aura® Communication Manager, Release 6.3, Oct 2013, Document ID
03-300509.
[2] Administering Avaya Aura® Experience Portal, Apr 2012.
The following documents are available from Speech Technology Center:
[3] VoiceKey Srv Voice Verification Server Developer’s Guide
LYM; Reviewed:
SPOC 2/17/2014
Solution & Interoperability Test Lab Application Notes
©2014 Avaya Inc. All Rights Reserved.
23 of 23
VoiceKey-AAEP
©2014 Avaya Inc. All Rights Reserved.
Avaya and the Avaya Logo are trademarks of Avaya Inc. All trademarks identified by ® and ™
are registered trademarks or trademarks, respectively, of Avaya Inc. All other trademarks are the
property of their respective owners. The information provided in these Application Notes is
subject to change without notice. The configurations, technical data, and recommendations
provided in these Application Notes are believed to be accurate and dependable, but are
presented without express or implied warranty. Users are responsible for their application of any
products specified in these Application Notes.
Please e-mail any questions or comments pertaining to these Application Notes along with the
full title name and filename, located in the lower right corner, directly to the Avaya DevConnect
Program at [email protected].