Arduino Lesson 9. Sensing Light
Created by Simon Monk
https://learn.adafruit.com/adafruit-arduino-lesson-9-sensing-light
Last updated on 2021-11-15 05:52:26 PM EST
©Adafruit Industries Page 1 of 12
3
3
9
10
11
12
Table of Contents
Overview
Parts
• Part
• Qty
Breadboard Layout
Photocells
Arduino Code
Other Things to Do
©Adafruit Industries Page 2 of 12
Overview
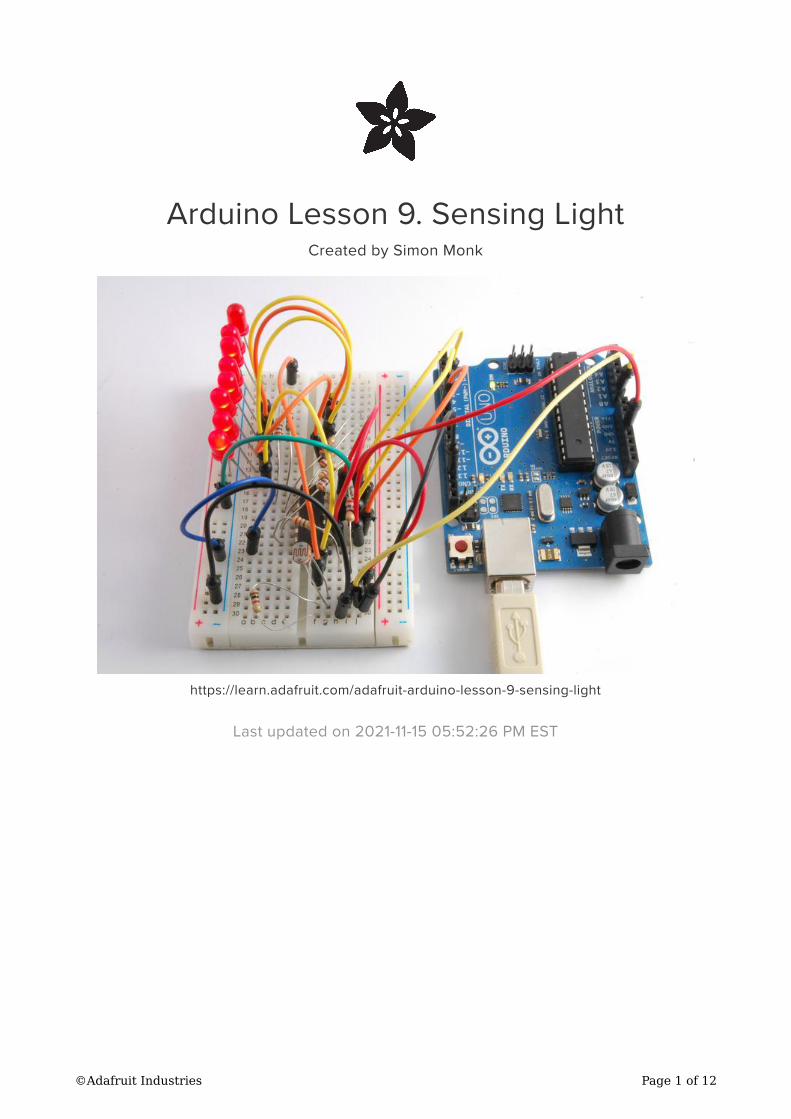
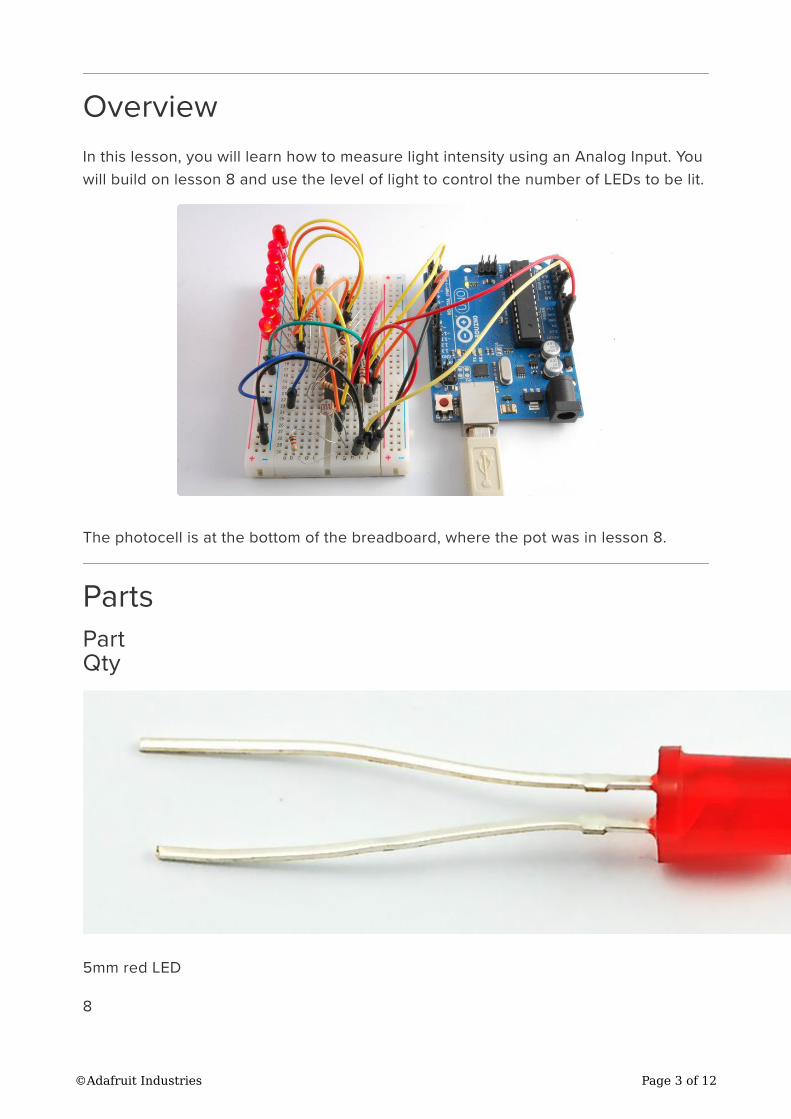
In this lesson, you will learn how to measure light intensity using an Analog Input. You
will build on lesson 8 and use the level of light to control the number of LEDs to be lit.
The photocell is at the bottom of the breadboard, where the pot was in lesson 8.
Parts
Part
Qty
5mm red LED
8
©Adafruit Industries Page 3 of 12
270 Ω Resistors (red, purple, brown stripes)
8
1 kΩ Resistor (brown, black, red stripes)
1
©Adafruit Industries Page 4 of 12
74HC595 Shift Register
1
©Adafruit Industries Page 5 of 12
Photocell (Light Dependent Resistor)
1
©Adafruit Industries Page 6 of 12
Half-size Breadboard
1
©Adafruit Industries Page 7 of 12
Arduino Uno R3
1
©Adafruit Industries Page 8 of 12
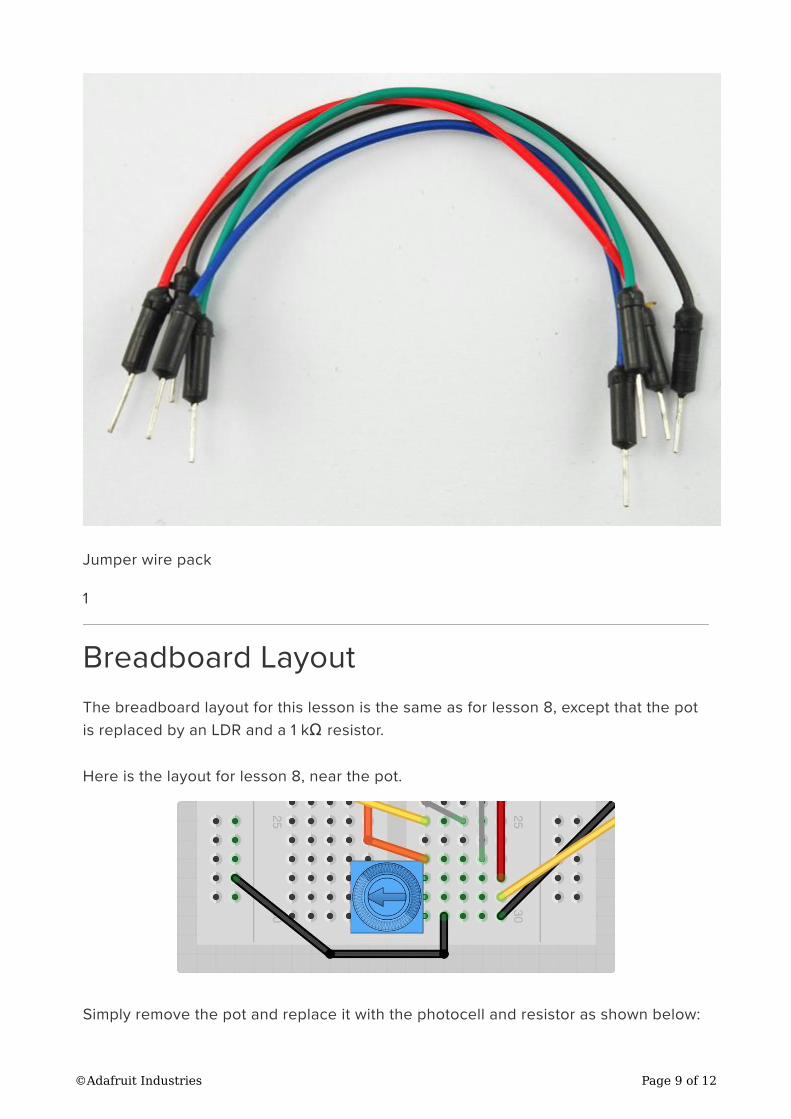
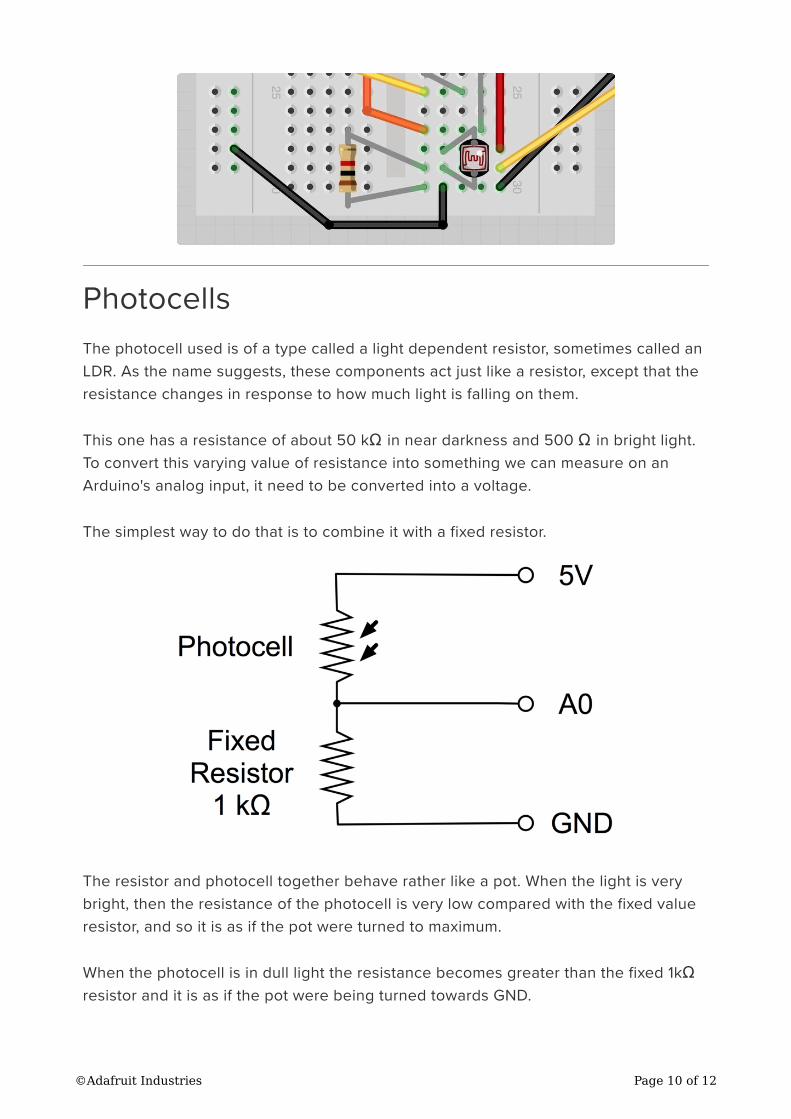
Breadboard Layout
The breadboard layout for this lesson is the same as for lesson 8, except that the pot
is replaced by an LDR and a 1 kΩ resistor.
Here is the layout for lesson 8, near the pot.
Simply remove the pot and replace it with the photocell and resistor as shown below:
Jumper wire pack
1
©Adafruit Industries Page 9 of 12
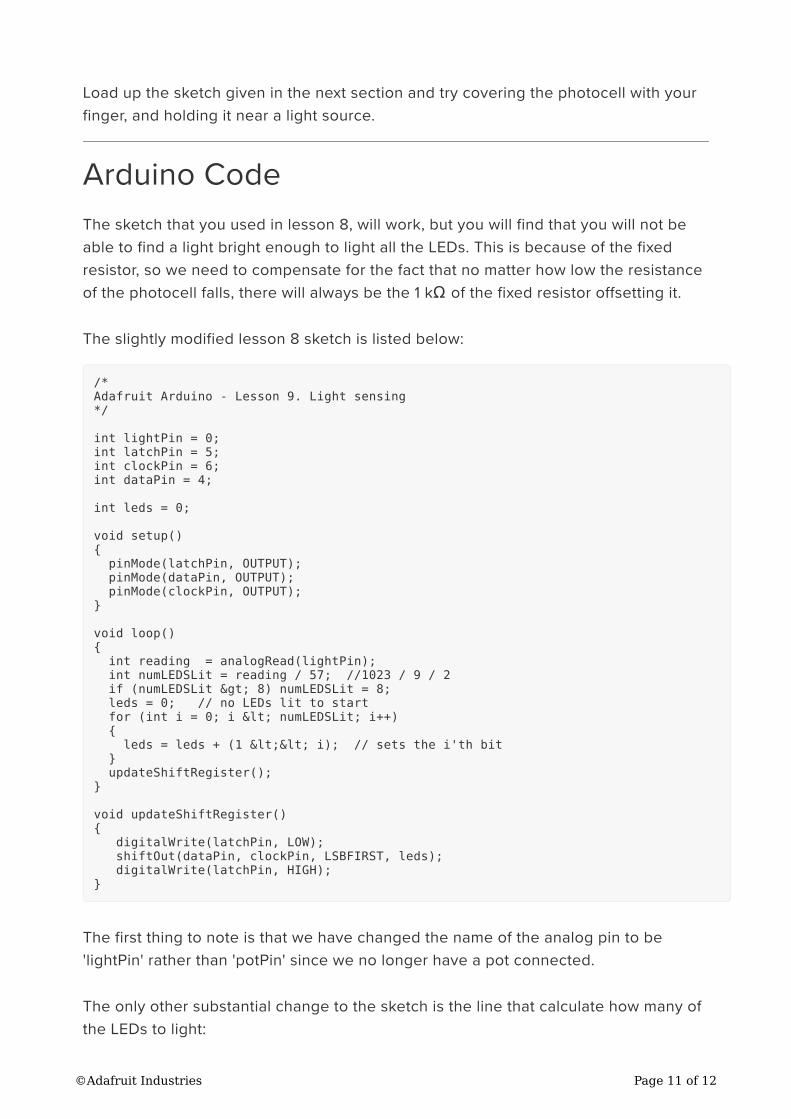
Photocells
The photocell used is of a type called a light dependent resistor, sometimes called an
LDR. As the name suggests, these components act just like a resistor, except that the
resistance changes in response to how much light is falling on them.
This one has a resistance of about 50 kΩ in near darkness and 500 Ω in bright light.
To convert this varying value of resistance into something we can measure on an
Arduino's analog input, it need to be converted into a voltage.
The simplest way to do that is to combine it with a fixed resistor.
The resistor and photocell together behave rather like a pot. When the light is very
bright, then the resistance of the photocell is very low compared with the fixed value
resistor, and so it is as if the pot were turned to maximum.
When the photocell is in dull light the resistance becomes greater than the fixed 1kΩ
resistor and it is as if the pot were being turned towards GND.
©Adafruit Industries Page 10 of 12
Load up the sketch given in the next section and try covering the photocell with your
finger, and holding it near a light source.
Arduino Code
The sketch that you used in lesson 8, will work, but you will find that you will not be
able to find a light bright enough to light all the LEDs. This is because of the fixed
resistor, so we need to compensate for the fact that no matter how low the resistance
of the photocell falls, there will always be the 1 kΩ of the fixed resistor offsetting it.
The slightly modified lesson 8 sketch is listed below:
/*
Adafruit Arduino - Lesson 9. Light sensing
*/
int lightPin = 0;
int latchPin = 5;
int clockPin = 6;
int dataPin = 4;
int leds = 0;
void setup()
{
pinMode(latchPin, OUTPUT);
pinMode(dataPin, OUTPUT);
pinMode(clockPin, OUTPUT);
}
void loop()
{
int reading = analogRead(lightPin);
int numLEDSLit = reading / 57; //1023 / 9 / 2
if (numLEDSLit > 8) numLEDSLit = 8;
leds = 0; // no LEDs lit to start
for (int i = 0; i < numLEDSLit; i++)
{
leds = leds + (1 << i); // sets the i'th bit
}
updateShiftRegister();
}
void updateShiftRegister()
{
digitalWrite(latchPin, LOW);
shiftOut(dataPin, clockPin, LSBFIRST, leds);
digitalWrite(latchPin, HIGH);
}
The first thing to note is that we have changed the name of the analog pin to be
'lightPin' rather than 'potPin' since we no longer have a pot connected.
The only other substantial change to the sketch is the line that calculate how many of
the LEDs to light:
©Adafruit Industries Page 11 of 12
int numLEDSLit = reading / 57; // all LEDs lit at 1k
This time we divide the raw reading by 57 rather than 114 from lesson 8. In other
words we divide it by half as much as we did with the pot, to split it into nine zones,
from no LEDs lit, to all eight lit. This extra factor is to account for the fixed 1 kΩ
resistor. This means that when the photocell has a resistance of 1 kΩ (the same as the
fixed resistor) the raw reading will be 1023 / 2 = 511. This will equate to all the LEDs
being lit and then a bit (numLEDSLit will be 9).
Other Things to Do
To vary the sensitivity of the light meter you have just made, try changing the value of
the factor (57) that you divide the analog reading by.
Increasing this value will make the reading less sensitive.
Another thing that you could try is to change the sketch so that while the reading is
below a certain level, the LEDs are on, but they automatically turn off when a
threshold is exceeded. So putting your finger near the photocell to cut out most of the
light will turn on the LEDs.
Click Here for the Next Lesson
https://adafru.it/aUs
About the Author
Simon Monk is author of a number of books relating to Open Source Hardware. The
following books written by Simon are available from Adafruit: Programming Arduino (h
ttp://adafru.it/1019), 30 Arduino Projects for the Evil Genius (http://adafru.it/868) and Pr
ogramming the Raspberry Pi (https://adafru.it/aM5).
©Adafruit Industries Page 12 of 12