Armitage H acking Made Easy Part -1 Author : r45c4l Mail : [email protected]http://twitter.com/#!/r45c4l Greetz and shouts to the entire ICW team and every Indian hackers
Let us see first of all that how Armitage gives us a upper hand in
comparison with Metasploit during a pen testing scenario.
Through just one instance it helps user/team by
> Using the same session
> Share host, captured data and
> Communicate through a shared event log
# How Armitage adds extra functions and makes it more powerful and
user friendly ?
→ One of the best and important feature is that it recommends and run
active checks to all the exploits which will work.
Every pen tester/hacker needs to follow certain protocols to get as much
possible information of the system the system/networks/targets/victims.
The correct method of conducting a pen test is by following the rules :
a) Reconnaissance
b) Social Engineering and site/target reconnaissance
c) IP and Network Reconnaissance
d) DNS Reconnaissance
e) Mapping Targets
f) Network Mapping (ICMP)
g) Port Scanning
h) Vulnerability - both Network based OS and application
interrogation.
i) Researching and probing vulnerabilities.
And in the most simple way we can just say that we have only 3 options
a) Footprinting
b) Scanning
c) Enumeration
To perform all these tasks we have to use different tools and it will
consume a lot of time too. This is where Armitage come handy to solve all
the problems under one framework. Although Metasploit is also capable of
performing almost all of these tasks but the basic difference that Armitage
has a user friendly GUI almost like point and click.
NOTE : I will be using Armitage over BT5, so all the descriptions will
be similar to *nix distros.
Starting up Armitage :
As I will be using Armitage on BT5 so it is by default installed on it, those
who are running different OS can check the site for downloading and
installing Armitage according to there OS.
The very first screen you will see will look like this above one which is the
path to start up Armitage. Now when we click over the Armitage option
we will move on to the second stage :
Once you click the connect option, you will be greeted with this second
windows. As seen in this screen-shot Armitage is asking to connect itself
with the Metasploit RPC server which is not running as of now.
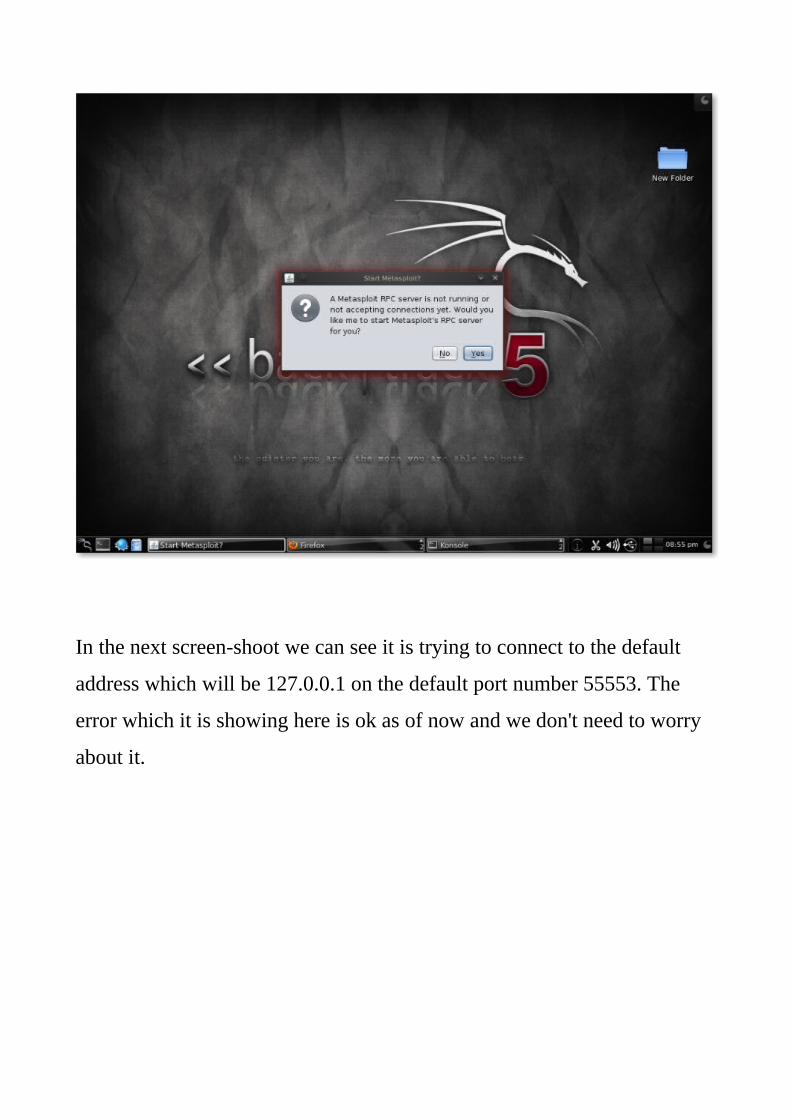
In the next screen-shoot we can see it is trying to connect to the default
address which will be 127.0.0.1 on the default port number 55553. The
error which it is showing here is ok as of now and we don't need to worry
about it.
After the connection is established the main Armitage window will come up. It will be like the one
shown in the following screen shot.
So here we can see the main Armitage window has three main panels :
Modules, Targets and Tabs. We can click on the individual panels to resize
them according to our needs. The different machines which we can see in
the Targets panel are there because my old sees ion are open there, but
otherwise it will be blank.
Let us have a look about the different panels and some brief description
about them. Let us start with “Modules” –
The Module browser gives us the options to launch Metasploit auxilary
modules, throw an exploit, generate a payload and run a post-exploitation
module. By clicking on the individual modules we can see the tree to lauch
desired module. Double click a module to open a module launch dialog.
Now let's come to the “Target Window”, here we have two options to
arrange/view the targets.
1. Graph View
2. Table View
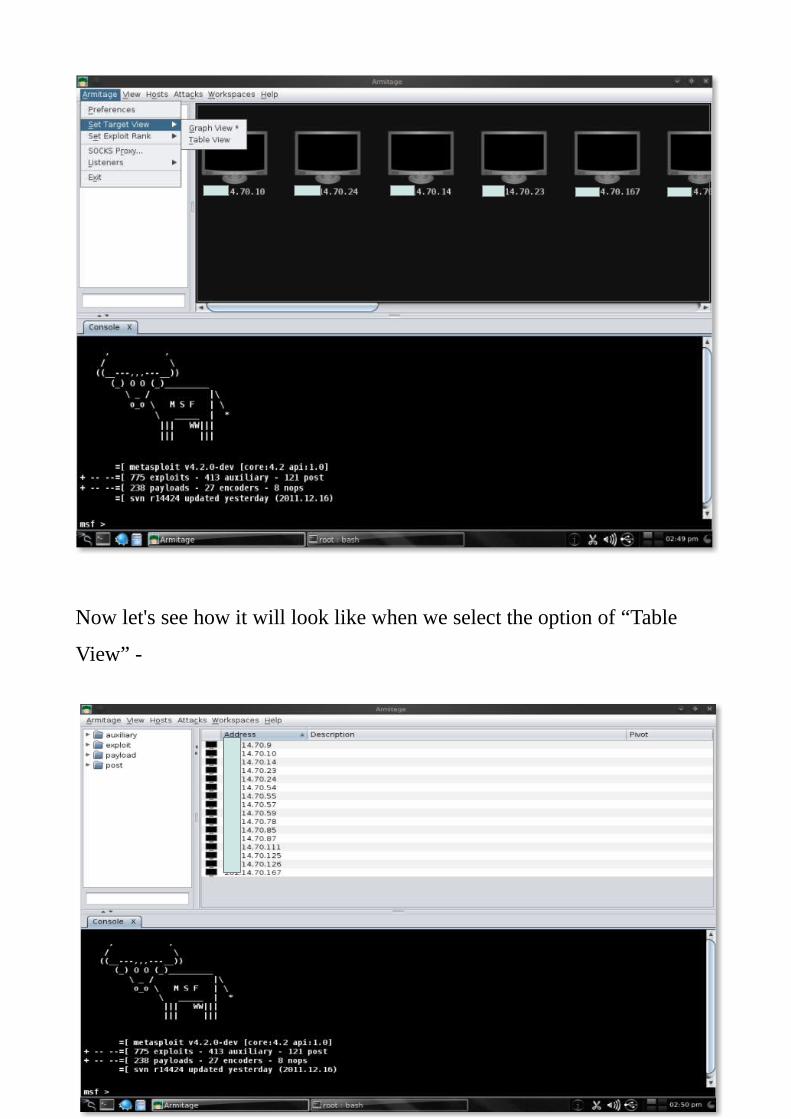
In the following screens shot the targets are already selected as “Graph
View” so this is what your screen will look like when you select the targets
to be viewed as “Graph View”
Now let's see how it will look like when we select the option of “Table
View” -
The following screen-shot shot shows how your targets will look when you
select the option of “Table View”
There are couple of keyboard shortcuts are also available in the Target
pannel and to edit them we have to go to Armitage → Preferences t
# Ctrl Plus – zoom in
# Ctrl Minus – zoom out
# Ctrl 0 – reset the zoom level
# Ctrl A – select all hosts
# Escape – clear selection
# Ctrl C – arrange hosts in a circle
# Ctrl S – arrange hosts in a stack
# Ctrl H – arrange hosts in a hirearchy
# Ctrl R – refresh hosts from the database
# Ctrl P – export hosts in a image
Now let's come to the very important and helpful feature of Armitage
which is “Tags”.
Armitage opens each dialog, console and table in a tab situated just below
the Module and Target panels. Tabs helps us to perform multiple tasks on
multiple targets at the same time by keeping every result on one particular
tab which we can close by clicking the X button on the right hand side of
the tab or move between tabs quickly to keep a eye on the result of the
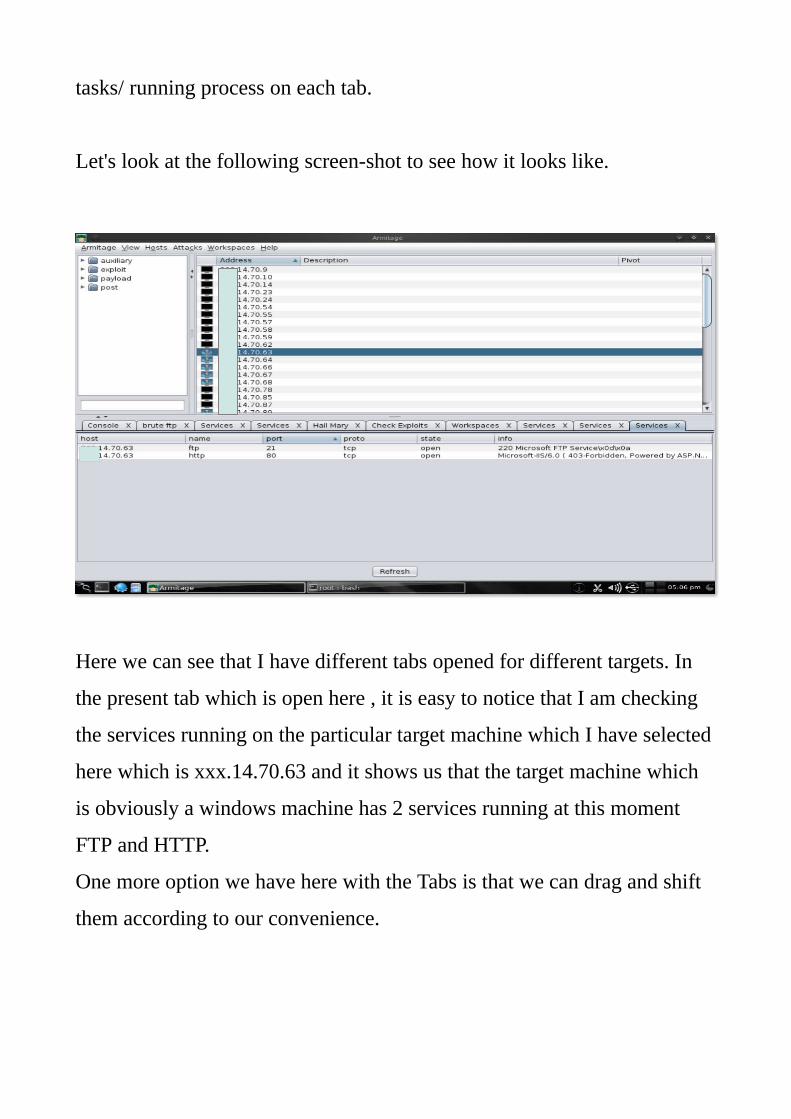
tasks/ running process on each tab.
Let's look at the following screen-shot to see how it looks like.
Here we can see that I have different tabs opened for different targets. In
the present tab which is open here , it is easy to notice that I am checking
the services running on the particular target machine which I have selected
here which is xxx.14.70.63 and it shows us that the target machine which
is obviously a windows machine has 2 services running at this moment
FTP and HTTP.
One more option we have here with the Tabs is that we can drag and shift
them according to our convenience.
Metasploit Console :
Let us come back to our “Console” tab.
Metasploit console, Meterpreter console and shell interfaces, they all use a
console tab. Console tab here lets you interact with all these interfaces
through Armitage.
The use of console tab is basically to take track of your command history.
“up arrow” and “down arrow” is to cycle through your previous and last
commands you type. In the Metsploit console in Armitagewe can use
“tab” to auto complete commands and parameter just like the Metasploit
console outside of Armitage.
Two more added feature of Armitage is Logging and Export data which
makes it more powerful and helpful. Let's just have a quick look about
these two features :
Logging : Armitage logs all the console, shell and event logs for the user.
These Logs are organized by date and hosts. The logs are stored in
~/.armitage folder. Go to View → Reporting → Activities Logs to open the
folder.
Copies of screen-shots and web-shots are also saved in this folder by
Armitage.
Now let's come to this Export Data part of Armitage :
Export Data : Armitage and Metasploit share a database to track your
hosts, services, vulnerabilities, credentials, loots, and user-agent strings by
browser exploit module.
We can get this by going to View → Reporting → Export Data. This can
be used to export data into a easily parsable XML and tab separates value
(TSV) files from Metasploit.
Now comes the part of Host Management
Host Management is basically Armitage's dynamic workspace feature to
create and view into the hosts database and quickly switch between them.
Workspace → Manage will take us to the window to manage our dynamic
workspace. Here we can see the different options we have like Activate,
Add, Edit and Remove which we can use according to our need.
By clicking the Add button we can create a new dynamic workspace. This
new dynamic workspace can be given any name according to our
convenience . We can specify a network description in the Host field either
by typing the IP range as 192.168.0.0/16 or as 192.168.0.0-
192.168.255.255
Ports in the Ports field by either specific services like 21,80,110 etc
separated by a comma and space.
OS field is used to see which Operating Systems we would like to see in
the workspace. Separate multiple OS with a comma and a space.
Select ' Hosts with sessions only' to only include hosts with sessions in this
dynamic workspace.
Each workspace will have an item in the Workspace menu and we can use
these menu items to switch between workspaces.
To display the entire database use Workspace → Show All
NOTE : Armitage will only display 512 hosts at any given time, it dosen't
matter how many hosts are there in the database. If the number of hosts is
large, we can use this feature to segment our hosts into useful target sets.
Importing Hosts :
Here we can import host information to Metasploit. To do that, as seen in
the above screen shot Hosts → Import Hosts. This accepts the following
files :
# Acunetix XML
# Amap Log
# Amap Log-m
# Appscan XML
# Burp Session XML
# Foundstone XML
# IP360 ASPL
# IP360 XML v3
# Microsoft Baseline Security Analyzer
# Nessus NBE
# Nessus XML (v1 abd v2)
# NetSpark XML
# NeXpose Simple XML
# Nmap XML
# OpenVAS Report
# Qualys Asset XML
# Qualys Scan XML
# Retina XML
We can add hosts by Hosts → Add Hosts...
The next option available is NMap Scans
We can launch a Nmap scan with all those default NMap options from
Armitage to automatically import the results into Metasploit. In the above
screenshot we can see the several scanning options we have there Hosts →
Nmap Scan
We can also type db_nmap in the Metasploit console with the options
available which we choose.
Nmap scans do not use the pivots we have set up.
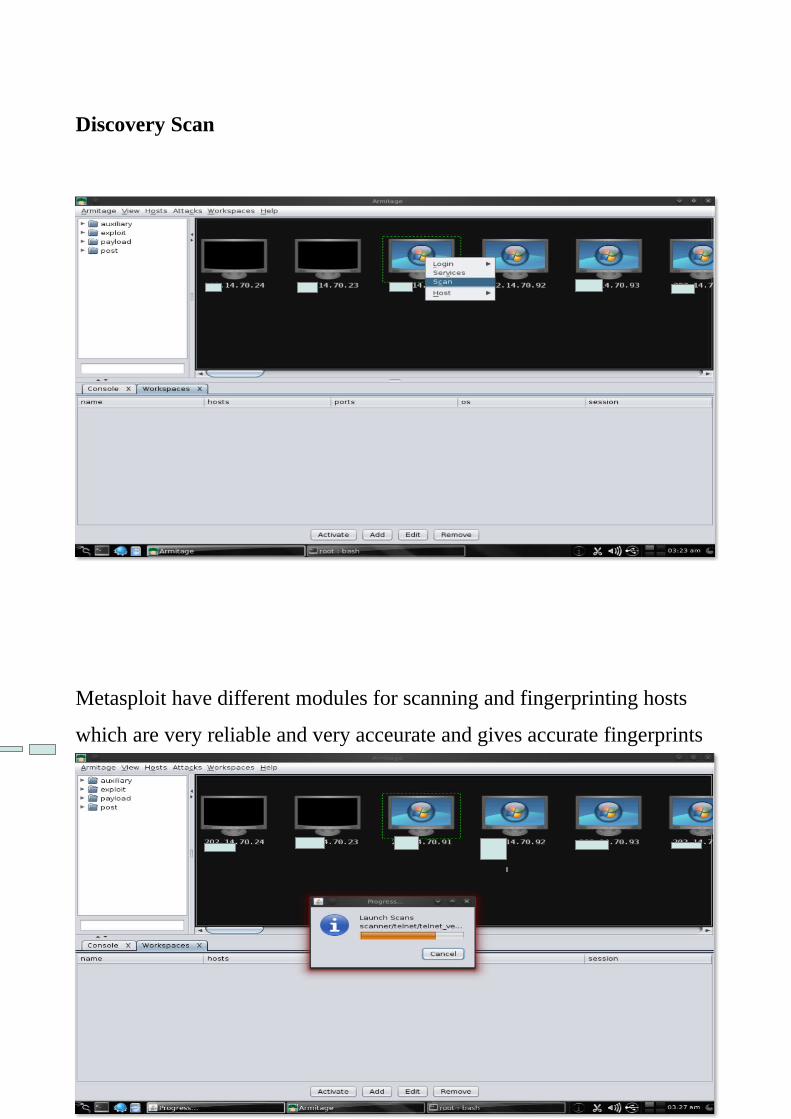
Discovery Scan
Metasploit have different modules for scanning and fingerprinting hosts
which are very reliable and very acceurate and gives accurate fingerprints
when common services are available. Highlight one or more hosts and
click Scan to launch these modules which works through a pivot.
We can use View → Jobs to see which modules are running as shown in
the below screenshot.
This way Armitage made it very simple and easy to identify the services running on the selected host ( in this case it is Microsoft IIS/6.0 which is running on port 80) and at the same time it can tell us by viewing the Jobs that it has a multi/handler exploit on pot 22024 and the payload which can be used is (windows/meterpreter/reverse_tcp).
Now let's move to a very important feature which is EXPLOITATION.
Before we move further with our targets we need to choose our weapon
which is made very simple in Armitage by just going to Attack → Find
Attacks to generate a custom attack. Let's look at the following screen-
shot.
Once we go through this we will see another screen which will look like
something this :
Here we can see that Attack Analysis has completed which can be seen as
an 'Attack' menu attached to each host in the Target window.
Let us go back to our old target machine and see how it looks like there
So here we can see that the Attack option has further more options
according to different services like http, iis, mssql etc etc which are further
categorized with different exploit payloads it found during the scan.
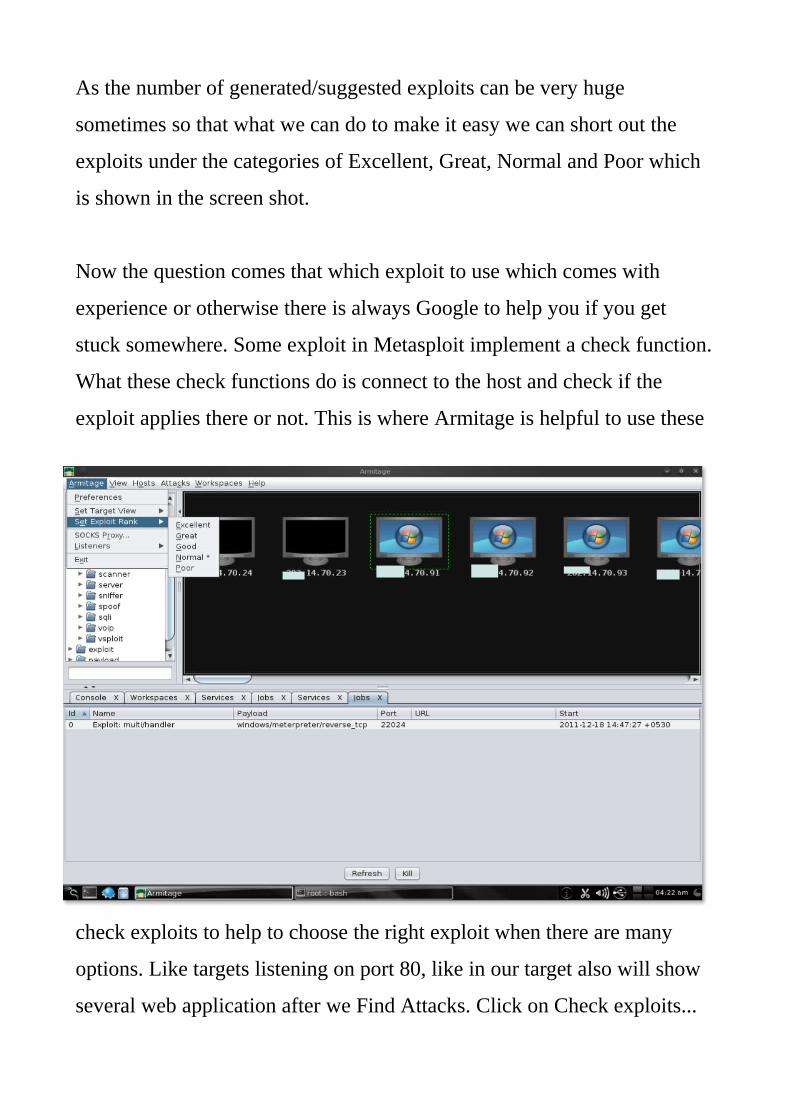
As the number of generated/suggested exploits can be very huge
sometimes so that what we can do to make it easy we can short out the
exploits under the categories of Excellent, Great, Normal and Poor which
is shown in the screen shot.
Now the question comes that which exploit to use which comes with
experience or otherwise there is always Google to help you if you get
stuck somewhere. Some exploit in Metasploit implement a check function.
What these check functions do is connect to the host and check if the
exploit applies there or not. This is where Armitage is helpful to use these
check exploits to help to choose the right exploit when there are many
options. Like targets listening on port 80, like in our target also will show
several web application after we Find Attacks. Click on Check exploits...
menu to run the check command. Once all the checks are complete we can
use Ctrl F and search for vulnerable. This will lead us to the right exploit.
Ok so we got our exploit, what now ??
Well the next step is Launching Exploits. So here we go :
Here the exploit launch dialogue box lets us configure options for a
module and choose whether to use a reverse connect payload.
Once we click the launch option the exploit will execute itself to pwn the
target and the result can be seen on the exploit tab.
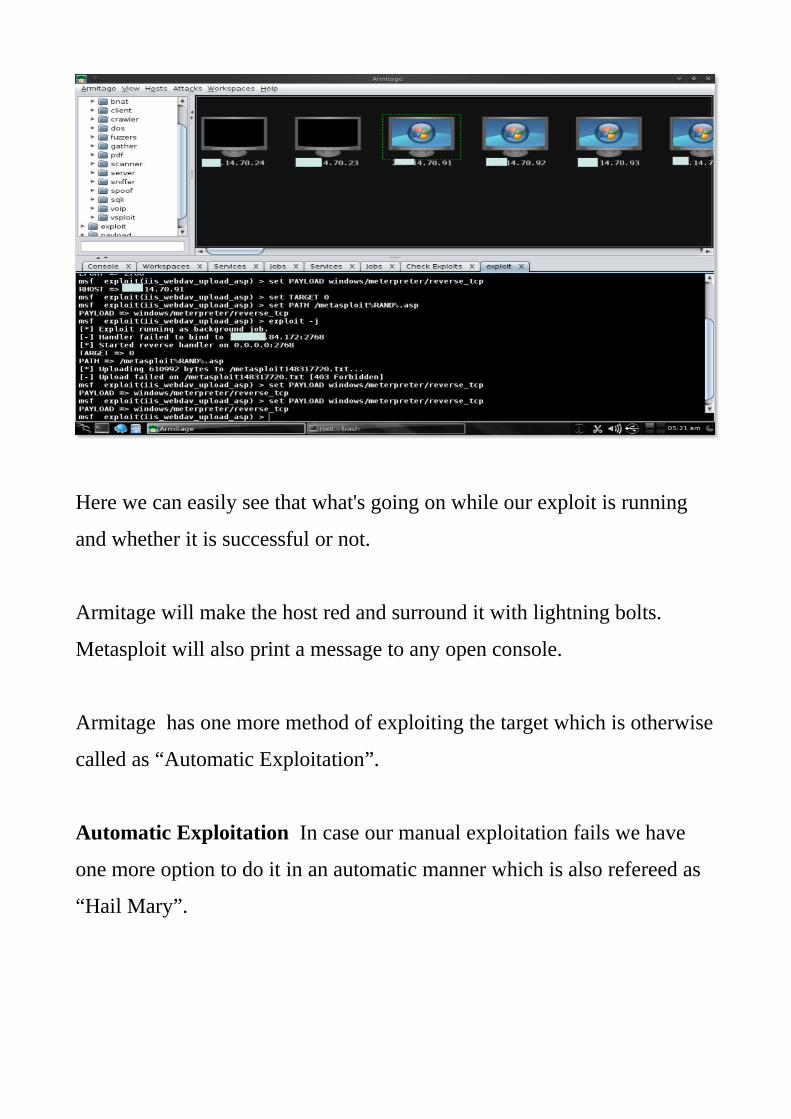
Here we can easily see that what's going on while our exploit is running
and whether it is successful or not.
Armitage will make the host red and surround it with lightning bolts.
Metasploit will also print a message to any open console.
Armitage has one more method of exploiting the target which is otherwise
called as “Automatic Exploitation”.
Automatic Exploitation In case our manual exploitation fails we have
one more option to do it in an automatic manner which is also refereed as
“Hail Mary”.
Armitage's Hail Mary feature is a smart db_autopwn . It finds
exploits relevant to our targets, filters the exploits using known
information, and the sorts them into an optimal order.
This option may not get you a good result or find you a shell but
oin case if it's your lucky day this is the best thing to do when
you don't know that what to do next.
Now comes the part of Client Side Exploits
We can use Metasploit's client side exploits through Armitage.
To understand what a client side attack is, it's the one which
attacks the applications and not the client. In case if we fail to
execute a remote exploit, we have to use client side attack.
To launch client side attack we can use the modules browser to
search and execute them.
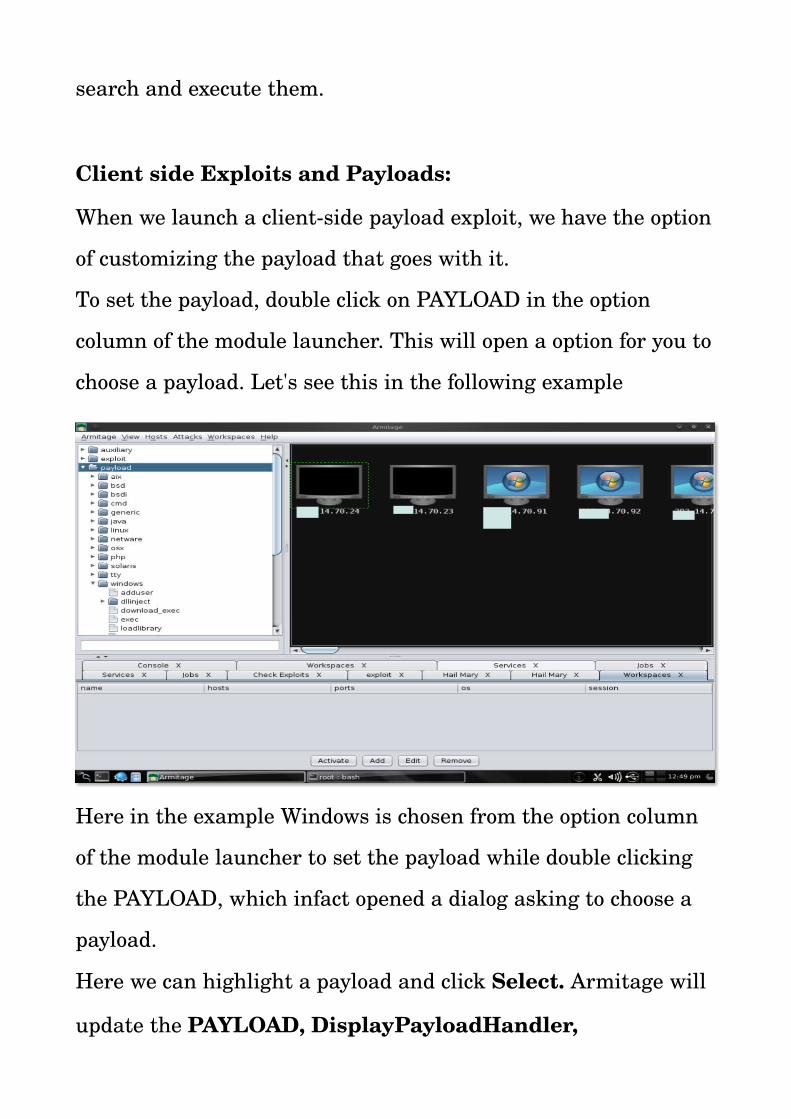
Client side Exploits and Payloads:
When we launch a clientside payload exploit, we have the option
of customizing the payload that goes with it.
To set the payload, double click on PAYLOAD in the option
column of the module launcher. This will open a option for you to
choose a payload. Let's see this in the following example
Here in the example Windows is chosen from the option column
of the module launcher to set the payload while double clicking
the PAYLOAD, which infact opened a dialog asking to choose a
payload.
Here we can highlight a payload and click Select. Armitage will
update the PAYLOAD, DisplayPayloadHandler,
ExitOnSession, LHOST, and RHOST values which we can
edit according to our needs.
Payload Handlers :
Payload handler is a server that runs in Metasploit to wait for a
payload to connect to the Metasploit and establish a session.
By navigating to Armitage → Listeners we can quickly start a
payload handler. A blind listener attempts to connect to a
payload listening for a connection. A reverse listener waits for
the payload to connect back to you. Let's have a look at the
following screen shot where Listener can be run on both Bind
and Connect option.
This is the screen shot of Bind Listener and following is the screenshot of Reverse Listener
Now we have almost reached to the end of our part 1 of this paper, but before closing it, let us just have a look about one more topic. In our previous topic we discussed about Payload Handlers, now let's have a look about Generating a Payload.
Generate a Payload :
As long as there are targets to run a program, all we need is an executable. Here Armitage comes handy by generating an executable from any of Metasploit's payloads. All that we need to do is just choose a payload in the module browser, double click it, select the type of output , and set our options. Once we click launch, a save dialog will ask where to save the file to.
Here we need to remember something that if we have a payload, it needs a handler. Use the multi/handler output type to create a haandler that waits for the payload to connect. This option is far more powerfull than the Armitage –> Listeners menu.
######################################################This is the end of Part 1 of this paper. A lot more issues, topics, features and functions will be discussed in the Part 2 which I will be posting very soon.
If there is any mistake or something which I missed here, or anything specific you want to know or want me to include, feel free to ping me on infosecpirate[at]gmail[dot]com