12
ARSP Operation Instructio n Step 1,Connect into internet Step 2,LAN setup Step 3,Port forward Step 4,ARSP setup
| Date post: | 07-Aug-2015 |
| Category: |
Art & Photos |
| Upload: | dishhd-asia |
| View: | 15 times |
| Download: | 0 times |

ARSP Operation Instruction
Step 1,Connect into internet
Step 2,LAN setup
Step 3,Port forward
Step 4,ARSP setup

Step 1,Connect into internet
Connect internet cable
Check netcard light if one is light and the other is flashing
Another way to check network,in your PC, go to Start->Run->cmd, then ping ip address,for example 192.168.1.10,see pic at the right

Step 2,LAN setup (1) IP address,set it as referenc
e of your router,but different with other DVR
(2) Set primary DNS and secondary DNS,you can find it in your PC if the dvr is in the same LAN as DVR(Start->Run->cmd->ipconfig/all)
(3) TCP port and HTTP port,you can set it as any value
Note: default setting as picture at the right

Setup, LAN setup After network configuration,then use IE to visit the device if it's s
et successfully,see below picture:
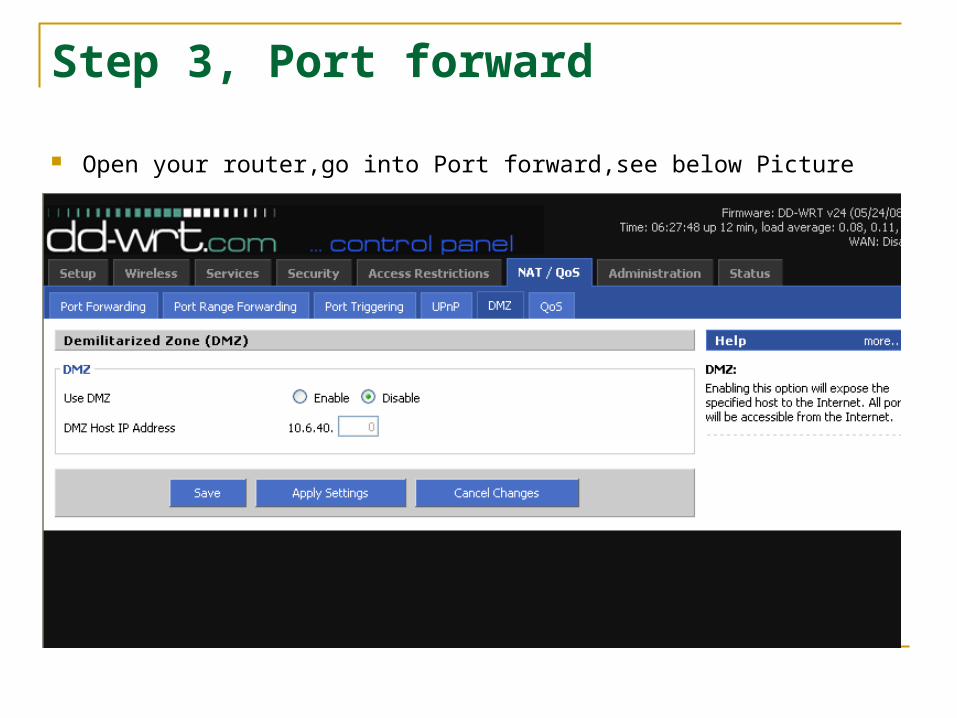
Step 3, Port forward
Open your router,go into Port forward,see below Picture
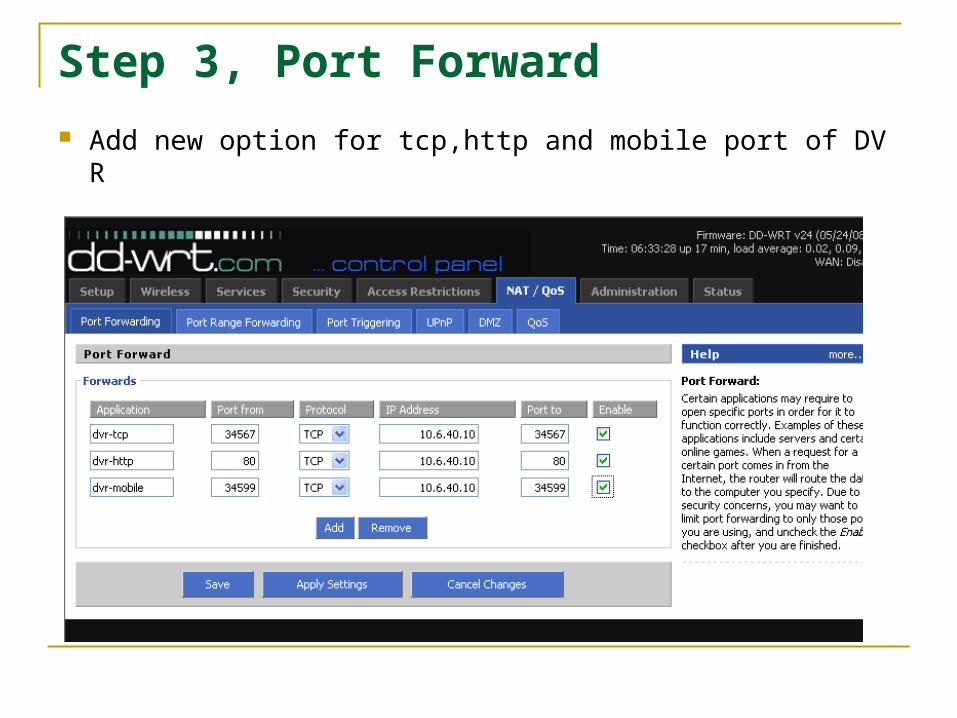
Step 3, Port Forward Add new option for tcp,http and mobile port of DVR
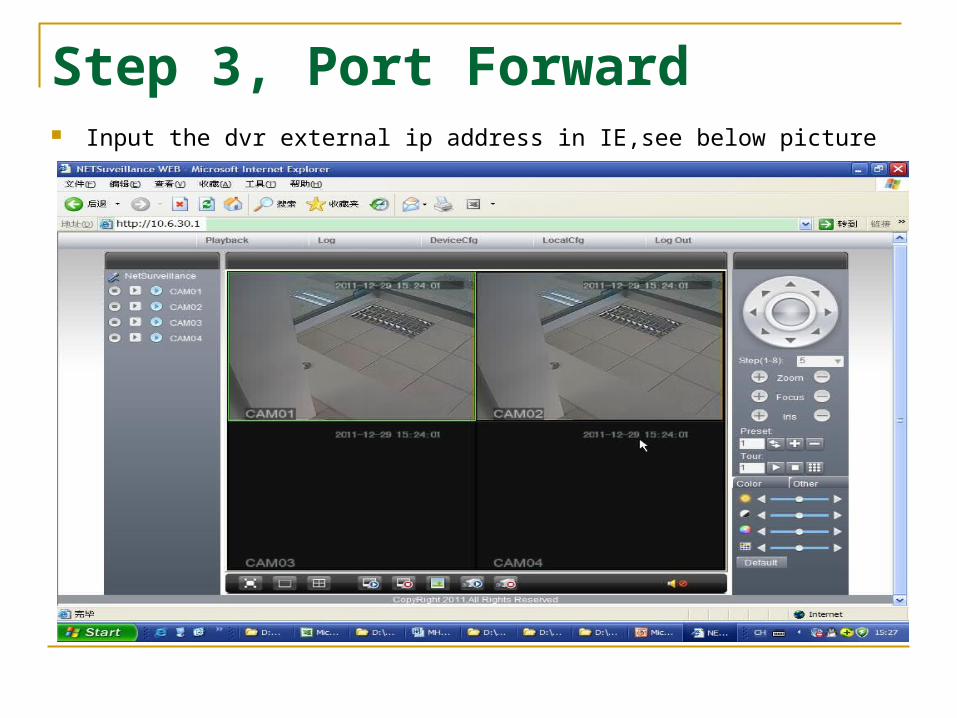
Step 3, Port Forward Input the dvr external ip address in IE,see below picture

Step 4, ARSP setup
1,Go to MainMenu->System->NetService->ARSP
2,Select “Enable”
3, Server IP:
cctvsv.com(113.98.254.150) or xmsecu.com.
4, Port, User name and password are default

Step 4, ARSP setup
When DNS is set over,go to MainMenu->Info->Version to find MAC
Each device has only 1 MAC number, so with with MAC number, you can go to visit your device by another way
Also you can find MAC Number in MainMenu->System->Network(the same as MAC address)

Step 4, ARSP setup After set ARSP,open http://113.98.254.150:8080/ with the MAC
number( eg. 000b3d00943a),then choose "log in by device",see below picture

Step 4, ARSP setup Now you can find your device as below picture

Step 4, ARSP setup This is the remote monitor screen of your device,just through by MAC number


