Ian C. Enochs NOAA/AOML UM/CIMAS 4301 Rickenbacker Cswy Miami, FL 33149 [email protected]NCRMP Bioerosion Monitoring Unit (BMU) Standard Operating Procedure Theory: The term bioerosion refers to the biological destruction of hard structures, such as coral skeletons. On coral reefs, this process is the antithesis of coral calcification. If rates of bioerosion are higher than calcification, healthy reef habitats can flatten into rubble. Bioerosion Monitoring Units (BMUs) are constructed and placed at reef monitoring sites. After collection, changes in density, volume, and mass indicate rates of bioerosion. Construction and pre-deployment analysis: Materials: 1. Clean coral skeleton block 2 x 5 x 1cm (use Porites lobata in Pacific, Orbicella faveolata in Atlantic and Caribbean) 2. Gray PVC base plate (2cm x ~ 8.5cm with 3/8” hole drilled on one end) 3. Epoxy (JB KWIK) 4. Metal ID tag 5. Cable tie 6. Small plastic bag 7. Analytical balance 8. Drying oven 9. 3D scanner 10. CT scanner Procedure: 1. Dry coral block in oven at 60 ˚C for 24 hrs, until dry.
NCRMP Bioerosion Monitoring Unit (BMU) Standard Operating Procedure
Theory:The term bioerosion refers to the biological destruction of hard structures, such as
coral skeletons. On coral reefs, this process is the antithesis of coral calcification. If rates of bioerosion are higher than calcification, healthy reef habitats can flatten into rubble. Bioerosion Monitoring Units (BMUs) are constructed and placed at reef monitoring sites. After collection, changes in density, volume, and mass indicate rates of bioerosion.
Construction and pre-deployment analysis:Materials:
1. Clean coral skeleton block 2 x 5 x 1cm (use Porites lobata in Pacific, Orbicella faveolata in Atlantic and Caribbean)
2. Gray PVC base plate (2cm x ~ 8.5cm with 3/8” hole drilled on one end)3. Epoxy (JB KWIK)4. Metal ID tag5. Cable tie6. Small plastic bag7. Analytical balance8. Drying oven9. 3D scanner10. CT scanner
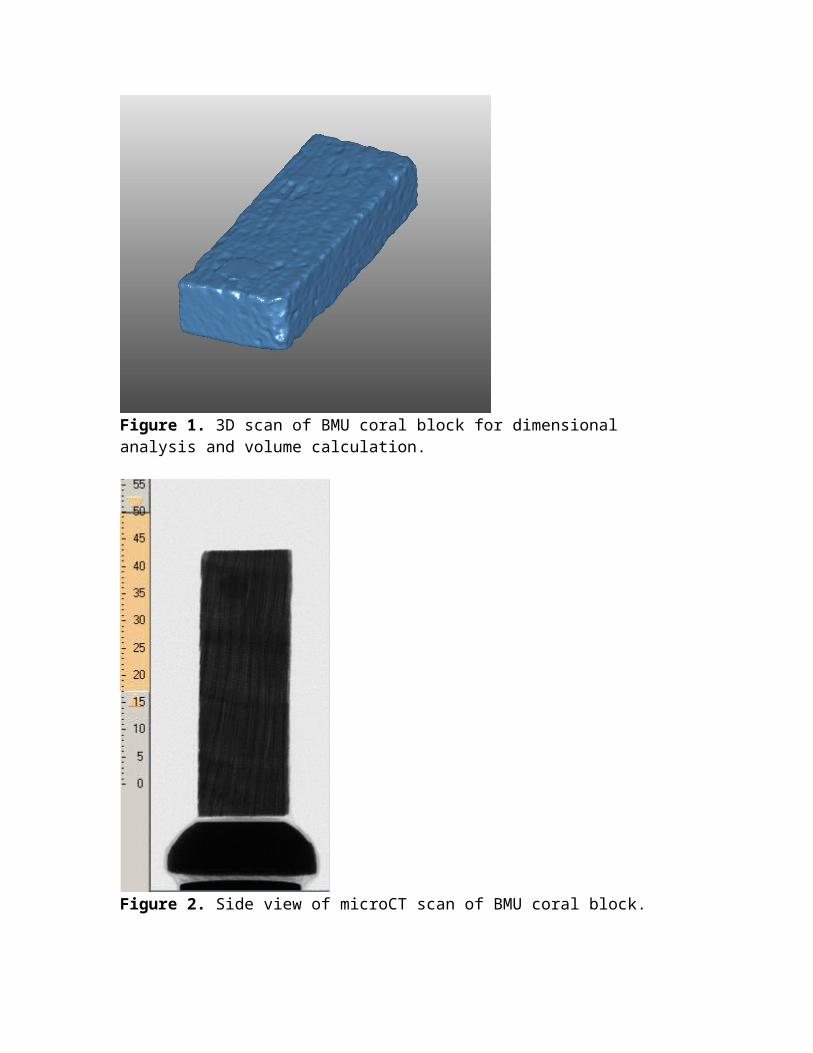
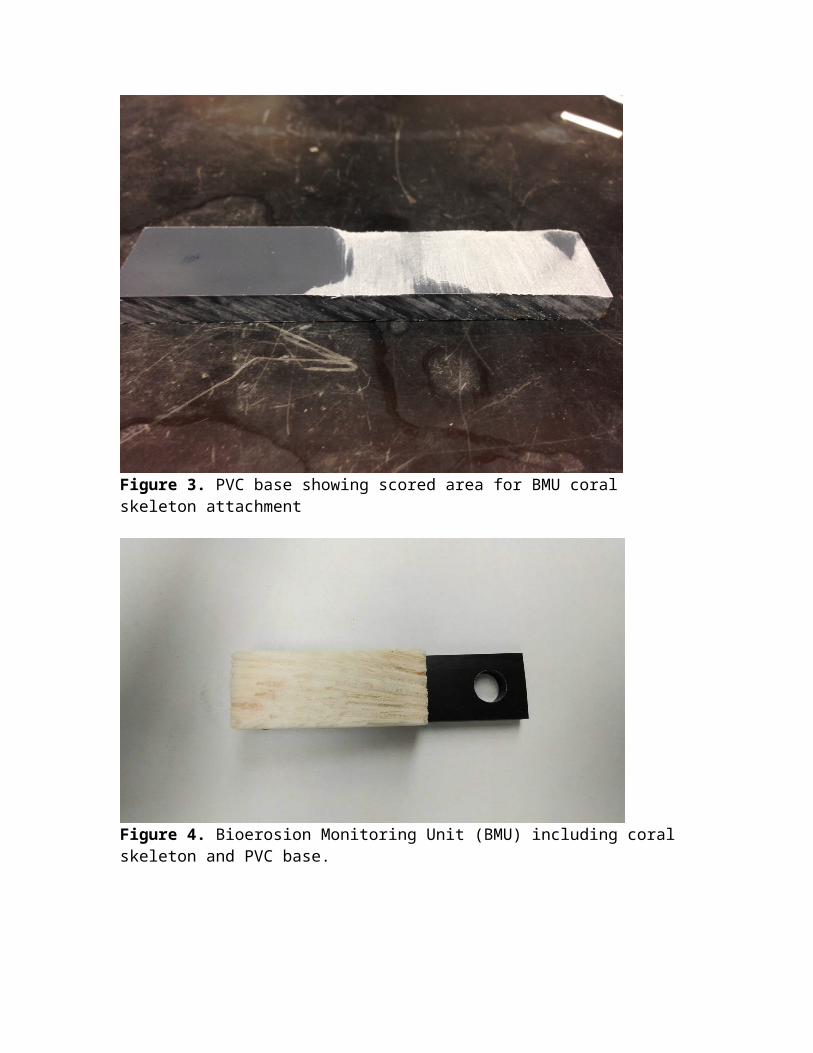
Procedure:1. Dry coral block in oven at 60 ˚C for 24 hrs, until dry.2. Mark the least clean 5 x 2 block side with BMU number using pencil.3. Weigh, and input into BMU database.4. Measure all dimensions and volume (3D scanning, Figure 1) 5. CT scan block using Skyscan 1174 microCT (Figure 2). 6. Reconstruct the scanned images into 3D image stacks using NRECON and the
reconstruction parameters at the end of this document.7. Open the image stack in CTAn and Confirm that x-ray attenuation is properly
calibrated to real-world density using the appropriate carbonate calibration phantom and note which phantom was used.
8. Epoxy coral block to PVC plate that has been scored to increase epoxy bond (Figure 3).
9. Weigh BMU after epoxy has cured and record the mass.10. Place completed BMU (Figure 4) into its own small plastic bag (labeled with the ID
tag number) along with a zip-tie, and its unique metal ID tag.
Deployment directions (from CRED SOP):Materials:
1. (5) BMUs per survey site2. (1) container for carrying/protecting 5 BMUs during the dive (CRED uses a small
plastic case…which floods as it is submerged)3. (5) stainless steel stakes4. (1-2) sledge hammers5. (10) 11/16 in. wire rope clips6. (1) container of Aqua-lube for limiting biofouling on the wire rope clip threads7. (1-2) 11/16 in. socket drivers8. (1-2) 11/16 in. wrenches. NOTE: The socket driver works best when tightening
the nuts on the wire rope clip. The wrench can be used if the horizontal access to the nuts is hindered, but the nuts on the wire rope clip are so close together that the wrench doesn’t get good purchase on the nut, making this tool’s use less efficient.
9. (2)tubes of underwater, 2-part, epoxy per survey site10. (1) marker float11. (6) 36” cable ties for securing the marker float to the seafloor (CRED uses marker
floats as a “nice to have,” but they are not necessary and sometimes draw attention to the survey site in populated dive areas)
12. (1) mesh dive bag for carrying above listed supplies
Dive Preparation:1. Record the CAU serial numbers (found on the yellow bands on an assembled CAU
unit) on a metadata sheet.2. Record the BMU serial numbers (found on the blue marker tab, cable-tied onto the
BMU) on a metadata sheet.3. Cover the threaded portion of the wire rope clips in Aqua-lube prior to the dive. By
inhibiting marine growth, it becomes much easier to remove the wire rope clips during CAU/BMU recovery.
Dive Operations:1. Hammer the stainless steel stakes vertically into the benthic substrate, making sure
each stake is secure. The stake should be rigid in its placement, and one should not rely on the epoxy to exclusively hold the CAU/BMU assembly in place over the duration of the deployment. The epoxy should be used in conjunction with a good stake placement.
2. Use a 2-3 inch amount of the 2-part epoxy stick for each stake placement. Make sure the epoxy is well mixed by squeezing the 2-3 inch mass between your fingers. A well-mixed amount of epoxy will be all one color (white) and will react evenly. The epoxy will get on your dive gloves, so remove them prior to mixing epoxy in your hand. Pack the epoxy around the base of the stake and into the surrounding substrate (ensuring there isn’t sand/debris within the application site is important, as sand/debris will make for a poor contact site with the epoxy).
3. Slide the BMU to the base of the stake and “seat it” into the epoxy mass holding the stake, ensuring that the BMU is flush with the benthos.
4. Secure the BMU in place by sliding an 11/16” wire rope clip down the stake to the plastic base portion of the BMU. Ensure that the wire rope clip is prepared with Aqua-lube and use the socket driver to tighten the nuts (Figure 5).
5. Attach a CAU to the upper 3” of the stainless steel stake with a wire rope clip. Mount with 3” of overlap between the stake and the threaded pin of the CAU. Again, ensure the wire rope clip is prepared with Aqua-lube and use the socket driver to tighten the nuts. The CAU should be mounted parallel to the ocean surface and the individual CAU plates should be “squared” up (sometimes the two plates can rotate on their mounting pin and not be perfectly positioned on top of each other). Often the benthos is sloped; however, try to have the CAU surface horizontal to the ocean surface.
6. Re-address the epoxy at the base of the stainless steel stake. If mounting the BMU and/or CAU on the stake has caused the epoxy to no longer be tightly packed around the stake’s base, fix the epoxy. It takes approximately an hour for the epoxy to begin to harden.
7. Install a survey site marker float, using cable ties. 8. Collect a waypoint on the survey site with a GPS. CRED uses two waypoint
techniques: 1. if the survey site can be seen from the surface, a snorkeler swims the GPS unit over the survey site and records a waypoint. 2. a SCUBA diver takes up the slack in the line of the dive team’s surface float, making the line taut from diver to surface float, then holds onto the bottom while repeatedly pulling the float under water. This action signals the coxswain/boat tending the divers to come overhead and record a GPS waypoint at the position where the diver is repeatedly pulling the surface float underwater (this is the technique that CRED uses 98% of the time). The coxswain signals to the divers that a waypoint has been collected by revving the engine 2 times…and the diver signals the coxswain that he understands the GPS point has been taken by no longer pulling on the surface float line.
Post Dive:1. Record the GPS location of the survey site on a metadata sheet.
Post-deployment:Collection:
1. Collect after three years in the field2. Carefully remove BMU and bring to surface along with identification tag3. Air dry the BMU and place it inside sample bag with identification information
Analysis:1. Dry BMU in oven at 60 ˚C for 24 hrs, until dry.2. Weigh using analytical balance.3. Place BMU in a 15% diluted hydrogen peroxide solution for two hours to remove
non-calcified organics (Kobluk & Risk, 1977). 4. Rinse with fresh water5. Dry BMU in oven at 60 ˚C for 24 hrs, until dry.
6. Weigh using analytical balance.7. Measure all dimensions and volume (3D scanning, Figure 1) 8. Remove PVC base plate from coral block.9. CT scan block using Skyscan 1174 microCT configured with the CT scan
parameters noted herein. 10. Scan calibration standards at least once throughout the course of BMU analysis (at
least once per week).11. Reconstruct the scanned images into 3D image stacks12. Volumetrically partition secondary accretion, external bioerosion, and macroboring
(Figure 6).13. Using a consistent and unbored region of interest, compare attenuation coefficients
of pre and post-scans, calibrated with carbonate density phantoms to calculate microboring.
Figure 1. 3D scan of BMU coral block for dimensional analysis and volume calculation.
Figure 2. Side view of microCT scan of BMU coral block.
Figure 3. PVC base showing scored area for BMU coral skeleton attachment
Figure 4. Bioerosion Monitoring Unit (BMU) including coral skeleton and PVC base.
Figure 5. Bioerosion Monitoring Unit deployed at a reef.
Figure 6. Volumetrically isolated accretion (blue) and macroboring (red).