30
SERIOUS SKILLS. Jon McFarland AutoCAD ® 2010 and AutoCAD LT ® 2010 NO EXPERIENCE REQUIRED

AutoCAD® 2010
AutoCAD
LT® 2010
NO
EXPERIENCE REQ
UIRED
and
McFarland
$34.99 US$41.99 CANCOMPUTERS/CAD-CAM
AutoCAD®
2010 and AutoCAD LT®
2010NO EXPERIENCE REQUIREDAutoCAD 2010 and AutoCAD LT 2010: No Experience Required is the perfect step-by-step introduction to the latest version of the world’s leading CAD software. It provides concise explanations and a hands-on tutorial that continues through the book to clearly show you how to plan, develop, and present a complete, customized AutoCAD project. Follow each step sequentially or jump in at any chapter by downloading the drawing fi les from the companion website (www.sybex.com/go/autocad2010ner). Either way, you’ll master all the crucial AutoCAD features, get a thorough grounding in the essentials, and quickly become productive with AutoCAD 2010.
This perennial bestseller is fully revised to include metric as well as Imperial measurements and provide comprehensive coverage of the latest AutoCAD features and capabilities, including the free-form design tools, parametric drawing tools, and enhanced PDF support.
• Quickly learn the AutoCAD interface as you immediately start using basic commands and set up your own drawings
• Build on your skills with groups, elevations, hatches, and multiline text• Develop sophisticated drawings as you graduate to dimensioning, creating external references, using
tables, leveraging dynamic blocks, and mastering layouts and printing• Master the new parametric tools to keep your drawing elements consistent• Harness the 3D capabilities that make AutoCAD 2010 a complete design tool
ABOUT THE AUTHOR
Jon McFarland is an Autodesk Certifi ed AutoCAD Professional who uses AutoCAD and 3ds Max to create visualizations of proposed facility construction and expansions. He also teaches AutoCAD and 3ds Max courses at the university level.
www.sybex.com www.sybex.com/go/autocad2010ner
Learn to clearly draw, dimension, and add notes and tables to your drawings
See the best ways to defi ne the appear-ance of 3D drawings using different visual styles
Apply materi-als to your 3D models and render them for photorealistic quality images
SERIOUS SKILLS.
Jon McFarland
AutoCAD®
2010 and
AutoCAD LT®
2010NO EXPERIENCE REQUIREDISBN: 978-0-470-43868-8

438688ffirst.qxd 4/23/09 8:26 PM Page ii

AUTOCAD® 2010 AND
AUTOCAD LT® 2010NO EXPERIENCE REQUIRED™
438688ffirst.qxd 4/23/09 8:26 PM Page i

438688ffirst.qxd 4/23/09 8:26 PM Page ii

AUTOCAD® 2010 AND
AUTOCAD LT® 2010NO EXPERIENCE REQUIRED ™
Jon McFarland
Wiley Publishing, Inc.
438688ffirst.qxd 4/23/09 8:26 PM Page iii

Senior Acquisitions Editor: Willem KnibbeDevelopment Editor: Gary SchwartzTechnical Editor: John EvanscoProduction Editor: Christine O’ConnorCopy Editor: Liz WelchProduction Manager: Tim TateVice President and Executive Group Publisher: Richard SwadleyVice President and Publisher: Neil EddeBook Designer and Compositor: Franz BaumhacklProofreader: Jen Larsen, Word One New YorkIndexer: Robert SwansonProject Coordinator, Cover: Lynsey StanfordCover Designer: Ryan SneedCover Image: Dieter Spannknebel / Digital Vision / Getty Images, Inc.
Copyright © 2009 by Wiley Publishing, Inc., Indianapolis, Indiana
Published simultaneously in Canada
ISBN: 978-0-470-43868-8
No part of this publication may be reproduced, stored in a retrieval system or transmitted in any form or by any means, elec-tronic, mechanical, photocopying, recording, scanning or otherwise, except as permitted under Sections 107 or 108 of the 1976United States Copyright Act, without either the prior written permission of the Publisher, or authorization through payment ofthe appropriate per-copy fee to the Copyright Clearance Center, 222 Rosewood Drive, Danvers, MA 01923, (978) 750-8400, fax(978) 646-8600. Requests to the Publisher for permission should be addressed to the Permissions Department, John Wiley &Sons, Inc., 111 River Street, Hoboken, NJ 07030, (201) 748-6011, fax (201) 748-6008, or online at http://www.wiley.com/go/permissions.
Limit of Liability/Disclaimer of Warranty: The publisher and the author make no representations or warranties with respect tothe accuracy or completeness of the contents of this work and specifically disclaim all warranties, including without limitationwarranties of fitness for a particular purpose. No warranty may be created or extended by sales or promotional materials. Theadvice and strategies contained herein may not be suitable for every situation. This work is sold with the understanding that thepublisher is not engaged in rendering legal, accounting, or other professional services. If professional assistance is required, theservices of a competent professional person should be sought. Neither the publisher nor the author shall be liable for damagesarising herefrom. The fact that an organization or Web site is referred to in this work as a citation and/or a potential source offurther information does not mean that the author or the publisher endorses the information the organization or Web site mayprovide or recommendations it may make. Further, readers should be aware that Internet Web sites listed in this work may havechanged or disappeared between when this work was written and when it is read.
For general information on our other products and services or to obtain technical support, please contact our Customer CareDepartment within the U.S. at (87700) 762-2974, outside the U.S. at (317) 572-3993 or fax (317) 572-4002.
Wiley also publishes its books in a variety of electronic formats. Some content that appears in print may not be available in elec-tronic books.
Library of Congress Cataloging-in-Publication Data
McFarland, Jon.
AutoCAD 2010 and AutoCAD LT 2010 : no experience required / Jon McFarland.
p. cm.
ISBN 978-0-470-43868-8 (paper/website)
1. Computer graphics. 2. AutoCAD. I. Title.
T385.M3783 2009
620’.00420285536—dc22
2009009717
TRADEMARKS: Wiley, the Wiley logo, and the Sybex logo are trademarks or registered trademarks of John Wiley & Sons, Inc.and/or its affiliates, in the United States and other countries, and may not be used without written permission. AutoCAD andAutoCAD LT are registered trademarks of Autodesk, Inc. All other trademarks are the property of their respective owners. WileyPublishing, Inc., is not associated with any product or vendor mentioned in this book.
10 9 8 7 6 5 4 3 2 1
438688ffirst.qxd 4/23/09 8:26 PM Page iv

Dear Reader,
Thank you for choosing AutoCAD 2010 and AutoCAD LT 2010: No ExperiencedRequired. This book is part of a family of premium-quality Sybex books, all ofwhich are written by outstanding authors who combine practical experiencewith a gift for teaching.
Sybex was founded in 1976. More than thirty years later, we’re still committedto producing consistently exceptional books. With each of our titles we’re work-ing hard to set a new standard for the industry. From the paper we print on, tothe authors we work with, our goal is to bring you the best books available.
I hope you see all that reflected in these pages. I’d be very interested to hearyour comments and get your feedback on how we’re doing. Feel free to let meknow what you think about this or any other Sybex book by sending me an emailat [email protected], or if you think you’ve found a technical error in this book,please visit http://sybex.custhelp.com. Customer feedback is critical to ourefforts at Sybex.
Best regards,
NEIL EDDE
Vice President and PublisherSybex, an Imprint of Wiley
438688ffirst.qxd 4/23/09 8:26 PM Page v

To my lovely wife, Lucy,
and our two sons,
Zach and Jacob
438688ffirst.qxd 4/23/09 8:26 PM Page vi

ACKNOWLEDGMENTS
I am grateful to the many people who contributed to the publication of thisupdate of the book. For those involved in this project at Sybex and Wiley, Iextend my thanks.
Sandy Jaffe clarified the nuances of the contract, and helped with the logisticsaround the signing. Thanks to Senior Acquisitions Editor Willem Knibbe whobrought me into this project and has served as acquisitions editor for this andprevious updates. He has continued to rally support for its publication, and hehas maintained a constructive relationship with Jim Quanci and Denis Cadu ofthe Autodesk Developer Network. Thanks to Shaan Hurley and Nate Bartley fromAutodesk, who provided me with access to the software in development andanswered many of my questions.
Thanks to John Evansco, who provided his expertise to do the technical edit-ing. I very much appreciate his lending his teaching and engineering expertisein checking the text and figures for technical accuracy. Gary Schwartz servedwell as developmental editor and quickly responded to issues that arose. Theproduction editor was Christine O’Connor; she kept track of the submissionsand all the changes and, thanks to her, the work progressed at a rate to meet theschedule. Liz Welch served as copy editor and, in doing so, helped update thelanguage and syntax to keep the book very readable, and she was also an asset inthis project. Thanks to Andre Evans for providing the excellent hand-drawngraphics in Chapter 16.
Finally, I want to thank the production team at Wiley. Franz Baumhackl hasagain served skillfully as compositor and designer. Jen Larsen took on the ardu-ous task of proofreader, and Jack Lewis served as indexer. They have all per-formed very well. Everyone involved has been successful in maintainingstandards of high quality, and I appreciate their work on this book.
438688ffirst.qxd 4/23/09 8:26 PM Page vii

ABOUT THE AUTHOR
J on McFarland manages the CAD department for a company that owns, devel-ops, and manages retail, office and, residential properties. He has written andcontributed to several books on AutoCAD and 3ds Max and teaches AutoCAD
and 3ds Max at the college level.
438688ffirst.qxd 4/23/09 8:26 PM Page viii

CONTENTS AT A GLANCE
Introduction xix
C H A P T E R 1 Getting to Know AutoCAD 1
C H A P T E R 2 Learning Basic Commands to Get Started 33
C H A P T E R 3 Setting Up a Drawing 69
C H A P T E R 4 Developing Drawing Strategies: Part 1 93
C H A P T E R 5 Developing Drawing Strategies: Part 2 161
C H A P T E R 6 Using Layers to Organize Your Drawing 225
C H A P T E R 7 Combining Objects into Blocks 285
C H A P T E R 8 Controlling Text in a Drawing 345
C H A P T E R 9 Using Dynamic Blocks and Tables 409
C H A P T E R 1 0 Generating Elevations 463
C H A P T E R 1 1 Working with Hatches, Gradients, and Tool Palettes 509
C H A P T E R 1 2 Dimensioning a Drawing 545
C H A P T E R 1 3 Managing External References 601
C H A P T E R 1 4 Using Layouts to Set Up a Print 637
C H A P T E R 1 5 Printing an AutoCAD Drawing 677
C H A P T E R 1 6 Creating 3D Geometry 715
C H A P T E R 1 7 Rendering and Materials 791
Glossary 827
Index 842
438688ffirst.qxd 4/23/09 8:26 PM Page ix

CONTENTS
Introduction xix
CHAPTER 1 Getting to Know AutoCAD 1
Starting AutoCAD . . . . . . . . . . . . . . . . . . . . . . . . . . . . . . . . . . . . . . . . . . . . . . 2The Initial Setup Dialog Box . . . . . . . . . . . . . . . . . . . . . . . . . . . . . . . . . . . 2Exploring the New Features Workshop . . . . . . . . . . . . . . . . . . . . . . . . . . . 4The Customer Involvement Program . . . . . . . . . . . . . . . . . . . . . . . . . . . . 6Exploring the AutoCAD User Interface . . . . . . . . . . . . . . . . . . . . . . . . . . . 7
Introducing the AutoCAD Graphics Window . . . . . . . . . . . . . . . . . . . . . . . . 11Working in the Command Window . . . . . . . . . . . . . . . . . . . . . . . . . . . . . . . 17Using the Ribbon . . . . . . . . . . . . . . . . . . . . . . . . . . . . . . . . . . . . . . . . . . . . . 18
Displaying the Ribbon Tools . . . . . . . . . . . . . . . . . . . . . . . . . . . . . . . . . . 18Using the Ribbon Tools . . . . . . . . . . . . . . . . . . . . . . . . . . . . . . . . . . . . . . 20Customizing the Ribbon . . . . . . . . . . . . . . . . . . . . . . . . . . . . . . . . . . . . . 22
Using the Application Menu . . . . . . . . . . . . . . . . . . . . . . . . . . . . . . . . . . . . . 22Opening a Drawing with the Application Menu . . . . . . . . . . . . . . . . . . . . 23Switching Between Open Drawings . . . . . . . . . . . . . . . . . . . . . . . . . . . . . 26
Using the Drop-Down Menus . . . . . . . . . . . . . . . . . . . . . . . . . . . . . . . . . . . . 28Using the Toolbars . . . . . . . . . . . . . . . . . . . . . . . . . . . . . . . . . . . . . . . . . . . . 29
Workspaces . . . . . . . . . . . . . . . . . . . . . . . . . . . . . . . . . . . . . . . . . . . . . . . 30Using the Keyboard . . . . . . . . . . . . . . . . . . . . . . . . . . . . . . . . . . . . . . . . . . . 31Using the Mouse . . . . . . . . . . . . . . . . . . . . . . . . . . . . . . . . . . . . . . . . . . . . . . 31
CHAPTER 2 Learning Basic Commands to Get Started 33
Using the Line Command . . . . . . . . . . . . . . . . . . . . . . . . . . . . . . . . . . . . . . . 34Using Coordinates . . . . . . . . . . . . . . . . . . . . . . . . . . . . . . . . . . . . . . . . . . 40Using Relative Coordinates . . . . . . . . . . . . . . . . . . . . . . . . . . . . . . . . . . . 43Using the Direct Distance Method . . . . . . . . . . . . . . . . . . . . . . . . . . . . . . 45
Drawing the Shape . . . . . . . . . . . . . . . . . . . . . . . . . . . . . . . . . . . . . . . . . . . . 45Using Relative Cartesian Coordinates . . . . . . . . . . . . . . . . . . . . . . . . . . . 45Erasing Lines . . . . . . . . . . . . . . . . . . . . . . . . . . . . . . . . . . . . . . . . . . . . . . 47Controlling How the Selection Tools Are Displayed . . . . . . . . . . . . . . . . . 47Using Relative Polar Coordinates . . . . . . . . . . . . . . . . . . . . . . . . . . . . . . . 48Using Direct Input . . . . . . . . . . . . . . . . . . . . . . . . . . . . . . . . . . . . . . . . . . 49
438688ffirst.qxd 4/23/09 8:26 PM Page x

CHAPTER 3 Setting Up a Drawing 69
Setting Up the Drawing Units . . . . . . . . . . . . . . . . . . . . . . . . . . . . . . . . . . . . 70Setting Up the Drawing Size . . . . . . . . . . . . . . . . . . . . . . . . . . . . . . . . . . . . 75
The Grid . . . . . . . . . . . . . . . . . . . . . . . . . . . . . . . . . . . . . . . . . . . . . . . . . . 75Setting Up Drawing Limits . . . . . . . . . . . . . . . . . . . . . . . . . . . . . . . . . . . 79
Drawing with Grid and Snap . . . . . . . . . . . . . . . . . . . . . . . . . . . . . . . . . . . . 83A Closer Look at Dynamic Input . . . . . . . . . . . . . . . . . . . . . . . . . . . . . . . 86
Saving Your Work . . . . . . . . . . . . . . . . . . . . . . . . . . . . . . . . . . . . . . . . . . . . . 88A Summary of AutoCAD’s Units . . . . . . . . . . . . . . . . . . . . . . . . . . . . . . . . . . 90
Linear Units . . . . . . . . . . . . . . . . . . . . . . . . . . . . . . . . . . . . . . . . . . . . . . . 90Angular Units . . . . . . . . . . . . . . . . . . . . . . . . . . . . . . . . . . . . . . . . . . . . . . 91
CHAPTER 4 Developing Drawing Strategies: Part 1 93
Laying Out the Walls . . . . . . . . . . . . . . . . . . . . . . . . . . . . . . . . . . . . . . . . . . 95Create a Polyline . . . . . . . . . . . . . . . . . . . . . . . . . . . . . . . . . . . . . . . . . . . 95Edit a Polyline . . . . . . . . . . . . . . . . . . . . . . . . . . . . . . . . . . . . . . . . . . . . . 98Creating the Exterior Wall Lines . . . . . . . . . . . . . . . . . . . . . . . . . . . . . . 101Creating the Interior Walls . . . . . . . . . . . . . . . . . . . . . . . . . . . . . . . . . . 103Cutting Openings in the Walls . . . . . . . . . . . . . . . . . . . . . . . . . . . . . . . . 115
Creating Doors . . . . . . . . . . . . . . . . . . . . . . . . . . . . . . . . . . . . . . . . . . . . . . 124Drawing Swinging Doors . . . . . . . . . . . . . . . . . . . . . . . . . . . . . . . . . . . . 124Copying Objects . . . . . . . . . . . . . . . . . . . . . . . . . . . . . . . . . . . . . . . . . . . 134Mirroring Objects . . . . . . . . . . . . . . . . . . . . . . . . . . . . . . . . . . . . . . . . . 136Scaling the Bathroom Door . . . . . . . . . . . . . . . . . . . . . . . . . . . . . . . . . . 138Drawing a Sliding Glass Door . . . . . . . . . . . . . . . . . . . . . . . . . . . . . . . . 140Drawing the Bi-Fold Doors . . . . . . . . . . . . . . . . . . . . . . . . . . . . . . . . . . 149
If You Would Like More Practice . . . . . . . . . . . . . . . . . . . . . . . . . . . . . . . . 156An Alternative Sliding Glass Door . . . . . . . . . . . . . . . . . . . . . . . . . . . . . 156An Addition to the Cabin . . . . . . . . . . . . . . . . . . . . . . . . . . . . . . . . . . . . 156Draw Three Views of a Block . . . . . . . . . . . . . . . . . . . . . . . . . . . . . . . . . 157
CHAPTER 5 Developing Drawing Strategies: Part 2 161
Drawing the Thresholds . . . . . . . . . . . . . . . . . . . . . . . . . . . . . . . . . . . . . . . 164Drawing the Front Threshold . . . . . . . . . . . . . . . . . . . . . . . . . . . . . . . . 165Drawing the Back Threshold . . . . . . . . . . . . . . . . . . . . . . . . . . . . . . . . . 169
C o n t e n t s x i
438688ffirst.qxd 4/23/09 8:26 PM Page xi
Drawing the Decks and Stairs . . . . . . . . . . . . . . . . . . . . . . . . . . . . . . . . . . 170Drawing the Front Deck . . . . . . . . . . . . . . . . . . . . . . . . . . . . . . . . . . . . 170
Laying Out the Kitchen . . . . . . . . . . . . . . . . . . . . . . . . . . . . . . . . . . . . . . . 188Drawing the Counter . . . . . . . . . . . . . . . . . . . . . . . . . . . . . . . . . . . . . . . 188Drawing the Stove and Refrigerator . . . . . . . . . . . . . . . . . . . . . . . . . . . . 192Completing the Stove . . . . . . . . . . . . . . . . . . . . . . . . . . . . . . . . . . . . . . 194Drawing the Kitchen Sink . . . . . . . . . . . . . . . . . . . . . . . . . . . . . . . . . . . 201
Constructing the Bathroom . . . . . . . . . . . . . . . . . . . . . . . . . . . . . . . . . . . . 203Setting Running Object Snaps . . . . . . . . . . . . . . . . . . . . . . . . . . . . . . . . 204Drawing a Shower Unit . . . . . . . . . . . . . . . . . . . . . . . . . . . . . . . . . . . . . 206Drawing the Bathroom Sink and Mirror . . . . . . . . . . . . . . . . . . . . . . . . 208Positioning the Toilet and Shelves . . . . . . . . . . . . . . . . . . . . . . . . . . . . . 210Drawing the Hot Tub . . . . . . . . . . . . . . . . . . . . . . . . . . . . . . . . . . . . . . . 213Using Parametric Constraints . . . . . . . . . . . . . . . . . . . . . . . . . . . . . . . . 216
If You Would Like More Practice . . . . . . . . . . . . . . . . . . . . . . . . . . . . . . . . 218Drawing the Cabin Again . . . . . . . . . . . . . . . . . . . . . . . . . . . . . . . . . . . . 218Drawing Something Else . . . . . . . . . . . . . . . . . . . . . . . . . . . . . . . . . . . . 219Drawing Some Furniture for the Cabin . . . . . . . . . . . . . . . . . . . . . . . . . 219Drawing a Gasket . . . . . . . . . . . . . . . . . . . . . . . . . . . . . . . . . . . . . . . . . . 220Drawing a Parking Lot . . . . . . . . . . . . . . . . . . . . . . . . . . . . . . . . . . . . . . 222
CHAPTER 6 Using Layers to Organize Your Drawing 225
Using Layers as an Organizing Tool . . . . . . . . . . . . . . . . . . . . . . . . . . . . . . 226Setting Up Layers . . . . . . . . . . . . . . . . . . . . . . . . . . . . . . . . . . . . . . . . . . 228
Assigning Linetypes to Layers . . . . . . . . . . . . . . . . . . . . . . . . . . . . . . . . . . 238Assigning Objects to Layers . . . . . . . . . . . . . . . . . . . . . . . . . . . . . . . . . . . . 243
Using the Quick Properties Panel . . . . . . . . . . . . . . . . . . . . . . . . . . . . . 247Selecting the Doors and Swings . . . . . . . . . . . . . . . . . . . . . . . . . . . . . . 248Turning Off and Freezing Layers . . . . . . . . . . . . . . . . . . . . . . . . . . . . . . 255Drawing the Headers . . . . . . . . . . . . . . . . . . . . . . . . . . . . . . . . . . . . . . . 258Drawing the Roof . . . . . . . . . . . . . . . . . . . . . . . . . . . . . . . . . . . . . . . . . . 261
Setting a Linetype Scale Factor . . . . . . . . . . . . . . . . . . . . . . . . . . . . . . . . . 267Assigning an Individual Linetype Scale Factor . . . . . . . . . . . . . . . . . . . 268
Setting Properties of Layers and Objects . . . . . . . . . . . . . . . . . . . . . . . . . . 274Selecting Colors for Layers and Objects . . . . . . . . . . . . . . . . . . . . . . . . . 274
C o n t e n t sx i i
438688ffirst.qxd 4/23/09 8:26 PM Page xii

Assigning a Color or a Linetype to an Object Instead of a Layer . . . . . . 274Making a Color or a Linetype Current . . . . . . . . . . . . . . . . . . . . . . . . . . 275
Using the Action Recorder . . . . . . . . . . . . . . . . . . . . . . . . . . . . . . . . . . . . . 275Creating Layer States . . . . . . . . . . . . . . . . . . . . . . . . . . . . . . . . . . . . . . . . . 278If You Would Like More Practice . . . . . . . . . . . . . . . . . . . . . . . . . . . . . . . . 283
Experimenting with Linetypes and Linetype Scales . . . . . . . . . . . . . . . . 283Setting Up Layers for Your Own Trade or Profession . . . . . . . . . . . . . . . 284
CHAPTER 7 Combining Objects into Blocks 285
Making a Block for a Door . . . . . . . . . . . . . . . . . . . . . . . . . . . . . . . . . . . . . 286Inserting the Door Block . . . . . . . . . . . . . . . . . . . . . . . . . . . . . . . . . . . . 291Using Dynamic Blocks . . . . . . . . . . . . . . . . . . . . . . . . . . . . . . . . . . . . . . 298
Finding Blocks in a Drawing . . . . . . . . . . . . . . . . . . . . . . . . . . . . . . . . . . . 300Using Grips to Detect a Block . . . . . . . . . . . . . . . . . . . . . . . . . . . . . . . . 300Using the List Command to Detect a Block . . . . . . . . . . . . . . . . . . . . . . 301Using the Properties Palette to Examine a Block . . . . . . . . . . . . . . . . . . 303Creating a Window Block . . . . . . . . . . . . . . . . . . . . . . . . . . . . . . . . . . . . 304
Inserting the Window Block . . . . . . . . . . . . . . . . . . . . . . . . . . . . . . . . . . . . 310Rotating a Block During Insertion . . . . . . . . . . . . . . . . . . . . . . . . . . . . . 311Using Snap Tracking to Set the Insertion Point . . . . . . . . . . . . . . . . . . . 314Changing a Block’s Scale Factor Using Object Properties . . . . . . . . . . . 316Finishing the Windows . . . . . . . . . . . . . . . . . . . . . . . . . . . . . . . . . . . . . 317
Revising a Block . . . . . . . . . . . . . . . . . . . . . . . . . . . . . . . . . . . . . . . . . . . . . 321Sharing Information Between Drawings . . . . . . . . . . . . . . . . . . . . . . . . . . 324
Dragging and Dropping Between Two Open Drawings . . . . . . . . . . . . . 325Using AutoCAD’s DesignCenter . . . . . . . . . . . . . . . . . . . . . . . . . . . . . . . 328Other Ways to Share Information Between Drawings . . . . . . . . . . . . . . 336
If You Would Like More Practice . . . . . . . . . . . . . . . . . . . . . . . . . . . . . . . . 342
CHAPTER 8 Controlling Text in a Drawing 345
Setting Up Text Styles . . . . . . . . . . . . . . . . . . . . . . . . . . . . . . . . . . . . . . . . . 346Determining Text and Drawing Scale . . . . . . . . . . . . . . . . . . . . . . . . . . . 346Defining a Text Style for Room Labels . . . . . . . . . . . . . . . . . . . . . . . . . . 348
Using Single-Line Text . . . . . . . . . . . . . . . . . . . . . . . . . . . . . . . . . . . . . . . . 353Placing Titles of Views in the Drawing . . . . . . . . . . . . . . . . . . . . . . . . . . 353
C o n t e n t s x i i i
438688ffirst.qxd 4/23/09 8:26 PM Page xiii

Placing Room Labels in the Floor Plan . . . . . . . . . . . . . . . . . . . . . . . . . 356Using Text in a Grid . . . . . . . . . . . . . . . . . . . . . . . . . . . . . . . . . . . . . . . . 363Creating a Title Block and Border . . . . . . . . . . . . . . . . . . . . . . . . . . . . . 372
Using Multiline Text . . . . . . . . . . . . . . . . . . . . . . . . . . . . . . . . . . . . . . . . . . 387Using the Spell-Check Feature . . . . . . . . . . . . . . . . . . . . . . . . . . . . . . . . 397Exploring Other Aspects of Multiline Text . . . . . . . . . . . . . . . . . . . . . . . 401
If You Would Like More Practice . . . . . . . . . . . . . . . . . . . . . . . . . . . . . . . . 407
CHAPTER 9 Using Dynamic Blocks and Tables 409
Using Attributes for a Grid . . . . . . . . . . . . . . . . . . . . . . . . . . . . . . . . . . . . . 410Defining Blocks with Attributes . . . . . . . . . . . . . . . . . . . . . . . . . . . . . . . 415Inserting Blocks with Attributes . . . . . . . . . . . . . . . . . . . . . . . . . . . . . . 416Editing Attribute Text . . . . . . . . . . . . . . . . . . . . . . . . . . . . . . . . . . . . . . 419
Setting Up Multiple Attributes in a Block . . . . . . . . . . . . . . . . . . . . . . . . . . 420Defining a Block with Multiple Attributes . . . . . . . . . . . . . . . . . . . . . . . 424Inserting the Room_Info Block . . . . . . . . . . . . . . . . . . . . . . . . . . . . . . . 428Editing Attributes . . . . . . . . . . . . . . . . . . . . . . . . . . . . . . . . . . . . . . . . . 433Controlling the Visibility of Attributes . . . . . . . . . . . . . . . . . . . . . . . . . . 436Exploring Other Uses for Attributes . . . . . . . . . . . . . . . . . . . . . . . . . . . . 440
Creating a Dynamic Block . . . . . . . . . . . . . . . . . . . . . . . . . . . . . . . . . . . . . 440Setting Up Parameters and Actions . . . . . . . . . . . . . . . . . . . . . . . . . . . . 442Fine-Tuning the Dynamic Block with the Properties Palette . . . . . . . . . 444Inserting a Dynamic Block . . . . . . . . . . . . . . . . . . . . . . . . . . . . . . . . . . . 446
Creating a Table . . . . . . . . . . . . . . . . . . . . . . . . . . . . . . . . . . . . . . . . . . . . . 451Defining a Table Style . . . . . . . . . . . . . . . . . . . . . . . . . . . . . . . . . . . . . . 452Designing a Table . . . . . . . . . . . . . . . . . . . . . . . . . . . . . . . . . . . . . . . . . . 455
CHAPTER 10 Generating Elevations 463
Drawing the South Elevation . . . . . . . . . . . . . . . . . . . . . . . . . . . . . . . . . . . 464Setting Up Lines for the Heights . . . . . . . . . . . . . . . . . . . . . . . . . . . . . . 466Using Grips to Copy Lines . . . . . . . . . . . . . . . . . . . . . . . . . . . . . . . . . . . 468Trimming Lines in the Elevation . . . . . . . . . . . . . . . . . . . . . . . . . . . . . . 471Drawing the Decks in Elevation . . . . . . . . . . . . . . . . . . . . . . . . . . . . . . . 475
Generating the Other Elevations . . . . . . . . . . . . . . . . . . . . . . . . . . . . . . . . 487Making the Opposite Elevation . . . . . . . . . . . . . . . . . . . . . . . . . . . . . . . 487Revising the New South Elevation . . . . . . . . . . . . . . . . . . . . . . . . . . . . . 490Making the Front and Back Elevations . . . . . . . . . . . . . . . . . . . . . . . . . 494
C o n t e n t sx i v
438688ffirst.qxd 4/23/09 8:26 PM Page xiv
Considering Drawing Scale Issues . . . . . . . . . . . . . . . . . . . . . . . . . . . . . . . 505Drawing Interior Elevations . . . . . . . . . . . . . . . . . . . . . . . . . . . . . . . . . . . . 506If You Would Like More Practice . . . . . . . . . . . . . . . . . . . . . . . . . . . . . . . . 506
CHAPTER 11 Working with Hatches, Gradients, and Tool Palettes 509
Hatching the South Elevation . . . . . . . . . . . . . . . . . . . . . . . . . . . . . . . . . . 510Looking at Hatch Patterns . . . . . . . . . . . . . . . . . . . . . . . . . . . . . . . . . . . 515Hatching the Rest of the South Elevation . . . . . . . . . . . . . . . . . . . . . . . 516Adding Special Effects . . . . . . . . . . . . . . . . . . . . . . . . . . . . . . . . . . . . . . 523
Using Hatches in the Floor Plan . . . . . . . . . . . . . . . . . . . . . . . . . . . . . . . . . 527Hatching the Floors . . . . . . . . . . . . . . . . . . . . . . . . . . . . . . . . . . . . . . . . 527Finishing the Hatches for the Floors . . . . . . . . . . . . . . . . . . . . . . . . . . . 531
Modifying the Shape of Hatch Patterns . . . . . . . . . . . . . . . . . . . . . . . . . . . 533Creating and Managing Tool Palettes . . . . . . . . . . . . . . . . . . . . . . . . . . . . . 535
Creating a New Tool Palette . . . . . . . . . . . . . . . . . . . . . . . . . . . . . . . . . . 535Setting Up a Palette for Hatches . . . . . . . . . . . . . . . . . . . . . . . . . . . . . . 537Creating a Palette for Commands . . . . . . . . . . . . . . . . . . . . . . . . . . . . . 539
If You Would Like More Practice . . . . . . . . . . . . . . . . . . . . . . . . . . . . . . . . 540Creating the Hatch Patterns for the Other Elevations . . . . . . . . . . . . . . 541Creating Your Hatch Palette . . . . . . . . . . . . . . . . . . . . . . . . . . . . . . . . . 543
CHAPTER 12 Dimensioning a Drawing 545
Introducing Dimension Styles . . . . . . . . . . . . . . . . . . . . . . . . . . . . . . . . . . 546Making a New Dimension Style . . . . . . . . . . . . . . . . . . . . . . . . . . . . . . . 546
Placing Dimensions on the Drawing . . . . . . . . . . . . . . . . . . . . . . . . . . . . . 565Placing Horizontal Dimensions . . . . . . . . . . . . . . . . . . . . . . . . . . . . . . . 565
Using Other Types of Dimensions . . . . . . . . . . . . . . . . . . . . . . . . . . . . . . . . 573Using Radial Dimensions . . . . . . . . . . . . . . . . . . . . . . . . . . . . . . . . . . . . 574Using Aligned and Angular Dimensions . . . . . . . . . . . . . . . . . . . . . . . . . 578Using Leader Lines . . . . . . . . . . . . . . . . . . . . . . . . . . . . . . . . . . . . . . . . . 582
Modifying Dimensions . . . . . . . . . . . . . . . . . . . . . . . . . . . . . . . . . . . . . . . . 586Modifying Dimension Text . . . . . . . . . . . . . . . . . . . . . . . . . . . . . . . . . . . 587Using Dimension Overrides . . . . . . . . . . . . . . . . . . . . . . . . . . . . . . . . . . 590Dimensioning Short Distances . . . . . . . . . . . . . . . . . . . . . . . . . . . . . . . 592
If You Would Like More Practice . . . . . . . . . . . . . . . . . . . . . . . . . . . . . . . . 595
C o n t e n t s x v
438688ffirst.qxd 4/23/09 8:26 PM Page xv

Dimensioning the Garage Addition . . . . . . . . . . . . . . . . . . . . . . . . . . . . 595Dimensioning to a Centerline . . . . . . . . . . . . . . . . . . . . . . . . . . . . . . . . 596Doing Other Exercises . . . . . . . . . . . . . . . . . . . . . . . . . . . . . . . . . . . . . . 599
CHAPTER 13 Managing External References 601
Drawing a Site Plan . . . . . . . . . . . . . . . . . . . . . . . . . . . . . . . . . . . . . . . . . . 602Using Surveyor’s Units . . . . . . . . . . . . . . . . . . . . . . . . . . . . . . . . . . . . . . 604Drawing the Driveway . . . . . . . . . . . . . . . . . . . . . . . . . . . . . . . . . . . . . . 607
Setting Up an External Reference . . . . . . . . . . . . . . . . . . . . . . . . . . . . . . . . 614Using the External References Palette . . . . . . . . . . . . . . . . . . . . . . . . . . 614Moving and Rotating an Xref . . . . . . . . . . . . . . . . . . . . . . . . . . . . . . . . . 619
Modifying an Xref Drawing . . . . . . . . . . . . . . . . . . . . . . . . . . . . . . . . . . . . . 620Modifying an Xref by Making It the Current Drawing . . . . . . . . . . . . . . 620Modifying an Xref from Within the Host Drawing . . . . . . . . . . . . . . . . . 623Adding an Image to a Drawing . . . . . . . . . . . . . . . . . . . . . . . . . . . . . . . . 627
Putting Xrefs to Use . . . . . . . . . . . . . . . . . . . . . . . . . . . . . . . . . . . . . . . . . . 629Exploring Additional Xref Features . . . . . . . . . . . . . . . . . . . . . . . . . . . . . . 631
Setting the Xref Path . . . . . . . . . . . . . . . . . . . . . . . . . . . . . . . . . . . . . . . 631Binding Xrefs . . . . . . . . . . . . . . . . . . . . . . . . . . . . . . . . . . . . . . . . . . . . . . . 633Exploring Other Xref Features . . . . . . . . . . . . . . . . . . . . . . . . . . . . . . . . . . 635If You Would Like More Practice . . . . . . . . . . . . . . . . . . . . . . . . . . . . . . . . 636
CHAPTER 14 Using Layouts to Set Up a Print 637
Setting the Layout Parameters . . . . . . . . . . . . . . . . . . . . . . . . . . . . . . . 642Creating the Paper Space Viewport . . . . . . . . . . . . . . . . . . . . . . . . . . . . 647Moving the Border to the Layout . . . . . . . . . . . . . . . . . . . . . . . . . . . . . . 650Setting the Viewport Scale . . . . . . . . . . . . . . . . . . . . . . . . . . . . . . . . . . . 652Copying the Layouts . . . . . . . . . . . . . . . . . . . . . . . . . . . . . . . . . . . . . . . 654
Adjusting a Viewport’s Contents . . . . . . . . . . . . . . . . . . . . . . . . . . . . . . . . . 657Setting the Linetype Scale . . . . . . . . . . . . . . . . . . . . . . . . . . . . . . . . . . . 660Adjusting the Other Viewports . . . . . . . . . . . . . . . . . . . . . . . . . . . . . . . . 661Setting Up the Site Plan Viewport . . . . . . . . . . . . . . . . . . . . . . . . . . . . . 668Locking and Turning Viewports Off . . . . . . . . . . . . . . . . . . . . . . . . . . . . 672
If You Would Like More Practice . . . . . . . . . . . . . . . . . . . . . . . . . . . . . . . . 675
C o n t e n t sx v i
438688ffirst.qxd 4/23/09 8:26 PM Page xvi

CHAPTER 15 Printing an AutoCAD Drawing 677
Using the Plot Dialog Box . . . . . . . . . . . . . . . . . . . . . . . . . . . . . . . . . . . . . . 678Printer/Plotter . . . . . . . . . . . . . . . . . . . . . . . . . . . . . . . . . . . . . . . . . . . . 681Paper Size and Number of Copies . . . . . . . . . . . . . . . . . . . . . . . . . . . . . 681Plot Area . . . . . . . . . . . . . . . . . . . . . . . . . . . . . . . . . . . . . . . . . . . . . . . . 681Plot Scale . . . . . . . . . . . . . . . . . . . . . . . . . . . . . . . . . . . . . . . . . . . . . . . . 687Plot Offset and Plot Options . . . . . . . . . . . . . . . . . . . . . . . . . . . . . . . . . . 688The Expanded Plot Dialog Box . . . . . . . . . . . . . . . . . . . . . . . . . . . . . . . . 690
Printing a Drawing . . . . . . . . . . . . . . . . . . . . . . . . . . . . . . . . . . . . . . . . . . . 691Determining Lineweights for a Drawing . . . . . . . . . . . . . . . . . . . . . . . . 691Setting Other Properties of Layers . . . . . . . . . . . . . . . . . . . . . . . . . . . . . 692Setting Up the Other Parameters for the Print . . . . . . . . . . . . . . . . . . . 692Previewing a Print . . . . . . . . . . . . . . . . . . . . . . . . . . . . . . . . . . . . . . . . . 692
Printing a Drawing Using Layouts . . . . . . . . . . . . . . . . . . . . . . . . . . . . . . . 692Printing a Drawing with Multiple Viewports . . . . . . . . . . . . . . . . . . . . . 692Publishing Multiple Layouts . . . . . . . . . . . . . . . . . . . . . . . . . . . . . . . . . 692
A Few Words about Plot Styles . . . . . . . . . . . . . . . . . . . . . . . . . . . . . . . . . . 692Introducing Plot-Style Table Files . . . . . . . . . . . . . . . . . . . . . . . . . . . . . 692
CHAPTER 16 Creating 3D Geometry 715
Modeling in 3D . . . . . . . . . . . . . . . . . . . . . . . . . . . . . . . . . . . . . . . . . . . . . . 716Setting Up a 3D Workspace . . . . . . . . . . . . . . . . . . . . . . . . . . . . . . . . . . 716Making the Walls . . . . . . . . . . . . . . . . . . . . . . . . . . . . . . . . . . . . . . . . . . 723Creating the Door and Window Block-Outs . . . . . . . . . . . . . . . . . . . . . . 727Moving and Rotating in 3D . . . . . . . . . . . . . . . . . . . . . . . . . . . . . . . . . . 732Cutting the Openings . . . . . . . . . . . . . . . . . . . . . . . . . . . . . . . . . . . . . . . 734
Creating the Floor, Foundation, and Thresholds . . . . . . . . . . . . . . . . . . . . 736Creating the Foundation and Supports . . . . . . . . . . . . . . . . . . . . . . . . . 738Building the Windows . . . . . . . . . . . . . . . . . . . . . . . . . . . . . . . . . . . . . . 739Navigating with the ViewCube . . . . . . . . . . . . . . . . . . . . . . . . . . . . . . . . 754Building the Decks . . . . . . . . . . . . . . . . . . . . . . . . . . . . . . . . . . . . . . . . . 759Putting a Roof on the Cabin . . . . . . . . . . . . . . . . . . . . . . . . . . . . . . . . . 774
Getting Further Directions in 3D . . . . . . . . . . . . . . . . . . . . . . . . . . . . . . . . 785Using Other Solids Modeling Tools . . . . . . . . . . . . . . . . . . . . . . . . . . . . 785Using Surface-Modeling Tools . . . . . . . . . . . . . . . . . . . . . . . . . . . . . . . . 788
C o n t e n t s x v i i
438688ffirst.qxd 4/23/09 8:26 PM Page xvii

CHAPTER 17 Rendering and Materials 791
Creating Cameras to Reproduce Views . . . . . . . . . . . . . . . . . . . . . . . . . . . . 792Using the Loft Tool . . . . . . . . . . . . . . . . . . . . . . . . . . . . . . . . . . . . . . . . 792Creating the Cameras . . . . . . . . . . . . . . . . . . . . . . . . . . . . . . . . . . . . . . 797
Creating a Lighting Scheme . . . . . . . . . . . . . . . . . . . . . . . . . . . . . . . . . . . . 801Creating a Light Source . . . . . . . . . . . . . . . . . . . . . . . . . . . . . . . . . . . . . 801Enabling Shadows . . . . . . . . . . . . . . . . . . . . . . . . . . . . . . . . . . . . . . . . . 805The First Render . . . . . . . . . . . . . . . . . . . . . . . . . . . . . . . . . . . . . . . . . . 806Controlling the Background of the Rendering . . . . . . . . . . . . . . . . . . . . 811
Adding Materials . . . . . . . . . . . . . . . . . . . . . . . . . . . . . . . . . . . . . . . . . . . . . 813Adjusting the Material Mapping . . . . . . . . . . . . . . . . . . . . . . . . . . . . . . . 817Rendering to a File . . . . . . . . . . . . . . . . . . . . . . . . . . . . . . . . . . . . . . . . 823
Glossary 827
Index 842
C o n t e n t sx v i i i
438688ffirst.qxd 4/23/09 8:26 PM Page xviii

INTRODUCTION
This book was born of the need for a simple, yet engaging tutorial that wouldhelp beginners step into the world of AutoCAD or AutoCAD LT withoutfeeling intimidated. That tutorial has evolved over the years into a fullintroduction to the ways in which architects and civil and structural engi-
neers use AutoCAD to increase their efficiency and ability to produce state-of-the-art computerized production drawings and designs.
Because AutoCAD and AutoCAD LT are so similar, it makes sense to cover thebasics of both programs in one book. For most of the book, the word AutoCADstands for both AutoCAD and AutoCAD LT.
When you come to a section of a chapter that applies to AutoCAD only,the icon shown here is displayed in the margin to alert you. When appro-
priate, extra information for AutoCAD LT users is provided to give you aworkaround or otherwise keep you in step with the tutorial.
The last two chapters, which are an introduction to drawing in 3D, apply onlyto AutoCAD, because AutoCAD LT doesn’t have AutoCAD’s 3D commands andfeatures. But LT users can be assured that LT is very much the same program asAutoCAD, with only minor differences. You’ll be prompted when those differ-ences, most of which are 3D features, come along.
This book is directed toward AutoCAD and AutoCAD LT novices—users whoknow how to use a computer and perform basic file-managing tasks, such as cre-ating new folders and saving and moving files, but who know nothing or littleabout AutoCAD or LT (as I’ll call AutoCAD LT throughout the book). If you’renew to the construction and design professions, this book will be an excellentcompanion as you learn AutoCAD. If you’re already practicing in those fields,you’ll immediately be able to apply the skills you’ll pick up from this book toreal-world projects. The exercises have been successfully used to train architects,engineers, and contractors, as well as college and high school students, in thebasics of AutoCAD.
For those of you in other trades and professions, the project that runs throughthe book—drawing a small cabin—has been kept simple so that it doesn’trequire special training in architecture or construction. Also, most chaptershave additional information and exercises specifically designed for non-AECusers. Anyone wanting to learn AutoCAD will find this book helpful.
438688flast.qxd 4/23/09 8:42 PM Page xix
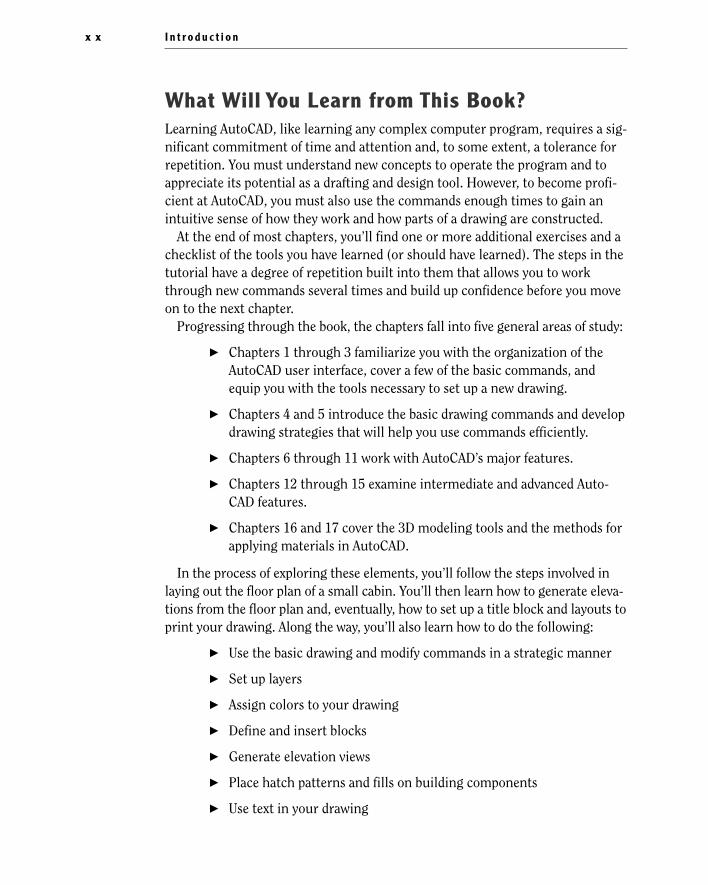
What Will You Learn from This Book?Learning AutoCAD, like learning any complex computer program, requires a sig-nificant commitment of time and attention and, to some extent, a tolerance forrepetition. You must understand new concepts to operate the program and toappreciate its potential as a drafting and design tool. However, to become profi-cient at AutoCAD, you must also use the commands enough times to gain anintuitive sense of how they work and how parts of a drawing are constructed.
At the end of most chapters, you’ll find one or more additional exercises and achecklist of the tools you have learned (or should have learned). The steps in thetutorial have a degree of repetition built into them that allows you to workthrough new commands several times and build up confidence before you moveon to the next chapter.
Progressing through the book, the chapters fall into five general areas of study:
� Chapters 1 through 3 familiarize you with the organization of theAutoCAD user interface, cover a few of the basic commands, andequip you with the tools necessary to set up a new drawing.
� Chapters 4 and 5 introduce the basic drawing commands and developdrawing strategies that will help you use commands efficiently.
� Chapters 6 through 11 work with AutoCAD’s major features.
� Chapters 12 through 15 examine intermediate and advanced Auto-CAD features.
� Chapters 16 and 17 cover the 3D modeling tools and the methods forapplying materials in AutoCAD.
In the process of exploring these elements, you’ll follow the steps involved inlaying out the floor plan of a small cabin. You’ll then learn how to generate eleva-tions from the floor plan and, eventually, how to set up a title block and layouts toprint your drawing. Along the way, you’ll also learn how to do the following:
� Use the basic drawing and modify commands in a strategic manner
� Set up layers
� Assign colors to your drawing
� Define and insert blocks
� Generate elevation views
� Place hatch patterns and fills on building components
� Use text in your drawing
I n t r o d u c t i o nx x
438688flast.qxd 4/23/09 8:42 PM Page xx

Chapters in the latter part of the book touch on more advanced features ofAutoCAD, including:
� Dimensioning the floor plan
� Drawing a site plan
� Using external references
� Setting up a drawing for printing with layouts
� Making a print of your drawing
� Working in 3D (for AutoCAD users)
All these features are taught using the cabin as a continuing project. As a result,you’ll build a set of drawings that document your progress throughout the project.You can use these drawings later as reference material if you need to refresh yourmemory with material covering a specific skill.
At the end of the book is a glossary of terms that are used in the book and arerelated to AutoCAD and building design. This is followed by an index.
Files on the WebsiteIf you’re already somewhat familiar with AutoCAD and you’re reading only someof the chapters, or if you want to check your work on the cabin against the bookat different stages, you can pull accompanying files from this book’s page onWiley’s website at www.sybex.com/go/autocad2010ner. Click the Resources &Downloads button on that page.
Hints for SuccessBecause this book is essentially a step-by-step tutorial, it has a common sideeffect with tutorials of this type. After you finish a chapter and see that you haveprogressed further through the cabin project, you may wonder exactly what youjust did and whether you could do it again without the help of the step-by-stepinstructions.
This feeling is a natural result of this type of learning tool, and you can do acouple of things to get beyond it:
� You can work through the chapter again. Doing so may seem tedious,but it will help you draw faster. You’ll be able to accomplish the sametask in half the time it took you to do it the first time. If you do a chap-ter a third time, you’ll halve your time again. Each time you repeat achapter, you can skip more and more of the explicit instructions, andeventually you’ll be able to execute the commands and finish the
I n t r o d u c t i o n x x i
438688flast.qxd 4/23/09 8:42 PM Page xxi

chapter by just looking at the figures and glancing at the text. Inmany ways, this process is like learning a musical instrument. Youmust go slowly at first, but over time and through practice, your pacewill pick up.
� Another suggestion for honing your skills is to follow the course ofthe book but apply the steps to a different project. You might drawyour own living space or design a new one. If you have a real-lifedesign project that isn’t too complex, that’s even better. Your chancesfor success in learning AutoCAD, or any computer program, aregreatly increased when you’re highly motivated, and a real project ofan appropriate size can be the perfect motivator.
Ready, Set…When I started learning AutoCAD about 19 years ago, I experienced a level offrustration that I never thought I was capable of feeling. When I finally got overthe hump and began feeling that I could successfully draw with this programafter all, I told myself that I would someday figure out a way to help others getpast their initial frustration. That was the primary motivating force for my writ-ing this book. I hope it works for you and that you too get some enjoyment whilelearning AutoCAD. As the title says, there is “no experience required”—only aninterest in the subject and a willingness to learn!
I n t r o d u c t i o nx x i i
438688flast.qxd 4/23/09 8:42 PM Page xxii

CHAPTER 1
Getting to KnowAutoCAD� Opening a new drawing
� Getting familiar with the AutoCAD and AutoCAD LTgraphics windows
� Modifying the display
� Displaying and arranging AutoCAD tools
4386886c01.qxd 4/23/09 8:43 PM Page 1
Your introduction to AutoCAD and AutoCAD LT begins with a tour of theuser interfaces of the two programs. In this chapter, you’ll also learn howto use some tools that help you control their appearance and how to findand start commands. For the material covered in this chapter, the two
applications are almost identical in appearance. Therefore, as you tour AutoCAD,I’ll point out any differences between AutoCAD and AutoCAD LT. In general, LTis a 2D program, so it doesn’t have most of the 3D features that come with Auto-CAD, such as solids modeling and rendering. The AutoLISP programming lan-guage found in AutoCAD is also absent from LT, as is the Action Recorder. Theother differences are minor. As mentioned in this book’s introduction, when Isay AutoCAD, I mean both AutoCAD and AutoCAD LT. I’ll also specifically refer toAutoCAD LT as LT throughout this chapter and the rest of the book. StartingAutoCAD is the first task at hand.
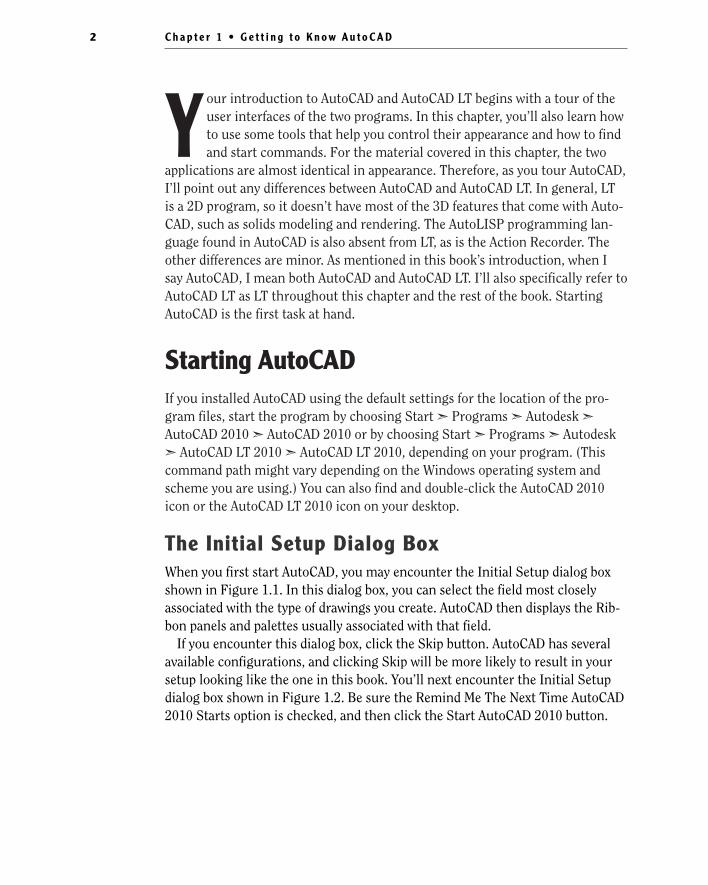
Starting AutoCADIf you installed AutoCAD using the default settings for the location of the pro-gram files, start the program by choosing Start ➣ Programs ➣ Autodesk ➣AutoCAD 2010 ➣ AutoCAD 2010 or by choosing Start ➣ Programs ➣ Autodesk➣ AutoCAD LT 2010 ➣ AutoCAD LT 2010, depending on your program. (Thiscommand path might vary depending on the Windows operating system andscheme you are using.) You can also find and double-click the AutoCAD 2010icon or the AutoCAD LT 2010 icon on your desktop.
The Initial Setup Dialog BoxWhen you first start AutoCAD, you may encounter the Initial Setup dialog boxshown in Figure 1.1. In this dialog box, you can select the field most closelyassociated with the type of drawings you create. AutoCAD then displays the Rib-bon panels and palettes usually associated with that field.
If you encounter this dialog box, click the Skip button. AutoCAD has severalavailable configurations, and clicking Skip will be more likely to result in yoursetup looking like the one in this book. You’ll next encounter the Initial Setupdialog box shown in Figure 1.2. Be sure the Remind Me The Next Time AutoCAD2010 Starts option is checked, and then click the Start AutoCAD 2010 button.
C h a p t e r 1 • G e t t i n g t o K n o w A u t o C A D2
4386886c01.qxd 4/23/09 8:43 PM Page 2

F I G U R E 1 . 1 : The first Initial Setup dialog box
F I G U R E 1 . 2 : The second Initial Setup dialog box
S t a r t i n g A u t o C A D 3
4386886c01.qxd 4/23/09 8:44 PM Page 3

ACCESS ING THE IN IT IAL SETUP DIALOG BOXES
To access the Initial Setup dialog boxes after the program has started, enterop↵ to open the Options dialog box, click the User Preferences tab, andthen click the Initial Setup button.
Exploring the New Features WorkshopThe New Features Workshop welcome screen opens when you first startAutoCAD and leads to several animated demonstrations and explanations
of the new features included in the latest release of AutoCAD (see Figure 1.3).This is a quick and easy way to see how AutoCAD 2010 has improved over Auto-CAD 2009 and which tools you can use to augment any skills you already have.Choosing Maybe Later on the left side causes the dialog box to reappear everytime you start AutoCAD. Choosing the No, Don’t Show This To Me Again optiondismisses the dialog box indefinitely. If you choose that option, you must thenaccess the New Features Workshop through the Help button on the right end ofthe AutoCAD title bar.
C h a p t e r 1 • G e t t i n g t o K n o w A u t o C A D4
4386886c01.qxd 4/23/09 8:44 PM Page 4

F I G U R E 1 . 3 : The AutoCAD welcome screen provides access to the New Features Workshop.
Selecting the Yes radio button on the left side of the dialog box opens the NewFeatures Workshop dialog box (see Figure 1.4). Here you navigate to and selectthe feature you want to investigate in the left pane and observe the selection inthe right pane. The drop-down list in the upper-left corner provides access to theNew Features Workshops for other Autodesk products installed on your system.
F I G U R E 1 . 4 : The New Features Workshop dialog box
S t a r t i n g A u t o C A D 5
4386886c01.qxd 4/23/09 8:44 PM Page 5

The Customer Involvement ProgramNearly all the recent releases of Autodesk products include the opportunity toparticipate in a customer involvement program (CIP). The CIP is designed tocollect nonpersonal information about your Autodesk products and computersystem to help the product programmers and developers design software thatbest meets your needs. If you haven’t yet agreed or declined to participate, whenyou first start AutoCAD the Customer Involvement Program dialog box (Fig-ure 1.5) might prompt you to join.
F I G U R E 1 . 5 : The Customer Involvement Program dialog box
Participation is strictly voluntary and, if you choose to participate, AutoCADwill periodically send a small file to Autodesk containing information such asyour software name and version, the commands you use, and your system con-figuration information. An Internet connection is required, and you must ensurethat your firewall settings don’t prevent the information from being transmitted.
C h a p t e r 1 • G e t t i n g t o K n o w A u t o C A D6
4386886c01.qxd 4/23/09 8:44 PM Page 6


