24
Fast Track Duo ™ Guide

Fast Track Duo™ Guide
Legal Notices© 2013 Avid Technology, Inc., (“Avid”), all rights reserved. This guide may not be duplicated in whole or in part without the written consent of Avid.
Avid, the Avid logo, Fast Track Duo, and Pro Tools are either trademarks or registered trademarks of Avid Technology, Inc. All other trademarks contained herein are the property of their respective owners.
This product may be protected by one or more U.S. and non-U.S. patents. Details are available at www.avid.com/patents.
Product features, specifications, system requirements, and availability are subject to change without notice.
Guide Part Number 9329-65276-00 REV A 02/13
Documentation FeedbackAt Avid, we are always looking for ways to improve our documentation. If you have comments, corrections, or suggestions regarding our documentation, email us at [email protected].
Chapter 1. Introduction to Fast Track Duo . . . . . . . . . . . . . . . . . . . . . . . . . . . . . . . . . . . . . . . . . 1Fast Track Duo Features . . . . . . . . . . . . . . . . . . . . . . . . . . . . . . . . . . . . . . . . . . . . . . . . . . . 1Registration . . . . . . . . . . . . . . . . . . . . . . . . . . . . . . . . . . . . . . . . . . . . . . . . . . . . . . . . . . . . . 2System Requirements and Compatibility . . . . . . . . . . . . . . . . . . . . . . . . . . . . . . . . . . . . . . . . 2Conventions Used in This Guide. . . . . . . . . . . . . . . . . . . . . . . . . . . . . . . . . . . . . . . . . . . . . . 2About www.avid.com . . . . . . . . . . . . . . . . . . . . . . . . . . . . . . . . . . . . . . . . . . . . . . . . . . . . . . 3
Chapter 2. Controls and Connectors . . . . . . . . . . . . . . . . . . . . . . . . . . . . . . . . . . . . . . . . . . . . . . 5Front Panel . . . . . . . . . . . . . . . . . . . . . . . . . . . . . . . . . . . . . . . . . . . . . . . . . . . . . . . . . . . . . 5Back Panel . . . . . . . . . . . . . . . . . . . . . . . . . . . . . . . . . . . . . . . . . . . . . . . . . . . . . . . . . . . . . 7
Chapter 3. Installing Drivers and Making Connections . . . . . . . . . . . . . . . . . . . . . . . . . . . . . . . 9Installing Fast Track Duo Drivers . . . . . . . . . . . . . . . . . . . . . . . . . . . . . . . . . . . . . . . . . . . . . 9Hardware Connections. . . . . . . . . . . . . . . . . . . . . . . . . . . . . . . . . . . . . . . . . . . . . . . . . . . . 10
Chapter 4. Using Fast Track Duo . . . . . . . . . . . . . . . . . . . . . . . . . . . . . . . . . . . . . . . . . . . . . . . . 11Setting the Output Level . . . . . . . . . . . . . . . . . . . . . . . . . . . . . . . . . . . . . . . . . . . . . . . . . . . 11Recording Microphones . . . . . . . . . . . . . . . . . . . . . . . . . . . . . . . . . . . . . . . . . . . . . . . . . . . 11Recording Instruments . . . . . . . . . . . . . . . . . . . . . . . . . . . . . . . . . . . . . . . . . . . . . . . . . . . . 11Setting Your Recording Levels . . . . . . . . . . . . . . . . . . . . . . . . . . . . . . . . . . . . . . . . . . . . . . 11Direct Monitoring . . . . . . . . . . . . . . . . . . . . . . . . . . . . . . . . . . . . . . . . . . . . . . . . . . . . . . . . 12Sample Rate, Buffer Size, and Bit Depth . . . . . . . . . . . . . . . . . . . . . . . . . . . . . . . . . . . . . . . 12
Appendix A. Compliance Information . . . . . . . . . . . . . . . . . . . . . . . . . . . . . . . . . . . . . . . . . . . . 15Environmental Compliance. . . . . . . . . . . . . . . . . . . . . . . . . . . . . . . . . . . . . . . . . . . . . . . . . 15EMC (Electromagnetic Compliance) . . . . . . . . . . . . . . . . . . . . . . . . . . . . . . . . . . . . . . . . . . 16Safety Compliance. . . . . . . . . . . . . . . . . . . . . . . . . . . . . . . . . . . . . . . . . . . . . . . . . . . . . . . 17
Contents
Contents iii

iv
Avid Fast Track Duo User Guide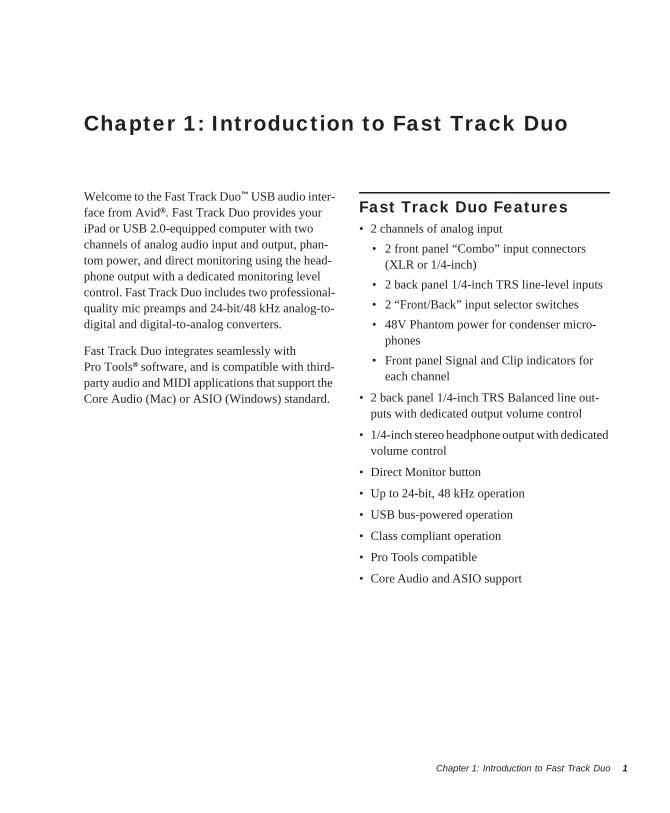
Chapter 1: Introduction to Fast Track Duo
Welcome to the Fast Track Duo™ USB audio inter-face from Avid®. Fast Track Duo provides your iPad or USB 2.0-equipped computer with two channels of analog audio input and output, phan-tom power, and direct monitoring using the head-phone output with a dedicated monitoring level control. Fast Track Duo includes two professional-quality mic preamps and 24-bit/48 kHz analog-to-digital and digital-to-analog converters.
Fast Track Duo integrates seamlessly with Pro Tools® software, and is compatible with third-party audio and MIDI applications that support the Core Audio (Mac) or ASIO (Windows) standard.
Fast Track Duo Features• 2 channels of analog input
• 2 front panel “Combo” input connectors (XLR or 1/4-inch)
• 2 back panel 1/4-inch TRS line-level inputs• 2 “Front/Back” input selector switches• 48V Phantom power for condenser micro-
phones• Front panel Signal and Clip indicators for
each channel
• 2 back panel 1/4-inch TRS Balanced line out-puts with dedicated output volume control
• 1/4-inch stereo headphone output with dedicated volume control
• Direct Monitor button
• Up to 24-bit, 48 kHz operation
• USB bus-powered operation
• Class compliant operation
• Pro Tools compatible
• Core Audio and ASIO support
Chapter 1: Introduction to Fast Track Duo 1
2
RegistrationReview the enclosed Registration Information Card and follow the instructions on it to quickly register your purchase online. This is one of the most important steps you can take as a new user. Registering your purchase is the only way you can be eligible to receive:
• Information regarding technical support
• Future upgrade offers
• Limited warranty on hardware
Hardware Warranty
Your warranty can be found on the Registration Information Card.
System Requirements and CompatibilityFast Track Duo can be used with an Avid-qualified computer running Pro Tools software or third-party Core Audio- or ASIO-compatible software.
Avid can only assure compatibility and provide support for hardware and software it has tested and approved.
For complete system requirements and a list of qualified computers, operating systems, hard drives, and third-party devices, visit:
www.avid.com/compatibility
Avid Fast Track Duo User Guide
Conventions Used in This GuideAll of our guides use the following conventions to indicate menu choices and key commands::
The names of Commands, Options, and Settings that appear on-screen are in a different font.
The following symbols are used to highlight important information:
Convention Action
File > Save Choose Save from the File menu
Control+N Hold down the Control key and press the N key
Control-click Hold down the Control key and click the mouse button
Right-click Click with the right mouse button
User Tips are helpful hints for getting the most from your system.
Important Notices include information that could affect your data or the performance of your system.
Shortcuts show you useful keyboard or mouse shortcuts.
Cross References point to related sections in this guide and other Pro Tools guides.

About www.avid.comThe Avid website (www.avid.com) is your best online source for information to help you get the most out of your Avid audio system. The following are just a few of the services and features available.
Product Registration Register your purchase online.
Support and Downloads Contact Avid Customer Success (technical support); download software updates and the latest online manuals; browse the Compatibility documents for system requirements; search the online Knowledge Base or join the worldwide Avid audio community on the User Conference.
Training and Education Study on your own using courses available online or find out how you can learn in a classroom setting at a certified Pro Tools training center.
Products and Developers Learn about Avid products; download demo software or learn about our Development Partners and their plug-ins, applications, and hardware.
News and Events Get the latest news from Avid or sign up for a product demo.
Chapter 1: Introduction to Fast Track Duo 3

4
Avid Fast Track Duo User Guide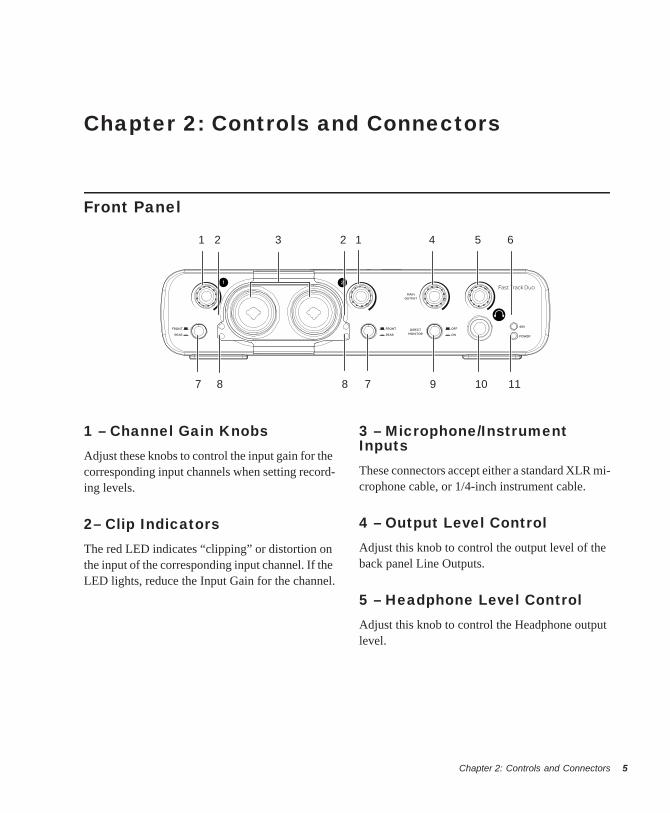
Chapter 2: Controls and Connectors
Front Panel
32 5 6
8
1
7
12 4
78 9 10 11
1 – Channel Gain Knobs Adjust these knobs to control the input gain for the corresponding input channels when setting record-ing levels.
2– Clip IndicatorsThe red LED indicates “clipping” or distortion on the input of the corresponding input channel. If the LED lights, reduce the Input Gain for the channel.
3 – Microphone/Instrument InputsThese connectors accept either a standard XLR mi-crophone cable, or 1/4-inch instrument cable.
4 – Output Level ControlAdjust this knob to control the output level of the back panel Line Outputs.
5 – Headphone Level ControlAdjust this knob to control the Headphone output level.
Chapter 2: Controls and Connectors 5
6
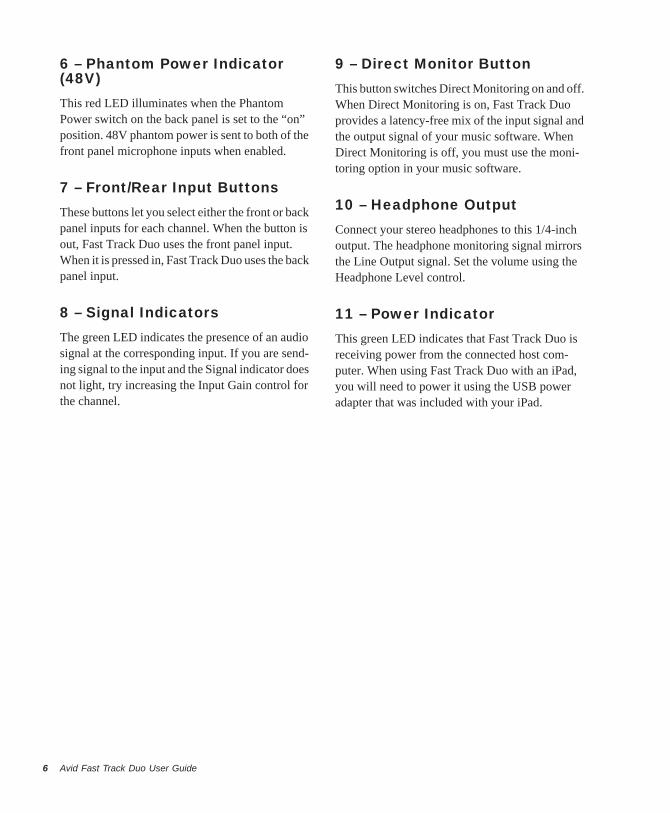
6 – Phantom Power Indicator (48V)This red LED illuminates when the Phantom Power switch on the back panel is set to the “on” position. 48V phantom power is sent to both of the front panel microphone inputs when enabled.
7 – Front/Rear Input ButtonsThese buttons let you select either the front or back panel inputs for each channel. When the button is out, Fast Track Duo uses the front panel input. When it is pressed in, Fast Track Duo uses the back panel input.
8 – Signal IndicatorsThe green LED indicates the presence of an audio signal at the corresponding input. If you are send-ing signal to the input and the Signal indicator does not light, try increasing the Input Gain control for the channel.
Avid Fast Track Duo User Guide
9 – Direct Monitor ButtonThis button switches Direct Monitoring on and off. When Direct Monitoring is on, Fast Track Duo provides a latency-free mix of the input signal and the output signal of your music software. When Direct Monitoring is off, you must use the moni-toring option in your music software.
10 – Headphone OutputConnect your stereo headphones to this 1/4-inch output. The headphone monitoring signal mirrors the Line Output signal. Set the volume using the Headphone Level control.
11 – Power IndicatorThis green LED indicates that Fast Track Duo is receiving power from the connected host com-puter. When using Fast Track Duo with an iPad, you will need to power it using the USB power adapter that was included with your iPad.
Back Panel
1 2 3 4 5 6
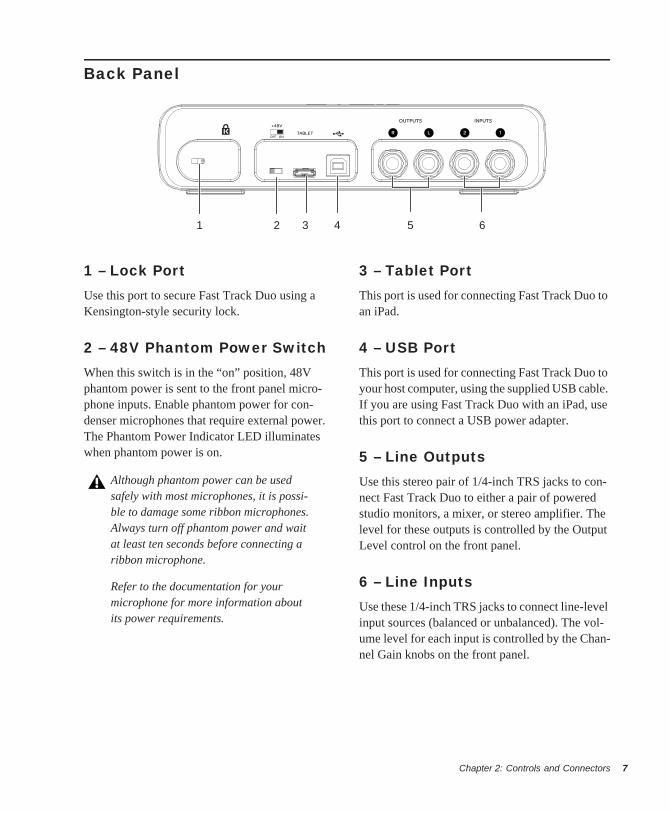
1 – Lock PortUse this port to secure Fast Track Duo using a Kensington-style security lock.
2 – 48V Phantom Power SwitchWhen this switch is in the “on” position, 48V phantom power is sent to the front panel micro-phone inputs. Enable phantom power for con-denser microphones that require external power. The Phantom Power Indicator LED illuminates when phantom power is on.
Although phantom power can be used safely with most microphones, it is possi-ble to damage some ribbon microphones. Always turn off phantom power and wait at least ten seconds before connecting a ribbon microphone.
Refer to the documentation for your microphone for more information about its power requirements.
3 – Tablet PortThis port is used for connecting Fast Track Duo to an iPad.
4 – USB PortThis port is used for connecting Fast Track Duo to your host computer, using the supplied USB cable. If you are using Fast Track Duo with an iPad, use this port to connect a USB power adapter.
5 – Line OutputsUse this stereo pair of 1/4-inch TRS jacks to con-nect Fast Track Duo to either a pair of powered studio monitors, a mixer, or stereo amplifier. The level for these outputs is controlled by the Output Level control on the front panel.
6 – Line Inputs Use these 1/4-inch TRS jacks to connect line-level input sources (balanced or unbalanced). The vol-ume level for each input is controlled by the Chan-nel Gain knobs on the front panel.
Chapter 2: Controls and Connectors 7

8
Avid Fast Track Duo User Guide
Chapter 3: Installing Drivers and Making Connections
Installing Fast Track Duo Drivers
Mac OS XFast Track Duo is a class-compliant device for Mac OS X, so no drivers are required.
iOSFast Track Duo is an iOS-compliant device for iPad, so no drivers are required.
Windows
To install the Fast Track Duo driver:
1 Ensure that Fast Track Duo is not connected to your computer.
2 Download the Fast Track Duo driver from www.avid.com/drivers.
3 Locate and double-click Install Avid Fast Track Duo.exe.
4 Follow the on-screen instructions.
5 Once the installation is complete and your computer has been restarted, connect Fast Track Duo to any available USB port on your computer.
6 When the Found New Hardware Wizard dialog appears, select “Install the software automati-cally” and click “Next.”
7 Click “Finish” once the software has been installed.
Do not start this procedure with your Fast Track Duo connected to your computer.
You may be notified that the driver being in-stalled has not passed Windows Logo testing, or asked whether the program you wish to run is a trusted application. Click “Install.”
Chapter 3: Installing Drivers and Making Connections 9
10
Hardware Connections
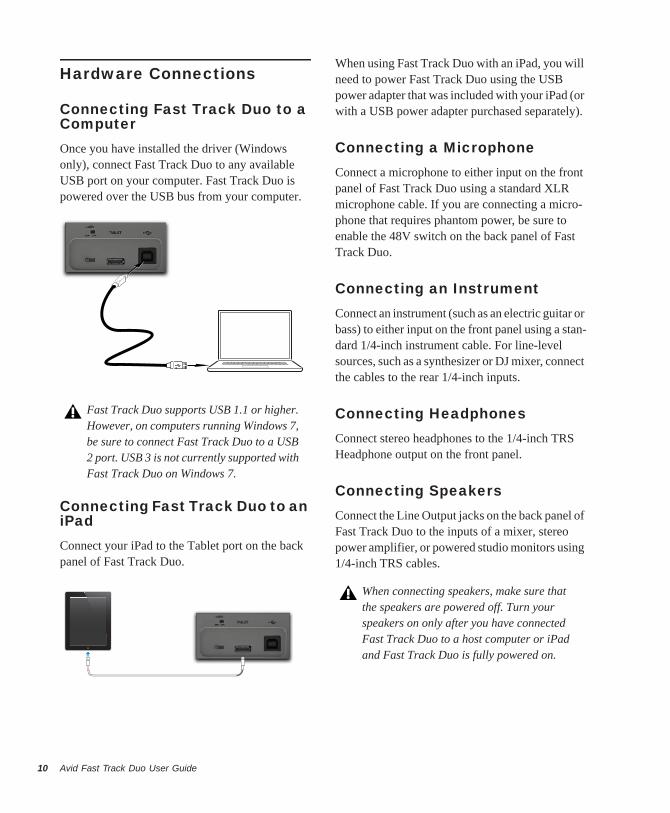
Connecting Fast Track Duo to a ComputerOnce you have installed the driver (Windows only), connect Fast Track Duo to any available USB port on your computer. Fast Track Duo is powered over the USB bus from your computer.
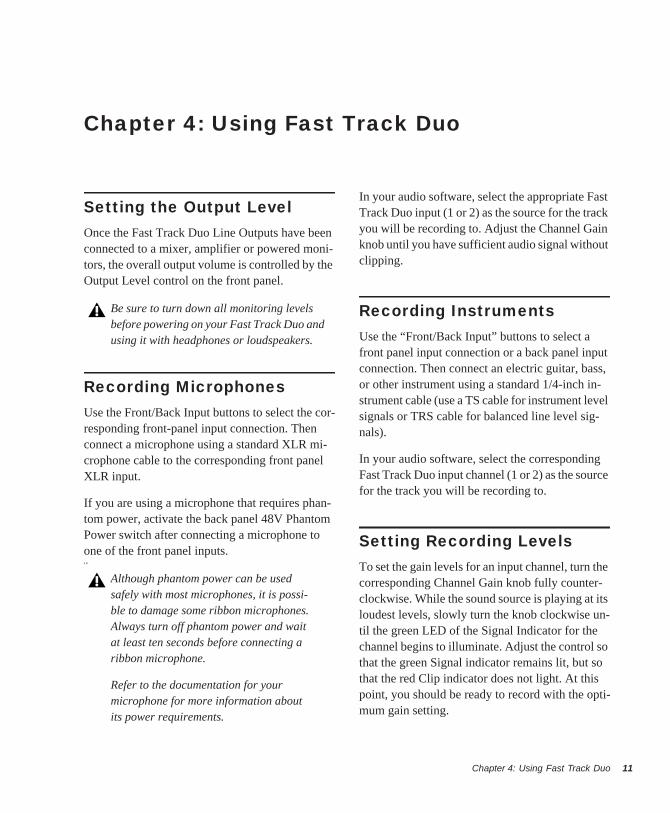
Connecting Fast Track Duo to an iPadConnect your iPad to the Tablet port on the back panel of Fast Track Duo.
Fast Track Duo supports USB 1.1 or higher. However, on computers running Windows 7, be sure to connect Fast Track Duo to a USB 2 port. USB 3 is not currently supported with Fast Track Duo on Windows 7.
Avid Fast Track Duo User Guide
When using Fast Track Duo with an iPad, you will need to power Fast Track Duo using the USB power adapter that was included with your iPad (or with a USB power adapter purchased separately).
Connecting a MicrophoneConnect a microphone to either input on the front panel of Fast Track Duo using a standard XLR microphone cable. If you are connecting a micro-phone that requires phantom power, be sure to enable the 48V switch on the back panel of Fast Track Duo.
Connecting an InstrumentConnect an instrument (such as an electric guitar or bass) to either input on the front panel using a stan-dard 1/4-inch instrument cable. For line-level sources, such as a synthesizer or DJ mixer, connect the cables to the rear 1/4-inch inputs.
Connecting HeadphonesConnect stereo headphones to the 1/4-inch TRS Headphone output on the front panel.
Connecting SpeakersConnect the Line Output jacks on the back panel of Fast Track Duo to the inputs of a mixer, stereo power amplifier, or powered studio monitors using 1/4-inch TRS cables.
When connecting speakers, make sure that the speakers are powered off. Turn your speakers on only after you have connected Fast Track Duo to a host computer or iPad and Fast Track Duo is fully powered on.
Chapter 4: Using Fast Track Duo
Setting the Output LevelOnce the Fast Track Duo Line Outputs have been connected to a mixer, amplifier or powered moni-tors, the overall output volume is controlled by the Output Level control on the front panel.
Recording MicrophonesUse the Front/Back Input buttons to select the cor-responding front-panel input connection. Then connect a microphone using a standard XLR mi-crophone cable to the corresponding front panel XLR input.
If you are using a microphone that requires phan-tom power, activate the back panel 48V Phantom Power switch after connecting a microphone to one of the front panel inputs.k D
Be sure to turn down all monitoring levels before powering on your Fast Track Duo and using it with headphones or loudspeakers.
Although phantom power can be used safely with most microphones, it is possi-ble to damage some ribbon microphones. Always turn off phantom power and wait at least ten seconds before connecting a ribbon microphone.
Refer to the documentation for your microphone for more information about its power requirements.
In your audio software, select the appropriate Fast Track Duo input (1 or 2) as the source for the track you will be recording to. Adjust the Channel Gain knob until you have sufficient audio signal without clipping.
Recording InstrumentsUse the “Front/Back Input” buttons to select a front panel input connection or a back panel input connection. Then connect an electric guitar, bass, or other instrument using a standard 1/4-inch in-strument cable (use a TS cable for instrument level signals or TRS cable for balanced line level sig-nals).
In your audio software, select the corresponding Fast Track Duo input channel (1 or 2) as the source for the track you will be recording to.
Setting Recording LevelsTo set the gain levels for an input channel, turn the corresponding Channel Gain knob fully counter-clockwise. While the sound source is playing at its loudest levels, slowly turn the knob clockwise un-til the green LED of the Signal Indicator for the channel begins to illuminate. Adjust the control so that the green Signal indicator remains lit, but so that the red Clip indicator does not light. At this point, you should be ready to record with the opti-mum gain setting.
Chapter 4: Using Fast Track Duo 11
12
Direct MonitoringWhen recording an audio signal into your audio software, there is often a slight delay before it reaches the outputs of the software and Fast Track Duo. This delay, called latency, is caused by the computer processing required to convert and re-cord audio. Since this delay can be distracting, Fast Track Duo provides a direct monitoring path from the inputs to the outputs, which is activated by pressing the Direct Monitor button.
When Direct Monitoring is enabled, the input sig-nal is mixed with the output signal from your audio software, and routed directly to the Line and Head-phone outputs. This lets you hear the “live” inputs without latency.
The Direct Monitor button has no effect on what is being recorded by your software. When using the Direct Monitor feature, make sure any software monitoring option for direct (or “low latency”) monitoring is disabled. Disabling Low Latency monitoring prevents “double-monitoring” of input audio signals when using the Direct Monitoring feature.
When “double-monitoring” occurs, there will be an increase in volume and an undesirable “phas-ing” sound. For more details about its monitoring function, refer to the documentation for your audio software.
Avid Fast Track Duo User Guide
Sample Rate, Bit Depth, and Buffer SizeFast Track Duo can operate at two sample rates (44.1 kHz or 48 kHz) and two different bit depths (16 bit or 24 bit) to accommodate a variety of proj-ects. You should decide on a sample rate and bit depth for your project before recording, to maxi-mize fidelity and avoid time-consuming format conversions.
Choosing Sample Rate and Bit DepthThe following guidelines should help you choose appropriate sample rate and bit depth settings for your recording:
Music Projects
If the final mix will be played back on CD, or in MP3 format, a 24-bit resolution with a sample rate of 44.1 kHz is recommended.
Video Projects
If the final mix is intended for DVD, film or TV, a 24-bit resolution with a sample rate of 48 kHz is recommended.
The final output file will have to be converted to 16 bit/44.1 kHz for playback on CD and some audio player applications.
It is not possible to raise the fidelity of previously recorded audio by increasing its bit depth or sample rate.
Always use the highest possible settings that are appropriate for your project.
Choosing a Buffer SizeUse the lowest possible buffer size to minimize latency while recording. However, you may want to increase the buffer size for larger mixes with lots of plug-ins to avoid pops and clicks in the audio output.
Configuring Settings
Mac OS X
On Mac OS X, use the Audio MIDI Setup applica-tion, or your audio application preferences or set-tings, to configure the device sample rate, hard-ware buffer size, and bit depth.
iOS
On iOS, use the system preferences for your audio app to configure the device sample rate, hardware buffer size, and bit depth.
Windows
On Windows, use the Avid Fast Track Duo control panel to configure the Sample Rate setting and Buffer Size for the device.
To configure the Fast Track control panel:
1 Choose Start > Control Panel > Fast Track Duo.
2 Select the sample rate (44100 or 48000) from the Sample Rate pop-up menu.
3 Set the buffer size with the Preferred Buffer Size slider.
Chapter 4: Using Fast Track Duo 13

14
Avid Fast Track Duo User Guide
Appendix A: Compliance Information
Environmental Compliance
Disposal of Waste Equipment by Users in the European Union
This symbol on the product or its packaging indicates that this product must not be disposed of with other waste. Instead, it is your responsibility to dispose of your waste equipment by handing it over to a designated collection point for the recycling of waste electrical and electronic equipment. The separate collection and recycling of your waste equipment at the time of disposal will help conserve natural resources and ensure that it is recycled in a manner that protects human health and the environment. For more information about where you can drop off your waste equipment for recycling, please contact your local city recycling office or the dealer from whom you purchased the product.
Proposition 65 Warning
Perchlorate NoticeThis product may contain a lithium coin battery. The State of California requires the following disclosure statement: “Perchlorate Material – special handling may apply, See www.dtsc.ca.gov/hazardouswaste/perchlorate.”
Recycling Notice
This product contains chemicals, including lead, known to the State of California to cause cancer and birth defects or other reproductive harm. Wash hands after handling.
Appendix A: Compliance Information 15
16
EMC (Electromagnetic Compliance)Avid declares that this product complies with the following standards regulating emissions and immunity:• FCC Part 15 Class B• EN 55022 Class B• EN 55024 Class B• AS/NZS CISPR 22 Class B • CISPR 22 Class B
FCC Compliance for United States
Radio and Television InterferenceThis equipment has been tested and found to comply with the limits for a Class B digital device, pursuant to Part 15 of the FCC Rules.
Communication StatementNOTE: This equipment has been tested and found to comply with the limits for a Class B digital device, pursuant to Part 15 of the FCC Rules. These limits are designed to provide reasonable protection against harmful interference in a residential installation. This equipment generates, uses, and can radiate radio frequency energy and, if not installed and used in accordance with the instructions, may cause harmful interference to radio communications. However, there is no guarantee that interference will not occur in a particular installation. If this equipment does cause harmful interference to radio or television reception, which can be determined by turning the equipment off and on, the user is encouraged to try and correct the interference by one or more of the following measures:• Reorient or locate the receiving antenna.• Increase the separation between the equipment and
receiver.• Connect the equipment into an outlet on a circuit
different from that to which the receiver is connected.• Consult the dealer or an experienced radio/TV
technician for help.Any modifications to the unit, unless expressly approved by Avid, could void the user's authority to operate the equipment.
Avid Fast Track Duo User Guide
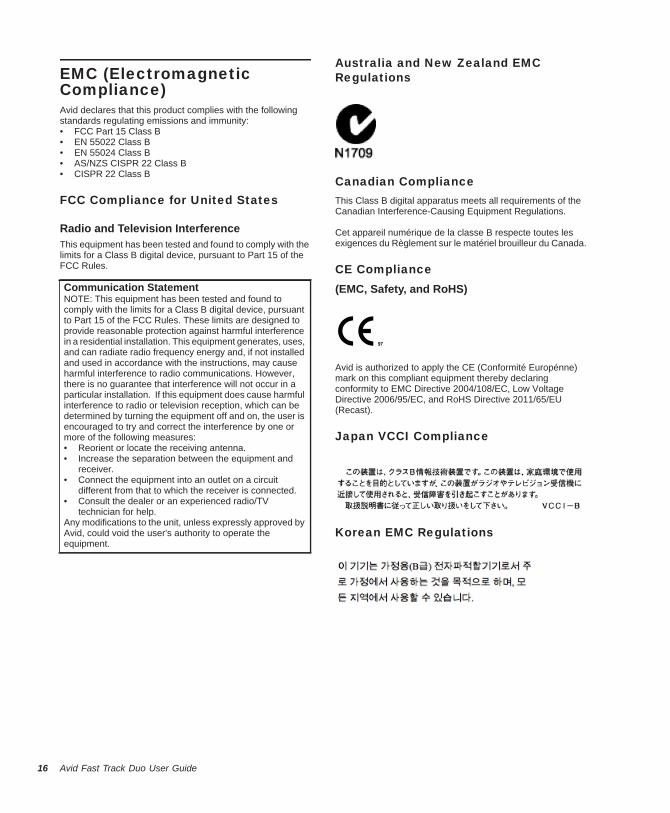
Australia and New Zealand EMC Regulations
Canadian ComplianceThis Class B digital apparatus meets all requirements of the Canadian Interference-Causing Equipment Regulations.
Cet appareil numérique de la classe B respecte toutes les exigences du Règlement sur le matériel brouilleur du Canada.
CE Compliance(EMC, Safety, and RoHS)
Avid is authorized to apply the CE (Conformité Europénne) mark on this compliant equipment thereby declaring conformity to EMC Directive 2004/108/EC, Low Voltage Directive 2006/95/EC, and RoHS Directive 2011/65/EU (Recast).
Japan VCCI Compliance
Korean EMC Regulations
Safety ComplianceThis equipment has been tested to comply with USA and Canadian safety certification in accordance with the specifications of UL Standards: UL 60950-1, 2nd Edition/IEC 60950-1, 2nd Edition and Canadian CAN/CSA C22.2 No. 60950-1-07, 2007, 2nd Edition. Avid Technology Inc. has been authorized to apply the appropriate NRTL mark on its compliant equipment.
Warning
Important Safety Instructions
1) Read these instructions.
2) Keep these instructions.
3) Heed all warnings.
4) Follow all instructions.
5) Do not use this equipment near water.
6) Clean only with dry cloth.
7) Do not block any ventilation openings. Install in accordance with the manufacturer’s instructions.
8) Do not install near any heat sources such as radiators, heat registers, stoves, or other equipment (including amplifiers) that produce heat.
9) Do not defeat the safety purpose of the polarized or grounding-type plug. A polarized plug has two blades with one wider than the other. A grounding type plug has two blades and a third grounding prong. The wide blade or the third prong are provided for your safety. If the provided plug does not fit into your outlet, consult an electrician for replacement of the obsolete outlet.
10) Protect power cords from being walked on or pinched particularly at plugs, convenience receptacles, and the point where they exit from the equipment.
11) Only use attachments/accessories specified by the manufacturer.
12) For products that are not rack-mountable: Use only with a cart, stand, tripod, bracket, or table specified by the manufacturer, or sold with the equipment. When a cart is used, use caution when moving the cart/equipment combination to avoid injury from tip-over.
13) Unplug this equipment during lightning storms or when unused for long periods of time.
14) Refer all servicing to qualified service personnel. Servicing is required when the equipment has been damaged in any way, such as power-supply cord or plug is damaged, liquid has been spilled or objects have fallen into the equipment, the equipment has been exposed to rain or moisture, does not operate normally, or has been dropped.
15) For products that are a Mains powered device: The equipment shall not be exposed to dripping or splashing and no objects filled with liquids (such as vases) shall be placed on the equipment.
Warning! To reduce the risk of fire or electric shock, do not expose this equipment to rain or moisture.
16) For products containing a lithium battery: CAUTION! Danger of explosion if battery is incorrectly replaced. Replace only with the same or equivalent type.
17) The equipment shall be used at a maximum ambient temperature of 40° C.
Appendix A: Compliance Information 17

18
Avid Fast Track Duo User Guide
Avid2001 Junipero Serra Boulevard Daly City, CA 94014-3886 USA
Technical Support (USA)Visit the Online Support Center at www.avid.com/support
Product InformationFor company and product information, visit us on the web at www.avid.com


