22
. . . M A K E Y O U R N E T W O R K S M A R T E R Axis Technical Training Axis Camera Workshop Advanced Level
| Date post: | 02-Jan-2016 |
| Category: |
Documents |
| Upload: | katell-lott |
| View: | 29 times |
| Download: | 2 times |

. . . M A K E Y O U R N E T W O R K S M A R T E R
Axis Technical Training
Axis Camera Workshop
Advanced Level

Session 1
Design of complete surveillance for a given site
•Choose appropriate equipment.
•Calculate Storage, Bandwidth and CPU needs.
•Calculate lens specifications.
•Install the camera on a network.
•Assign an IP Address and verify the setting.
•Adjust lenses.
•Install, configure and test surveillance software.
Optical – Focal Length
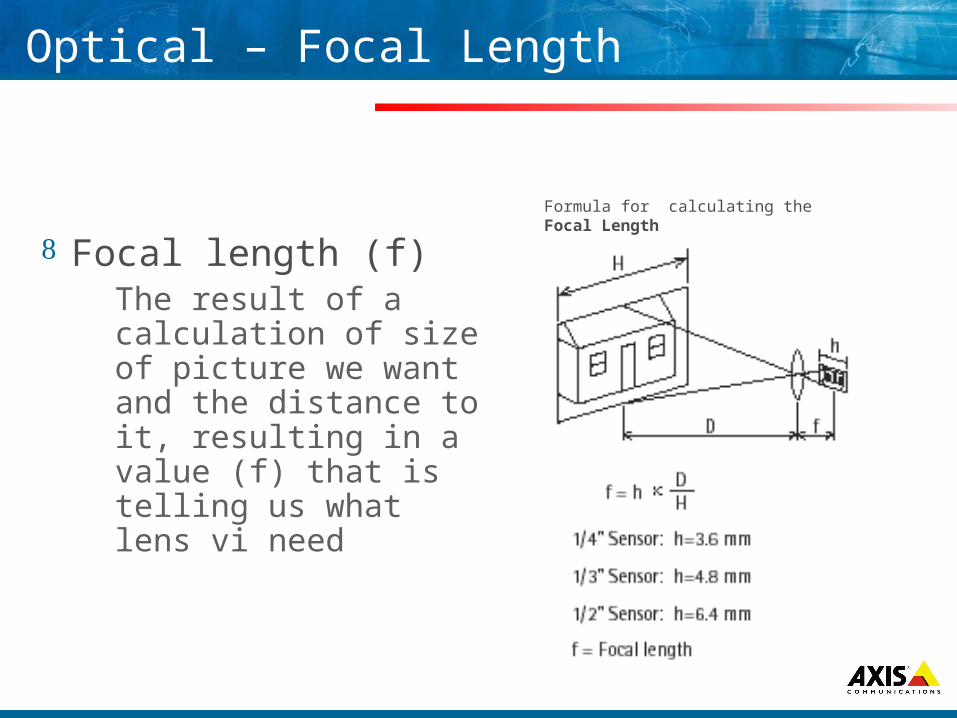
Formula for calculating the Focal Length
Focal length (f) The result of a calculation
of size of picture we want and the distance to it, resulting in a value (f) that is telling us what lens vi need

Optical – Focal Length example
f = h x 1/3” CCD
Distance D=5 m Width H=2 m Calculated lens f=12 mm
D=5m H=8m Calculated lens f=3.0 mm
DH

Mr. ROTAKIN
WWW.CENELEC.ORG Standard EN 0132-7

Rotakin guide-lines
http://www.homeoffice.gov.uk/docs/or_manual.pdf
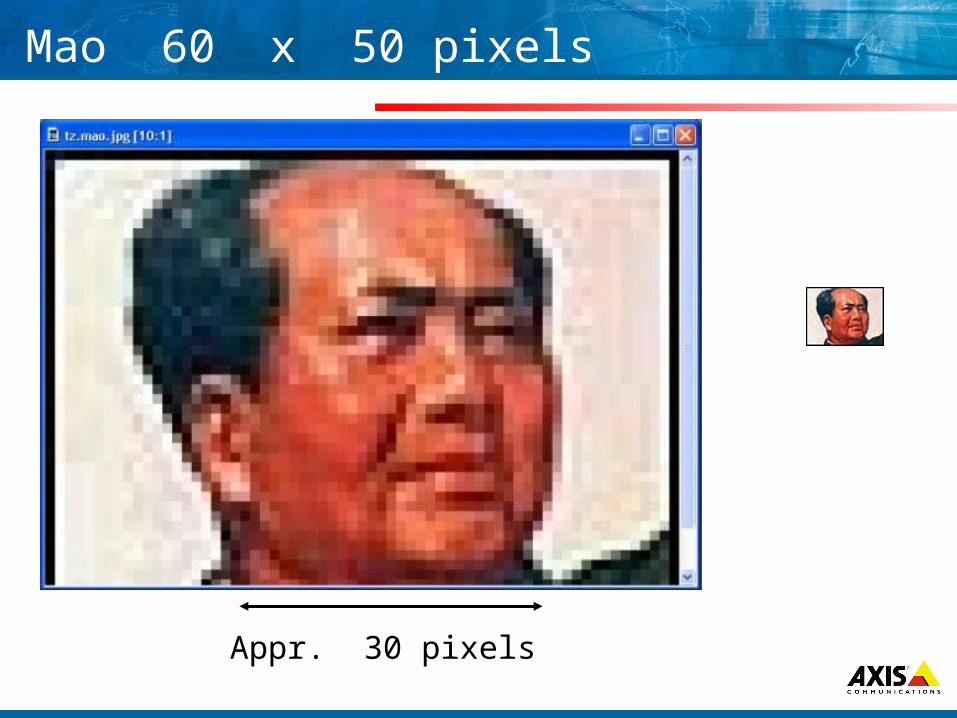
Mao 60 x 50 pixels
Appr. 30 pixels

Compare to Rotakin standard
KayaComputer generated beauty
20% 10%
10%
Rolling’ compared to Rotakin

Licence plate recognition

Character recognition
Appr 70 pixels

Session 2
External Devices, Internet considerations
•Connect and configure Audio accessories and compare sound quality.
•Connect and configure PTZ camera and use it in ACR.
•Connect and configure W-LAN accessories and understand security aspects,measure bandwidth.
•Configure DynDNS router and understand Internet connectivity possibilities
with regards to camera.

Session 3
HTTP commands, Web design
•Understand camera HTTP commands.
•Seek HTTP command in manual and use these.
•Understand HTML structure.
•Make own HTML Web page.
•Construct own camera Web page on Web Server.
•Construct own camera Web page placed in camera.
•HI-HIT Web server

HTTP command in URL
URL address

HTTP command with parameters
? = delimiter to parameters & = delimiter to the next parameter.
Compression = 0 no compressionCompression = 100 max compression

HTTP I/O
Check Input
Activate Output
Note: camera returns status -> web browser get white

HTML commands
http://www.w3.org/MarkUp/Guide/
<html>
<head> <title>New Page 1</title> </head>
<body> your code here </body>
</html>

HTML tags
title>My first HTML document</title>
<h1>An important heading</h1> <h2>A slightly less important heading</h2>
<p>This is a paragraph.</p>
<img src=“axis.jpg" width="200" height="150">
This a link to <a href=“my_page.html">My best page</a>.
<font color="#FF0000">hello in red</font><b> bold </b> <br> = new line

Camera Web page
1. Go to demo
2. Right click on white area
3. Click Source

Camera Web page HTML code
Enter camera IP address
You may change as you wish
Only camera resolution to be given
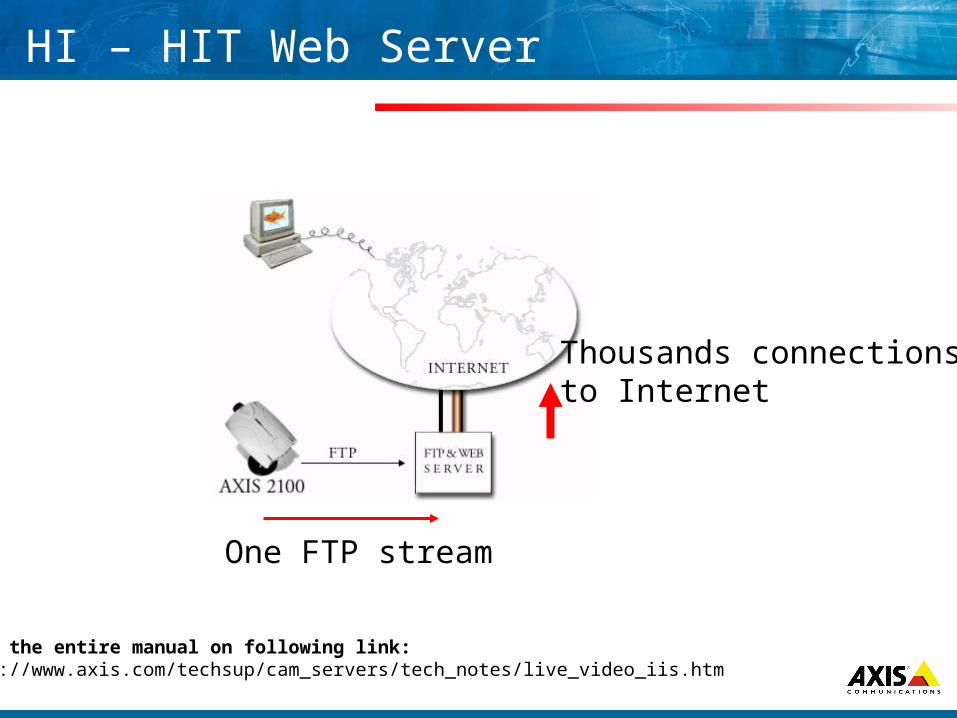
HI – HIT Web Server
One FTP stream
Thousands connectionsto Internet
Read the entire manual on following link:http://www.axis.com/techsup/cam_servers/tech_notes/live_video_iis.htm

HI –HIT configuration
Create the image directory on the Web server.Example: c:\inetpub\ftproot\liveCreate a Web Server alias (virtual directory) and use this as the image path in the Web pageExample: http://[WebServer]/live/
Get the LiveImg.dll and copy it to the "execute" directory in your Web server file tree (typically c:\inetpub\wwwroot\cgi-bin if you are using Microsoft IIS/PWS).
a) Configure Web Server
b) Configure Camera to FTP transfer

HI – HIT modification of Camera stream
Change these Parameters in your HTML code:
path: The image path (i.e. /live/image.jpg).fps | fpm: Frames/second or frames/minute.duration: For how many seconds the images should be pushed to the client.timeout: The image feed stops after timeout seconds if the image has not been updated.
Examples:Deliver 3 images/second during 60 seconds. Stop after30 seconds if the image has not been updated (default parameter values):http://<web_server>/cgi-bin/liveimg.dll?path=/live/image.jpg


