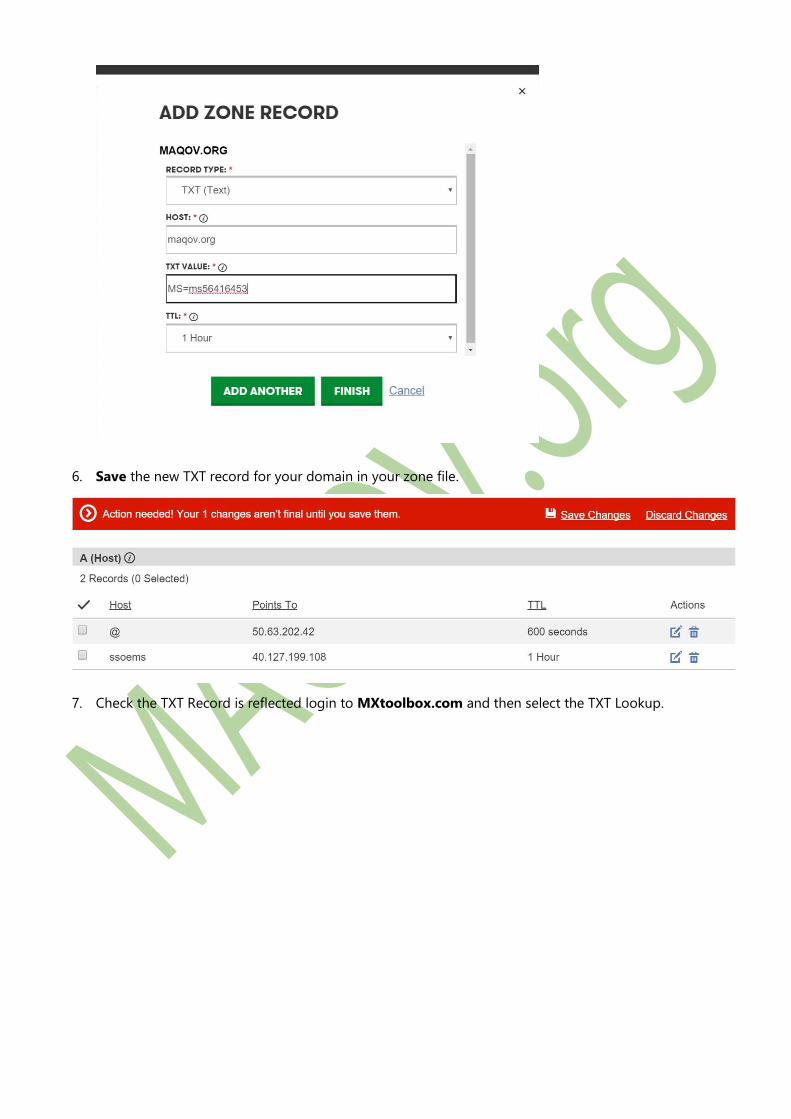
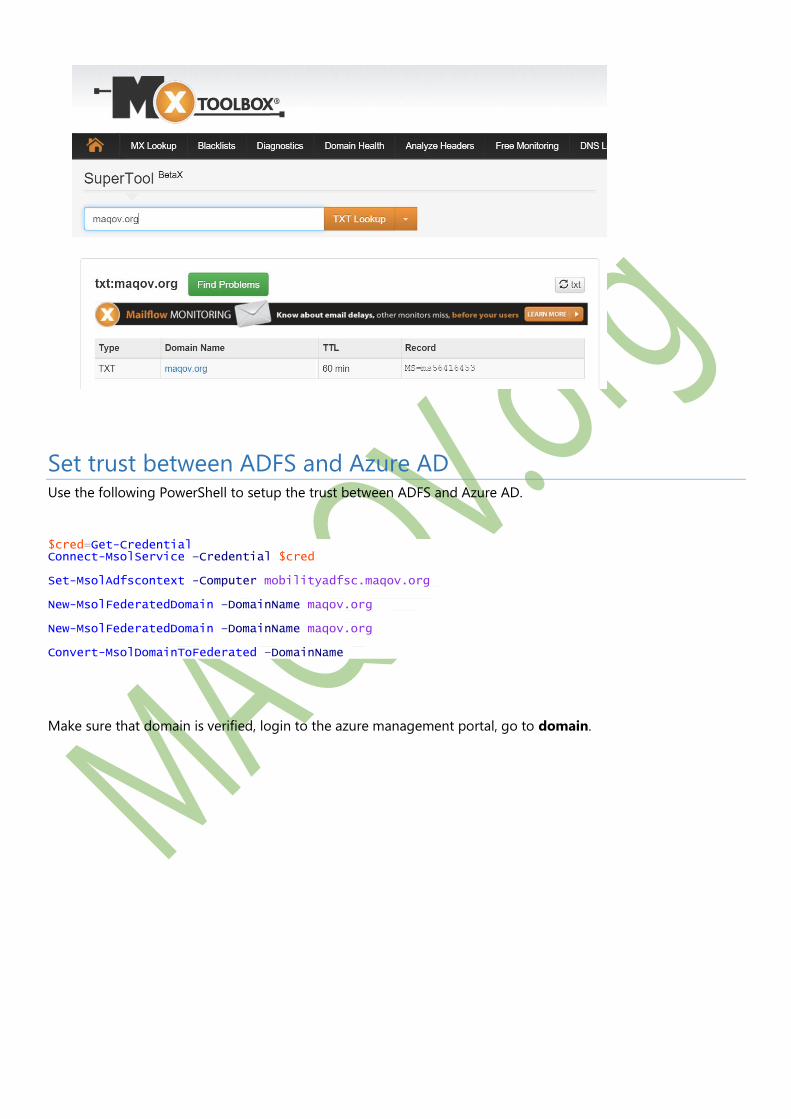
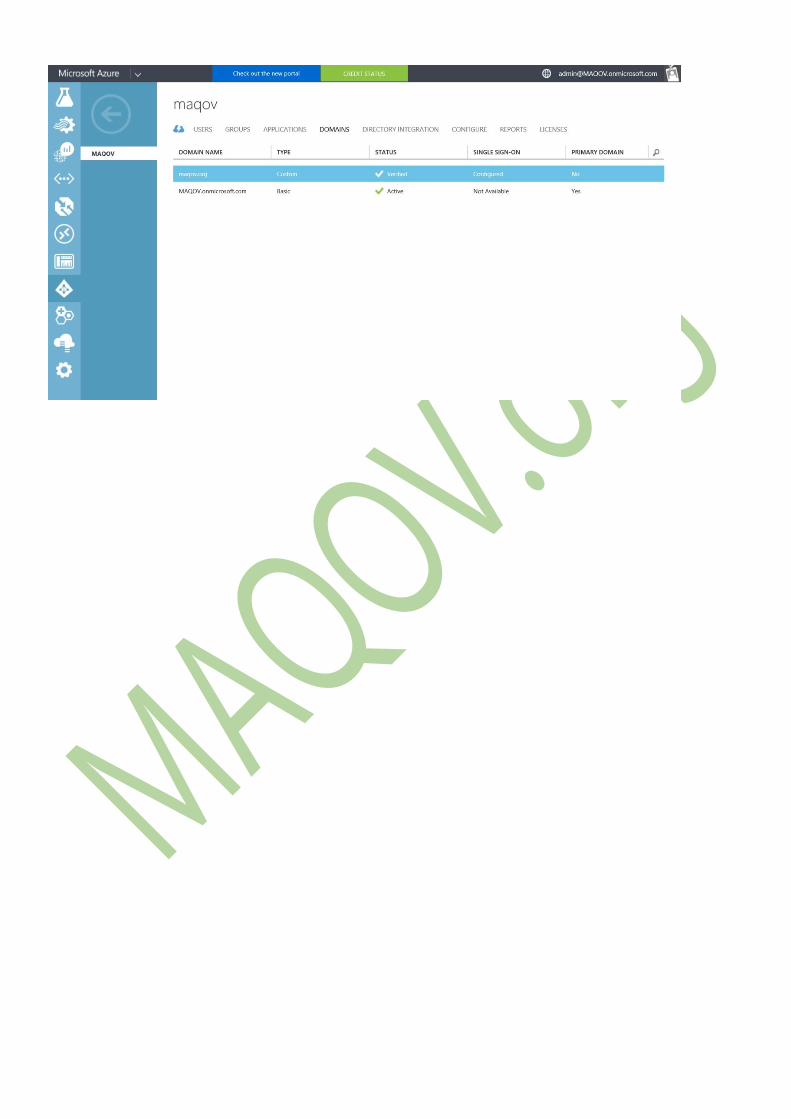
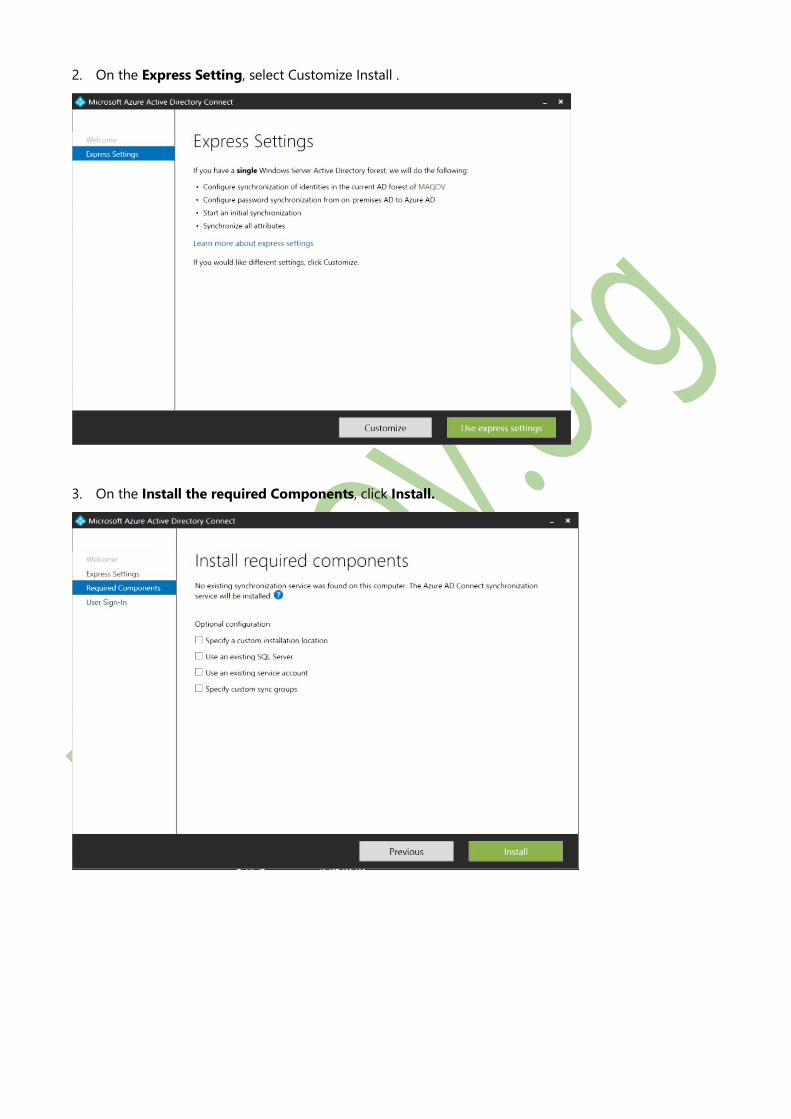
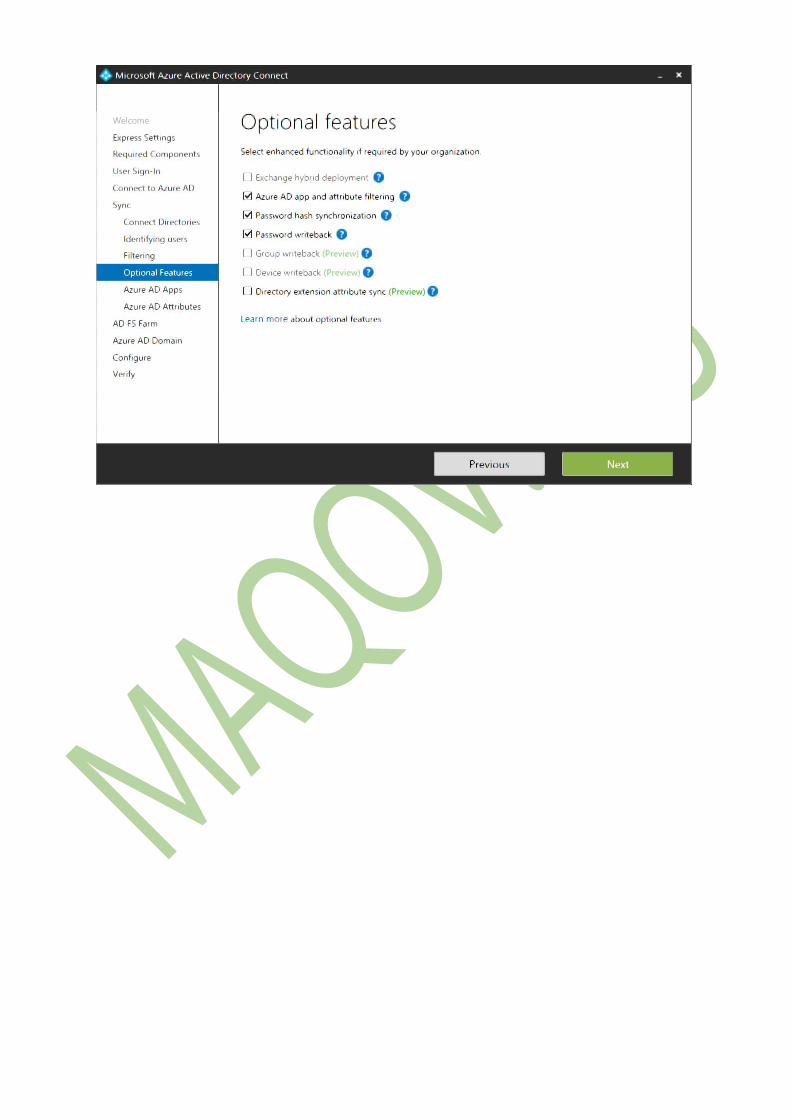
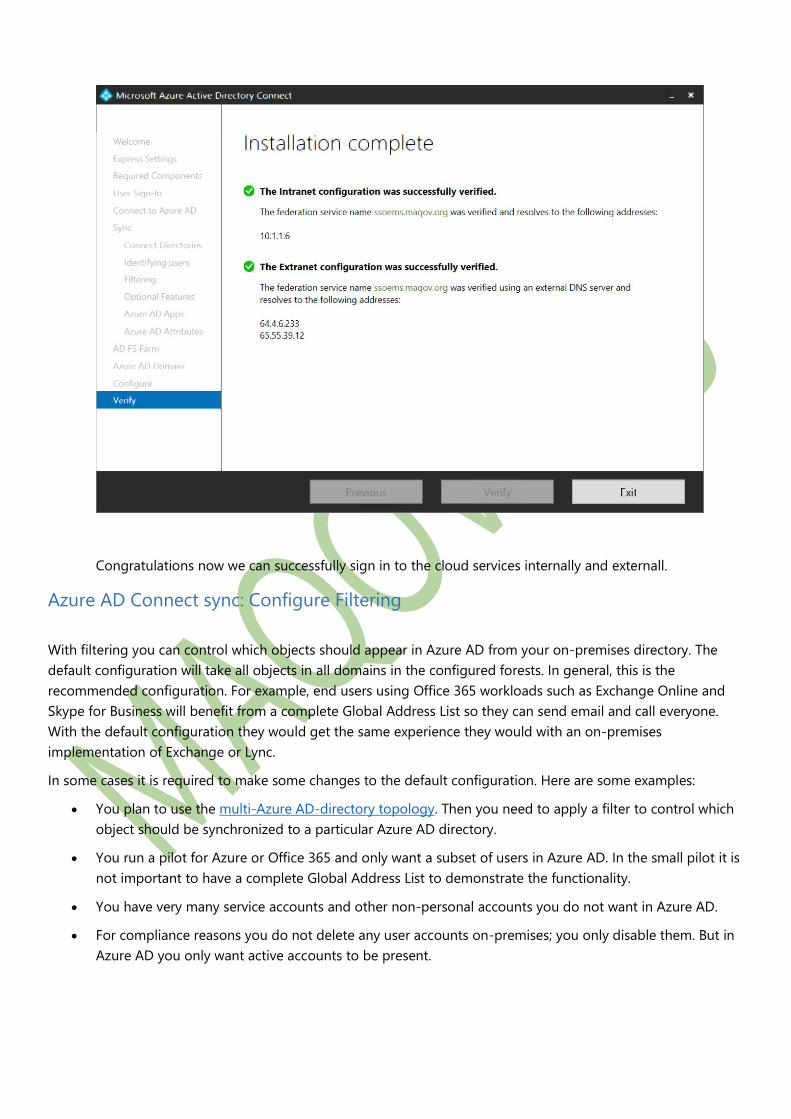
Azure AD Connect with Single Sign-on on Azure Tenant Integrating your on-premises identities with Azure Active Directory In this section we will figure out how MOBILITYADCon will be installed and configured with the following tool: - Azure AD Connect Some Useful info for the VM and related components. Cloud Service Name: maqovcs1 Virtual Net Name: maqovvnetmobility Subnet Name: Subnet-1 Virtual Network Range: 10.1.1.0/24 VM Static IP (DIP): 10.1.1.7 Local Admin: MAQOV Service Account: SVC_ADFS Objective Integrating your on-premises directories with Azure AD makes your users more productive by providing a common identity for accessing both cloud and on-premises resources. With this integration users and organizations can take advantage of the following: Users can use a single identity to access on-premises applications and cloud services such as Office 365. Single tool to provide an easy deployment experience for synchronization and sign-in. Provides the newest capabilities for your scenarios. Azure AD Connect replaces older versions of identity integration tools such as DirSync and Azure AD Sync.
Transcript
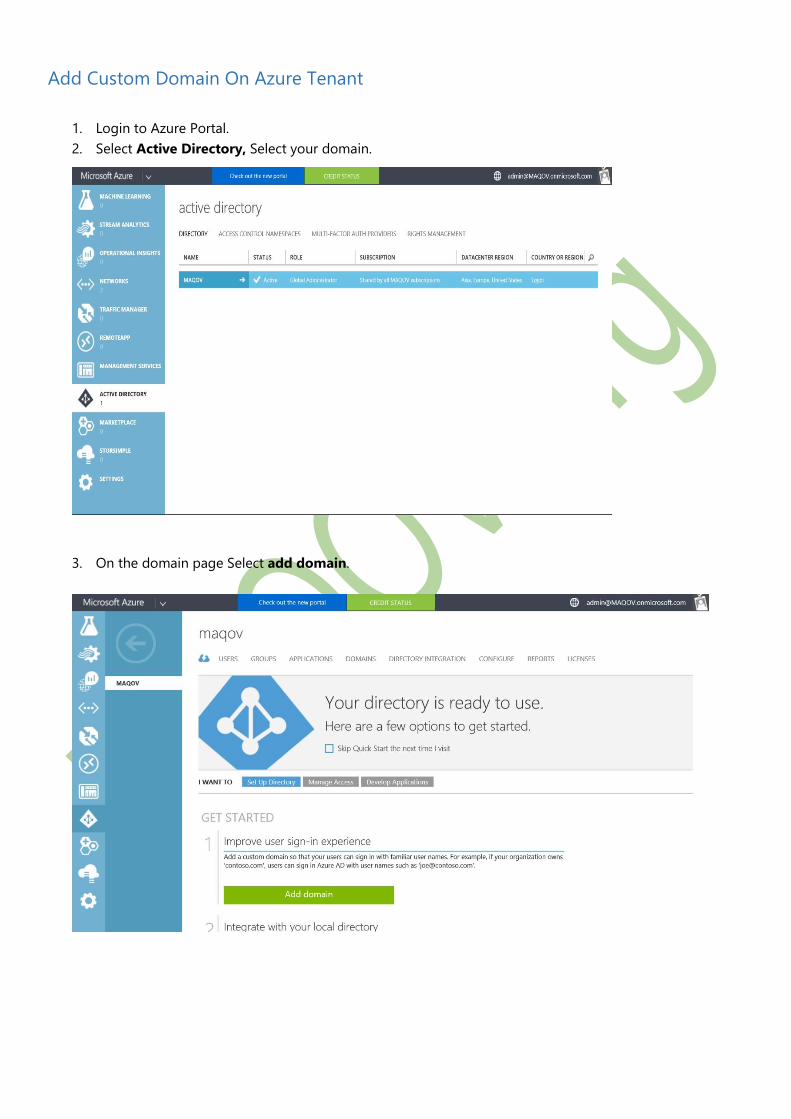
Azure AD Connect with Single
Sign-on on Azure Tenant
Integrating your on-premises identities with Azure Active
Directory
In this section we will figure out how MOBILITYADCon will be installed and configured with the following tool:
- Azure AD Connect
Some Useful info for the VM and related components.
Cloud Service Name: maqovcs1
Virtual Net Name: maqovvnetmobility
Subnet Name: Subnet-1
Virtual Network Range: 10.1.1.0/24
VM Static IP (DIP): 10.1.1.7
Local Admin: MAQOV
Service Account: SVC_ADFS
Objective
Integrating your on-premises directories with Azure AD makes your users more productive by providing a
common identity for accessing both cloud and on-premises resources. With this integration users and
organizations can take advantage of the following:
Users can use a single identity to access on-premises applications and cloud services such as Office 365.
Single tool to provide an easy deployment experience for synchronization and sign-in.
Provides the newest capabilities for your scenarios. Azure AD Connect replaces older versions of identity
integration tools such as DirSync and Azure AD Sync.
Prerequisites
Azure Subscription
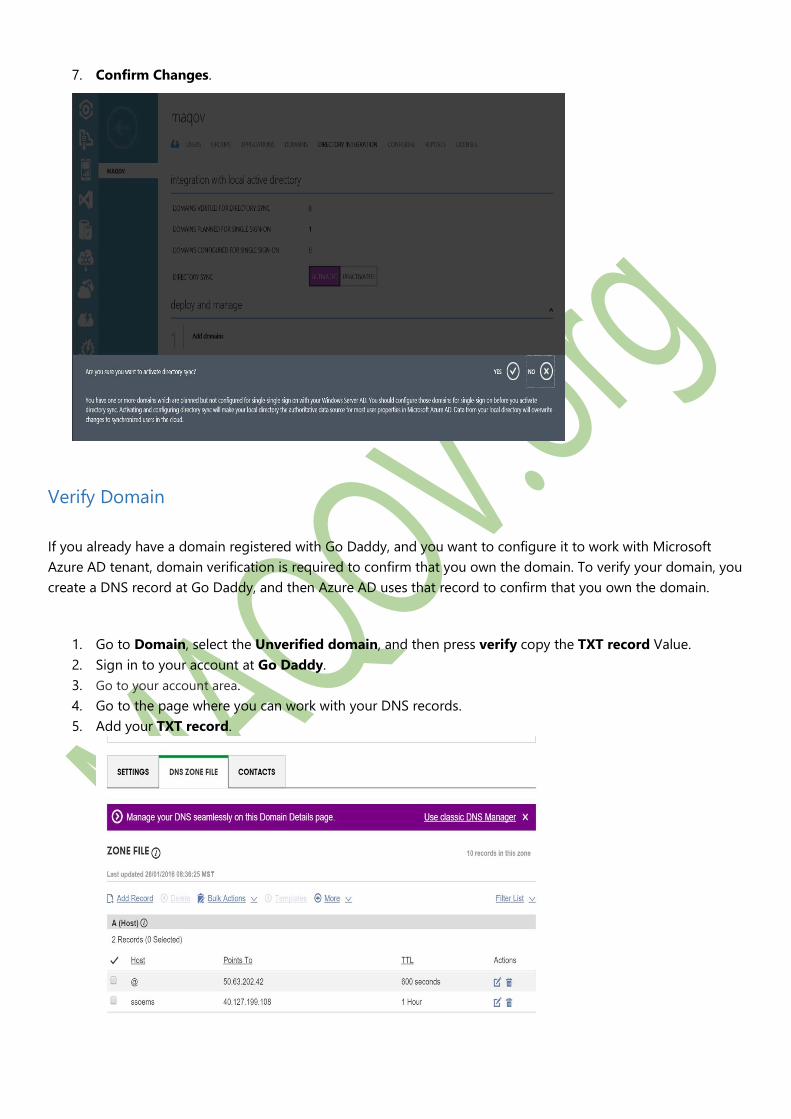
Access to Public Domain, Ex godady, hover, networksolutions.
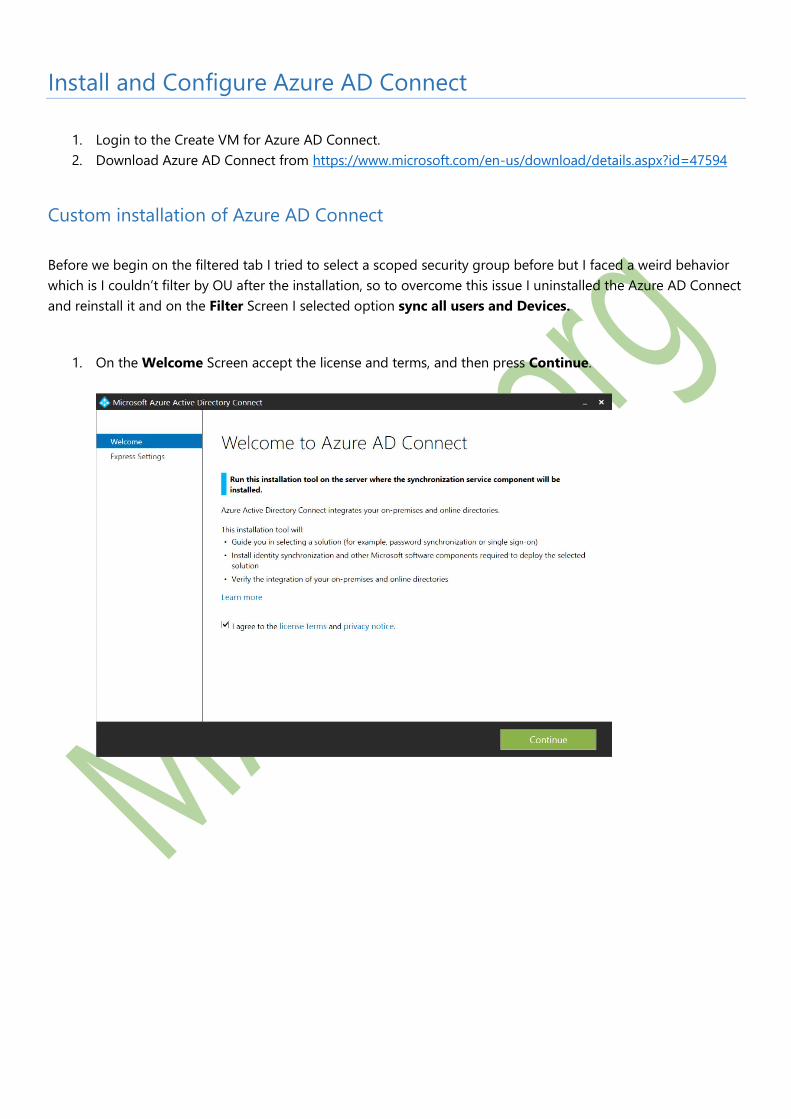
Azure AD Connect Virtual Machine.
Azure AD Connect tool.
Azure AD Connect overview
Azure AD Connect is the tool to integrate your on-premises identity system such as Windows Server Active
Directory with Azure Active Directory and connect your users to Office 365, Azure and 1000’s of SaaS
applications. This topic provides a comprehensive guide to prepare and deploy the necessary components for
your end users to access cloud services with the same identity that they use today to access existing company
apps.
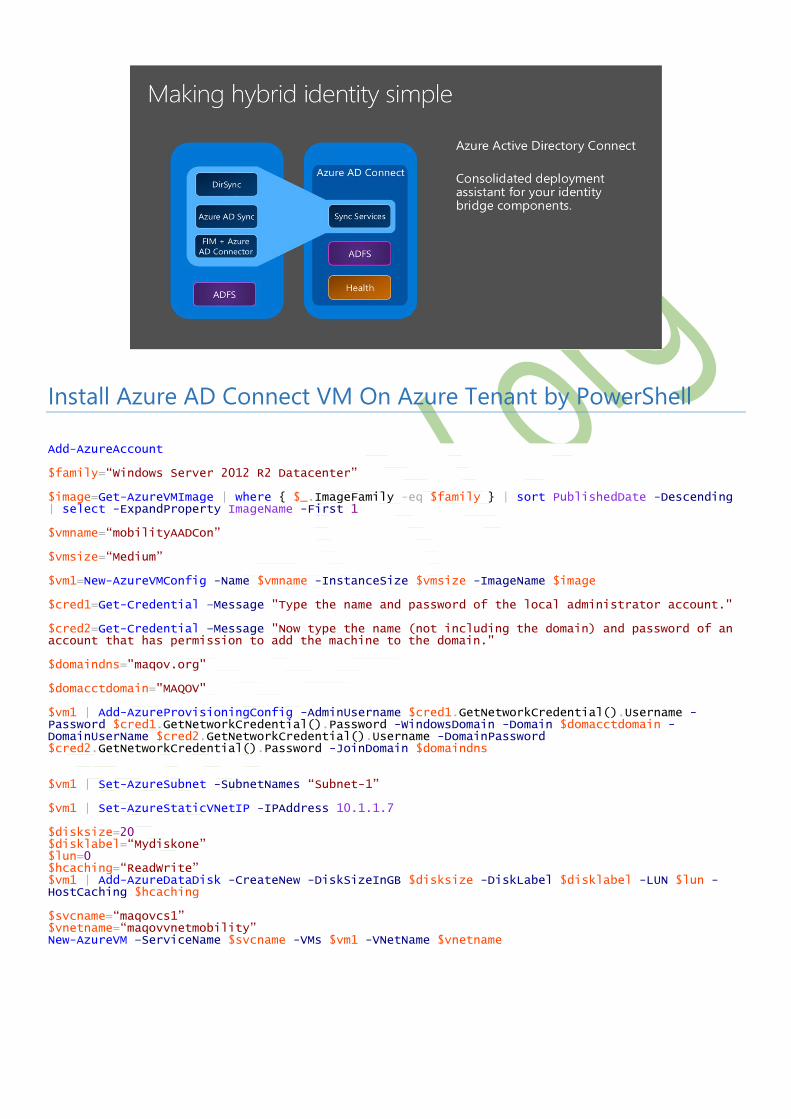
Azure AD Connect: How It Works
Azure Active Directory Connect is made up of three primary parts. They are the synchronization services, the
optional Active Directory Federation Services piece, and the monitoring piece which is done using Azure AD
Connect Health
Synchronization - This part is made up of the components and functionality previously released as Dirsync
and Azure AD Sync. This is the part that is responsible for creating users and groups. It is also responsible for
making sure that the information on users and groups in your on-premises environment, matches the cloud.
AD FS - This is an optional part of Azure AD Connect and can be used to setup a hybrid environment using
an on-premises AD FS infrastructure. This part can be used by organizations to address complex
deployments that include such things as domain join SSO, enforcement of AD login policy and smart card or
3rd party MFA.
Health Monitoring - Azure AD Connect Health can provide robust monitoring of your AD FS servers and
provide a central location in the Azure portal to view this activity. For additional information see Azure Active


![5. Logging in by Azure AD Certification · 2019-10-02 · Login to S-PAS (via Azure AD Certification) 5 S-PAS Login. ... Click [Sign Out From All] 4 Click [Profile] 3 5 Click [OK]](https://static.documents.pub/doc/80x56/5f3c150a67b3bf4d6f4d812f/5-logging-in-by-azure-ad-certification-2019-10-02-login-to-s-pas-via-azure-ad.jpg)


