9
BALUN construction This is based on the info from: http://www.iw5edi.com/technical-articles/homebrewing-a-balun This site is in French, so a Google translation was used. 1
BALUN construction
This is based on the info from: http://www.iw5edi.com/technical-articles/homebrewing-a-balun
This site is in French, so a Google translation was used.
1

BALUN construction
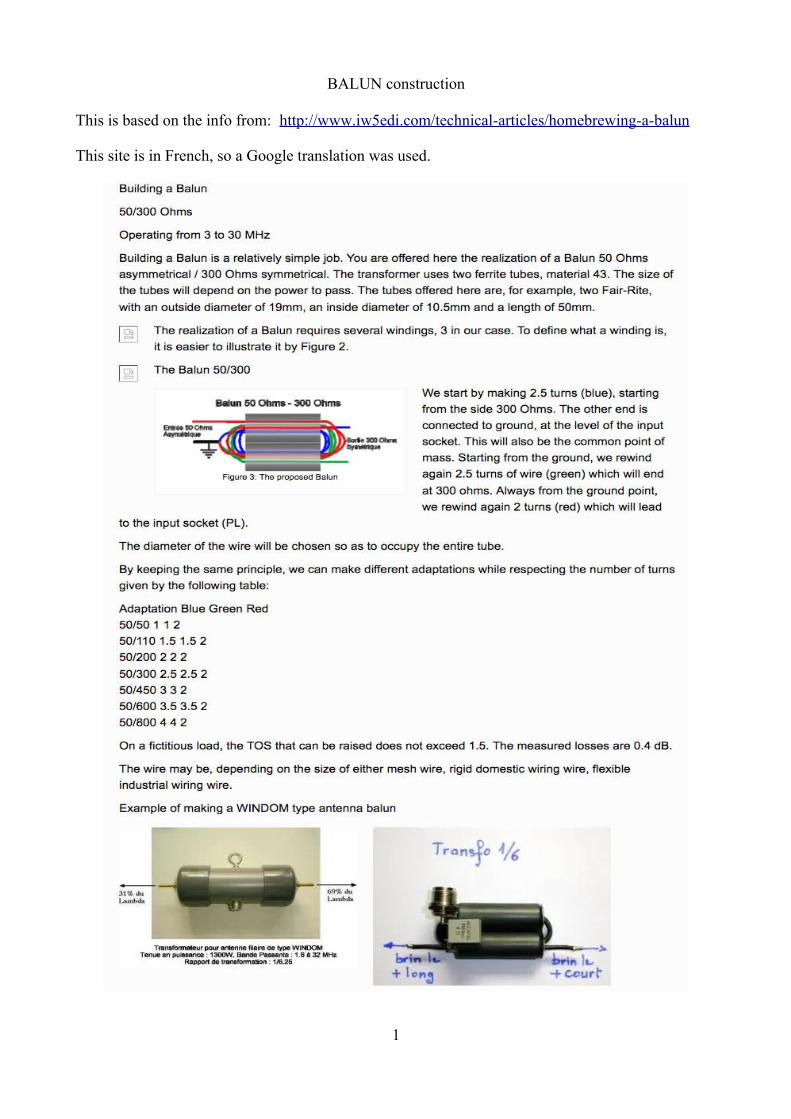
This is the construction of the 50:300 ohm version. There are 2 windings of 2.5 turns and one off 2 turns.
The BALUN is constructed using 8 x Jaycar LO1238 toroids. They come in a 2 pack for around $5.00. The case is the HB6127. And a socket of your choice.
The wire used in the original pair was PCV covered Earth wire, and the next versions uses much bigger wire.
2

BALUN construction
The cores are first super glued together in 2 stacks of 4 cores. I used an old CD drive case to hold them in position.
Then, a length of large heat shrink tube was used to hold the stacks together.
3

BALUN construction
Sitting the cores on a couple of thick washers to lift them up a bit from the wood block allows the heat shrink tube to wrap around the ends a bit.
A paint stripper heat gun (on low) shrinks the tube quite well.
4

BALUN construction
Following the instructions for the 50:300 ohm version...First, wind the Blue wire, 2.5turns, starting from the 300 ohm end.
Next, the green wire, 2.5 turns, starting from the Earth end.
5

BALUN construction
Lastly, the red wire, 2 turns, starting from the Earth end.
Add lugs to the leads for the brass bolts used as the 300 ohm connections.
Those I chose were the Jaycar PT4934 to suit M6 bolts. The core is done for now.
6

BALUN construction
Now, mark the case for the input socket...
Drill a hole to suit your selected socket type. I used a small hole saw to suit the SO239 panel mount socket
Then drill out the screw holes. M3 screws work well. M3 machine screws of various sizes, shake proof washers and nuts are available at Jaycar too.
7
BALUN construction
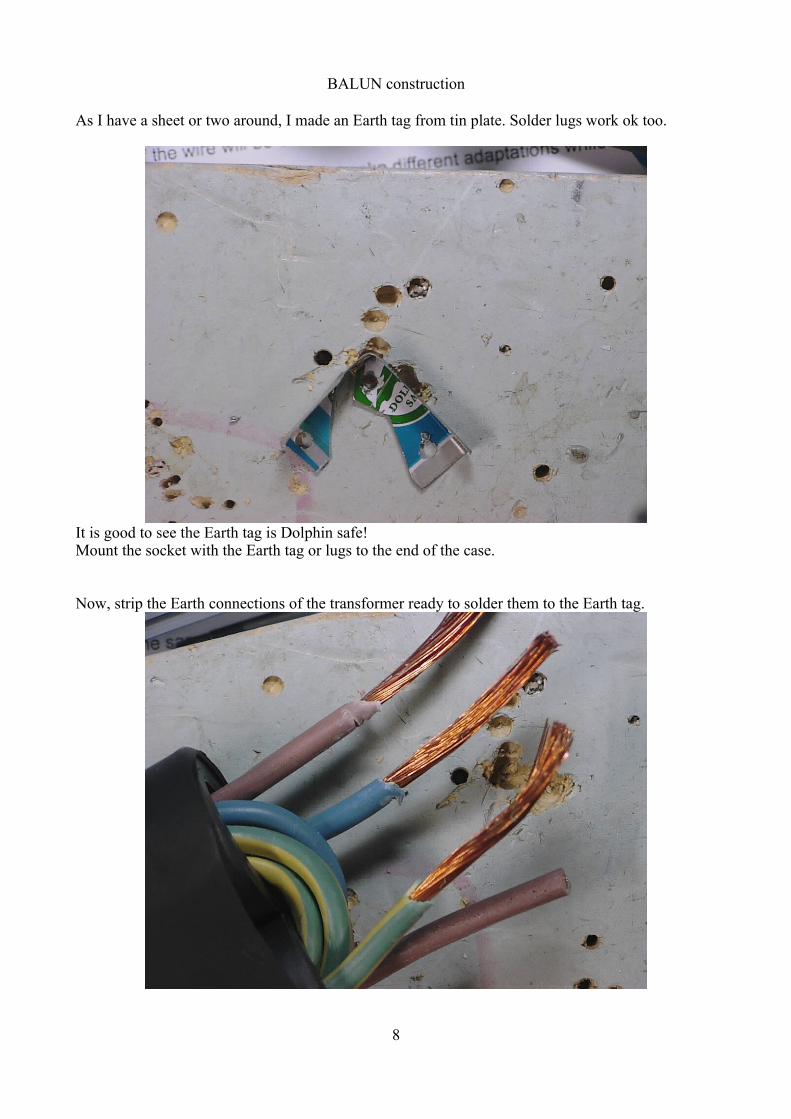
As I have a sheet or two around, I made an Earth tag from tin plate. Solder lugs work ok too.
It is good to see the Earth tag is Dolphin safe! Mount the socket with the Earth tag or lugs to the end of the case.
Now, strip the Earth connections of the transformer ready to solder them to the Earth tag.
8
BALUN construction
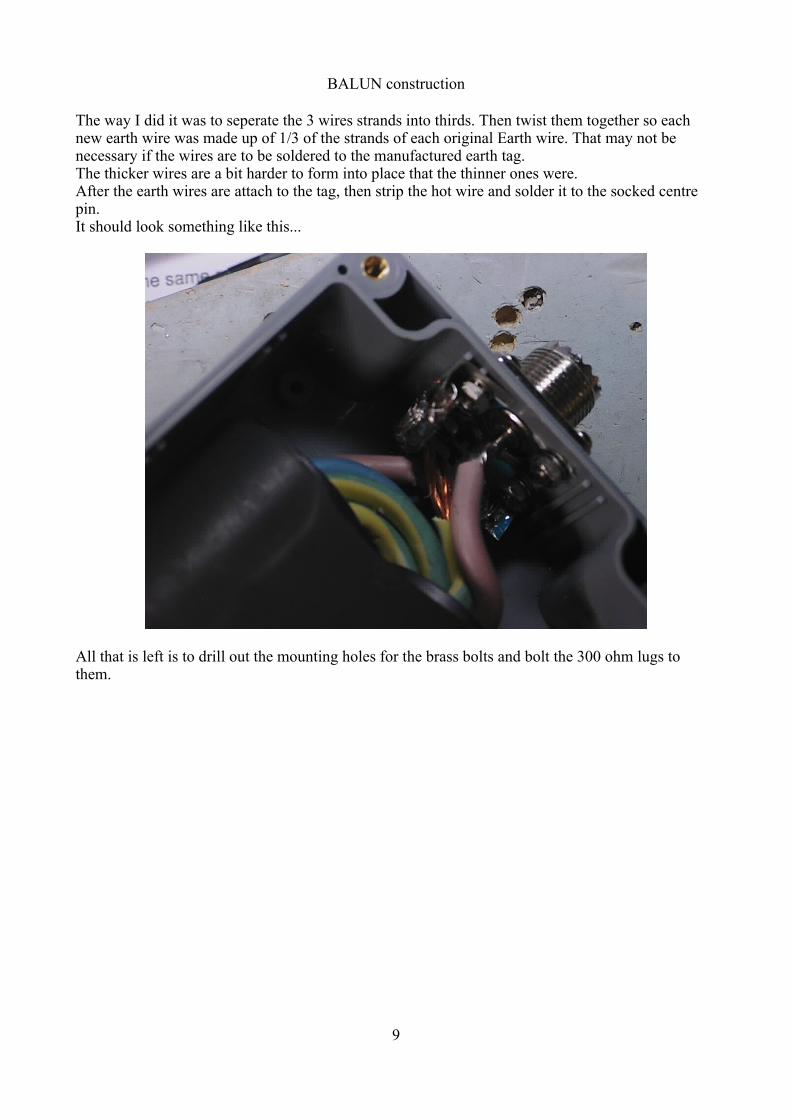
The way I did it was to seperate the 3 wires strands into thirds. Then twist them together so each new earth wire was made up of 1/3 of the strands of each original Earth wire. That may not be necessary if the wires are to be soldered to the manufactured earth tag.The thicker wires are a bit harder to form into place that the thinner ones were.After the earth wires are attach to the tag, then strip the hot wire and solder it to the socked centre pin.It should look something like this...
All that is left is to drill out the mounting holes for the brass bolts and bolt the 300 ohm lugs to them.
9


