more tutorials on www.mooict.com Basic Website tutorial Welcome to the basic website tutorial. We will create a very basic website with 5 pages interlinked with each other. Each page will have pictures, videos embedded in them and colours. Let's get started. Thing you will need: To follow along this tutorial you don't specifically need any software however if you want to make your life easier in the web development process use Brackets. You can simply and Google and download it. We have an extensive tutorial on that you can check it out. If you don't choose to use Brackets you can use notepad or notepad++ to follow along as we are going to use simply code view to create our website from scratch. You will also need a web browser to test the website on best choices are anything but internet explorer hehe. Firefox, Google Chrome, Safari, Opera etc First lets create a folder called basic website and inside that folder create two more folders called images and styles. Alternatively you can down the website structure from our page and follow along. Images folder will contain all our images for this website and the styles folder will contain the whole styling of the website. All this will be explained step by step so follow along. The folder that contain those two folders is our main html folder to hold all the HTML files in there. So to begin in brackets lets drag and drop it on the side bar so its easier for us to keep track of the project. Much better. Start by right clicking on the side bar and clicking on new file.
Transcript
more tutorials on www.mooict.com
Basic Website tutorial
Welcome to the basic website tutorial. We will create a very basic website with 5 pages interlinked
with each other. Each page will have pictures, videos embedded in them and colours. Let's get
started.
Thing you will need:
To follow along this tutorial you don't specifically need any software however if you want to make
your life easier in the web development process use Brackets. You can simply and Google and
download it. We have an extensive tutorial on that you can check it out.
If you don't choose to use Brackets you can use notepad or notepad++ to follow along as we are
going to use simply code view to create our website from scratch.
You will also need a web browser to test the website on best choices are anything but internet
explorer hehe. Firefox, Google Chrome, Safari, Opera etc
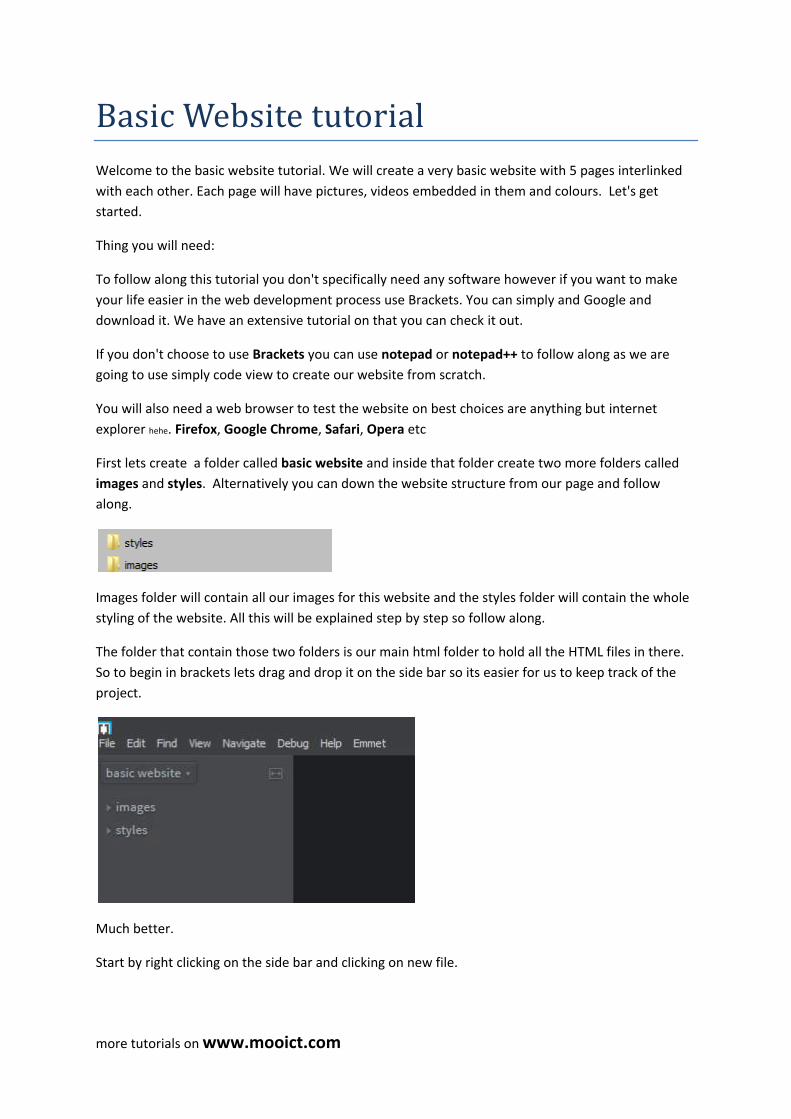
First lets create a folder called basic website and inside that folder create two more folders called
images and styles. Alternatively you can down the website structure from our page and follow
along.
Images folder will contain all our images for this website and the styles folder will contain the whole
styling of the website. All this will be explained step by step so follow along.
The folder that contain those two folders is our main html folder to hold all the HTML files in there.
So to begin in brackets lets drag and drop it on the side bar so its easier for us to keep track of the
project.
Much better.
Start by right clicking on the side bar and clicking on new file.
more tutorials on www.mooict.com
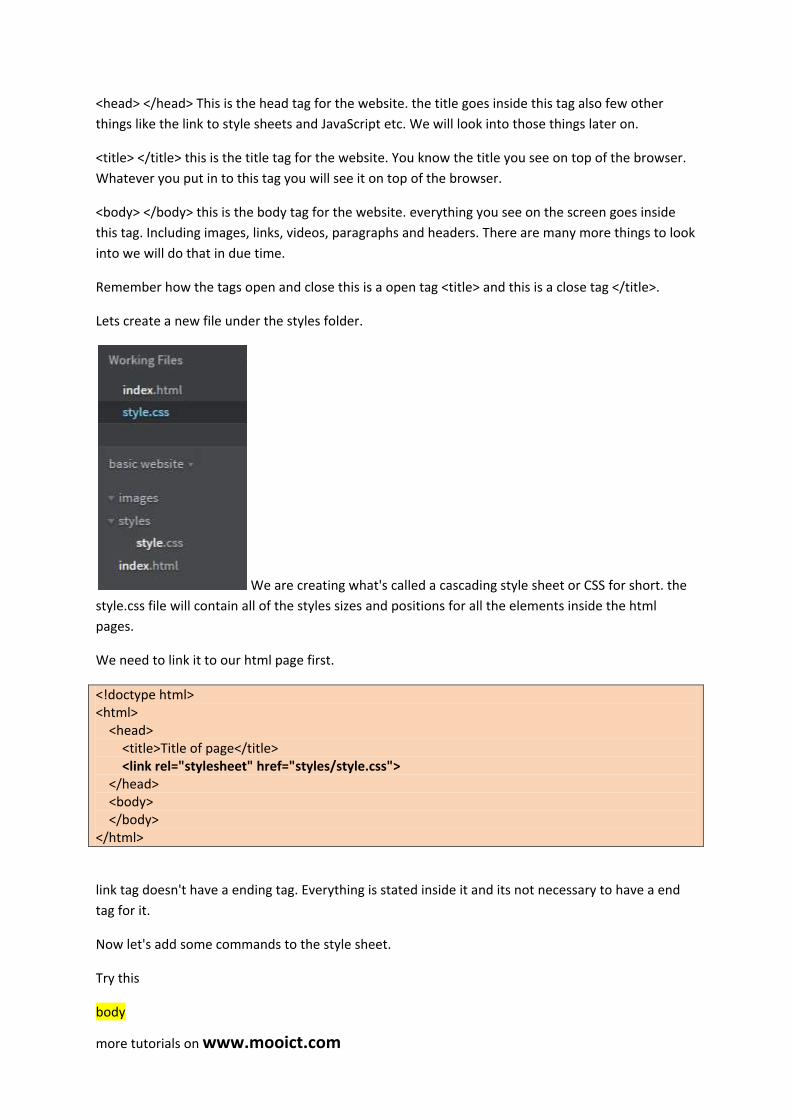
Call it index.html
These are the five pages we will have in the website
index.html --- Home page for the website
aboutus.html -- Some little information about the page
videos.html --- will contain some videos and information
gallery.html --- will contain pictures and information
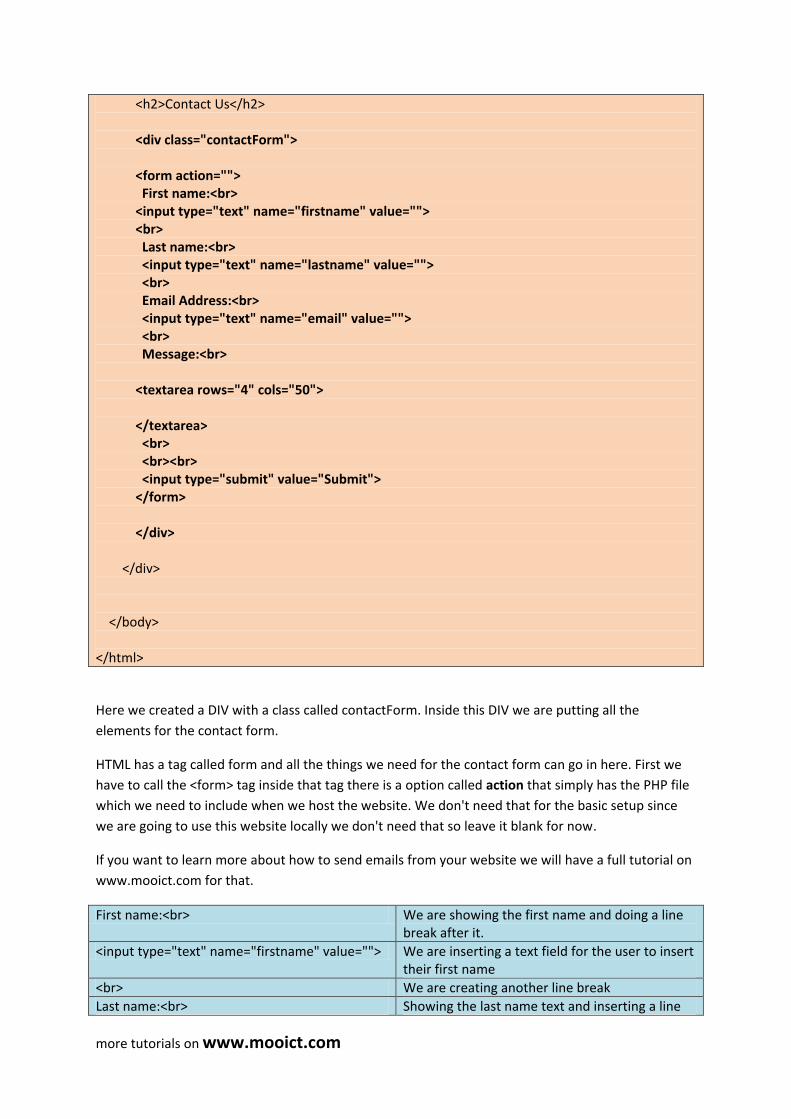
contactus.html --- will contain a simple contact form for the website.
This website will be about my favourite engineer Elon Musk.
So the plan is to create a html template than to copy it 4 times and change it to something else after.
We can do this and it will be simple without going over the same codes over and over.
Notice how we are calling the CLASS in CSS. it starts with a full stop and then the name of the class
we gave before. Classes work similar to ID's but as I explained before it can effect multiple elements
instead of just one. To call a class in CSS we need to use the period . symbol and to call an ID we use
the hash tag symbol # remember that.
Also that we are using American spelling for the HTML. HTML standards are created in the united
states and they have done a wonderful job. So we have to use their spelling in the CSS. No biggie.
We added the text-align in the navigation div and defined it as CENTER. inside the links we gave it a
colour of white, font size to 15 points and added padding around it to 2 pixels lastly we are adding 8
pixels margin to the right so there is enough space between the links.
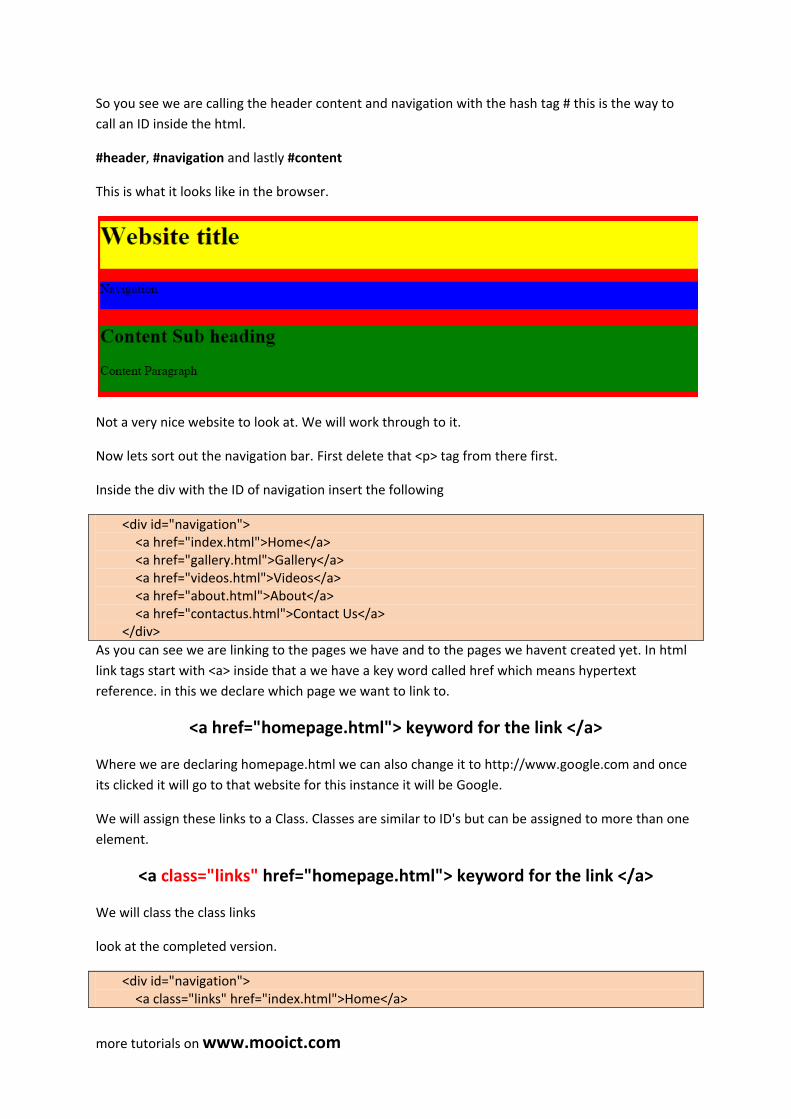
This is what the navigation looks like now. Pretty neat right.
We are still working inside the index.html file. We haven't create the other ones just yet because we
need complete our template first. That includes background images and other fancy stuff.
more tutorials on www.mooict.com
I've gathered all the images, videos and information about Elon Musk which we can use in this
website. He is a real inspiration to everyone who want to make the world a better place. So let's do
something nice for him and make him a functional website while learning a little html and css.
We have added some place holder colours to see where what will be so let's take those off and
make some final adjustments.
If you downloaded the files for this basic website from mooict.com you will have access the
resources however you can follow it with your images if you want.
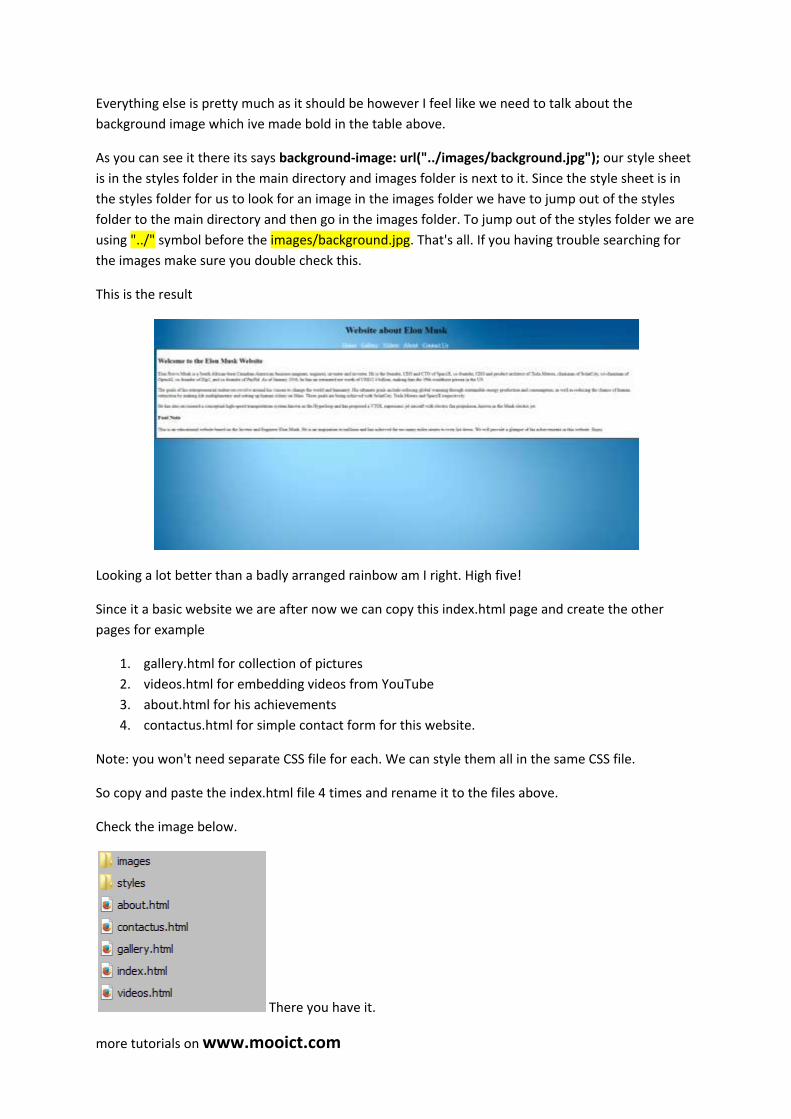
Here is the final index.html file now
<!doctype html> <html> <head> <title>Elon Musk Home page</title> <link rel="stylesheet" href="styles/style.css"> </head> <body> <div id="header"> <h1>Website about Elon Musk</h1> </div> <div id="navigation"> <a class="links" href="index.html">Home</a> <a class="links" href="gallery.html">Gallery</a> <a class="links" href="videos.html">Videos</a> <a class="links" href="about.html">About</a> <a class="links" href="contactus.html">Contact Us</a> </div> <div id="content"> <h2>Welcome to the Elon Musk Website</h2> <p>Elon Reeve Musk is a South African-born Canadian-American business magnate, engineer, inventor and investor. He is the founder, CEO and CTO of SpaceX, co-founder, CEO and product architect of Tesla Motors, chairman of SolarCity, co-chairman of OpenAI, co-founder of Zip2, and co-founder of PayPal. As of January 2016, he has an estimated net worth of US$12.4 billion, making him the 39th wealthiest person in the US.</p> <p>The goals of his entrepreneurial endeavors revolve around his visions to change the world and humanity. His ultimate goals include reducing global warming through sustainable energy production and consumption; as well as reducing the chance of human extinction by making life multiplanetary and setting up human colony on Mars. These goals are being achieved with SolarCity, Tesla Motors and SpaceX respectively.</p> <p>He has also envisioned a conceptual high-speed transportation system known as the Hyperloop and has proposed a VTOL supersonic jet aircraft with electric fan propulsion, known as the Musk electric jet.</p>
more tutorials on www.mooict.com
<h3>Foot Note</h3> <p>This is an educational website based on the Invetor and Engineer Elon Musk. He is an inspiration to millions and has achieved far too many miles stones to even list down. We will provide a glimpse of his achievements in this website. Enjoy</p> </div> </body> </html>
Here is the final style CSS so far without the other pages included at the moment
<div class="video"> <iframe width="560" height="315" src="https://www.youtube.com/embed/SVk1hb0ZOrE" frameborder="0" allowfullscreen></iframe> <p class="description"> The iconic entrepreneur behind SpaceX, Tesla Motors and Paypal shares his predictions for artificial intelligence, renewable energy and space exploration, in conversation with DFJ General Partner Steve Jurvetson at Stanford on Oct. 7, 2015. University President John Hennessy introduces the future-focused discussion, which follows Musk's journey from his first Internet startup in the mid-nineties to his dream of a Mars colony in the next 20 years. </p> </div> <div class="video"> <iframe width="560" height="315" src="https://www.youtube.com/embed/mh45igK4Esw" frameborder="0" allowfullscreen></iframe> <p class="description"> Aug. 3 (Bloomberg) -- "Bloomberg Risk Takers" profiles Elon Musk, the entrepreneur who helped create PayPal, built America's first viable fully electric car company, started the nation's biggest solar energy supplier, and may make commercial space travel a reality in our lifetime. (Source: Bloomberg) </p> </div> <div class="video"> <iframe width="560" height="315" src="https://www.youtube.com/embed/0871VJfvD1c" frameborder="0" allowfullscreen></iframe> <p class="description"> In January 2016 Elon Musk talks to BBC Technology Correspondent Rory Cellan-Jones at Tesla's Design Studio in Hawthorne, California. The conversation covers the future of electric vehicles and of autonomous driving technology. The importance of Tesla building an affordable car is discussed along with Musk's confidence that Apple will build an electric car. </p> </div> </div> </body> </html>
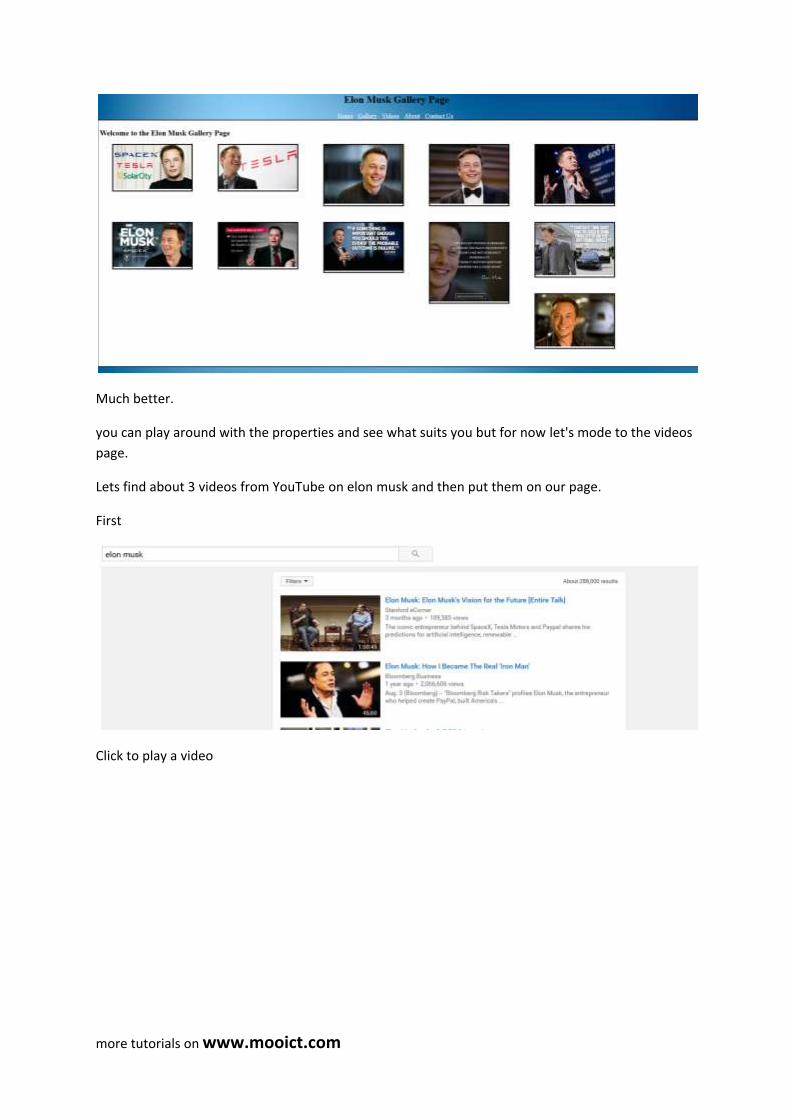
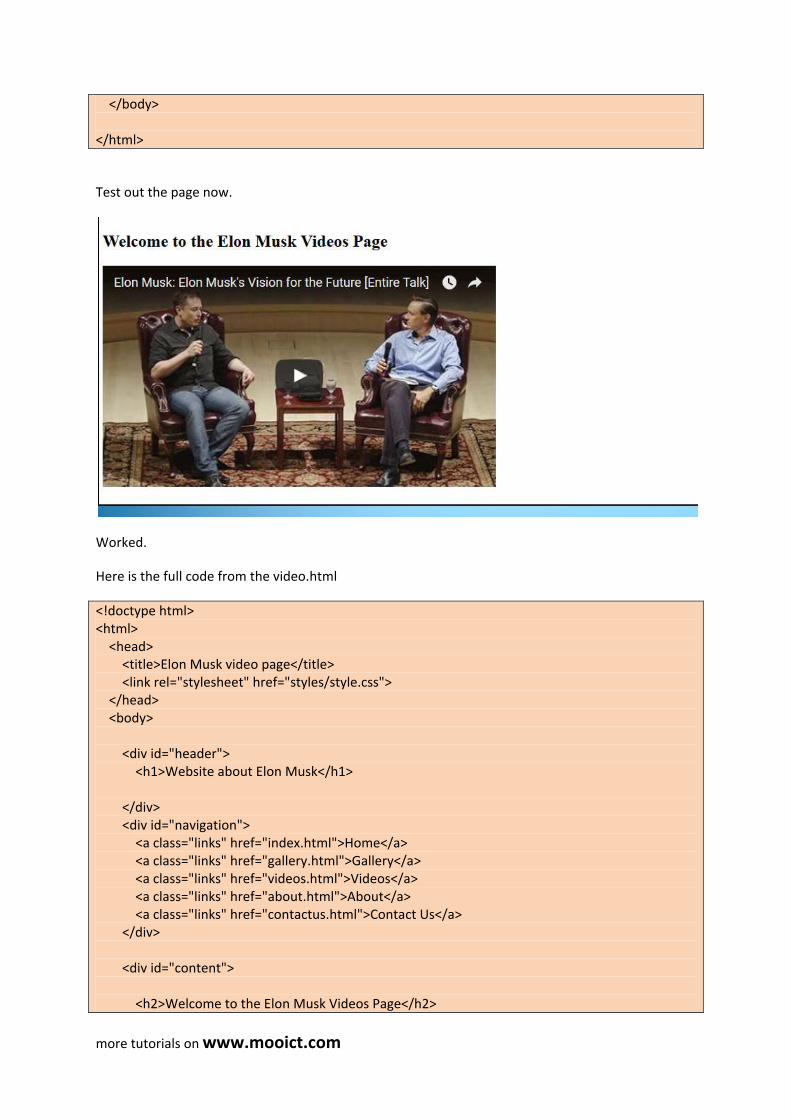
We have 3 different videos inside the 3 div called video and appropriate description for each video.
Looks a lot better with the videos in the centre and paragraphs highlighted.
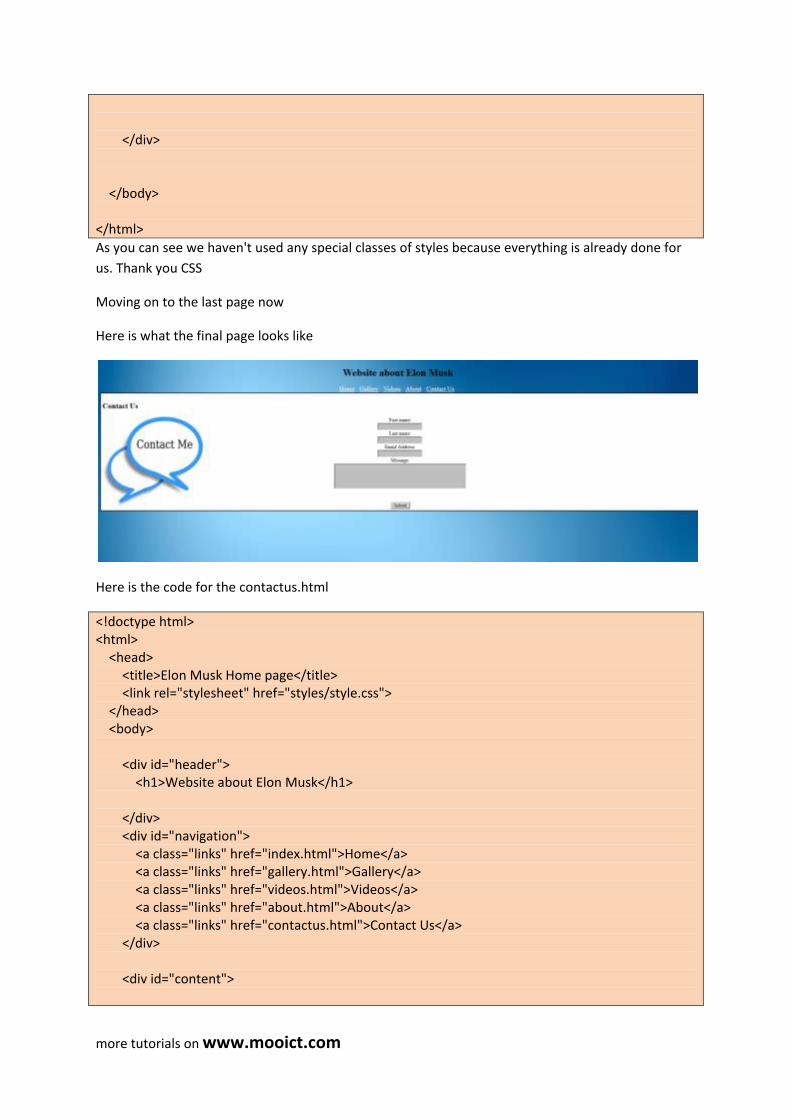
We are almost done now. Only have about.html and contactus.html to complete and you will have
your first basic website done. It only gets better from here.
Here are the codes in the page of about.html
<!doctype html> <html> <head> <title>Elon Musk Home page</title> <link rel="stylesheet" href="styles/style.css"> </head> <body> <div id="header"> <h1>Website about Elon Musk</h1>
more tutorials on www.mooict.com
</div> <div id="navigation"> <a class="links" href="index.html">Home</a> <a class="links" href="gallery.html">Gallery</a> <a class="links" href="videos.html">Videos</a> <a class="links" href="about.html">About</a> <a class="links" href="contactus.html">Contact Us</a> </div> <div id="content"> <h2>Time Line and Achievements of Elon Musk</h2> <p> At SpaceX, Elon is the chief designer, overseeing development of rockets and spacecraft for missions to Earth orbit and ultimately to other planets. In 2008, SpaceX's Falcon 9 rocket and Dragon spacecraft won the NASA contract to provide a commercial replacement for the cargo transport function of the Space Shuttle, which retired in 2011. The SpaceX Falcon 1 was the first privately developed liquid fuel rocket to reach orbit. In 2010, SpaceX became the first commercial company to successfully recover a spacecraft from Earth orbit with its Dragon spacecraft. In 2012, SpaceX became the first commercial company to dock with the International Space Station and return cargo to Earth with the Dragon. Since then Dragon has twice delivered cargo to and from the space station, in the first of many cargo resupply missions for NASA. In December 2013, SpaceX completed its first geostationary transfer mission, delivering the SES-8 satellite to Earth's orbit. In January 2014, SpaceX successfully launched the THAICOM 6 satellite for leading Asian satellite operator THAICOM. </p> <p> At Tesla, Elon has overseen product development and design from the beginning, including the all electric Tesla Roadster, Model S and Model X. Transitioning to a sustainable energy economy, in which electric vehicles play a pivotal role, has been one of his central interests for almost two decades, stemming from his time as a physics student working on ultracapacitors in Silicon Valley. In December 2013, the National Highway Traffic Safety Administration (NHTSA) reaffirmed the 5-star safety rating of the Tesla Model S overall and in all subcategories for Model Year 2014, confirming the highest safety rating in America. </p> <p> In addition, Elon is the non-executive chairman and principal shareholder of SolarCity, which he helped create. SolarCity is now the leading provider of solar power systems in the United States. </p> <p> Prior to SpaceX, Elon co-founded PayPal, the world's leading Internet payment system, and served as the company's Chairman and CEO. Before PayPal, Mr. Musk co-founded Zip2, a provider of Internet software to the media industry. </p> <p> He has a physics degree from the University of Pennsylvania and a business degree from Wharton. </p>
more tutorials on www.mooict.com
</div> </body> </html>
As you can see we haven't used any special classes of styles because everything is already done for