51
23.03.22 Seite 1 23.03.22 Seite 1 Battery kit project Hilario Saenz Palomeque Internship with GTZ AMES-M In Manica, Mozambique
| Date post: | 02-Jan-2016 |
| Category: |
Documents |
| Upload: | gail-mccoy |
| View: | 41 times |
| Download: | 0 times |

20.04.23 Seite 120.04.23 Seite 1
Battery kit project
Hilario Saenz Palomeque
Internship with GTZ AMES-M
In Manica, Mozambique
20.04.23 Seite 2
Introduction- Battery kit presentation- Goal of battery kits in GTZ-AMES project
Technical part : review of the material and installation- Devices : requirements and performances- Installation, use and maintenance- Life of materials, repair and recycling- customer information
Commercial part : strategy- Procurement of the material- Price of the battery kit- Payment procedures- Quantity of kits to sell per area- Warranty and Seller’s responsibility
Battery Kit Project – Introduction
20.04.23 Seite 3
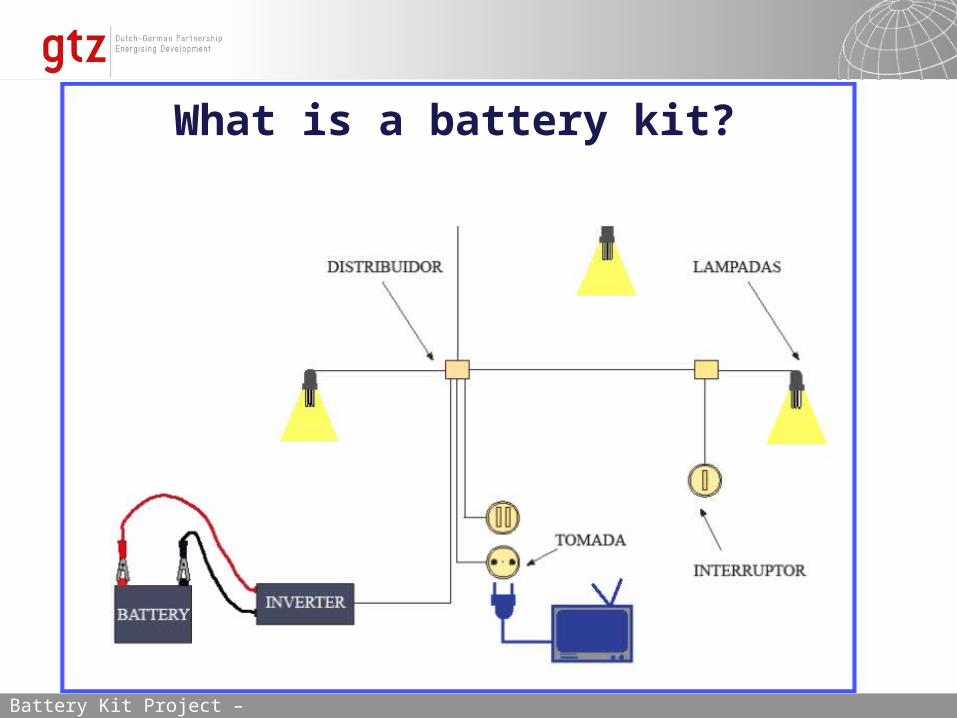
What is a battery kit?
Battery Kit Project – Introduction

20.04.23 Seite 4
Goal of battery kit in GTZ AMES project
Included in a small-scale hydro power project for rural areas
Goal : expand the range of the project to the most remote houses
Advantages : low cost and high effective
Challenges : good quality material and ease of recharging
Battery Kit Project – Introduction
20.04.23 Seite 5
Introduction- Battery kit presentation- Goal of battery kits in GTZ-AMES project
Technical part : review of the material and installation- Devices : requirements and performances- Installation, use and maintenance- Life of materials, repair and recycling- customer information
Commercial part : strategy- Procurement of the material- Price of the battery kit- Payment procedures- Quantity of kits to sell per area- Warranty and Seller’s responsibility
Battery Kit Project - Technical part
20.04.23 Seite 6
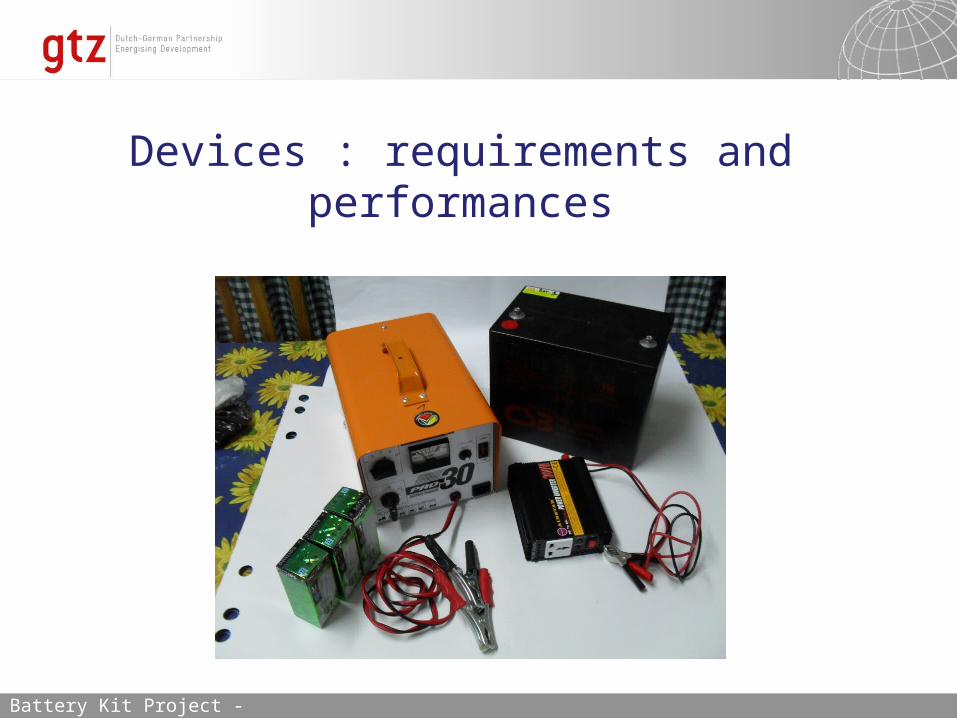
Devices : requirements and performances
Battery Kit Project - Technical part
20.04.23 Seite 7
Performances of the battery kit
Provide lighting and use of low consumption domestic devices
Easy to use
Easy to carry in order to charge
Affordable price
Sustainable strategy
Battery Kit Project - Technical part

20.04.23 Seite 8
Material used
Battery
Inverter
Bulbs
Cables, plugs, installation devices
Battery Charger
Battery Kit Project - Technical part
20.04.23 Seite 9
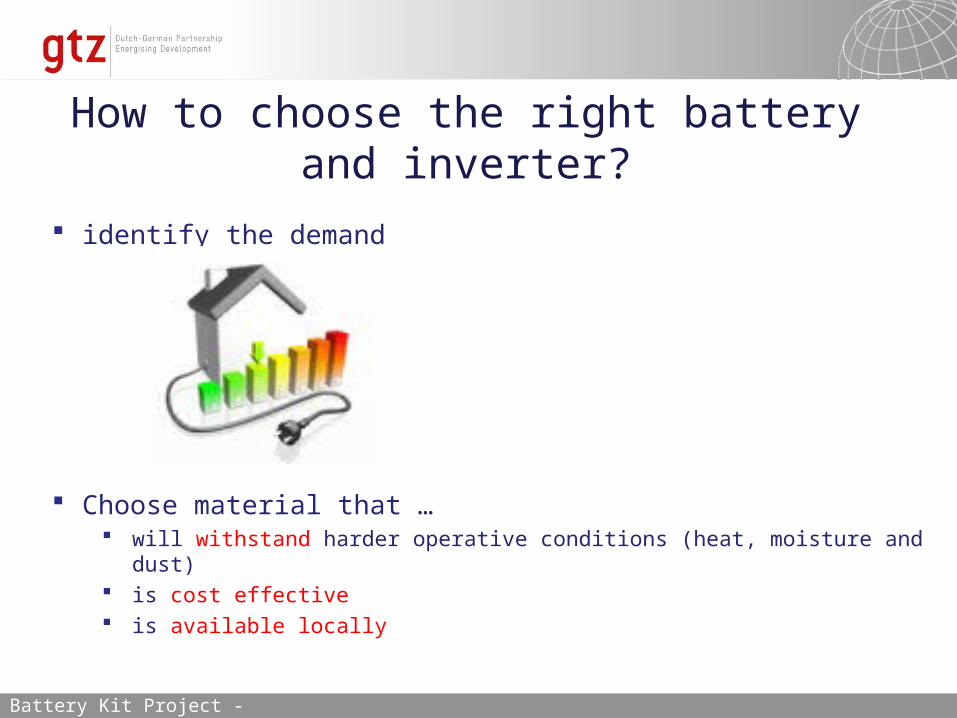
How to choose the right battery and inverter?
identify the demand
Choose material that … will withstand harder operative conditions (heat, moisture and dust) is cost effective is available locally
Battery Kit Project - Technical part
20.04.23 Seite 10
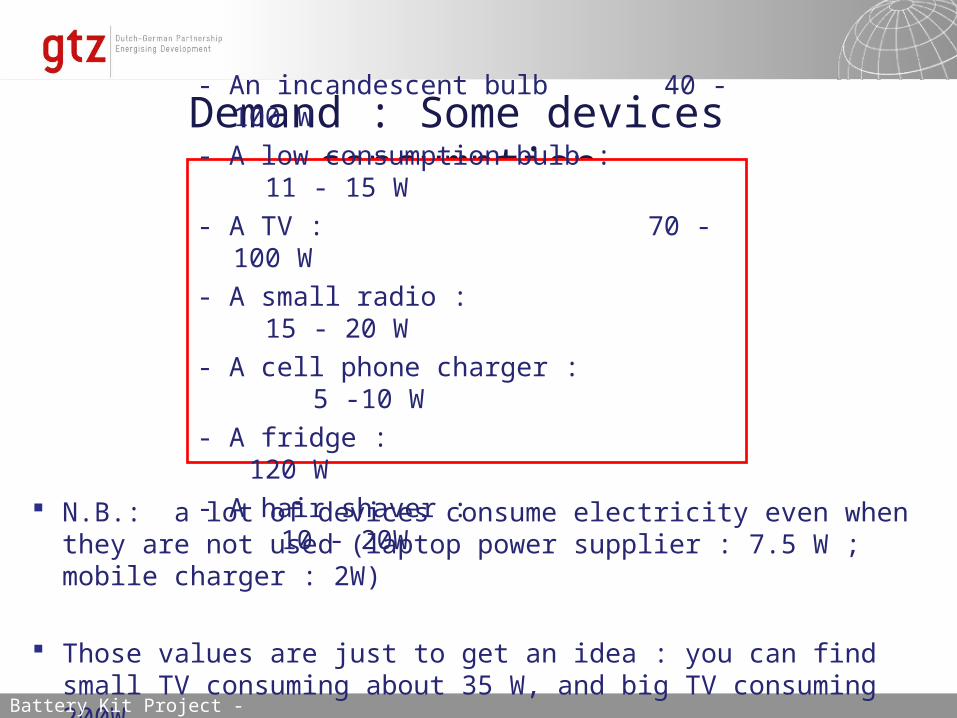
Demand : Some devices consumption
N.B.: a lot of devices consume electricity even when they are not used (laptop power supplier : 7.5 W ; mobile charger : 2W)
Those values are just to get an idea : you can find small TV consuming about 35 W, and big TV consuming 200W…
- An incandescent bulb 40 -100 W
- A low consumption bulb : 11 - 15 W
- A TV : 70 - 100 W
- A small radio : 15 - 20 W
- A cell phone charger : 5 -10 W
- A fridge : 120 W
- A hair shaver : 10 - 20W
Battery Kit Project - Technical part

20.04.23 Seite 11
Choosing the right inverter Identify the maximal power output needed 3 CFL bulbs (45W) + TV (100W) + DVD (25W) + Small Radio ( max 25 W) + Fridge (120W)
+ cell phone charger ( 5-10W) = ~300W
For rural areas, 300W is enough (and 200W or 400W would be OK too) N.B. : using the inverter at its maximum output will empty the battery quite fast
We could think of smaller inverters (100W) just for lighting and small electrical appliances (radio and cell charger)
The quality of the inverter varies with the price. Cheap inverters are normally more fragile, so it is better to invest a bit more money in good quality material
Battery Kit Project - Technical part
20.04.23 Seite 12
Choosing the right battery Type : a battery that can be totally discharged without loosing its capacity
a battery that does not need maintenance
The right solution is then a deep cycle sealed battery
We recommend a famous brand (for ex : CSB,…), which will guarantee a better quality, and with technical specifications available
The size of the battery (in Ah) should be the bigger the better:75 Ah is good to start with, but up to 150Ah is better (if available)
N.B.: The bigger the battery is, the heavier it weights !
Battery Kit Project - Technical part
20.04.23 Seite 13
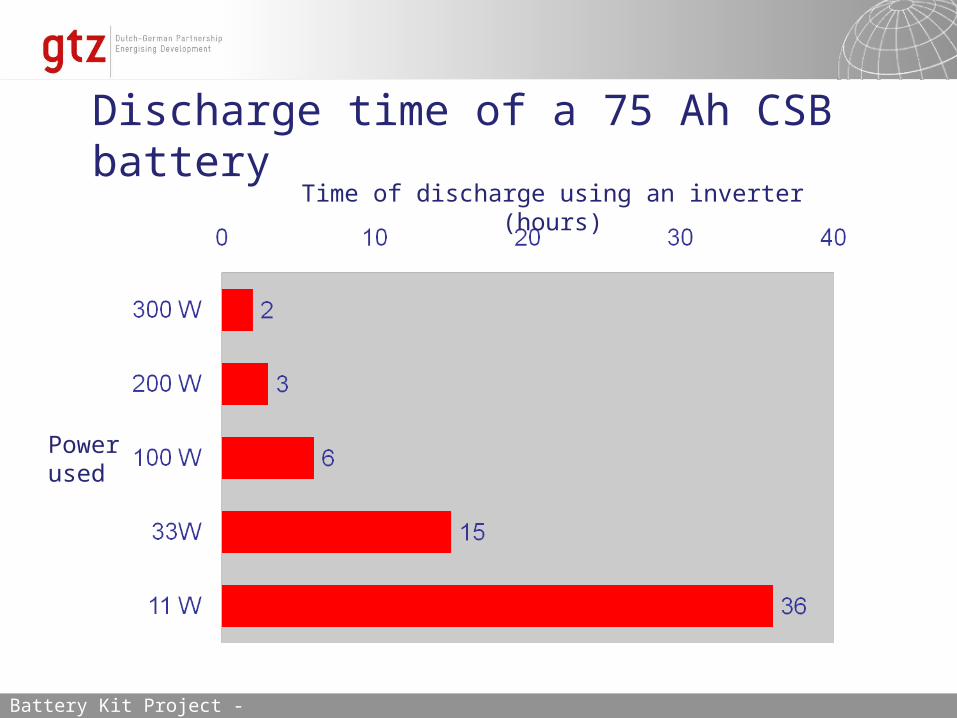
Discharge time of a 75 Ah CSB battery
Time of discharge using an inverter (hours)
Power used
Battery Kit Project - Technical part
20.04.23 Seite 14
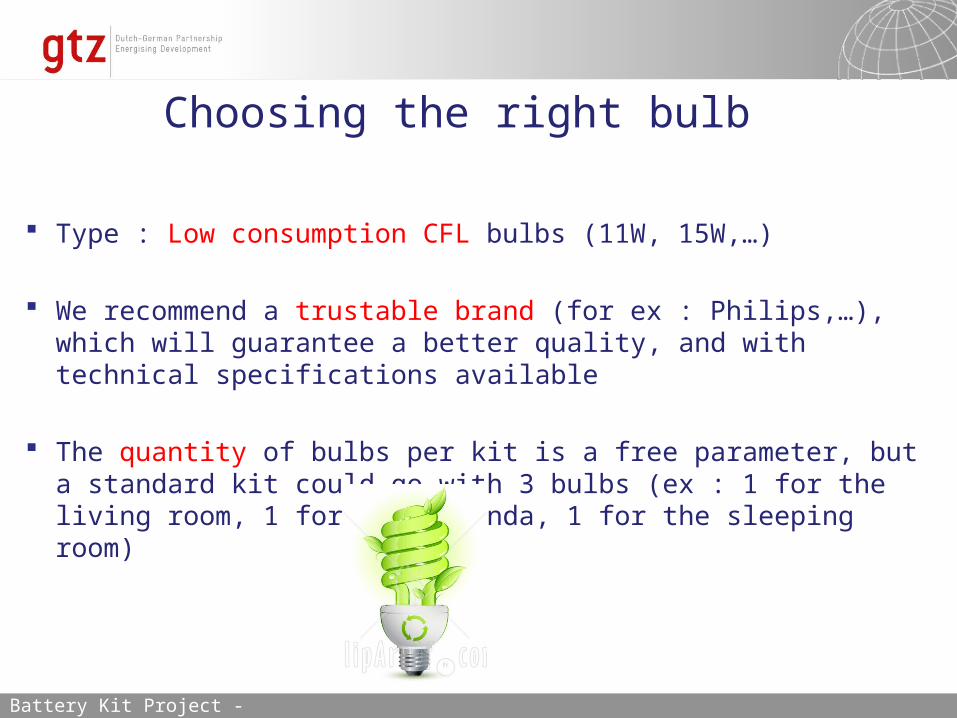
Choosing the right bulb
Type : Low consumption CFL bulbs (11W, 15W,…)
We recommend a trustable brand (for ex : Philips,…), which will guarantee a better quality, and with technical specifications available
The quantity of bulbs per kit is a free parameter, but a standard kit could go with 3 bulbs (ex : 1 for the living room, 1 for the veranda, 1 for the sleeping room)
Battery Kit Project - Technical part
20.04.23 Seite 15
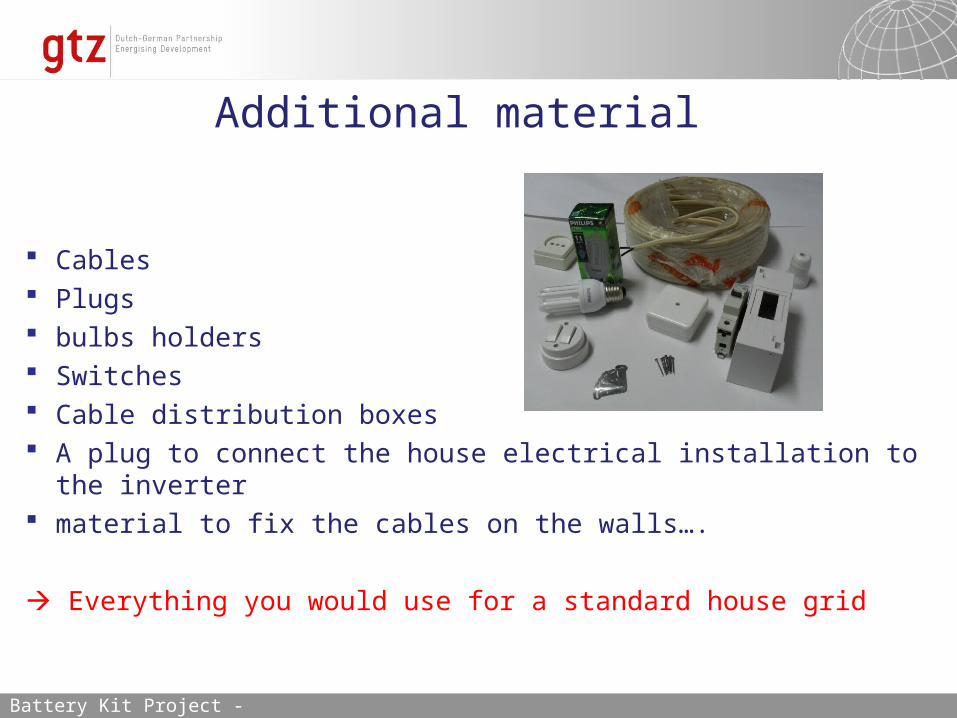
Additional material
Cables Plugs bulbs holders Switches Cable distribution boxes A plug to connect the house electrical installation to the inverter material to fix the cables on the walls….
Everything you would use for a standard house grid
Battery Kit Project - Technical part

20.04.23 Seite 16
Choosing the right charger
There are three types of battery chargers:
1) Non-adjustable : These chargers use only one range of voltage (6/12/24 V) and the charge current decreases with voltage increasing
2) Adjustable : It is possible to select the voltage and the charge current according to the size of the battery
3) Automatic : The charger adapts automatically the charge current during the whole charging, optimizing the charge.
BUT : Automatic chargers do not start charging a battery if its voltage is too low (ex: below 10V for a 12V battery). That would prevent it from being charged. It is then recommended to use an adjustable charger to charge those flat batteries
Battery Kit Project - Technical part
20.04.23 Seite 17
Choosing the right charger The current selection should ideally be automatic, in order to prevent
people from overcharging the battery.
Must be appropriate for the batteries chosen !
Must be user-friendly (easy to use), and heavy-duty.
Ideally, could also charge other battery sizes ( 6V and 24V)
The optimal current of charge is between 1/10 and 1/8 of the battery capacity
Ex: for a 100Ah battery, optimal current of charge is between 10 and 13 Amps
Battery chargers need reliable electricity source they work on single phase electricity, but need a right voltage and frequency
Battery Kit Project - Technical part
20.04.23 Seite 18
Alternative 1 : built-in charger and inverter
An alternative could be to provide an inverter that also charges the battery to every user. The user should then bring his/her kit to any electricity source and plug the charger/inverter. In that case, the charger should be automatic.
Advantages : the kit can then be sealed and the battery could be protected from dust or polarities
reversing The users would not depend on a single battery charger
BUT the inverter would then be carried away from the house and could be damaged during
transport a charger/inverter is usually more expensive than a simple inverter
Battery Kit Project - Technical part
20.04.23 Seite 19
Alternative 2 : DC system
Another alternative could be to provide just a battery, with a charge controller, and use DC LED lamps, and DC radios, for long lasting battery kits.
Advantages : the kit can last longer as the load is very low (LED lamps need less than 5 W) There is no need of an inverter, which reduces cost of the kit.
BUT The battery kit cannot be used for common domestic devices
Battery Kit Project - Technical part
20.04.23 Seite 20
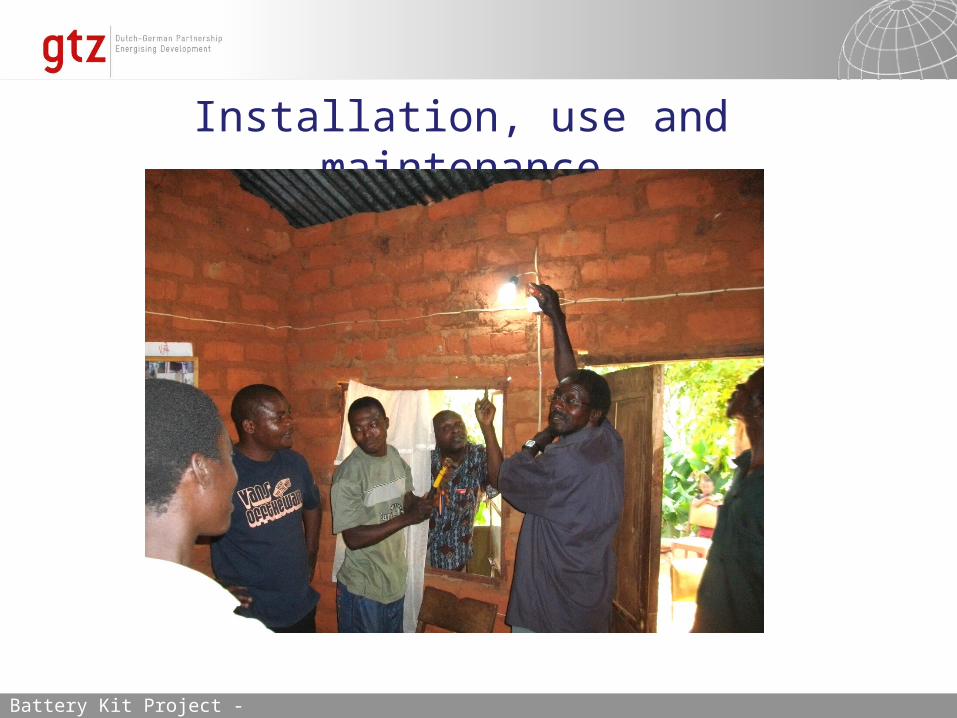
Installation, use and maintenance
Battery Kit Project - Technical part

20.04.23 Seite 21
Installation of the battery kit
Should be done by local electricians; it is just installing the cables, switches, plugs,… and connecting the battery and inverter.
A 1-day training should be enough to make them familiar to battery and inverter .
Important : install the battery charging station before starting to install the battery kits…
Battery Kit Project - Technical part
20.04.23 Seite 22
Installation of the battery charger
The ideal place to install the chargers are next to the power house. The voltage is the highest there. Plus, the operator of the microhydro should be able to use the battery chargers properly.
We recommend to protect the plug to the charger with a jumper.
Battery Kit Project - Technical part
20.04.23 Seite 23
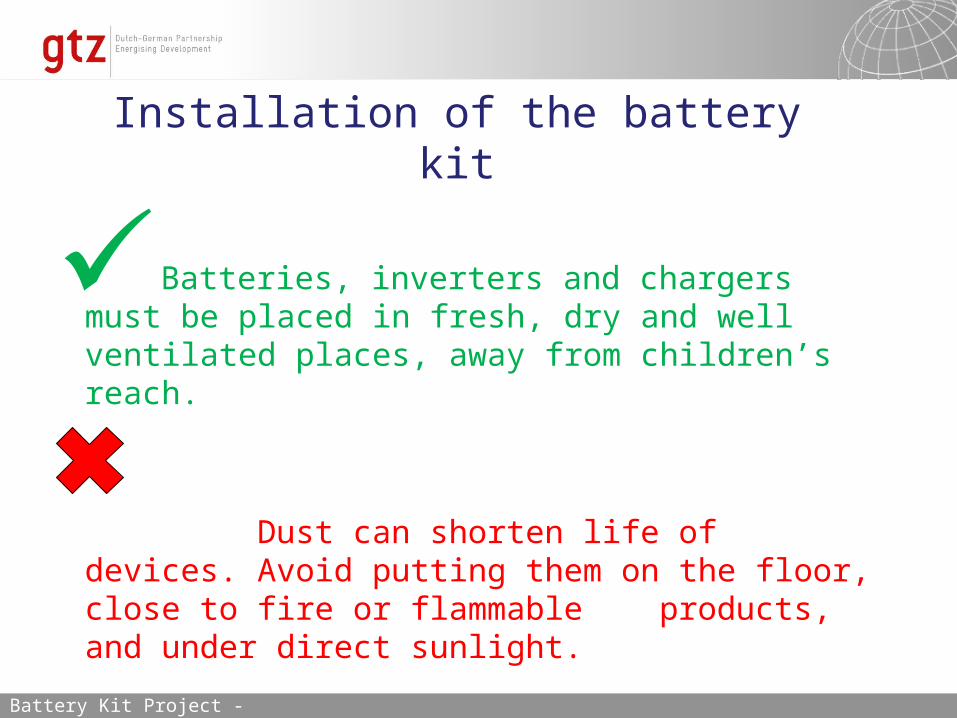
Installation of the battery kit
Batteries, inverters and chargers must be placed in fresh, dry and well ventilated places, away from children’s reach.
Dust can shorten life of devices. Avoid putting them on the floor, close to fire or flammable products, and under direct sunlight.
Battery Kit Project - Technical part

20.04.23 Seite 24
Use of the battery kit
Users of battery kits have few or no knowledge about electricity. This is why battery kit use should be as simple as possible. Almost all the inverters are used the same way
Once the battery kit is installed, it can be operative after three easy steps:
1) Plug the inverter on the battery (taking care of connecting the red cable to the positive pole of the battery and the black cable to the negative pole of the battery
Battery Kit Project - Technical part

20.04.23 Seite 25
Use of the battery kit
If the inverter makes noise when switching on, it means it is overloaded because:
• that too many devices are plugged; then remove the most consuming ones and try again.
• that the battery is empty ; then charge the battery
Battery Kit Project - Technical part

20.04.23 Seite 26
How to know the level of charge of a battery ?
Level of charge
Voltage
100% 12.7
90% 12.6
80% 12.4
70% 12.3
60% 12.2
50% 12
40% 11.9
30% 11.75
20% 11.6
10% 11.3
0% 10.5
• An easy way is to measure the voltage of the battery. Here is a chart with data for the battery used in this specific project (it is recommended to measure it for every new model of battery used)
• N.B. : Voltage is measured when battery is not connected to any device. When plugged to the inverter, the voltage drops automatically of 0.2 to 0.4 V . But after unplugging the inverter, battery voltage increases again of 0.2 to 0.4V
Battery Kit Project - Technical part

20.04.23 Seite 27
Use of the battery charger
The battery charger is an expensive item. Therefore it should be handled with care and used only by trained people.
• The way to use a battery charger may vary from one model to another. One should always check on the user’s manual.
N.B.: Even if it is a good tool for measurements and experiments, the charger used in this project is not the most appropriate to sealed batteries (it should be automatic).
Battery Kit Project - Technical part
20.04.23 Seite 28
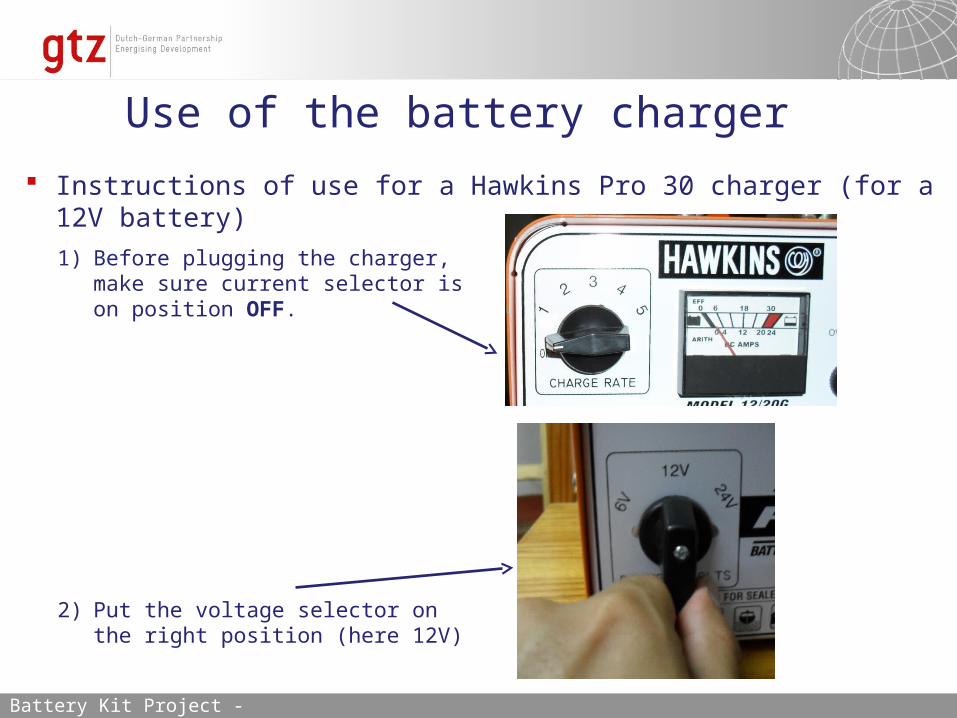
Use of the battery charger
Instructions of use for a Hawkins Pro 30 charger (for a 12V battery)
1) Before plugging the charger, make sure current selector is on position OFF.
2) Put the voltage selector on the right position (here 12V)
Battery Kit Project - Technical part

20.04.23 Seite 29
Use of the battery charger
3) Connect the battery to the charger
(red cable to positive connexion,
black cable to negative connexion)
4) Plug the charger in the clutch
Battery Kit Project - Technical part
20.04.23 Seite 30
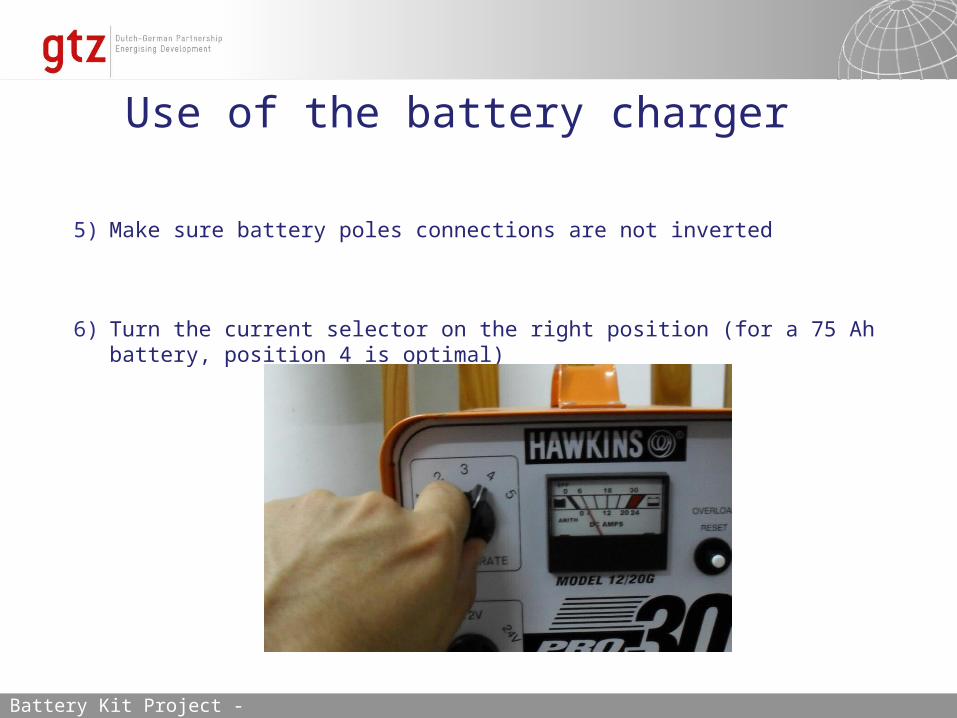
Use of the battery charger
5) Make sure battery poles connections are not inverted
6) Turn the current selector on the right position (for a 75 Ah battery, position 4 is optimal)
Battery Kit Project - Technical part
20.04.23 Seite 31
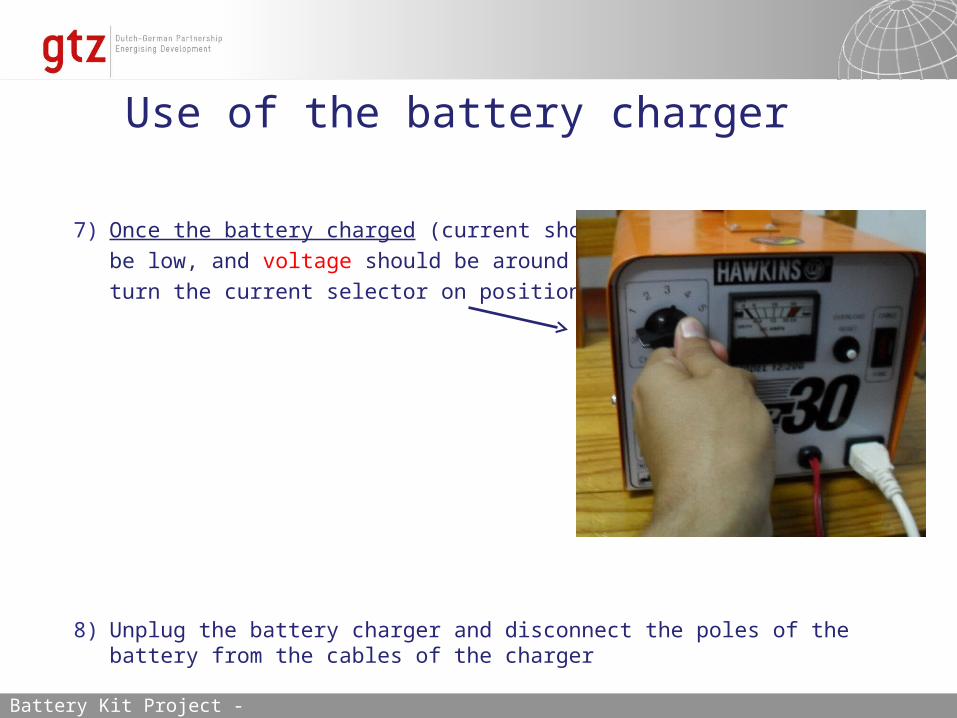
Use of the battery charger
7) Once the battery charged (current should
be low, and voltage should be around 13.5V),
turn the current selector on position OFF
8) Unplug the battery charger and disconnect the poles of the battery from the cables of the charger
Battery Kit Project - Technical part
20.04.23 Seite 32
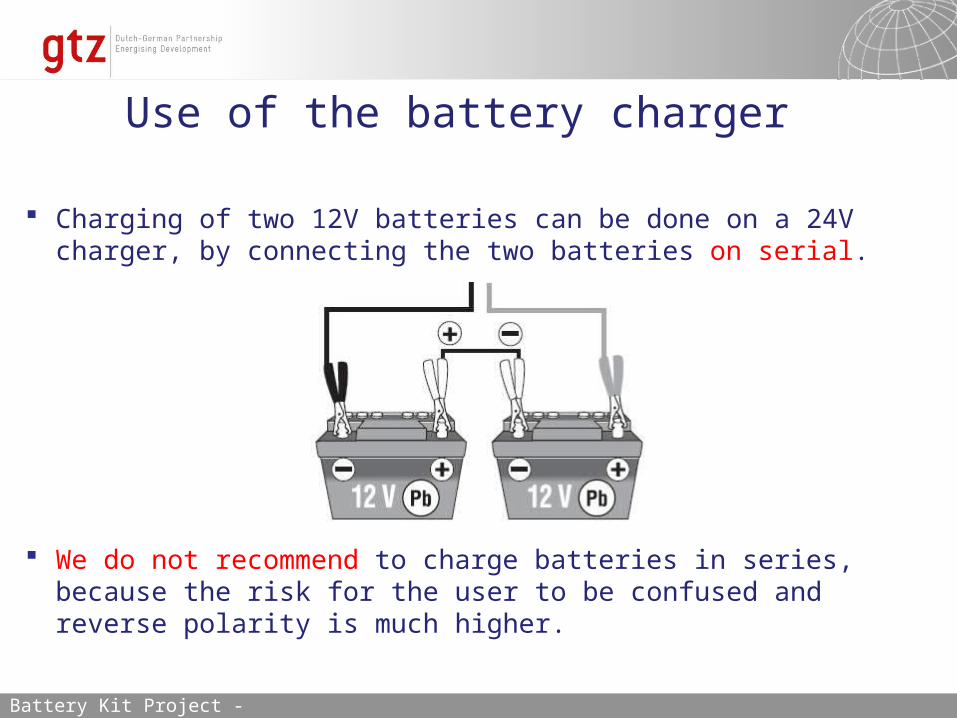
Use of the battery charger
Charging of two 12V batteries can be done on a 24V charger, by connecting the two batteries on serial.
We do not recommend to charge batteries in series, because the risk for the user to be confused and reverse polarity is much higher.
Battery Kit Project - Technical part

20.04.23 Seite 33
Use of the battery charger
To guarantee that the operator of the battery charger will charge the batteries properly, it is recommended to introduce receipts with all the information that may be useful :
Battery Kit Project - Technical part

20.04.23 Seite 34
Maintenance
The maintenance of the battery kit can be done by its owner
When not used, battery and inverter should be stored in their boxes, in an appropriate place (fresh, clean, dry, away from direct sunlight, away from children’s reach, away from any dangerous or flammable material)
Removing the dust from battery and inverters should be done every day.
If a problem occurs with the inverter or the battery, users should not try to open them, and should ask to the NGO or to a trained electrian to take them for repair.
Battery Kit Project - Technical part
20.04.23 Seite 35
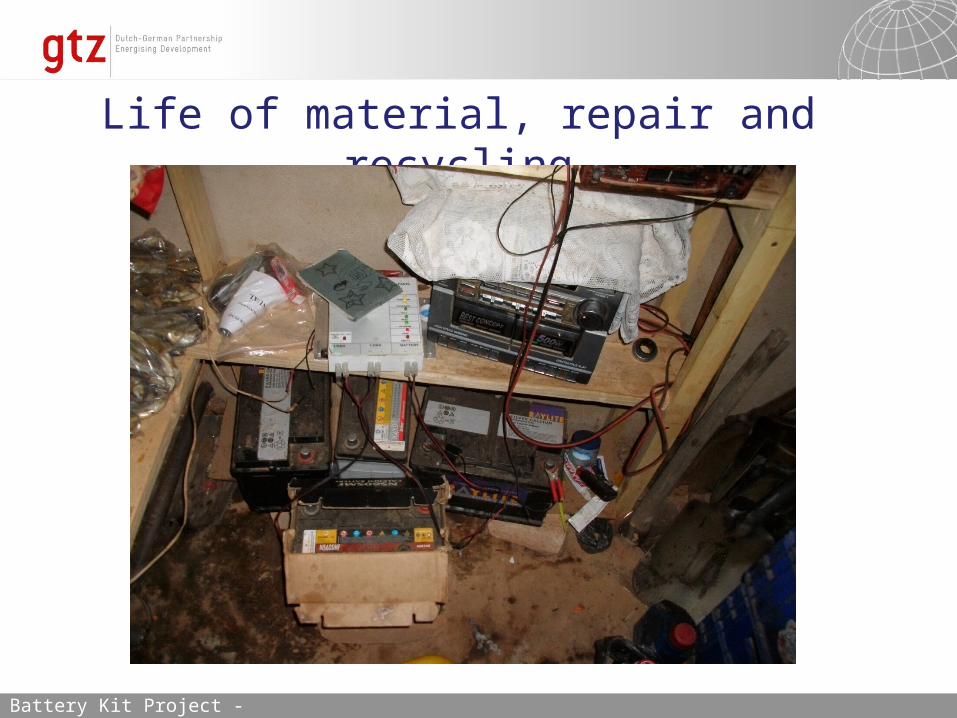
Life of material, repair and recycling
Battery Kit Project - Technical part
20.04.23 Seite 36
Life of material
The life of the inverter depends on its quality and of the care taken by the user (in a proper environment)
If an inverter is tested in a laboratory (or in the NGO’s office) and work properly for 6 months, it does not mean it will last as long on the field. Care must be taken while choosing the inverter.
The life of the CFL bulbs are usually of about 3000 hours. If used properly, the battery kit delivers good quality electricity. Bulbs should be protected from rain, to avoid short circuits.
Battery Kit Project - Technical part

20.04.23 Seite 37
Life of material The life of the battery depends on several parameters
The quality of the battery. The room temperature (capacity and life decrease with temperature increase). The depth of discharge (DOD). If DOD is of 100%, the battery’s capacity should be
reduced by half after about 200 cycles. If DOD is of 50%, the battery’s capacity should be reduced by half after about 400 to 500 cycles. See the specifications of the battery for further information.
Capacity decrease with
cycles, for different depths
of discharge
Battery Kit Project - Technical part graph from specifications sheet of CSB deep cycle 12280W
20.04.23 Seite 38
Repair (inverters)
Usually, failing inverters can be easily repaired, by replacing the damaged piece inside the inverter. This must be done by an acknowledged electronician.
Training a member of the technical staff of the NGO to repair inverter is recommended.
Battery Kit Project - Technical part
20.04.23 Seite 39
Recycling (batteries)
After a while, batteries must be replaced (about after 3 to 5 years, depending on the use and the brand of the battery)
There are people who buy old batteries (to resell the spare parts). It is possible to find one in the area of work of the NGO
The NGO can then replace batteries to their clients, and take back the old batteries to resell them.
Battery Kit Project - Technical part
20.04.23 Seite 40
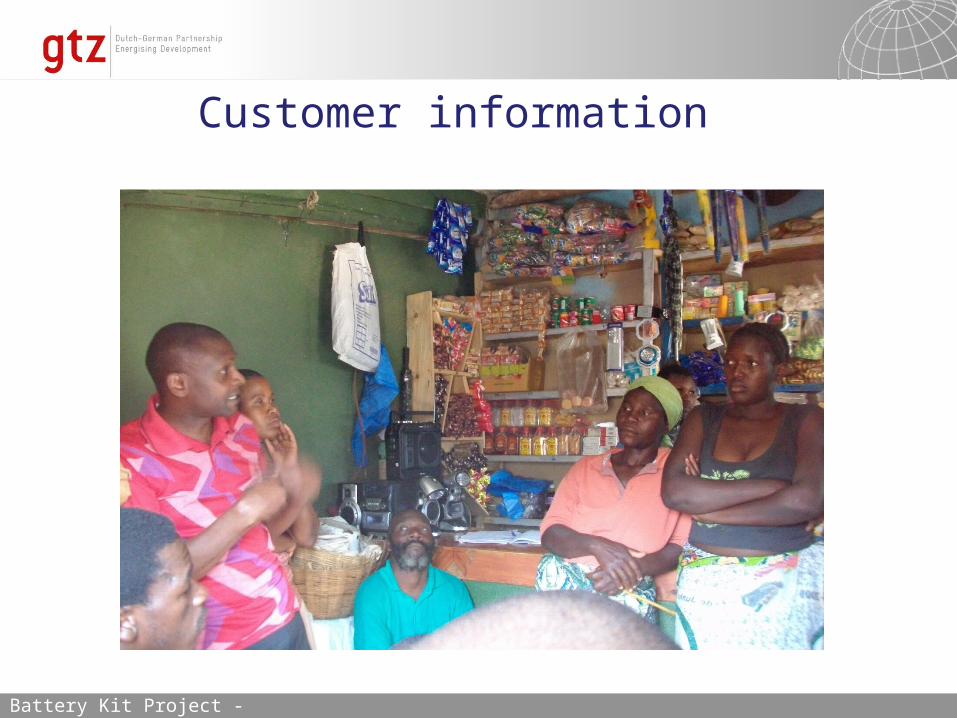
Customer information
Battery Kit Project - Technical part
20.04.23 Seite 41
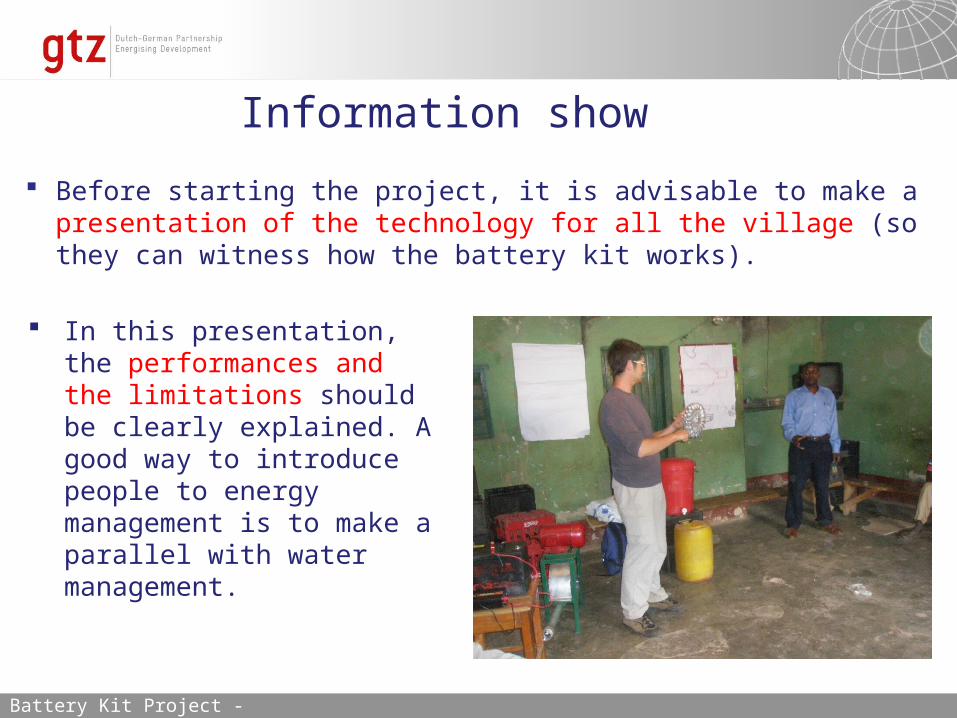
Information show
Before starting the project, it is advisable to make a presentation of the technology for all the village (so they can witness how the battery kit works).
In this presentation, the performances and the limitations should be clearly explained. A good way to introduce people to energy management is to make a parallel with water management.
Battery Kit Project - Technical part

20.04.23 Seite 42
Social event
Once the project has started, it can be helpful to organize a social event (for example football tournament), including drama plays about topic of the project, and dangers of electricity
It is a good way to gather all the community and make sure that everybody is well informed about the project.
Battery Kit Project - Technical part
20.04.23 Seite 43
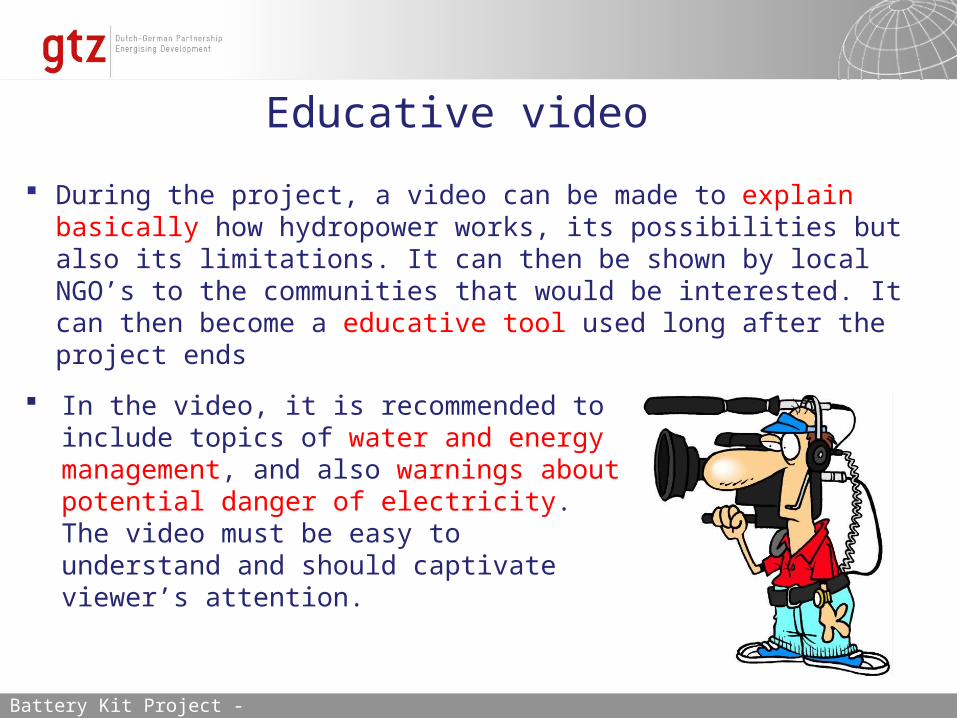
Educative video
During the project, a video can be made to explain basically how hydropower works, its possibilities but also its limitations. It can then be shown by local NGO’s to the communities that would be interested. It can then become a educative tool used long after the project ends
In the video, it is recommended to include topics of water and energy management, and also warnings about potential danger of electricity. The video must be easy to understand and should captivate viewer’s attention.
Battery Kit Project - Technical part

20.04.23 Seite 44
Information leaflet
A good way for villagers to keep reliable information is to produce a leaflet about the battery kit. It can be combined with a users’ manual.
This pamphlet should contain: A description of the kit How to use it How to charge the battery Safety recommendations Examples of consumption of some materials Contact details of the NOG/reseller … all the information that may seem important
Battery Kit Project - Technical part
20.04.23 Seite 45
Introduction- Battery kit presentation- Goal of battery kits in GTZ-AMES project
Technical part : review of the material and installation- Devices : requirements and performances- Installation, use and maintenance- Life of materials, repair and recycling- customer information
Commercial part : strategy- Procurement of the material- Price of the battery kit- Payment procedures- Quantity of kits to sell per area- Warranty and Seller’s responsibility
Battery Kit Project – Commercial part

20.04.23 Seite 46
Procurement of the material
Cheap, made in china material is to avoid. If possible, rely on locally produced material. If not, look for the closest country with a developed industry (ex: for Mozambique : South Africa)
If project is successful, good quality material may become available locally, according to the demand.
The success of the project will depend strongly on the quality of the battery kit
Key materials are battery and inverter
Battery Kit Project – Commercial part

20.04.23 Seite 47
Price of the battery kit
Price must comply with what beneficiaries can afford.
Expenses for other sources of energy (little pen stick batteries, candles,…) must be considered to evaluate a reasonable price for the kit.
Battery Kit Project – Commercial part

20.04.23 Seite 48
Payment procedures
Priority should be given to people who will pay the kit at once. A payment in 2 or 3 months is a good idea.
Expect life of the system to be about 2 to 3 years without having to replace the battery
Battery Kit Project – Commercial part
20.04.23 Seite 49
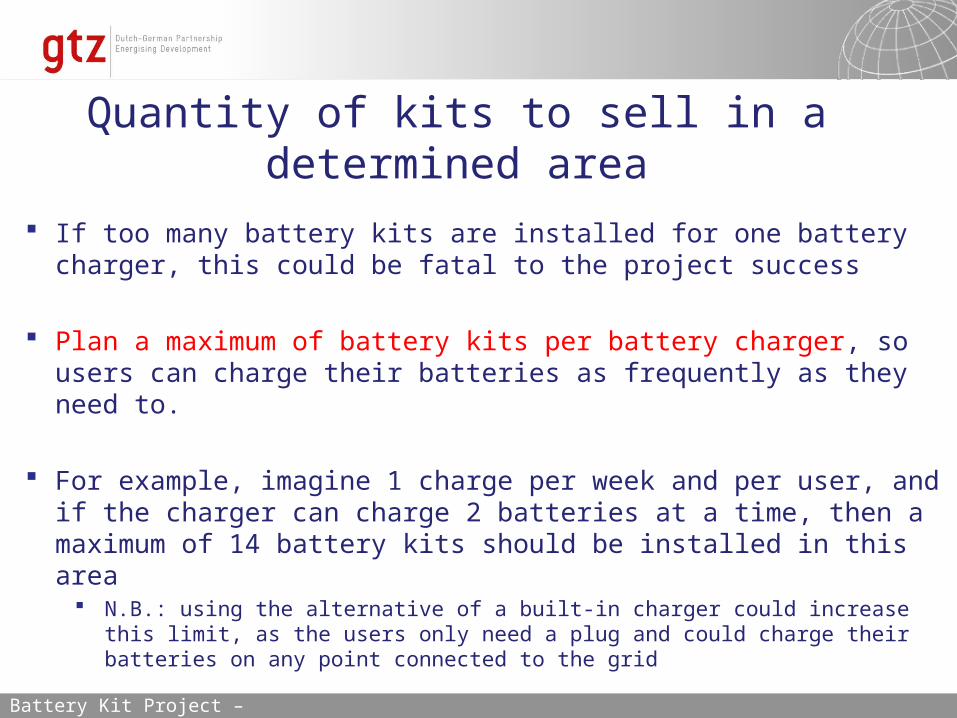
Quantity of kits to sell in a determined area
If too many battery kits are installed for one battery charger, this could be fatal to the project success
Plan a maximum of battery kits per battery charger, so users can charge their batteries as frequently as they need to.
For example, imagine 1 charge per week and per user, and if the charger can charge 2 batteries at a time, then a maximum of 14 battery kits should be installed in this area
N.B.: using the alternative of a built-in charger could increase this limit, as the users only need a plug and could charge their batteries on any point connected to the grid
Battery Kit Project – Commercial part

20.04.23 Seite 50
Warranty and reseller’s responsibility
The project should adapt to local regulations about warranty. We recommend the reseller to be clear about warranty, to avoid problems with customers later on.
If the inverter fails after a short period, the reseller should take the responsibility to repair it or replace it. Buying good material and checking its performances when buying can avoid bad surprises.
The warranty should be different for batteries, inverters, bulbs, and installation
Battery Kit Project – Commercial part

20.04.23 Seite 51
Thank you for your attention


