Biryani Rogan josh Laal maas Cashew Chicken Yield: 4 servings Prep Time: 45 minutes Cook Time: 15 minutes Total Time: 1 hour Ingredients: 1½ pounds boneless, skinless chicken breasts, cut into 1- inch pieces 2 tablespoons dry sherry (or cooking wine, or omit) 2 teaspoons minced, peeled fresh ginger 3½ teaspoons cornstarch, divided Coarse salt ½ cup chicken broth 2 tablespoons soy sauce 1 tablespoon rice vinegar 2 teaspoons granulated sugar 1 tablespoon + 2 teaspoons vegetable oil 2 garlic cloves, minced 2/3 cup unsalted cashews 2 green onions, white and green parts divided and thinly sliced Directions: 1. In a medium bowl, toss the chicken with the sherry, ginger, and 1½ teaspoons cornstarch; season with coarse salt. Refrigerate for 30 minutes. 2. Meanwhile, in a small bowl whisk together the chicken broth, soy sauce, rice vinegar, sugar and 2 teaspoons cornstarch. Set aside. 3. In a large nonstick skillet over medium-high heat, heat 1 tablespoon of vegetable oil. Add half of the chicken and cook until golden brown and cooked through, about 5 minutes. Transfer the chicken to a plate and cover with foil. Add 1 teaspoon of oil to the skillet and cook the remaining chicken (reduce the heat if the chicken is over- browning). Transfer to the covered plate. 4. In the same skillet, add the remaining teaspoon of vegetable oil. Add the cashews, garlic, and green onion whites. Cook, stirring constantly, until the garlic begins to soften, about 30 seconds. Whisk the sauce again to combine and add to the skillet along with the chicken. Cook until the sauce thickens, about 30 seconds.
1½ pounds boneless, skinless chicken breasts, cut into 1-inch pieces2 tablespoons dry sherry (or cooking wine, or omit)2 teaspoons minced, peeled fresh ginger3½ teaspoons cornstarch, dividedCoarse salt½ cup chicken broth2 tablespoons soy sauce1 tablespoon rice vinegar2 teaspoons granulated sugar1 tablespoon + 2 teaspoons vegetable oil2 garlic cloves, minced2/3 cup unsalted cashews2 green onions, white and green parts divided and thinly sliced
Directions:
1. In a medium bowl, toss the chicken with the sherry, ginger, and 1½ teaspoons cornstarch; season with coarse salt. Refrigerate for 30 minutes.2. Meanwhile, in a small bowl whisk together the chicken broth, soy sauce, rice vinegar, sugar and 2 teaspoons cornstarch. Set aside.3. In a large nonstick skillet over medium-high heat, heat 1 tablespoon of vegetable oil. Add half of the chicken and cook until golden brown and cooked through, about 5 minutes. Transfer the chicken to a plate and
cover with foil. Add 1 teaspoon of oil to the skillet and cook the remaining chicken (reduce the heat if the chicken is over-browning). Transfer to the covered plate.4. In the same skillet, add the remaining teaspoon of vegetable oil. Add the cashews, garlic, and green onion whites. Cook, stirring constantly, until the garlic begins to soften, about 30 seconds. Whisk the sauce again to combine and add to the skillet along with the chicken. Cook until the sauce thickens, about 30 seconds. Serve over rice or noodles and top with the green onion greens.
Homemade Buttermilk Ranch DressingYield: About 2 cupsPrep Time: 10 minutesTotal Time: 10 min
¾ cup mayonnaise¾ cup sour cream¼ to ½ cup buttermilk1 tablespoon lemon juice1 tablespoon olive oil1 tablespoon minced fresh parsley1 tablespoon minced fresh chives1 small garlic clove (or half of 1 large clove)½ teaspoon salt¼ teaspoon ground black pepper
Directions:
1. Add all ingredients with ¼ cup of the buttermilk to a blender. Puree for about 10 seconds to combine. Check the consistency and add additional buttermilk a couple tablespoons at a time if you desire a thinner dressing.2. Store in a glass jar or airtight container in the refrigerator for 7 to 10 days.
For the Marinade:1 cup chicken stock½ cup water½ cup soy sauce¼ cup honey¼ cup rice wine vinegar3 tablespoons light brown sugar2 tablespoons cornstarch1 tablespoon sesame oil1½ pounds boneless, skinless chicken breast, cut into 1-inch chunksFor the Sauce:1 tablespoon sesame oil2 garlic cloves, minced1 tablespoon minced fresh ginger1 teaspoon chili paste (can substitute a couple pinches of red pepper flakes)For Coating & Frying:3 egg whites1½ cups cornstarch½ cup all-purpose flour½ teaspoon baking soda6 cups vegetable oil, for fryingSesame seeds, to garnishScallions, sliced, to garnish
Directions:
1. To make the marinade, whisk the chicken stock, water, soy sauce, honey, rice wine vinegar, brown sugar, cornstarch and sesame oil in a bowl. Of this mixture, place 6 tablespoons into a zip lock storage bag and add the chicken; seal and refrigerate for at least 30 minutes. Set aside the remaining marinade in the bowl.2. While the chicken is chilling in the marinade, heat the 1 tablespoon of sesame oil in a large skillet over medium heat until shimmering. Sauté the garlic, ginger and
chile paste until fragrant (about 2 minutes). Add 2 cups of the reserved marinade to the skillet and simmer, whisking constantly, until the mixture has become a darker brown and thickened. Remove from the heat and cover.3. To prepare the chicken for coating and frying, whisk the egg whites in a shallow dish until foamy; set aside. Combine the cornstarch, flour, baking soda, and remaining marinade in a second shallow dish; mix using a fork until it resembles coarse meal.4. Remove the chicken from the refrigerator and from the marinade. Pat the marinated chicken dry with paper towels. 5. Heat the oil in a Dutch oven over medium high heat until the oil registers 350 degrees. 6. While the oil is heating, prepare the chicken for frying. Toss half the chicken into the foamy egg whites until well coated, then dredge the chicken in the cornstarch mixture, pressing to adhere. Transfer the coated chicken to a plate and repeat with the remaining chicken.7. Fry half the chicken until golden brown, about 3 minutes, turning each piece halfway through cooking. Transfer the cooked chicken onto a paper towel-lined plate to drain. Return the oil to 350 degrees. Repeat with the remaining chicken.8. Warm the sauce over medium heat until simmering. Turn off the heat and add the fried chicken pieces. Toss to coat and serve, sprinkling with sesame seeds and chopped scallions.
Biryani
2 cups basmati rice (uncooked) 2 bay leaf 1 1/2 Teaspoon salt 1 Tablespoon vegetable oil 3 Tablespoon ghee 1/2 Teaspoon black cumin 700-800 Gram chicken (pieces) 4 onion (chopped) 1 1/2 Tablespoon garlic-ginger paste 2 tomato (large - chopped) 1 Cup thick curd (hung yoghurt will
do?) 1 Teaspoon chilli powder salt (to taste) 5-6 Tablespoon vegetable oil 1 Cup onions ((2-3 onions) sliced and
fried til crisp & brown) 1/2 Cup fresh mint leaves (whole ) 1-3 saffron strands (dissolve in 1 tsp
warm milk - or few drops of orange colour)
2-3 Drop kewra essence 1 1/2 Teaspoon cumin seeds 3-4 green cardamom 3-4 clove 5cm cinnamon stick 2-3 black peppercorn 2 black cardamom
1. To cook the rice: boil 6-7 cups water with bay, salt and oil. Add the rice and cook until almost tender. Strain and spread the drained rice on a wide tray. Run a fork through the rice to let the steam escape.
2. To cook the chicken: heat oil in a heavy bottomed pan. Add chopped onions. Stir fry till brown. Add 1 1/2 TB ginger-garlic paste. Stir for 30 seconds. Add chopped tomatoes. Cook till dry. Add curd. Stir for a minute. Add salt, chilli powder and chicken. Bhuno for 30 minutes. Add 1 cup water and cook till chicken turns tender. If there is any extra curry, dry it on fire. Keep on fire till you get a thick masala gravy. Remove from fire. Keep aside.
3. Grind all the ingredients after kewra essence/ starting cumin seeds ('flavouring masala') by adding 1/4 cup water to a paste. Add 1/2 cup water to
the paste and strain it. Keep liquid masala aside.
4. For assembling the biryani: take a large heavy bottomed pan, sprinkle some curry of the chicken at the bottom. Spread 1/3 of the rice. Place 1/2 the chicken pieces on it and wet the rice with 2 TB of masala gravy of the chicken, Sprinkle 1/3 of the fried onion and mint leaves on it. Sprinkle 2-3 TB liquid flavouring masala.
5. repeat by adding rice, then chicken, sprinkle 2-3 TB curry, followed by mint leaves, fried onions and flavouring masala, 2-3 drops of kewra and colour.
6. Heat 3 TB ghee in a pan. Splutter 1/2 tsp black cumin and pour on the biryani.
7. Cover pan with a tight fitting lid and seal the lid with dough (or tin foil). Place pan on the fire with a tawa underneath to reduce the heat ti minimum for 1/2 hour before serving.
LAL MAAS800 gms lamb (mutton) - cut into pieces15 whole dry, red chillies - soak in hot water for 10 minutes & grind to a fine paste½ cup oil4-5 black cardamoms (moti elaichi), 4-5 cloves (laung), 1” cinnamon (dalchini)4 onions - chopped2 tbsp ginger paste, 2½ tbsp garlic paste1 tsp degi mirch powder¾ cup yogurt1 tsp cumin powder, 1 tbsp coriander powder½ tsp turmeric powder2 tsp saltTEMPERING2 tbsp ghee8-10 flakes garlic - chopped2-3 cloves (laung)
Method of preparation
1. Heat oil. Add black cardamoms, cloves and cinnamon. Wait for a minute.
2. Add chopped onions and sauté till brown.
3. Add mutton and sauté for 4-5 minutes. Add degi mirch and stir to mix well.
4. Add garlic-ginger, sauté for 2-3 minutes.5. Beat the yogurt well and add cumin
powder, coriander powder, turmeric powder, prepared red chilli paste and salt.
6. Add yogurt to mutton and stir frequently for about 5-7 minutes till oil separates.
7. Add 2 cups hot water. Bring to a boil and simmer covered on low heat for 40 minutes, stirring in between. Cook till tender.
8. Heat ghee in a small pan. Add garlic and cloves and when you start getting the aroma, remove from fire and add to the mutton. Cover and keep aside till serving. Serve hot with rice or missi roti
Smoke the meat
Matr Kulcha
Ingredients
for the matar/white peas curry:
1 and ½ cups dried white peas 3 to 4 cups water for pressure cooking the
peas. ½ tsp cumin seeds 1 tsp chaat masala ½ tsp roasted cumin powder/bhuna jeera
powder ½ tsp dry mango powder/amchur powder ¼ tsp red chili powder ¼ tsp garam masala powder
jaljeera chutney:
¾ cup fresh mint leaves, loosely packed 1 tsp cumin seeds 1 tsp fennel seeds/saunf seeds removed from 1 black cardamom –
discard the outer cover 1 dry red chili, deseeded (optional) a pinch of asafoetida/hing 1 tsp black salt/kala namak 5-6 black pepper ½ tsp dry mango powder/amchur powder 1 tbsp seedless tamarind ¼ or ⅓ cup water for grinding
for toppings & garnish:
1 small onion, finely chopped 1 medium sized tomato, finely chopped 1 green chili, slit or chopped ½ inch ginger, julienned or finely chopped 1 lemon, quartered some coriander leaves (optional)
for the kulcha
please refer to the kulcha recipe here.
Instructions
cooking the peas:
1. soak the matar or dried white peas overnight or for 7-8 hours.
2. drain and then pressure cook with 3 to 4 cups of water till the matar are completely cooked.
3. if there is extra water and the mixture is thin, then simmer till the matar get a medium consistency.
4. mash the matar slightly with a wooden spoon.
5. the soaked matar can also be cooked in a pan, but they will take a lot of time.
preparing jaljeera chutney:
1. grind all the ingredients listed under jaljeera chutney with ¼ or ⅓ cup water to a smooth paste. keep aside.
preparing jaljeera chutney:
1. in a pan, heat oil.2. on a low flame, first brown the cumin
seeds.3. remove the pan from fire.4. then add the dry spice powders one by
one – chaat masala, roasted cumin powder, amchur powder, red chili powder, garam masala powder.
5. stir and immediately pour this mixture into the cooked matar/peas or add the cooked matar to this mixture.
6. switch on the fire and heat through the matar for 3-4 mins.
7. now add the prepared jaljeera chutney and stir.
8. if the matar mixture looks dry, add some water.
9. cook the matar or peas curry till all the flavors are mingled, for about 2-3 minutes.
10. check the seasoning and add more black salt if required.
11. you can make this and keep it aside till you prepare the kulchas.
12. when serving reheat the matar.13. serve matar kulcha in bowls or plates.
top with onions, tomato, ginger and chilies. squeeze some lemon juice on top and mix lightly.
14. garnish with coriander leaves and serve with matar kulchas.
Serves: 8-10 kulchasIngredients•2 and ½ cups maida or all purpose flour•4 tbsp yogurt or (3 tbsp yogurt + 1 tbsp milk) i used cashew curd•½ tsp baking powder•¼ tsp baking soda•approx ¾ cup water for kneading – add more if required•2 to 2 & ½ tsp sugar•¾ tsp salt or as required•2 and ½ tbsp oil or ghee•some oil or ghee or butter for frying•extra flour for dusting•a few nigella seedsInstructions1.mix the maida or all purpose flour, salt, sugar, baking powder and baking soda in a bowl.2.make a well in the center.
3.add the curd, oil and water.4.begin to mix the flour with the liquids first and then start to knead.5.make a smooth and soft dough.6.in the same bowl or pan, cover the dough with a wet kitchen napkin and let the dough ferment for 2 hours.7.make small balls of the dough.8.sprinkle some nigella seeds on the ball.9.with the rolling pin flatten the dough and roll each into a small sized kulcha.10.heat a griddle or a tava.11.place the kulcha on the tava.12.cook one side partly till its ¼ cooked.13.flip and cook the other side till its ½ cooked.14.apply ghee or oil on both sides whilst cooking.15.cook the kulcha till it get golden spots and is evenly cooked.16.make all kulchas this way.17.serve the kulcha hot or warm with chana or chole.18.the kulchas can also be stacked in a roti basket and then served warm.
Ingredients:For Malpua1/2 Cup Flour/ Maida1/4 Cup Semolina1 Cup Whole Milk, warm3 Tbsp. Condense Milk1 Tsp. Cardamom Powder1 Tsp. Fennel SeedsFew RaisinsOil for Frying
For Sugar Syrup1 Cup Sugar1 Cup WaterFew Saffron Strands
For GarnishingAlmonds, sliveredPistachios, sliveredRabri, chilled
Instructions:Sieve the semolina and flour together and combine with raisins, cardamom, fennel and condense milk. Add warm milk and mix it without any lumps. Cove and keep aside to rest for 2-3 hours, if you are in rush try to keep for atleast 30-40 minutes. Heat the water in separate pan and when water starts boiling, add sugar and stir continuously until to dissolve completely. Try to prepare one string consistency syrup. Heat the oil in flat surface pan or wok. When oil is hot enough, pour the ladleful batter in kadai to form of pancake in one motion. Cook this pancake on slow flame from both sides until to cook and golden. Place these malpuas on a kitchen towel drain excess oil. Keep this malpua in sugar syrup for atleast 5 minutes. Remove it and garnish with chopped nuts and serve hot with chilled rabri.
You can use grated and unsweetened khoya instead of condense milk. If you used unsweetened khoya, add 2 tbsp. sugar also. Try to keep batter for 3-4 hours to prepare smooth and soft malpuas.
For the Malted Chocolate Frosting:2 cups unsalted butter, at room temperature4 cups powdered sugar¾ cup Ovaltine Classic1 tablespoon vanilla extractPinch of salt8 ounces semisweet or dark chocolate chocolate, melted and cooled½ cup heavy cream
Make the Malted Chocolate Frosting: Beat the butter and powdered sugar on low speed until blended together, about 1 minute. Add the Ovaltine, vanilla and salt, and continue to beat on low until well combined, about 1 to 2 minutes. Add the melted chocolate and beat on medium speed until smooth, about 2 minutes. Add the heavy cream and beat on medium-high speed for another minute
Preparation:In a large bowl of an electric mixer, add egg whites, corn syrup, and salt. Using your electric mixer on high speed, mix for approximately 5 minutes or until the mixture is thick and volume has almost doubled. Reduce your mixer to low speed, add powdered sugar and mix until well blended. Add vanilla extract, mixing just until well blended.Your homemade marshmallow fluff/cream is now ready to use in your recipes. Use immediately, or refrigerate in a covered container for up to 2 weeks.Makes a large quantity.
Yield: About 2 cupsPrep Time: 20 minutesTotal Time: 20 minutes
¾ cup granulated sugar½ cup light corn syrup¼ cup waterPinch of salt2 egg whites, at room temperature¼ teaspoon cream of tartar1½ teaspoons vanilla extract
Directions:
1. Combine the sugar, corn syrup, water and salt in a small saucepan over medium-high heat. Boil, stirring occasionally, until the mixture reaches 240 degrees F on a candy thermometer.2. While the sugar mixture is boiling, add the egg whites and cream of tartar to a stand mixer fitted with a whisk attachment. Whip on medium-high speed until soft peaks form. The egg whites should be ready and waiting when the sugar mixture reaches 240 degrees F. If the egg whites reach soft peaks before the sugar mixture reaches its temperature, turn off the mixer. 3. Once the sugar mixture reaches 240 degrees F, turn the mixer speed to low and very slowly drizzle the syrup down the side of the mixer bowl. Once all of the syrup has been added, increase the speed to medium-high and beat until stiff, glossy peaks form and the mixture has cooled substantially, about 7 to 9 minutes. Add the vanilla extract during the last minute or two of beating.4. Use immediately, or store in an airtight container in the refrigerator for up to 2 weeks.
Turtle Cheesecake
For the Crust:24 Oreo cookies, finely crushed into crumbs6 tablespoons unsalted butter, meltedPinch of saltFor the Caramel-Pecan Layer:1½ cups caramel sauce (omit the salt for a sweeter version)1 cup chopped pecansFor the Cheesecake:32 ounces cream cheese, at room temperature1¼ cups granulated sugar4 eggs, at room temperature¾ cup heavy cream1 tablespoon vanilla extractFor the Chocolate Ganache:¾ cup heavy cream¼ cup light corn syrup8 ounces semisweet chocolate, finely chopped½ teaspoon vanilla extract
Directions:
1. Make the Crust: Preheat oven to 350 degrees F. Toss together the Oreo crumbs, melted butter and salt until all of the crumbs are moistened. Press into the bottom and two inches up the sides of a 9-inch springform pan. Place pan in the freezer for 10 minutes. Bake for 7 minutes, or until crust is firm. Remove from oven and cool completely.2. Make the Caramel-Pecan Layer: In a small bowl, stir together the caramel sauce and pecans. Pour onto the cooled crust and gently spread into an even layer. Refrigerate while the cheesecake is prepared.3. Make the Cheesecake: Beat together the cream cheese and sugar on medium speed until smooth and creamy, scraping the sides of the bowl as needed, about 3 minutes. Add the eggs one at a time, beating well until fully incorporated and scraping down the sides of the bowl between each addition. Add the heavy cream and vanilla and beat until well combined, about 1 minute. Pour the batter on top of the caramel-pecan layer and bake for 55 to 65 minutes, or until the edges are set, but the middle still jiggles a little.
4. Keeping the oven door closed, turn off the oven and let the cheesecake rest in the oven for 1 hour. After 1 hour, remove the cheesecake from the oven, and place the pan on a wire rack to cool completely, about an additional 2 hours. Once completely cool, refrigerate for at least 6 hours (preferably overnight).5. Make the Chocolate Ganache: Combine the heavy cream, corn syrup, chocolate and vanilla in a small saucepan over medium heat, stirring constantly, until smooth. Set the glaze aside to cool and thicken at room temperature for 30 minutes.6. Pour the ganache over the top of the cheesecake, gently spreading it to the edges. Refrigerate for 15 minutes, or until set. Remove the sides of the pan, garnish with additional caramel sauce and chopped pecans, and serve. Leftover cheesecake can be stored, tightly covered, in the refrigerator for up to 5 days. It can also be frozen for up to 2 months.
For the Crust:8 ounces Oreo cookies, crushed into fine crumbsPinch of salt4 tablespoons unsalted butter, melted4 ounces semisweet chocolate chips½ cup heavy cream¼ cup chopped peanutsFor the Filling:1 cup heavy cream8 ounces cream cheese1 cup creamy peanut butter1 cup powdered sugar14-oz can sweetened condensed milk1 teaspoon vanilla extract1 teaspoon lemon juiceTo Finish:1/3 cup semisweet chocolate chips1 teaspoon vegetable shortening
Directions:
1. In a medium bowl, combine the Oreo crumbs, pinch of salt and melted butter, tossing with a fork until the crumbs are all evenly moistened. Press into the bottom and about 1-inch up the sides of a 9-inch springform pan. Place in the freezer for 10 minutes.2. While crust is in the freezer, place the 4 ounces of chocolate chips into a small bowl. In a small saucepan set over medium-high heat, bring the ½ cup of heavy cream to a full boil. Pour over the chocolate chips, let it sit a minute, and then stir gently with a rubber spatula until completely smooth and glossy. Pour over the bottom of the crust, tilting the pan or using an offset spatula to ensure it covers the entire bottom. Sprinkle with the chopped peanuts. Place pan in the refrigerator while you prepare the filling.
3. Using an electric mixer with a whisk attachment, whip the 1 cup of heavy cream on medium-high speed until stiff peaks form. Transfer the whipped cream to a medium bowl and place in the refrigerator until ready to use.4. Again using an electric mixer, this time with a paddle attachment (or regular beaters if using a hand mixer), cream together the peanut butter and cream cheese on medium speed until light and fluffy. Reduce the speed to low and gradually add the powdered sugar. Once it is all added, scrape the sides of the bowl and beat on medium speed for about 30 seconds to completely incorporate. Add the sweetened condensed milk, vanilla extract and lemon juice and beat at medium speed until everything is completely combined and smooth.5. Using a rubber spatula, stir in about 1/3 of the whipped cream to lighten the mixture. Very gently, fold in the remaining whipped cream until no streaks of whipped cream remain. Pour the filling into the prepared crust.6. In a microwave on 50% power, melt the 1/3 cup of chocolate chips with the shortening in 30 second bursts, stirring after each one, until the chocolate is completely melted and smooth. Using a spoon or pastry bag, drizzle the melted chocolate over the top of the pie filling.7. Refrigerate for at least 3 hours (or overnight) before serving. Store leftovers in the refrigerator.
For the Crust:1¾ cups chocolate cookie crumbs (about 20 Oreos)3 tablespoons dark brown sugar6 tablespoons unsalted butter, meltedPinch of saltFor the Filling:6 ounces cream cheese, at room temperature¾ cup powdered sugar1 teaspoon kosher salt1¼ cups creamy peanut butter (not chunky or natural)1 tablespoon vanilla extract2 cups heavy creamFor the Topping Drizzle:1 ounce semisweet chocolate, finely chopped2 tablespoons peanut butter
Directions:
1. To make the crust: Preheat oven to 350 degrees F. Combine the cookie crumbs, brown sugar and salt in a medium bowl. Add the butter and toss with a fork until all of the crumbs are moistened. Press into the bottom and up the sides of a 9-inch pie plate. Refrigerate for 15 minutes, then bake until set, about 8-10 minutes. Transfer to a wire rack to cool completely.2. To make the filling: In the bowl of a stand mixer fitted with the paddle attachment, beat the cream cheese, powdered sugar and salt on medium speed until light and fluffy, about 2 minutes. Add the peanut butter and vanilla. Wipe out the mixing bowl, switch to the whisk attachment and whip the heavy cream on medium-high until soft peaks form. Stir 1/3 of the whipped cream into the cream cheese mixture to lighten it up. Use a rubber spatula to gently fold in the remaining whipped cream. Transfer the filling to the cooled crust and spread in an even layer.
Freeze uncovered for at least 4 hours or up to 1 day covered with plastic wrap.3. To garnish the pie: Put the chocolate in a microwave-safe bowl and heat in 30 second increments at 50% power, stirring after each. Continue until the chocolate is melted and smooth. Transfer to a resealable plastic bag and snip a tiny bit off the corner. Hold the bag over the pie and drizzle the melted chocolate in a zig-zag pattern. Melt the peanut butter in the microwave using the same method used for the chocolate. Add the melted peanut butter to a resealable plastic bag, snip off a corner and drizzle over the pie. Let stand for about 10 minutes to set. Return to the freeze if not serving immediately.4. Remove the pie from the freezer about 10-15 minutes before you are ready to serve. If you have trouble cutting it, running your knife under warm water will help. Cover leftovers tightly with plastic wrap and foil, and store in the freezer.
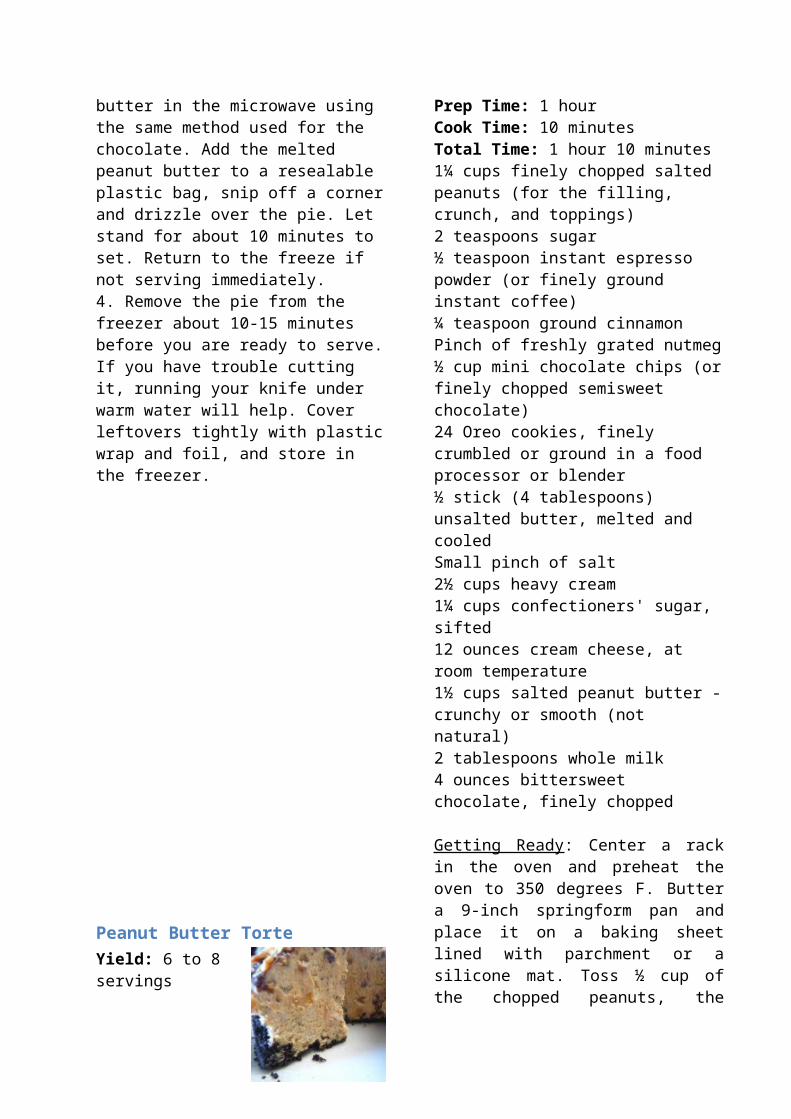
Total Time: 1 hour 10 minutes1¼ cups finely chopped salted peanuts (for the filling, crunch, and toppings)2 teaspoons sugar½ teaspoon instant espresso powder (or finely ground instant coffee)¼ teaspoon ground cinnamonPinch of freshly grated nutmeg½ cup mini chocolate chips (or finely chopped semisweet chocolate)24 Oreo cookies, finely crumbled or ground in a food processor or blender½ stick (4 tablespoons) unsalted butter, melted and cooledSmall pinch of salt2½ cups heavy cream1¼ cups confectioners' sugar, sifted12 ounces cream cheese, at room temperature1½ cups salted peanut butter - crunchy or smooth (not natural)2 tablespoons whole milk4 ounces bittersweet chocolate, finely chopped
Getting Ready: Center a rack in the oven and preheat the oven to 350 degrees F. Butter a 9-inch springform pan and place it on a baking sheet lined with parchment or a silicone mat. Toss ½ cup of the chopped peanuts, the sugar, espresso powder, cinnamon, nutmeg and chocolate chips together in a small bowl. Set aside.Put the Oreo crumbs, melted butter and salt in another small bowl and stir with a fork just until the crumbs are moistened. Press the crumbs evenly over the bottom and up the sides of the springform pan (they should go up about 2 inches on the sides). Freeze the crust for 10 minutes. Bake the crust for 10 minutes, then transfer it to a rack and let it cool completely before filling. Working with a stand mixer fitted with the whisk attachment or with a hand mixer in a large bowl, whip 2 cups of the cream until it holds medium peaks. Beat in ¼ cup of the confectioners' sugar and whip until the cream holds medium-firm peaks. Scrape the cream into a bowl and refrigerate until needed.
Wipe out (no need to wash) the bowl, fit the stand mixer with the paddle attachment if you have one, or continue with the hand mixer, and beat the cream cheese with the remaining 1 cup confectioners' sugar on medium speed until the cream cheese is satiny smooth. Beat in the peanut butter, ¼ cup of the chopped peanuts and the milk.Using a large rubber spatula, gently stir in about one quarter of the whipped cream, just to lighten the mousse. Still working with the spatula, stir in the crunchy peanut mixture, then gingerly fold in the remaining whipped cream. Scrape the mousse into the crust, mounding and smoothing the top. Refrigerate for at least 4 hours, or overnight; cover with plastic wrap as soon as the mousse firms.To Finish the Torte: Put the chopped chocolate in a heatproof bowl and set the bowl over a saucepan of simmering water. Leave the bowl over the water just until the chocolate softens and starts to melt, about 3 minutes; remove the bowl from the saucepan.Bring the remaining ½ cup cream to a full boil. Pour the cream over the chocolate and, working with a rubber spatula, very gently stir together until the ganache is completely blended and glossy.Pour the ganache over the torte, smoothing it with a metal icing spatula. Scatter the remaining ½ cup peanuts over the top and chill to set the topping, about 20 minutes.When the ganache is firm, remove the sides of the springform pan; it's easiest to warm the pan with a hairdryer, then remove the sides, but you can also wrap a kitchen towel dampened with hot water around the pan and leave it there for 10 seconds. Refrigerate until ready to serve.Serving: I like to serve the torte with strong espresso, but it lends itself to being paired with black tea, hot cocoa or even a not-too-thick not-too-sweet coffee milkshake.Storing: Well covered, the torte will keep in the refrigerator for about 2 days; just make sure to keep it away from foods with strong odors
Dark Chocolate MousseYield: 6 to 8 servingsPrep Time: 3 hours 30 minutesTotal Time: 3 hours 30 minutesA fabulous recipe for classic chocolate mousse.
1. Combine the chocolate, water, cocoa powder, brandy and espresso powder in a medium bowl. Place the bowl over a small saucepan filled with about 1 inch of water set over low heat, so that it is barely simmering. Stir the mixture frequently until it is completely melted and smooth; remove the bowl from the heat.2. In a large bowl, whisk together the egg yolks, 1½ teaspoons of the sugar and the salt until it is slightly thickened and pale in color, about 30 seconds. Pour the melted chocolate mixture into the egg mixture and whisk to combine. Let cool until it's slightly warmer than room temperature, about 5 minutes.3. Whip the egg whites using a stand mixer with a whisk attachment on medium speed until foamy, about 1 minute. Add the remaining 1½ teaspoons of sugar and increase the speed to medium-high. Continue to whip until soft peaks form, about 1 more minute. Gently whisk one-quarter of the whipped egg whites into the chocolate mixture. Add the remaining egg whites and
gently fold into the chocolate mixture using a rubber spatula until just a few white streaks remain.4. Wipe out the mixing bowl and then add the heavy cream to the bowl. Again using the whisk attachment, whip the cream on medium speed until it begins to thicken, about 30 seconds. Increase the speed to high and whip until soft peaks form, at least another 15 seconds. Using a rubber spatula, gently fold the whipped cream into the mousse until no white streaks remain. Spoon the mousse into individual serving cups, cover with plastic wrap and refrigerate until set and firm, at least 2 hours or up to 24 hours.Notes:
If you are concerned about using raw eggs in this recipe, look for pasteurized eggs - almost all grocery stores carry them now.
You can omit the brandy if you do not drink alcohol. You may substitute vanilla extract, adding it to the egg yolks, sugar and salt in step #2.
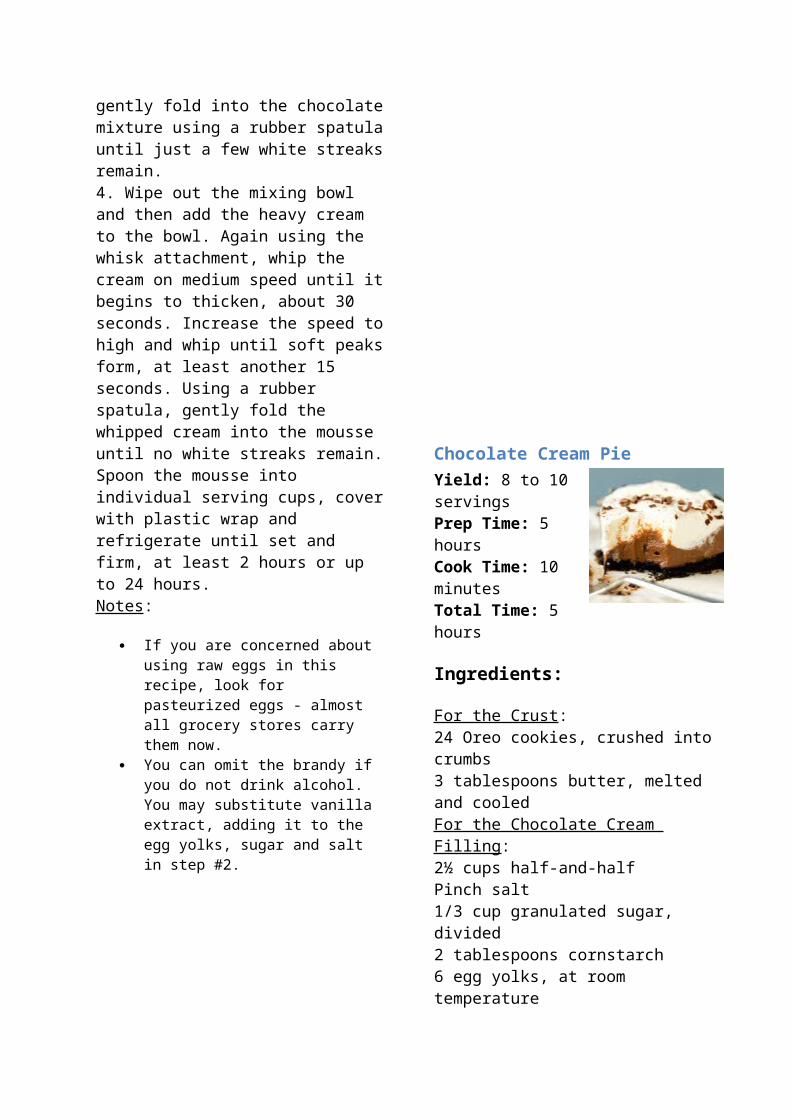
For the Crust:24 Oreo cookies, crushed into crumbs3 tablespoons butter, melted and cooledFor the Chocolate Cream Filling:2½ cups half-and-halfPinch salt1/3 cup granulated sugar, divided2 tablespoons cornstarch6 egg yolks, at room temperature6 tablespoons unsalted butter, cold and cut into 6 pieces6 ounces semisweet or bittersweet chocolate, finely chopped1 ounce unsweetened chocolate, finely chopped1 teaspoon vanilla extractFor the Whipped Cream Topping:1½ cups heavy cream4½ teaspoons granulated sugar½ teaspoon vanilla extract
Directions:
1. Make the Crust: Preheat oven to 350 degrees F. Combine the Oreo cookie crumbs and the melted butter in a medium bowl and toss with a fork until the crumbs are evenly moistened. Transfer the crumbs to a 9-inch pie plate. Press the crumbs evenly into the bottom and up the sides of the pan, forming a crust. Refrigerate the lined pie plate for 20 minutes. Bake for 10 minutes, until the crust is fragrant and set. Cook on a wire rack while the filling is prepared.2. Make the Chocolate Cream Filling: Bring the half-and-half, salt and 3 tablespoons of the sugar to a simmer in a medium saucepan over medium-high heat, stirring occasionally
with a wooden spoon to dissolve the sugar. Stir together the remaining sugar and cornstarch in a small bowl. Whisk the yolks thoroughly in a medium bowl for about 30 seconds, until slightly thickened. Add the cornstarch mixture and whisk until the mixture is glossy and the sugar has begun to dissolve, about 1 minute. When the half-and-half reaches a full simmer, drizzle about ½ cup hot half-and-half over the yolks, whisking constantly to temper; then whisk the egg yolk mixture into the simmering half-and-half. Return to a simmer, whisking constantly, until 3 or 4 bubbles burst on the surface and mixture is thickened and glossy, about 15 seconds longer.3. Off the heat, whisk in the butter until incorporated; add the chopped chocolate and whisk until melted, scraping the bottom of the pan with a rubber spatula to fully incorporate. Stir in the vanilla, then immediately pour the filling through a fine-mesh sieve set over a bowl. Using a spatula, scrape the strained filling into the baked and cooled crust. Press plastic wrap directly on the surface of the filling and refrigerate the pie until the filling is cold and firm, at least 4 hours or overnight.4. Make the Whipped Cream Topping: When ready to serve, beat the cream and sugar in the chilled bowl of an electric mixer at medium speed to soft peaks; add the vanilla. Continue to beat to barely stiff peaks. Spread or pipe the whipped cream over the chilled filling and garnish with shaved chocolate, if desired. Serve immediately.
Triple Chocolate Mousse CakeYield: 12 to 16 servingsPrep Time: 3 hours 30 minutesCook Time: 13 to 18 minutesTotal Time: 4 hours 30 minutesLayers of flourless chocolate cake, dark chocolate mousse and white chocolate mousse create an absolutely sinful dessert for chocolate lovers everywhere.
Ingredients:
For the Bottom Layer6 tablespoons (3 ounces) unsalted butter, cut into 6 pieces, plus extra for greasing pan7 ounces bittersweet chocolate, finely chopped¾ teaspoon instant espresso powder1½ teaspoons vanilla extract4 eggs, separatedPinch salt⅓ cup light brown sugarFor the Middle Layer:2 tablespoons cocoa powder, preferably Dutch-processed5 tablespoons hot water7 ounces bittersweet chocolate, finely chopped1½ cups cold heavy cream1 tablespoon granulated sugar⅛ teaspoon table saltFor the Top Layer¾ teaspoon powdered gelatin1 tablespoon water6 ounces (1 cup) white chocolate chips1½ cups cold heavy cream
Directions:
1. Make the Bottom Layer: Preheat oven to 325 degrees F. Butter the bottom and sides of a 9-inch springform pan that is at least 3 inches high. 2. Melt the butter, chocolate and espresso powder in a large heatproof bowl set over a
saucepan filled with 1 inch of barely simmering water, stirring occasionally until smooth. Remove from heat and cool for 5 minutes. Whisk in the vanilla and egg yolks; set aside.3. In a stand mixer fitted with the whisk attachment, beat the egg whites and salt at medium speed until frothy, about 30 seconds. Add half of the brown sugar and beat until combined, about 15 seconds. Add the remaining brown sugar and beat at high speed until soft peaks form when the whisk is lifted, about 1 minute longer, scraping down the sides halfway through. Whisk one-third of the beaten egg whites into the chocolate mixture. Using a rubber spatula, fold in the remaining egg whites until no white streaks remain. Carefully transfer the batter to the prepared springform pan, gently smoothing the top with an offset spatula.4. Bake until the cake has risen, is firm around the edges, and the center has just set but is still soft (the center of cake will spring back after pressing gently with your finger), 13 to 18 minutes. Transfer the pan to a wire rack to cool completely, about 1 hour. (The cake will collapse as it cools.) Do not remove the cake from the pan.5. Make the Middle Layer: Whisk together the cocoa powder and hot water in a small bowl and set aside. Melt the chocolate in a large heatproof bowl set over a saucepan filled with 1 inch of barely simmering water, stirring occasionally until smooth. Remove from heat and cool for 5 minutes.6. In the bowl of a stand mixer fitted with the whisk attachment, whip the cream, granulated sugar and salt on medium speed until the mixture begins to thicken, about 30 seconds. Increase the speed to high and whip until soft peaks form when the whisk is lifted, 15 to 60 seconds.7. Whisk the cocoa powder mixture into the melted chocolate until smooth. Whisk one-third of the whipped cream into the chocolate mixture to lighten. Using a rubber spatula, fold in the remaining whipped cream until no white streaks remain. Spoon the mousse into the springform pan over the cooled cake and
gently tap the pan on counter 3 times to remove any large air bubbles; smooth the top with an offset spatula. Refrigerate for at least 15 minutes while preparing the top layer.8. Make the Top Layer: In a small bowl, sprinkle the gelatin over the water; let stand for at least 5 minutes. Place the white chocolate in a medium bowl. Bring ½ cup of the heavy cream to a simmer in a small saucepan over medium-high heat. Remove from heat and add the gelatin mixture, whisking until fully dissolved. Pour the cream mixture over the white chocolate chips and whisk until the chocolate is melted and the mixture is completely smooth. Cool to room temperature, stirring occasionally, 5 to 8 minutes (the mixture will thicken slightly).9. In the bowl of a stand mixer fitted with the whisk attachment, whip the remaining 1 cup heavy cream at medium speed until it begins to thicken, about 30 seconds. Increase the speed to high and whip until soft peaks form when the whisk is lifted, 15 to 60 seconds. Whisk one-third of the whipped cream into the white chocolate mixture to lighten. Using a rubber spatula, fold the remaining whipped cream into the white chocolate mixture until no white streaks remain. Spoon the white chocolate mousse into the pan over the middle layer. Smooth the top with an offset spatula. Return the cake to the refrigerator and chill until set, at least 2½ hours.10. The cake can be made up to 1 day in advance and refrigerated. Remove the cake from the refrigerator and let sit at room temperature for 45 minutes before releasing it from the pan. Garnish the top of cake with chocolate curls or dust with cocoa, if desired. Run a thin knife between the cake and side of the springform pan, then remove the side of pan. Cut into slices and serve. (For clean slices, dip a sharp knife into hot water and wipe dry between cuts.)
For the Crust:24 Oreo cookies, crushed into crumbs3 tablespoons butter, melted and cooledFor the Filling:8 ounces cream cheese, at room temperature½ cup creamy peanut butter¼ cup granulated sugarPinch of salt8 ounces Cool Whip8 Fun Size Butterfinger candy bars, coarsely choppedFor the Topping:4 ounces Cool WhipChocolate syrup2 Fun Size Butterfinger candy bars, coarsely chopped
Directions:
1. Make the Crust: Combine the Oreo cookie crumbs and the melted butter in a medium bowl and toss with a fork until the crumbs are evenly moistened. Transfer the crumbs to a 9-inch pie plate. Press the crumbs evenly into the bottom and up the sides of the pan, forming a crust. Place the lined pie plate in the freezer while preparing the filling.2. Make the Filling: Beat together the cream cheese, peanut butter, sugar and salt on medium speed until light and fluffy, about 3 minutes. Using a rubber spatula, fold in the Cool Whip until completely combined, then fold in the chopped Butterfinger candy bars. Pour filling into the prepared crust and smooth into an even layer. Top with the remaining 4 ounces Cool Whip, then refrigerate for at least 1 hour.3. Before serving, drizzle with chocolate syrup and top with additional chopped Butterfinger candy bars. Leftovers can be stored in the refrigerator, covered with plastic wrap, for up to 3 days.
Snickers CakeYield: 12 to 16 servingsPrep Time: 3 hours 30 minutesCook Time: 32 minutesTotal Time: 4 hoursA cake reminiscent of a Snickers bar - chocolate cake with a peanut nougat filling, covered in a salted caramel buttercream and topped with a milk chocolate ganache and chopped peanuts.
Omit peanuts for Mars bars cake
For the Cake:2½ cups + 1 tablespoon all-purpose flour3 cups granulated sugar1 cup + 1 tablespoon Dutch-process cocoa powder1 tablespoon baking soda1½ teaspoons baking powder1½ teaspoons salt3 eggs, at room temperature1½ cups buttermilk, at room temperature1½ cups strong black coffee, hot¾ cup vegetable oil4½ teaspoons vanilla extract
For the Nougat Filling:4 tablespoons unsalted butter1 cup granulated sugar¼ cup evaporated milk1½ cups marshmallow fluff¼ cup creamy peanut butter1 teaspoon vanilla extract1½ cups salted peanuts, roughly choppedFor the Salted Caramel Buttercream Frosting:½ cup unsalted butter, at room temperature4 ounces cream cheese, at room temperature¼ cup salted caramel sauce2 cups powdered sugarFor the Milk Chocolate Ganache:8 ounces milk chocolate, finely chopped4 ounces (½ cup) heavy creamFor the Assembly & Garnish:Additional salted caramel sauceChopped peanuts
Directions:
1. Make the Cake: Preheat oven to 350 degrees F. Grease three 8-inch round cake pans, line the bottoms with rounds of parchment paper, grease the parchment, then flour the insides of the pans, tapping out excess; set aside. 2. In the bowl of an electric mixer (or large mixing bowl if you're using a hand mixer), sift together the flour, sugar, cocoa powder, baking soda, baking powder and salt. In a medium bowl, whisk together the eggs, buttermilk, coffee, oil and vanilla.3. Add the wet ingredients to the dry ingredients and mix for 2 minutes on medium speed. Scrape the sides and bottom of the bowl and mix for an additional 20 seconds (the batter will be very thin). 4. Divide the batter evenly among prepared pans. Bake for 20 minutes and rotate the pans in the oven. Continue to bake until a toothpick inserted into the center of one of the cakes comes out almost clean (with a few moist crumbs), about 12 more minutes. Cool the cakes (in the pans) on wire racks for 20 minutes, then carefully turn them out onto cooling racks to cool completely.5. Make the Nougat Filling: Melt the butter in a medium saucepan over medium heat. Add the sugar and evaporated milk, stirring until dissolved, and bring to a boil. Reduce the heat to low and cook for 5 minutes, stirring occasionally. Remove the pan from heat and add the marshmallow fluff, peanut butter, and vanilla extract, stirring until completely smooth. Fold in the peanuts. Let the nougat mixture cool to room temperature before using it in the cake. You can do this leaving it at room temperature or you can pop it into the refrigerator to speed up the process. Be sure to give a stir occasionally as it cools.6. Make the Frosting: Beat together the butter and cream cheese on medium-high speed for 5 minutes (I like to use the whisk attachment for my KitchenAid stand mixer, but it's not necessary). Pour in the salted caramel and beat until combined. Reduce the speed to medium-low and slowly add the
powdered sugar, a little at a time, until it has all been incorporated. Increase the speed to medium-high and beat for an additional two to three minutes, until light and fluffy.7. Assemble the Cake: If your cakes baked up uneven or have domed on top, level off the tops. Place one cake layer on a serving plate. Cover with half of the nougat filling and then spread a couple spoonfuls of the salted caramel sauce over top to evenly cover the nougat filling. Top with a second cake layer and cover with the remaining nougat filling and top with caramel sauce. Place the final cake layer on top face-down. Frost the cake with the salted caramel frosting, finishing it as smoothly as possible. Refrigerate the cake for at least 1 hour, until the frosting is set.8. Make the Chocolate Ganache: While the cake chills, make the chocolate ganache. Place the chocolate in a medium bowl; set aside. Place the cream in a small saucepan over medium heat and warm until it just comes to a boil. Pour the cream over the chopped chocolate and let sit for 2 minutes. Begin whisking the mixture in the center, gradually working your way outward until the ganache is completely smooth. Set aside to cool, whisking occasionally, until it has thickened slightly, yet still a pourable consistency.9. Garnish the Cake: Transfer the ganache to a 2-cup measuring cup. Slowly pour the chocolate ganache into the center of the cake, letting it push itself outward and flow over the sides of the cake. Refrigerate the cake for at least 30 minutes, giving the ganache a chance to set up. To finish garnishing, drizzle some additional salted caramel sauce over the top and side of the cake, and top with chopped peanuts. Keep the cake refrigerated, removing it from the refrigerator about 20 minutes prior to serving.
Dirt DessertYield: 16 to 20 servingsPrep Time: 30 minutesTotal Time: 4 hours alternating layers of crushed Oreo cookies and a lightened chocolate pudding mixture that is made to look like "dirt", complete with (gummy) worms!
1 package (about 15 ounces) Oreo Cookies2 (3.9-ounces) packages instant chocolate pudding4 cups milk8 ounces cream cheese, at room temperature¼ cup butter, at room temperature1 cup powdered sugar8 ounces Cool WhipGummy worms (optional)
1. Crush the Oreo cookies into fine crumbs using a food processor (or, place the cookies in a resealable plastic bag and crush with a rolling pin); set aside.2. In a large bowl, whisk together both boxes of the instant pudding with the milk for about 2 minutes. Let sit for 5 minutes.3. Meanwhile, beat together the cream cheese and butter on medium speed until light and fluffy, about 3 minutes. Reduce the speed to low, add the powdered sugar, then gradually increase the speed back to medium until a fluffy texture is reached. 4. Using a rubber spatula, fold the cream cheese mixture into the chocolate pudding, then fold in the Cool Whip until completely combined.5. The dessert can be assembled in a number of ways - in a rectangular or square serving dish, in a trifle dish, or in individual cups. However you plan to serve it, layer the dessert with alternating layers of the crushed Oreos and pudding mixture, beginning and ending with the crushed Oreos. Refrigerate for at least 4 hours (or overnight) before serving. Decorate the top with gummy worms before serving, if desired.Faux flower Pots
For the cake:3 eggs3 egg yolks¾ cup sugar1 tsp. vanilla extract3 egg whites1/8 tsp. cream of tartar2 tbsp. sugar2/3 cup cake flour, siftedFor the soaking syrup:½ cup water1/3 cup sugar2 tbsp. kirsch or strawberry liqueurFor the strawberry Bavarian cream:2 ½ tbsp. unflavored gelatin1 ½ cups strained strawberry puree5 egg yolks2/3 cup sugar1 ½ cups milk1 tbsp. lemon juiceseveral drops of red food coloring1 ¾ cups whipping creamFor the strawberry juice:1 ½ pints strawberries (18 oz.)¾ cup sugar¾ cup waterFor the strawberry mirror:1 ½ cups strawberry juice1 tsp. lemon juice1 tbsp. kirsch1 tbsp. water1 tbsp. unflavored gelatina few drops of red food coloring
1. To Make the Cake: Preheat oven to 450°. Butter and flour the sides of an 11×17-inch sheet pan (rimmed baking sheet). Line the bottom of the pan with a sheet of parchment paper cut to fit exactly.2. Beat eggs, egg yolks and ¾ cup sugar together in a medium bowl until thick and
light. Beat in the vanilla. Set aside. In a separate bowl, beat the egg whites until foamy. Add the cream of tartar and beat until the whites begin to form soft peaks. Add the 2 tablespoons of sugar and beat until the whites hold stiff glossy peaks (do not overbeat). Sift the flour over the egg yolk mixture and fold in. Stir in one fourth of the whites. Then carefully fold in the remaining whites.3. Spread the batter evenly in the prepared pan. Bake until light brown and springy to touch, 7-10 minutes. Cool in pan 5 minutes. Run a knife along the edge to loosen. Cut out two 8 ¼-inch circles of cake. Wrap the cake layers, separated with wax paper, and set aside. (Cake may be frozen at this point.)4. To Make the Soaking Syrup: Combine the water and sugar in a saucepan. Bring to a boil to dissolve sugar. Cool to room temperature; flavor with liqueur. Set aside or refrigerate in an air-tight container until ready to use.5. To Make the Strawberry Bavarian Cream: Sprinkle the gelatin over the strawberry puree in a small bowl and set aside until spongy. Combine the egg yolks and the sugar in a bowl and beat until light. Bring the milk to a boil in a saucepan.6. Slowly pour the warm milk mixture into the egg yolk mixture, whisking constantly. Return this mixture to the saucepan and cook over medium heat, stirring constantly, until your finger leaves a clear trail in the sauce when drawn across the back of a spoon. Do not allow the mixture to boil! Immediately remove from heat and stir in the gelatin mixture. Pour into a stainless steel bowl placed over a bowl of ice water. Stir in the lemon juice and a few drops of red food coloring.7. Cool over ice water, stirring occasionally, until the mixture thickens to the consistency of softly whipped cream.8. While the gelatin mixture is cooling, whip the whipping cream until it holds soft peaks. When the gelatin mixture resembles softly whipped cream, fold the whipped cream into the gelatin mixture.
9. To Make the Strawberry Juice: Wash and hull strawberries; coarsely chop. Place strawberries in a saucepan; crush to start juices flowing. Place over low heat; add sugar and water; simmer slowly for 10 minutes. Pour juice and pulp into a fine-mesh sieve placed over a bowl. Allow to drain for 15 minutes. Do not press down on fruit.10. To Assemble the Cake: Brush the sides of a 10-inch springform pan lightly with flavorless salad oil or almond oil. Cut out a cardboard circle that is the exact same size as the bottom side of the pan; cover cardboard in aluminum foil and fit into bottom of pan.11. Center one layer of cake in the bottom of the pan. Brush the cake with some of the soaking syrup to just moisten the cake. Immediately after preparing the Bavarian cream, pour about half of it over the first layer of cake in the pan. Set the next layer of cake on top of the cream. Brush with soaking syrup to just moisten as before. Pour remaining Bavarian cream over the cake and smooth the top with a spatula. Refrigerate until the cream sets (1 to 2 hours).12. To Make the Strawberry Mirror: Place lemon juice, water and kirsch in a small bowl. Sprinkle gelatin over this mixture; set aside until spongy and soft.13. Measure 1 ½ cups strawberry juice into a small saucepan and bring to a simmer. Pour over gelatin mixture and stir to dissolve gelatin. Tint to desired color with red food coloring. Place bowl over a bowl of ice water and stir occasionally until the mixture is syrupy and just begins to thicken (do not let jell). Remove from the ice water. When the mixture is syrupy, pour a 1/16-inch layer over the top of the assembled cake. Refrigerate until set.14. To serve, wrap a hot towel around the outside of the springform pan for a few minutes. Run a small sharp knife tip around the edge of the strawberry mirror to separate it from the sides of the pan. The mirror will tear when the sides are unlatched if it is stuck at any point. Slowly unlatch the pan and slide it off the cake. Slice cake in wedges and serve in upright slices.
Perfect Party CakeYield: 10 to 12 servingsPrep Time: 45 minutesCook Time: 30 minutesTotal Time: 1 hour 15 minutes
Ingredients:
For the Cake:2 1/4 cups cake flour1 tablespoon baking powder½ teaspoon salt1 ¼ cups whole milk or buttermilk4 large egg whites1 ½ cups sugar2 teaspoons grated lemon zest1 stick (8 tablespoons or 4 ounces) unsalted butter, at room temperature½ teaspoon pure lemon extractFor Finishing:2/3 cup seedless raspberry preserves stirred vigorously or warmed gently until spreadableAbout 1 ½ cups sweetened shredded coconutFor the Orange Cream Cheese Frosting:12 ounces cream cheese, softened1 cup butter2 teaspoons fresh orange juice8 cups powdered sugar
Directions:
1. Center a rack in the oven and preheat the oven to 350 degrees F. Butter two 9 x 2 inch round cake pans and line the bottom of each pan with a round of buttered parchment or wax paper. Put the pans on a baking sheet.2. To Make the Cake: Sift together the flour, baking powder and salt. Whisk together the milk and egg whites in a medium bowl. Put the sugar and lemon zest in a mixer bowl or another large bowl and rub them together with your fingers until the sugar is moist and fragrant. Add the butter and working with the paddle or whisk attachment, or with a hand mixer, beat at medium speed for a full 3 minutes, until the butter and sugar are very light. Beat in the extract, then add one third of the flour mixture, still beating on medium
speed.Beat in half of the milk-egg mixture, then beat in half of the remaining dry ingredients until incorporated. Add the rest of the milk and eggs beating until the batter is homogeneous, then add the last of the dry ingredients. Finally, give the batter a good 2- minute beating to ensure that it is thoroughly mixed and well aerated. Divide the batter between the two pans and smooth the tops with a rubber spatula. Bake for 30-35 minutes, or until the cakes are well risen and springy to the touch - a thin knife inserted into the centers should come out cleanTransfer the cakes to cooling racks and cool for about 5 minutes, then run a knife around the sides of the cakes, unfold them and peel off the paper liners. Invert and cool to room temperature, right side up (the cooled cake layers can be wrapped airtight and stored at room temperature overnight or frozen for up to two months).3. To make the Orange Cream Cheese Frosting: In a medium mixing bowl combine cream cheese, butter and orange juice. Beat on low to medium until light and fluffy. Gradually add 4 cups powdered sugar, beating well. Gradually beat in the remaining powdered sugar until frosting reaches spreading consistency.4. To Assemble the Cake: Using a sharp serrated knife and a gentle sawing motion, slice each layer horizontally in half. Put one layer cut side up on a cardboard cake round or a cake plate protected by strips of wax or parchment paper.Spread it with one third of the preserves. Cover the jam evenly with about one quarter of the frosting. Top with another layer, spread with preserves and frosting and then do the same with a third layer (you'll have used all the jam and have frosting leftover). Place the last layer cut side down on top of the cake and use the remaining frosting to frost the sides and top.Serving: The cake is ready to serve as soon as it is assembled, but I think it's best to let it sit and set for a couple of hours in a cool room - not the refrigerator. Whether you wait or slice and enjoy it immediately, the cake
should be served at room temperature; it loses all its subtlety when it's cold. Depending on your audience you can serve the cake with just about anything from milk to sweet or bubbly wine.Storing: The cake is best the day it is made, but you can refrigerate it, well covered, for up to two days. Bring it to room temperature before serving. If you want to freeze the cake, slide it into the freezer to set, then wrap it really well - it will keep for up to 2 months in the freezer; defrost it, still wrapped overnight in the refrigerator.
Homemade Baileys Irish CreamYield: 34 ouncesPrep Time: 5 minutesTotal Time: 5 minutesAn incredibly easy recipe for making your own Baileys Irish Cream at home!
Ingredients:
1⅔ cups Jamison Irish whiskey1 cup half & half or heavy cream1 (14-ounce) can sweetened condensed milk2 tablespoons chocolate syrup2 teaspoons vanilla extract1 teaspoon instant coffee
Directions:
1. Combine all ingredients in a blender and puree on high speed for 30 seconds. 2. Transfer mixture to an airtight container or glass bottle with a tight-fitting lid and store in the refrigerator for up to 2 months. Shake well before using.
DIY Instant Vanilla Pudding MixYield: 20 to 25 servings (enough for 5 batches of pudding)Prep Time: 5 minutesCook Time: 10 minutesTotal Time: 15 minutes
Ingredients:
1 cup granulated sugar¾ cup cornstarch¾ cup nonfat dry milk powder1 teaspoon kosher salt2 whole vanilla beans
Directions:
1. In a medium bowl, whisk together the sugar, cornstarch, milk powder, and salt; set aside.2. Split open the vanilla beans and use the back of a knife to scrape out the seeds. Add the seeds to the sugar mixture, and again whisk well to evenly combine, using a fork or the back of the spoon to break up any chunks of vanilla bean seeds. Cut the empty vanilla bean pods into two or three pieces each.3. Place the vanilla bean pieces into an airtight container or jar, and add the sugar mixture. Seal it, and then give it a few good shakes to distribute the vanilla bean pieces evenly. Store in a cool, dry place.To make pudding: Combine 2 cups of milk with ½ cup of the instant pudding mix in a medium saucepan over high heat, whisking constantly. Bring to a boil, and then immediately reduce the heat to a simmer and continue whisking until the mixture thickens and coats the back of a spoon (about 3 to 5 minutes). Let sit for at least 5 minutes before serving. Store leftovers in an airtight container in the refrigerator.
5 large eggs9 ounces bittersweet chocolate, coarsely chopped1 cup of sugar5 tablespoons unsalted butter, cut into chunks2 tablespoons coffee or water1/3 cup all-purpose flourPinch of saltFor the Glaze (optional)4 ounces bittersweet chocolate, coarsely chopped½ cup heavy cream2 teaspoons light corn syrup
Directions:
1. Center a rack in the oven and preheat the oven to 350 degrees F. Butter a 9-inch springform pan, line the bottom with parchment paper, butter the paper, dust the inside of the pan with flour and tap out the excess. Place the pan n a baking sheet lined with parchment or a silicone mat.Separate the eggs, putting the whites in a mixer bowl or other large bowl and the yolks in a small bowl.2. Set a heatproof bowl over a saucepan of simmering water and add the chocolate, sugar butter and coffee. Stir occasionally until the chocolate and butter are melted; the sugar may still be grainy, and that's fine. Transfer the bowl to the counter and let the mixture sit for 3 minutes.3. Using a rubber spatula, stir in the yolks one by one, then fold in the flour.4. Working with the whisk attachment of the mixer or a hand mixer, beat the egg whites with the pinch of salt until the hold firm, but glossy peaks. Using the spatula, stir about one quarter of the beaten whites into the
batter, then gently fold in the rest. Scrape the butter into the pan and jiggle the pan from side to side a couple of times to even the batter.5. Bake for 35 to 45 minutes, or until the cake has risen evenly (it might rise around the edges and you'll think it's done, but give it a few minutes more, and the center will puff too) and the top has firmed (it will probably be cracked) and doesn't shimmy when tapped; a think knife inserted into the center should come out just slightly streaked with chocolate. Transfer the pan to a cooling rack and let the cake rest for 5 to 10 minutes.6. Run a blunt knife gently around the edges of the cake and remove the sides of the pan. Carefully turn the cake over onto a rack and remove the pan bottom and the parchment paper. Invert the cake onto another rack and cool to room temperature ride side up. As the cake cools, it may sink.7. To Make the Optional Glaze: Turn the cooled cake over onto another rack so you'll be glazing the flat bottom, and place the rack over a baking sheet lined with parchment or wax paper to catch any drips.8. Put the chocolate in a small heatproof bowl.9. Melt the chocolate over a pan of simmering water or in a microwave oven - the chocolate should be just melted and only warm, not hot.10. Meanwhile, bring the cream to a boil in a small sauce pan. Pour the hot cream over the chocolate and stir very gently with a rubber spatula until the mixture is smooth and shiny. Stir in the corn syrup.11. Pour the glaze over the cake and smooth the top with a long metal icing spatula. Don't worry if the glaze drips unevenly down the sides of the cake - it will just add to its charms. Allow the glaze to set at room temperature or, if you're impatient, slip the cake into the refrigerator for about 20 minutes. If the glaze dulls in the fridge, just give it a little gentle heat from a hairdryer.
Cookies & Cream Oreo Look-Alike CakeYield: 12 servingsFor the Cake (Hershey’s Perfectly Chocolate Cake)2 cups sugar1¾ cups all-purpose flour¾ cup cocoa powder1½ teaspoons baking powder1½ teaspoons baking soda1 teaspoon salt2 eggs1 cup whole milk½ cup vegetable oil2 teaspoons vanilla extract1 cup boiling water coffeeFor the Filling:8 ounces cream cheese, at room temperature½ cup sugar1 cup (8 ounces) heavy whipping cream12 Oreo cookies, coarsely choppedFor the Ganache:4 ounces semi-sweet chocolate4 tablespoons (¼ cup) unsalted butter, cubed1. To make the cake, preheat the oven to 350°F. Grease and flour two 9-inch round baking pans.2. Stir together the sugar, flour, cocoa, baking powder, baking soda and salt in a large bowl. Add eggs, milk, oil and vanilla; beat on medium speed for 2 minutes. Stir in boiling water (batter will be thin). Divide the batter evenly between the two pans.3. Bake for 30-35 minutes or until a toothpick inserted in the center comes out clean. Cool 10 minutes; remove from pans to wire racks. Cool completely.4. To make the filling, with a stand or hand mixer fitted with a whisk attachment, whisk the heavy whipping cream on low until it starts to become frothy and thick. Gradually increase the speed and whisk until stiff peaks form. Set aside.5. In a large bowl beat together the cream cheese and sugar until well-blended and smooth. Using a rubber spatula, gently fold in ¼ of the whipped cream to lighten the cream cheese mixture. Fold in the remaining whipped cream, and then the chopped Oreos.
6. Place one layer of the cake on a serving plate, spread the filling mixture on top, and top with the second cake layer.7. To make the ganache, microwave the chocolate and butter in a small microwavable bowl in 30-second intervals, stirring after each interval, until the butter is melted. Cool for 5 minutes.8. Spread the ganache over the top of the cake and let stand until firm. Keep refrigerated.
Boston Cream PieYield: 8 to 10 servingsPrep Time: 1 hour (active), 4 hours Cook Time: 16 to 20 Total Time: 1 hour 20 minutes
For the Pastry Cream:2 cups half-and-half½ cup granulated sugarPinch of salt5 egg yolks3 tablespoons cornstarch4 tablespoons cold unsalted butter, cut into 4 pieces1½ teaspoons vanilla extract
For the Sponge Cake:½ cup plain cake flour¼ cup all-purpose flour1 teaspoon baking powder¼ teaspoon salt3 tablespoons whole milk2 tablespoons unsalted butter½ teaspoon vanilla extract5 eggs, at room temperature¾ cup granulated sugar
For the Glaze:1 cup heavy cream¼ cup light corn syrup8 ounces semisweet chocolate, chopped into small pieces½ teaspoon vanilla extract
1. To Make the Pastry Cream: Heat the half-and-half, 6 tablespoons of the sugar, and the salt in a medium heavy-bottomed saucepan over medium heat until simmering, stirring occasionally to dissolve the sugar.
2. Meanwhile, whisk the egg yolks in a medium bowl until thoroughly combined. Whisk in the remaining 2 tablespoons sugar and whisk until the sugar has begun to dissolve and the mixture is creamy, about 15 seconds. Whisk in the cornstarch until
combined and the mixture is pale yellow and thick, about 30 seconds.
3. When the half-and-half mixture reaches a full simmer, gradually whisk the simmering half-and-half into the yolk mixture to temper. Return the mixture to the saucepan, scraping the bowl with a rubber spatula; return to a simmer over medium heat, whisking constantly, until a few bubbles burst on the surface and the mixture is thickened and glossy, about 30 seconds. Off the heat, whisk in the butter and vanilla. Strain the pastry cream through a fine-mesh sieve set over a medium bowl. Press plastic wrap directly on the surface to prevent a skin from forming and refrigerate until cold and set, at least 3 hours or up to 2 days.
4. To Make the Sponge Cake: Adjust an oven rack to the lower-middle position and heat oven to 350 degrees F. Grease two 8- or 9-inch cake pans and cover the pan bottoms with rounds of parchment paper. Whisk together the flours, baking powder and salt in a medium bowl. Heat the milk and butter in a small saucepan over low heat until the butter melts. Remove from the heat and add the vanilla; cover and keep warm.
5. Separate 3 of the eggs, place the whites in the bowl of a standing mixer, reserving the 3 yolks plus the remaining 2 whole eggs in another bowl. Beat the 3 whites at low speed until foamy. Increase the mixer speed to medium and gradually add 6 tablespoons of the sugar; continue to beat the whites to soft, moist peaks. (Do not overbeat.) Transfer the egg whites to a large bowl and add the whole-egg mixture to the mixer bowl.
6. Beat the whole-egg mixture with the remaining 6 tablespoons sugar. Beat at medium-high speed until the eggs are very thick and a pale yellow color, about 5 minutes. Add the beaten eggs to the whites.
7. Sprinkle the flour mixture over the beaten eggs and whites; fold very gently 12 times
with a large rubber spatula. Make a well in one side of the batter and pour the milk mixture into the bowl. Continue folding until the batter shows no trace of flour and the whites and whole eggs are evenly mixed, about 8 additional strokes.
8. Immediately pour the batter into the prepared cake pans; bake until the cake tops are light brown and feel firm and spring back when touched, about 16 minutes for 9-inch cake pans and 20 minutes for 8-inch cake pans.
9. Immediately run a knife around the pan perimeters to loosen the cakes. Turn the cakes out and remove the parchment paper. Turn right-side-up and place on a cooling rack. Cool the cake layers to room temperature before proceeding.
10. For the Glaze: Bring the cream and corn syrup to a full simmer over medium heat in a medium saucepan. Remove from the heat and add the chocolate; cover and let stand for 8 minutes. (If the chocolate has not completely melted, return the saucepan to low heat; stir constantly until melted.) Add the vanilla; stir very gently until the mixture is smooth. Cool until tepid so that a spoonful drizzled back into the pan mounds slightly. (The glaze can be refrigerated to speed up to the cooling process, stirring every few minutes to ensure even cooling.)
11. To Assemble: While the glaze is cooling, place one cake layer on a serving plate (if you don't want any stray chocolate, you can place strips of wax paper under the cake for easy cleanup; I didn't put anything under mine). Carefully spoon the pastry cream onto the cake and spread it evenly up to the edges. Place the second cake layer on top, making sure the layers line up properly.
12. Pour the glaze onto the middle of the top layer and let it flow down the cake sides. Use a metal spatula, if necessary, to completely coat the cake. Use a small needle to puncture any air bubbles. Let the cake sit until the
glaze fully sets, about 1 hour. Serve the same day, preferably within a couple of hours.
Gooey Chocolate CakesYield: 6 servings Prep Time: 15 min Cook Time: 13 min Total Time: 30 min
1/3 cup all-purpose flour3 tablespoons unsweetened cocoa powder¼ teaspoon salt5 ounces bittersweet chocolate (4 ounces coarsely chopped, 1 ozvery finely chopped)1 stick (8 tablespoons) unsalted butter, cut into 8 pieces2 large eggs, at room temperature1 large egg yolk, at room temperature6 tablespoons of sugar
1. Center a rack in the oven and preheat the oven to 400 degrees F. butter (or spray - it's easier) 6 cups of a regular-size muffin pan, preferably a disposable aluminum foil pan, dust the insides with flour and tap out the excess. Put the muffin pan on a baking sheet.2. Sift the flour, cocoa and salt together.3. Set a heatproof bowl over a saucepan of gently simmering water, put the coarsely chopped chocolate and the butter in the bowl and stir occasionally over the simmering water just until they are melted - you don't want them to get so hot that the butter separates. Remove the bowl from the pan of water.4. In a large bowl, whisk the eggs and yolk until homogenous. Add the sugar and whisk until well blended, about 2 minutes. Add the dry ingredients and, still using the whisk, stir (don't beat) them into the eggs. Little by little, and using a light hand, stir in the melted chocolate and butter. Divide the batter evenly among the muffin cups and sprinkle the finely chopped chocolate over the batter.5. Bake the cakes for 13 minutes. Transfer them, still on the baking sheet, to a rack to cool for 3 minutes. (There is no way to test that these cakes are properly baked, because the inside remains liquid.)
6. Line a cutting board with a silicone baking mat or parchment or wax paper, and, after the 3-minute rest, unmold the cakes onto the board. Use a wide metal spatula to lift the cakes onto dessert plates.
For the Pastry Cream:2 cups half-and-half1/2 cup sugarPinch salt5 large egg yolks3 tablespoons cornstarch4 tablespoons (1/2 stick) cold unsalted butter, cut into 4 pieces1 1/2 teaspoons vanilla extractFor the Pâte à Choux:2 large eggs plus 1 large egg white5 tablespoons unsalted butter, cut into 10 pieces2 tablespoons whole milk6 tablespoons water1 1/2 teaspoons sugar1/4 teaspoon salt1/2 cup (2 1/2 ounces) unbleached all-purpose flour, siftedFor the Chocolate Glaze:2 ounces bittersweet chocolate, chopped1 tablespoon heavy cream2 teaspoons light corn syrup
Directions:
1. Make the Pastry Cream: Heat the half-and-half, 6 tablespoons of the sugar, and the salt in a medium heavy-bottomed saucepan over medium heat until simmering, stirring occasionally to dissolve the sugar.2. Meanwhile, whisk the egg yolks in a medium bowl until thoroughly combined. Whisk in the remaining 2 tablespoons sugar and whisk until the sugar has begun to dissolve and the mixture is creamy, about 15
seconds. Whisk in the cornstarch until combined and the mixture is pale yellow and thick, about 20 seconds.3. When the half-and-half mixture reaches a full simmer, gradually whisk the simmering half-and-half into the yolk mixture to temper. Return the mixture to the saucepan, scraping the bowl with a rubber spatula; return to a simmer over medium heat, whisking constantly, until a few bubbles burst on the surface and the mixture is thickened and glossy, about 30 seconds. Off the heat, whisk in the butter and vanilla. Strain the pastry cream through a fine-mesh sieve set over a medium bowl. Press plastic wrap directly on the surface to prevent a skin from forming and refrigerate until cold and set, at least 3 hours or up to 2 days.4. Make the Pâte à Choux: Beat the eggs and egg white in a measuring cup or small bowl; you should have 1/2 cup (discard the excess). Set aside.5. Bring the butter, milk, water, sugar, and salt to a boil in a small saucepan over medium heat, stirring once or twice. When the mixture reaches a full boil (the butter should be fully melted), immediately remove the saucepan from the heat and stir in the flour with a heatproof spatula or wooden spoon until combined and the mixture clears the sides of the pan. Return the saucepan to low heat and cook, stirring constantly, using a smearing motion, until the mixture is slightly shiny, looks like wet sand, and tiny beads of fat appear on the bottom of the saucepan, about 3 minutes (the paste should register 175 to 180 degrees on an instant-read thermometer).6. Immediately transfer the mixture to a food processor and process with the feed tube open for 10 seconds to cool slightly. With the machine running, gradually add the eggs in a steady stream. When all the eggs have been added, scrape down the sides of the bowl, then process for 30 seconds until a smooth, thick, sticky paste forms. (If not using immediately in one of the following recipes, transfer the paste to a medium bowl, press a sheet of plastic wrap that has been sprayed lightly with nonstick cooking spray
directly on the surface, and store at room temperature for up to 2 hours.)7. Adjust an oven rack to the middle position and heat the oven to 425 degrees. Spray a large (18 by 12-inch) baking sheet with nonstick cooking spray and line with parchment paper; set the pan aside.8. Fold down the top 3 or 4 inches of a large pastry bag fitted with a 1/2-inch plain tip to form a cuff. Hold the bag open with one hand in the cuff and fill the bag with the paste. Unfold the cuff, lay the bag on the work surface, and, using your hands or a bench scraper, push the paste toward the tip of the pastry bag.For Cream Puffs: Twist the top of the bag and pipe the paste into 1 1/4- to 1 1/2-inch mounds on the prepared baking sheet, spacing them about 1 to 1 1/4 inches apart. Use the back of a teaspoon dipped in a bowl of cold water to even out the shape and smooth the surface of the piped mounds.For Eclairs: Twist the top of the bag and pipe the paste into eight 5 by 1-inch strips, spaced about 1 inch apart. Use the back of a teaspoon dipped in a bowl of cold water to even out the shape and smooth the surface of the piped strips.9. Bake 15 minutes (do not open the oven door), then reduce the oven temperature to 375 degrees and continue to bake until golden brown and fairly firm (the puffs and éclairs should not be soft and squishy), 8 to 10 minutes longer. Remove the baking sheet from the oven. With a paring knife, cut a 3/4-inch slit into the side of each puff and on the top of each éclair to release steam; return the puffs to the oven, turn off the oven, and prop the oven door open with the handle of a wooden spoon. Dry the puffs and éclairs in the turned-off oven until the centers are just moist (not wet) and the puffs and éclairs are crisp, about 45 minutes. Transfer the puffs and/or éclairs to a wire rack to cool completely. (The cooled puffs and éclairs can be stored at room temperature for up to 24 hours or frozen in a zipper-lock plastic bag for up to 1 month. Before serving, crisp room-temperature puffs in a 300-degree
oven 5 to 8 minutes; crisp frozen puffs/éclairs 8 to 10 minutes.)10. When ready to serve:For Cream Puffs: Use the tip of a paring knife to make a small X in the side of each puff, about halfway between the top and bottom. Fill a pastry bag fitted with a 1/4-inch plain tip with the pastry cream and then pip some pastry cream through the X in the side of each puff. (Fill each puff until the pastry cream starts to ooze out the side.) Top with chocolate glaze or sifted powdered sugar.For Eclairs: With a paring knife, cut around the sides of each éclair to remove the top third. Dip the top of each éclair into the glaze, shaking off any excess, and transfer the tops to a wire rack to dry. Spoon 3 to 4 tablespoons of pastry cream in the bottom of each éclair. Once the glaze has set, set the tops on the éclairs and press gently to secure.