BMW E61 Aircon/Heater Fan Replacement Follow these steps in order, then in reverse for reassembly. I used plastic trim removal wedges – they were worth having. I used masking tape to protect surfaces. Mine is a RHD car, it’s also 2004 so pre-LCi. Preliminary 1. Expose battery. 2. Panoramic roof blind open to get more light in. Centre Tunnel 3. Remove cover below rear vent, lever out. 4. Remove two clips holding rear vent. Pull vent down and out. 5. Disconnect wire to rear vent (small screwdriver or tip of table knife helps release the clip on this and most other connectors). This will register a fault code but you don’t want to disconnect the battery just yet. 6. Undo the 2 x 10mm nuts securing the centre tunnel. 7. Remove the carpet trim left and right of centre tunnel. Push towards rear of car from front with stout screwdriver. You need the battery still connected here if you have electric seats so you can move the seats to get decent access.
Transcript
BMW E61 Aircon/Heater Fan Replacement
Follow these steps in order, then in reverse for reassembly. I used plastic trim removal wedges – they were worth having.
I used masking tape to protect surfaces. Mine is a RHD car, it’s also 2004 so pre-LCi.
Preliminary
1. Expose battery. 2. Panoramic roof blind open to get more light in.
Centre Tunnel
3. Remove cover below rear vent, lever out.
4. Remove two clips holding rear vent. Pull vent down and out.
5. Disconnect wire to rear vent (small screwdriver or tip of table knife helps release the clip on this and most other connectors). This will register a fault code but you don’t
want to disconnect the battery just yet.
6. Undo the 2 x 10mm nuts securing the centre tunnel. 7. Remove the carpet trim left and right of centre tunnel. Push towards rear of car from
front with stout screwdriver. You need the battery still connected here if you have electric seats so you can move the seats to get decent access.
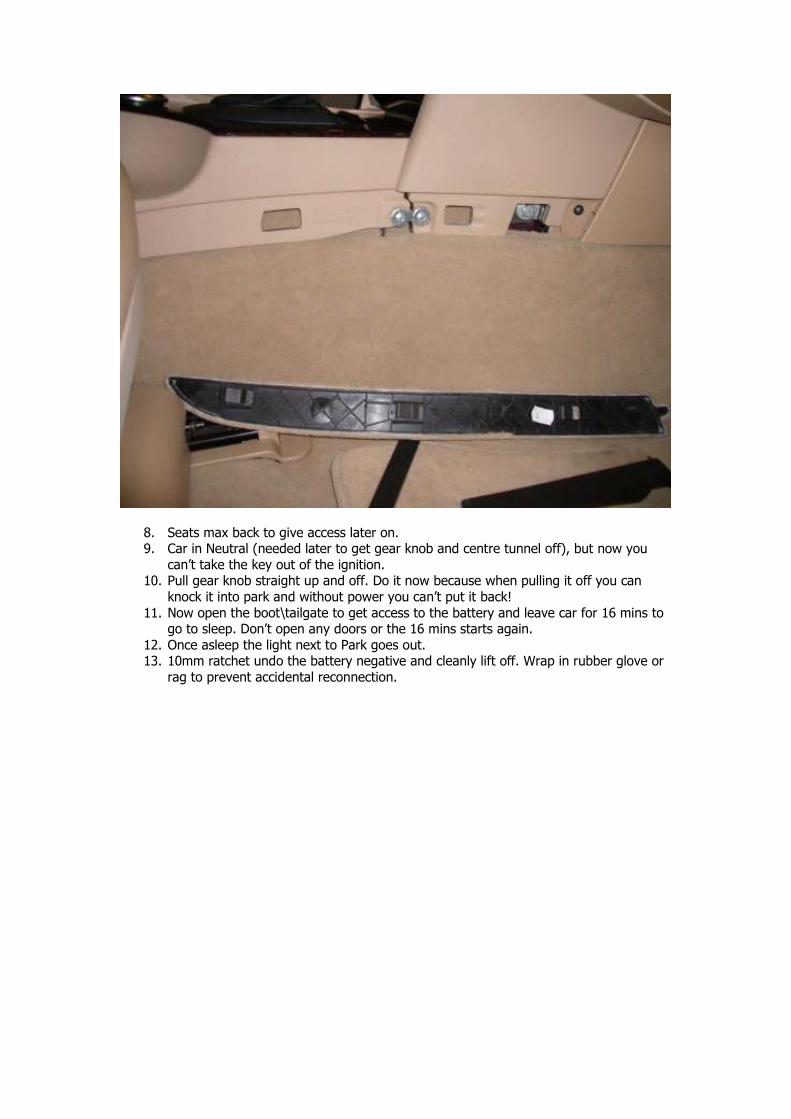
8. Seats max back to give access later on. 9. Car in Neutral (needed later to get gear knob and centre tunnel off), but now you
can’t take the key out of the ignition. 10. Pull gear knob straight up and off. Do it now because when pulling it off you can
knock it into park and without power you can’t put it back!
11. Now open the boot\tailgate to get access to the battery and leave car for 16 mins to go to sleep. Don’t open any doors or the 16 mins starts again.
12. Once asleep the light next to Park goes out. 13. 10mm ratchet undo the battery negative and cleanly lift off. Wrap in rubber glove or
rag to prevent accidental reconnection.
14. Pull iDrive knob straight up and off. 15. Pop out menu button, lever out from both short sides. Button comes out not the
surround.
16. Ashtray insert out (push down).
17. Leather round gear knob, squeeze inwards and pull up.
18. Pull gear surround out, fingers in the hole and pull up.
19. 2 screws holding wood trim down under gear surround (TIS says 3 but only 2 on my car). I believe the LCI (2007 onwards) has 2 extra screws at the front.
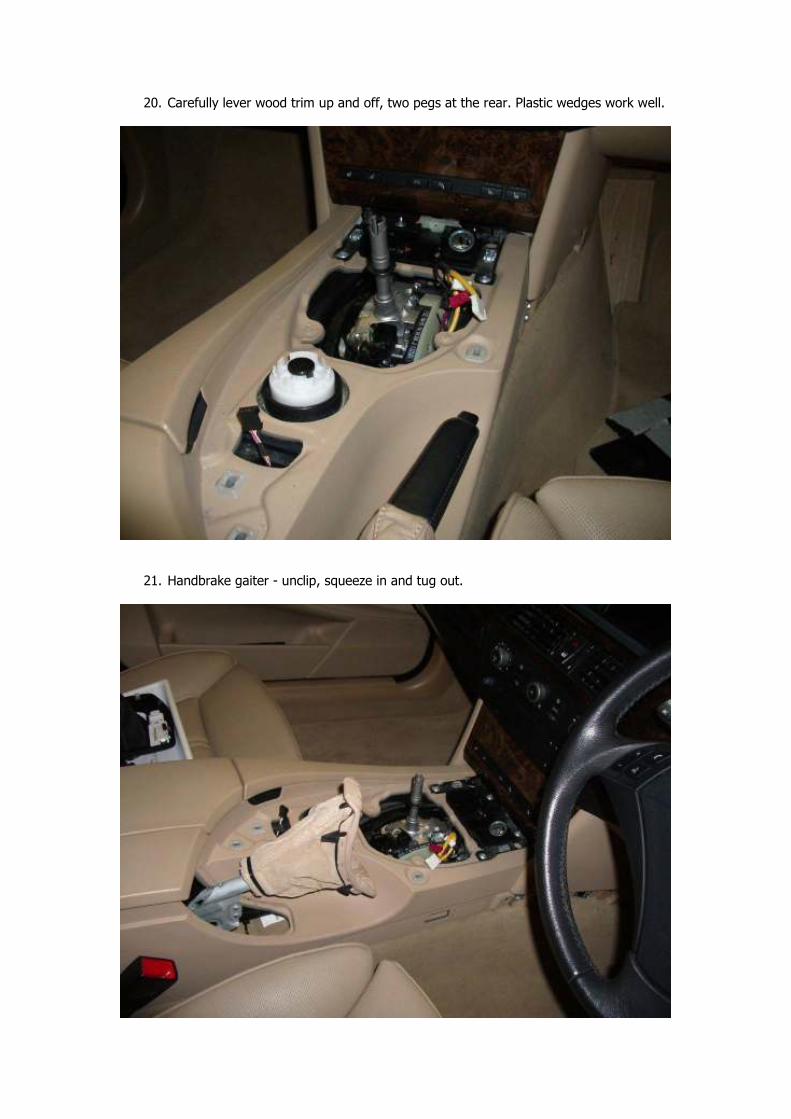
20. Carefully lever wood trim up and off, two pegs at the rear. Plastic wedges work well.
21. Handbrake gaiter - unclip, squeeze in and tug out.
22. Turn inside out and cut cable tie to remove gaiter completely.
23. Disconnect feed to ashtray.
24. Ashtray out, noting the wire is looped round part of the tunnel before the connector
is clipped to the holder. 4 screws.
25. Lift up centre tunnel at rear and prop up. There are a few plugs to disconnect.
26. Disconnect wires to phone from rear vent hole. 27. Use mirror under rear to see torx screw holding connector clip, undo.
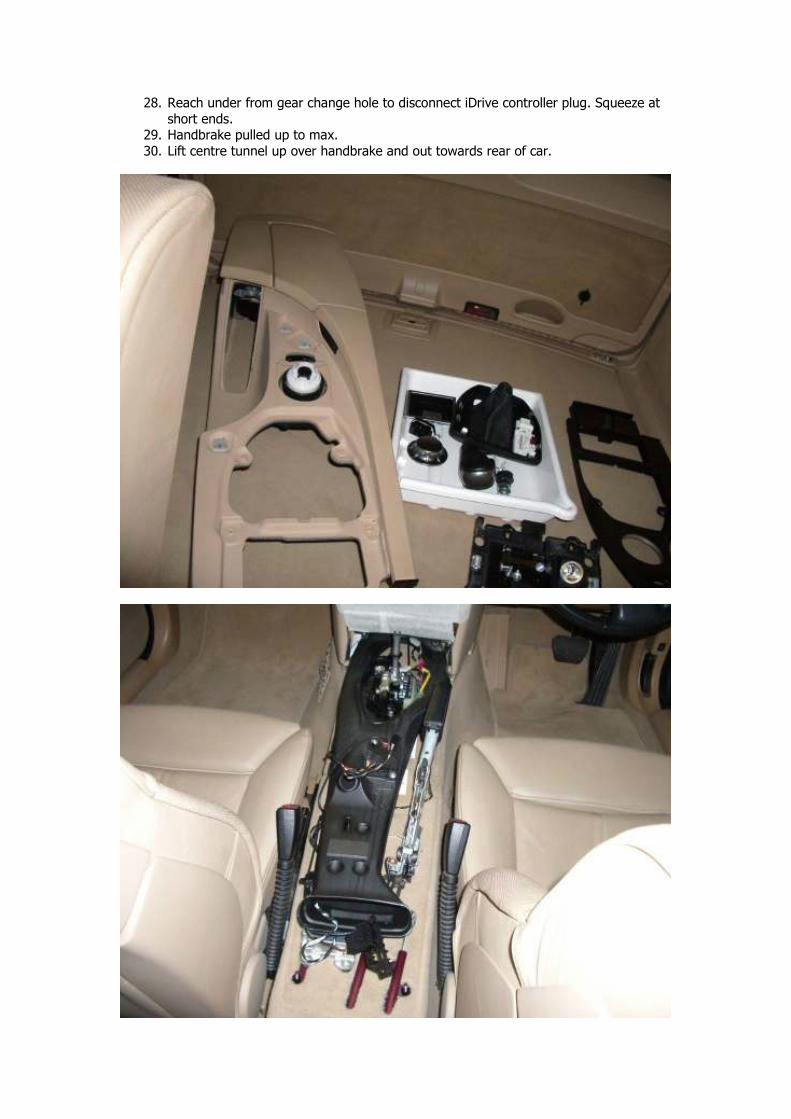
28. Reach under from gear change hole to disconnect iDrive controller plug. Squeeze at
short ends. 29. Handbrake pulled up to max.
30. Lift centre tunnel up over handbrake and out towards rear of car.
Dash
31. Hazard switch out, lever out from bottom, protect trim with masking tape 32. Lever wood off dash, start near door, plastic wedges work well. Try to avoid bending
it. Held in with metal pegs, levers off fine.
33. Wrap some rag round the metal gear knob and secure with tape or you’ll damage some trim later on.
34. Centre console out, Aircon controls and DSC+heated seats buttons. This is the trickiest bit. 2 screws at top. Two clips at bottom - pull DSC buttons towards you. The
hard bit is 2 hefty clips in the middle. Lever from sides (plastic wedges) lever from top with screwdriver and pull. Do one side at a time.
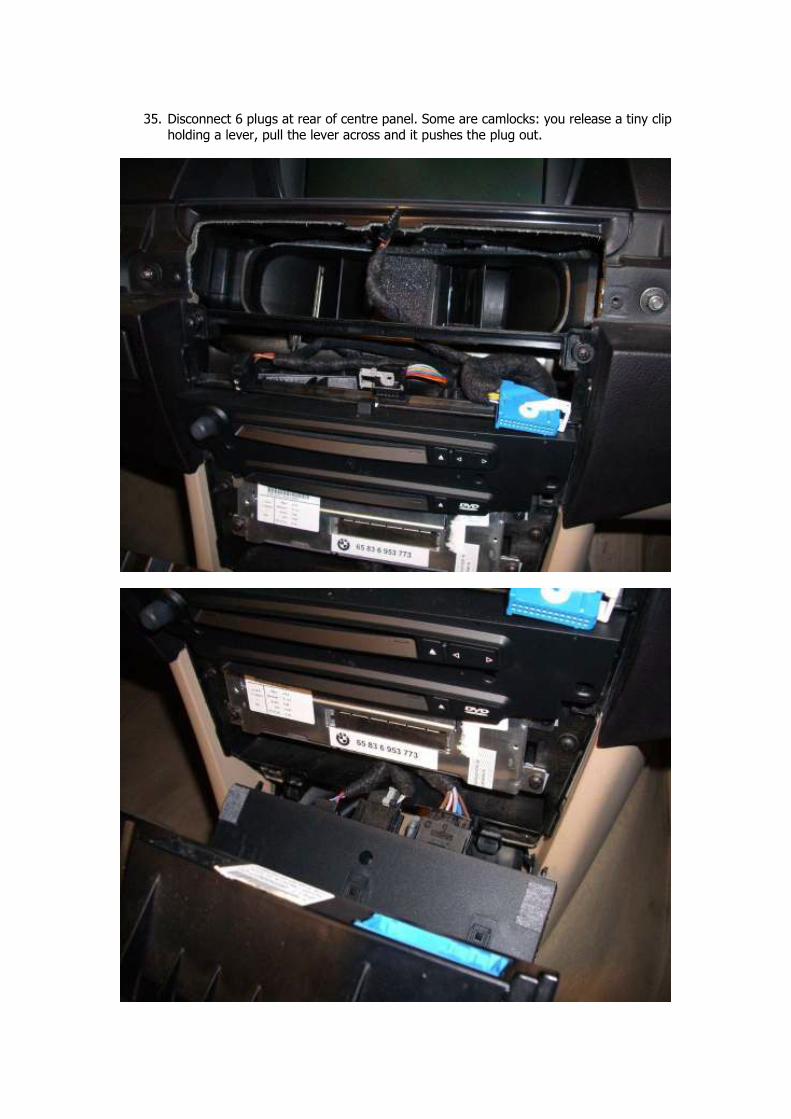
35. Disconnect 6 plugs at rear of centre panel. Some are camlocks: you release a tiny clip holding a lever, pull the lever across and it pushes the plug out.
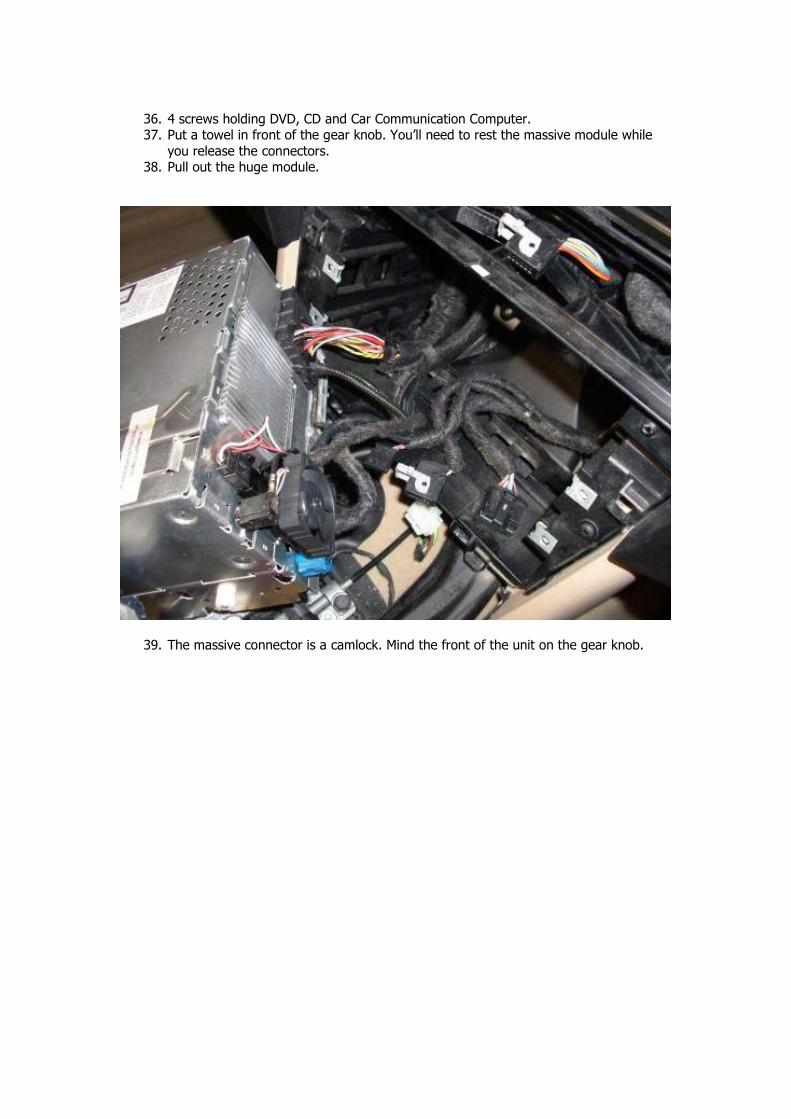
36. 4 screws holding DVD, CD and Car Communication Computer. 37. Put a towel in front of the gear knob. You’ll need to rest the massive module while
you release the connectors. 38. Pull out the huge module.
39. The massive connector is a camlock. Mind the front of the unit on the gear knob.
Driver’s footwell
40. Remove driver’s pedal trim panel. 5 screws, two clips at top near the steering wheel. Leather also clipped on but you can deal with that when the panel is loose.
Passenger footwell
41. Remove trim panel under glovebox. 3 x shorter blunt screws go up towards glovebox,
2 other screws.
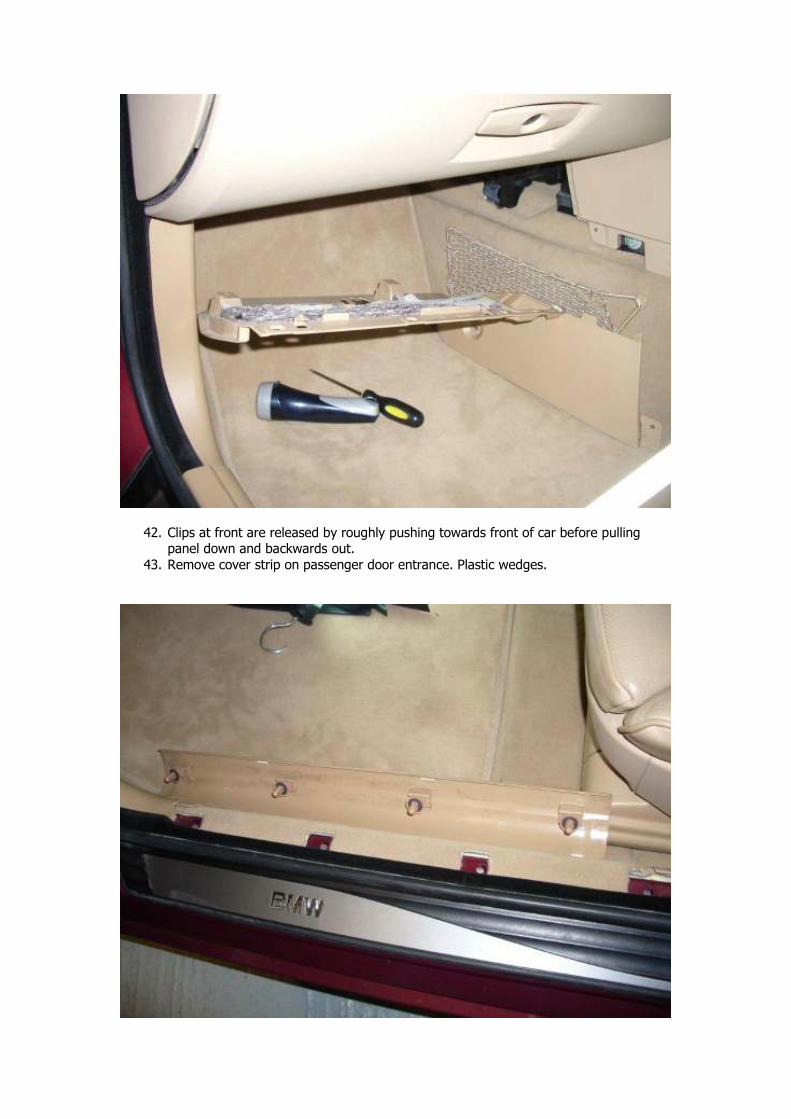
42. Clips at front are released by roughly pushing towards front of car before pulling panel down and backwards out.
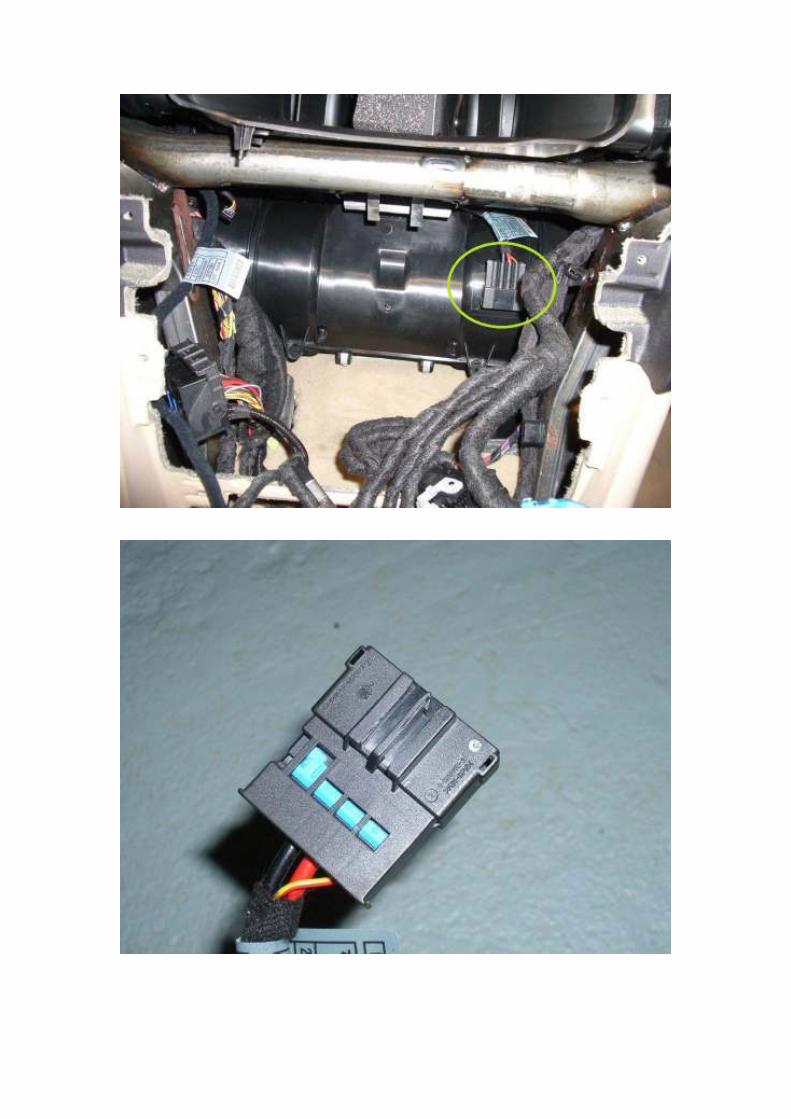
43. Remove cover strip on passenger door entrance. Plastic wedges.
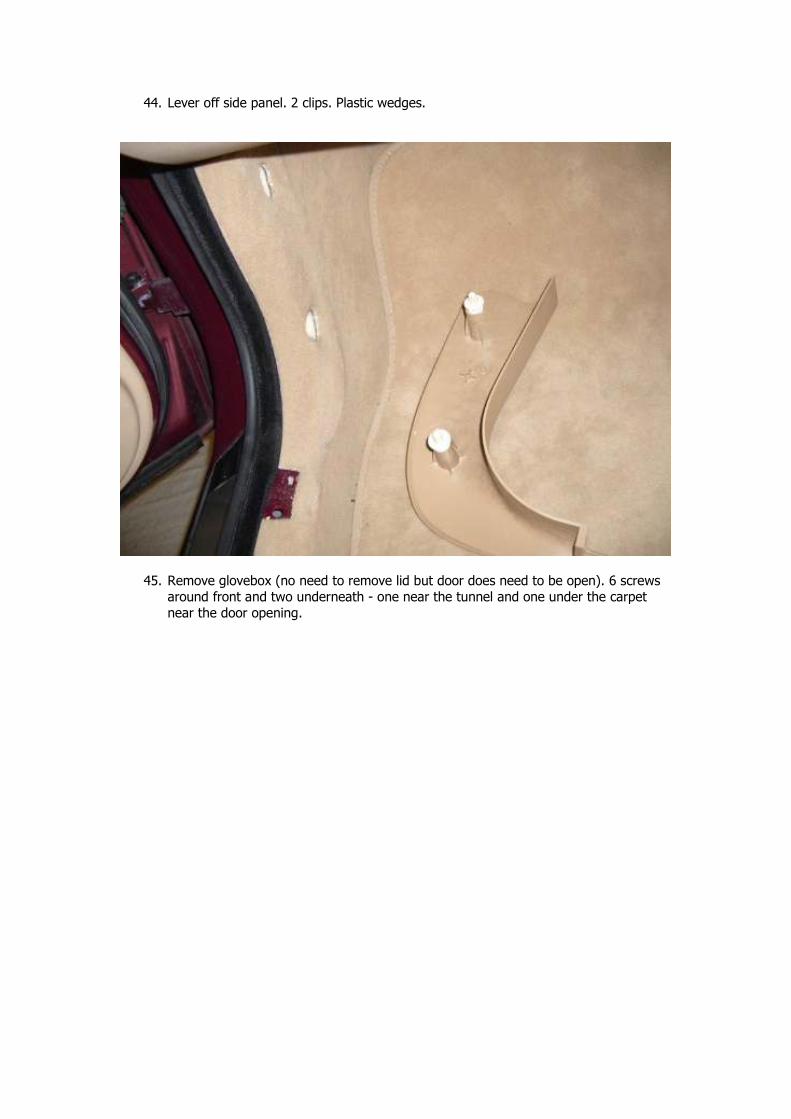
44. Lever off side panel. 2 clips. Plastic wedges.
45. Remove glovebox (no need to remove lid but door does need to be open). 6 screws
around front and two underneath - one near the tunnel and one under the carpet
near the door opening.
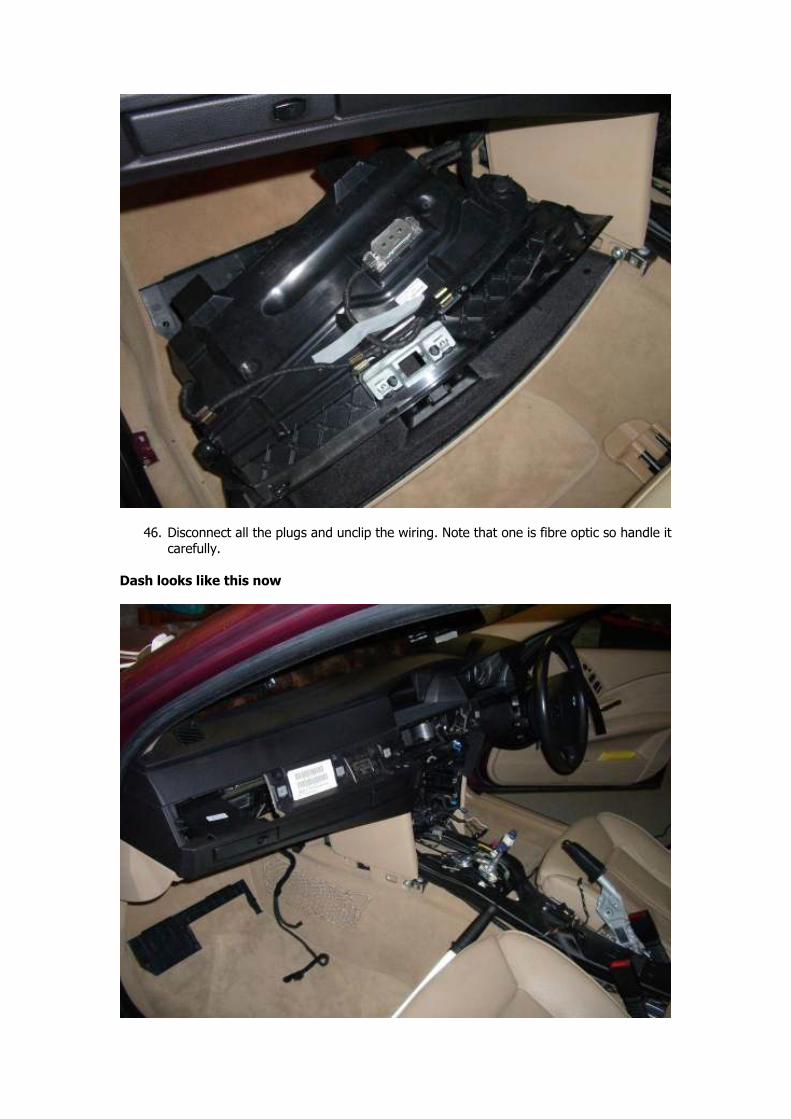
46. Disconnect all the plugs and unclip the wiring. Note that one is fibre optic so handle it carefully.
Dash looks like this now
Ducting
47. Central duct lifts out. Disconnect connector on top with purple insert on it. Lever off
cable tie clip at side. Lay iDrive loom on top when refitting and watch you don’t trap
any wires when putting the centre tunnel back on.
48. Central dash frame out. 6 screws. Photo the wire layout and plug positions first.
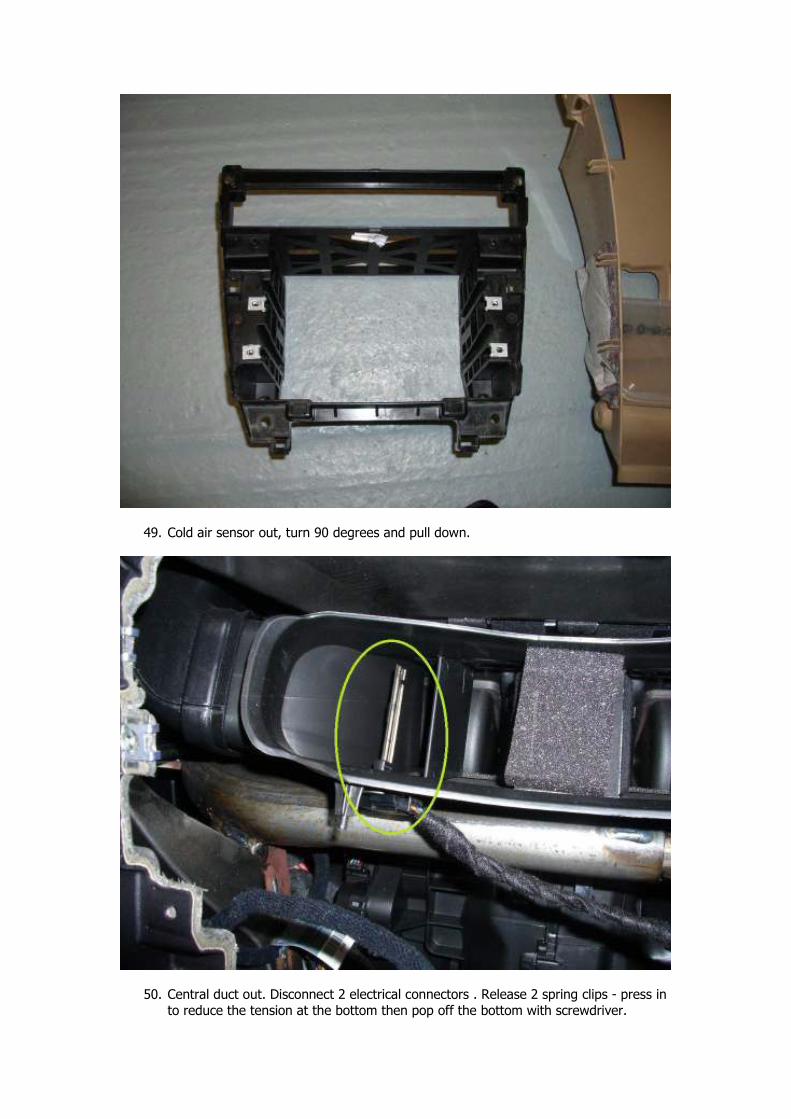
49. Cold air sensor out, turn 90 degrees and pull down.
50. Central duct out. Disconnect 2 electrical connectors . Release 2 spring clips - press in
to reduce the tension at the bottom then pop off the bottom with screwdriver.
51. Left duct out. Wiggle out into the footwell.
52. Lever off clip holding big cable loom to chassis. You need the room to get the right
duct out.
53. Ideally remove plug clipped to fan cover to give more room. I couldn’t see how and
had to leave it attached. Pic shows clips, the latch is underneath. Plug slides up and
off.
54. Cut a cable tie holding the gear selector cable to the right duct.
55. Right duct out. Comes out front hole better.
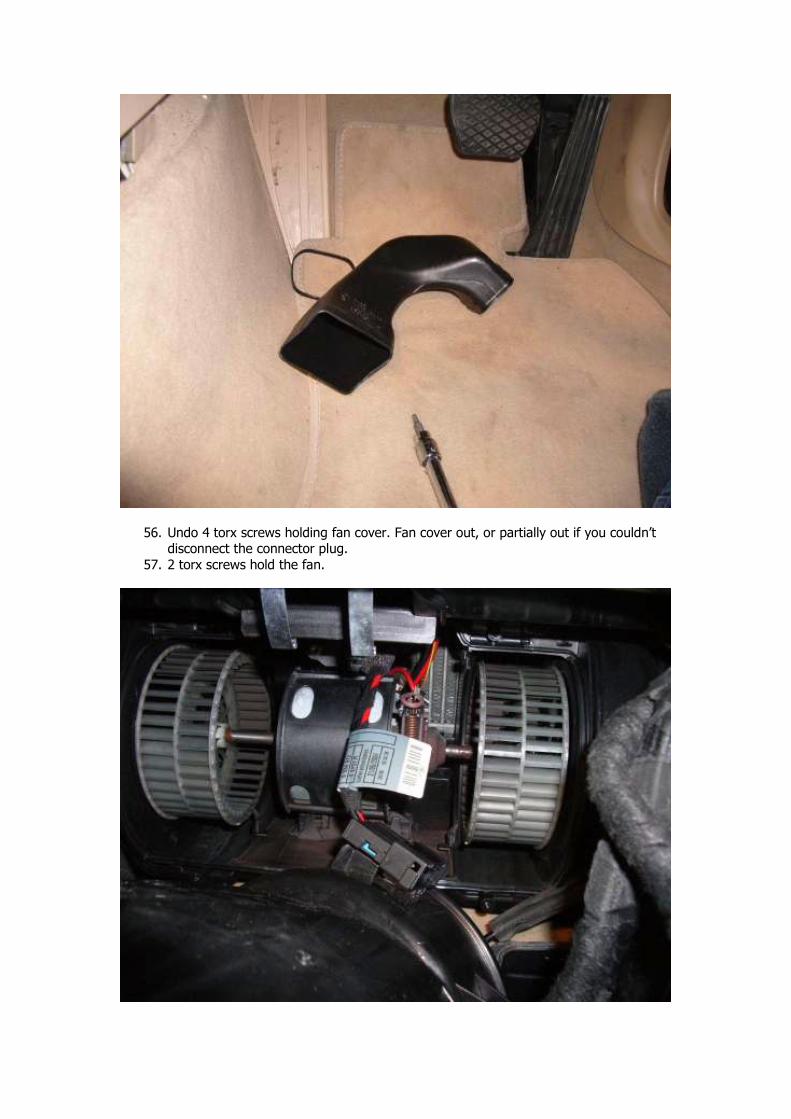
56. Undo 4 torx screws holding fan cover. Fan cover out, or partially out if you couldn’t disconnect the connector plug.
57. 2 torx screws hold the fan.
58. Fan out (and cover if still attached).
59. Swap over “hedgehog” controller.
60. Fit silicon mounts and feet, top and bottom to new fan.
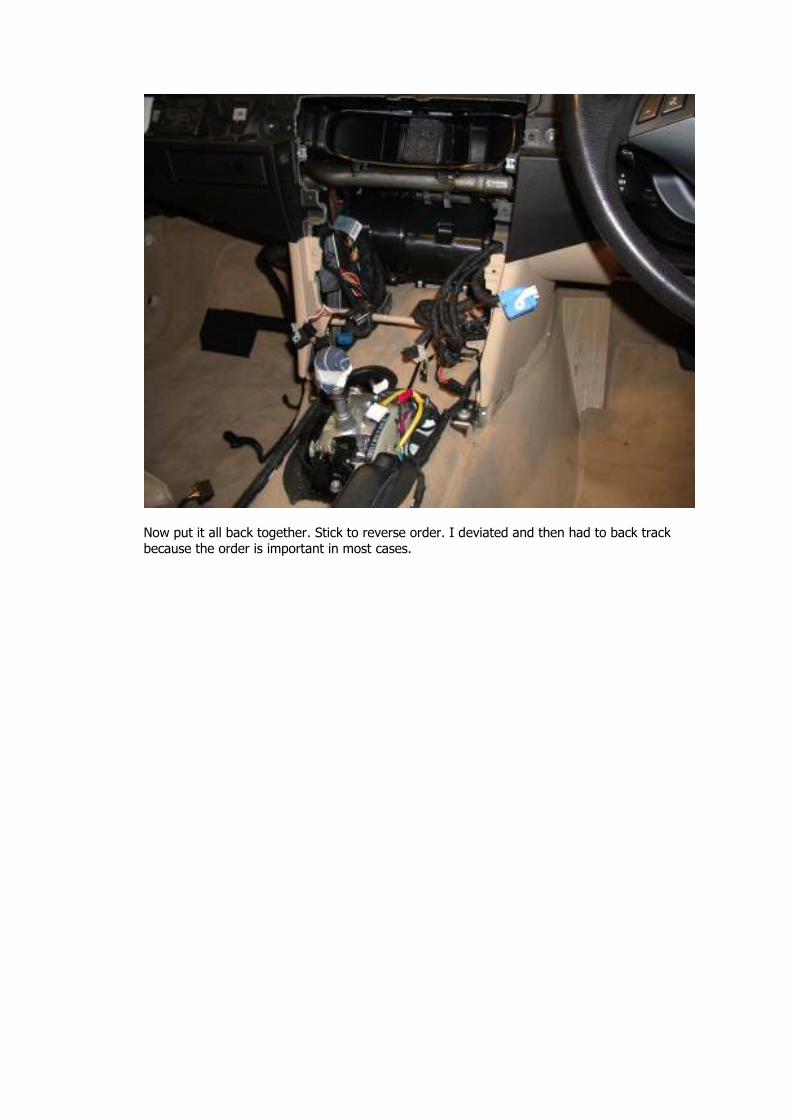
Here’s what it looks like with most parts out (except the fan):
Now put it all back together. Stick to reverse order. I deviated and then had to back track because the order is important in most cases.