Date post: | 28-Mar-2016 |
Category: |
Documents |
Upload: | sarah-standing |
View: | 212 times |
Download: | 0 times |
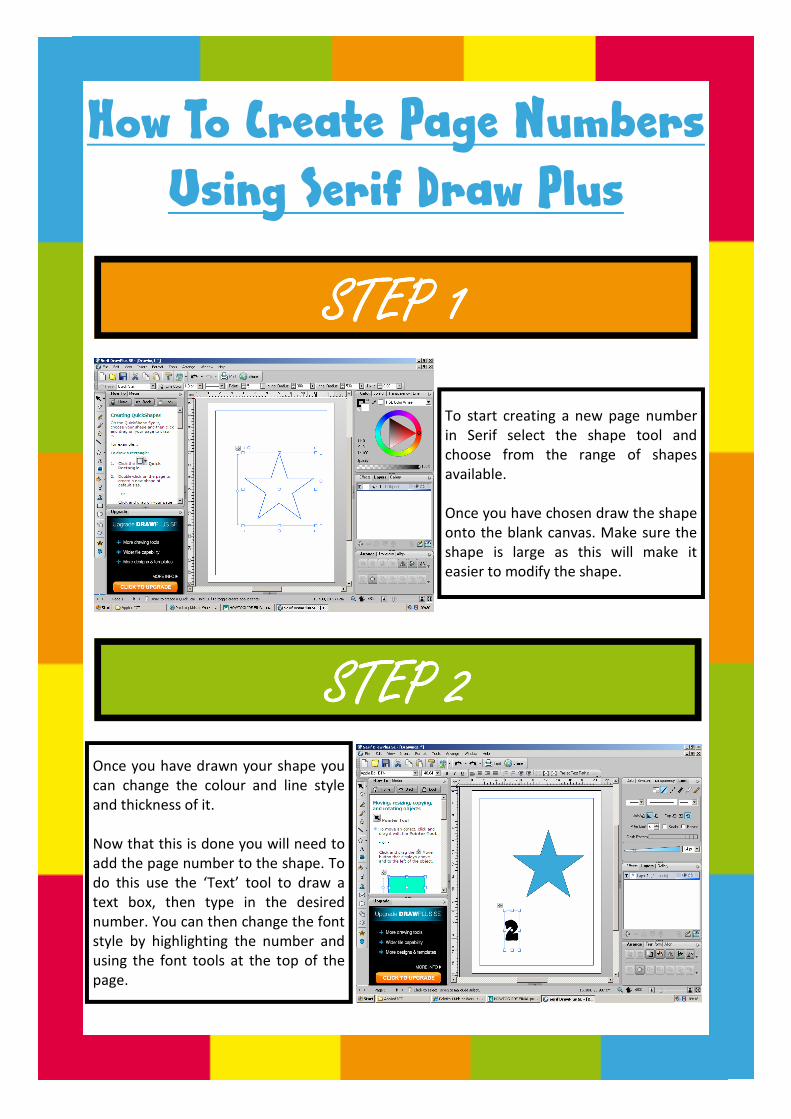
JONATHAN GREEN—AS APPLIED ICT
How To Create Page Numbers Using Serif Draw Plus
To start creating a new page number
in Serif select the shape tool and
choose from the range of shapes
available.
Once you have chosen draw the shape
onto the blank canvas. Make sure the
shape is large as this will make it
easier to modify the shape.
Once you have drawn your shape you
can change the colour and line style
and thickness of it.
Now that this is done you will need to
add the page number to the shape. To
do this use the ‘Text’ tool to draw a
text box, then type in the desired
number. You can then change the font
style by highlighting the number and
using the font tools at the top of the
page.
STEP 1STEP 1STEP 1STEP 1
STEP 2STEP 2STEP 2STEP 2
JONATHAN GREEN—AS APPLIED ICT
When you have finished
formatting the number, place
the figure on top of the shape.
Try to make the number as
central as possible.
Then group the two objects
together to make one object.
When you have finished creating
your page number you will need
to export the image so it can be
used in other documents.
To do this click ‘File’ then
‘Export’ then ‘Export as Image’.
STEP 3STEP 3STEP 3STEP 3
STEP 4STEP 4STEP 4STEP 4
JONATHAN GREEN—AS APPLIED ICT
Following this ensure that all of
the settings are correct and then
press ‘Export’ at the bottom of
the screen.
To create a different page
number ‘Ungroup’ the image by
selecting the image with the
‘Mouse’ tool and press the
‘Ungroup’ button at the bottom
of the image.
STEP 5STEP 5STEP 5STEP 5
STEP 6STEP 6STEP 6STEP 6
JONATHAN GREEN—AS APPLIED ICT
Drag the number out of the
shape and select the ‘Text’
tool. Highlight the number
and delete it. Now type your
new number into the text box.
To finish drag the new number
into the middle of the shape
ensuring that it is as central as
possible.
Then using the ‘Mouse’ tool,
draw a large square around the
shape to highlight both objects
together. Then press the ‘Group’
button to combine the images
together.
STEP 7STEP 7STEP 7STEP 7
STEP 8