12
Braided Leashes Braided Leashes Eric Eric Esden Esden and Karen O and Karen O ’ ’ Donnell Donnell Natural Encounters Inc. Natural Encounters Inc.

Braided LeashesBraided Leashes
Eric Eric Esden Esden and Karen Oand Karen O’’DonnellDonnellNatural Encounters Inc.Natural Encounters Inc.

Materials:_ Block of 2 x 4
_ Lighter
_ Thin wire CoatHanger-Cut androunded to blunt point
_ Scissors
_Hemostats
_ One Arms Lengthpiece of Parachute Cord
_One Double-ArmsLength Piece ofParachute Cord

_ Remove insides from both pieces of cut parachute cord and discard
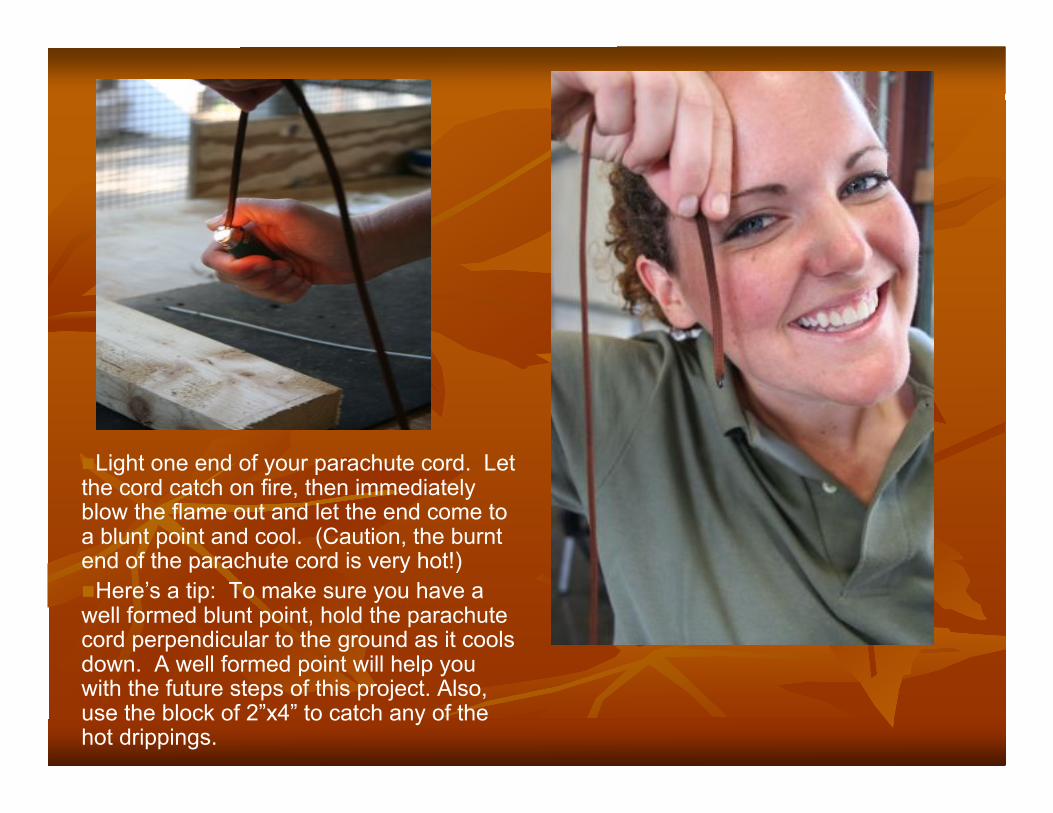
Light one end of your parachute cord. Letthe cord catch on fire, then immediatelyblow the flame out and let the end come toa blunt point and cool. (Caution, the burntend of the parachute cord is very hot!)Here’s a tip: To make sure you have awell formed blunt point, hold the parachutecord perpendicular to the ground as it coolsdown. A well formed point will help youwith the future steps of this project. Also,use the block of 2”x4” to catch any of thehot drippings.

_ Find the center of the parachute cord. On oneside of the cord, create a hole with the blunt end ofthe wire coat hanger. Be sure not to go throughthe opposite side and to only make one hole in thecenter. Be careful not to tear the cord. Tearing thecord decreases the integrity and strength of thecord. (see photo 1)
_ Once hole is created remove the hanger andinsert both jaws of the hemostats into the holefeeding fabric up towards the joint of thehemostats. Remove hemostats when done. Thiswill increase the diameter of hole and make futuresteps easier. (see photo 2)
_ Take your smaller piece of parachute cord andinsert the hanger using technique above into thefabric roughly 3 inches away from burnt end ofcord. Be careful only to go through one side of thecord ending with hanger in the center. Pushhanger inside of cord until the point reaches theburnt end. (see photo 3)

_ Holding the longer strand of parachute cord atthe point where you made your hole, insert thesmaller piece of cord at the burnt end into thehole at the center point of the longer strand andfeed inside. The short piece of cord should be fedinside the longer chord about 4-5 inches.
_ Once pushed in about 4-5 inches carefullyremove the coat hanger only, being careful toleave the cord that you have pushed inside. Whatyou have left should look much like what you seein the adjacent picture.

_ Form the loop of your leash at the same point you just stuffed 4-5 inches of cordinside your long piece of parachute cord. The loop should be between 1 to 1 and1/2 inches long. Holding the forked point of the cord either in your right or lefthand cross the double thick portion of your cord between the fork with youropposite hand adjusting for loop diameter as desired. Once you find a desireddiameter (standard being about the size of a quarter) continue crossing left strandover your now center strand while alternating strand pieces from left to right in atraditional braiding fashion. See photos below
Note: When finding the desirediameter of your loop make suresome of the “double thick” portionof your cord is braided into yourleash. This will ensure your loopstays secure and doesn’t loosenwith time.
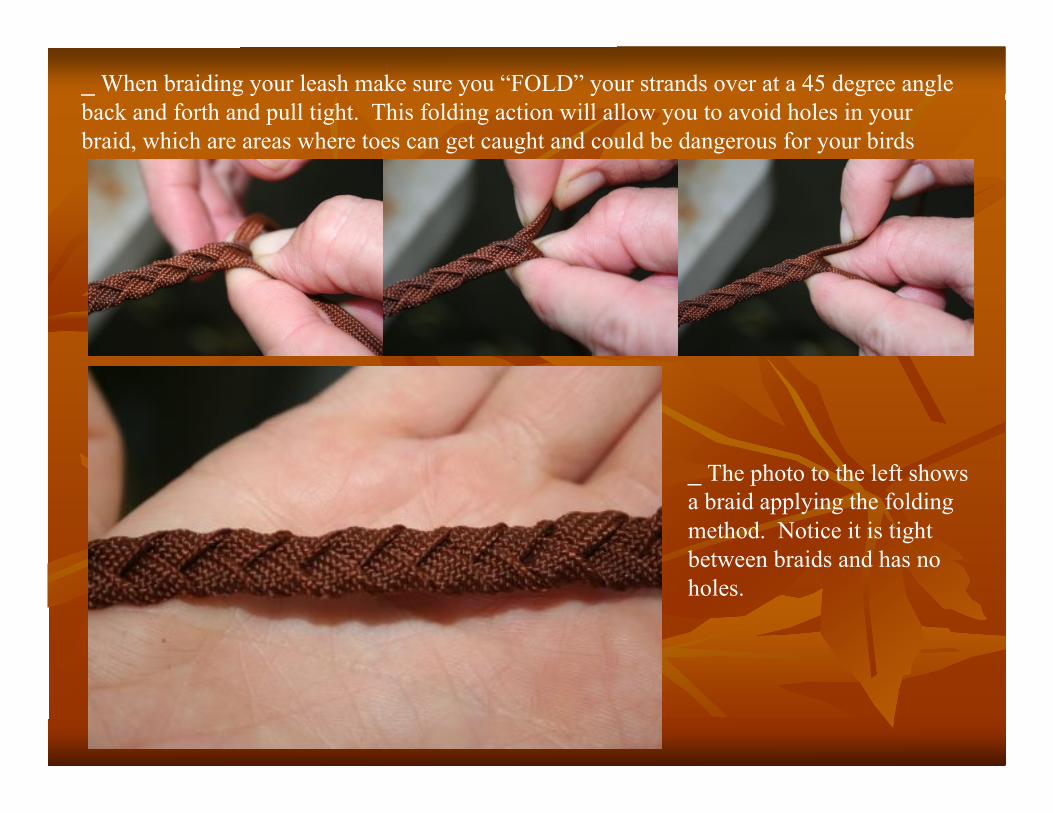
_ When braiding your leash make sure you “FOLD” your strands over at a 45 degree angleback and forth and pull tight. This folding action will allow you to avoid holes in yourbraid, which are areas where toes can get caught and could be dangerous for your birds
_ The photo to the left showsa braid applying the foldingmethod. Notice it is tightbetween braids and has noholes.

_ To make braiding your leash easier you can use adog clip or caribeaner and attach your leash at theloop end to your shoe laces. This will allow you tobraid quicker as it will make your leash “taught.”
_If using your shoe is uncomfortable you can attachyour leash through the loop to a cage or other objectwith a dog clip or caribeaner.
_ If you need to step away from braiding your leash,no problem, you can attach a set of hemostats at ourcurrent ending point and come back later!

_ Sealing your Leash: Once you’ve reached your desiredleash length (these instructions result in a leash roughly 60inches long) it is time to seal your leash. Attach hemostats tobraid as if stepping away during the braiding process and cutoff a piece of your excess chord not incorporated into braid.This will be used to seal the braid.
_ Light one end of this piece of chord and allow it to catch fire.As it is burning, drip the melted chord onto your leash justabove where you attached your hemostats.
_ Continue dripping the melting chord onto the end of yourleash until you cover all surface area of three braid lengths.Once covered turn your leash over and repeat on opposite side.

_ Once the braid is sealed cut off excess cord right up tothe edge of the melted braid and discard
_ Using a lighter, lightly melt this freshly cut endof your leash and any rough edges
Note: Do not hold lighter directly on leash for toolong as this will melt off your sealed end and resultin having to reseal your braid.
_ This is what your leash end should look like.There should be no sharp points or edges ensuringthe safety of your birds.

You now have made a braided leash!


