1 Broadworks User Guide Please note that this document is meant to cover all of the main features/functionality of the Broadworks platform, as well as the main features/functionality of Polycom Soundpoint IP Phones (firmware version 3.3.2). Therefore, some of the items listed will not apply to your site. Things to Keep In Mind with IP Phones There are a few things to keep in mind that differentiate IP phones from “traditional” phones. First, the fact that only one extension or DID is assigned to your phone does not mean that you can only receive one call at a time. Traditional telephones are limited to one call (perhaps two if utilizing call waiting) by the technology used between the telephone switch and the phone, and the fact that the phone is “dumb” (no advanced electronics). Polycom phones (having advanced electronics), along with our Broadworks platform, do not have that limitation. A Polycom 550, with only one line assigned, can handle 24 concurrent calls. Second, when placing a call with a traditional phone, every dialed digit is processed, one at a time, by the telephone switch. So, if you hit the wrong digit, you must hang up and re-dial. On an IP phone, all of the dialed digits are sent to the telephone switch at once. So, if you hit the wrong digit on an IP phone, you can delete that digit and correct your mistake, without hanging up and re-dialing (an example of that is shown below). Polycom Soundpoint IP Phones A typical Broadworks deployment will consist mostly of Polycom phones, so this guide will describe, in some detail, the basic features/functionality of Polycom phones (this guide will give examples based specifically on a Polycom 550 phone, as this is the most common Polycom currently deployed by Adams. All other Polycom phones are very similar to the 550 in terms of functionality, but if you have questions about your specific phone model, please see your system administrator). Also, keep in mind that at the time of writing this guide, Adams is deploying Polycom phones with firmware version 3.3.2. Future firmware upgrades may have a minor effect on the main features/functionality of the Polycom phones (Adams will keep all customers informed about any firmware changes that dramatically change how the phone operates).
Transcript
1
Broadworks User Guide
Please note that this document is meant to cover all of the main features/functionality of the Broadworks platform, as well as the main features/functionality of Polycom Soundpoint IP Phones (firmware version 3.3.2). Therefore, some of the items listed will not apply to your site. Things to Keep In Mind with IP Phones There are a few things to keep in mind that differentiate IP phones from “traditional” phones. First, the fact that only one extension or DID is assigned to your phone does not mean that you can only receive one call at a time. Traditional telephones are limited to one call (perhaps two if utilizing call waiting) by the technology used between the telephone switch and the phone, and the fact that the phone is “dumb” (no advanced electronics). Polycom phones (having advanced electronics), along with our Broadworks platform, do not have that limitation. A Polycom 550, with only one line assigned, can handle 24 concurrent calls. Second, when placing a call with a traditional phone, every dialed digit is processed, one at a time, by the telephone switch. So, if you hit the wrong digit, you must hang up and re-dial. On an IP phone, all of the dialed digits are sent to the telephone switch at once. So, if you hit the wrong digit on an IP phone, you can delete that digit and correct your mistake, without hanging up and re-dialing (an example of that is shown below). Polycom Soundpoint IP Phones A typical Broadworks deployment will consist mostly of Polycom phones, so this guide will describe, in some detail, the basic features/functionality of Polycom phones (this guide will give examples based specifically on a Polycom 550 phone, as this is the most common Polycom currently deployed by Adams. All other Polycom phones are very similar to the 550 in terms of functionality, but if you have questions about your specific phone model, please see your system administrator). Also, keep in mind that at the time of writing this guide, Adams is deploying Polycom phones with firmware version 3.3.2. Future firmware upgrades may have a minor effect on the main features/functionality of the Polycom phones (Adams will keep all customers informed about any firmware changes that dramatically change how the phone operates).
2
Basic Button Usage There are two types of buttons on the phone, hard buttons and soft buttons. Hard buttons are those buttons that have a permanent label and always perform the same function. For example, the “Do Not Disturb” button is always used to enable/disable “Do Not Disturb”, and is labeled as such. Other examples are the “Messages”, “Hold”, and “Transfer” buttons. Soft buttons are those buttons that surround the screen, are not permanently labeled, and whose functionality can be changed. For example, out of the box, your phone has 4 soft buttons located near the upper-left corner of the screen. The first button is labeled on the screen as your extension and the three remaining buttons are unnamed. Those 3 soft buttons can be used for speed dials, busy lamp field, additional extensions, etc. There are also 4 soft buttons along the bottom of the screen. Notice that if you push the “New Call” soft button, your phone goes off-hook and the soft button that used to say “Forward”, now says “End Call”. The remaining buttons on the phone to take note of are the arrow keys, check mark, and “x” in the upper right corner of the phone. These buttons have a couple of different uses. First, the arrow keys are shortcut keys. Pressing the “Up” arrow takes you to your speed dial list, “right” goes to the placed calls list, “down” goes to missed calls, and “left” goes to received calls. These arrow keys are also used to navigate various menus on the phone. For example, press the “Menu” hard button. You now have 4 options. You can navigate to a specific option using the arrow keys and then press the check mark to select it (you can also use the “select” soft button or the right arrow key). To exit, press the “back” soft button and then the “exit” soft button (the left arrow works the same as “back and “exit”). Alternatively, you can use the number pad to select an option. Notice that all options under a menu have a number beside them. Pushing that number on the keypad will automatically take you to that option. For example, press the “menu” hard button again and then press the number “1” on your keypad. That will take you to the “features” option. The main function of the “x” button is to delete incorrectly dialed digits. Let’s say you meant to dial 217-696-4611, but inadvertently dialed 217-696-4612. Pressing the “x” button will delete the last digit and you can then press the correct digit (the “<<” soft button does the same thing). Let’s say now that you inadvertently dial 217-699-4611 and needed to change the 6th digit from a 9 to a 6. You can use the arrow keys to navigate to the incorrect digit and then use the “x” button or “<<” soft key to delete it, and finally use the number pad to input the correct digit.
3
Dialing an outside number: All outside dialing can be done using 7, 10, or 11 digits, as long as the called number is in the 217 area code. 10 or 11 digits must be used when calling any other area code. Also, it is not necessary to dial a “9” to make an outside call. Keep in mind that there are multiple ways of connecting the call. Option 1: Picking up the handset and dialing the number. If you use this option, the call will automatically be connected if you dial 10 or 11 digits. If you dial any other number of digits, it is necessary to push the “send” soft button to connect the call. Option 2: Using the speaker phone button. Like option 1, 10 and 11 digit calls will connect automatically and the “send” soft button will need to be used to connect all other calls. Option 3: Dial number, and then pick up the handset. Using this option, ALL calls will be automatically connected once the handset is picked up. Transferring a call: There are two types of transfer; regular and blind. Regular transfer means that you speak to the person that is receiving the transferred call. Blind transfer means you are transferring a call directly to an extension, without first speaking to the person at that extension. For a regular transfer, press the “transfer” button (both the hard and soft buttons do the same thing) while on an active call, then dial the extension of the person you wish to transfer the call to. After speaking with the person receiving the transfer, push the “transfer” button again. For a blind transfer, press the “transfer” button while on an active call, then push the “blind” button. Next, dial the extension of the person you wish to transfer the call to, press the “send” button, and hang up. Transferring a call to voicemail: Perform a regular transfer, but add “*55” in front of the extension you wish to transfer to. You should then hear a recorded announcement telling you that the transfer was successful. Conferencing: During an active call, press the “conference” button (like transfer, both the hard and soft buttons do the same thing) and then dial the 3rd party’s phone number or extension. When the 3rd party answers, press the conference button again (This type of conferencing
4
is limited to 3 parties). Adams offers a conferencing solution for customers who require calls involving more than 3 parties. Please call Adams for more details. Call Park: Call Park allows you to “virtually” park a call and then pick that call back up at any phone. This feature should only be used when you answer a call at one phone, but need to finish the conversation on another phone (If you have the “Broadworks Anywhere” feature, you should never have to park a call. Broadworks Anywhere is described later in this guide). To park a call at someone’s extension: Perform a regular transfer, but add “*68” to the front of their extension. If successful, you will hear a recorded announcement stating so. If unsuccessful, you will hear fast busy tone. If this is the case, you must hit the “cancel” button, which will connect you back to the original caller. You will then have to park the call at your own extension. To park a call at your own extension: Perform a regular transfer, but dial “*68” followed by your extension. You should then hear a recorded announcement stating the park was successful. Picking up a parked call: First, dial “*88”. Then, dial the extension where the call is parked, followed by the “#” key. If the call is parked on your extension, you can simply dial “*88”, followed by the “#” key. Directed Call Pickup Directed Call Pickup allows you to answer a nearby co-worker’s phone. This is accomplished by dialing “*97”, followed by the extension of the phone that is ringing, followed by the “#”key. Voicemail: You can access your voicemail box by pressing the “messages” button on your phone. The first time you access voicemail, your passcode will be “0000” and you will be required to change it. Your new passcode must be 3-12 digits long and cannot be your extension, phone number, extension backwards, phone number backwards, or repeated digits (i.e. 1111 or 2222222). You will also be required to record your name the first time you log in.
5
Accessing voicemail box remotely: There are two ways to access your voicemail box remotely. The first is by dialing your DID and the second is by dialing the “main voice portal” number. When dialing your DID, press the “*” key during the recorded announcement. You will then be given the option to enter your passcode, followed by the “#” key. This option is only available to employee’s that have DID’s. The other option is to use your company’s main voice portal (see your system administrator for the voice portal number). If you dial the main voice portal number from any phone, you will be prompted to enter your mailbox ID (Both your extension and DID will work as your mailbox ID. After entering your mailbox ID, you will be prompted to enter your passcode.
6
Web Interface: The web interface is useful for setting/changing some of the advanced features of Broadworks. To access it, type the following into your web browser: as.digitalvoice.adams.net (Please bookmark this link for future use). Log in using your User ID and password (see your system administrator if you do not know your User ID and password). Upon initial login, you will be required to change your password. Please keep in mind that this password is completely separate from your voice mail passcode. Once logged in, your screen will look similar to the one below.
The screen is broke up into a left pane and right pane. For the rest of this guide, features will be referred to using the format “left pane link”, “right pane link”. For example, to toggle calling name retrieval on/off, click on “Incoming calls, Calling Name Retrieval”.
7
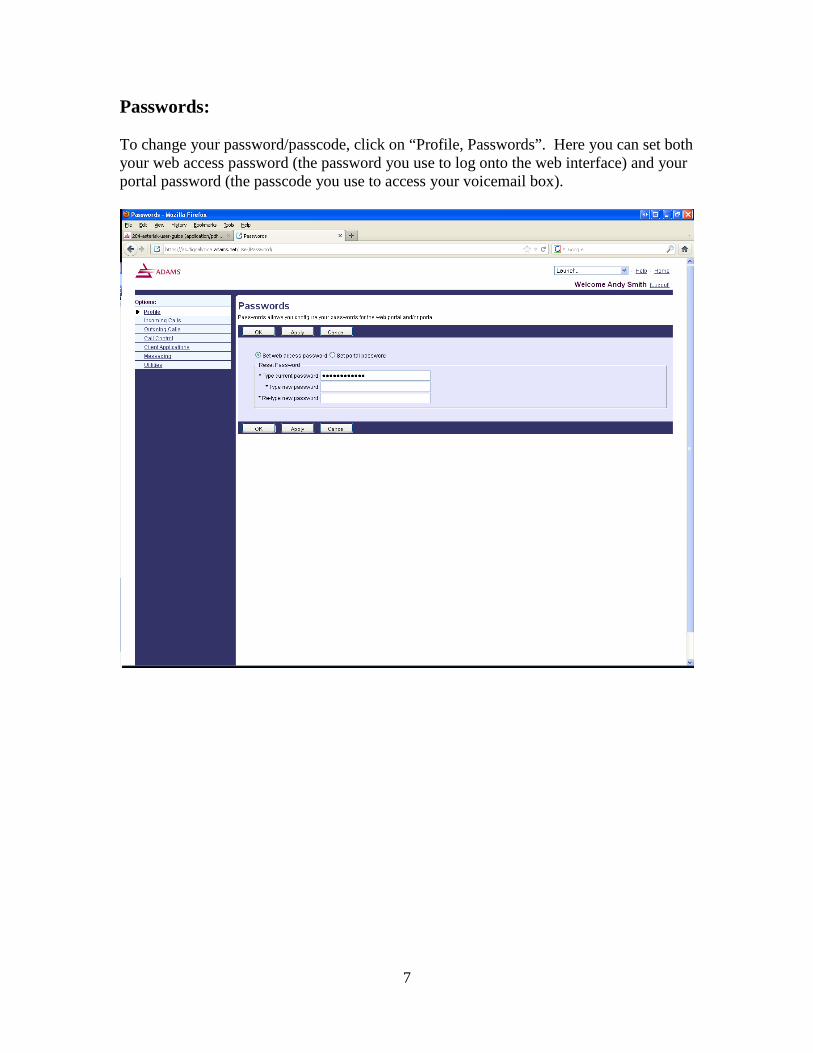
Passwords: To change your password/passcode, click on “Profile, Passwords”. Here you can set both your web access password (the password you use to log onto the web interface) and your portal password (the passcode you use to access your voicemail box).
8
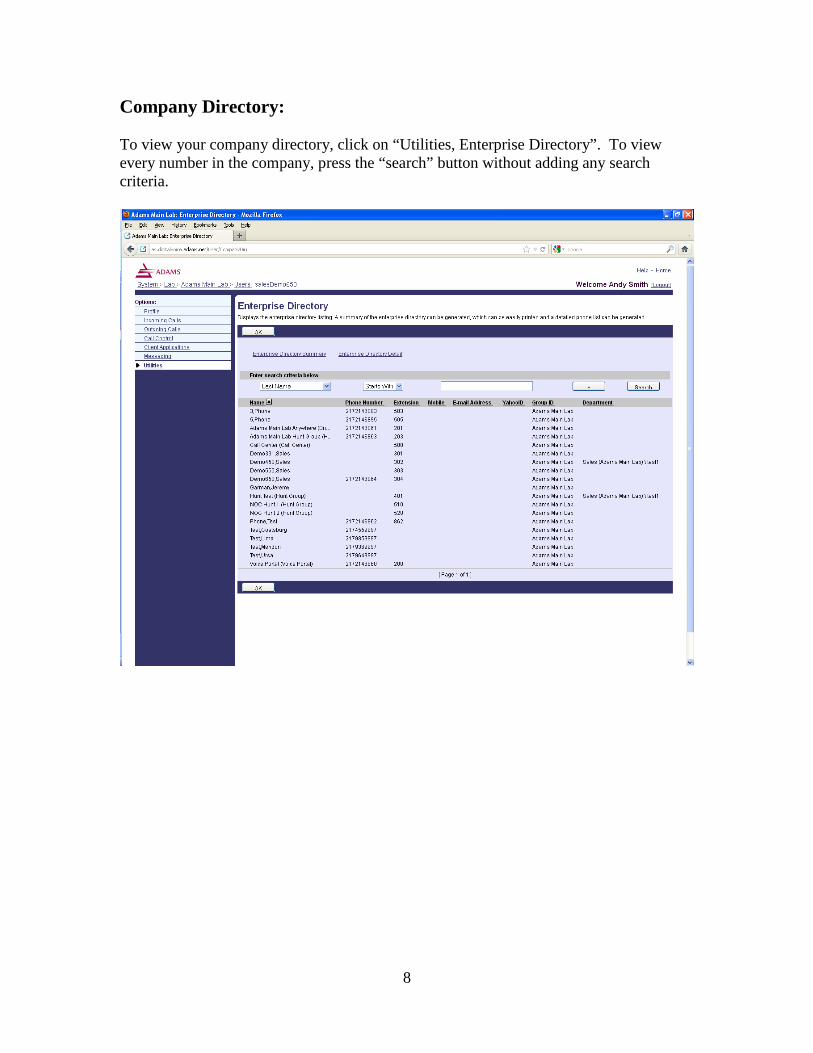
Company Directory: To view your company directory, click on “Utilities, Enterprise Directory”. To view every number in the company, press the “search” button without adding any search criteria.
9
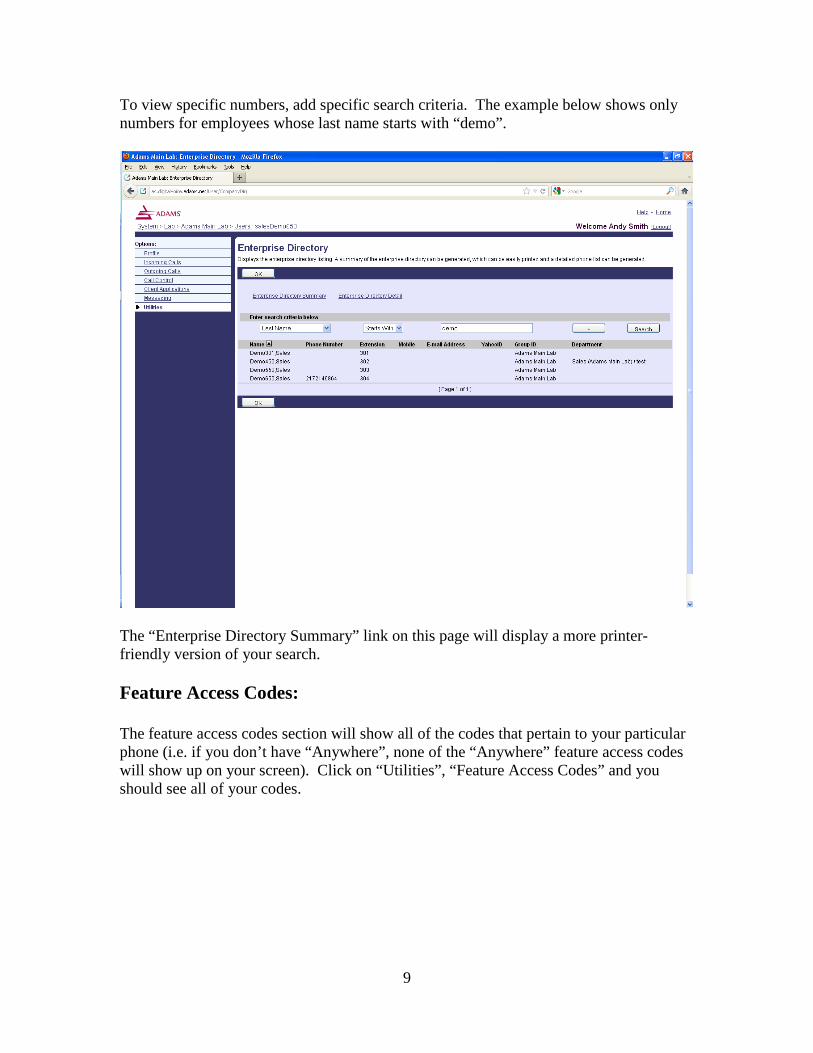
To view specific numbers, add specific search criteria. The example below shows only numbers for employees whose last name starts with “demo”.
The “Enterprise Directory Summary” link on this page will display a more printer-friendly version of your search. Feature Access Codes: The feature access codes section will show all of the codes that pertain to your particular phone (i.e. if you don’t have “Anywhere”, none of the “Anywhere” feature access codes will show up on your screen). Click on “Utilities”, “Feature Access Codes” and you should see all of your codes.
10
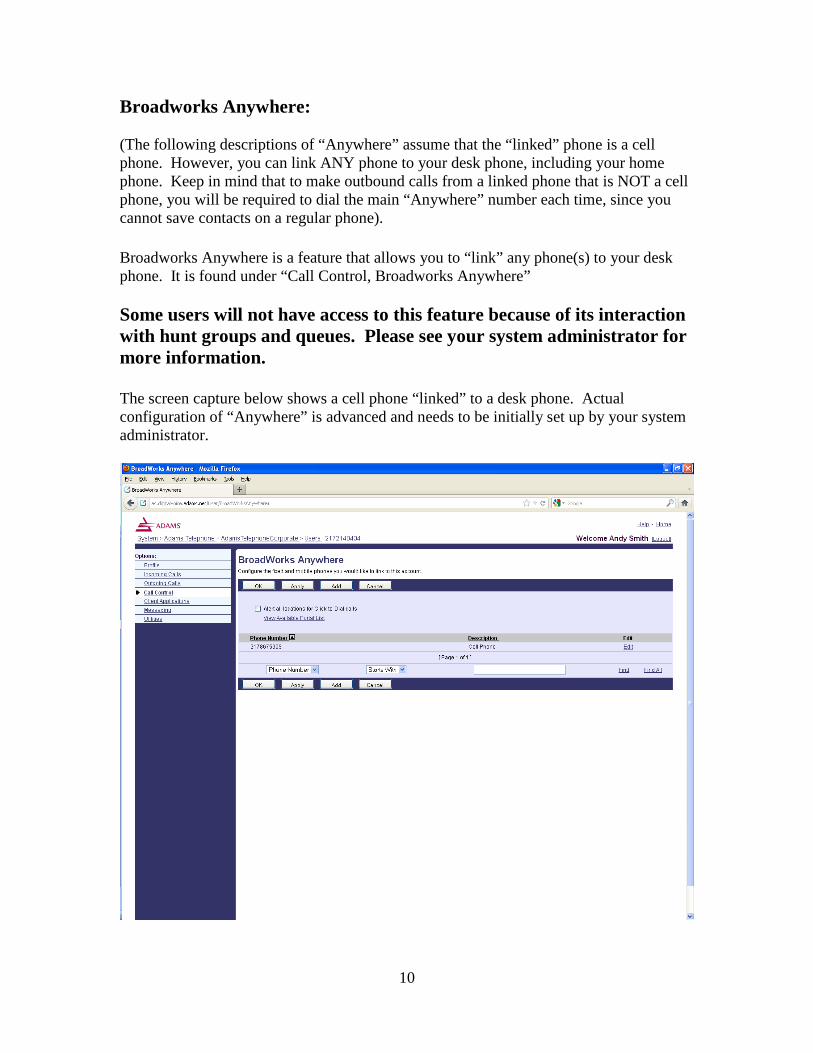
Broadworks Anywhere: (The following descriptions of “Anywhere” assume that the “linked” phone is a cell phone. However, you can link ANY phone to your desk phone, including your home phone. Keep in mind that to make outbound calls from a linked phone that is NOT a cell phone, you will be required to dial the main “Anywhere” number each time, since you cannot save contacts on a regular phone). Broadworks Anywhere is a feature that allows you to “link” any phone(s) to your desk phone. It is found under “Call Control, Broadworks Anywhere” Some users will not have access to this feature because of its interaction with hunt groups and queues. Please see your system administrator for more information. The screen capture below shows a cell phone “linked” to a desk phone. Actual configuration of “Anywhere” is advanced and needs to be initially set up by your system administrator.
11
The linked cell phone will simultaneously ring every time the desk phone rings and will maintain the original caller ID (a major advantage over call forwarding). The linked cell phone can also be used to make outbound calls; in place of the desk phone (These outbound calls will use the desk phone caller ID policies, instead of the cell phone caller ID). Incoming calls: As mentioned previously, incoming calls to the desk phone will also ring the cell phone. When one of the phones is answered, the other phone(s) stop ringing. For this reason, desk phones that are part of a hunt group or queue generally should not have cell phones linked to them. When a call is made to a “dead” cell phone, or a cell phone that is turned off, the cell phone provider automatically sends the call to voicemail. So, if employee A is in the customer service queue and has a dead cell phone linked to their desk phone, EVERY call into the queue will go straight to employee A’s cell phone voice mail. Outgoing calls: By dialing your company’s main “Anywhere” number, outbound calls can be made from the linked cell phone as if they were made from your desk phone (see your system administrator for the main “Anywhere” number). First, create a new contact on the linked cell phone with your company’s main “Anywhere” number (Name it something like “Broadworks” or “Anywhere”). If you have a smart phone, you may find it beneficial to save a shortcut of this contact to your main screen. Next, call that contact. Once connected, a recorded announcement will instruct you to enter your destination digits and you will be given “new” dial tone. Dial the destination digits as if you were using your desk phone (i.e. to call a co-worker, simply dial their extension), followed by the “#” key. Transferring “Anywhere” Calls: “Anywhere” calls can be transferred seamlessly from desk phone to linked cell phone and vice versa. From cell phone to desk phone: An active “Anywhere” call on the linked cell phone can be instantly transferred to the desk phone by dialing “*11” on the desk phone. From desk phone to cell phone: Using the linked cell phone, call the “Anywhere” contact you’ve previously saved. When given new dial tone, dial “*11”, followed by the “#” key. Again, the call will be transferred instantly.
12
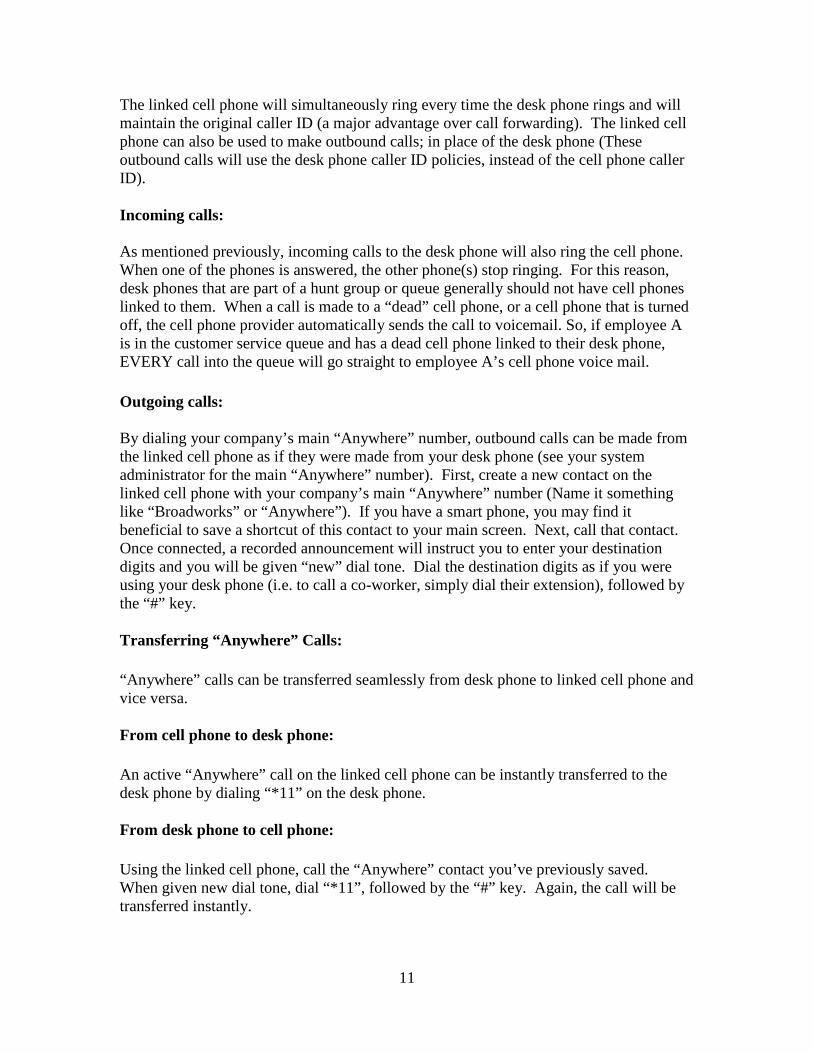
You can transfer the same call back and forth as many times as you’d like. Also, the transfer happens instantly, without notifications or beeps of any kind, thus making it unnecessary to notify the person you are talking to that a transfer is taking place. Simultaneous Ring: An alternative to Broadworks Anywhere is “Simultaneous Ring”. Simultaneous ring has some similarities to “Anywhere”, but there are a few important differences. First, only incoming calls DIRECTLY to your desk phone will ring your simultaneous ring phone (calls made to queues/hunt groups that you belong to will not ring your simultaneous ring phone). Also, you will not be able to make outbound calls from your simultaneous ring phone as if it were your desk phone. To set up simultaneous ring, click on “Incoming Calls”, “Simultaneous Ring Personal”.
13
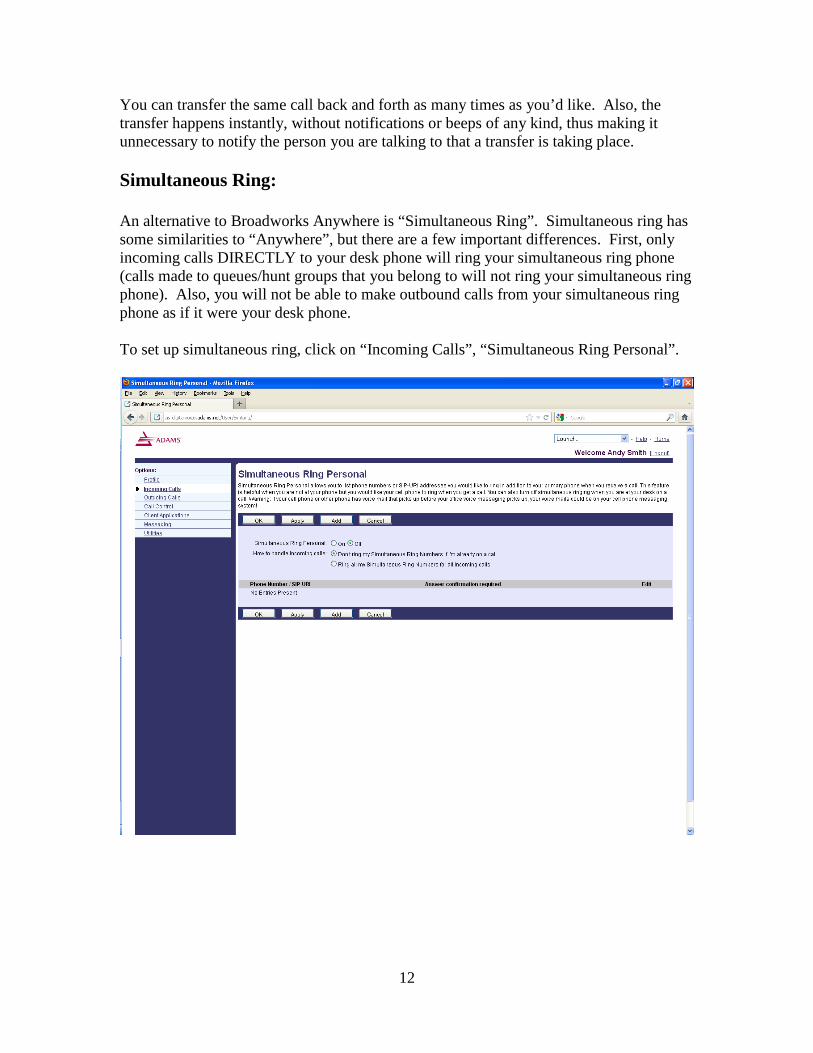
Next, click the “add” button and enter the 10 digit phone number of your simultaneous ring phone(s). Click “Ok”. Your screen should look similar to this.
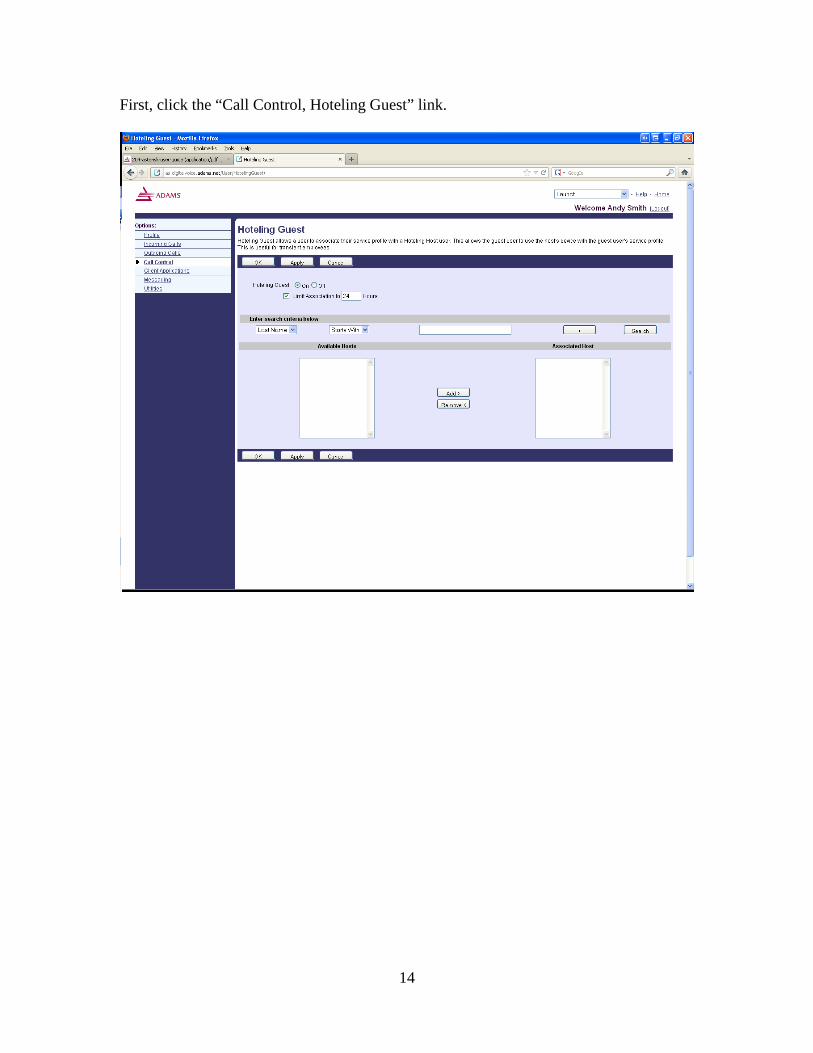
If you need to change “how to handle incoming calls”, do so now. Finally, click the “on” radio button next to “Simultaneous Ring Personal” and click “Ok”. Hoteling Hoteling is a feature that allows you to use a “host” phone as if it were your own desk phone. This feature is particularly useful for employees that work part of the week in one location and the rest of the week in another (Employee “A” works in Golden 3 days per week and Quincy 2 days per week). When you “hotel” into a host phone, that phone becomes your normal desk phone. Calls to your normal extension will ring the host phone instead of your normal phone, including calls to any hunt groups or queues that you belong to, voice mails left for you will show up on the host phone, and outgoing calls made from the host phone will work as if you were at your normal phone.
14
First, click the “Call Control, Hoteling Guest” link.
15
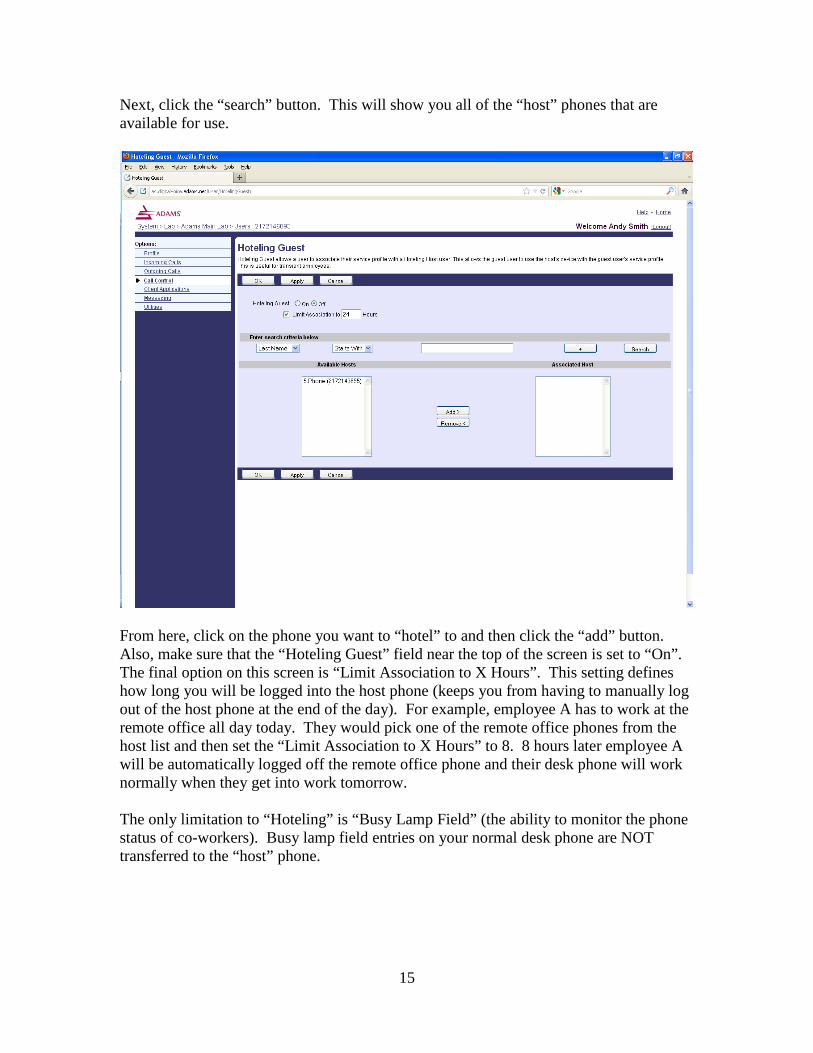
Next, click the “search” button. This will show you all of the “host” phones that are available for use.
From here, click on the phone you want to “hotel” to and then click the “add” button. Also, make sure that the “Hoteling Guest” field near the top of the screen is set to “On”. The final option on this screen is “Limit Association to X Hours”. This setting defines how long you will be logged into the host phone (keeps you from having to manually log out of the host phone at the end of the day). For example, employee A has to work at the remote office all day today. They would pick one of the remote office phones from the host list and then set the “Limit Association to X Hours” to 8. 8 hours later employee A will be automatically logged off the remote office phone and their desk phone will work normally when they get into work tomorrow. The only limitation to “Hoteling” is “Busy Lamp Field” (the ability to monitor the phone status of co-workers). Busy lamp field entries on your normal desk phone are NOT transferred to the “host” phone.
16
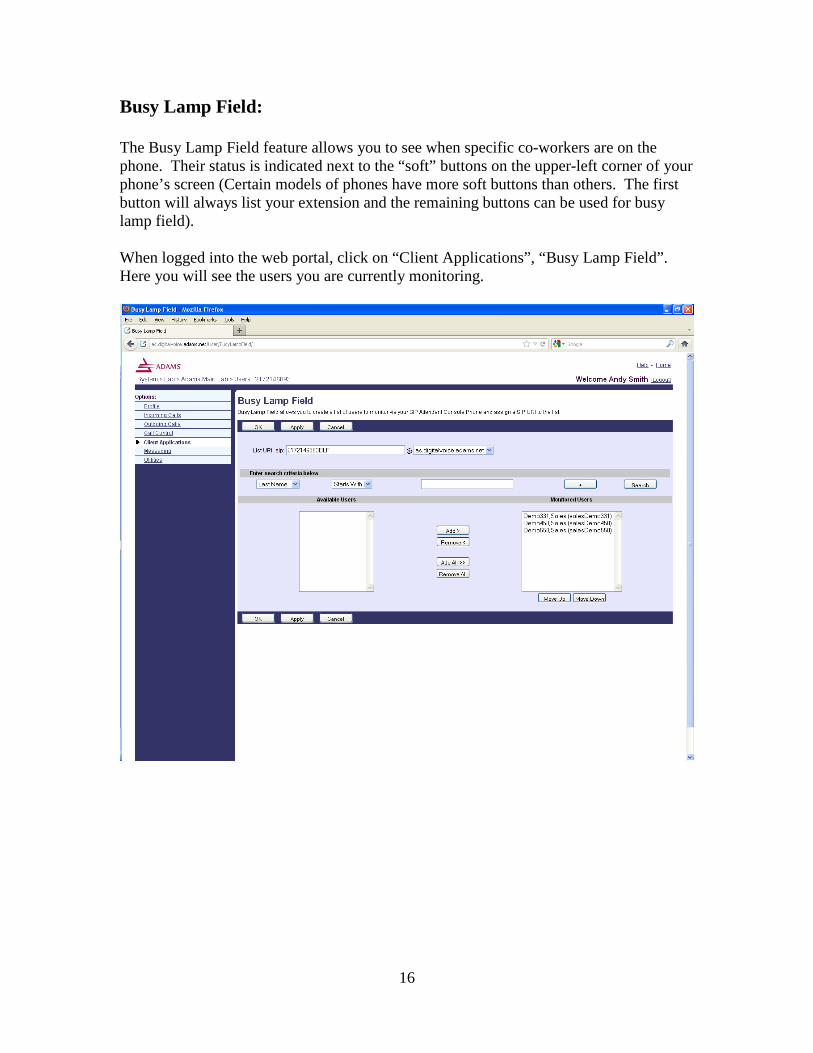
Busy Lamp Field: The Busy Lamp Field feature allows you to see when specific co-workers are on the phone. Their status is indicated next to the “soft” buttons on the upper-left corner of your phone’s screen (Certain models of phones have more soft buttons than others. The first button will always list your extension and the remaining buttons can be used for busy lamp field). When logged into the web portal, click on “Client Applications”, “Busy Lamp Field”. Here you will see the users you are currently monitoring.
17
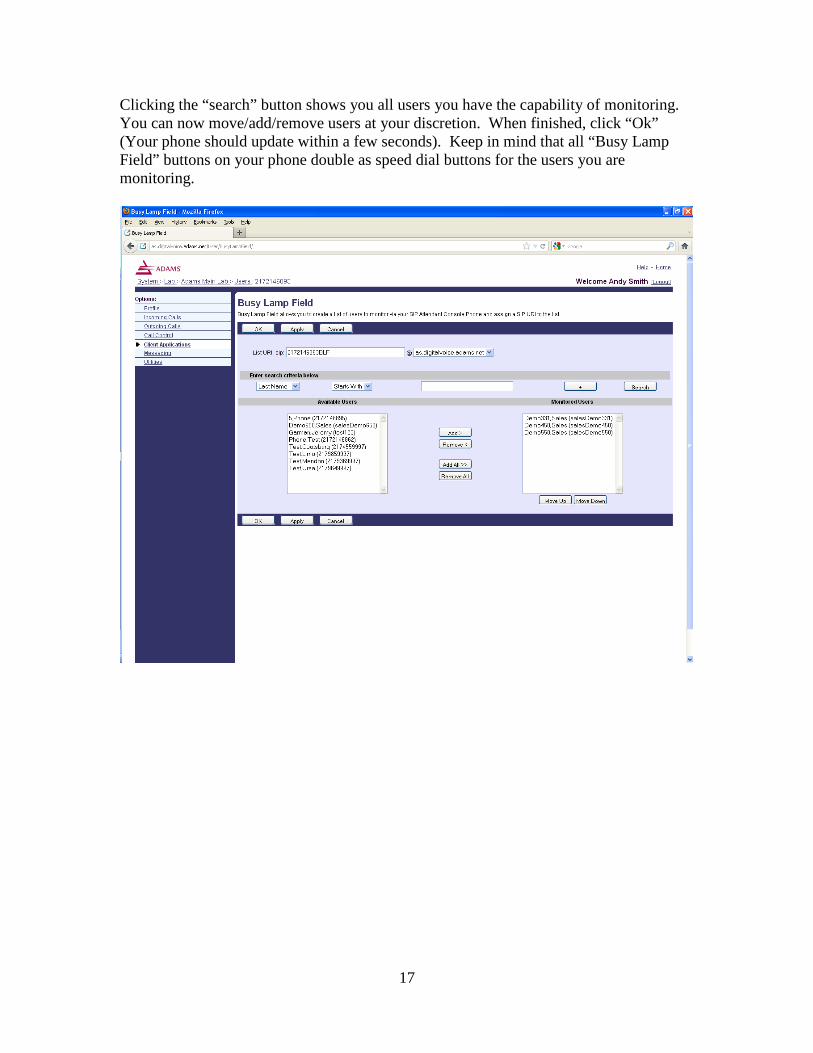
Clicking the “search” button shows you all users you have the capability of monitoring. You can now move/add/remove users at your discretion. When finished, click “Ok” (Your phone should update within a few seconds). Keep in mind that all “Busy Lamp Field” buttons on your phone double as speed dial buttons for the users you are monitoring.
18
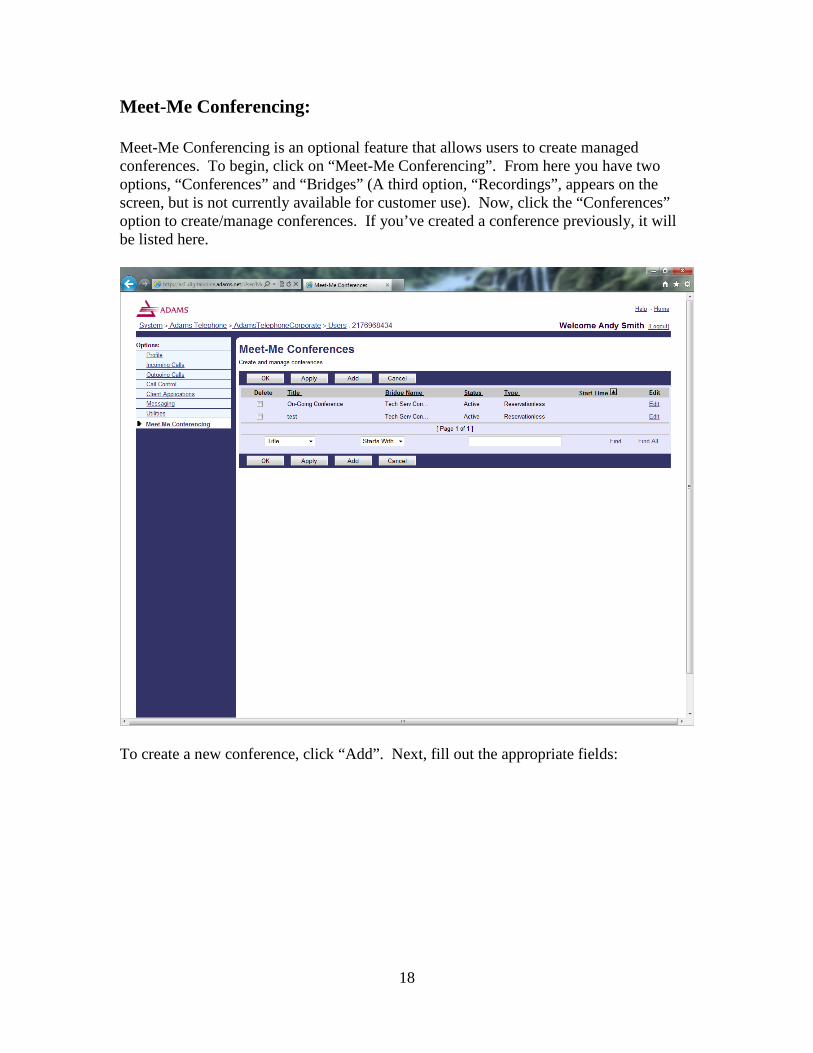
Meet-Me Conferencing: Meet-Me Conferencing is an optional feature that allows users to create managed conferences. To begin, click on “Meet-Me Conferencing”. From here you have two options, “Conferences” and “Bridges” (A third option, “Recordings”, appears on the screen, but is not currently available for customer use). Now, click the “Conferences” option to create/manage conferences. If you’ve created a conference previously, it will be listed here.
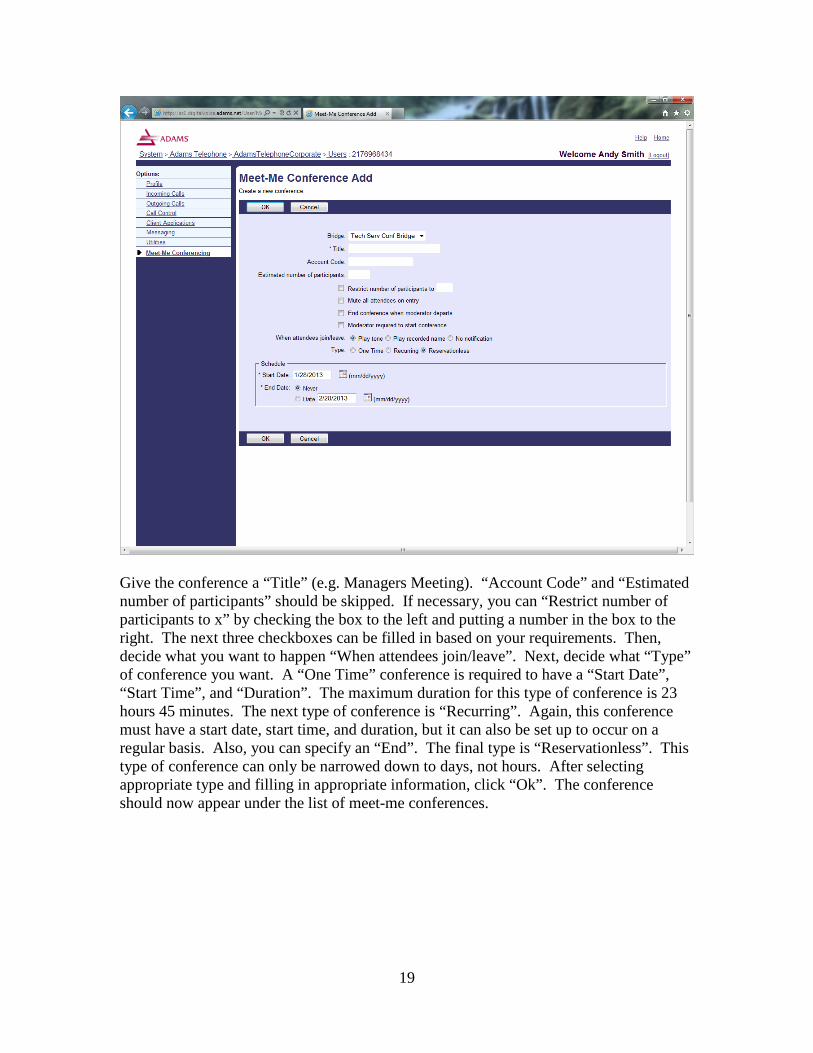
To create a new conference, click “Add”. Next, fill out the appropriate fields:
19
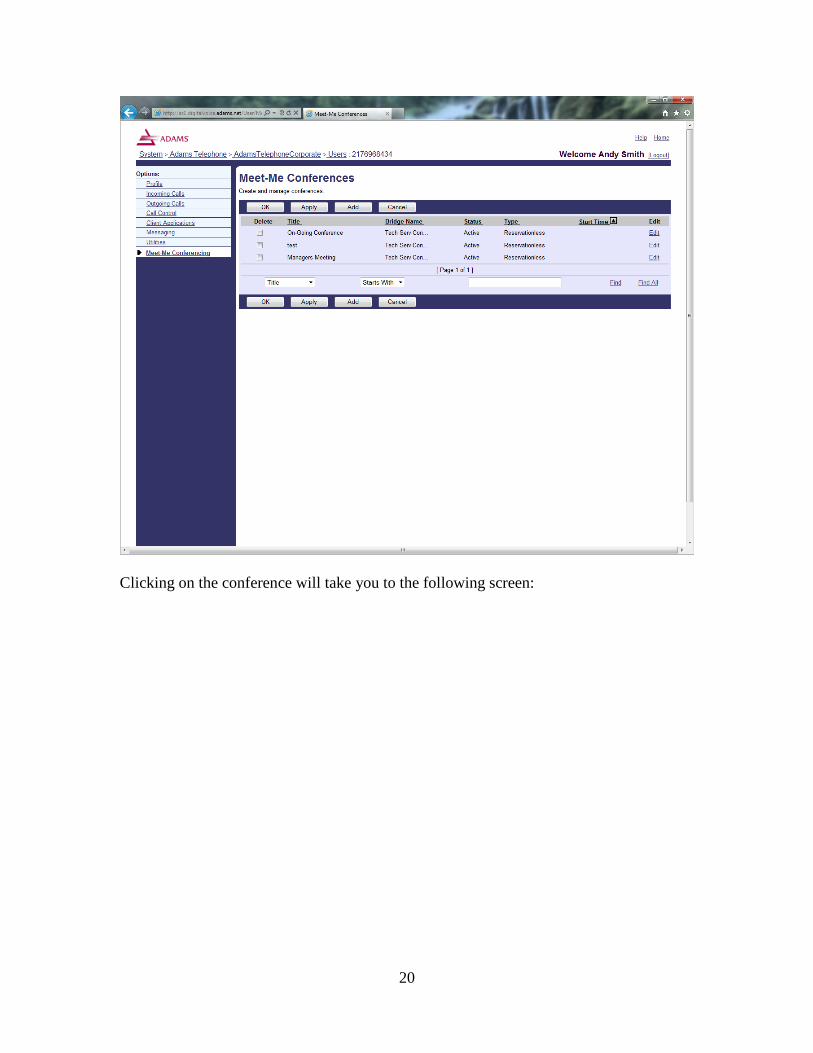
Give the conference a “Title” (e.g. Managers Meeting). “Account Code” and “Estimated number of participants” should be skipped. If necessary, you can “Restrict number of participants to x” by checking the box to the left and putting a number in the box to the right. The next three checkboxes can be filled in based on your requirements. Then, decide what you want to happen “When attendees join/leave”. Next, decide what “Type” of conference you want. A “One Time” conference is required to have a “Start Date”, “Start Time”, and “Duration”. The maximum duration for this type of conference is 23 hours 45 minutes. The next type of conference is “Recurring”. Again, this conference must have a start date, start time, and duration, but it can also be set up to occur on a regular basis. Also, you can specify an “End”. The final type is “Reservationless”. This type of conference can only be narrowed down to days, not hours. After selecting appropriate type and filling in appropriate information, click “Ok”. The conference should now appear under the list of meet-me conferences.
20
Clicking on the conference will take you to the following screen:
21
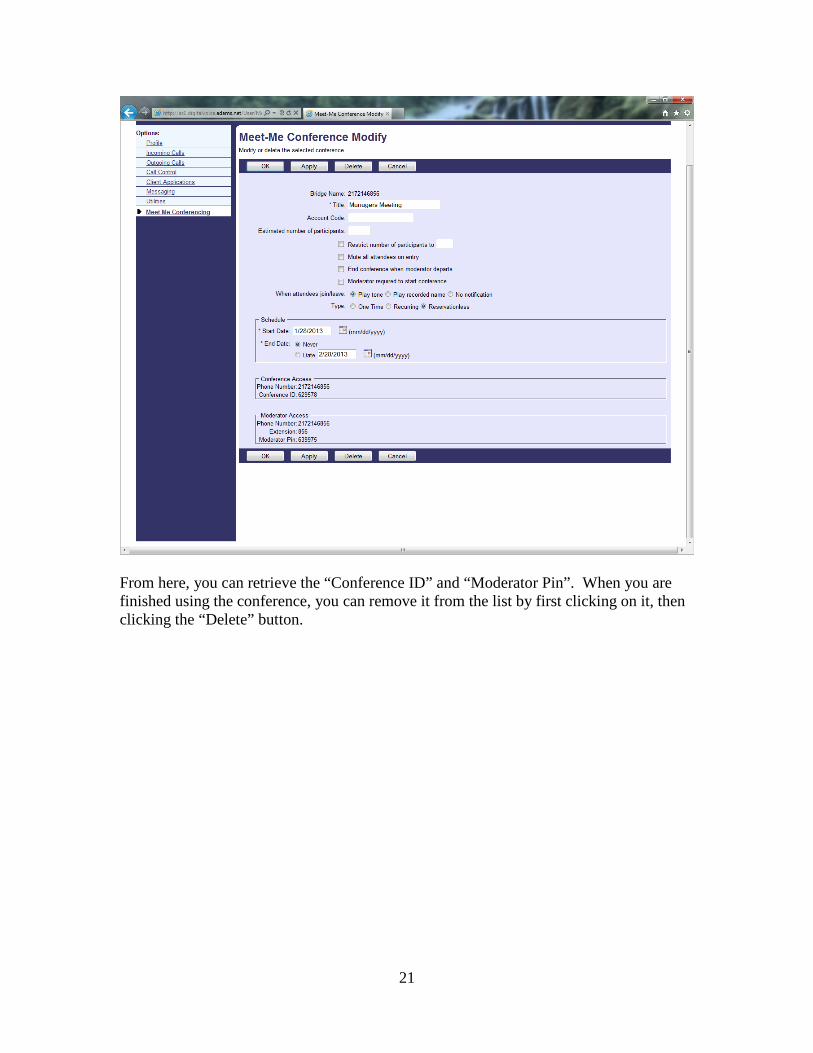
From here, you can retrieve the “Conference ID” and “Moderator Pin”. When you are finished using the conference, you can remove it from the list by first clicking on it, then clicking the “Delete” button.