38
Brocade Network Advisor for IP

Brocade Network Advisor for IP

BNA System Requirements
• Operating Systems Supported (64 bit):
‒ Windows Server 2008 R2 (Standard, Datacenter, and Enterprise)
‒ Windows Server 2012 (Standard and Datacenter)
‒ Windows Server 2012 R2 (Standard and Datacenter)
‒ Windows 8 and 8.1 Enterprise
‒ Windows 7 Professional
‒ RedHat Enterprise and Advanced Enterprise
‒ SuSE Enterprise
‒ Oracle Enterprise

BNA System Requirements Cont.
• Memory:
‒ Required: 6 GB RAM
‒ Recommended: 16 GB RAM
• Processor:
‒ Required: 2 Cores (Physical or logical)
‒ Recommended:
• 2 Cores – Small install
• 4 Cores – Medium Install
• 8 Cores – Large Install
• Disk Space:
‒ Required: 20GB (Free space after OS Install)
‒ Recommended:
• 50 GB– Small install
• 150 GB – Medium Install
• 300 GB – Large Install

To download BNA, go to http://my.brocade.comGo to the Downloads Section and look for Management Software

Under Brocade Network Advisor, go to Brocade Network Advisor 12.4.xFind Brocade Network Advisor 12.4.2 (Brocade) GA (This is Target Path)
Click on Network Advisor 12.4.2 for Windows (zip 1.24 GB)
Downloading
• When you download the zip file, extract it.
• When extracted, go to \na1242_brocade_windows\Windows\
‒ Double click install.exe
6

Installation Note

Installation
Select Next
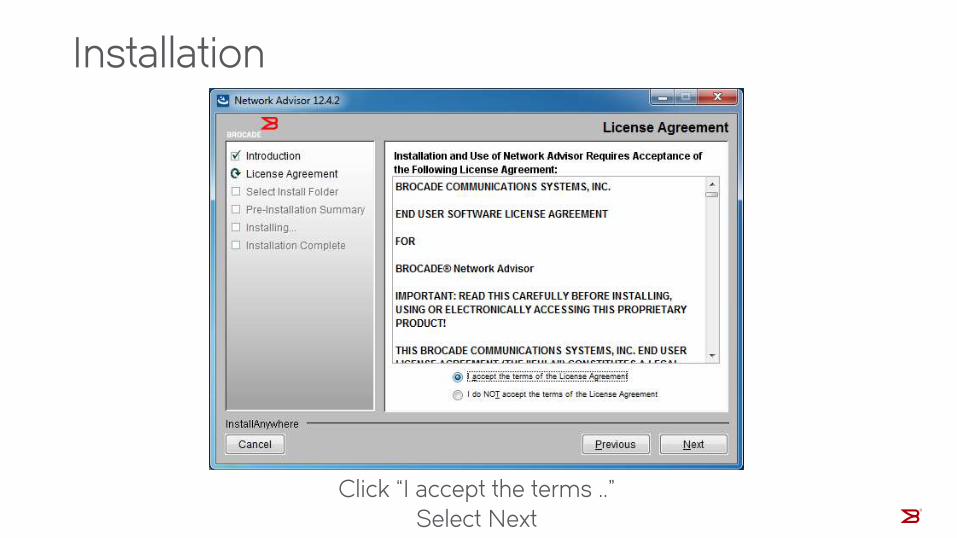
Installation
Click “I accept the terms ..”Select Next

Installation
Select Next
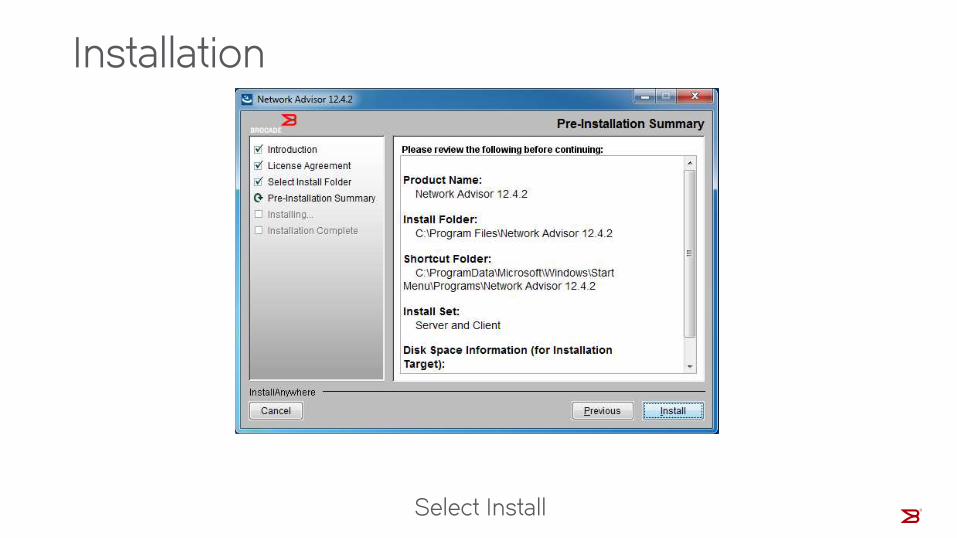
Installation
Select Install

Installation
Select Done

Initial Configuration
Select Next

Initial Configuration
Select Next
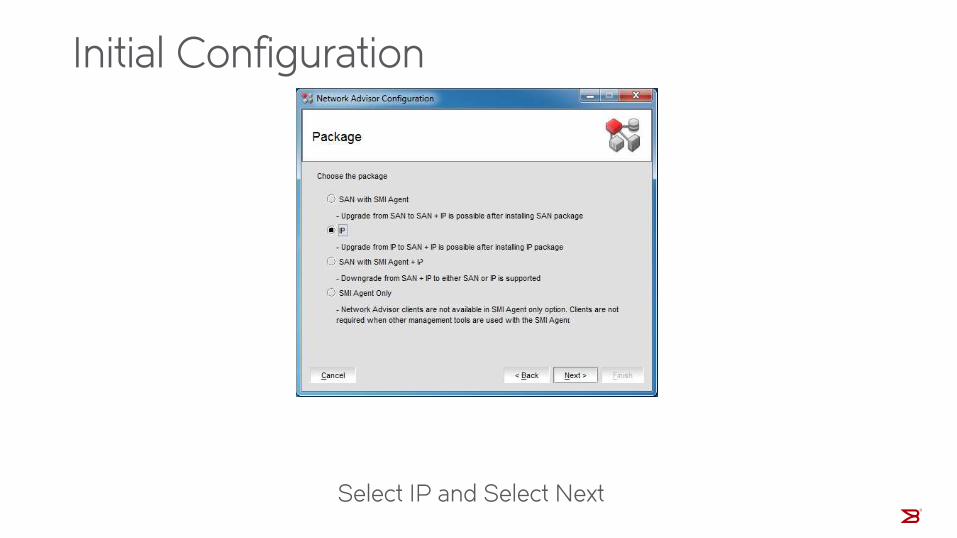
Initial Configuration
Select IP and Select Next

Initial Configuration
Network Advisor Licensed Version requires a licenses key to install. (Select This)Network Advisor – Professional is a free, but limited version.
Click Next

Initial Configuration
Select Browse
Select the license fileand click Open
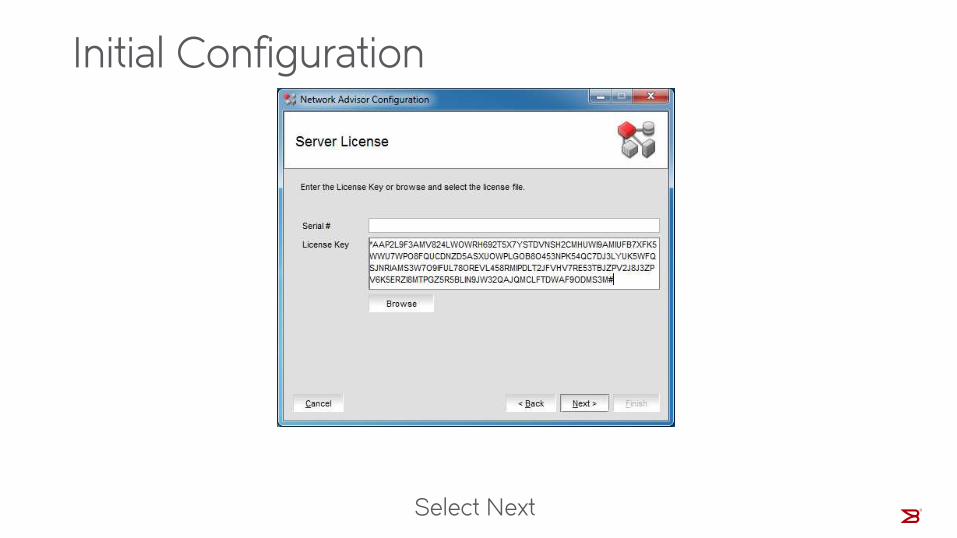
Initial Configuration
Select Next

Initial Configuration
19
Check both Built-in FTP and SCP boxes andClick Next

Initial Configuration
20Select Next

Initial Configuration
21
If you configure DNS for the Server, Use the Server name
If not, Use the IP Address
Select Next

Initial Configuration
22Select Next
Initial Configuration
23
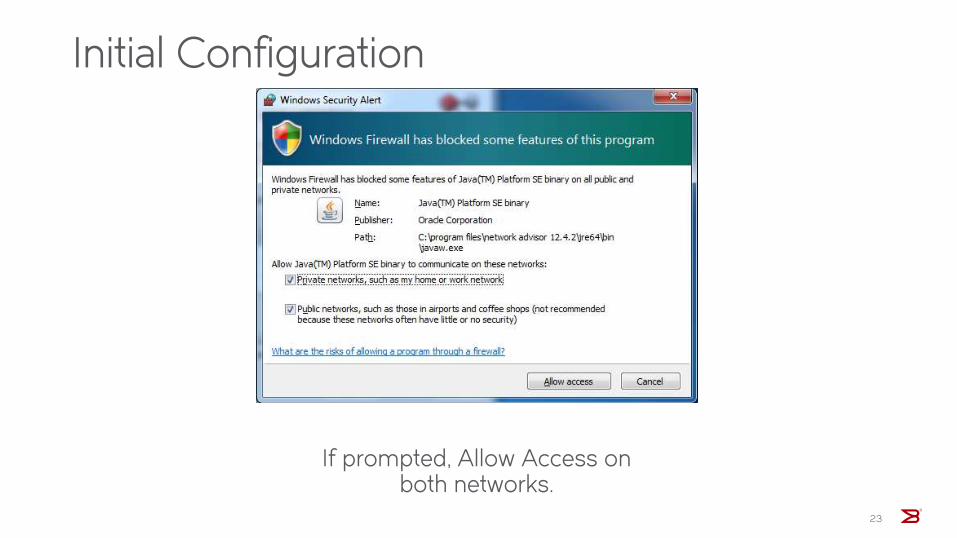
If prompted, Allow Access on both networks.
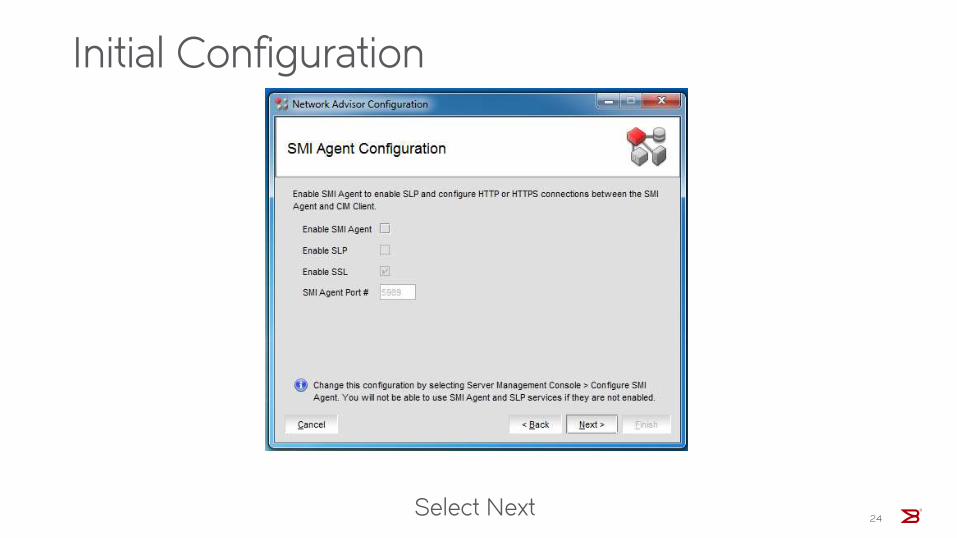
Initial Configuration
24Select Next

Initial Configuration
25Select Next

Initial Configuration
26Select Next

Initial Configuration
27Select Next

Initial Configuration
28Select Next

Note

Initial Configuration
30Select Finish

Initial Configuration
31
BNA will now configure the server. This will take a few minutes.

Switch Configuration for BNA

Switch Configuration
• Note: All xxxxxx need to be changed
! Configures Username and Password for local authentication
username xxxxxxx password xxxxxxxx
!
!
! Configures enable password
enable super-user-password xxxxxxxx
!
!Generate a crypto key for SSH
crypto key generate rsa mod 1024

Switch Configuration Cont.
! web services authentication
aaa authentication web-server default local
!
! enable authentication for local super user access
aaa authentication enable default enable
! SSH/Telnet authentication
aaa authentication login default local
!
! Enters Priv mode directly
aaa authentication login privilege-mode

Switch Configuration Cont.
! Configure logging to the BNA Server
logging host X.X.X.X
! Enable FDP and LLDP for neighbor discovery and Mapping
fdp run
lldp run
!
!Enables CDP if Cisco devices are present in the Network
cdp run
35
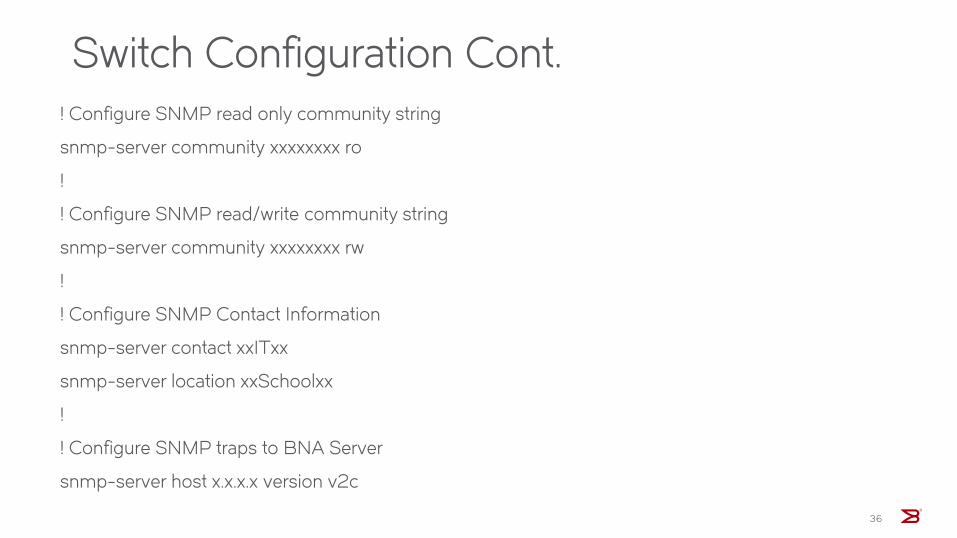
Switch Configuration Cont.! Configure SNMP read only community string
snmp-server community xxxxxxxx ro
!
! Configure SNMP read/write community string
snmp-server community xxxxxxxx rw
!
! Configure SNMP Contact Information
snmp-server contact xxITxx
snmp-server location xxSchoolxx
!
! Configure SNMP traps to BNA Server
snmp-server host x.x.x.x version v2c
36

BNA
• At this point, you are ready to begin using BNA.
• Open the client and login.
‒ Default Username: administrator
‒ Default Password: password
• Begin Discovery!
37

Thank You


