14
BUILDING YOUR OWN CLIMBING WALL ELEVATE CLIMBING WALLS This Guide Provides Step By Step Directions on Creating Your Own Climbing Wall

BUILDING YOUR OWN
CLIMBING WALL
ELEVATE CLIMBING WALLS
This Guide Provides Step By Step Directions on Creating Your Own Climbing Wall

Design. Take into consideration on whether it will be a top rope wall, or a
bouldering wall. A bouldering wall is more cost effective and does not require
technical equipment skills. The lay out of the space will determine how much
climbing wall you can build. The landing surface will take up a good portion of
the floor space.
A home wall is constructed in much the same way as a wood framed house: The
individual walls are formed from standard dimensional lumber from any lumber
yard of home improvement center. The framework can then be attached to an
existing structure.

Framing Materials
Framing-studs: 2"x 4" or 2"x 6" wood studs
Self-drilling screws:
• #9-2 1/2” for panel to frame
• #9-3” for framing
• #9-4” TimberLok or lag screw for header and ledger connections
Joist hangers and right angle brackets
• #9-1 1/2” Simpson Strong-Tie for hangers and brackets
Panel Materials
Elevate 4’ x 4’ panels in desired color and texture
Additional concrete mix from Elevate Climbing Walls
MATERIALS NEEDED

For a flat wall panel, establish a square frame with no more than 16” spacing of
interior studs.
Secure all corners using metal corner braces and interior studs with metal joist
hangers.

Mount a top and bottom ledger to provide a platform for securing the section to
the wall.
Secure ledger with screws to the framing section.

Position the section in the desired location, with the location of the wall studs
being marked or visible.
Screw section to the studs in the existing wall through the top and bottom stud on
the section using #9-4” TimberLok screws.
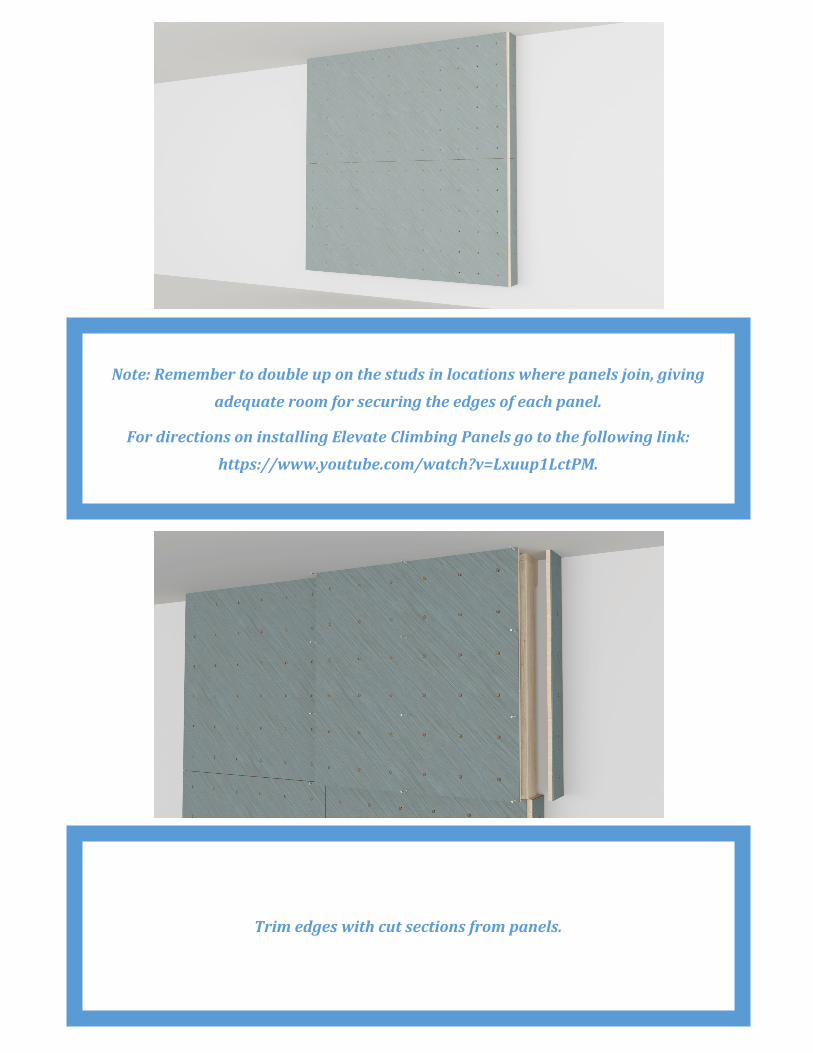
Note: Remember to double up on the studs in locations where panels join, giving
adequate room for securing the edges of each panel.
For directions on installing Elevate Climbing Panels go to the following link:
https://www.youtube.com/watch?v=Lxuup1LctPM.
Trim edges with cut sections from panels.
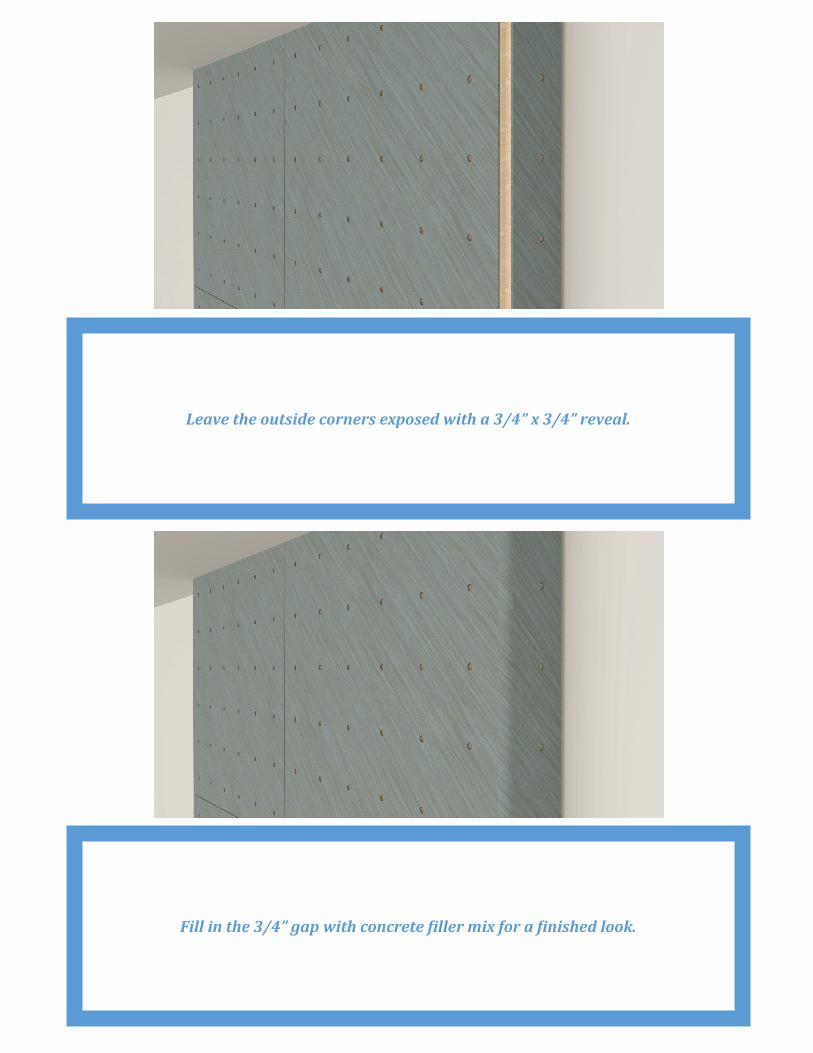
Leave the outside corners exposed with a 3/4” x 3/4” reveal.
Fill in the 3/4” gap with concrete filler mix for a finished look.

More complex shapes are formed with altering the framing but still using the
same dimensions and hardware.
For sections that have an incline, framing can be screwed to the ceiling joists
through the header stud in the framing using the #9-4” TimberLok screws.
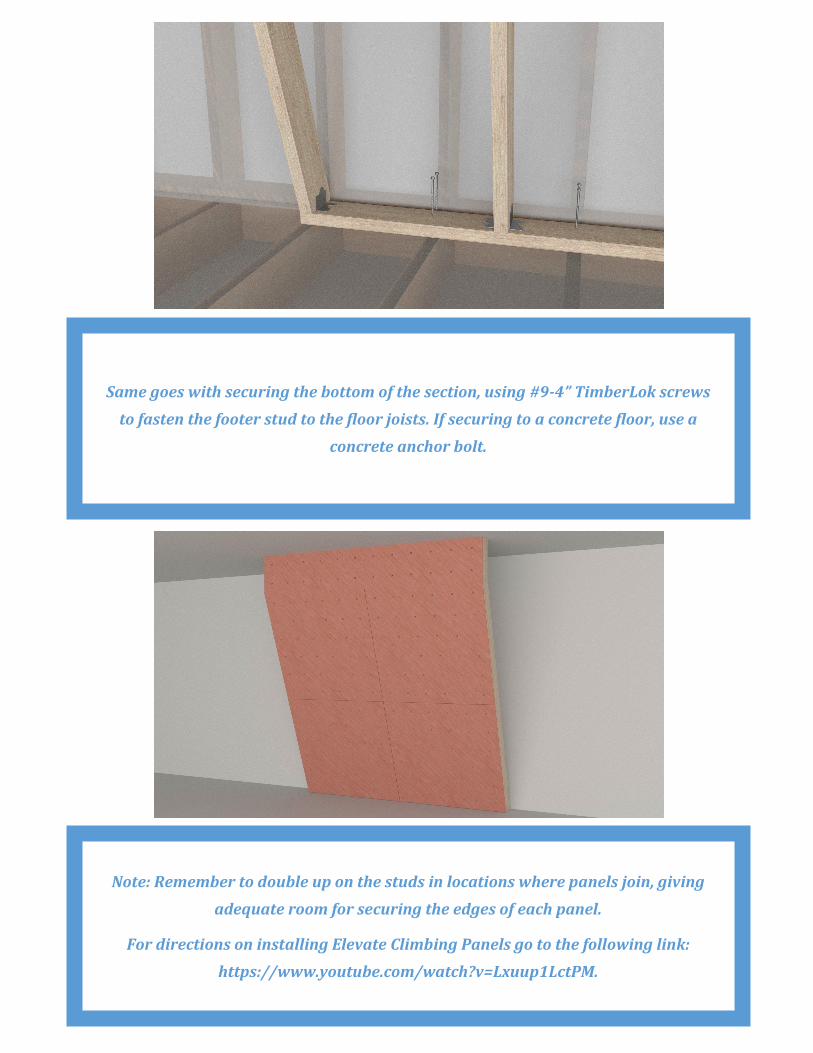
Same goes with securing the bottom of the section, using #9-4” TimberLok screws
to fasten the footer stud to the floor joists. If securing to a concrete floor, use a
concrete anchor bolt.
Note: Remember to double up on the studs in locations where panels join, giving
adequate room for securing the edges of each panel.
For directions on installing Elevate Climbing Panels go to the following link:
https://www.youtube.com/watch?v=Lxuup1LctPM.

Secure panels as tight as possible to reduce the amount of filing that must be
done.
Any exposed joints can be filled with extra concrete mixture.

Essentially there are infinite configurations of wall section with the framing being
the foundation for the shape. Just make sure there are studs that are directly
secured to wall, ceiling, and floor joists to support the section.
Note: Remember to double up on the studs in locations where panels join, giving
adequate room for securing the edges of each panel.
For directions on installing Elevate Climbing Panels go to the following link:
https://www.youtube.com/watch?v=Lxuup1LctPM.

If you interested in a more complex wall, please contact us at
[email protected] and we can build a wall for you.

For installation of top rope walls contact Elevate Climbing Walls directly. The framing
system for a top rope wall is in many ways similar, but there are forces generated by top
ropes and auto-belays that do not exist with bouldering walls. There will be requirements
for installing headers at the top of the wall, and in some situations engineering will be
required.
Visit www.elevatelimbingwalls.com for additional information.
Email us at [email protected] with any questions you may have.
ADDITIONAL INFORMATION


