423
C ++ Windows 95/NT ® under Dave Mark Learn
| Date post: | 30-Oct-2014 |
| Category: |
Documents |
| Upload: | markus-hayner |
| View: | 110 times |
| Download: | 3 times |

C++Windows
95/NT®
under
Dave Mark
Learn
Learn C++ under Windows 95/NT 1
Table of Contents1 Welcome Aboard . . . . . . . . . . . . . . . . . . . . . . . . . . .5
What’s in the Package? . . . . . . . . . . . . . . . . . . . 5Why Learn C++? . . . . . . . . . . . . . . . . . . . . . . 5What Should I Know to Get Started? . . . . . . . . . . . . . 6What Equipment Do I Need?. . . . . . . . . . . . . . . . . 6The Lay of the Land. . . . . . . . . . . . . . . . . . . . . 6Strap Yourself In... . . . . . . . . . . . . . . . . . . . . . 9
2 Using CodeWarrior . . . . . . . . . . . . . . . . . . . . . . . . . 11Opening a Project. . . . . . . . . . . . . . . . . . . . . 11Compiling a Project . . . . . . . . . . . . . . . . . . . . 13What’s Next?. . . . . . . . . . . . . . . . . . . . . . . 14
3 Remembering C . . . . . . . . . . . . . . . . . . . . . . . . . . . 15Literal Constants . . . . . . . . . . . . . . . . . . . . . 15Variables . . . . . . . . . . . . . . . . . . . . . . . . 19Operators . . . . . . . . . . . . . . . . . . . . . . . . 28Statements. . . . . . . . . . . . . . . . . . . . . . . . 34Functions . . . . . . . . . . . . . . . . . . . . . . . . 34Preprocessor Directives . . . . . . . . . . . . . . . . . . 35Comments . . . . . . . . . . . . . . . . . . . . . . . . 36Summary . . . . . . . . . . . . . . . . . . . . . . . . 36
4 Introducing C++ . . . . . . . . . . . . . . . . . . . . . . . . . . . 39Getting C Code to Run under C++ . . . . . . . . . . . . . 39New Features of C++ . . . . . . . . . . . . . . . . . . . 43The // Comment Marker . . . . . . . . . . . . . . . . . 43Handling Input and Output . . . . . . . . . . . . . . . . 44Default Argument Initializers . . . . . . . . . . . . . . . 55Reference Variables . . . . . . . . . . . . . . . . . . . . 59Function Name Overloading . . . . . . . . . . . . . . . . 67The new and delete Operators . . . . . . . . . . . . . . . 71The Scope Resolution Operator . . . . . . . . . . . . . . . 78Inline Functions . . . . . . . . . . . . . . . . . . . . . 81Summary . . . . . . . . . . . . . . . . . . . . . . . . 84

Table of Contents
2 Learn C++ under Windows 95/NT
5 Object Programming Basics . . . . . . . . . . . . . . . . . . . . 85The Organizational Power of the Struct . . . . . . . . . . . 85Encapsulating Data and Functions . . . . . . . . . . . . . 87Creating an Object . . . . . . . . . . . . . . . . . . . . 87Accessing an Object’s Members. . . . . . . . . . . . . . . 89Deleting an Object . . . . . . . . . . . . . . . . . . . . 92Writing Member Functions. . . . . . . . . . . . . . . . . 93Access Privileges . . . . . . . . . . . . . . . . . . . . . 99Bringing It All Together . . . . . . . . . . . . . . . . . . 102Friends . . . . . . . . . . . . . . . . . . . . . . . . . 109Summary . . . . . . . . . . . . . . . . . . . . . . . . 119
6 Derived Classes . . . . . . . . . . . . . . . . . . . . . . . . . . 121Inheritance. . . . . . . . . . . . . . . . . . . . . . . . 121Derivation, Constructors, and Destructors . . . . . . . . . . 131Base Classes and Constructors with Parameters. . . . . . . . 139Overriding Member Functions . . . . . . . . . . . . . . . 146Summary . . . . . . . . . . . . . . . . . . . . . . . . 151
7 Operator Overloading . . . . . . . . . . . . . . . . . . . . . . . 153The Operator Overloading Alternative . . . . . . . . . . . 154A Few Restrictions . . . . . . . . . . . . . . . . . . . . 164Covering All the Bases . . . . . . . . . . . . . . . . . . 167Special Cases. . . . . . . . . . . . . . . . . . . . . . . 178Summary . . . . . . . . . . . . . . . . . . . . . . . . 202
8 Inside iostream . . . . . . . . . . . . . . . . . . . . . . . . . . 203The Character-Based Interface . . . . . . . . . . . . . . . 203The iostream Classes . . . . . . . . . . . . . . . . . . . 204Working with Files . . . . . . . . . . . . . . . . . . . . 213The iostream State Bits . . . . . . . . . . . . . . . . . . 217More File Info . . . . . . . . . . . . . . . . . . . . . . 223Customizing iostream . . . . . . . . . . . . . . . . . . . 226Formatting Your Output . . . . . . . . . . . . . . . . . . 233Using Manipulators. . . . . . . . . . . . . . . . . . . . 239istrstream and ostrstream . . . . . . . . . . . . . . . . . 241Summary . . . . . . . . . . . . . . . . . . . . . . . . 244
Table of Contents
Learn C++ under Windows 95/NT 3
9 C++ Potpourri . . . . . . . . . . . . . . . . . . . . . . . . . . . 245Templates . . . . . . . . . . . . . . . . . . . . . . . . 245Multiple Inheritance . . . . . . . . . . . . . . . . . . . 259Resolving Ambiguities . . . . . . . . . . . . . . . . . . 268Initialization Versus Assignment . . . . . . . . . . . . . . 280Memberwise Initialization . . . . . . . . . . . . . . . . . 285Summary . . . . . . . . . . . . . . . . . . . . . . . . 293
10 Moving On . . . . . . . . . . . . . . . . . . . . . . . . . . . . 295The User Interface . . . . . . . . . . . . . . . . . . . . 295The Windows API and Class Libraries . . . . . . . . . . . . 297Books and Other Reference Material. . . . . . . . . . . . . 297Go Get ‘Em.... . . . . . . . . . . . . . . . . . . . . . . 298
A Glossary. . . . . . . . . . . . . . . . . . . . . . . . . . . . . . 299
B Source Code Listings . . . . . . . . . . . . . . . . . . . . . . 305call (Chapter 7) . . . . . . . . . . . . . . . . . . . . . . 305cin (Chapter 4) . . . . . . . . . . . . . . . . . . . . . . 306cout (Chapter 4) . . . . . . . . . . . . . . . . . . . . . 307derived (Chapter 6) . . . . . . . . . . . . . . . . . . . . 307employee (Chapter 5) . . . . . . . . . . . . . . . . . . . 309equals (Chapter 7) . . . . . . . . . . . . . . . . . . . . 311formatter (Chapter 8) . . . . . . . . . . . . . . . . . . . 313friends (Chapter 5) . . . . . . . . . . . . . . . . . . . . 314gramps (Chapter 6) . . . . . . . . . . . . . . . . . . . . 317hello++ (Chapter 2) . . . . . . . . . . . . . . . . . . . . 320init (Chapter 9) . . . . . . . . . . . . . . . . . . . . . . 320inline (Chapter 4) . . . . . . . . . . . . . . . . . . . . . 321memberWise (Chapter 9) . . . . . . . . . . . . . . . . . 322menu (Chapter 7) . . . . . . . . . . . . . . . . . . . . . 325multInherit (Chapter 9) . . . . . . . . . . . . . . . . . . 327new (Chapter 7) . . . . . . . . . . . . . . . . . . . . . 330newTester (Chapter 4) . . . . . . . . . . . . . . . . . . . 331nonVirtual (Chapter 9) . . . . . . . . . . . . . . . . . . 332overload (Chapter 4) . . . . . . . . . . . . . . . . . . . 334overload (Chapter 8) . . . . . . . . . . . . . . . . . . . 335

Table of Contents
4 Learn C++ under Windows 95/NT
protoTester (Chapter 4) . . . . . . . . . . . . . . . . . . 337readMe (Chapter 8) . . . . . . . . . . . . . . . . . . . . 338reference (Chapter 4) . . . . . . . . . . . . . . . . . . . 339scopeTester (Chapter 4) . . . . . . . . . . . . . . . . . . 340smartPtr (Chapter 7) . . . . . . . . . . . . . . . . . . . 341square (Chapter 6) . . . . . . . . . . . . . . . . . . . . 342stateBits (Chapter 8). . . . . . . . . . . . . . . . . . . . 344strstream (Chapter 8) . . . . . . . . . . . . . . . . . . . 346subscript (Chapter 7) . . . . . . . . . . . . . . . . . . . 346template (Chapter 9) . . . . . . . . . . . . . . . . . . . 348time (Chapter 7) . . . . . . . . . . . . . . . . . . . . . 350virtual (Chapter 9) . . . . . . . . . . . . . . . . . . . . 353whatAmI (Chapter 6) . . . . . . . . . . . . . . . . . . . 356
C fstream.h . . . . . . . . . . . . . . . . . . . . . . . . . . . . . 359
D iomanip.h . . . . . . . . . . . . . . . . . . . . . . . . . . . . . 381
E iostream.h . . . . . . . . . . . . . . . . . . . . . . . . . . . . . 395
F sstream.h . . . . . . . . . . . . . . . . . . . . . . . . . . . . . 397
G Bibliography . . . . . . . . . . . . . . . . . . . . . . . . . . . 421
Learn C++ under Windows 95/NT 5
1Welcome AboardWelcome! By opening this book, you’ve taken the first step toward learning the C++ programming language. As you make your way through the book, you’ll learn one of the most popular and power-ful programming languages in the world today—you’ve definitely made a wise investment.
Before we start programming, we first need to address a few ques-tions.
What’s in the Package?Learn C++ under Windows 95/NT is an electronic book. The book is filled with interesting facts, figures, and programming examples, all of which are designed to teach you how to program in C++.
In addition to this electronic book, the Discover Programming CD-ROM contains all the software you’ll need to run each of the book’s programming examples on your own computer. Included on the CD is CodeWarrior, a leading C++ programming environment. The CD also includes each of the programs presented in the book so that you don’t have to type the examples yourself. Such a deal!
Why Learn C++?There are a lot of reasons for learning C++. Perhaps the biggest rea-son is the popularity of C++ as a programming language. Go to your local technical bookstore and count the books dedicated to each programming language. Ten years ago, you would have found that the most popular language out there was Pascal. Five years ago, the pendulum shifted and C became the most popular language. Now, the move is toward C++.
You’ll find support for C++ everywhere. There are C++ compilers for Unix, the Macintosh, DOS, and, of course, Windows. The num-

Welcome AboardWhat Should I Know to Get Started?
6 Learn C++ under Windows 95/NT
ber of C++ programming texts is growing by leaps and bounds. Op-portunities for a good C++ programmer are endless.
The bottom line is this: C++ is the language of the nineties. Major computer companies like Microsoft, Apple, and Sun are basing their future operating system designs around C++. Knowledge of C or Pascal just isn’t enough anymore. In my opinion, C++ is a must!
What Should I Know to Get Started?There are two prerequisites to using this book. First, you must have a basic knowledge of Windows. Do you know how to start up an ap-plication? Do you know how to use a word processor like Microsoft Word? If you can use Windows to run programs and edit docu-ments, you’re halfway there.
Second, you should have a working knowledge of C. If you’re just getting started with programming or if your language of choice is a language other than C, you might want to pick up a copy of The C Programming Language by Brian Kernighan and Dennis Ritchie. Be sure to get the second edition. If you just need a quick C refresher course, check out Chapter 3 of this book. Once you have a handle on both C and Windows, you’re ready to tackle C++.
What Equipment Do I Need?While it is possible to learn C++ just by reading a book, you’ll get the most out of this book if you run each example program as you read and discover how it works. To do this, you need a PC. If you don’t have one, borrow one from a friend. You’ll need a PC with at least a 486-based processor and 16 megabytes of memory. CodeWar-rior will run with Windows 95 and Windows NT 4.0.
The Lay of the LandThis book was designed with several different readers in mind. If you’re new to programming, you’ll want to read each and every chapter. If you’re a C master, you might want to skip the C review in Chapter 3. Try not to skip over material that seems fuzzy. If you get stuck, find a C++ programmer who can answer your questions.

Welcome AboardThe Lay of the Land
Learn C++ under Windows 95/NT 7
Most C++ programmers are friendly and are usually more than glad to help someone just getting started. Make a commitment to finish this book. You can do it!
The Chapters and AppendicesThis book is made up of ten chapters and seven appendices. This chapter provides an overview of the book and gets you started down the right path.
Chapter 2 covers the basics of using CodeWarrior to open a project and then convert the project’s source code into an executable appli-cation.
Chapter 3 contains a refresher course in C. Even if you’re a seasoned C programmer, you might want to take a quick look through this chapter just to make sure everything in it looks familiar.
Chapter 4 introduces the basic syntax of C++. It covers topics rang-ing from C++ operators and keywords to reference types and func-tion name overloading.
Chapter 5 introduces you to the basics of object programming, the heart and soul of C++. You’ll learn all about classes and objects and the C++ functions that allow you to create objects of your very own.
Chapter 6 takes the concept of classes one step further. It shows you how to use one class as the basis for a new, derived class. Derived classes play a critical role in extending an existing set of C++ classes.
Chapter 7 introduces the concept of operator overloading. C++ al-lows you to overload its built-in operators, customizing them to work with objects you define. For example, you might overload the + operator, enabling you to add two arrays together.
Chapter 8 introduces iostream, C++’s equivalent of C’s stdio li-brary. Just as routines such as printf() and scanf() allow you to build a portable user interface in C, the iostream functions allow you to build a portable C++ interface.
Chapter 9 takes you down the homestretch by exploring a potpourri of miscellaneous C++ topics. When you finish this chapter, you’ll have completed the first phase of your C++ education.
Welcome AboardThe Lay of the Land
8 Learn C++ under Windows 95/NT
Chapter 10 wraps things up. It prepares you for the next step on your programming path. You’ll learn about class libraries. You’ll also read about some of the books and reference materials that you’ll want by your side as you start your own C++ development efforts.
Appendix A is a glossary of the technical terms used in this book.
Appendix B contains a complete listing of all the examples used in this book. This section will come in handy as a reference, as you write your own C++ programs. Need an example of an overloaded operator? Turn to the examples in Appendix B.
Appendices C, D, E, and F contain listings of the files <fstream.h>, <iomanip.h>, <iostream.h>, and <sstream.h>, respectively. These files are all critical parts of the iostream library. If you’ll be using iostream in your own ap-plications, you’ll find these appendices helpful.
Appendix G is a bibliography of useful programming titles.
The Conventions Used in This BookAs you read this book, you’ll encounter a few standard conventions that make the book easier to read. For example, technical terms ap-pearing for the first time are displayed in boldface. (You’ll find most of these terms in the glossary in Appendix A.)
All of the source code examples in this book are presented using a special font, known as the code font. This includes source code fragments that appear in the middle of running text.
By the Way Occasionally, you’ll come across a block of text set off in a box, like this. These blocks are called tech blocks and are intended to add technical detail to the subject currently being discussed. Each tech block will fit into one of five categories: “By the Way,” “Style,” “De-tail,” “Definition,” and “Warning.” As the names imply, “By the Way” tech blocks are intended to be informative but not crucial. “Style” tech blocks contain information relating to your C++ programming style. “Detail” tech blocks offer more detailed information about the current topic. “Definition” tech blocks contain the definition of an important C++ term. “Warning” tech blocks are usually trying to
Welcome AboardStrap Yourself In...
Learn C++ under Windows 95/NT 9
caution you about some potential programming problem, so pay attention!
Strap Yourself In...That’s about it. Let’s get started!
Welcome AboardStrap Yourself In...
10 Learn C++ under Windows 95/NT

Learn C++ under Windows 95/NT 11
2Using CodeWarriorIn this chapter, we’ll go over the basics of using CodeWarrior to open a project and then convert the project’s source code into a real executable application.
Opening a ProjectLet’s take CodeWarrior for a spin. Open the Learn C++ Projects directory on your hard drive; then open the subdirectory named 02.01 - hello. You should see a window with three files. Two of the files in this window, hello.cwp and hello.cp, contain the ingredients you’ll use to build your very first C++ application. (The third file, hello.exe, is the finished C++ application.)
Double-click on the file hello.cwp. A window just like the one shown in Figure 2.1 should appear. This window is called the project window. It contains information about the files used to build our executable application. Since this information is
Figure 2.1 The hello.cwp project window.

Using CodeWarriorOpening a Project
12 Learn C++ under Windows 95/NT
stored in the file hello.cwp, this file is also known as a project file. A file that ends in the characters .cwp is a CodeWarrior project file.
Warning If a window with the title hello.cp appeared instead of the one shown in Figure 2.1, you double-clicked on the wrong file. Quit CodeWarrior and double-click on the file hello.cwp instead of hello.cp.
The project window in Figure 2.1 is divided into two parts, each marked by a down-pointing triangle on the extreme left side of the window. The first part (labeled source) names the files that contain the project source code. Source code is a set of instructions that de-termine what your application will do and when it will do it. This project contains a single source code file, named hello.cp.
Let’s take a look at the source code in hello.cp. Double-click on the label hello.cp, being careful not to double-click on the word source. A source code window will appear containing the source code in the file hello.cp (Figure 2.2). This is your first C++ pro-gram. This program tells the computer to display the text “Hello, world!” in a window. Don’t worry about the how or
Figure 2.2 The source code window with the source code from the file hello.cp.
Using CodeWarriorCompiling a Project
Learn C++ under Windows 95/NT 13
why of it right now. We’ll get into all that later on. For now, let’s turn this source code into an application.
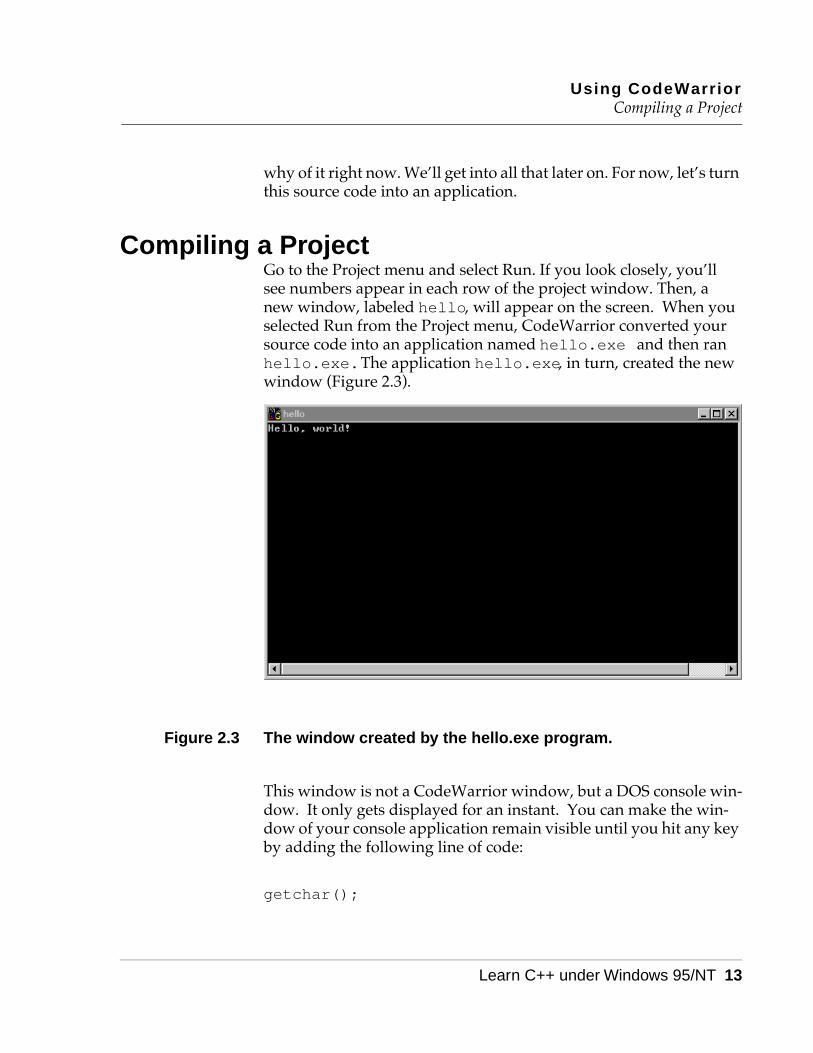
Compiling a ProjectGo to the Project menu and select Run. If you look closely, you’ll see numbers appear in each row of the project window. Then, a new window, labeled hello, will appear on the screen. When you selected Run from the Project menu, CodeWarrior converted your source code into an application named hello.exe and then ran hello.exe. The application hello.exe, in turn, created the new window (Figure 2.3).
Figure 2.3 The window created by the hello.exe program.
This window is not a CodeWarrior window, but a DOS console win-dow. It only gets displayed for an instant. You can make the win-dow of your console application remain visible until you hit any key by adding the following line of code:
getchar();
Using CodeWarriorWhat’s Next?
14 Learn C++ under Windows 95/NT
This has already been done for you in the first couple of sample projects. If you execute hello.exe directly from the DOS window, the text “Hello, world!” will be output to the same window.
What’s Next?Now that you’ve learned the basics of CodeWarrior, let’s take a lit-tle closer look at the programming process. Get comfortable and turn the page. Here we go. . . .
Learn C++ under Windows 95/NT 15
3Remembering CBefore we get started with C++, it’s important that you have a good grasp of the C programming language. This chapter offers a review of the primary features of C. Since C is a subset of C++, you’ll want to make sure you feel comfortable with all the material covered here. As you read through the chapter, build yourself a checklist of the C features you need to bone up on. Then grab your favorite C reference and plug away.
Literal ConstantsThis section covers the various forms you can use to represent a con-stant in C.
Integral ConstantsIntegral constants (constants that represent mathematical integers) can be represented in decimal, octal, or hexadecimal format. Deci-mal constants appear as plain numbers. Octal (base 8) constants al-ways start with a leading zero. Hexadecimal (base 16) constants always start with the two characters 0x.
The size in bytes of an octal or a hex constant is determined by the number of characters that appear in the constant. For example, since there are two characters to every hex byte, this constant is 4 bytes long:
0x00FF00FF
Decimal constants default to the size of an int.
To represent a decimal constant as a long, tack an L (in either upper or lower case) at the end:

Remembering CLiteral Constants
16 Learn C++ under Windows 95/NT
205L
To represent a decimal constant as an unsigned int, tack a U (in either upper or lower case) at the end:
205U
The characters UL (in either upper or lower case) are used to denote a decimal constant of type unsigned long:
205UL
By the Way The characters U and L can also be used at the end of octal and hexadecimal constants.
Floating-Point ConstantsFloating-point constants represent signed, real numbers. A complete floating-point constant consists of an integer portion (to the left of the decimal point), a fractional portion (to the right of the decimal point), and an exponent. For example the constant
103.75e2
represents 103.75 times 10 to the second power, or 10,375.
To qualify as a floating-point constant, either the decimal point or the exponent (or both) must be present. All of the following are legal constants:
100.e2.5e2100.5.5

Remembering CLiteral Constants
Learn C++ under Windows 95/NT 17
100e5
Normally, floating-point constants are represented as a double. To represent a floating-point constant as a float, tack an F at the end:
125.7F
To represent a floating-point constant as a long double, tack an L at the end:
125.7L
float, double, and long double are the three floating-point types offered by C. For more information on these types, read the section on variables a few pages down the road.
Character ConstantsSingle-byte character constants are represented by enclosing a char-acter in single quotes, like this:
‘a’
The \ character (backslash) is used to create special single-byte char-acter constants. If the first character following the \ is a zero, the re-mainder of the constant is interpreted as an octal ASCII character code. If the first character following the \ is an x, the remainder of the constant is interpreted as a hexadecimal ASCII character code. For example, both of the following constants represent the ASCII bell character:
‘\007’‘\x7’

Remembering CLiteral Constants
18 Learn C++ under Windows 95/NT
In addition, there are 11 backslash combinations that represent sin-gle-byte characters (Figure 3.1). For example, the constant ‘\a’ rep-resents the ASCII bell character.
By the Way The most frequently used backslash sequence is the newline char-acter, represented by the sequence ‘\n’. When placed at the end of a string sent to the console, the newline character forces the cursor to the beginning of the next line of output.
Finally, the constant ‘\0’ represents a single byte with a value of 0. This constant is used as a terminator for C character strings.
Figure 3.1 Single-byte backslash characters.
String ConstantsString constants are formed when a set of zero or more characters is surrounded by double quotes, like this:
char *nickname = “Apple dumpling”;
\a\b\f\n\r\t\v\\\?\'\"
BellBackspaceFormfeedNewlineReturnHorizontal tabVertical tabBackslashQuestion markSingle quoteDouble quote

Remembering CVariables
Learn C++ under Windows 95/NT 19
Each character in the string consumes 1 byte of memory. A null ter-minator (‘\0’) is automatically placed at the end of the string. The \ combinations presented in the previous section are particularly useful when placed inside a string constant.
EnumerationsEnumerations are types declared using the enum keyword and a list of enumeration constants. These constants provide an alternative to the #define mechanism (described later in the chapter) by allow-ing you to declare a series of constants with a single statement. Here’s an example:
enum weekDays { monday = 2, tuesday, wednesday, thursday, friday }
By default, the first constant starts with a value of 0, and following constants increase in value by 1. Any or all of these constants can be initialized automatically. In the example just given, monday is ini-tialized to 2, tuesday to 3, wednesday to 4, and so on.
VariablesVariables can be defined within any block of code. The basic vari-able types are char, int, and float. All three of these can be de-fined as signed or unsigned. A signed variable can represent either a positive or a negative number, while an unsigned variable is limited to nonnegative numbers. For example, a signed char can hold values ranging from –128 to 127 and an unsigned char can hold values from 0 to 255.
In addition to signed and unsigned, an int can be defined using the qualifier short or long, as in these examples:
long int myLong;short int myShort;
Remembering CVariables
20 Learn C++ under Windows 95/NT
Most programmers prefer the shorthand notation, using long for long int and short for short int:
long myLong;short myShort;
The ANSI standard does not specify the size of the int data type, leaving that decision up to the development environment.
Just as char, short, and long represent a steadily increasing se-quence of integral types, float, double, and long double are a steadily increasing sequence of floating-point types.
According to the ANSI standard, a double is at least as large as a float, and a long double is at least as large as a double. Typi-cally, a float is four bytes long, and a double, appropriately enough, is 8 bytes long. On most machines, a long double is the same size as a double.
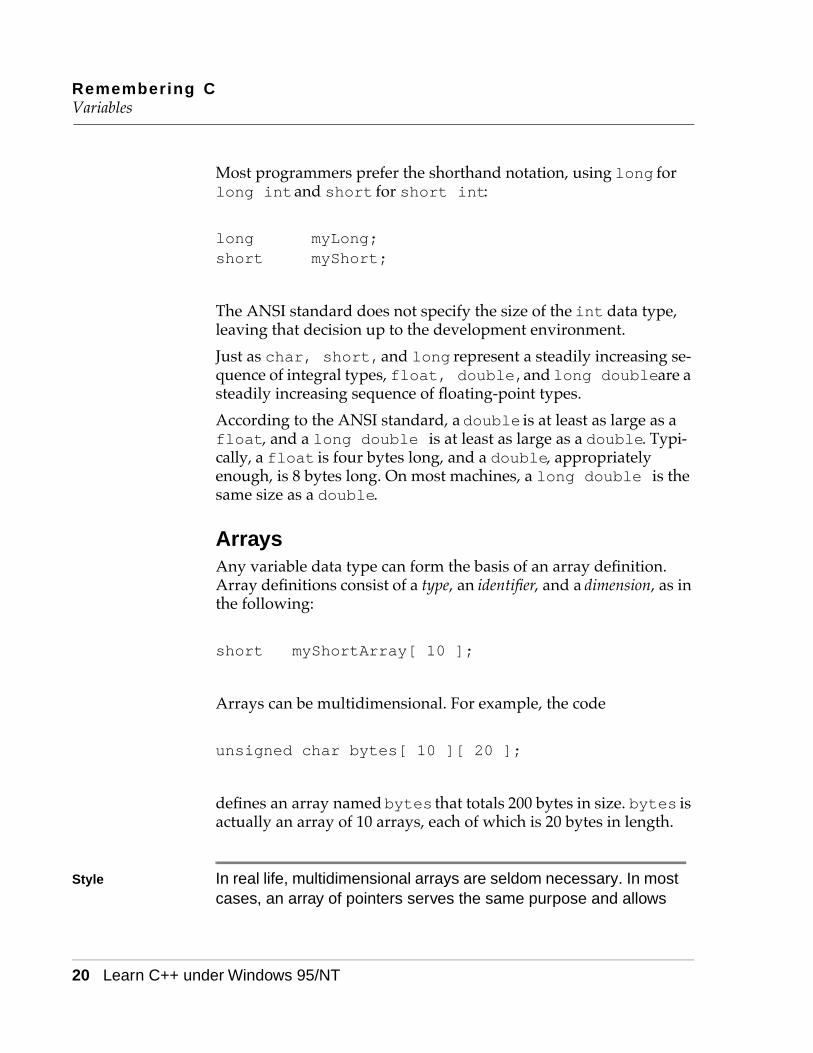
ArraysAny variable data type can form the basis of an array definition. Array definitions consist of a type, an identifier, and a dimension, as in the following:
short myShortArray[ 10 ];
Arrays can be multidimensional. For example, the code
unsigned char bytes[ 10 ][ 20 ];
defines an array named bytes that totals 200 bytes in size. bytes is actually an array of 10 arrays, each of which is 20 bytes in length.
Style In real life, multidimensional arrays are seldom necessary. In most cases, an array of pointers serves the same purpose and allows
Remembering CVariables
Learn C++ under Windows 95/NT 21
the size of each “row” to be specified independently, as opposed to the fixed row size of a multidimensional array.
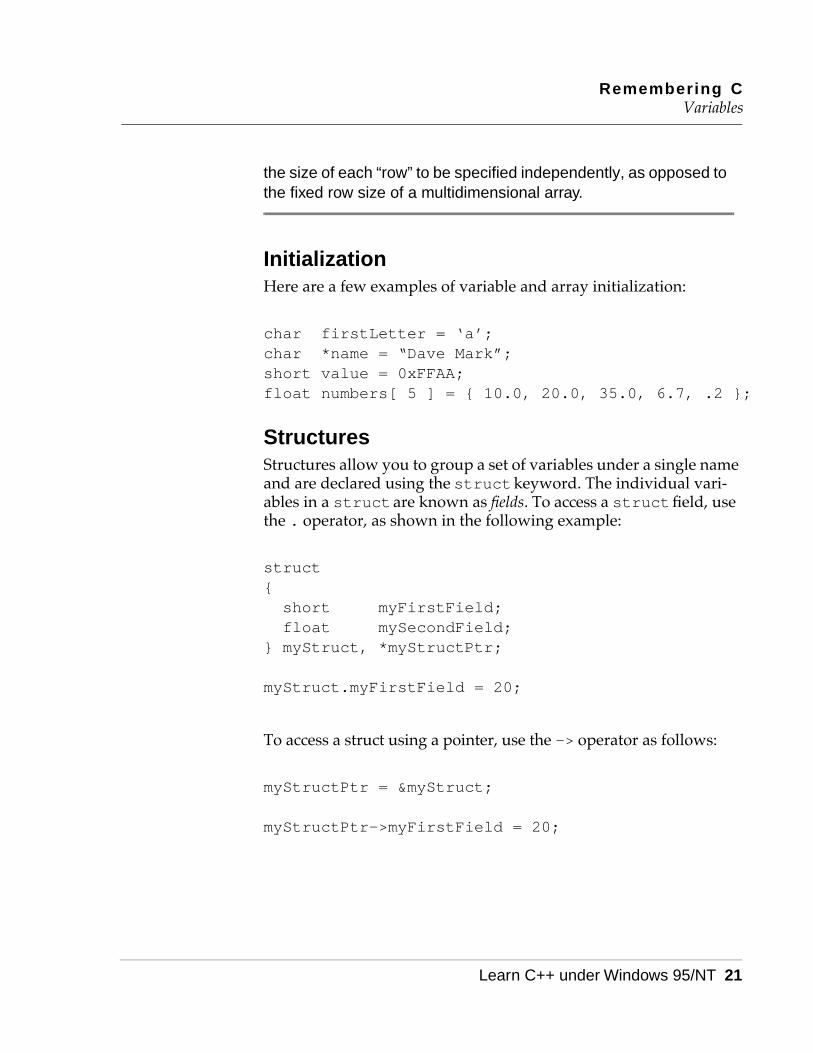
InitializationHere are a few examples of variable and array initialization:
char firstLetter = ‘a’;char *name = “Dave Mark”;short value = 0xFFAA;float numbers[ 5 ] = { 10.0, 20.0, 35.0, 6.7, .2 };
StructuresStructures allow you to group a set of variables under a single name and are declared using the struct keyword. The individual vari-ables in a struct are known as fields. To access a struct field, use the . operator, as shown in the following example:
struct{short myFirstField;float mySecondField;
} myStruct, *myStructPtr;
myStruct.myFirstField = 20;
To access a struct using a pointer, use the -> operator as follows:
myStructPtr = &myStruct;
myStructPtr->myFirstField = 20;

Remembering CVariables
22 Learn C++ under Windows 95/NT
UnionsUnions allow you to interpret the same block of memory in more than one way. Unions are declared using the same format as a struc-ture declaration, but the union keyword is substituted for the struct keyword. In a union, however, enough memory is allocated to hold the largest of the declared fields. The contents of the union are interpreted based on the field you reference. Here’s an example:
union short_or_long{short myShort;long myLong;
}
union short_or_long myUnion;
The union declaration just given merges a short and a long into a single entity. If you refer to
myUnion.myShort
the first 2 bytes of the union will be interpreted as a short. If you refer to
myUnion.myLong
all 4 bytes of the union will be used as a long. The size of the union is determined by the largest of the union’s fields.
TypedefsTypedefs are used to create new variable types from existing types. For example, the typedef statement
typedef short MyType;

Remembering CVariables
Learn C++ under Windows 95/NT 23
creates a new type called MyType, which can be used in future vari-able definitions, such as the following:
MyType myVariable;
Typedefs are frequently used in combination with structure and union declarations. Here’s a struct example:
typedef struct{short shortField;long longField;
} MyStructType;
MyStructType myStruct;
myStruct.shortField = 20;
The typedef statement in this example creates a new symbol with the name MyStructType, which can then be used to define a struct named myStruct.
Automatic Type ConversionWhen an operator joins two operands of differing data types, the operands are converted to a common type before the operation is performed. Here’s an example:
short myShort = 20;long myLong = 10;long result;
result = myLong + myShort;

Remembering CVariables
24 Learn C++ under Windows 95/NT
In this code, the + operator joins a short (2 bytes) and a long (4 bytes). Since the long is larger than the short, the short is con-verted to a long before the addition is performed, producing a long as a result.
This example typifies C’s approach toward automatic type conver-sion. In general, a small type will be converted to a larger type, rather than the other way around. In this way, no information is lost by truncating a value.
If an operator’s operands are built-in C data types (one of char, short, int, long, unsigned, unsigned long, float, double, or long double), the following rules are used to guide the automatic type conversion:
• First, if either of the operands is a char or a short, that operand is converted to an int.
• Next, if the operands are of different types, the shorter of thetwo operands is converted to the longer of the two types.
• Finally, the result of the operation is converted to the type of the l–value.
For example, if the operands were an int and a double, the int would be promoted to a double before the operation was per-formed. A comparison between a float and a char would first see the promotion of the char to an int, then the promotion of the int to a float.
The rules change when the operands are pointer types instead of built-in types. With one exception, pointer types need to match ex-actly. If they don’t, you’ll need to cast one of the pointers to the type of the other pointer.
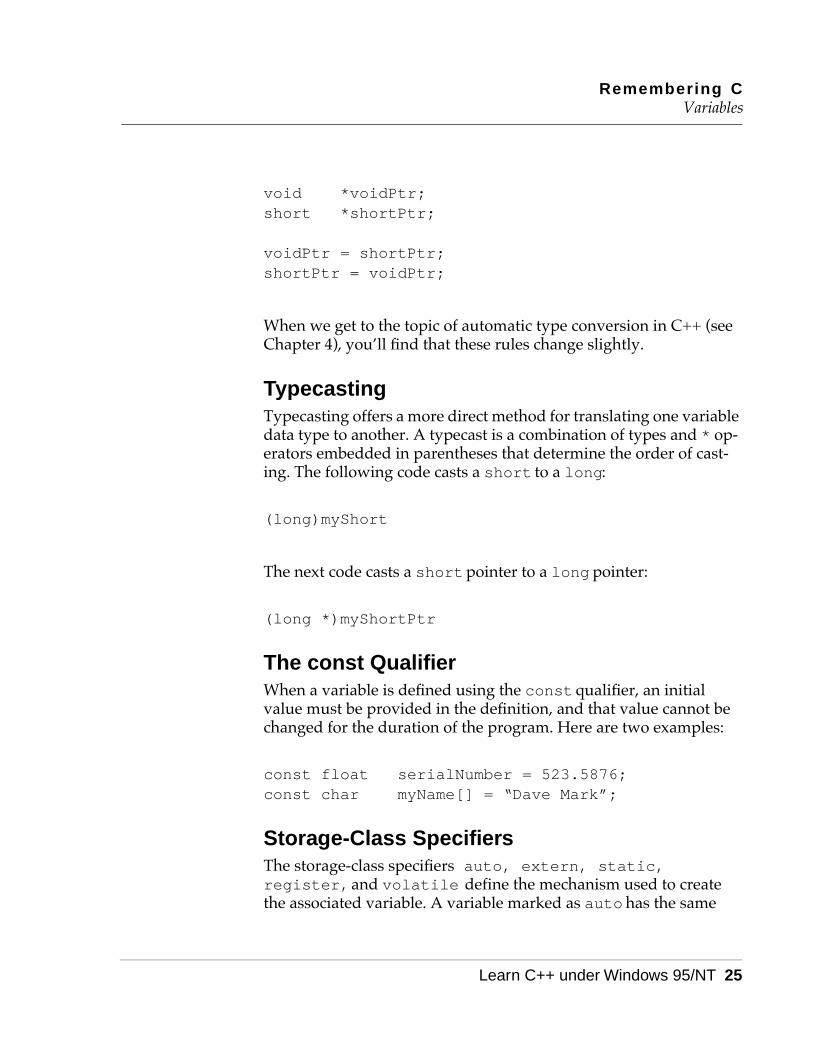
The exception to this rule involves the void pointer (void *). The void pointer was designed to serve as a generic pointer type, point-ing to a block of data whose type may not be known at compile time. In an expression where one of the two operands is a void pointer, no typecasting is necessary. This means that the following code will compile (even if it doesn’t do very much):
Remembering CVariables
Learn C++ under Windows 95/NT 25
void *voidPtr;short *shortPtr;
voidPtr = shortPtr;shortPtr = voidPtr;
When we get to the topic of automatic type conversion in C++ (see Chapter 4), you’ll find that these rules change slightly.
TypecastingTypecasting offers a more direct method for translating one variable data type to another. A typecast is a combination of types and * op-erators embedded in parentheses that determine the order of cast-ing. The following code casts a short to a long:
(long)myShort
The next code casts a short pointer to a long pointer:
(long *)myShortPtr
The const QualifierWhen a variable is defined using the const qualifier, an initial value must be provided in the definition, and that value cannot be changed for the duration of the program. Here are two examples:
const float serialNumber = 523.5876;const char myName[] = “Dave Mark”;
Storage-Class SpecifiersThe storage-class specifiers auto, extern, static, register, and volatile define the mechanism used to create the associated variable. A variable marked as auto has the same
Remembering CVariables
26 Learn C++ under Windows 95/NT
properties as a local, nonstatic variable. This means that space for the variable is allocated when the defining block is entered and the same space is deallocated when the block is exited.
The extern specifier tells you that space for a variable is allocated outside the current scope. static variables retain their value even after the block they’re defined in is exited. register variables are allocated using a register, if the current implementation allows for it.
Finally, volatile is a little used qualifier that marks a variable as modifiable from outside the program. volatile is implementation dependent. For more information on it, check the manual that comes with your development environment.
PointersA variable defined as a pointer is designed to hold the address of a variable or function of a specific type. The * operator combines with a normal variable definition to create a pointer variable, as in the fol-lowing example:
long myLong;long *myLongPtr;
These definitions create a long and a pointer to a variable of type long. To make the pointer point to a long, use the & operator. The unary & operator returns the address of its operand:
myLongPtr = &myLong;
To retrieve a value from a pointer, use the * operator. The * operator takes an address and returns the value at that address:
myLong = *myLongPtr;
Remembering CVariables
Learn C++ under Windows 95/NT 27
As mentioned earlier, the -> operator can be used with a pointer to a struct to access one of the struct’s fields. The * and . operators can be used in the same way. The code
myStructPtr->myField
has the same effect as the following code:
(*myStructPtr).myField
Pointers are frequently used to step through an array. To do this, you’ll make use of the +, ++, -, and -- operators (described in the section on operators). The + and ++ operators increase the value of a pointer based on the size of the pointer’s base type. The - and -- operators do the reverse. For example, + will increment a char pointer by 1 byte, a short pointer by 2 bytes, and a long pointer by 4 bytes. This is precisely the amount of memory you want to incre-ment a pointer to move it from one element of an array to the next element.
Pointer arithmetic comes in especially handy when you’re working with character strings, which are implemented as an array of chars. For example, the following code copies one character string to an-other:
void CopyString( char *source, char *dest ){while ( *source != ‘\0’ ){*dest = *source;dest++;source++;
}*dest = ‘\0’;
}

Remembering COperators
28 Learn C++ under Windows 95/NT
This example copies each byte of source to the corresponding byte in dest until source’s terminating null byte is encountered. The ++ operator is used to bump the pointers along the character strings.
Style Here’s a version of the preceding string-copying example that’s preferred by many C programmers:
void CopyString( char *source, char *dest ){
while ( *dest++ = *source++ );
}
The key to this code is the combination of the =, *, and ++ oper-ators inside the while clause. Take a few minutes to analyze this code. This method of copying a null-terminated string is so com-mon (and elegant, in my opinion) that you may want to add it to your personal toolbox.
OperatorsAt the heart of C is an extensive set of operators that allow you to build complex expressions. Some of the operators work with a sin-gle operand. Others require two or more operands. Some operators are mathematical in nature. Some are comparative. This section lists the complete set of ANSI C operators.
Arithmetic OperatorsThe arithmetic operators are +, -, *, /, and %. Each of these op-erators is binary (takes two operands). +, -, and * perform addi-tion, subtraction, and multiplication, respectively. / performs integer division, truncating its result to an integral value. % divides its first operand by its second and returns the remainder.
Remembering COperators
Learn C++ under Windows 95/NT 29
Assignment OperatorsAll of the assignment operators are binary. The = operator copies the value of its right side to the variable on its left side. All of the other assignment operators combine = with some other operator, as in this example:
leftSide += rightSide;
This expression is equivalent to the following statement:
leftSide = leftSide + rightSide;
The augmented assignment operators are +=, -=, *=, /=, %=, >>=, <<=, &=, |=, and ^=. Each of these operators follows the pattern just described. The operator portions of the augmented as-signment operators are described individually throughout this sec-tion.
Bitwise Logical OperatorsThe bitwise logical operators are &, |, ^, <<, >>, and ~. ~ is a unary operator (takes a single operand). The remainder of the bit-wise logical operators are binary. ~ produces a one’s complement of its operand. & performs a bitwise AND, | a bitwise OR, and ^ a bit-wise EXCLUSIVE OR on their two operands.
<< and >> perform a left and a right bit shift, respectively, on the left-hand argument. The right-hand argument determines the num-ber of bit positions to shift.
Detail The bitwise OR operator (|) is typically used to change the value of a specified bit to 1. For example, suppose you had a byte with a value, in binary, of 00001111, and you wanted to set its high bit to 1. Use the bitwise OR operator, along with the binary value 10000000:
Remembering COperators
30 Learn C++ under Windows 95/NT
unsigned char highBitIsOne = 0x80;/* 10000000 */
unsigned char myByte = 0x0F;/* 00001111 */
myByte |= highBitIsOne; /* Now myByte is 10001111 */
The bitwise AND operator (&) is typically used to test whether a bit is set to 1 or to change a bit (or bits) to 0. Consider these two vari-ables:
unsigned char highBitIsOne = 0x80;/* 10000000 */
unsigned char myByte = 0x0F;/* 00001111 */
To test whether the high bit of myByte is set, use the bitwise AND operator:
if ( (myByte & highBitIsOne) == highBitIsOne )
This expression will evaluate to true only if the high bit of myByte is set to 1.
This line of code will set the high bit of myByte to 0:
myByte &= 0x7F; /* 0x7F == 01111111 */
The Conditional OperatorThe conditional operator (?:) is C’s only ternary operator (requiring three operands). The operator takes the following form:
expression1 ? expression2 : expression3
Remembering COperators
Learn C++ under Windows 95/NT 31
The first expression is evaluated. If it evaluates to true, the second expression is evaluated and that result is the result of the entire ?: operation. If, however, the first expression evaluates to false, the third expression is evaluated and that result is the result of the entire expression.
Increment and Decrement OperatorsThe increment and decrement operators offer a quick way to incre-ment or decrement a variable. Both of these operators are unary. The increment operator (++) increments its operand by 1. The decrement operator (--) decrements its operand by 1. Applying either of these operators to an array pointer changes the value of the pointer to point to the next element (either up or down) in the array.
These two operators may be placed before the operand (prefix nota-tion) or immediately after the operand (postfix notation). In prefix notation, the increment or decrement operation is performed before the enclosing expression is evaluated. In postfix notation, the incre-ment or decrement operation is performed after the enclosing ex-pression is evaluated.
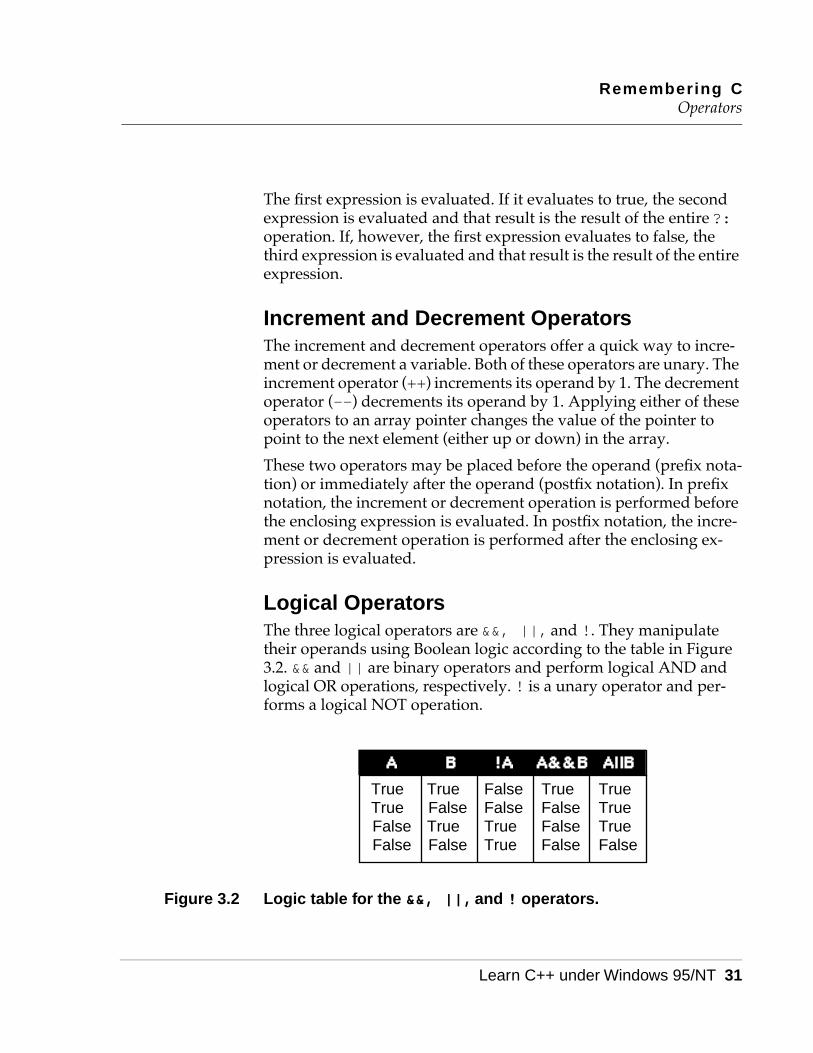
Logical OperatorsThe three logical operators are &&, ||, and !. They manipulate their operands using Boolean logic according to the table in Figure 3.2. && and || are binary operators and perform logical AND and logical OR operations, respectively. ! is a unary operator and per-forms a logical NOT operation.
Figure 3.2 Logic table for the &&, ||, and ! operators.
TrueTrueFalseFalse
TrueFalseTrueFalse
FalseFalseTrueTrue
TrueFalseFalseFalse
TrueTrueTrueFalse

Remembering COperators
32 Learn C++ under Windows 95/NT
Relational OperatorsThe six relational operators are >, >=, <, <=, ==, and !=. All are binary operators and compare the first operand with the second. > returns true if the first operand is greater than the second. >= re-turns true if the first operand is greater than or equal to the second. < returns true if the first operand is less than the second. <= returns true if the first operand is less than or equal to the second. == re-turns true if the two operands are equal. != returns true if the two operands are not equal.
The Comma OperatorThe comma operator (,) is used to fuse two expressions into a single expression. For example, the line of code
i++, j++;
increments the variables i and j. The expressions that surround the comma operator are evaluated from left to right. The result of the operation is the value of the rightmost expression.
The sizeof() OperatorAlthough it appears to be a function call, sizeof() is actually a C operator that takes a single parameter. sizeof() returns the size in bytes of the argument. If the argument is a variable, sizeof() re-turns the number of bytes allocated for that variable. If the parame-ter is a type, sizeof() returns the number of bytes necessary to allocate a variable of that type.
Operator PrecedenceAll of C’s operators are ranked according to precedence. In this ex-pression
6 + 3 * 5
Remembering COperators
Learn C++ under Windows 95/NT 33
the order in which the two operators are evaluated has a definite ef-fect on the expression’s value. If + has a higher precedence than *, the expression will evaluate to 45. If * has a higher precedence, the result will be 21 (the correct answer is 21, by the way).
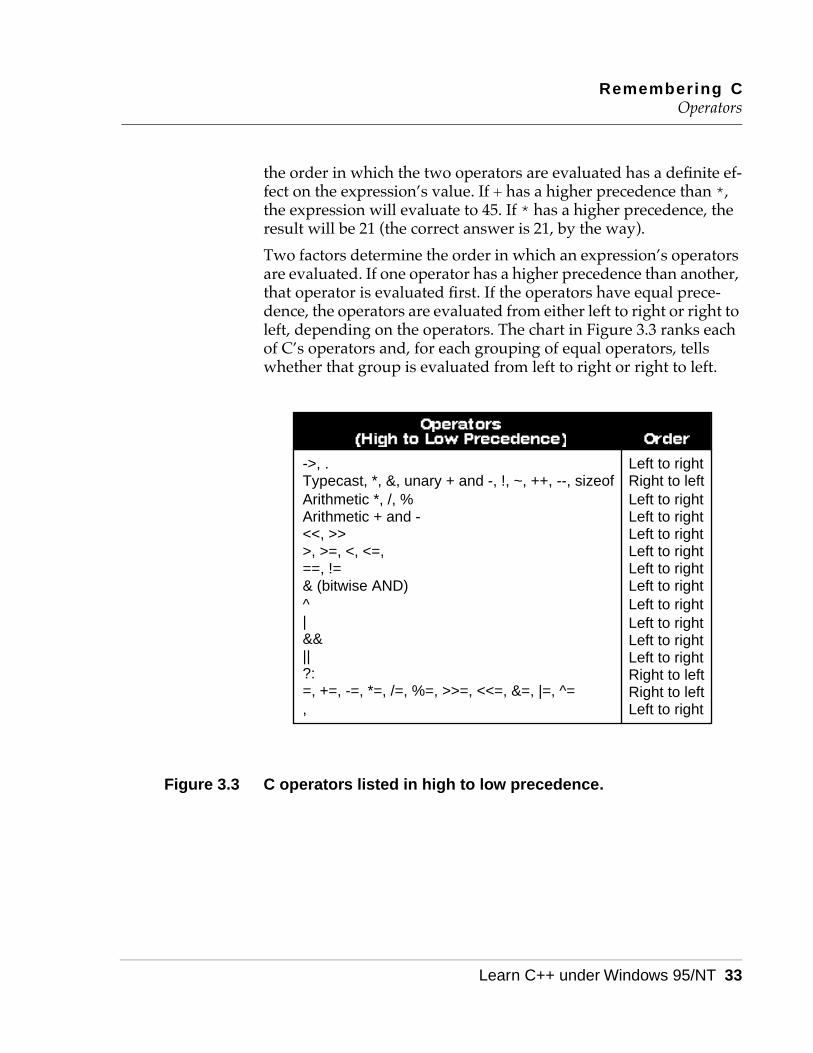
Two factors determine the order in which an expression’s operators are evaluated. If one operator has a higher precedence than another, that operator is evaluated first. If the operators have equal prece-dence, the operators are evaluated from either left to right or right to left, depending on the operators. The chart in Figure 3.3 ranks each of C’s operators and, for each grouping of equal operators, tells whether that group is evaluated from left to right or right to left.
Figure 3.3 C operators listed in high to low precedence.
->, .Typecast, *, &, unary + and -, !, ~, ++, --, sizeofArithmetic *, /, %Arithmetic + and -<<, >>>, >=, <, <=,==, !=& (bitwise AND)^|&&||?:=, +=, -=, *=, /=, %=, >>=, <<=, &=, |=, ^=,
Right to leftLeft to rightLeft to rightLeft to rightLeft to rightLeft to rightLeft to rightLeft to rightLeft to rightLeft to rightLeft to rightRight to leftRight to leftLeft to right
Left to right

Remembering CStatements
34 Learn C++ under Windows 95/NT
StatementsC statements are terminated by a semicolon (;). They can be grouped into blocks by using a matching pair of curly braces (left { and right }). Figure 3.4 lists the keywords that can be used in the construction of ANSI C statements. You should be familiar with each of these keywords.
Figure 3.4 C statement keywords.
FunctionsC statements can be grouped into individual functions. Every pro-gram contains at least one function, main(). main() is automati-cally called to start the program. When the program starts, main() takes two parameters, argc and argv. argc and argv are known as command-line arguments. argc specifies the number of parameters embedded in the second argument, argv. argv is an array of pa-rameters.
Functions can take parameters, and those parameters may be passed by value or by reference. Each function can also return a value of a specified type. If you don’t specify a return type, int is assumed by the compiler. The predefined type void indicates an ab-sence of a return type or an absence of parameters. A function with no parameters and no return values might look like this:
void GoodForNothing( void ){
autobreakcasecharconstcontinuedefault
dodoubleelseenumexternfloatfor
gotoifintlongregisterreturn
shortsignedsizeofstaticstructswitch
typedefunionunsignedvoidvolatilewhile

Remembering CPreprocessor Directives
Learn C++ under Windows 95/NT 35
}
Typically, functions are declared at the top of the program file (or in a header file) by using function prototypes. Function prototypes allow you to specify a function’s return type as well as the type of each of its parameters, adding an extra layer of type checking to your program.
The EllipsisUsed at the end of a function’s argument list, the ellipsis (...) indi-cates that a variable number of arguments may be passed to the function. For example, consider the following function declaration:
void MyFunc( short atLeastOne, ... );
MyFunc() requires at least one parameter but may take more than one. The type of the first parameter is short. The type of any addi-tional parameters is unspecified.
The classic example of ellipsis use is in the declaration of printf():
int printf( char *format, ... );
The first parameter is a text string containing the format specifica-tion. The remaining arguments (if there are any) are determined by the format string.
Preprocessor DirectivesTraditional C compilers compile your program in two passes. The first of these two passes is known as the preprocessor pass. There are a number of commands that you can place in your code to instruct the compiler to take a special action during this pass. These commands
Remembering CComments
36 Learn C++ under Windows 95/NT
are known as preprocessor directives and always start with the pound sign (#).
Two widely used preprocessor directives are #define and #include. #define takes two parameters and asks the pre-pro-cessor to substitute the second parameter for the first throughout the remainder of the code. Since this substitution happens during the first compiler pass, the substitutions are in place for the second pass.
#include includes the specified file in the source code, also in time for interpretation by the second pass of the compiler. Typically, the name of the included file ends in .h (instead of C’s traditional .c). These files are known as header files and contain typedefs, #defines, function prototypes, and other useful nonexecutable statements.
Other preprocessor directives include #elif, #else, #endif, #error, #if, #ifdef, #ifndef, #line, #pragma, and #undef.
CommentsThe character combinations /* and */ have a special meaning in C. /* marks the beginning and */ marks the end of a source code com-ment. When the compiler encounters these characters in your code, it will ignore all characters in the comment, including /* and */.
C comments cannot be nested. This means that you can’t put a com-ment block inside another comment block. Also, /* and */ lose their meaning when placed inside a string or character literal.
SummaryIt is downright impossible to describe the entire C language in one chapter. However, if you understand the concepts presented here, you are definitely ready for C++. If you ran into trouble anywhere along the line, pick up a copy of the second edition of The C Pro-

Remembering CSummary
Learn C++ under Windows 95/NT 37
gramming Language by Kernighan and Ritchie. Better yet, hook up with your local neighborhood C guru or ask your teacher for help. You’ll get much more out of this book once you understand C.
When you’re ready, turn the page. C++, here we come!

Remembering CSummary
38 Learn C++ under Windows 95/NT
Learn C++ under Windows 95/NT 39
4Introducing C++Now that you’ve got a review of C under your belt, you’re ready to tackle C++. C++ supports all the features of C, with a few twists and a lot more features thrown in.
This chapter starts with a comparison of C and C++, focusing on changes you’ll need to make to compile your ANSI C code with an ANSI C++ compiler. It then moves on to some features unique to C++.
Getting C Code to Run under C++Think of C++ as a superset of C. For the most part, every single fea-ture you’ve come to know and love in C is available in C++ (albeit with a few changes). As in C, C++ programs start with a main() function. All of C’s keywords and functions work just fine in C++. If you’ve ever written a C program that takes advantage of the com-mand-line arguments argc and argv, you’ll be glad to know that they’re still around in C++.
In fact, with only a few tweaks here and there, your C programs should run quite well in the C++ world. Try not to get too wrapped up in this section. While it is important that you be aware of each of the issues discussed, some of this stuff is pretty subtle and you may never run into it in your own code. You may want to skim the rest of this section, then come back to it for a quick review once you start coding. Be sure you’re back on full alert, however, when we get into new features of C++.
Function Prototypes Are RequiredIn C, function prototypes are optional. As long as there’s no type conflict between a function call and the same function’s declaration, your program will compile.
Introducing C++Getting C Code to Run under C++
40 Learn C++ under Windows 95/NT
In C++, a function prototype is required for each of your program’s functions. Your C++ program will not compile unless each and every function prototype is in place. As in C, you can declare a func-tion without a return type. If no return type is present, the function is assumed to have a return type of int.
Automatic Type ConversionIf you haven’t already, turn back to Chapter 3 and review the section that describe C’s automatic type conversion. C++ uses the same rules as C for automatic type conversion, but with a slight twist.
Although a void pointer can be assigned the value of another pointer type without explicit typecasting, the reverse is not true. For example, although the following code compiles properly in C, it will not compile in C++:
void *voidPtr;short *shortPtr;
voidPtr = shortPtr; /*<-- This line is just fine...*/
shortPtr = voidPtr; /*<-- This line is fine in C, but WILL NOT compile in C++*/
shortPtr = (short *)voidPtr; /*<-- This works in C++ */
Scope IssuesThere are several subtle differences between C and C++ involving scope. A variable’s scope defines the availability of the variable throughout the rest of a program. For example, a global variable is available throughout a program, while a local variable is limited to the block in which it is declared. Though C++ follows the same scope rules as C, there are a few subtleties you should be aware of.
For example, take a look at the following code. Try to guess the value of size at the bottom of main():
char dummy[ 32 ];
Introducing C++Getting C Code to Run under C++
Learn C++ under Windows 95/NT 41
int main(){long size;
struct dummy{char myArray[ 64 ];
};
size = sizeof( dummy );
return 0;}
In C, size ends up with a value of 32; the reference to dummy in the sizeof() statement matches the global variable declared at the top of the program. In C++, however, size ends up with a value of 64; the reference to dummy matches the struct tag inside main().
In C++, a structure name declared in an inner scope can hide a name in an outer scope. This same rule holds true for an enumeration:
enum color { red, green, blue };
In C++, this enum creates a type named color that can be used to declare other enums and would obscure a global with the same name.
Here’s another example:
int main(){struct s{enum { good, bad, ugly } clint;
};
Introducing C++Getting C Code to Run under C++
42 Learn C++ under Windows 95/NT
short good;
return 0;}
An ANSI C compiler will not compile this code, complaining that the identifier good was declared twice. The problem here is with the scope of the enumeration constant good. In C, an enumeration con-stant is granted the same scope as a local variable, even if it is em-bedded in a struct definition. When the compiler hits the short declaration, it complains that it already has a good identifier de-clared at that level.
In C++, this code compiles cleanly. Why? C++ enumeration con-stants embedded in a struct definition have the same scope as that struct’s fields. Thus, the enumeration constant good is hidden from the short declaration at the bottom of main().
A third example involves multiple declarations of the same variable within the same scope. Consider the following code:
short gMyGlobal;short gMyGlobal; /* Cool in C, error in C++ */
The C compiler will resolve these two variable declarations to a sin-gle declaration. The C++ compiler, on the other hand, will report an error if it hits two variable declarations with the same name.
Definition It’s useful to be aware of the difference between a declaration and a definition. A declaration specifies the types of all elements of an identifier. For example, a function prototype is a declaration. Here are some more declarations:
char name[ 20 ];typedef int myType;const short kMaxNameLength = 20;
Introducing C++New Features of C++
Learn C++ under Windows 95/NT 43
extern char aLetter;short MyFunc( short myParam );
As you can see, a declaration can do more than tie a type to an identifier. A declaration can also be a definition. A definition instan-tiates an identifier, allocating the appropriate amount of memory. In this declaration:
const short kMaxNameLength = 20;
the constant kMaxNameLength is also defined and initialized.
New Features of C++OK, here comes the good stuff! The remainder of this chapter will take you beyond C into the heart of C++. While we won’t explore object programming in this chapter, we will cover just about every other C++ concept.
The // Comment MarkerC’s comment block markers, /* and */, perform the same function in C++. In addition, C++ supports a single-line comment marker. When a C++ compiler encounters the characters //, it ignores the remainder of that line of code. Here’s an example:
int main(){short numGuppies; // May increase suddenly!!
return 0;}

Introducing C++Handling Input and Output
44 Learn C++ under Windows 95/NT
As you’d expect, the characters // are ignored inside a comment block. In the following example, // is included as part of the com-ment block:
int main(){/* Just a comment...// */
return 0;}
Conversely, the comment characters /* and */ have no special meaning inside a single-line comment. The start of the comment block in the following example is swallowed up by the single-line comment:
int main(){// Don’t start a /* comment blockinside a single-line comment...This code WILL NOT compile!!! */
return 0;}
The compiler will definitely complain about this example!
Handling Input and OutputIn a standard C program, input and output are usually handled by Standard Library routines such as scanf() and printf(). While you can call scanf() and printf() from within your C++ pro-gram, there is an elegant alternative. The iostream facility allows you to send a sequence of variables and constants to an output
Introducing C++Handling Input and Output
Learn C++ under Windows 95/NT 45
stream, just as printf() does. Also, iostream makes it easy to convert data from an input stream into a sequence of variables, just as scanf() does.
By the Way Though the iostream features presented in this section may seem simplistic, don’t be fooled. iostream is actually quite so-phisticated. In fact, iostream is far more powerful than C’s stan-dard I/O facility. The material given here will allow you to perform the input and output you’ll need to get through the next few chap-ters. Later in the book, we’ll explore iostream in more depth.
iostream predefines three streams for input and output. cin is used for input, cout for normal output, and cerr for error output. The << operator is used to send data to a stream. The >> operator is used to retrieve data from a stream.
Definition The << operator is known as the insertion operator because it al-lows you to insert data into a stream. The >> operator is known as the extraction operator because it allows you to extract data from a stream.
Here’s an example of the << operator:
#include <iostream.h>
int main(){cout << “Hello, world!”;
return 0;}
This program sends the text string “Hello, world!” to the con-sole, just as if you’d used printf(). The include file
Introducing C++Handling Input and Output
46 Learn C++ under Windows 95/NT
<iostream.h> contains all of the definitions needed to use iostream. Since << is a binary operator, it requires two operands. In this case, the operands are cout and the string “Hello, world!”. The destination stream always appears on the left side of the << operator.
By the Way Just like the & and * operators, >> and << have more than one meaning (>> and << are also used as the right and left shift opera-tors). Don’t worry about confusion, however. The C++ compiler uses the operator’s context to determine which meaning is appro-priate.
As with any other operator, you can use more than one << on a sin-gle line. Here’s another example:
#include <iostream.h>
int main(){short i = 20;
cout << “The value of i is “ << i;
return 0;}
This program produces the following output:
The value of i is 20
iostream knows all about C++’s built-in data types. This means that text strings are printed as text strings, shorts as shorts, and floats as floats, complete with decimal point. No special format-ting is necessary.
Introducing C++Handling Input and Output
Learn C++ under Windows 95/NT 47
An iostream Output ExampleHere’s an interesting example of iostream and output. To start up CodeWarrior, go to the Start menu, and select Programs. From the Programs menu, select CodeWarrior, and then select CW IDE. After the IDE opens, you can open a project by selecting Open from the File menu. Go into the directory called Learn C++ Projects. The Learn C++ Projects directory is in the Learn C++ under Windows directory, which is in the CodeWarrior Books direc-tory. Next, go into the subdirectory named 04.01 - cout, and open the project file named cout.cwp.
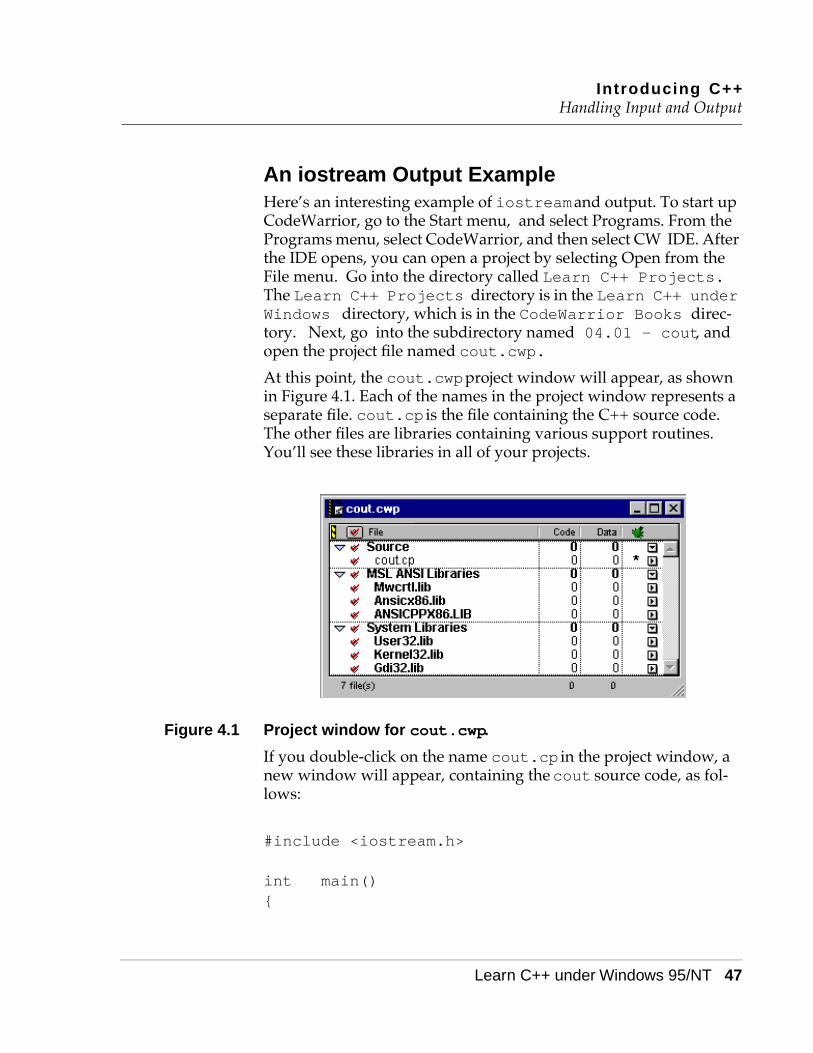
At this point, the cout.cwp project window will appear, as shown in Figure 4.1. Each of the names in the project window represents a separate file. cout.cp is the file containing the C++ source code. The other files are libraries containing various support routines. You’ll see these libraries in all of your projects.
Figure 4.1 Project window for cout.cwp.
If you double-click on the name cout.cp in the project window, a new window will appear, containing the cout source code, as fol-lows:
#include <iostream.h>
int main(){

Introducing C++Handling Input and Output
48 Learn C++ under Windows 95/NT
char *name = “Dr. Crusher”;
cout << “char: “ << name[ 0 ] << ‘\n’<< “short: “ << (short)(name[ 0 ]) << ‘\n’<< “string: “ << name << ‘\n’<< “address: “ << (unsigned long)name;
return 0;}
Running cout.cwpSelect Run from the Project menu. CodeWarrior will compile your source code, then run the compiled program. When the console window appears, compare your output with that shown in Figure 4.2. Remember, when you run the program, the output will be dis-played in a DOS console window that appears for only a moment. To make the window remain open, append the line
getchar();
to the end of your program.
Figure 4.2 CodeWarrior’s console window, showing the cout output.

Introducing C++Handling Input and Output
Learn C++ under Windows 95/NT 49
Let’s take a closer look at the code.
The cout Source Code
The program starts by initializing the char pointer name, pointing it to the text string “Dr. Crusher”. Next comes one giant statement featuring eleven different occurrences of the << operator. This state-ment produces four lines of output.
The following line of code
cout << “char: “ << name[ 0 ] << ‘\n’
produces this line of output:
char: D
As you’d expect, printing name[ 0 ] produces the first character in name, an uppercase D.
The next line of code is
<< “short: “ << (short)(name[ 0 ]) << ‘\n’
The output associated with this line of code is as follows:
short: 68
This result was achieved by casting the character ‘D’ to a short. In general, iostream displays integral types (such as short and int) as an integer. As you’d expect, a float is displayed in float-ing-point format.
The next line of code
<< “string: “ << name << ‘\n’
Introducing C++Handling Input and Output
50 Learn C++ under Windows 95/NT
produces this line of output:
string: Dr. Crusher
When the << operator encounters a char pointer, it assumes you want to print a zero-terminated string.
The final chunk of code in our example shows another way to dis-play the contents of a pointer:
<< “address: “ << (unsigned long)name;
Again, name is printed, but this time is cast as an unsigned long. Here’s the result:
address: 2150000
Warning Anytime you encounter an address, take it with a grain of salt. Since your computer and mine are probably quite different, your addresses will probably be different from those shown in the book.
As you can see, cout does what it thinks makes sense for each type it prints. Later in the book, you’ll learn how to customize cout by using it to print data in a specified format or teaching it how to print your own data types.
By the Way According to the ARM (The Annotated C++ Reference Manual) main()’s type is implementation dependent. Traditionally, main() is declared to return an int. If main() doesn’t return a value, the compiler assumes its type to be void. Consider this code:
Introducing C++Handling Input and Output
Learn C++ under Windows 95/NT 51
main(){}
Different compilers deal with this code in different ways. Some, like CodeWarrior, accept it. Others print a warning message, telling you that a return value from main() was expected.
All of the programs in this book declare main() to return an int. To avoid compile warnings/errors, each main() ends with the line:
return 0;
To avoid repetition, I ignore this line in the code walkthroughs. Just thought you’d like to know why it’s in there.
An iostream Input ExampleOur next example explores the flip side of iostream by reading data in as well as printing it out. Close cout.cwp by selecting Close from CodeWarrior’s File menu. To open a new project file, select Open from the File menu. Go back to the Learn C++ Projects directory, open the subdirectory named 04.02 - cin, and open the project file named cin.cwp.
Running cin.cwp
Select Run from the Project menu. First, you’ll be prompted to type in your first name. Type in a single name (don’t type in any spaces, tabs, or other white space characters) and hit return. Next, you’ll be prompted for three numbers: a short, a long, and a float. Type all three numbers on the same line, separating each by a space, and then hit return. cin will then list your name, as well as each of the three numbers you typed in (Figure 4.3).

Introducing C++Handling Input and Output
52 Learn C++ under Windows 95/NT
Figure 4.3 CodeWarrior’s console window, showing the cin.cwp output.
Warning If things didn’t go exactly as planned, try running the program again. This time, when prompted for your first name, be careful to type only a single word containing no white space characters. Next, be sure that the three numbers are in the proper order, a short, followed by a long, followed by a float. As you’ll see, cin is pretty picky about the format of its input data.
The cin Source Code
As is always the case when you use iostream, the program starts by including the file <iostream.h>. Next, the constant kMaxNameLength is defined, providing a length for the char array name:
#include <iostream.h>
const short kMaxNameLength = 40;
Introducing C++Handling Input and Output
Learn C++ under Windows 95/NT 53
int main()
Style When a variable is defined using the const qualifier, an initial value must be provided in the definition, and that value cannot be changed for the duration of the program. Although some C pro-grammers tend to use #define instead of const, C++ program-mers prefer const to #define.
cin uses cout and << to prompt for a text string, a short, a long, and a float. cin and >> are used to read the values into the four variables name, myShort, myLong, and myFloat:
{char name[ kMaxNameLength ];short myShort;long myLong;float myFloat;
The next line uses << to send a text string to the console:
cout << “Type in your first name: “;
Next, >> is used to read in a text string:
cin >> name;
Type your first name and hit a carriage return. Be sure to type your first name only. When the >> operator reads a text string, it reads a character at a time until a white space character (like a space or a tab) is encountered.
Now, three more pieces of data are read using a single statement. First, display the prompt
Introducing C++Handling Input and Output
54 Learn C++ under Windows 95/NT
cout << “Short, long, float: “;
Then, read in the data, separating the three receiving variables by consecutive >> operators:
cin >> myShort >> myLong >> myFloat;
Warning Be sure to separate each of the three numbers by a space (or some white space character). Also, make sure the numbers match the type of the corresponding variable. For example, it’s probably not a good idea to enter 3.52 or 125000 as a short, although an integer like 47 works fine as a float.
Finally, display each of the variables we worked so hard to fill:
cout << “\nYour name is: “ << name;cout << “\nmyShort: “ << myShort;cout << “\nmyLong: “ << myLong;cout << “\nmyFloat: “ << myFloat;
return 0;}
iostream and ObjectsSo far, iostream might seem primitive compared to the routines in C’s Standard Library. After all, routines like scanf() and printf() give you precise control over your input and output. Routines like getchar() and putchar() allow you to process one character at a time, letting you decide how to handle white space.
Be patient. I promise you that iostream is awesome. The trouble is, to unleash iostream’s true power, you must first come up to speed on object programming. The iostream concepts presented here are the bare minimum you’ll need to get through the sample programs in the next few chapters. Later in the book, we’ll examine iostream
Introducing C++Default Argument Initializers
Learn C++ under Windows 95/NT 55
with an electron microscope. For now, basic input and output are all we need.
Default Argument InitializersC++ allows you to assign default values (known as default argu-ment initializers) to a function’s arguments. For example, here’s a routine designed to generate a tone at a specified frequency:
void GenerateATone( short frequency = 440 ){
// A frequency of 440 is equal to an A note}
If you call this function with a parameter, the value you pass in is used. For example, the call
GenerateATone( 330 );
will generate a tone with a frequency of 330 beats per second, which, in musical notation, is equivalent to an E note. If you call the function without specifying a value, the default value is used. The call
GenerateATone();
will generate a tone with a frequency of 440, which represents an A note.
This technique works with multiple parameters as well, although the rules get a bit more complicated. You can specify a default value for a parameter only if you also specify a default for all the parame-ters that follow it. For example, this declaration is cool:

Introducing C++Default Argument Initializers
56 Learn C++ under Windows 95/NT
void GotSomeDefaults( short manny, short moe=2, char jack=’x’ );
Since the second parameter has a default, the third parameter must have a default. The next declaration won’t compile, however, be-cause the first parameter specifies a default and the parameter that follows does not:
void WillNotCompile( long time=100L, short stack );
Default parameter values are specified in the function prototype rather than in the function’s implementation. For example, here’s a function prototype, followed by the function itself:
void MyFunc( short param1 = 27 );
void MyFunc( short param1 ){// Body of the function...
}
Style Many C++ programmers create a separate #include file for their function prototypes. Gathering all the function declarations, includ-ing parameters and default values, into a single list makes a handy reference tool. I keep my prototypes in alphabetical order and fol-low each one with a comment telling me where the actual code for that routine is. Here’s an example:
void MyFunc( short param1 = 27 );// MySourceFile.cp
Introducing C++Default Argument Initializers
Learn C++ under Windows 95/NT 57
A Default Argument Initializer ExampleLet’s take default argument initializers out for a quick spin. Close cin.cwp, then select Open from the File menu. Go back to the Learn C++ Projects directory, open the subdirectory named 04.03 - protoTester, and open the project file named protoTester.cwp. Next, run protoTester.cwp by selecting Run from the Project menu. Here’s what you’ll see:
MyFunc( 1, 0, 0 )MyFunc( 1, 2, 0 )MyFunc( 1, 2, 3 )
Let’s take a look at the source code.
The protoTester Source Code
The key to protoTester lies in the function MyFunc() and its de-fault-laden parameter list. After the obligatory #include of the file <iostream.h>, you’ll find the prototype for MyFunc():
#include <iostream.h>
void MyFunc( short param1,short param2 = 0,short param3 = 0 );
Notice that defaults are provided for the second and third parame-ters only. Both of these parameters have a default value of 0.
main() calls MyFunc() using three different calling sequences. Since no default is provided for MyFunc()’s first parameter, all calls to MyFunc() must include at least one value. Calls like
MyFunc();
or

Introducing C++Default Argument Initializers
58 Learn C++ under Windows 95/NT
MyFunc( , 1 );
will cause the compiler to complain bitterly.
The first call of MyFunc() passes a single value, forcing MyFunc() to rely on its default values for the second and third parameters. The call
MyFunc( 1 );
produces this line of output:
MyFunc( 1, 0, 0 )
Notice that the default value of 0 is used for the second and third parameters.
Next, the code
MyFunc( 1, 2 );
produces this line of output:
MyFunc( 1, 2, 0 )
In this case, values are passed in for the first and second parameters, while the default value of 0 is used for the third parameter.
Finally, the code
MyFunc( 1, 2, 3 );
produces this line of output:
Introducing C++Reference Variables
Learn C++ under Windows 95/NT 59
MyFunc( 1, 2, 3 )
In this last case, the three values passed in override all of the param-eter defaults.
The function MyFunc() uses iostream to print the current values of MyFunc()’s three parameters:
void MyFunc( short param1,short param2,short param3 )
{cout << “MyFunc( “ << param1<< “, “ << param2<< “, “ << param3<< “ )\n”;
}
Notice that the defaults are specified in the function prototype and not in the function title.
Reference VariablesIn C, all parameters are passed by value as opposed to being passed by reference. When you pass a parameter to a C function, the value of the parameter is passed on to the function. Any changes you make to this value are not carried back to the calling function.
Here’s an example:
void DoubleMyValue( short valueParam ){valueParam *= 2;
}
int main()
Introducing C++Reference Variables
60 Learn C++ under Windows 95/NT
{short number = 10;
DoubleMyValue( number );
return 0;}
main() sets number to 10, then passes it to the function DoubleMyValue(). Since number is passed by value, the call to DoubleMyValue() has no effect on number. When DoubleMyValue() returns, number still has a value of 10.
Here’s an updated version of the program:
void DoubleMyValue( short *numberPtr ){*numberPtr *= 2;
}
int main(){short number = 10;
DoubleMyValue( &number );
return 0;}
In this version, number’s address is passed to DoubleMyValue(). By dereferencing this pointer, DoubleMyValue() can reach out and change the value of number. When DoubleMyValue() returns, number will have a value of 20.
Introducing C++Reference Variables
Learn C++ under Windows 95/NT 61
The Reference Variable Reference variables allow you to pass a parameter by reference, without using pointers. Here’s another version of the program, this time implemented with a reference variable:
void DoubleMyValue( short &referenceParam ){referenceParam *= 2;
}
int main(){short number = 10;
DoubleMyValue( number );
return 0;}
Notice that this code looks just like the first version, with one small exception. DoubleMyValue()’s parameter is defined using the & operator:
short &referenceParam
The & marks referenceParam as a reference variable and tells the compiler that referenceParam and its corresponding input parame-ter, number, are one and the same. Since both names refer to the same location in memory, changing the value of referenceParam is exactly the same as changing number.
By the Way Some people declare their reference variables and parameters like this:
short &referenceParam
Introducing C++Reference Variables
62 Learn C++ under Windows 95/NT
placing the & next to the variable, some like this:
short & referenceParam
leaving white space in between the two, and others like this:
short& referenceParam
placing the & directly after the type. All of these will work. Use whichever one you prefer, just be consistent.
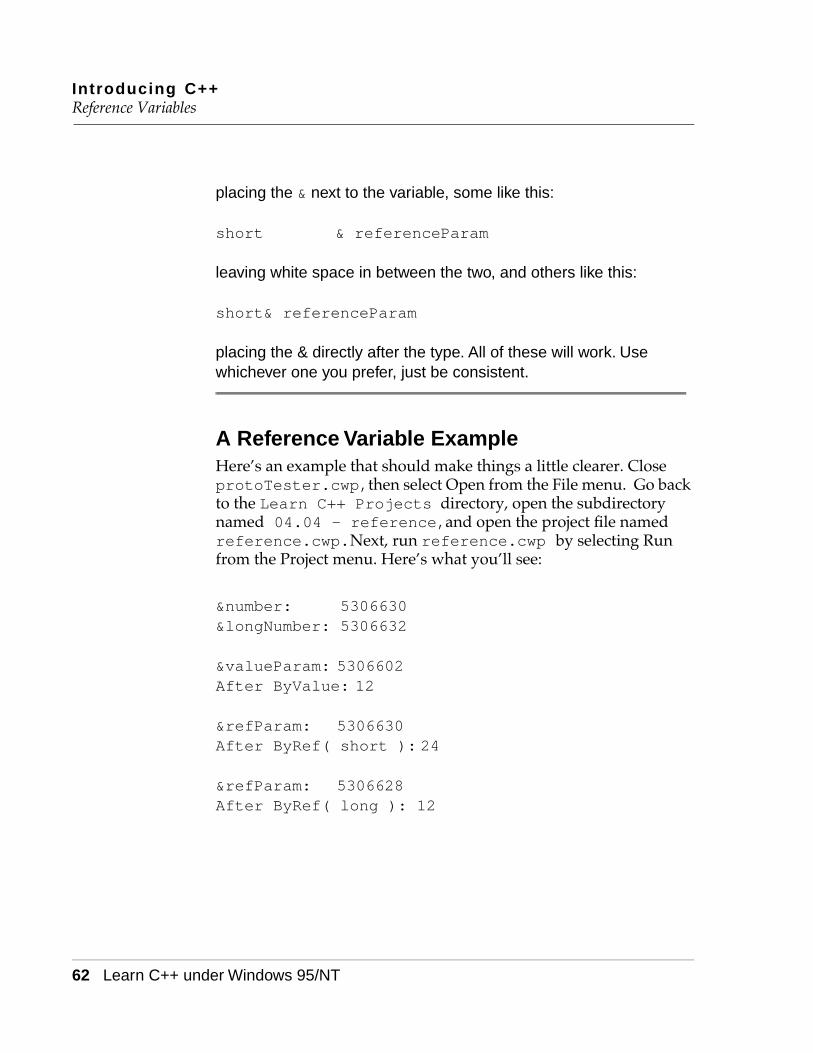
A Reference Variable ExampleHere’s an example that should make things a little clearer. Close protoTester.cwp, then select Open from the File menu. Go back to the Learn C++ Projects directory, open the subdirectory named 04.04 - reference, and open the project file named reference.cwp. Next, run reference.cwp by selecting Run from the Project menu. Here’s what you’ll see:
&number: 5306630&longNumber: 5306632
&valueParam: 5306602After ByValue: 12
&refParam: 5306630After ByRef( short ): 24
&refParam: 5306628After ByRef( long ): 12
Introducing C++Reference Variables
Learn C++ under Windows 95/NT 63
By the Way The seven-digit numbers shown in this example are addresses. Unless you snuck in here and have been using my PC, your ad-dresses will probably be different.
Let’s take a look at the source code.
The reference Source Code
reference starts with a pair of function prototypes. Just like the routine DoubleMyValue() presented earlier, both of these routines take a single parameter and double its value:
#include <iostream.h>
void CallByValue( short valueParam );void CallByReference( short &refParam );
Notice that CallByValue() takes a short as a parameter using the standard by-value parameter passing mechanism; while CallByReference() takes a reference variable as a parameter passed by reference.
main() starts by defining two variables, a short and a long, ini-tializing each to a value of 12:
int main(){short number = 12;long longNumber = 12L;
Next, the address of both variables is printed in the console. When a parameter is successfully passed by reference, the calling and re-ceiving parameters will have the same address:
cout << “&number: “ << (unsigned long)&number << “\n”;
Introducing C++Reference Variables
64 Learn C++ under Windows 95/NT
cout << “&longNumber: “ << (unsigned long)&longNumber << “\n\n”;
By the Way You may have noticed that reference prints its addresses in dec-imal, rather than hexadecimal, format. Later in the book, you’ll learn how to customize cout to print data in any format you like. For the moment, we’ll print out addresses by casting them to un-signed longs.
Next, number is passed by value to CallByValue():
CallByValue( number );
CallByValue() prints the address of, and then doubles the value of, its parameter. number’s address, which we printed earlier, was 5306630. The address of the value parameter is 5306602. Clearly, this parameter was not passed by reference, which explains why number’s value is not changed by the call to CallByValue(). As proof, the value of number is printed again. As you can see by the output, the value stays at 12:
cout << “After ByValue: “ << number << “\n\n”;
Then, number is passed to CallByReference():
CallByReference( number );
CallByReference() also prints the address of its parameter. When we compare this address with the address printed earlier, they match exactly. number’s address (printed earlier) was 5306630. The address of CallByReference()’s parameter is also 5306630. This call by reference was successful! As proof, when the value of number is printed for a third time, its value doubles to 24:

Introducing C++Reference Variables
Learn C++ under Windows 95/NT 65
cout << “After ByRef( short ): “ << number << “\n\n”;
Finally, a long is passed to CallByReference():
CallByReference( longNumber );
Since CallByReference() declares its parameter as a reference to a short, the compiler is faced with an interesting problem. Refer-ence variables work only if the type of the variable being referenced agrees with the type of the reference variable. When this isn’t the case, the compiler creates a temporary variable that is referenced by the reference parameter in the called routine. When a change is made to this parameter, the change is made to the temporary vari-able and not to the matching parameter in the calling function.
In this case, the value of the long is passed on to CallByReference(). As proof, compare the address of longNumber, which is 5306632 with the parameter address printed out by CallByReference(), which is 5306628. As you can see, the addresses don’t match.
By the Way Some C++ compilers generate warnings when they encounter this line of code:
CallByReference( longNumber );
The problem here is that longNumber is a long, but CallByReference() expects a short reference variable. Since the types don’t agree, the compiler prints a warning and then cre-ates a temporary variable.
To add more proof to the pudding, when the value of longNumber is printed upon CallByReference()’s return, it remains at 12, un-changed from its original value:
Introducing C++Reference Variables
66 Learn C++ under Windows 95/NT
cout << “After ByRef( long ): “ << longNumber << “\n”;
return 0;}
Detail Reference variables are frequently used as call-by-reference pa-rameters. However, they can also be used to establish a link be-tween two variables in the same scope. Here’s an example:
short romulus;short &remus = romulus;
The first line of code defines a short with the name romulus. The second line of code declares a reference variable with the name remus, linking it to the variable romulus. Just as before, the & marks remus as a reference variable.
Now that remus and romulus are linked, they share the same lo-cation in memory. Changing the value of one is exactly the same as changing the value of the other.
It’s important to note that a reference variable must be initialized with a variable as soon as it is declared. The following code will not compile:
short romulus;short &remus; // Will not compile!!!
remus = romulus;
The reference variable must also be of the same type as the vari-able it references. The following code won’t work:
short romulus;long &remus = romulus; // Type mismatch!!!

Introducing C++Function Name Overloading
Learn C++ under Windows 95/NT 67
In addition, once established, the link between a reference and a regular variable cannot be changed as long as the reference re-mains in scope. In other words, once remus is linked to romulus, it cannot be set to reference a different variable.
Function Name OverloadingThe next feature up for discussion, function name overloading, al-lows you to write several functions that share the same name.
Suppose you needed a function that would print the value of one of your variables, be it long, short, or a text string. You could write one function that takes four parameters:
Display( short whichType, long longParam,
short shortParam, char *textParam );
The first parameter might act like a switch, determining which of the three types you were passing in for printing. The main code of the function might look like this:
if ( whichType == kIsLong )cout << “The long is: “ << longParam << “\n”;
else if ( whichType == kIsShort )cout << “The short is: “ << shortParam << “\n”;
else if ( whichType == kIsText )cout << “The text is: “ << text << “\n”;
Another solution is to write three separate functions, one for print-ing shorts, one for longs, and one for text strings:
void DisplayLong( long longParam );void DisplayShort( short shortParam );

Introducing C++Function Name Overloading
68 Learn C++ under Windows 95/NT
void DisplayText( char *text );
Each of these solutions has an advantage. The first solution groups all printing under a single umbrella, making the code somewhat easier to maintain. On the other hand, the second solution is more modular than the first. If you want to change the method you use to display longs, you modify only the routine that works with longs; you don’t have to deal with the logic that displays other types.
As you might expect, there is a third solution that combines the ben-efits of the first two. Here’s how it works.
As mentioned earlier, C++ allows several functions to share the same name by way of function name overloading. When an over-loaded function is called, the compiler compares the parameters in the call with the parameter lists in each of the candidate functions. The candidate with the most closely matching parameter list is the one that gets called.
Definition A function’s parameter list is also known as its signature. A func-tion’s name and signature combine to distinguish it from all other functions. Note that a function’s return type is not part of its signa-ture.
A Function Name Overloading ExampleEarlier, we looked at two solutions to our multitype printing prob-lem. As promised, here’s a third solution that takes advantage of function name overloading. Close reference.cwp, then select Open from the File menu. Go back to the Learn C++ Projects directory, then into the subdirectory named 04.05 - overload and open the project file named overload.cwp. Next, run overload.cwp by selecting Run from the Project menu. Here’s what you’ll see:
The short is: 3The long is: 12345678

Introducing C++Function Name Overloading
Learn C++ under Windows 95/NT 69
The text is: Make it so...
Let’s look at the code.
The overload Source Code
overload starts with three function prototypes, each of which shares the name Display():
#include <stream.h>
void Display( short shortParam );void Display( long longParam );void Display( char *text );
Notice that each version of Display() has a unique signature. This is important. You are not allowed to define two functions with the same name and the same signature.
main() starts by defining three variables: a short, a long and a text string.
int main(){short myShort = 3;long myLong = 12345678L;char *text = “Make it so...”;
Next, Display() is called three times. First, a short is passed as a parameter. Since this call exactly matches one of the Display() routines, the compiler doesn’t have a problem deciding which func-tion to call:
Display( myShort );
Introducing C++Function Name Overloading
70 Learn C++ under Windows 95/NT
Similarly, the calls passing a long and a text string to Display() match perfectly with the Display() functions having long and text string signatures:
Display( myLong );
Display( text );
return 0;}
The signatures of these three versions of Display() feature a short, a long, and a text string, respectively:
void Display( short shortParam ){cout << “The short is: “ << shortParam << “\n”;
}
void Display( long longParam ){cout << “The long is: “ << longParam << “\n”;
}
void Display( char *text ){cout << “The text is: “ << text << “\n”;
}
Matching Rules for Overloaded FunctionsThe preceding example was fairly straightforward. The compiler had no difficulty deciding which version of Display() to call be-cause each of the calls matched perfectly with one of the Display() functions. What do you think would happen if you passed a float to Display()?
Introducing C++The new and delete Operators
Learn C++ under Windows 95/NT 71
Display( 1.0 );
When the compiler can’t find an exact match for an overloaded function call, it turns to a set of rules that determine the best match for this call. After applying each of the rules, unless one and only one match is found, the compiler reports an error.
As you’ve already seen, the compiler starts the matching process by looking for an exact match between the name and signature of the function call and a declared function. If a match is not found, the compiler starts promoting the type of any integral parameters in the function call, following the rules for automatic type conversion de-scribed in Chapter 3. For example, a char or a short would be pro-moted to an int and a float would be promoted to a double.
If a match is still not found, the compiler starts promoting non-inte-gral types. Finally, the ellipsis operator in a called function is taken into account, matching against zero or more parameters.
In answer to our earlier question, passing a float to Display() would result in an error, listing the function call as ambiguous. If we had written a version of Display() with a float or a double in its signature, the compiler would find the match.
The new and delete OperatorsIn C, memory allocation typically involves a call to malloc() paired with a call to free() when the memory is no longer needed. In C++, the same functionality is provided by the operators new and delete.
Call new when you want to allocate a block of memory. For exam-ple, the following code allocates a block of 1024 chars:
char *buffer;
buffer = new char[ 1024 ];

Introducing C++The new and delete Operators
72 Learn C++ under Windows 95/NT
new takes a type as an operand, allocates a block of memory the same size as the type, and returns a pointer to the block. To return the memory to the heap, use the delete operator. The next code frees up the memory just allocated:
delete [] buffer;
Detail The brackets in the preceding line of code indicate that the item to be deleted is a pointer to an array. If you are deleting something other than a pointer to an array, leave the brackets out:
int myIntPtr;
myIntPtr = new int;
delete myIntPtr;
new can be used with any legal C++ type, including those you create yourself. Here are a few examples:
struct Wobble{short papaWobble;short mamaWobble;long littleBabyWobble;
} ;
short *shortPtr;long double *longDoublePtr;Wobble *wobblePtr;
shortPtr = new short;longDoublePtr = new long double;wobblePtr = new Wobble;
Introducing C++The new and delete Operators
Learn C++ under Windows 95/NT 73
Here’s an example of a bad use of new, guaranteed to bring the com-piler to its knees:
short *shortPtr;
shortPtr = new 1024; // Will not compile!!!
Though you can pass a constant to malloc(), a constant is not a type and has no place in new.
What to Do When new FailsEvery program that allocates memory runs the risk that its request for memory will fall on deaf ears, most likely because there’s no more memory left to allocate. If your program uses new to allocate memory, it had better detect, and handle, any failure on new’s part.
Since new returns a value of 0 when it fails, the simplest approach just checks this return value, taking the appropriate action when new fails:
char *bufPtr;
bufPtr = new char[ 1024 ];
if ( bufPtr == 0 )cout << “Not enough memory!!!”;
elseDoSomething( bufPtr );
This code uses new to allocate a 1024-byte buffer. If new fails, an error message is printed; otherwise, the program goes on its merry way.
This approach requires that you check the return value every time you call new. If your program performs a lot of memory allocation, this memory-checking code can really add up. As your programs

Introducing C++The new and delete Operators
74 Learn C++ under Windows 95/NT
get larger and more sophisticated, you might want to consider a sec-ond strategy.
C++ allows you to specify a single routine, known as a new handler, that gets called if and when new fails. Design your new handler for the general case so that it can respond to any failed attempt to allo-cate memory.
By the Way Whether or not you designate a new handler, new will still return 0 if it fails. This means you can design a two-tiered memory man-agement strategy combining a new handler and code that runs if new returns 0.
To specify a new handler, pass the handler’s name to the function set_new_handler(). To use set_new_handler(), be sure to in-clude the file <new.h>:
#include <new.h>
void NewFailed( void );
int main(){set_new_handler( NewFailed );...
}
Style One possible memory allocation strategy is to allocate a block of memory at the beginning of your program, storing a pointer to the block in a global variable. Then, when new fails, your program can free up the spare memory block, ensuring that it will have enough memory to perform any housekeeping chores that it requires in a memory emergency.

Introducing C++The new and delete Operators
Learn C++ under Windows 95/NT 75
A new ExampleOur next sample program repeatedly calls new until the program runs out of memory, keeps track of the number of memory requests, and then reports on the amount of memory allocated before failure. This program uses the spare memory scheme just described.
Close overload.cwp, then select Open from the File menu. Go to the Learn C++ Projects directory, then into the subdirectory named 04.06 - newTester, and open the project file named newTester.cwp. Next, run newTester.cwp by selecting Run from the Project menu. Here’s what you’ll see:
Installing NewHandler...Number of blocks allocated: 25
By the Way The number of blocks you can allocate before you run out of mem-ory depends on the amount of memory you make available to your program. Don’t be too surprised if your number differs from the number of blocks shown in this example.
Let’s take a look at the source code.
The newTester Source Code
newTester starts by including both <iostream.h> for access to the iostream library and <new.h> for access to the set_new_handler() function:
#include <iostream.h>#include <new.h>
NewFailed() is the function we want called if new fails in its at-tempt to allocate memory:
void NewFailed();
Introducing C++The new and delete Operators
76 Learn C++ under Windows 95/NT
newTester makes use of two global variables. gDone acts as a flag, initially set to false, but set to true when we’re ready to exit our memory allocation loop; gSpareBlockPtr is a pointer to the spare block of memory we allocate at the beginning of the program:
char gDone = false;char *gSpareBlockPtr = 0;
main() uses two local variables. myPtr acts as a pointer to the blocks of memory we allocate; numBlocks tracks the number of blocks we allocate before new finally fails:
int main(){char *myPtr;long numBlocks = 0;
Next, we’ll send an appropriate message to the console. This mes-sage serves a subtle purpose. It causes iostream to allocate all the memory it needs for the console window before the program con-sumes all remaining free memory. This guarantees that our subse-quent console output will appear.
cout << “Installing NewHandler...\n”;
set_new_handler() is called to set NewFailed() as the routine to be called if and when new fails:
set_new_handler( NewFailed );
Then, the spare block of memory (20 kilobytes) is allocated, and a pointer to the spare block is stored in gSpareBlockPtr:
Introducing C++The new and delete Operators
Learn C++ under Windows 95/NT 77
gSpareBlockPtr = new char[20480];
Next, we enter an endless loop, allocating a 1-kilobyte block and in-crementing numBlocks:
while ( gDone == false ){myPtr = new char[1024];numBlocks++;
}
Warning Notice that we don’t squirrel away the pointers to these allocated blocks. Once we allocate a new block, we lose the pointer to the previously allocated block. That block can never be deleted and is lost forever. Not a particularly good memory management scheme, eh? Make sure you balance every use of new with a cor-responding delete.
Once we’ve allocated all the available memory, new will fail and NewFailed() will be called. NewFailed() sets gDone to true, and the memory allocation loop exits. Once the loop exits, we print out the number of blocks we were able to allocate:
cout << “Number of blocks allocated: “ << numBlocks;
return 0;}
NewFailed() starts by checking to see whether gSpareBlockPtr actually points to a block of memory. After all, new might fail when we first try to allocate the spare block. If we were able to allocate the spare block, NewFailed() uses delete to return the block to the heap and gSpareBlockPtr is reset to 0:
Introducing C++The Scope Resolution Operator
78 Learn C++ under Windows 95/NT
if ( gSpareBlockPtr != 0 ){delete gSpareBlockPtr;gSpareBlockPtr = 0;
}
Finally, gDone is set to true:
gDone = true;}
The Scope Resolution OperatorThe next feature we’ll examine is C++’s scope resolution operator (::). The scope resolution operator precedes a variable, telling the compiler to look outside the current block for a variable of the same name.
Suppose you declare a global variable and a local variable with the same name:
short number;
int main(){short number;
number = 5; // local reference::number = 10; // global reference
return 0;}

Introducing C++The Scope Resolution Operator
Learn C++ under Windows 95/NT 79
Inside main(), the first assignment statement refers to the local def-inition of number. The second assignment statement uses the scope operator to refer to the global definition of number. This code leaves the local number with a value of 5 and the global number with a value of 10.
A Scope Resolution Operator ExampleOur next sample program offers a quick demonstration of the scope resolution operator. Close newTester.cwp, then select Open from the File menu. Go to the Learn C++ Projects directory, then into the subdirectory named 04.07 - scopeTester, and open the project file named scopeTester.cwp. Next, run scopeTester.cwp by selecting Run from the Project menu. Here’s what you’ll see:
yourValue: 5yourValue: 10yourValue: 5
Let’s look at the source code.
The scopeTester Source Code
scopeTester defines a global variable with the name myValue, initializing it to a value of 5:
#include <iostream.h>
short myValue = 5;
main() defines a local variable named yourValue and assigns it the value in myValue:
int main(){short yourValue = myValue;
Introducing C++The Scope Resolution Operator
80 Learn C++ under Windows 95/NT
Then, yourValue is printed out, showing it with a value of 5, the same as the global myValue:
cout << “yourValue: “ << yourValue << “\n”;
Next, a local with the name myValue is defined and initialized with a value of 10. When myValue is copied to yourValue, which vari-able is copied, the local or the global?
short myValue = 10;yourValue = myValue;
As you can see from the output, the reference to myValue matches with the local declaration, showing yourValue with a value of 10:
cout << “yourValue: “ << yourValue << “\n”;
Then, the scope resolution operator is used to copy myValue to yourValue. When yourValue is printed again, it has a value of 5, showing that ::myValue refers to the global declaration of myValue:
yourValue = ::myValue;cout << “yourValue: “ << yourValue << “\n”;
return 0;}
Warning The scope resolution operator can be applied only when a match is available. Applying the scope resolution operator to a local vari-able without a corresponding global will generate a compile error. To see this for yourself, add the following code to the end of main() and try to compile it:
Introducing C++Inline Functions
Learn C++ under Windows 95/NT 81
::yourValue = 20;
Since there is no global named yourValue, the code will not com-pile.
Inline FunctionsOK. One final topic, then we’ll move on to object programming. Tra-ditionally, when a function is called, the CPU executes a set of in-structions that move control from the calling function to the called function. Tiny as these instructions may be, they still take time. C++, however, provides inline functions, which allow you to bypass these instructions and save a bit of execution time. Here’s how this feature works.
When you declare a function using the inline keyword, the com-piler copies the body of the function into the calling function, mak-ing the copied instructions a part of the calling function as if it were written that way originally. The benefit to you is a slight improve-ment in performance. The cost is in memory usage. Why? If you call an inline function twenty times from within your program, twenty copies of the function will be grafted into your object code.
An inline Function ExampleOur final sample program features a single inline function that re-turns the value achieved when its first argument is raised to its sec-ond argument’s power. As an example, the following call will return the value 25 = 2*2*2*2*2 = 32:
power( 2, 5 );
Close scopeTester.cwp, then select Open from the File menu. Go to the Learn C++ Projects directory, then into the subdirec-tory named 04.08 - inline, and open the project file named

Introducing C++Inline Functions
82 Learn C++ under Windows 95/NT
inline.cwp. Next, run inline.cwp by selecting Run from the Project menu. Here’s what you’ll see:
power( 2, 3 ): 8power( 3, 6 ): 729power( 5, 0 ): 1power( -3, 4 ): 81
Let’s take a look at the source code.
The inline Source Code
inline starts with the standard include file, followed by a function prototype that features the keyword inline:
#include <iostream.h>
inline long power( short base, short exponent );
main() calls power() four times and prints the result of each call:
int main(){cout << “power( 2, 3 ): “ <<
power( 2, 3 ) << “\n”;
cout << “power( 3, 6 ): “ <<power( 3, 6 ) << “\n”;
cout << “power( 5, 0 ): “ <<power( 5, 0 ) << “\n”;
cout << “power( -3, 4 ): “ <<power( -3, 4 ) << “\n”;
return 0;
Introducing C++Inline Functions
Learn C++ under Windows 95/NT 83
}
By preceding power()’s declaration by the inline keyword, we’ve asked the compiler to replace each of the four function calls in main() with the code in power(). Note that this replacement ef-fects the object code and has no impact on the source code:
inline long power( short base, short exponent ){long product = 1;short i;
if ( exponent < 0 )return( 0 );
for ( i=1; i<=exponent; i++ )product *= base;
return( product );}
Detail There are two clear benefits that arise from using inline code in-stead of a #define macro: type-safety and side-effects protec-tion.
Consider this #define macro:
#define square(a)( (a) * (a) )
Compare that macro to this inline function:
inline int square( int a ){
return( a * a );
The inline version restricts its parameter to an integral value while

Introducing C++Summary
84 Learn C++ under Windows 95/NT
the #define performs a simple-minded text substitution.
Now suppose you call square() with a prefix operator:
xSquared = square( ++x );
The #define version expands this as follows:
xSquared = ( (++x) * (++x) );
which has the unwanted side-effect of incrementing x twice. The inline version doesn’t do this.
The upshot here is that both #defines and inlines offer an in-line performance advantage, but the inline does its job a little more carefully.
SummaryCongratulations! You’ve reached the first summit in your quest for C++ mastery. You’ve moved well beyond the boundaries of C and covered most of the syntax you’ll need to build your own C++ pro-grams. Your next goal is to move on to Chapter 5 and explore the world of object programming.

Learn C++ under Windows 95/NT 85
5Object Programming BasicsBefore we get into the main thrust of this chapter, let’s take a mo-ment and talk about objects.
There is nothing mysterious about the concept of an object. In C++, an object is any instance of a data type. For example, this line of code:
int myInt;
declares an int object. This chapter will teach you how to use C++ to create, destroy, and manipulate objects in very powerful ways.
The first object we’ll take a look at is the structure.
The Organizational Power of the StructOne of the most valuable features shared by C and C++ is the struc-ture. Without the structure, you’d have no way to group data that belonged together. For example, suppose you wanted to implement an employee data base that tracked an employee’s name, employee ID, and salary. You might design a structure that looks like this:
const short kMaxNameSize = 20;
struct Employee{char name[ kMaxNameSize ];long id;
Object Programming BasicsThe Organizational Power of the Struct
86 Learn C++ under Windows 95/NT
float salary;};
The great advantage of this structure is that it lets you bundle sev-eral pieces of information together under a single name. This con-cept is known as encapsulation.
For example, if you wrote a routine to print an employee’s data, you could write:
Employee newHire;•••
PrintEmployee( newHire.name, newHire.id, newHire.salary );
By the Way Did you notice anything unusual about the declaration of newHire in the preceding code sample? In C, this code would not have compiled. Instead, the declaration would have looked like this:
struct Employee newHire; /* The C version */
When the C++ compiler sees a structure declaration, it uses the structure name to create a new data type, making it available for future structure declarations.
On the other hand, it would be so much more convenient to pass the data in its encapsulated form:
PrintEmployee( &newHire );
Encapsulation allows you to represent complex information in a more natural, easily accessible form. In the C language, the struct is the most sophisticated encapsulation mechanism available. As you’ll soon see, C++ takes encapsulation to a new level.
Object Programming BasicsEncapsulating Data and Functions
Learn C++ under Windows 95/NT 87
Encapsulating Data and FunctionsWhile C structures are limited strictly to data, C++ supports struc-tures composed of both data and functions.
Here’s an example of a C++ structure declaration:
const short kMaxNameSize = 20;
struct Employee{// Data members...
char employeeName[ kMaxNameSize ];long employeeID;float employeeSalary;
// Member functions...void PrintEmployee();
};
This example declares a new type named Employee. You can use the Employee type to declare individual Employee objects. Each Employee object is said to be a member of the Employee class.
The Employee class consists of three data fields as well as a function named PrintEmployee(). In C++, a class’s data fields are known as data members and its functions are known as member functions.
Each Employee object you create gets its own copy of the Employee class data members. All Employee objects share a single set of Employee member functions.
Later in the chapter, you’ll see how to access an object’s data mem-bers and member functions. For now, let’s take a look at the mecha-nisms C++ provides to create and destroy objects.
Creating an ObjectThere are two ways to create a new object. The simplest method is to define the object directly, just as you would a local variable:
Object Programming BasicsCreating an Object
88 Learn C++ under Windows 95/NT
Employee employee1;
This definition creates an Employee object whose name is employee1. employee1 consists of a block of memory large enough to accommodate each of the three Employee data members.
When you create an object by defining it directly, as we did above, memory for the object is allocated when the definition moves into scope. That same memory is freed up when the object drops out of scope.
For example, you might define an object at the beginning of a func-tion:
void CreateEmployee(){Employee employee1;
•••
}
When the function is called, memory for the object is allocated, right along with the function’s other local objects. When the function ex-its, the object’s memory is deallocated.
Definition When the memory for an object is deallocated, the object is said to be destroyed.
If you want a little more control over when your object is destroyed, take advantage of C++’s new operator (introduced in Chapter 4).
First, define an object pointer, then call new to allocate the memory for your object. new returns a pointer to the newly created object. Here’s some code that creates an Employee object:
Object Programming BasicsAccessing an Object’s Members
Learn C++ under Windows 95/NT 89
Employee *employeePtr;
employeePtr = new Employee;
The first line of code defines a pointer designed to point to an Employee object. The second line uses new to create an Employee object. new returns a pointer to the newly created Employee.
Accessing an Object’s MembersOnce you’ve created an object, you can modify its data members and call its member functions. If you’ve defined the object directly, you’ll refer to its data members using the . operator:
Employee employee1;
employee1.employeeSalary = 200.0;
If you’re referencing the object through a pointer, use the -> opera-tor:
Employee *employeePtr;
employeePtr = new Employee;
employeePtr->employeeSalary = 200.0;
To call a member function, use the same technique. If the object was defined directly, you’ll use the . operator:
Employee employee1;

Object Programming BasicsAccessing an Object’s Members
90 Learn C++ under Windows 95/NT
employee1.PrintEmployee();
If you’re referencing the object through a pointer, you’ll use the -> operator:
Employee *employeePtr;
employeePtr = new Employee;
employeePtr->PrintEmployee();
The Current ObjectIn the previous examples, each reference to a data member or mem-ber function started with an object or object pointer. Inside a mem-ber function, however, the object or object pointer isn’t necessary to refer to the object for which the member function is executing.
For example, inside the PrintEmployee() function, you can refer to the data member employeeSalary directly, without referring to an object or object pointer:
if ( employeeSalary <= 200 )cout << “Give this person a raise!!!”;
This code is kind of puzzling. What object does employeeSalary belong to? After all, you’re used to saying:
myObject->employeeSalary
instead of just plain:
employeeSalary
Object Programming BasicsAccessing an Object’s Members
Learn C++ under Windows 95/NT 91
The key to this puzzle lies in knowing which object spawned the call of PrintEmployee() in the first place. Although this may not be obvious, a call to a nonstatic member function must originate with a single object.
Detail As you’ll see later in the book, class members may be declared as static. A static data member holds a value that is global to a class and not specific to a single object of that class. A static mem-ber function is usually designed to work with a class’s static data members.
Suppose you called PrintEmployee() from a non-Employee function (such as main()). You must precede this call with a refer-ence to an object:
employeePtr->PrintEmployee();
Whenever a member function is called, C++ keeps track of the ob-ject used to call the function. This object is known as the current ob-ject.
In the call of PrintEmployee() above, the object pointed to by employeePtr is the current object. Whenever this call of PrintEmployee() refers to an Employee data member or func-tion without using an object reference, the current object (in this case, the object pointed to by employeePtr) is assumed.
Suppose PrintEmployee() then called another Employee func-tion. The object pointed to by employeePtr is still considered the current object. A reference to employeeSalary would still refer to the current object’s copy of employeeSalary.
The point to remember is, a nonstatic member function always starts up with a single object in mind.
The “This” Object PointerC++ provides a generic object pointer, available inside any member function, that points to the current object. The generic pointer has

Object Programming BasicsDeleting an Object
92 Learn C++ under Windows 95/NT
the name “this”. For example, inside every Employee function, the line:
this->employeeSalary = 400;
is equivalent to this line:
employeeSalary = 400;
this is useful when a member function wants to return a pointer to the current object, pass the address of the current object on to an-other function, or just store the address somewhere. This line of code:
return this;
returns the address of the current object.
Deleting an ObjectWhen you create an object using new, you’ve got to take responsibil-ity for destroying the object at the appropriate time. Just as a C pro-grammer balances a call to malloc() with a call to free(), a C++ programmer balances each use of the new operator with an eventual use of the delete operator. Here’s the syntax:
Employee *employeePtr;
employeePtr = new Employee;
delete employeePtr;
Object Programming BasicsWriting Member Functions
Learn C++ under Windows 95/NT 93
As you’d expect, delete destroys the specified object, freeing up any memory allocated for the object. Note that this freed up mem-ory only includes memory for the actual object and does not include any extra memory you may have allocated.
For example, suppose the object is a structure and one of its data members is a pointer to another structure. When you delete the first structure, the second structure is not deleted.
Detail If delete is used with a pointer having a value of 0, delete does nothing. If the pointer has any other value delete will try to de-stroy the specified object.
Writing Member FunctionsOnce your structure is declared, you’re ready to write your member functions. Member functions behave in much the same way as ordi-nary functions, with a few small differences. One difference, pointed out earlier, is that a member function has access to the data mem-bers and member functions of the object used to call it.
Another difference lies in the function implementation’s title line. Here’s a sample:
void Employee::PrintEmployee(){cout << “Employee Name: “ << employeeName <<
“\n”;}
Notice that the function name is preceded by the class name and two colons. This notation is mandatory and tells the compiler that this function is a member of the specified class.
Object Programming BasicsWriting Member Functions
94 Learn C++ under Windows 95/NT
The Constructor FunctionTypically, when you create an object, you’ll want to perform some sort of initialization on the object. For instance, you might want to provide initial values for your object’s data members. The construc-tor function is C++’s built-in initialization mechanism.
The constructor function (or just plain constructor) is a member function that has the same name as the object’s class. For example, the constructor for the Employee class is named Employee(). When an object is created, the constructor for that class gets called.
Consider this code:
Employee *employeePtr;
employeePtr = new Employee;
In the second line, the new operator allocates a new Employee ob-ject, then immediately calls the object’s constructor. Once the con-structor returns, the address of the new object is assigned to employeePtr.
This same scenario holds true in this declaration:
Employee employee1;
As soon as the object is created, its constructor is called.
Here’s our Employee struct declaration with the constructor dec-laration added in:
const short kMaxNameSize = 20;
struct Employee{// Data members...
char employeeName[ kMaxNameSize ];long employeeID;
Object Programming BasicsWriting Member Functions
Learn C++ under Windows 95/NT 95
float employeeSalary;
// Member functions...Employee();
void PrintEmployee();};
Notice that the constructor is declared without a return value. Con-structors never return a value.
Here’s a sample constructor:
Employee::Employee(){employeeSalary = 200.0;
}
As mentioned earlier, the constructor is declared without a return value. This is proper form.
By the Way Constructors are optional. If you don’t have any initialization to per-form, don’t define one.
Adding Parameters to Your ConstructorIf you like, you can add parameters to your constructor. Constructor parameters are typically used to provide initial values for the ob-ject’s data members. Here’s a new version of the Employee() con-structor:
Employee::Employee( char *name, long id, float salary )
{strncpy( employeeName, name, kMaxNameSize );

Object Programming BasicsWriting Member Functions
96 Learn C++ under Windows 95/NT
employeeName[ kMaxNameSize - 1 ] = ‘\0’;
employeeID = id;employeeSalary = salary;
}
The constructor copies the three parameter values into the corre-sponding data members.
Detail Notice that strncpy() was used, ensuring that the copy will work, even if the source string was not properly terminated. A null termi-nator is provided at the end of the string for just such an emer-gency.
The object that was just created is always the constructor’s current object. In other words, when the constructor refers to an Employee data member, such as employeeName or employeeSalary, it is referring to the copy of that data member in the newly created ob-ject.
This line of code supplies the new operator with a set of parameters to pass on to the constructor:
employeePtr = new Employee( “Dave Mark”, 1000, 200.0 );
This line of code does the same thing without using new:
Employee employee1( “Dave Mark”, 1000, 200.0 );
As you’d expect, this code creates an object named employee1 by calling the Employee constructor, passing it the three specified pa-rameters.
Object Programming BasicsWriting Member Functions
Learn C++ under Windows 95/NT 97
Just for completeness, here’s the class declaration again, showing the new constructor:
struct Employee{// Data members...
char employeeName[ kMaxNameSize ];long employeeID;float employeeSalary;
// Member functions...Employee( char *name, long id,
float salary );void PrintEmployee();
};
The Destructor FunctionThe destructor function is called for you, just as the constructor is. Unlike the constructor, however, the destructor is called when an object in its class is deleted or goes out of scope. Use the destructor to clean up after your object before it goes away. For instance, you might use the destructor to deallocate any additional memory your object may have allocated.
The destructor function is named by a tilde character (~) followed by the class name. The destructor for the Employee class is named ~Employee(). The destructor has no return value and no parame-ters.
Here’s a sample destructor:
Employee::~Employee(){cout << “Deleting employee #” << employeeID <<
“\n”;}
Object Programming BasicsWriting Member Functions
98 Learn C++ under Windows 95/NT
By the Way Technically, the name of the Employee constructor is Employee::Employee() and the name of its destructor is Employee::~Employee(). Just thought you’d like to know.
If you created your object using new, the destructor is called when you use delete:
Employee *employeePtr;
employeePtr = new Employee;
delete employeePtr;
If your object was defined directly, the destructor is called just be-fore the object is destroyed. For example, if the object was declared at the beginning of a function, the destructor is called when the function exits.
By the Way If your object was declared as a global or static variable, its con-structor will be called at the beginning of the program and its de-structor will be called just before the program exits. Yes, global objects have scope, just as local objects do.
Here’s an updated Employee class declaration showing the con-structor and destructor:
class Employee{// Data members...
char employeeName[ kMaxNameSize ];long employeeID;float employeeSalary;
// Member functions...Employee( char *name, long id,

Object Programming BasicsAccess Privileges
Learn C++ under Windows 95/NT 99
float salary );~Employee();
void PrintEmployee();};
Access PrivilegesWhen you declare a class, you need to decide which data members and functions you’d like to make available to the rest of your pro-gram. C++ gives you the power to hide a class’s functions and data from all the other functions in your program, or allow access to a se-lect few.
For example, consider the Employee class we’ve been working with throughout the chapter. In the current model, an Employee’s name is stored in a single array of chars. Suppose you wrote some code that created a new Employee, specifying the name, id, and salary, then later in your program you decided to modify the Employee’s name, perhaps adding a middle name provided while your program was running.
With the current design, you could access and modify the Employee’s employeeName data member from anywhere in your program. As time passes and your program becomes more complex, you might find yourself accessing employeeName from several places in your code.
Now imagine what happens when you decide to change the imple-mentation of employeeName. For example, you might decide to break the single employeeName into three separate data members, one each for the first, middle, and last names. Imagine the hassle of having to pore through your code finding and modifying every sin-gle reference to employeeName, making sure you adhere to the brand new model.
C++ allows you to hide the implementation details of a class (the specific type of each data member, for example), funneling all access to the implementation through a specific set of interface routines. By hiding the implementation details, the rest of your program is forced to go through the interface routines your class provides. That
Object Programming BasicsAccess Privileges
100 Learn C++ under Windows 95/NT
way, when you change the implementation, all you have to do is make whatever changes are necessary to the class’s interface, with-out having to modify the rest of your program.
The mechanism C++ provides to control access to your class’s im-plementation is called the access specifier.
Access SpecifiersC++ allows you to assign an access specifier to any of a class’s data members and member functions. The access specifier defines which of your program’s functions have access to the specified data mem-ber or function. The access specifier must be public, private, or protected.
If a data member or function is marked as private, access to it is limited to member functions of the same class (or, as you’ll see later in the chapter, to classes or member functions marked as a friend of the class).
On the flip side, the public specifier gives complete access to the member function or data member, limited only by scope.
By the Way The third C++ access code is protected. The protected ac-cess code offers the same protection as private, with one excep-tion. A protected data member or function can also be accessed by a class derived from the current class. Since we won’t get to de-rived classes till later in the book, we’ll put off discussion of the protected access code till then.
By default, the data members and member functions of a class de-clared using the struct keyword are all public. By adding the private keyword to our class declaration, we can limit access to the Employee data members, forcing the outside world to go through the provided member functions:
struct Employee{// Data members...
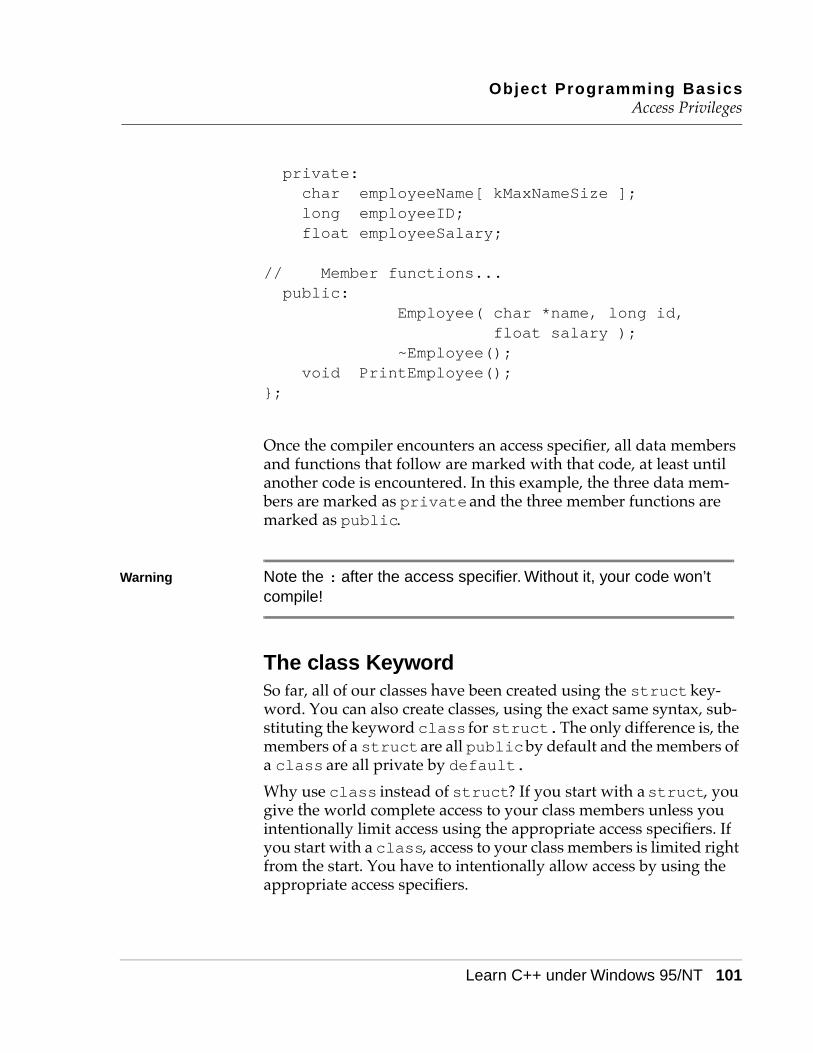
Object Programming BasicsAccess Privileges
Learn C++ under Windows 95/NT 101
private:char employeeName[ kMaxNameSize ];long employeeID;float employeeSalary;
// Member functions...public:
Employee( char *name, long id, float salary );
~Employee();void PrintEmployee();
};
Once the compiler encounters an access specifier, all data members and functions that follow are marked with that code, at least until another code is encountered. In this example, the three data mem-bers are marked as private and the three member functions are marked as public.
Warning Note the : after the access specifier. Without it, your code won’t compile!
The class KeywordSo far, all of our classes have been created using the struct key-word. You can also create classes, using the exact same syntax, sub-stituting the keyword class for struct. The only difference is, the members of a struct are all public by default and the members of a class are all private by default.
Why use class instead of struct? If you start with a struct, you give the world complete access to your class members unless you intentionally limit access using the appropriate access specifiers. If you start with a class, access to your class members is limited right from the start. You have to intentionally allow access by using the appropriate access specifiers.

Object Programming BasicsBringing It All Together
102 Learn C++ under Windows 95/NT
For the remainder of this book, we’ll use the class keyword to de-clare our classes. Here’s the new version of the Employee class:
class Employee{// Data members...private:char employeeName[ kMaxNameSize ];long employeeID;float employeeSalary;
// Member functions...public:
Employee( char *name, long id, float salary );
~Employee();void PrintEmployee();
};
Notice that the private access specifier is still in place. Since the members of a class-based class are private by default, the private access specifier is not needed here, but it does make the code a little easier to read. The public access specifier is necessary, however, to give the rest of the program access to the Employee member functions.
Bringing It All TogetherWith all that we’ve covered so far, we’re about ready for our next sample program. Employee.cwp brings these concepts together.
An Object Programming ExampleIf CodeWarrior is already running, close the current project by se-lecting Close from the File menu. If CodeWarrior isn’t running, launch it by selecting Programs from the Start menu, then selecting
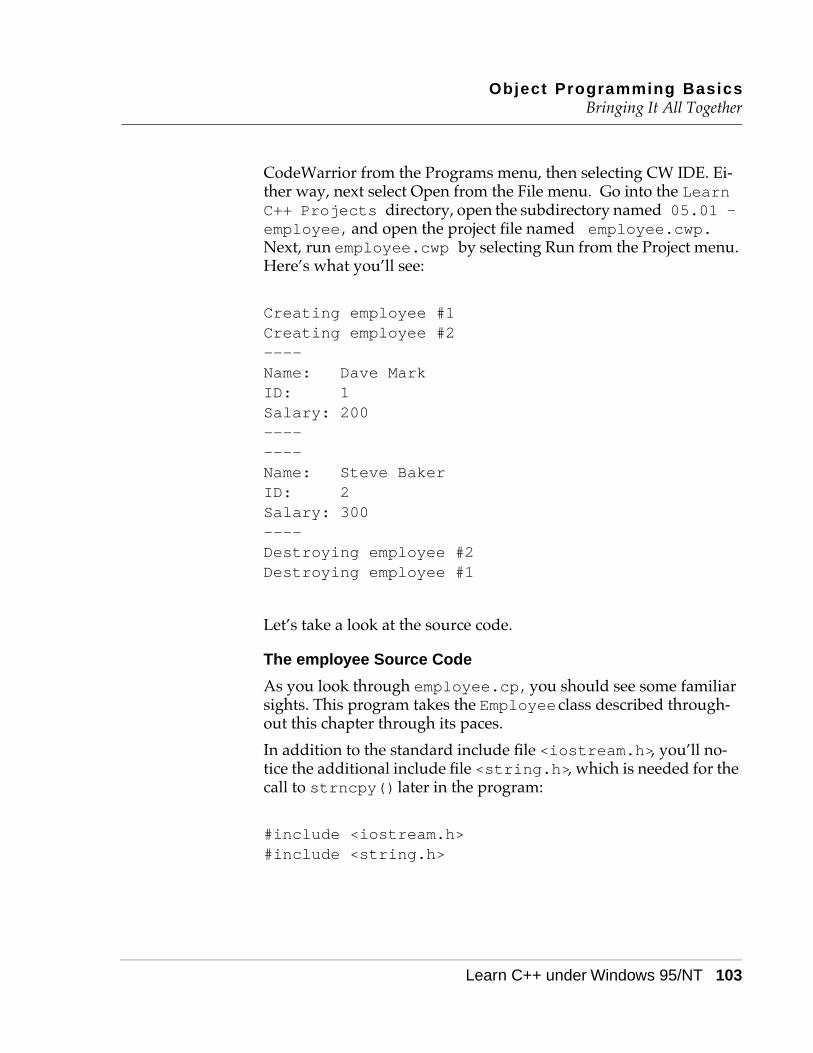
Object Programming BasicsBringing It All Together
Learn C++ under Windows 95/NT 103
CodeWarrior from the Programs menu, then selecting CW IDE. Ei-ther way, next select Open from the File menu. Go into the Learn C++ Projects directory, open the subdirectory named 05.01 - employee, and open the project file named employee.cwp. Next, run employee.cwp by selecting Run from the Project menu. Here’s what you’ll see:
Creating employee #1Creating employee #2----Name: Dave MarkID: 1Salary: 200--------Name: Steve BakerID: 2Salary: 300----Destroying employee #2Destroying employee #1
Let’s take a look at the source code.
The employee Source Code
As you look through employee.cp, you should see some familiar sights. This program takes the Employee class described through-out this chapter through its paces.
In addition to the standard include file <iostream.h>, you’ll no-tice the additional include file <string.h>, which is needed for the call to strncpy() later in the program:
#include <iostream.h>#include <string.h>
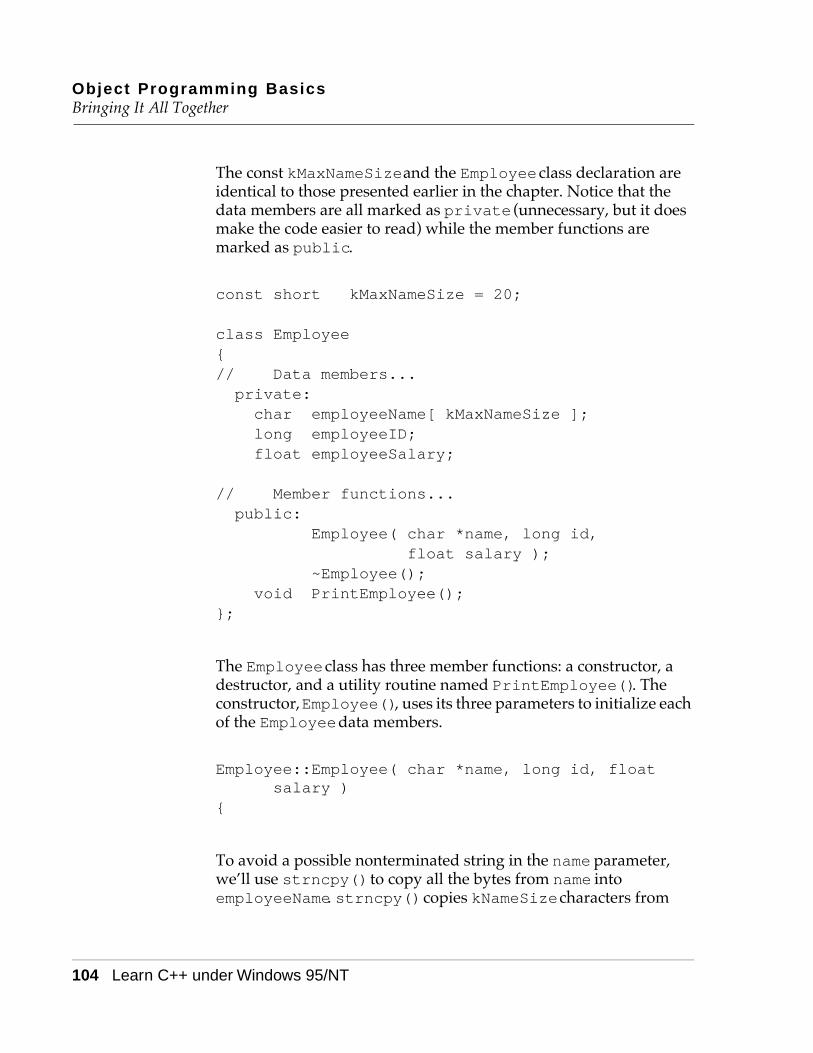
Object Programming BasicsBringing It All Together
104 Learn C++ under Windows 95/NT
The const kMaxNameSize and the Employee class declaration are identical to those presented earlier in the chapter. Notice that the data members are all marked as private (unnecessary, but it does make the code easier to read) while the member functions are marked as public.
const short kMaxNameSize = 20;
class Employee{// Data members...private:char employeeName[ kMaxNameSize ];long employeeID;float employeeSalary;
// Member functions...public:
Employee( char *name, long id, float salary );
~Employee();void PrintEmployee();
};
The Employee class has three member functions: a constructor, a destructor, and a utility routine named PrintEmployee(). The constructor, Employee(), uses its three parameters to initialize each of the Employee data members.
Employee::Employee( char *name, long id, float salary )
{
To avoid a possible nonterminated string in the name parameter, we’ll use strncpy() to copy all the bytes from name into employeeName. strncpy() copies kNameSize characters from
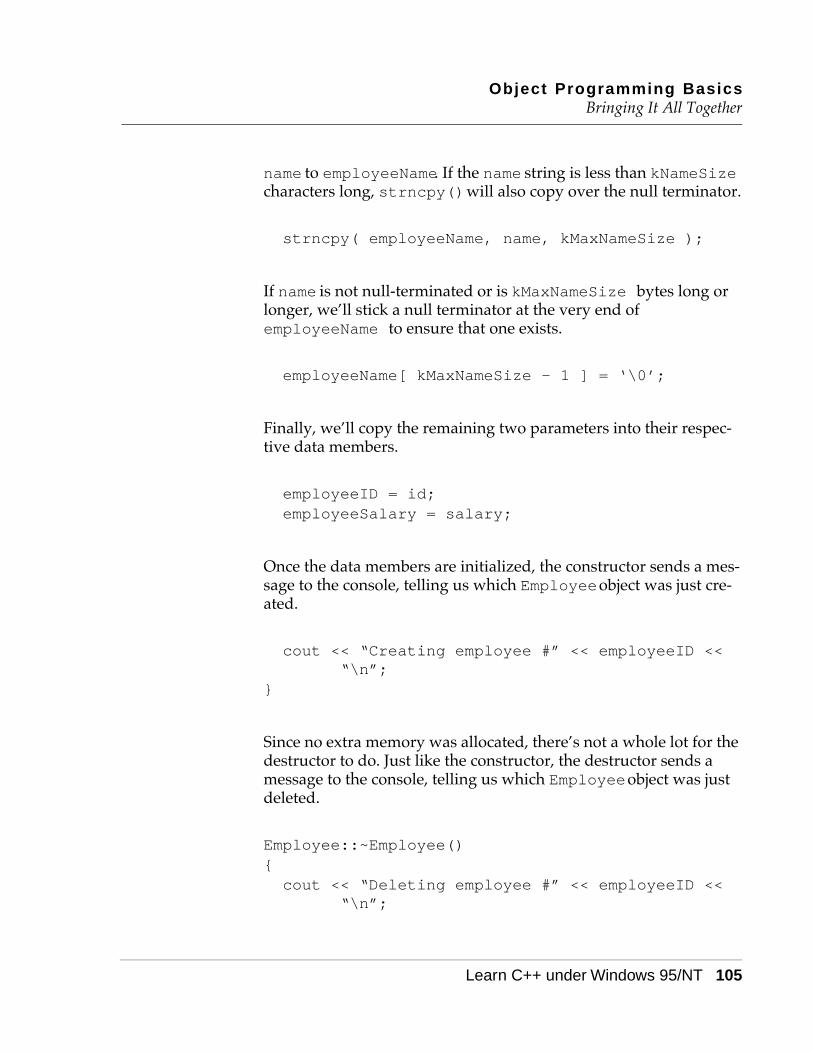
Object Programming BasicsBringing It All Together
Learn C++ under Windows 95/NT 105
name to employeeName. If the name string is less than kNameSize characters long, strncpy() will also copy over the null terminator.
strncpy( employeeName, name, kMaxNameSize );
If name is not null-terminated or is kMaxNameSize bytes long or longer, we’ll stick a null terminator at the very end of employeeName to ensure that one exists.
employeeName[ kMaxNameSize - 1 ] = ‘\0’;
Finally, we’ll copy the remaining two parameters into their respec-tive data members.
employeeID = id;employeeSalary = salary;
Once the data members are initialized, the constructor sends a mes-sage to the console, telling us which Employee object was just cre-ated.
cout << “Creating employee #” << employeeID << “\n”;
}
Since no extra memory was allocated, there’s not a whole lot for the destructor to do. Just like the constructor, the destructor sends a message to the console, telling us which Employee object was just deleted.
Employee::~Employee(){cout << “Deleting employee #” << employeeID <<
“\n”;
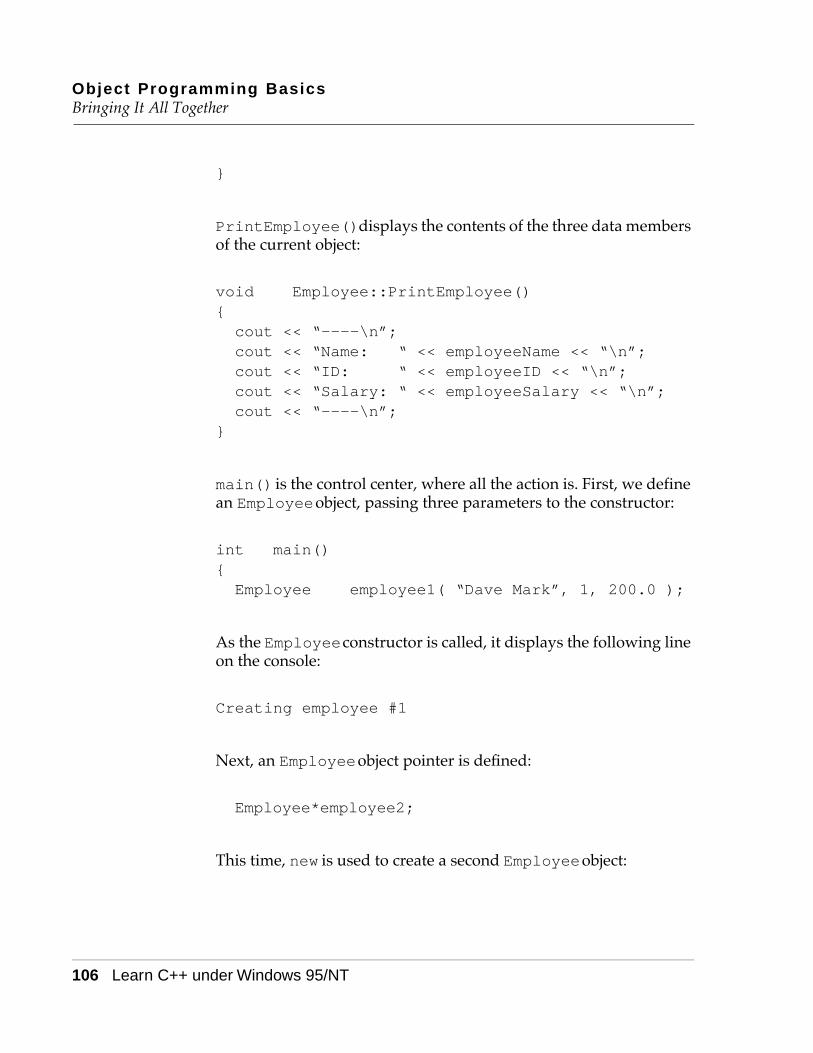
Object Programming BasicsBringing It All Together
106 Learn C++ under Windows 95/NT
}
PrintEmployee() displays the contents of the three data members of the current object:
void Employee::PrintEmployee(){cout << “----\n”;cout << “Name: “ << employeeName << “\n”;cout << “ID: “ << employeeID << “\n”;cout << “Salary: “ << employeeSalary << “\n”;cout << “----\n”;
}
main() is the control center, where all the action is. First, we define an Employee object, passing three parameters to the constructor:
int main(){Employee employee1( “Dave Mark”, 1, 200.0 );
As the Employee constructor is called, it displays the following line on the console:
Creating employee #1
Next, an Employee object pointer is defined:
Employee*employee2;
This time, new is used to create a second Employee object:
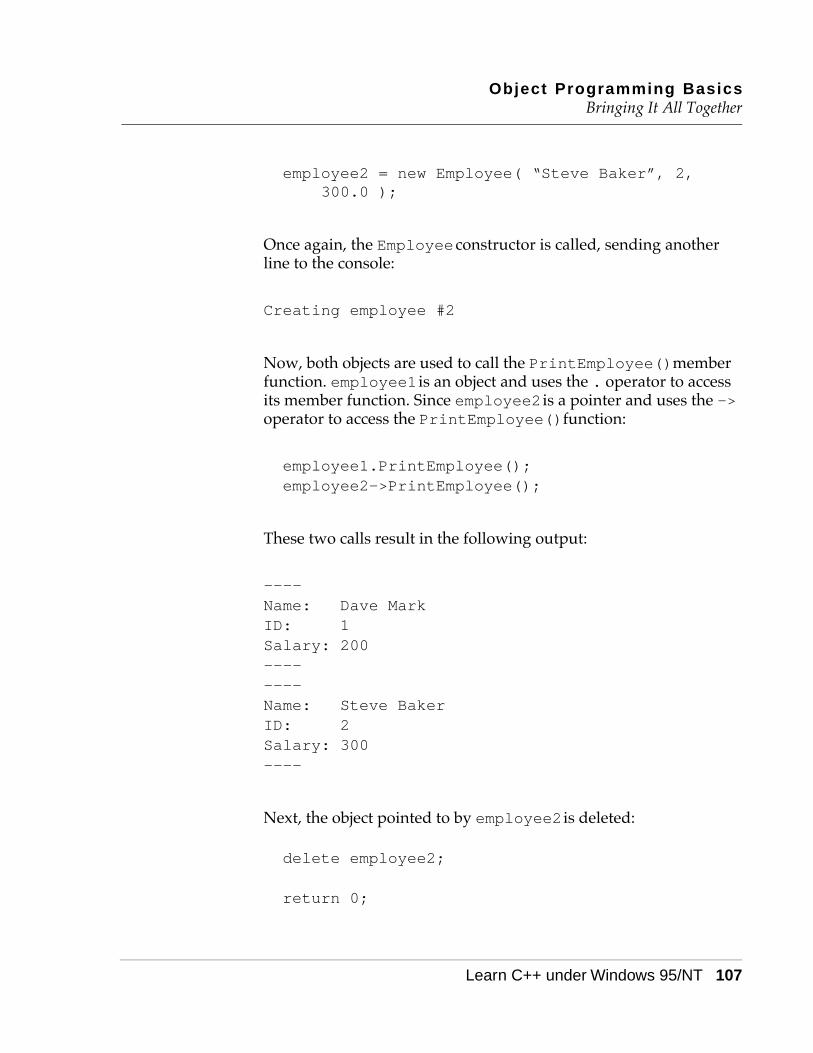
Object Programming BasicsBringing It All Together
Learn C++ under Windows 95/NT 107
employee2 = new Employee( “Steve Baker”, 2, 300.0 );
Once again, the Employee constructor is called, sending another line to the console:
Creating employee #2
Now, both objects are used to call the PrintEmployee() member function. employee1 is an object and uses the . operator to access its member function. Since employee2 is a pointer and uses the -> operator to access the PrintEmployee() function:
employee1.PrintEmployee();employee2->PrintEmployee();
These two calls result in the following output:
----Name: Dave MarkID: 1Salary: 200--------Name: Steve BakerID: 2Salary: 300----
Next, the object pointed to by employee2 is deleted:
delete employee2;
return 0;
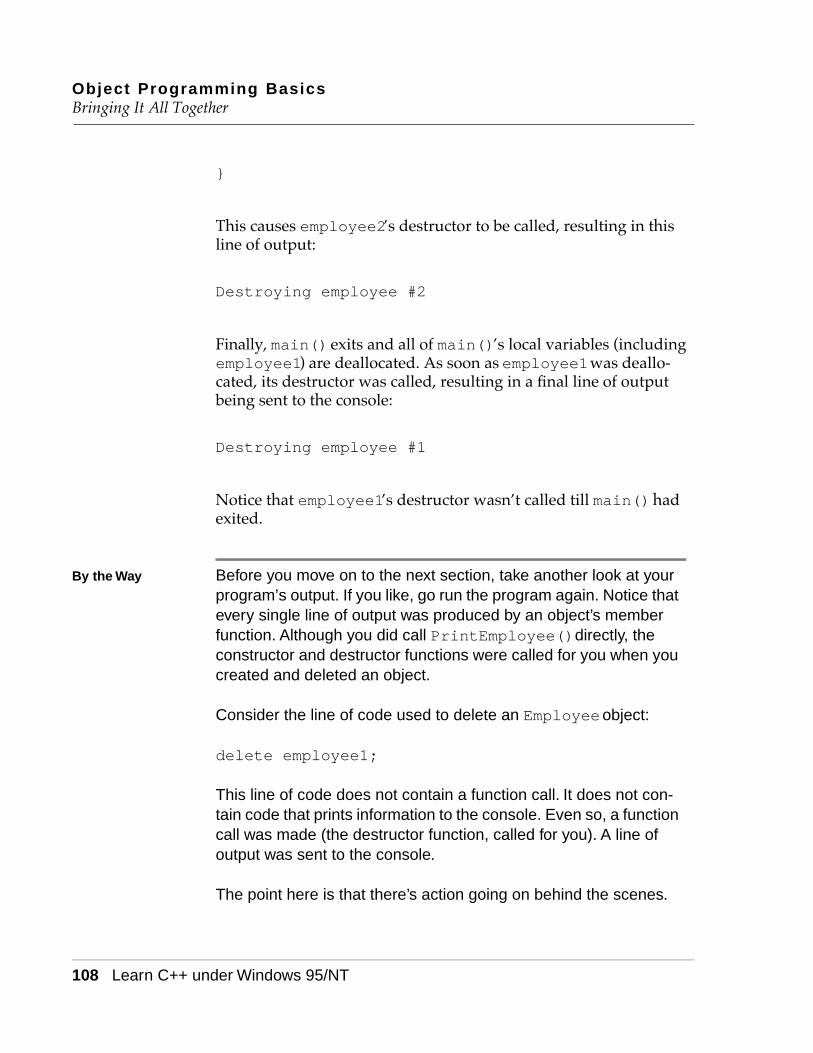
Object Programming BasicsBringing It All Together
108 Learn C++ under Windows 95/NT
}
This causes employee2’s destructor to be called, resulting in this line of output:
Destroying employee #2
Finally, main() exits and all of main()’s local variables (including employee1) are deallocated. As soon as employee1 was deallo-cated, its destructor was called, resulting in a final line of output being sent to the console:
Destroying employee #1
Notice that employee1’s destructor wasn’t called till main() had exited.
By the Way Before you move on to the next section, take another look at your program’s output. If you like, go run the program again. Notice that every single line of output was produced by an object’s member function. Although you did call PrintEmployee() directly, the constructor and destructor functions were called for you when you created and deleted an object.
Consider the line of code used to delete an Employee object:
delete employee1;
This line of code does not contain a function call. It does not con-tain code that prints information to the console. Even so, a function call was made (the destructor function, called for you). A line of output was sent to the console.
The point here is that there’s action going on behind the scenes.

Object Programming BasicsFriends
Learn C++ under Windows 95/NT 109
Stuff happens automatically. You delete an object, the destructor gets called for you. This might seem like a minor point, but this is your first peek at the power of object programming.
FriendsIn our last program, the Employee class marked its data members as private and its member functions as public. As we discussed earlier, the idea behind this strategy is to hide the implementation details of a class from the rest of the program, funneling all access to the class’s data members through a set of interface routines.
For example, suppose we wanted to provide access to the Employee class’s employeeSalary data member. Since employeeSalary is marked as private, there’s no way to access this data member outside the Employee class. If we wanted to, we could provide a pair of public member functions a user of the Employee class could use to retrieve (GetEmployeeSalary()) and modify (ChangeEmployeeSalary()) the value of employeeSalary.
Sometimes this strategy just doesn’t cut it. For example, suppose you created a Payroll class to generate paychecks for your Employees. Clearly, the Payroll class is going to need access to an Employee’s salary. But if you create a public GetEmployeeSalary() member function (or mark employeeSalary as public) you’ll make employeeSalary available to the entire program, something you might not want to do.
The solution to this problem is provided by C++’s friend mecha-nism. C++ allows you to designate a class or a single member func-tion as a friend to a specific class. In the previous example, we could designate the Payroll class as a friend to the Employee class:
class Employee{
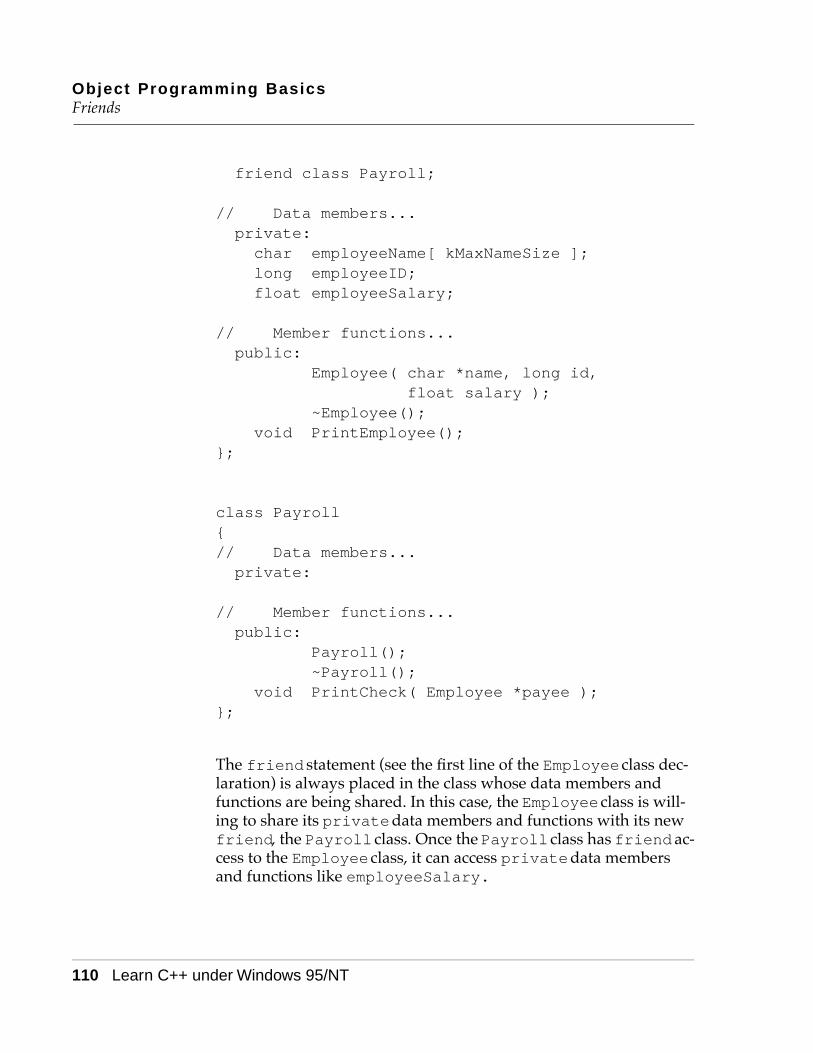
Object Programming BasicsFriends
110 Learn C++ under Windows 95/NT
friend class Payroll;
// Data members...private:char employeeName[ kMaxNameSize ];long employeeID;float employeeSalary;
// Member functions...public:
Employee( char *name, long id, float salary );
~Employee();void PrintEmployee();
};
class Payroll{// Data members...private:
// Member functions...public:
Payroll();~Payroll();
void PrintCheck( Employee *payee );};
The friend statement (see the first line of the Employee class dec-laration) is always placed in the class whose data members and functions are being shared. In this case, the Employee class is will-ing to share its private data members and functions with its new friend, the Payroll class. Once the Payroll class has friend ac-cess to the Employee class, it can access private data members and functions like employeeSalary.
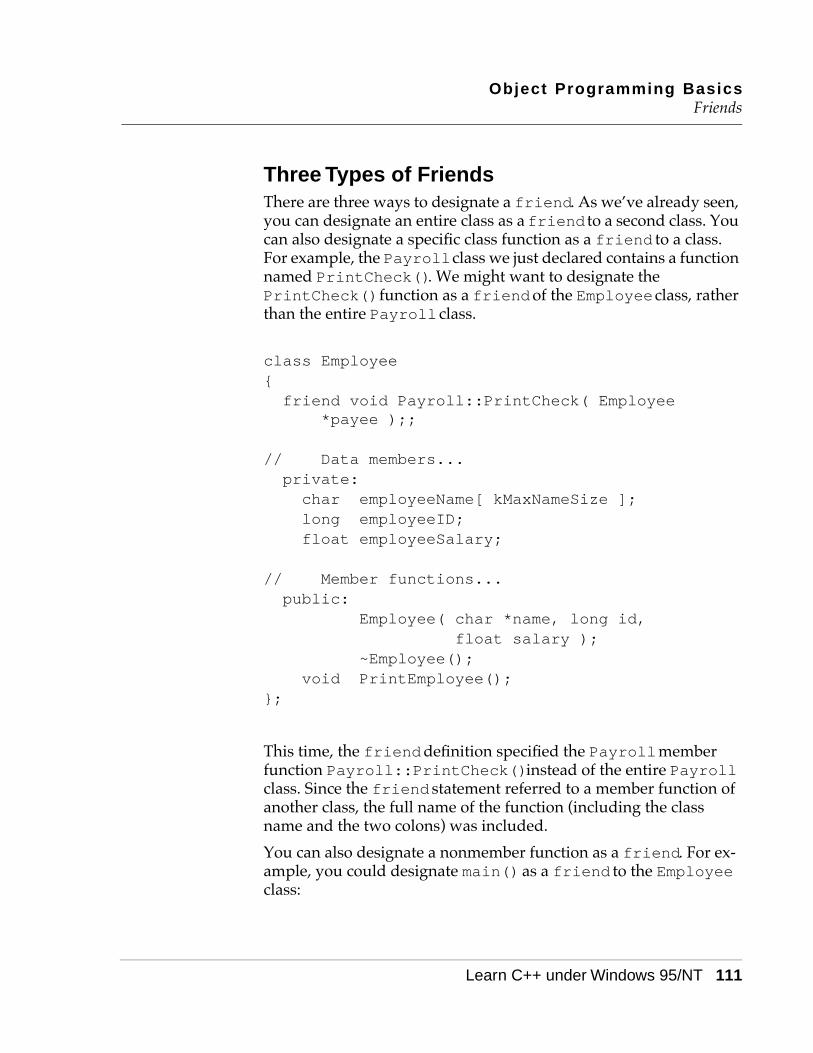
Object Programming BasicsFriends
Learn C++ under Windows 95/NT 111
Three Types of FriendsThere are three ways to designate a friend. As we’ve already seen, you can designate an entire class as a friend to a second class. You can also designate a specific class function as a friend to a class. For example, the Payroll class we just declared contains a function named PrintCheck(). We might want to designate the PrintCheck() function as a friend of the Employee class, rather than the entire Payroll class.
class Employee{friend void Payroll::PrintCheck( Employee
*payee );;
// Data members...private:char employeeName[ kMaxNameSize ];long employeeID;float employeeSalary;
// Member functions...public:
Employee( char *name, long id, float salary );
~Employee();void PrintEmployee();
};
This time, the friend definition specified the Payroll member function Payroll::PrintCheck() instead of the entire Payroll class. Since the friend statement referred to a member function of another class, the full name of the function (including the class name and the two colons) was included.
You can also designate a nonmember function as a friend. For ex-ample, you could designate main() as a friend to the Employee class:
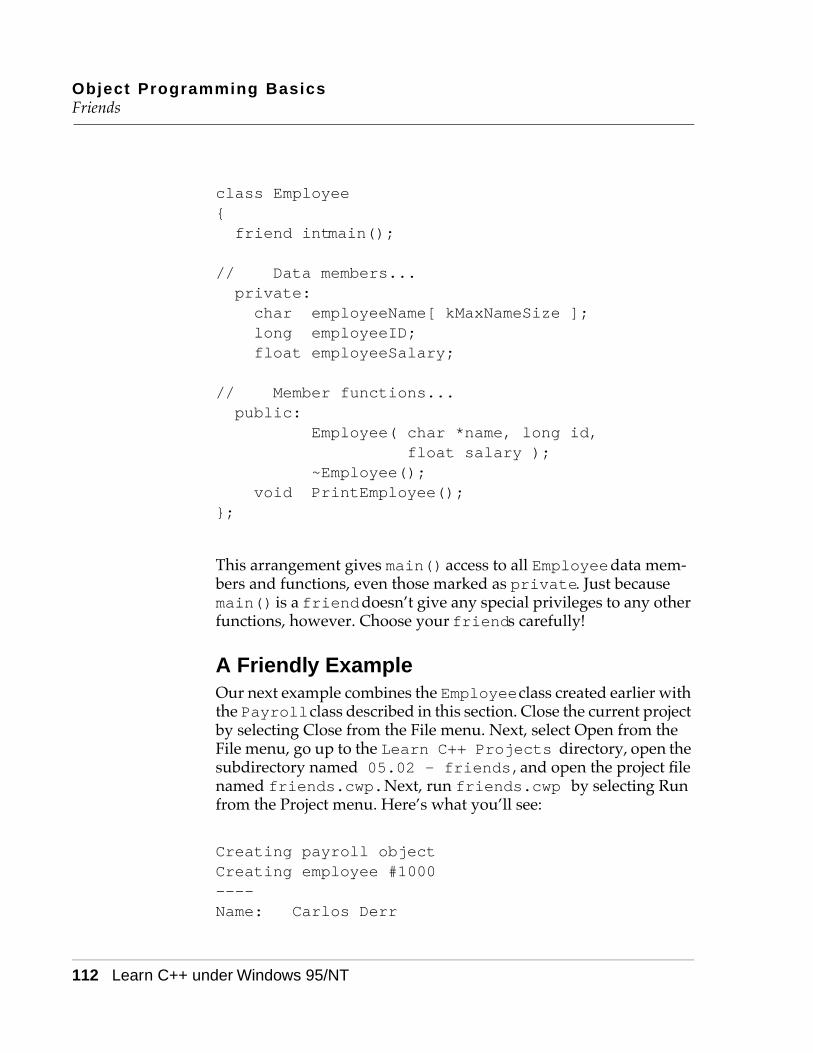
Object Programming BasicsFriends
112 Learn C++ under Windows 95/NT
class Employee{friend intmain();
// Data members...private:char employeeName[ kMaxNameSize ];long employeeID;float employeeSalary;
// Member functions...public:
Employee( char *name, long id, float salary );
~Employee();void PrintEmployee();
};
This arrangement gives main() access to all Employee data mem-bers and functions, even those marked as private. Just because main() is a friend doesn’t give any special privileges to any other functions, however. Choose your friends carefully!
A Friendly ExampleOur next example combines the Employee class created earlier with the Payroll class described in this section. Close the current project by selecting Close from the File menu. Next, select Open from the File menu, go up to the Learn C++ Projects directory, open the subdirectory named 05.02 - friends, and open the project file named friends.cwp. Next, run friends.cwp by selecting Run from the Project menu. Here’s what you’ll see:
Creating payroll objectCreating employee #1000----Name: Carlos Derr
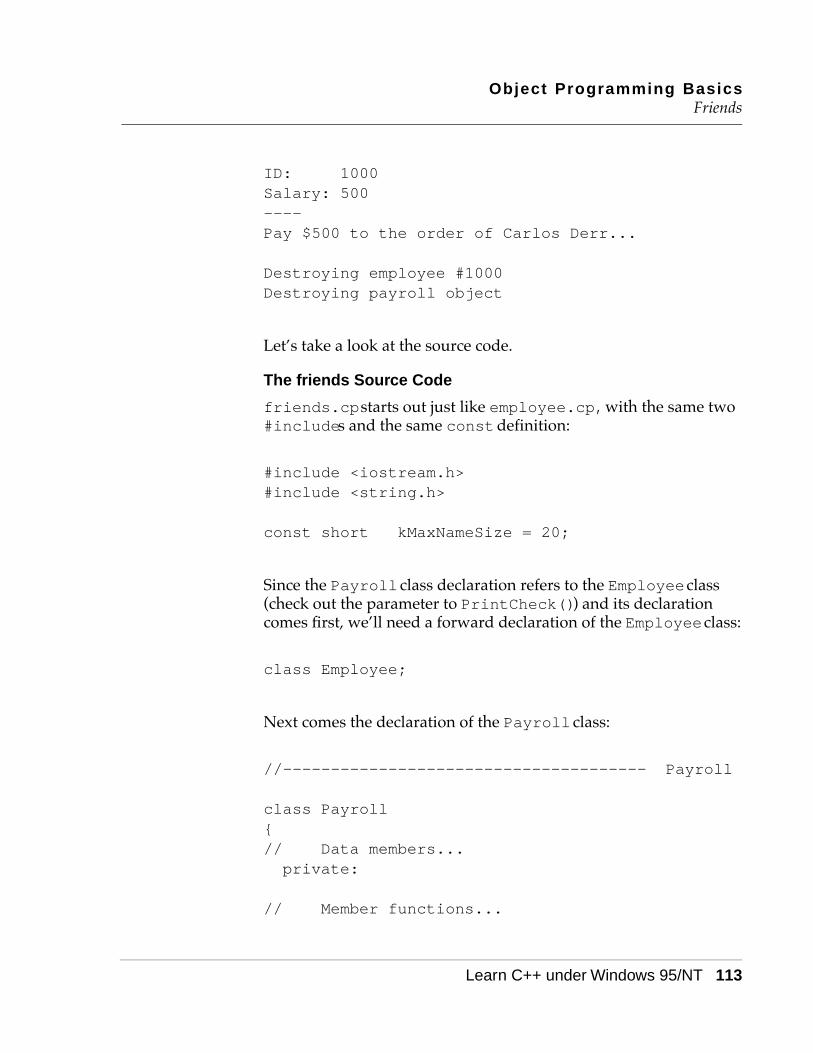
Object Programming BasicsFriends
Learn C++ under Windows 95/NT 113
ID: 1000Salary: 500----Pay $500 to the order of Carlos Derr...
Destroying employee #1000Destroying payroll object
Let’s take a look at the source code.
The friends Source Code
friends.cp starts out just like employee.cp, with the same two #includes and the same const definition:
#include <iostream.h>#include <string.h>
const short kMaxNameSize = 20;
Since the Payroll class declaration refers to the Employee class (check out the parameter to PrintCheck()) and its declaration comes first, we’ll need a forward declaration of the Employee class:
class Employee;
Next comes the declaration of the Payroll class:
//-------------------------------------- Payroll
class Payroll{// Data members...private:
// Member functions...
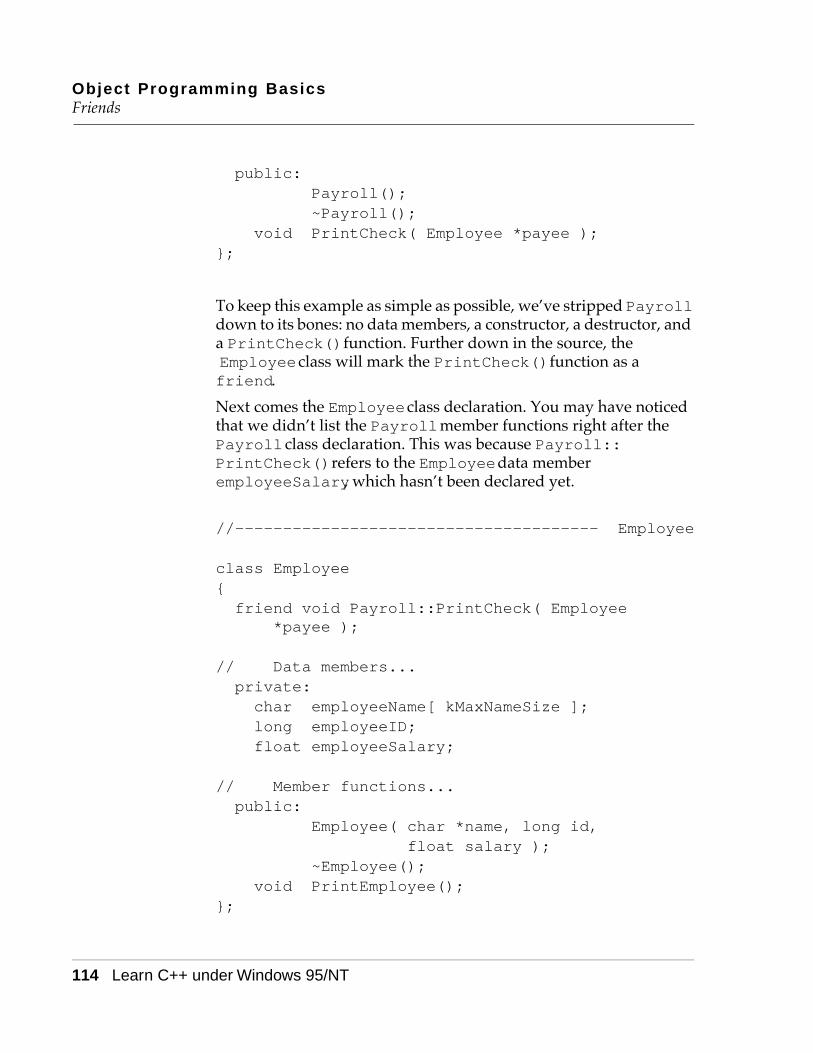
Object Programming BasicsFriends
114 Learn C++ under Windows 95/NT
public:Payroll();~Payroll();
void PrintCheck( Employee *payee );};
To keep this example as simple as possible, we’ve stripped Payroll down to its bones: no data members, a constructor, a destructor, and a PrintCheck() function. Further down in the source, the Employee class will mark the PrintCheck() function as a friend.
Next comes the Employee class declaration. You may have noticed that we didn’t list the Payroll member functions right after the Payroll class declaration. This was because Payroll::PrintCheck() refers to the Employee data member employeeSalary, which hasn’t been declared yet.
//-------------------------------------- Employee
class Employee{friend void Payroll::PrintCheck( Employee
*payee );
// Data members...private:char employeeName[ kMaxNameSize ];long employeeID;float employeeSalary;
// Member functions...public:
Employee( char *name, long id, float salary );
~Employee();void PrintEmployee();
};
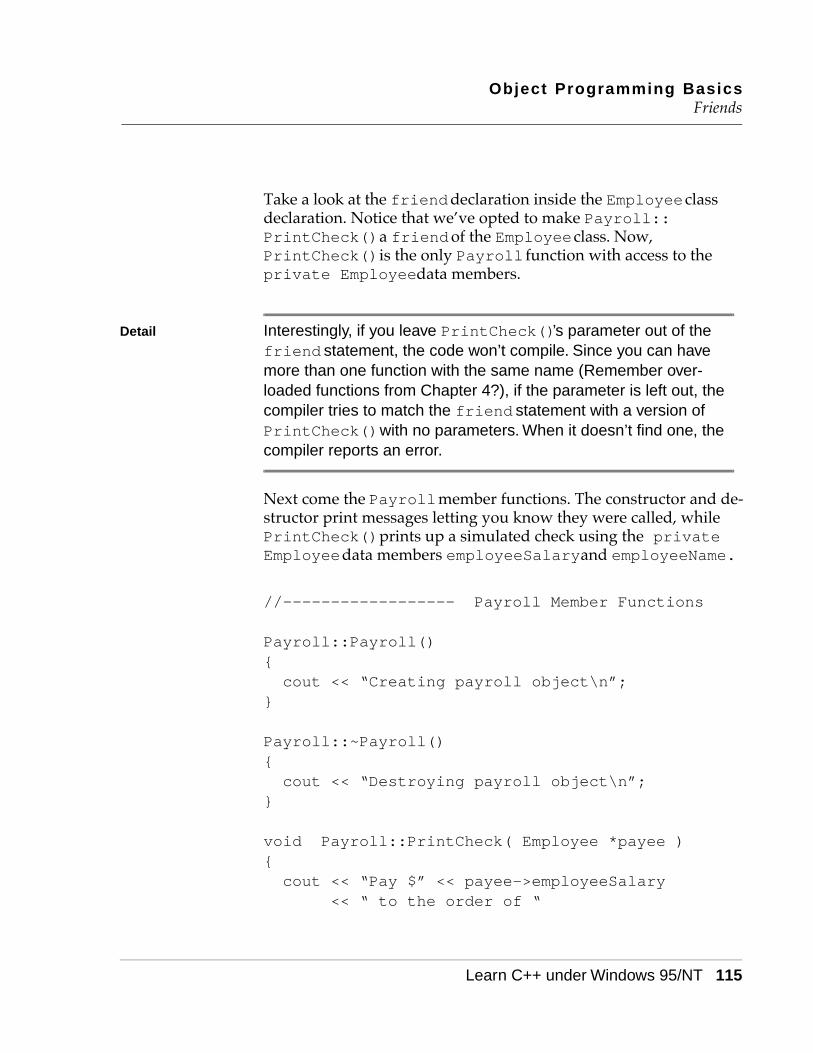
Object Programming BasicsFriends
Learn C++ under Windows 95/NT 115
Take a look at the friend declaration inside the Employee class declaration. Notice that we’ve opted to make Payroll::PrintCheck() a friend of the Employee class. Now, PrintCheck() is the only Payroll function with access to the private Employee data members.
Detail Interestingly, if you leave PrintCheck()’s parameter out of the friend statement, the code won’t compile. Since you can have more than one function with the same name (Remember over-loaded functions from Chapter 4?), if the parameter is left out, the compiler tries to match the friend statement with a version of PrintCheck() with no parameters. When it doesn’t find one, the compiler reports an error.
Next come the Payroll member functions. The constructor and de-structor print messages letting you know they were called, while PrintCheck() prints up a simulated check using the private Employee data members employeeSalary and employeeName.
//------------------ Payroll Member Functions
Payroll::Payroll(){cout << “Creating payroll object\n”;
}
Payroll::~Payroll(){cout << “Destroying payroll object\n”;
}
void Payroll::PrintCheck( Employee *payee ){cout << “Pay $” << payee->employeeSalary << “ to the order of “
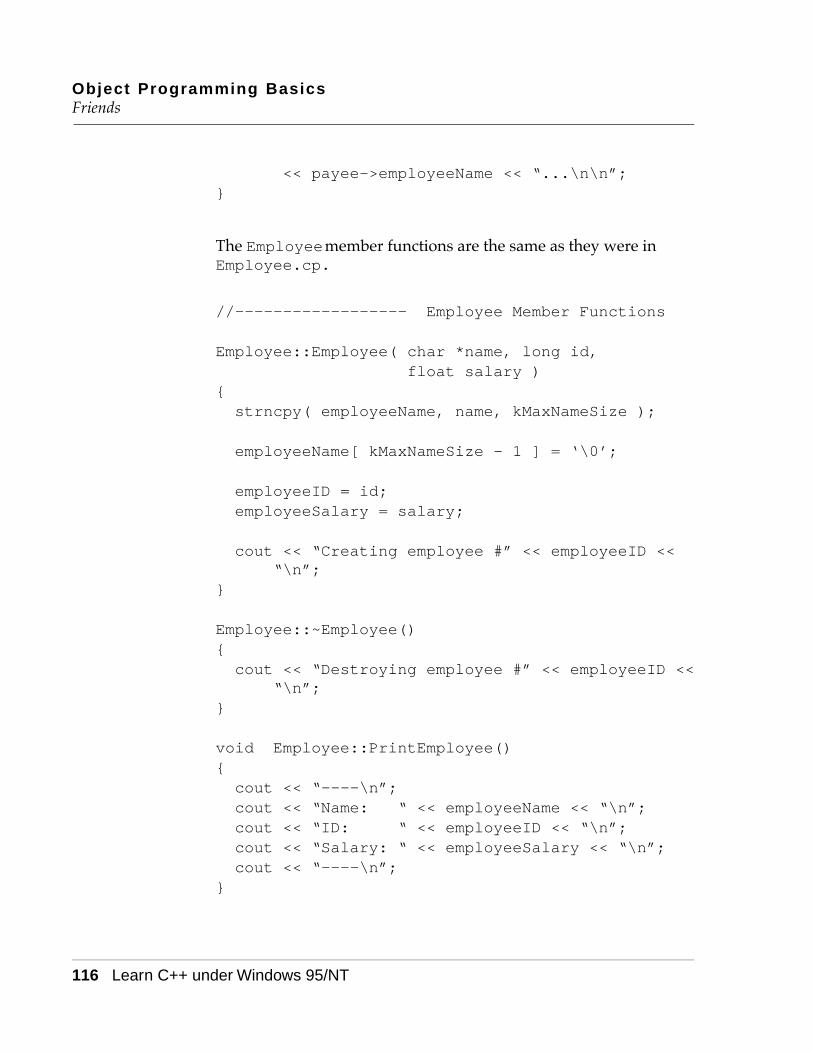
Object Programming BasicsFriends
116 Learn C++ under Windows 95/NT
<< payee->employeeName << “...\n\n”;}
The Employee member functions are the same as they were in Employee.cp.
//------------------ Employee Member Functions
Employee::Employee( char *name, long id, float salary )
{strncpy( employeeName, name, kMaxNameSize );
employeeName[ kMaxNameSize - 1 ] = ‘\0’;
employeeID = id;employeeSalary = salary;
cout << “Creating employee #” << employeeID << “\n”;
}
Employee::~Employee(){cout << “Destroying employee #” << employeeID <<
“\n”;}
void Employee::PrintEmployee(){cout << “----\n”;cout << “Name: “ << employeeName << “\n”;cout << “ID: “ << employeeID << “\n”;cout << “Salary: “ << employeeSalary << “\n”;cout << “----\n”;
}
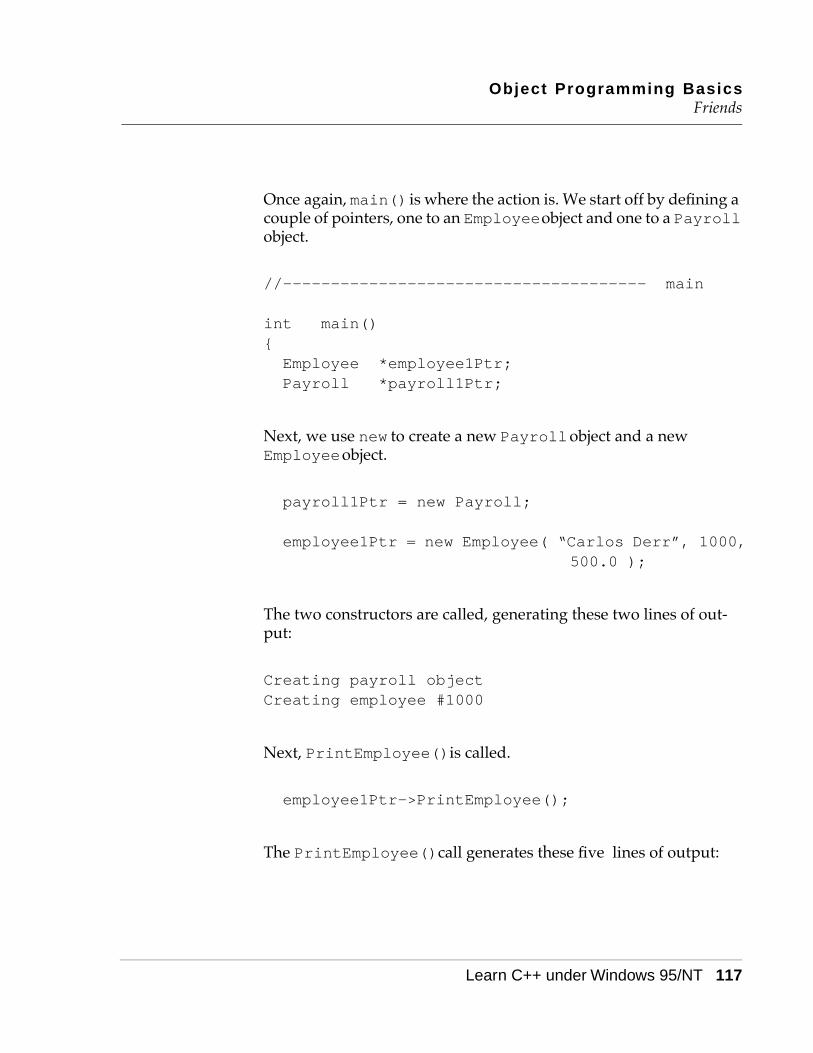
Object Programming BasicsFriends
Learn C++ under Windows 95/NT 117
Once again, main() is where the action is. We start off by defining a couple of pointers, one to an Employee object and one to a Payroll object.
//-------------------------------------- main
int main(){Employee *employee1Ptr;Payroll *payroll1Ptr;
Next, we use new to create a new Payroll object and a new Employee object.
payroll1Ptr = new Payroll;
employee1Ptr = new Employee( “Carlos Derr”, 1000, 500.0 );
The two constructors are called, generating these two lines of out-put:
Creating payroll objectCreating employee #1000
Next, PrintEmployee() is called.
employee1Ptr->PrintEmployee();
The PrintEmployee() call generates these five lines of output:
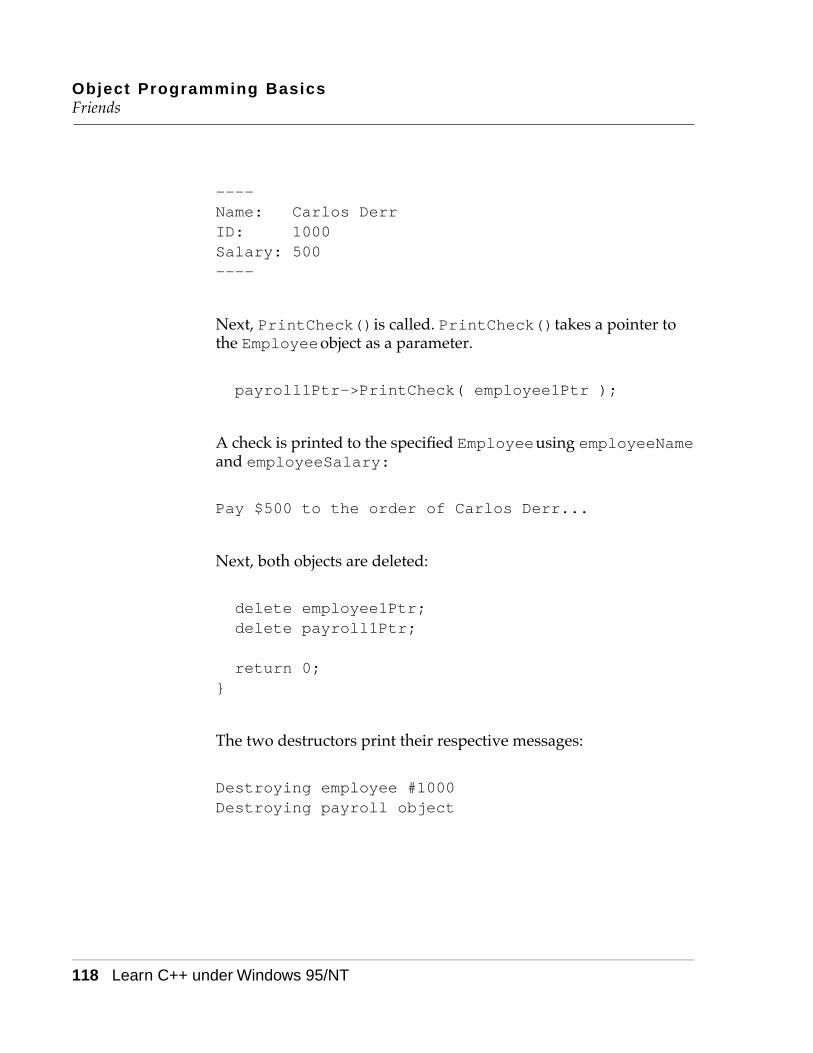
Object Programming BasicsFriends
118 Learn C++ under Windows 95/NT
----Name: Carlos DerrID: 1000Salary: 500----
Next, PrintCheck() is called. PrintCheck() takes a pointer to the Employee object as a parameter.
payroll1Ptr->PrintCheck( employee1Ptr );
A check is printed to the specified Employee using employeeName and employeeSalary:
Pay $500 to the order of Carlos Derr...
Next, both objects are deleted:
delete employee1Ptr;delete payroll1Ptr;
return 0;}
The two destructors print their respective messages:
Destroying employee #1000Destroying payroll object
Object Programming BasicsSummary
Learn C++ under Windows 95/NT 119
SummarySo far, you’ve gotten a taste of object programming. You’ve learned how to create a class and how to define objects of that class, either directly or by using new. You’ve learned about constructors and de-structors and you’ve seen how these routines are called when an ob-ject is created or destroyed.
You’ve learned the difference between private and public data members and functions. You’ve also learned how to establish a friend relationship between a class and another class or function.
Perhaps most important of all, you’ve started down a new program-ming path. You are now well on your way to becoming an object programmer. Our next chapter, Chapter 6, will take you further down that path, exploring some of the fundamental techniques you’ll want to develop as your C++ programs become more and more sophisticated.
Object Programming BasicsSummary
120 Learn C++ under Windows 95/NT
Learn C++ under Windows 95/NT 121
6Derived ClassesC++ allows you to use one class declaration, known as a base class, as the basis for the declaration of a second class, known as a derived class. For example, you might declare an Employee class that de-scribes your company’s employees. Next, you might declare a Sales class, based on the Employee class, that describes employees in the sales department.
This chapter is filled with examples that emphasize the advantages of classes derived from other classes. As you read through the chap-ter, focus on the syntax and techniques demonstrated by each exam-ple. The mechanics and philosophy presented here form the body and soul of that part of object programming known as class der-ivation.
InheritanceOne of the most important features of class derivation is inherit-ance. Just like the cherished heirlooms you hope to inherit from your granduncle Morty, a derived class inherits all of the data mem-bers and member functions from its base class.
As an example, consider the following class declaration:
class Base{public:short baseMember;
void SetBaseMember( short baseValue );};
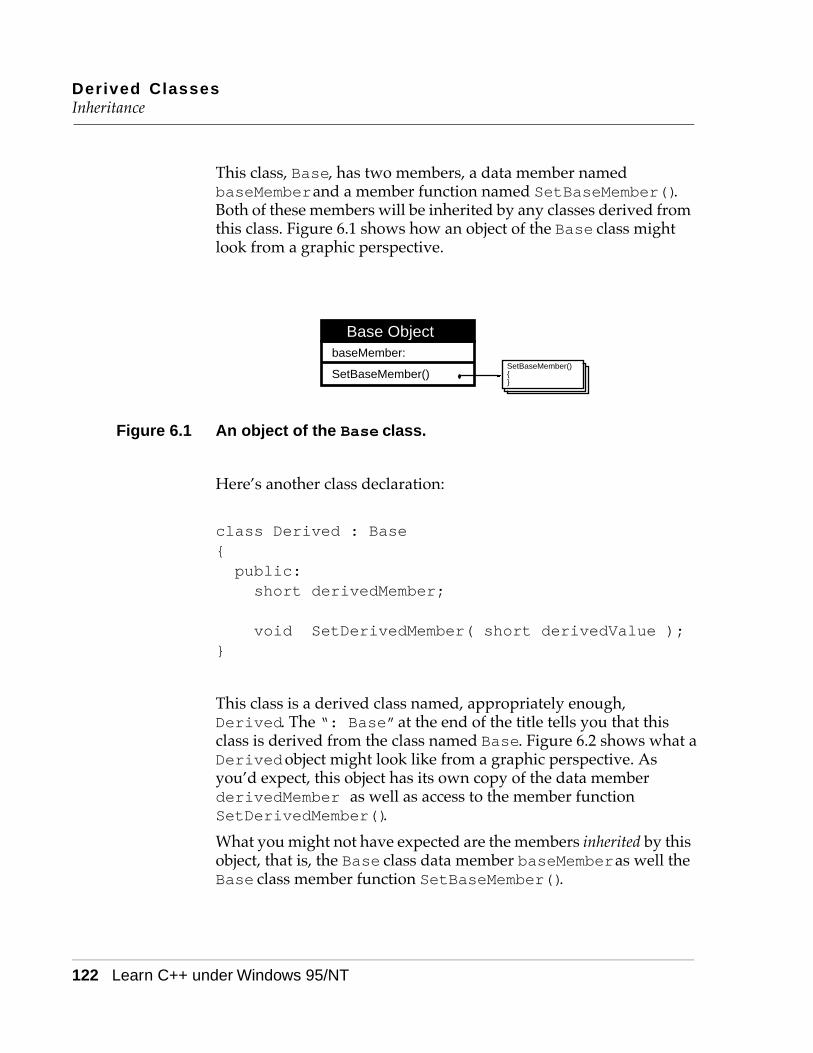
Derived ClassesInheritance
122 Learn C++ under Windows 95/NT
This class, Base, has two members, a data member named baseMember and a member function named SetBaseMember(). Both of these members will be inherited by any classes derived from this class. Figure 6.1 shows how an object of the Base class might look from a graphic perspective.
Figure 6.1 An object of the Base class.
Here’s another class declaration:
class Derived : Base{public:short derivedMember;
void SetDerivedMember( short derivedValue );}
This class is a derived class named, appropriately enough, Derived. The “: Base” at the end of the title tells you that this class is derived from the class named Base. Figure 6.2 shows what a Derived object might look like from a graphic perspective. As you’d expect, this object has its own copy of the data member derivedMember as well as access to the member function SetDerivedMember().
What you might not have expected are the members inherited by this object, that is, the Base class data member baseMember as well the Base class member function SetBaseMember().
Base ObjectbaseMember:
SetBaseMember()SetBaseMember(){}
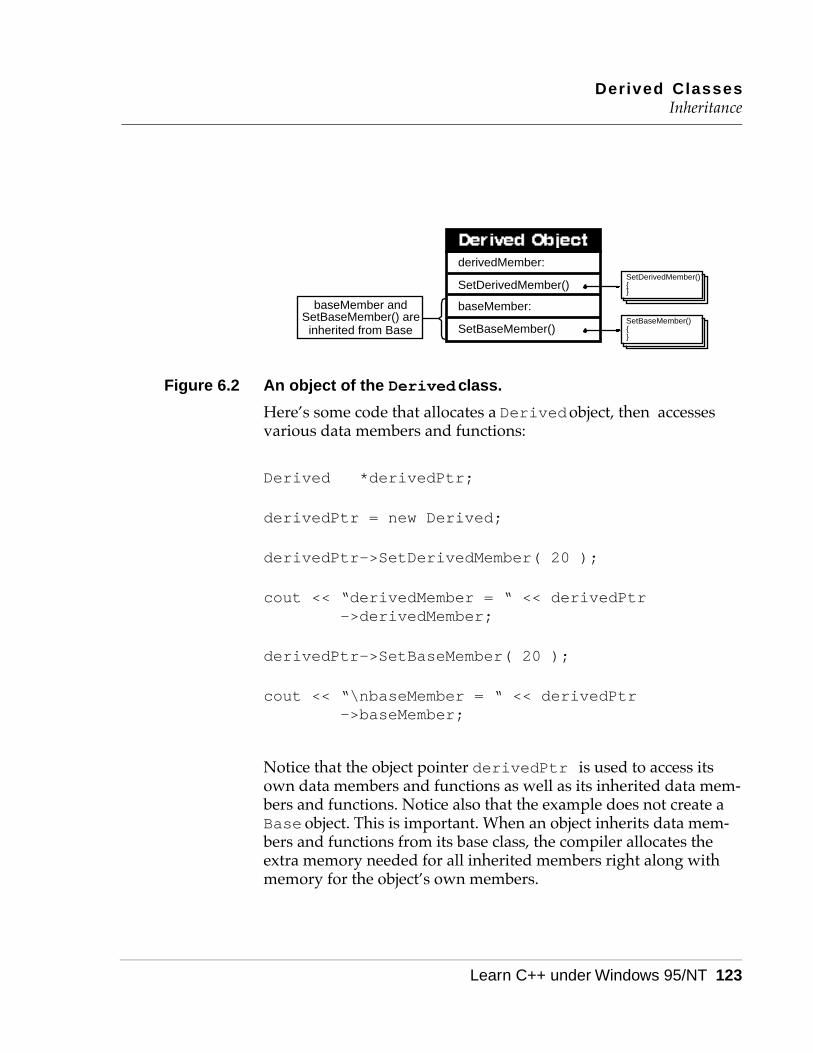
Derived ClassesInheritance
Learn C++ under Windows 95/NT 123
Figure 6.2 An object of the Derived class.
Here’s some code that allocates a Derived object, then accesses various data members and functions:
Derived *derivedPtr;
derivedPtr = new Derived;
derivedPtr->SetDerivedMember( 20 );
cout << “derivedMember = “ << derivedPtr->derivedMember;
derivedPtr->SetBaseMember( 20 );
cout << “\nbaseMember = “ << derivedPtr->baseMember;
Notice that the object pointer derivedPtr is used to access its own data members and functions as well as its inherited data mem-bers and functions. Notice also that the example does not create a Base object. This is important. When an object inherits data mem-bers and functions from its base class, the compiler allocates the extra memory needed for all inherited members right along with memory for the object’s own members.
baseMember andSetBaseMember() areinherited from Base
SetDerivedMember(){}
derivedMember:
SetDerivedMember()
baseMember:
SetBaseMember()SetBaseMember(){}

Derived ClassesInheritance
124 Learn C++ under Windows 95/NT
Access and InheritanceAlthough a derived class inherits all of the data members and mem-ber functions from its base class, it doesn’t necessarily retain access to each member.
Here’s how this works. When you declare a derived class, you de-clare its base class as either public or private. One way to do this is to include either public or private in the title line of the de-clared class.
For example, in this declaration, the class Base is marked as public:
class Derived : public Base{public:short derivedMember;
void SetDerivedMember( short derivedValue );}
In this declaration, Base is marked as private:
class Derived : private Base{public:short derivedMember;
void SetDerivedMember( short derivedValue );}
Detail You can also mark a base class as public or private by leaving off the access specifier. If you use the class keyword to declare the derived class, the base class defaults to private. If you use the struct keyword to declare the derived class, the base class defaults to public.
Derived ClassesInheritance
Learn C++ under Windows 95/NT 125
Once you know whether the base class is public or private, you can determine the access of each of its inherited members by follow-ing these three rules:
1. The derived class does not have access to private members inherited from the base class. This is true regardless of whether the base class is public or private.
2. If the base class is public, the members inherited from the base class retain their access level (providing the inherited member is not private, of course). This means that an inherited public member remains public and an inherited protected member remains protected.
3. If the base class is private, the members inherited from the base class are marked as private in the derived class.
By the Way If these rules seem a bit confusing, don’t worry. As you go through each of the chapter’s sample programs, things should become clearer. For the moment, just mark this page so you can refer back to it later.
In Chapter 5, we adopted the strategy of declaring our data mem-bers as private and our member functions as public. This ap-proach works well if the class will never be used as a base class for later derivation. If you ever plan on using a class as the basis for other classes, declare your data members as protected and your member functions as public.
A protected member can be accessed only by members of its class or by members of any classes derived from its class. In a base class, protected is just like private. The advantage of protected is that it allows a derived class to access the member, while protecting it from the outside world. We’ll get back to this strategy in a bit. For now, let’s take a look at an example of class derivation.
Derived ClassesInheritance
126 Learn C++ under Windows 95/NT
A Class Derivation ExampleSo far in this chapter, you’ve learned how to derive one class from another and you’ve been introduced to the protected access speci-fier. Our first sample program brings these lessons to life.
If CodeWarrior is already running, close the current project by se-lecting Close from the File menu. If CodeWarrior isn’t running, launch it by selecting Programs from the Start menu, then selecting CodeWarrior from the Programs menu, then selecting CW IDE. Ei-ther way, next select Open from the File menu. Go into the Learn C++ Projects directory, open the subdirectory named 06.01 - derived, and open the project file named derived.cwp. Next, run derived.cwp by selecting Run from the Project menu. Here’s what you’ll see:
baseMember was set to 10derivedMember was set to 20
Let’s take a look at the source code.
The derived Source Code
As usual, derived.cp starts by including <iostream.h>:
#include <iostream.h>
Next, we declare a class named Base, which we’ll use later as the basis for a second class named Derived:
//-------------------------------------- Base
class Base{

Derived ClassesInheritance
Learn C++ under Windows 95/NT 127
Base has a single data member, a short named baseMember, which is marked as private.
// Data members...private:short baseMember;
Base also includes two member functions, each marked as protected. SetBaseMember() sets baseMember to the specified value while GetBaseMember() returns the current value of baseMember.
// Member functions...protected:void SetBaseMember( short baseValue );short GetBaseMember();
};
void Base::SetBaseMember( short baseValue ){baseMember = baseValue;
}
short Base::GetBaseMember(){return baseMember;
}
Since baseMember is private, it cannot be accessed by any func-tion outside the Base class. Since SetBaseMember() and GetBaseMember() are protected, they can only be accessed by Base member functions and from within any classes derived from Base. Note that main() cannot access either of these functions.
Our second class, Derived, is derived from Base:
Derived ClassesInheritance
128 Learn C++ under Windows 95/NT
//-------------------------------------- Base:Derived
class Derived : public Base{
The public keyword following the colon in the class title line marks Base as a public base class.
As mentioned earlier, if a base class is declared as public, all inher-ited public members remain public and inherited protected members remain protected. Inherited private members are not accessible by the derived class.
Detail If you marked Base as private instead of public all inherited members would be marked as private and would not be acces-sible by any classes derived from Derived. The point here is this: If you mark the base class as private you effectively end the in-heritance chain.
As a general rule, you should declare your derived classes using public inheritance:
class Derived : public Base
It’s rare that you’d want to reduce the amount of information inher-ited by a derived class. Most of the time, a derived class is created to extend the reach of the base class by adding new data members and functions. As you go through the examples in this and later chap-ters, the idea of derived classes as extenders will appear again and again.
Derived has a single data member, a short named derivedMember, which is declared as private:
// Data members...
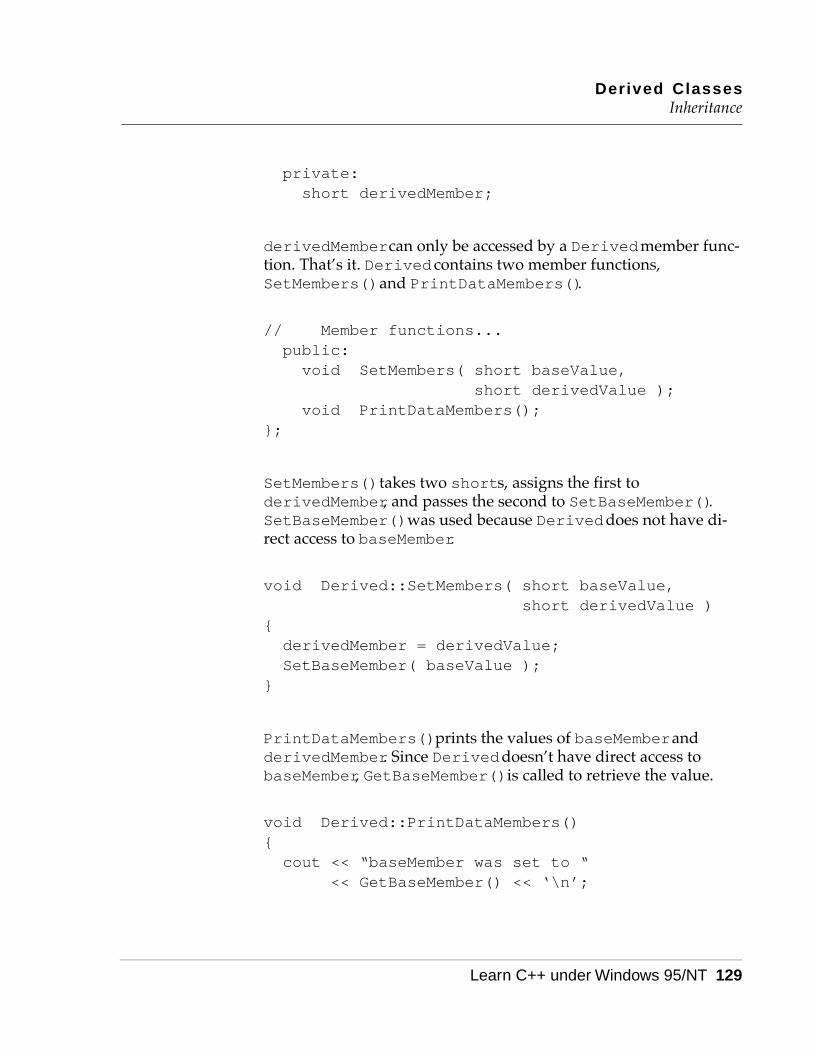
Derived ClassesInheritance
Learn C++ under Windows 95/NT 129
private:short derivedMember;
derivedMember can only be accessed by a Derived member func-tion. That’s it. Derived contains two member functions, SetMembers() and PrintDataMembers().
// Member functions...public:void SetMembers( short baseValue,
short derivedValue );void PrintDataMembers();
};
SetMembers() takes two shorts, assigns the first to derivedMember, and passes the second to SetBaseMember(). SetBaseMember() was used because Derived does not have di-rect access to baseMember.
void Derived::SetMembers( short baseValue, short derivedValue )
{derivedMember = derivedValue;SetBaseMember( baseValue );
}
PrintDataMembers() prints the values of baseMember and derivedMember. Since Derived doesn’t have direct access to baseMember, GetBaseMember() is called to retrieve the value.
void Derived::PrintDataMembers(){cout << “baseMember was set to “
<< GetBaseMember() << ‘\n’;
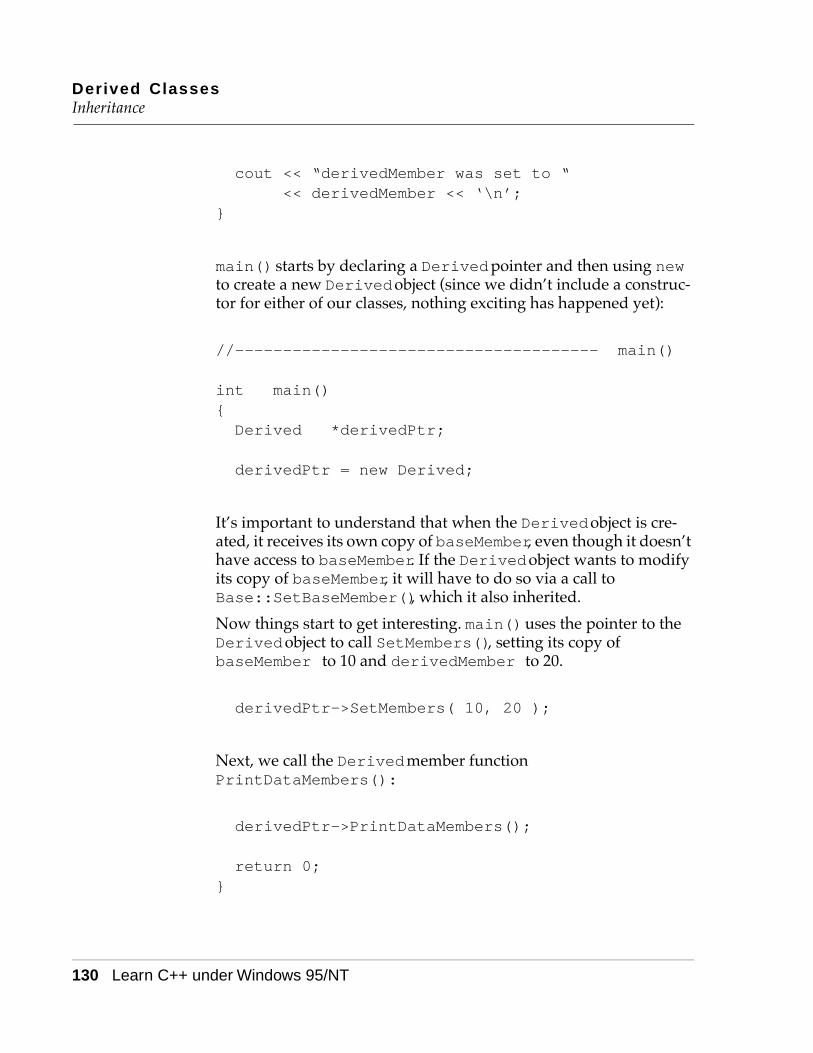
Derived ClassesInheritance
130 Learn C++ under Windows 95/NT
cout << “derivedMember was set to “ << derivedMember << ‘\n’;
}
main() starts by declaring a Derived pointer and then using new to create a new Derived object (since we didn’t include a construc-tor for either of our classes, nothing exciting has happened yet):
//-------------------------------------- main()
int main(){Derived *derivedPtr;
derivedPtr = new Derived;
It’s important to understand that when the Derived object is cre-ated, it receives its own copy of baseMember, even though it doesn’t have access to baseMember. If the Derived object wants to modify its copy of baseMember, it will have to do so via a call to Base::SetBaseMember(), which it also inherited.
Now things start to get interesting. main() uses the pointer to the Derived object to call SetMembers(), setting its copy of baseMember to 10 and derivedMember to 20.
derivedPtr->SetMembers( 10, 20 );
Next, we call the Derived member function PrintDataMembers():
derivedPtr->PrintDataMembers();
return 0;}
Derived ClassesDerivation, Constructors, and Destructors
Learn C++ under Windows 95/NT 131
As you saw when you ran the program, the values of the two data members are successfully set:
baseMember was set to 10derivedMember was set to 20
Just as the Derived object pointer is able to take advantage of in-heritance to call SetBaseMember(), PrintDataMembers() is able to print the value of the inherited data member baseMember by calling GetBaseMember().
For the moment, don’t worry too much about the advantages of in-heritance. Instead, concentrate on the mechanics and syntax of in-heritance. Once you master the how, the why will come naturally.
Derivation, Constructors, and DestructorsWhen an object is created, its constructor is called to initialize the object’s data members. When the object is deleted, its destructor is called to perform any necessary cleanup.
Suppose the object belongs to a derived class, and suppose it inher-its a few data members from its base class. How do these inherited data members get initialized? When the object is deleted, who does the cleanup for the inherited data members?
As it turns out, C++ solves this tricky issue for you. Before the com-piler calls an object’s constructor, it first checks to see whether the object belongs to a derived class. If so, the constructor belonging to the base class is called and then the object’s own constructor is called. The base class constructor initializes the object’s inherited members, while the object’s own constructor initializes the mem-bers belonging to the object’s class (Figure 6.3).
The reverse holds true for the destructor. When an object of a derived class is deleted, the derived class’s destructor is called and then the base class’s destructor is called.

Derived ClassesDerivation, Constructors, and Destructors
132 Learn C++ under Windows 95/NT
Figure 6.3 The base class constructor is called before the derived class constructor.
The Derivation ChainThere will frequently be times when you derive a class from a base class that is, itself, derived from some other class. Each of these classes acts like a link in a derivation chain. The constructor/de-structor calling sequence just described still holds, no matter how long the derivation chain.
Suppose you declare three classes, A, B, and C, where class B is de-rived from A and C is derived from B. Take a look at Figure 6.4.
When you create an object of class B, it will inherit the members from class A. When you create an object of class C, it will inherit the members from class B, which includes the previously inherited members from class A.
Figure 6.4 Three classes in a single derivation chain where class B is derived from A and C is derived from B.
The derived classconstructor initializes
these members
MembersBelonging to theDerived Class
Members Inherited fromthe Base Class
The base class constructorinitializes these members
Data Membersand
Member Functions
Data Membersand
Member Functions
Inherited Members fromClass A
Data Membersand
Member Functions
Inherited Members fromClass B
Inherited Members fromClass A
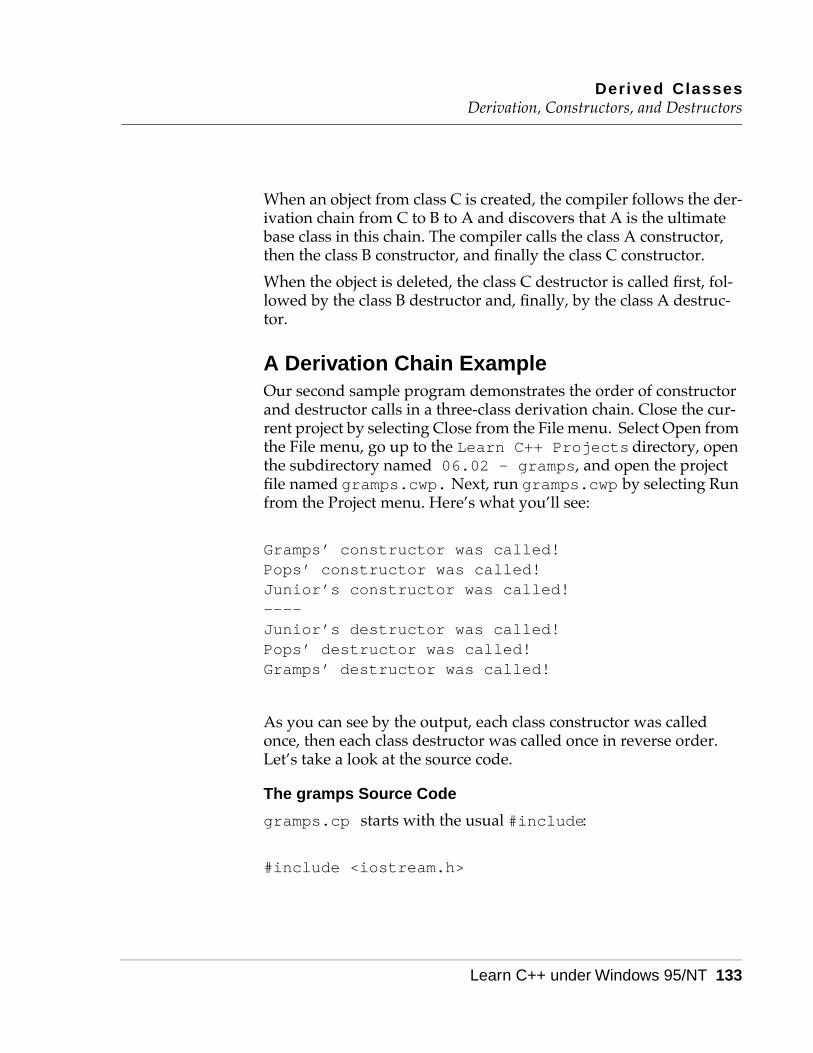
Derived ClassesDerivation, Constructors, and Destructors
Learn C++ under Windows 95/NT 133
When an object from class C is created, the compiler follows the der-ivation chain from C to B to A and discovers that A is the ultimate base class in this chain. The compiler calls the class A constructor, then the class B constructor, and finally the class C constructor.
When the object is deleted, the class C destructor is called first, fol-lowed by the class B destructor and, finally, by the class A destruc-tor.
A Derivation Chain ExampleOur second sample program demonstrates the order of constructor and destructor calls in a three-class derivation chain. Close the cur-rent project by selecting Close from the File menu. Select Open from the File menu, go up to the Learn C++ Projects directory, open the subdirectory named 06.02 - gramps , and open the project file named gramps.cwp. Next, run gramps.cwp by selecting Run from the Project menu. Here’s what you’ll see:
Gramps’ constructor was called!Pops’ constructor was called!Junior’s constructor was called!----Junior’s destructor was called!Pops’ destructor was called!Gramps’ destructor was called!
As you can see by the output, each class constructor was called once, then each class destructor was called once in reverse order. Let’s take a look at the source code.
The gramps Source Code
gramps.cp starts with the usual #include:
#include <iostream.h>
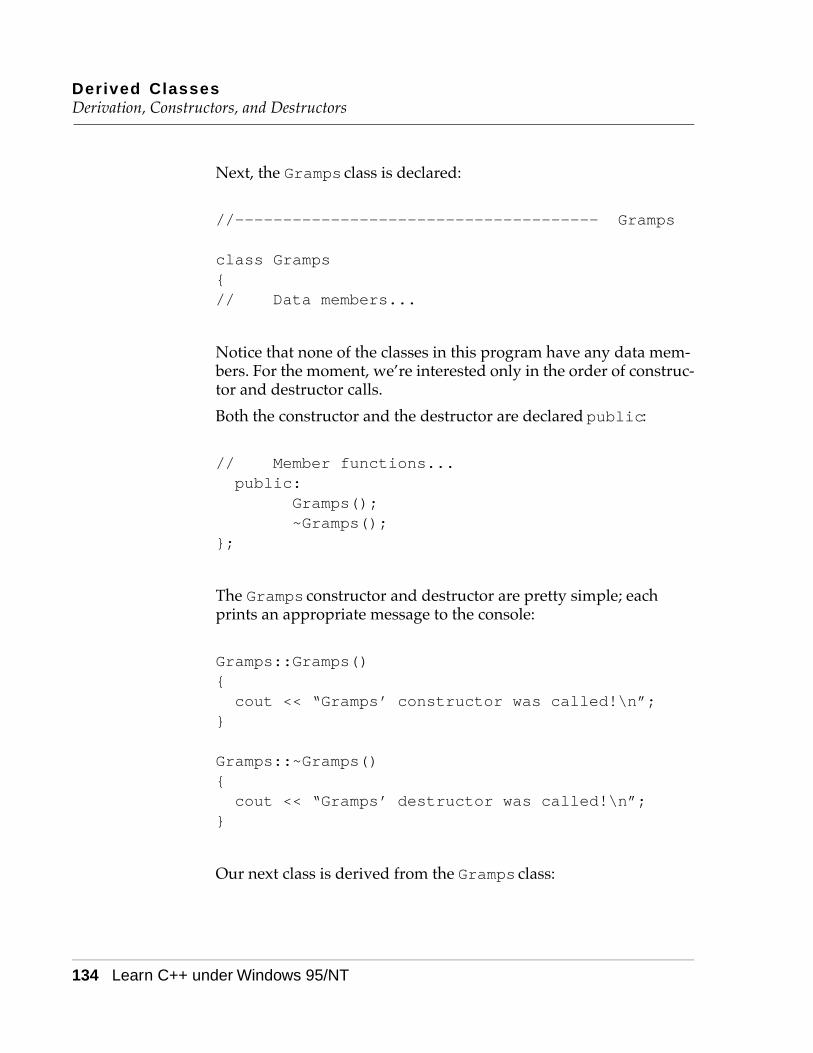
Derived ClassesDerivation, Constructors, and Destructors
134 Learn C++ under Windows 95/NT
Next, the Gramps class is declared:
//-------------------------------------- Gramps
class Gramps{// Data members...
Notice that none of the classes in this program have any data mem-bers. For the moment, we’re interested only in the order of construc-tor and destructor calls.
Both the constructor and the destructor are declared public:
// Member functions...public:
Gramps();~Gramps();
};
The Gramps constructor and destructor are pretty simple; each prints an appropriate message to the console:
Gramps::Gramps(){cout << “Gramps’ constructor was called!\n”;
}
Gramps::~Gramps(){cout << “Gramps’ destructor was called!\n”;
}
Our next class is derived from the Gramps class:

Derived ClassesDerivation, Constructors, and Destructors
Learn C++ under Windows 95/NT 135
//---------------------------------- Pops:Gramps
class Pops : public Gramps{// Data members...
Notice that we use the public keyword in the class title line. This ensures that the constructor and the destructor inherited from Gramps are marked as public inside the Pops class.
Once again, this class has no data members. Both the constructor and the destructor are marked as public. They’ll be inherited by any class derived from Pops:
// Member functions...public:
Pops();~Pops();
};
Just like those of Gramps, the Pops constructor and destructor are simple and to the point; each sends an appropriate message to the console:
Pops::Pops(){cout << “Pops’ constructor was called!\n”;
}
Pops::~Pops(){cout << “Pops’ destructor was called!\n”;
}
Junior is to Pops what Pops is to Gramps. Junior inherits not only the Pops members but the Gramps members as well (as you’ll
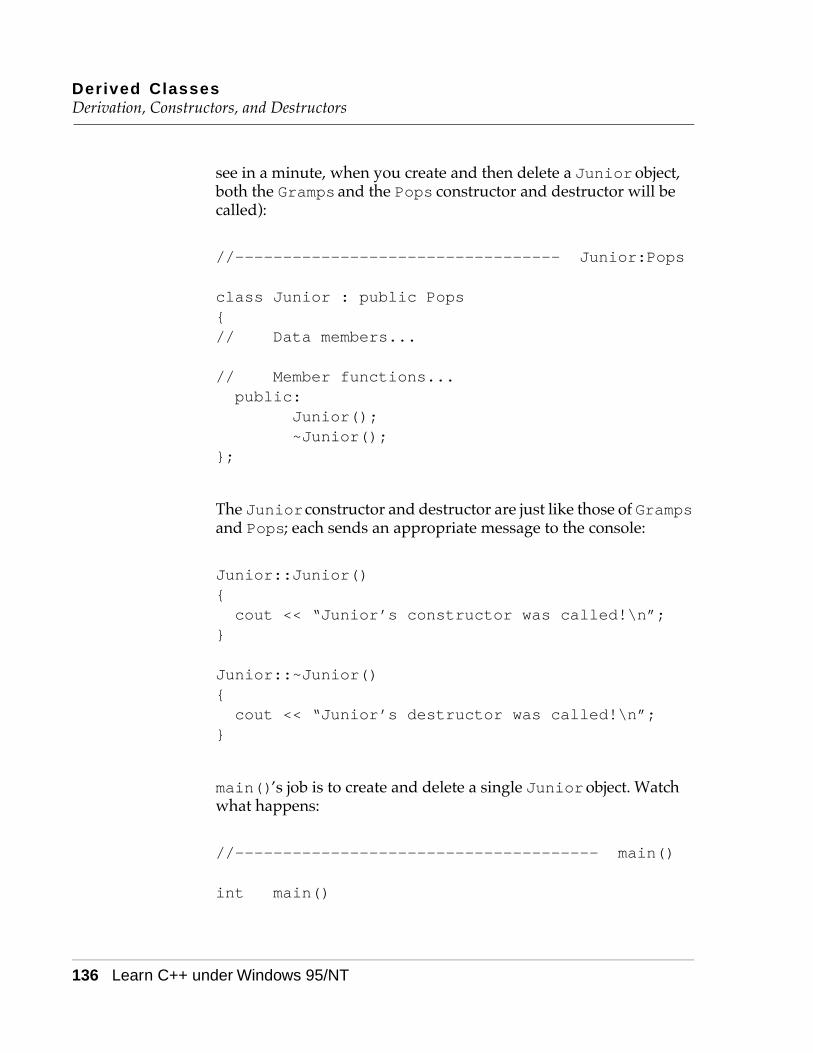
Derived ClassesDerivation, Constructors, and Destructors
136 Learn C++ under Windows 95/NT
see in a minute, when you create and then delete a Junior object, both the Gramps and the Pops constructor and destructor will be called):
//---------------------------------- Junior:Pops
class Junior : public Pops{// Data members...
// Member functions...public:
Junior();~Junior();
};
The Junior constructor and destructor are just like those of Gramps and Pops; each sends an appropriate message to the console:
Junior::Junior(){cout << “Junior’s constructor was called!\n”;
}
Junior::~Junior(){cout << “Junior’s destructor was called!\n”;
}
main()’s job is to create and delete a single Junior object. Watch what happens:
//-------------------------------------- main()
int main()
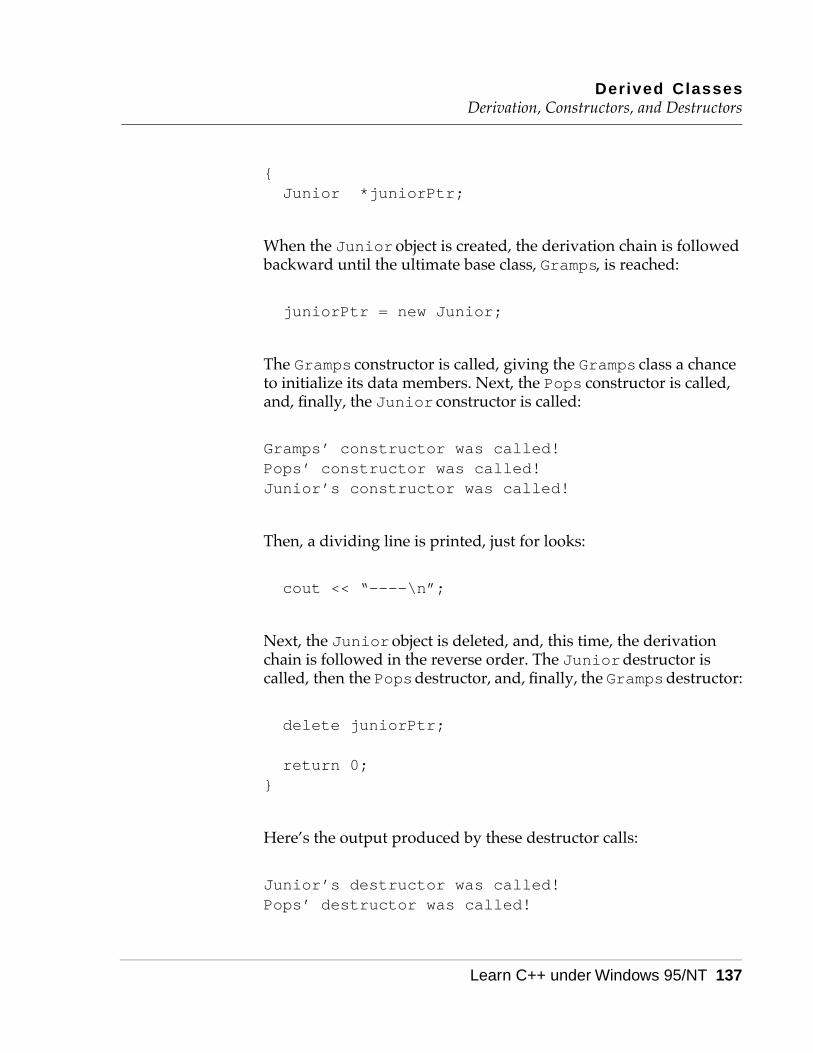
Derived ClassesDerivation, Constructors, and Destructors
Learn C++ under Windows 95/NT 137
{Junior *juniorPtr;
When the Junior object is created, the derivation chain is followed backward until the ultimate base class, Gramps, is reached:
juniorPtr = new Junior;
The Gramps constructor is called, giving the Gramps class a chance to initialize its data members. Next, the Pops constructor is called, and, finally, the Junior constructor is called:
Gramps’ constructor was called!Pops’ constructor was called!Junior’s constructor was called!
Then, a dividing line is printed, just for looks:
cout << “----\n”;
Next, the Junior object is deleted, and, this time, the derivation chain is followed in the reverse order. The Junior destructor is called, then the Pops destructor, and, finally, the Gramps destructor:
delete juniorPtr;
return 0;}
Here’s the output produced by these destructor calls:
Junior’s destructor was called!Pops’ destructor was called!
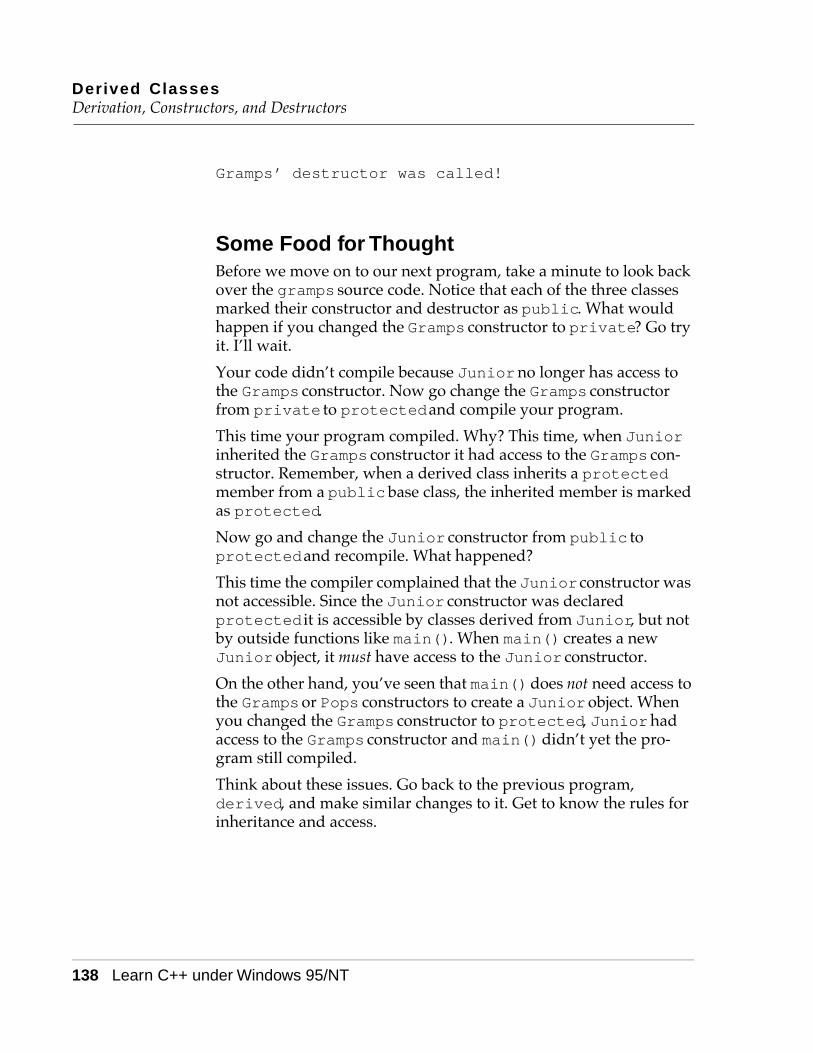
Derived ClassesDerivation, Constructors, and Destructors
138 Learn C++ under Windows 95/NT
Gramps’ destructor was called!
Some Food for ThoughtBefore we move on to our next program, take a minute to look back over the gramps source code. Notice that each of the three classes marked their constructor and destructor as public. What would happen if you changed the Gramps constructor to private? Go try it. I’ll wait.
Your code didn’t compile because Junior no longer has access to the Gramps constructor. Now go change the Gramps constructor from private to protected and compile your program.
This time your program compiled. Why? This time, when Junior inherited the Gramps constructor it had access to the Gramps con-structor. Remember, when a derived class inherits a protected member from a public base class, the inherited member is marked as protected.
Now go and change the Junior constructor from public to protected and recompile. What happened?
This time the compiler complained that the Junior constructor was not accessible. Since the Junior constructor was declared protected it is accessible by classes derived from Junior, but not by outside functions like main(). When main() creates a new Junior object, it must have access to the Junior constructor.
On the other hand, you’ve seen that main() does not need access to the Gramps or Pops constructors to create a Junior object. When you changed the Gramps constructor to protected, Junior had access to the Gramps constructor and main() didn’t yet the pro-gram still compiled.
Think about these issues. Go back to the previous program, derived, and make similar changes to it. Get to know the rules for inheritance and access.
Derived ClassesBase Classes and Constructors with Parameters
Learn C++ under Windows 95/NT 139
Base Classes and Constructors with ParametersOur first program in this chapter, derived, declared two classes, Base and Derived. Neither of these classes included a constructor. Our second program, gramps, featured three classes. Though all three classes declared a constructor, none of the constructors de-clared any parameters.
Our next example enters uncharted waters by declaring classes whose constructors contain parameters. What’s the big deal about constructor parameters? In a world without class derivation, not much. When you add derived classes into the picture, however, things get a bit more complex. Here’s why.
Imagine a base class whose constructor sports a single parameter:
class Base{public:Base( short baseParam );
};
Now, add a derived class based on this base class:
class Derived : public Base{public:Derived();
};
Notice that the derived class constructor is declared without a pa-rameter. When a Derived object is created, the Base constructor is called. What parameter is passed to this constructor?
The secret lies in the definition of the derived class constructor. When a base class constructor has parameters, you have to provide some extra information in the derived class constructor’s title line. This information tells the compiler how to map data from the de-rived class constructor to the base class constructor’s parameter list.
Derived ClassesBase Classes and Constructors with Parameters
140 Learn C++ under Windows 95/NT
For example, we might define the derived class constructor this way:
Derived::Derived() : Base( 20 ){cout << “Inside the Derived constructor”;
}
Notice the “: Base( 20 )” at the end of the title line. This code tells the compiler to pass the number 20 as a parameter when the Base constructor is called.
This technique is really useful when your derived class constructor also has parameters. Check out the following piece of code:
Derived::Derived( short derivedParam ) : Base( derivedParam )
{}
This constructor takes a single parameter, derivedParam, and maps it to the single parameter in its base class constructor. When a Derived object is created, as follows,
Derived *derivedPtr;
derivedPtr = new Derived( 20 );
the parameter is passed to the Base constructor. Once the Base con-structor returns, the same parameter is passed to the Derived con-structor.
Style In the preceding example, the Derived constructor does nothing but pass along a parameter to the Base constructor. Though it may take some getting used to, this technique is quite legitimate. It is
Derived ClassesBase Classes and Constructors with Parameters
Learn C++ under Windows 95/NT 141
perfectly fine to define an empty function whose sole purpose is to map a parameter to a base class constructor.
Another Classy ExampleOur next example combines the class derivation techniques from our first two programs with the constructor parameter-mapping mechanism described in the previous section. Close the current project by selecting Close from the File menu. Select Open from the File menu, go into the Learn C++ Projects directory, open the subdirectory named 06.03 - square , and open the project file named square.cwp. Next, run square.cwp by selecting Run from the Project menu. Here’s what you’ll see:
Area is: 100Area is: 150
Let’s take a look at the source code.
The square Source Code
square.cp starts in the usual way, by including <iostream.h>:
#include <iostream.h>
Next, the first of two classes is declared. Rectangle will act as a base class:
//-------------------------------------- Rectangle
class Rectangle{
Derived ClassesBase Classes and Constructors with Parameters
142 Learn C++ under Windows 95/NT
The data members of our base class are declared as protected; the member functions, public. height and width hold the height and width of a Rectangle object:
// Data members...protected:short height;short width;
The Rectangle() constructor takes two parameters, heightParam and widthParam, that are used to initialize the Rectangle data members. The member function DisplayArea() displays the area of the current object:
// Member functions...public:
Rectangle( short heightParam, short widthParam );
void DisplayArea();};
Rectangle() uses its two parameters to initialize the Rectangle data members:
Rectangle::Rectangle( short heightParam, short widthParam )
{height = heightParam;width = widthParam;
}
void Rectangle::DisplayArea(){cout << “Area is: “ <<height * width << ‘\n’;
}
Derived ClassesBase Classes and Constructors with Parameters
Learn C++ under Windows 95/NT 143
The Square class is derived from the Rectangle class. Just as a square is a specialized form of rectangle (a rectangle whose sides are all equal), a Square object is a specialized Rectangle object. The Square class has no data members, just a single member function, the Square() constructor:
//-------------------------------- Rectangle:Square
class Square : public Rectangle{// Data members...
The Square() constructor takes a single parameter, a short named side:
// Member functions...public:
Square( short side );};
The Square() constructor has one purpose in life. It maps the sin-gle Square() parameter to the two parameters required by the Rectangle() constructor. A square whose side has a length of side is equivalent to a rectangle with a height of side and a width of side:
Square::Square( short side ) : Rectangle( side, side )
{}
main() starts by declaring a Square pointer and a Rectangle pointer:
Derived ClassesBase Classes and Constructors with Parameters
144 Learn C++ under Windows 95/NT
//-------------------------------------- main()
int main(){Square *mySquare;Rectangle *myRectangle;
The Square pointer is used to create a new Square object with a side of 10:
mySquare = new Square( 10 );
As specified by the Square() constructor’s title line, the compiler calls Rectangle(), passing 10 as both heightParam and widthParam. The Rectangle() constructor initializes the Square object’s inherited data members height and width to 10, just as if you’d created a Rectangle with a height of 10 and a width of 10.
Next, the Square object’s inherited member function, DisplayArea(), is called:
mySquare->DisplayArea();
DisplayArea() uses the inherited data members height and width to calculate the area of the Square:
Area is: 100
By the Way As far as DisplayArea() is concerned, the object whose area it just calculated was a Rectangle. It had no idea it was working with data members inherited from a Rectangle. That’s part of the power of object programming.

Derived ClassesBase Classes and Constructors with Parameters
Learn C++ under Windows 95/NT 145
Finally, the Rectangle pointer is used to create a new Rectangle object with a height of 10 and a width of 15:
myRectangle = new Rectangle( 10, 15 );myRectangle->DisplayArea();
return 0;}
When we call DisplayArea(), it displays the appropriate area:
Area is: 150
An Important Lesson
This program demonstrates a very important point. With just a few lines of code, we can add a new dimension to an existing class with-out modifying the existing class.
The Square class takes advantage of what’s already in place, build-ing on the data members and member functions of its base class. Es-sentially, Square added a shortcut to the Rectangle class, a quicker way to create a Rectangle when the height and width are the same.
This may not seem like a significant gain to you, but there’s an im-portant lesson behind this example. C++ makes it easy to build upon existing models, to add functionality to your software by de-riving from existing classes.
As you gain experience in object programming, you’ll build up a li-brary of classes that you’ll use again and again. Sometimes, you’ll use the classes “as is.” At other times, you’ll extend an existing class by deriving a new class from it. By deriving new classes from exist-ing classes, you get the best of both worlds. Code that depends on the base classes will continue to work quite well without modifica-tion. Code that takes advantage of the new, derived classes will work just as well, allowing these classes to live in harmony with their base classes.
Derived ClassesOverriding Member Functions
146 Learn C++ under Windows 95/NT
In my mind, this is what object programming is all about.
Overriding Member FunctionsIn the preceding example, the derived class, Square, inherited the member function, DisplayArea(), from its base class, Rectangle. Sometimes, it’s useful to override a member function from the base class with a more appropriate function in the derived class. For example, you could have provided Square with its own version of DisplayArea() that based its area calculation on the fact that the height and width of a square are equal.
Here’s another example. Suppose you create a base class named Shape and a series of derived classes such as Rectangle, Circle, and Triangle. You can create a DisplayArea() func-tion for the Shape class, then override DisplayArea() in each of the derived classes.
Suppose you want to create a linked list of Shapes. To simplify mat-ters for the software that manages the linked list, you can treat the derived objects as Shapes, no matter what their actual type. Then, when you call the Shape’s DisplayArea() function, their true identity will emerge. A Triangle will override the Shape DisplayArea() function with a Triangle DisplayArea() function. The Rectangle and Circle will have their own versions as well. The trick is to get C++ to call the proper overriding function, if one exists.
Creating a Virtual FunctionThe linked list example just presented has a slight problem. Suppose the linked list contains a pointer to a Shape which is actually one of Rectangle, Triangle, or Circle. Now suppose that Shape pointer is used to call the member function DisplayArea():
myShapePtr->DisplayArea();

Derived ClassesOverriding Member Functions
Learn C++ under Windows 95/NT 147
As it is now, this code will call the function Shape::DisplayArea() even if the Shape pointed to by myShapePtr is a Rectangle, Triangle, or Circle.
The solution to this problem? Declare Shape::DisplayArea() as a virtual function. By declaring a base member function that we intend to override using the virtual keyword, we are asking the compiler to call the overriding function instead of the base function, even if the object used to call the function belongs to the base class.
A Virtual Function ExampleOur final program in this chapter provides a simple example of vir-tual function overriding by using a base class named Shape and two derived classes, Rectangle and Triangle. Close the current project by selecting Close from the File menu. Select Open from the File menu, go into the Learn C++ Projects directory, open the subdirectory named 06.04 - whatAmI, and open the project file named whatAmI.cwp. Next, run whatAmI.cwp by selecting Run from the Project menu. Here’s what you’ll see:
I’m a rectangle!I’m a triangle!I don’t know what kind of shape I am!
Let’s take a look at the source code.
The whatAmI Source Code
whatAmI.cp starts in the usual way, by including <iostream.h>:
#include <iostream.h>
Next, the base class Shape is declared. Shape contains a single member function, WhatAmI(). When it is called, WhatAmI() tells you what kind of shape it belongs to. Notice that it is declared using the virtual keyword, which tells the compiler that you’d like any overriding function to be called, if one exists:

Derived ClassesOverriding Member Functions
148 Learn C++ under Windows 95/NT
//-------------------------------------- Shape
class Shape{// Data members...
// Member functions...public:virtual void WhatAmI();
};
Here’s the definition of Shape::WhatAmI():
void Shape::WhatAmI(){cout << “I don’t know what kind of shape I
am!\n”;}
Notice that the virtual keyword isn’t used here. The virtual keyword is only allowed in the function declaration inside the class declaration.
Our next class, Rectangle, is derived from the Shape class. Rectangle also has a single member function named WhatAmI():
//-------------------------------------- Shape:Rectangle
class Rectangle : public Shape{// Data members...
// Member functions...public:void WhatAmI();
Derived ClassesOverriding Member Functions
Learn C++ under Windows 95/NT 149
};
Rectangle’s version of WhatAmI() is called when the object doing the calling is a Rectangle:
void Rectangle::WhatAmI(){cout << “I’m a rectangle!\n”;
}
Our next class, Triangle, is also derived from Shape:
//-------------------------------------- Shape:Triangle
class Triangle : public Shape{// Data members...
// Member functions...public:void WhatAmI();
};
Once again, Triangle has its own version of WhatAmI():
void Triangle::WhatAmI(){cout << “I’m a triangle!\n”;
}
Now comes the fun part. main() declares three Shape pointers, s1, s2, and s3:
Derived ClassesOverriding Member Functions
150 Learn C++ under Windows 95/NT
//-------------------------------------- main()
int main(){Shape *s1, *s2, *s3;
Each of these pointers is used to create a new object, a Rectangle, a Triangle, and a Shape:
s1 = new Rectangle;s2 = new Triangle;s3 = new Shape;
You may be wondering why the three pointers are all declared as Shapes while the objects assigned to the pointers are of three differ-ent types. This is intentional. If you’re building a linked list of shapes, you can store a pointer to each object in the list as a Shape pointer rather than as a Rectangle pointer or Triangle pointer. In this way, your list management software doesn’t have to know what type of shape it is dealing with. If you want to call WhatAmI() (or some other, more useful function) for each object in the list, you just step through the list, one object at a time, treating each object as if it were a Shape. If the object belongs to a derived class that over-rides the function, C++ will make sure the correct function is called.
Once our three objects are created, we try using each object to call WhatAmI():
s1->WhatAmI();s2->WhatAmI();s3->WhatAmI();
return 0;}
Derived ClassesSummary
Learn C++ under Windows 95/NT 151
When the Rectangle object is used to call WhatAmI(), we get this result:
I’m a rectangle!
When the Triangle object is used to call WhatAmI(), we get this result:
I’m a triangle!
Finally, when the Shape object is used to call WhatAmI(), we get this result:
I don’t know what kind of shape I am!
In this example, the Shape class exists just so that we can create use-ful, derived classes from it. Creating a Shape object is not particu-larly useful.
SummaryCongratulations! You’ve made it through the hardest part of object programming with C++. You’ve mastered most of the skills you’ll need to write your own object-oriented programs.
The remainder of this book is dedicated to filling in the gaps. Though there’s still a major topic or two to cover, you’ll find that most of the toughest aspects of C++ are behind you. Once again, congratulations, and welcome to the world of object programming!

Derived ClassesSummary
152 Learn C++ under Windows 95/NT
Learn C++ under Windows 95/NT 153
7Operator OverloadingThe C++ feature up for discussion in this chapter is operator over-loading. In C++, you can overload any of the built-in operators, such as + or *, giving each one your own personal twist.
For instance, imagine that you’re running a restaurant and you want to write some software to handle your billing, print your menus, and so on. Your program might create a MenuItem class that looks something like this:
class MenuItem{private:float price;char name[ 40 ];
public:MenuItem::MenuItem( float itemPrice,
char *itemName );float MenuItem::GetPrice( void );
};
Your software would define a MenuItem object for each item on the menu. When someone orders, you’d calculate the bill by adding to-gether the price of each MenuItem. Here’s an example:
MenuItem chicken( 8.99, “Chicken Kiev with salad” );
MenuItem houseWine( 2.99, “Riesling by the glass” );

Operator OverloadingThe Operator Overloading Alternative
154 Learn C++ under Windows 95/NT
float total;
total = chicken->GetPrice() + houseWine->GetPrice();
This particular diner had the chicken and a glass of the house wine. The total is calculated using the member function GetPrice(). Nothing new here.
The Operator Overloading AlternativeOperator overloading provides an alternative way of figuring up the bill. If things are set up properly, the compiler will interpret the statement
total = chicken + houseWine;
by adding the price of chicken to the price of houseWine. Ordi-narily, the compiler would complain if you tried to use a nonintegral type with the + operator. You can get around this limitation by giv-ing the + operator a new meaning.
To do this, create a function to overload the + operator:
float operator+( MenuItem item1, MenuItem item2 ){return( item1.GetPrice() + item2.GetPrice() );
}
Notice the name of this new function. Any function whose name fol-lows the form
operator<C++ operator>
Operator OverloadingThe Operator Overloading Alternative
Learn C++ under Windows 95/NT 155
is said to overload the specified operator. When you overload an opera-tor, you’re asking the compiler to call your function instead of inter-preting the operator as it normally would.
Calling an Operator Overloading FunctionWhen the compiler calls an overloading function, it maps the opera-tor’s operands to the function’s parameters. For example, suppose the function
float operator+( MenuItem item1, MenuItem item2 ){return( item1.GetPrice() + item2.GetPrice() );
}
is used to overload the + operator. When the compiler encounters the expression
chicken + houseWine
it calls operator+(), passing chicken as the first parameter and houseWine as the second parameter. operator+()’s return value is used as the result of the expression.
Detail The number of operands taken by an operator determines the number of parameters passed to its overloading function. For ex-ample, a function designed to overload a unary operator takes a single parameter; a function designed to overload a binary opera-tor takes two parameters.
Operator Overloading Using a Member FunctionYou can also use a member function to overload an operator. For ex-ample, the function

Operator OverloadingThe Operator Overloading Alternative
156 Learn C++ under Windows 95/NT
float MenuItem::operator+( MenuItem item ){return( GetPrice() + item.GetPrice() );
}
overloads the + operator and performs pretty much the same func-tion as the earlier example. The difference lies in the way a member function is called by the compiler.
When the compiler calls an overloading member function, it uses the first operand to call the function and passes the remainder of the operands as parameters. So with the function just given in place, the compiler handles the expression
chicken + houseWine
by calling chicken.operator+(), passing houseWine as a pa-rameter, as if you had made the following call:
chicken.operator+( houseWine )
Again, the value returned by the function is used as the result of the expression.
Multiple Overloading FunctionsThe previous example brings up an interesting point. What will the compiler do when it encounters several functions that overload the same operator? For example, both of the following functions over-load the + operator:
float operator+( MenuItem item1, MenuItem item2 )
float MenuItem::operator+( MenuItem item )

Operator OverloadingThe Operator Overloading Alternative
Learn C++ under Windows 95/NT 157
If both are present, which one is called?
The answer to this question is, neither! The compiler will not allow you to create an ambiguous overloading situation. You can create several functions that overload the same operator, however. You might create one version of operator+() that handles MenuItems and another that allows you to add two arrays together. The com-piler chooses the proper overloading function based on the types of the operands.
An Operator Overloading ExampleHere’s an example that brings some of these concepts to life. First, we’ll declare a Time class and use it to store a length of time speci-fied in hours, minutes, and seconds. Then, we’ll overload the + and *= operators and use them to add two times together and to multi-ply a time by a specified value.
If CodeWarrior is already running, close the current project by se-lecting Close from the File menu. If CodeWarrior isn’t running, launch it by selecting Programs from the Start menu, then selecting CodeWarrior from the Programs menu, then selecting CW IDE. Ei-ther way, next select Open from the File menu. Go into the Learn C++ Projects directory, open the subdirectory named 07.01 - time, and open the project file named time.cwp. Next, run time.cwp by selecting Run from the Project menu. Here’s what you’ll see:
(1:10:50)(2:24:20)--------(3:35:10)* 2--------(7:10:20)
Let’s take a look at the source code.

Operator OverloadingThe Operator Overloading Alternative
158 Learn C++ under Windows 95/NT
The time Source CodeAs usual, time.cp starts by including <iostream.h>:
#include <iostream.h>
Next, we declare the Time class, which is used to store time in hours, minutes, and seconds:
class Time{// Data members...private:short hours;short minutes;short seconds;
Next come the member functions. The first, NormalizeTime(), converts any overflow in the seconds and minutes data members; for example, 70 seconds is converted to 1 minute and 10 seconds. NormalizeTime() will only be used from within the Time class. Since we’re not planning on deriving any classes from Time, we’ve left it as private. The rest of the member functions will be public.
// Member functions...void NormalizeTime();
public:
The Time class sports two constructors. The first takes no parame-ters and is used to create a Time object with all three data members set to 0 (You’ll see why later on in the code). The second Time con-structor uses its three parameters to initialize the three Time data members.
Time();
Operator OverloadingThe Operator Overloading Alternative
Learn C++ under Windows 95/NT 159
Time( short h, short m, short s );
Display() displays the time stored in the current object, operator+() overloads the + operator, and operator*=() over-loads the *= operator:
void Display();Time operator+( Time &aTime );void operator*=( short num );
};
Next come the two overloaded constructors. The first one initializes all three data members to 0. The second initializes the data members and then calls NormalizeTime() to resolve any overflow.
Time::Time(){seconds = 0;minutes = 0;hours = 0;
}
Time::Time( short h, short m, short s ){seconds = s;minutes = m;hours = h;
NormalizeTime();}
NormalizeTime() starts by adding the seconds overflow to minutes, and then it adds the minutes overflow to hours:
void Time::NormalizeTime()
Operator OverloadingThe Operator Overloading Alternative
160 Learn C++ under Windows 95/NT
{hours += ((minutes + (seconds/60)) / 60);
Next, the same calculation is performed to calculate a new value for minutes and then for seconds:
minutes = (minutes + (seconds/60)) % 60;
seconds %= 60;}
Display() is self-explanatory:
void Time::Display(){cout << “(“ << hours << “:” << minutes
<< “:” << seconds << “)\n”;}
operator+() is called when the + operator is used to add two Time objects together. The first operand is used as the current object, and the second operand corresponds to the parameter aTime.
Time Time::operator+( Time &aTime ){short h;short m;short s;
Detail Notice that aTime is declared as a reference parameter. Why? This code would also work if aTime were declared without the &.
Without the &, the compiler would create a copy of the parameter to pass in to operator+(). Since C++ passes its parameters on the stack, this could cause a problem if the parameter was big
Operator OverloadingThe Operator Overloading Alternative
Learn C++ under Windows 95/NT 161
enough. With the &, aTime is a reference to the object passed in as a parameter.
Next, the hours, minutes, and seconds data members of the two objects are added together and stored in the local variables h, m, and s:
h = hours + aTime.hours;m = minutes + aTime.minutes;s = seconds + aTime.seconds;
Next, a new Time object is created using h, m, and s. Since the Time constructor calls NormalizeTime(), there’s no need to do that here.
Time tempTime( h, m, s );
Detail It is perfectly OK to declare an object in the middle of your code. In this case, we wanted to initialize h, m, and s before we created tempTime.
Finally, we return the newly created object. Since we are not using a reference, the compiler will make a copy of tempTime, then return the copy. The compiler is responsible for destroying this copy, so you don’t have to worry about it.
return tempTime;}
operator*=() is called when the *= operator is used to multiply a Time object by a constant. Notice that operator*=() does not re-turn a value because the multiplication is performed inside the Time object that appears as the first operand:
Operator OverloadingThe Operator Overloading Alternative
162 Learn C++ under Windows 95/NT
void Time::operator*=( short num ){
Each of the Time object’s data members is multiplied by the speci-fied short:
hours *= num;minutes *= num;seconds *= num;
Since we won’t be creating a new Time object, we call NormalizeTime() to fix any overflow problems that may have just been caused:
NormalizeTime();}
Style In general, your overloading functions return a value if it makes sense for the operator being overloaded. If the operator includes an =, chances are you’ll make your changes in place and won’t re-turn a value, as we did with operator*=(). If the operator doesn’t include an =, you’ll most likely return a value, as we did with operator+().
Before you make the decision, build a few expressions using the operator under consideration. Do the expressions resolve to a sin-gle value? If so, then you want your overloading function to return a value.
main() starts by defining two Time objects (the values in parenthe-ses represent the hours, minutes, and seconds, respectively):
int main(){
Operator OverloadingThe Operator Overloading Alternative
Learn C++ under Windows 95/NT 163
Time firstTime( 1, 10, 50 );Time secondTime( 2, 24, 20 );
Next, a third Time object is created, this time via a call to the Time constructor that doesn’t take any parameters.
Time sumTime;
Display() is called to display the data members of the two Time objects, and then a line is drawn under the two Times:
firstTime.Display();secondTime.Display();
cout << “--------\n”;
Here are the results:
(1:10:50)(2:24:20)--------
Next, the + operator is used to add the two Times together, and the resulting object is displayed:
sumTime = firstTime + secondTime;sumTime.Display();
Here’s what this result looks like:
(3:35:10)
Operator OverloadingA Few Restrictions
164 Learn C++ under Windows 95/NT
Now, two more lines are sent to the console:
cout << “* 2\n”;cout << “--------\n”;
Here’s what they look like:
* 2--------
These lines indicate that we’ll be multiplying our previous result by 2.
We accomplish this multiplication by using the *= operator and then display the results:
sumTime *= 2;sumTime.Display();
return 0;}
Here’s the final time:
(7:10:20)
If you like, try substituting your own numbers and run the program again.
A Few RestrictionsNow that you’ve mastered the basics of operator overloading, you need to be aware of a few restrictions. First, you can only overload
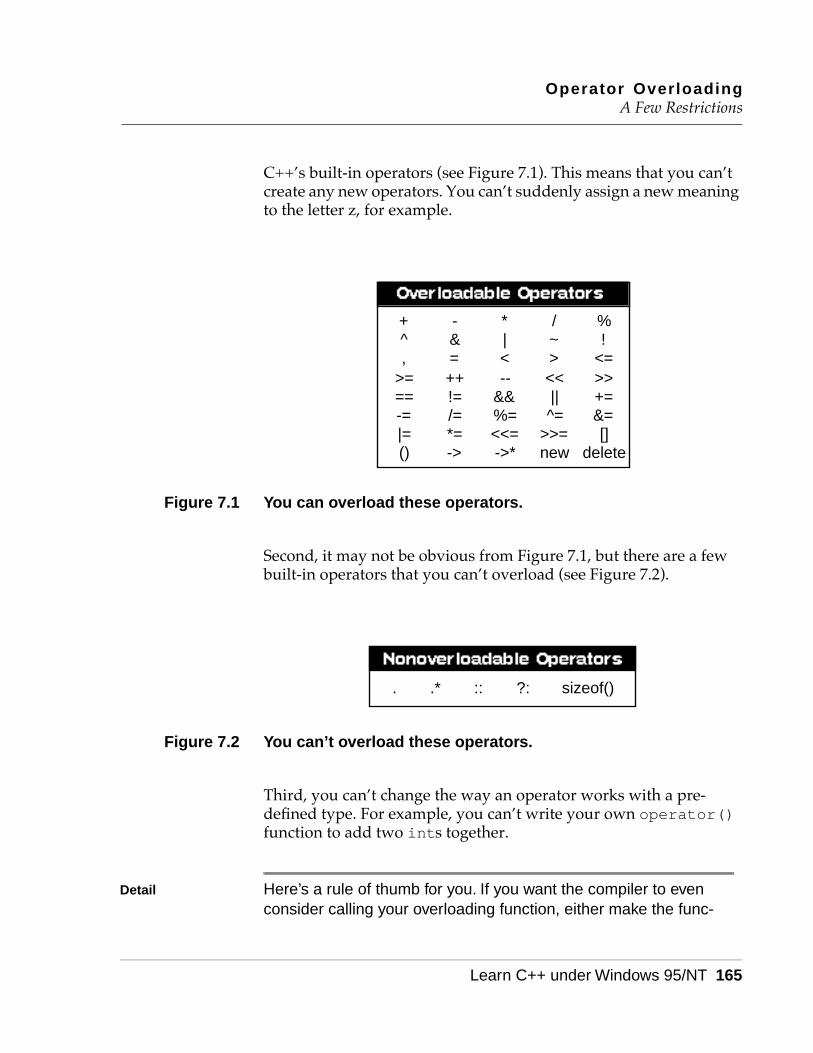
Operator OverloadingA Few Restrictions
Learn C++ under Windows 95/NT 165
C++’s built-in operators (see Figure 7.1). This means that you can’t create any new operators. You can’t suddenly assign a new meaning to the letter z, for example.
Figure 7.1 You can overload these operators.
Second, it may not be obvious from Figure 7.1, but there are a few built-in operators that you can’t overload (see Figure 7.2).
Figure 7.2 You can’t overload these operators.
Third, you can’t change the way an operator works with a pre-defined type. For example, you can’t write your own operator() function to add two ints together.
Detail Here’s a rule of thumb for you. If you want the compiler to even consider calling your overloading function, either make the func-
+^,
>===-=|=()
-&=++!=/=*=->
*|<--
&&%=<<=->*
/~><<||^=
>>=new
%!
<=>>+=&=[]
delete
. .* :: ?: sizeof()
Operator OverloadingA Few Restrictions
166 Learn C++ under Windows 95/NT
tion a class member function, or else make one of its parameters an object. Remember, the compiler will complain if you write an operator() function designed to work solely with C++’s built-in types.
Fourth, when you overload the ++ and -- operators, you’ll have to provide two versions of the operator function, one to support pre-fix notation and one to support postfix notation. The compiler dis-tinguishes between the two by checking for a dummy int parameter. Prefix version of your operator function shouldn’t have any parameters, while the postfix version takes a single int.
Detail Here’s an example of a prefix and postfix ++ overloading operator for the Time class from our last program. First, the prefix opera-tor function:
Time operator++(){
*this = *this +1;return *this;
}
Now here’s a version of the postfix operator function:
Time operator++( int ){
Time aTime = *this;
*this = *this + 1;return aTime;
}
Notice the unused int parameter in the postfix operator++() function. That’s how the compiler identifies this function as postfix. Finally, you’ll want to add a new version of operator+() to han-dle adding 1 to a Time object (as we do in the two functions above):

Operator OverloadingCovering All the Bases
Learn C++ under Windows 95/NT 167
Time Time::operator+( int num ){
hours += 1;
return *this;}
Go ahead and add this code to your program. Don’t forget to add the function declarations to your Time class declaration.
Fifth, you can’t change an operator’s precedence by overloading it. If you want to force an expression to be evaluated in a specific order, use parentheses.
Sixth, overloading functions cannot specify default parameters. This restriction makes sense since a function with default parameters can be called with a variable number of arguments. For example, you could call the function
MyFunc( short a=0, short b=0, short c=0 )
using anywhere from zero to three arguments. If an operator() function allowed default parameters, you’d be able to use an opera-tor without any operands! If you did that, how would the compiler know which overloading function to call? You get the idea.
Seventh, you can’t change the number of operands handled by an operator. For example, you couldn’t make a binary operator unary.
Covering All the BasesEarlier in the chapter, we looked at a function that overloaded the + operator and was designed to add the price of two MenuItems to-gether:
Operator OverloadingCovering All the Bases
168 Learn C++ under Windows 95/NT
float operator+( MenuItem item1, MenuItem item2 ){return( item1.GetPrice() + item2.GetPrice() );
}
When the compiler encountered an expression like
chicken + houseWine
where both chicken and houseWine were declared as MenuItems, it called operator+(), which passed the two operands as parame-ters. The float produced by adding both prices together was re-turned as the result of the expression.
What happens when the compiler evaluates an expression like
chicken + houseWine + applePie
This expression seems innocent enough, but look at it from the com-piler’s viewpoint. First, the subexpression
chicken + houseWine
is evaluated, resolving to a float. Next, this float is combined with applePie in the expression
<float> + applePie
Hmmm…what does the compiler do with this expression? We de-signed an overloading function that handles the + operator when its operands are both MenuItems, but we don’t have one that handles a float as the first operand and a MenuItem as the second operand.
Now take a look at the following expression:
Operator OverloadingCovering All the Bases
Learn C++ under Windows 95/NT 169
chicken + (houseWine + applePie)
First, the compiler evaluates the subexpression
(houseWine + applePie)
resolving it to a float. That leaves us with the expression
chicken + <float>
Once again, we designed an operator+() function that handles + and two MenuItems, but we don’t have one that handles a MenuItem as the first operand and a float as the second operand.
Overloading an Overloading FunctionAs you can see, you frequently need more than one version of the same operator() function. To accomplish this task, you use a tech-nique introduced back in Chapter 4, function overloading. Just as with any other function, you can overload an operator() function by providing more than one version, each with its own unique sig-nature.
By the Way Remember, a function’s signature is based on its parameter list and not on its return value.
How Many Versions Are Needed?Figuring out how many versions of an operator() function to pro-vide is actually pretty straightforward. Start by making a list of the number of possible types you want to allow for each of the opera-tor’s operands. Don’t forget to include the type returned by your operator() function.
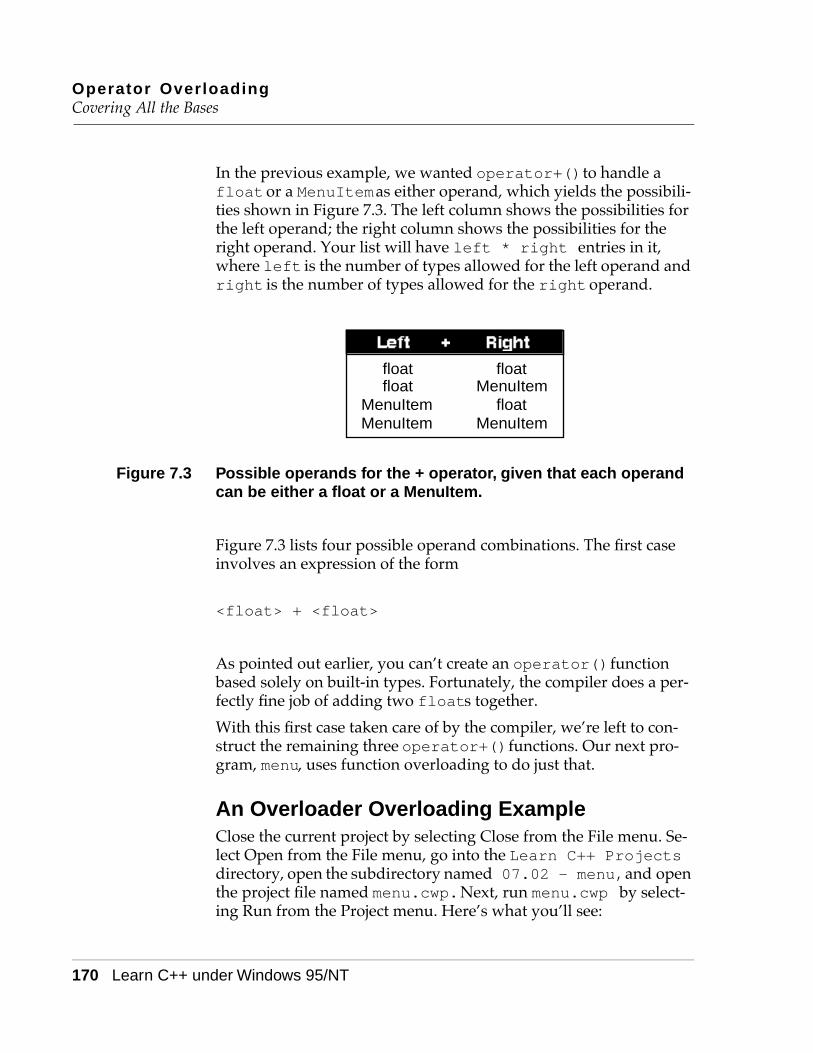
Operator OverloadingCovering All the Bases
170 Learn C++ under Windows 95/NT
In the previous example, we wanted operator+() to handle a float or a MenuItem as either operand, which yields the possibili-ties shown in Figure 7.3. The left column shows the possibilities for the left operand; the right column shows the possibilities for the right operand. Your list will have left * right entries in it, where left is the number of types allowed for the left operand and right is the number of types allowed for the right operand.
Figure 7.3 Possible operands for the + operator, given that each operand can be either a float or a MenuItem.
Figure 7.3 lists four possible operand combinations. The first case involves an expression of the form
<float> + <float>
As pointed out earlier, you can’t create an operator() function based solely on built-in types. Fortunately, the compiler does a per-fectly fine job of adding two floats together.
With this first case taken care of by the compiler, we’re left to con-struct the remaining three operator+() functions. Our next pro-gram, menu, uses function overloading to do just that.
An Overloader Overloading ExampleClose the current project by selecting Close from the File menu. Se-lect Open from the File menu, go into the Learn C++ Projects directory, open the subdirectory named 07.02 - menu, and open the project file named menu.cwp. Next, run menu.cwp by select-ing Run from the Project menu. Here’s what you’ll see:
floatfloat
MenuItemMenuItem
floatMenuItem
floatMenuItem
Operator OverloadingCovering All the Bases
Learn C++ under Windows 95/NT 171
MenuItem::operator+( MenuItem item )operator+( float subtotal, MenuItem item )
Total: 15.969999
MenuItem::operator+( MenuItem item )MenuItem::operator+( float subtotal )
Total: 15.969999
Let’s take a look at the source code.
The menu Source Code
menu.cp starts with two include files and a single constant:
#include <iostream.h>#include <string.h>
const short kMaxNameLength = 40;
Next, the MenuItem class is declared. The MenuItem class contains two data members. price lists the price of the item while name con-tains the item’s name as it might appear on a menu:
//-------------------------------------- MenuItem
class MenuItem{private:float price;char name[ kMaxNameLength ];
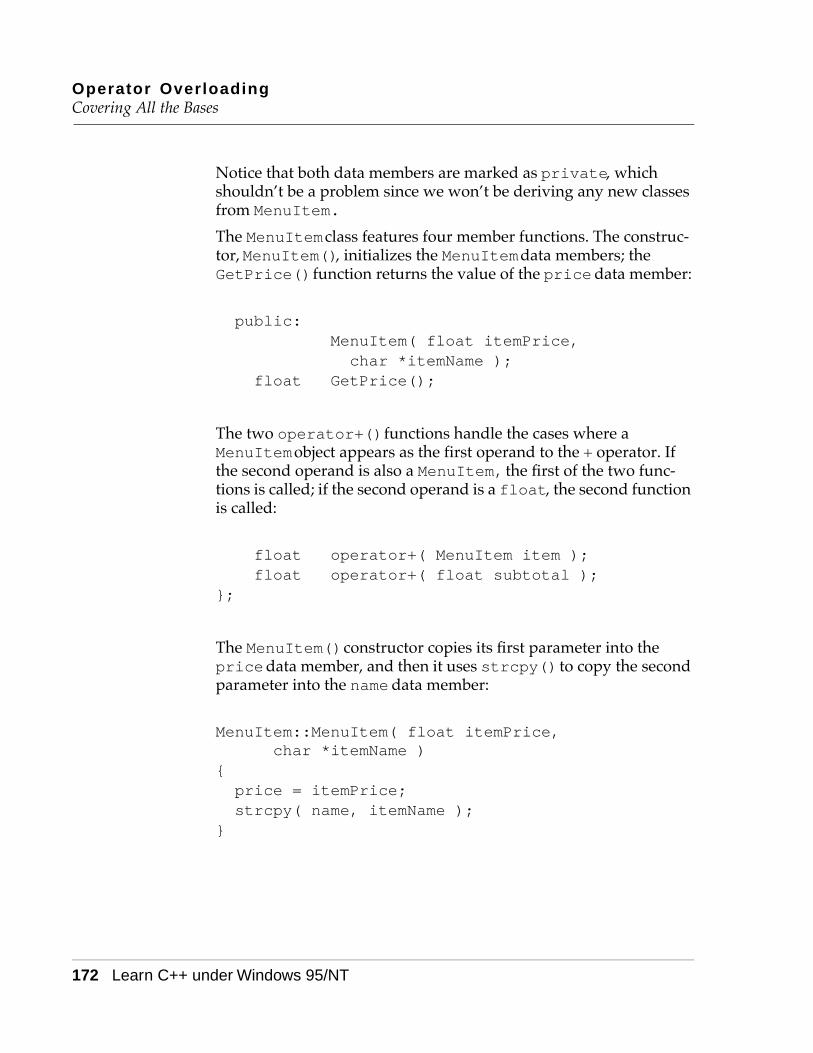
Operator OverloadingCovering All the Bases
172 Learn C++ under Windows 95/NT
Notice that both data members are marked as private, which shouldn’t be a problem since we won’t be deriving any new classes from MenuItem.
The MenuItem class features four member functions. The construc-tor, MenuItem(), initializes the MenuItem data members; the GetPrice() function returns the value of the price data member:
public:MenuItem( float itemPrice, char *itemName );
float GetPrice();
The two operator+() functions handle the cases where a MenuItem object appears as the first operand to the + operator. If the second operand is also a MenuItem, the first of the two func-tions is called; if the second operand is a float, the second function is called:
float operator+( MenuItem item );float operator+( float subtotal );
};
The MenuItem() constructor copies its first parameter into the price data member, and then it uses strcpy() to copy the second parameter into the name data member:
MenuItem::MenuItem( float itemPrice, char *itemName )
{price = itemPrice;strcpy( name, itemName );
}
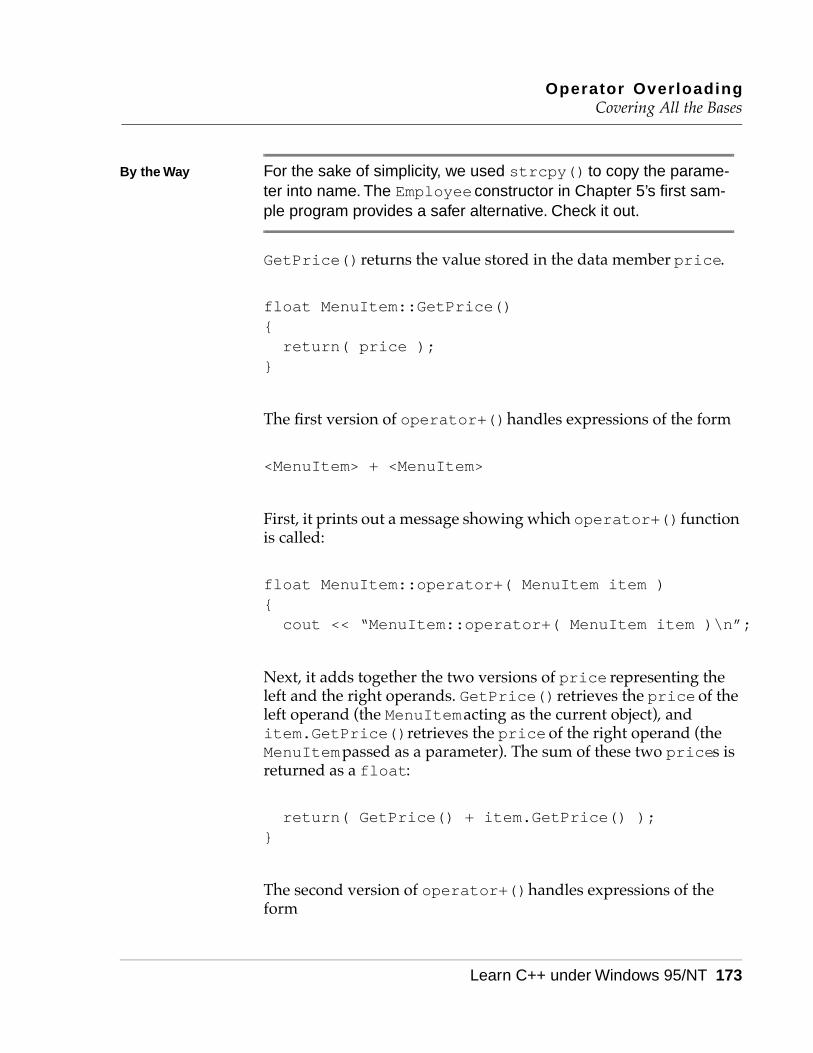
Operator OverloadingCovering All the Bases
Learn C++ under Windows 95/NT 173
By the Way For the sake of simplicity, we used strcpy() to copy the parame-ter into name. The Employee constructor in Chapter 5’s first sam-ple program provides a safer alternative. Check it out.
GetPrice() returns the value stored in the data member price.
float MenuItem::GetPrice(){return( price );
}
The first version of operator+() handles expressions of the form
<MenuItem> + <MenuItem>
First, it prints out a message showing which operator+() function is called:
float MenuItem::operator+( MenuItem item ){cout << “MenuItem::operator+( MenuItem item )\n”;
Next, it adds together the two versions of price representing the left and the right operands. GetPrice() retrieves the price of the left operand (the MenuItem acting as the current object), and item.GetPrice() retrieves the price of the right operand (the MenuItem passed as a parameter). The sum of these two prices is returned as a float:
return( GetPrice() + item.GetPrice() );}
The second version of operator+() handles expressions of the form

Operator OverloadingCovering All the Bases
174 Learn C++ under Windows 95/NT
<MenuItem> + <float>
First, it prints out a message showing which operator+() function is called:
float MenuItem::operator+( float subtotal ){cout << “MenuItem::operator+( float
subtotal )\n”;
Next, it adds together the price of the current object, retrieved by calling GetPrice(), and the float passed as a parameter. The sum is returned as a float:
return( GetPrice() + subtotal );}
The third version of operator+() is, by necessity, not a member function of any class. To understand why this is so, take a look at the expressions this version of operator+() is designed to handle:
<float> + <MenuItem>
As mentioned earlier, the compiler uses the first operand to deter-mine how the overloading operator() function is called. If the first parameter is an object, that object is used to call the operator() function and all other operands are passed to the func-tion as parameters. If the first parameter is not an object, the com-piler’s list of candidate overloading functions is reduced to the program’s nonclass operator() functions. Once a matching func-tion is located, the compiler calls it, passing all of the operands as parameters.
Just like its compatriots, the third version of operator+() starts by printing a message showing which operator+() function is called:

Operator OverloadingCovering All the Bases
Learn C++ under Windows 95/NT 175
//-------------------------------------- operator+()
float operator+( float subtotal, MenuItem item ){cout << “operator+( float subtotal, MenuItem
item )\n”;
Next, the float and the MenuItem’s price, retrieved by calling GetPrice(), are added together and returned as a float:
return( subtotal + item.GetPrice() );}
OK, here comes the good stuff! main() declares three MenuItem objects, initializing each with a price and a name:
//-------------------------------------- main()
int main(){MenuItem chicken( 8.99, “Chicken Kiev with
salad” );MenuItem houseWine( 2.99, “Riesling by the
glass” );MenuItem applePie( 3.99, “Apple Pie a la
Mode” );
main() also declares a float used to hold the result of our Menu addition.
float total;
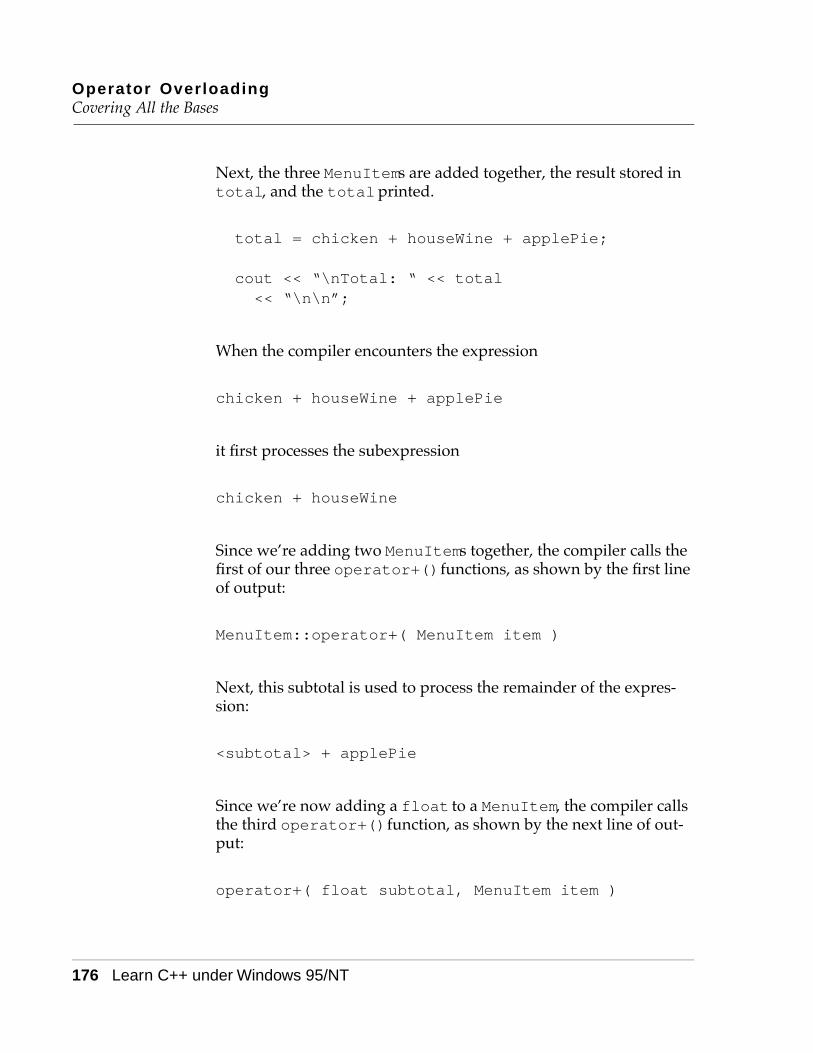
Operator OverloadingCovering All the Bases
176 Learn C++ under Windows 95/NT
Next, the three MenuItems are added together, the result stored in total, and the total printed.
total = chicken + houseWine + applePie;
cout << “\nTotal: “ << total<< “\n\n”;
When the compiler encounters the expression
chicken + houseWine + applePie
it first processes the subexpression
chicken + houseWine
Since we’re adding two MenuItems together, the compiler calls the first of our three operator+() functions, as shown by the first line of output:
MenuItem::operator+( MenuItem item )
Next, this subtotal is used to process the remainder of the expres-sion:
<subtotal> + applePie
Since we’re now adding a float to a MenuItem, the compiler calls the third operator+() function, as shown by the next line of out-put:
operator+( float subtotal, MenuItem item )

Operator OverloadingCovering All the Bases
Learn C++ under Windows 95/NT 177
Once the calculations are complete, the total is printed:
Total: 15.969999
By the Way Why 15.969999 instead of 15.97? Since we are using the default settings of the iostream library, we don’t have much control over the precision used to print floats. In our next chapter, we’ll ex-plore the mechanisms you can use to fine-tune your iostream output.
Then, the three MenuItems are added together again, this time with a slight wrinkle—the addition of parentheses wrapped around the last two operands:
total = chicken + (houseWine + applePie);
These parentheses force the compiler to start by evaluating the sub-expression
(houseWine + applePie)
Once again, we’re adding two MenuItems together, as shown by the next line of output:
MenuItem::operator+( MenuItem item )
Next, this subtotal is used to process the remainder of the expres-sion:
chicken + <subtotal>
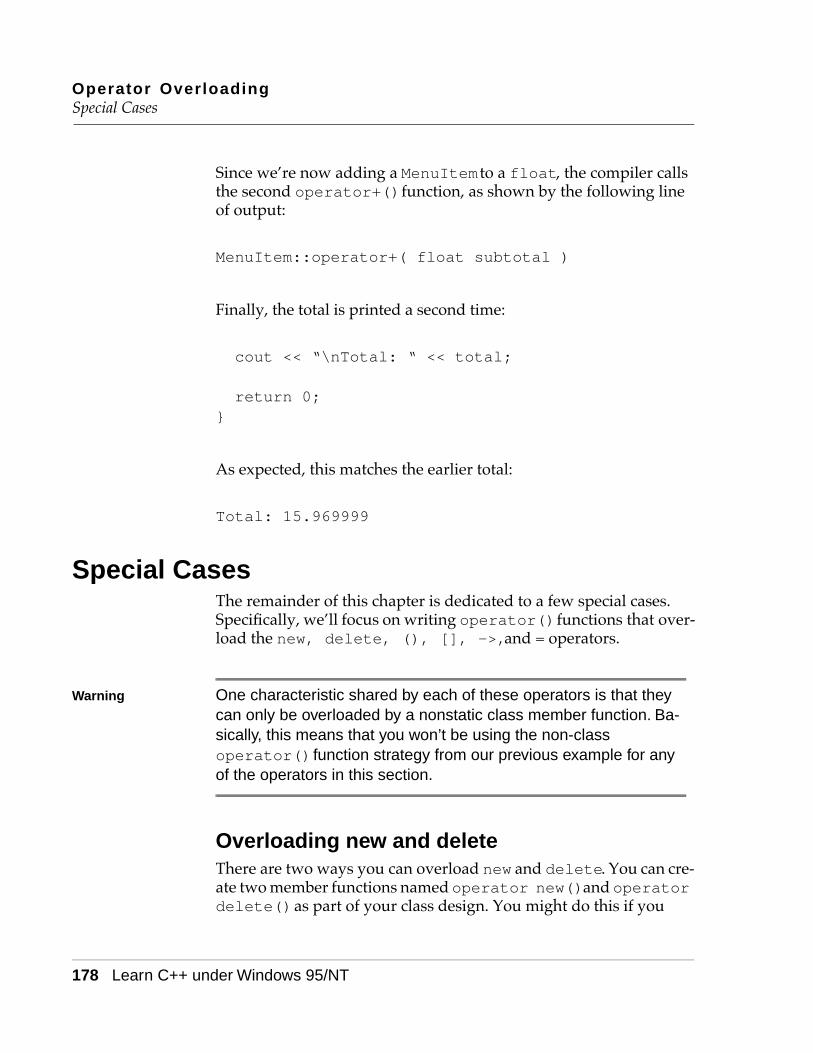
Operator OverloadingSpecial Cases
178 Learn C++ under Windows 95/NT
Since we’re now adding a MenuItem to a float, the compiler calls the second operator+() function, as shown by the following line of output:
MenuItem::operator+( float subtotal )
Finally, the total is printed a second time:
cout << “\nTotal: “ << total;
return 0;}
As expected, this matches the earlier total:
Total: 15.969999
Special CasesThe remainder of this chapter is dedicated to a few special cases. Specifically, we’ll focus on writing operator() functions that over-load the new, delete, (), [], ->, and = operators.
Warning One characteristic shared by each of these operators is that they can only be overloaded by a nonstatic class member function. Ba-sically, this means that you won’t be using the non-class operator() function strategy from our previous example for any of the operators in this section.
Overloading new and deleteThere are two ways you can overload new and delete. You can cre-ate two member functions named operator new() and operator delete() as part of your class design. You might do this if you
Operator OverloadingSpecial Cases
Learn C++ under Windows 95/NT 179
wanted to implement your own memory management scheme for a specific class.
Another way to overload new and delete is to overload the global new and delete operators by providing operator new() and operator delete() functions that are not members of a class. You might do this if you wanted new and delete to always initial-ize newly allocated memory.
Warning Whatever your reasons for overloading new and delete, proceed with caution. No matter how you do it, once you overload new and delete, you are taking on a big responsibility, one that can get you in deep trouble if you don’t handle things properly.
An operator new ExampleHere’s a small example you can use as the basis for your own new and delete operator() functions. Close the current project by selecting Close from the File menu. Select Open from the File menu, go into the Learn C++ Projects directory, open the subdirec-tory named 07.03 - new, and open the project file named new.cwp. Next, run new.cwp by selecting Run from the Project menu. Here’s what you’ll see:
new: 1 byte(s).delete: 1 byte(s).
Let’s take a look at the source code.
The new Source Code
new.cp starts with a #include you’ve seen before:
#include <iostream.h>
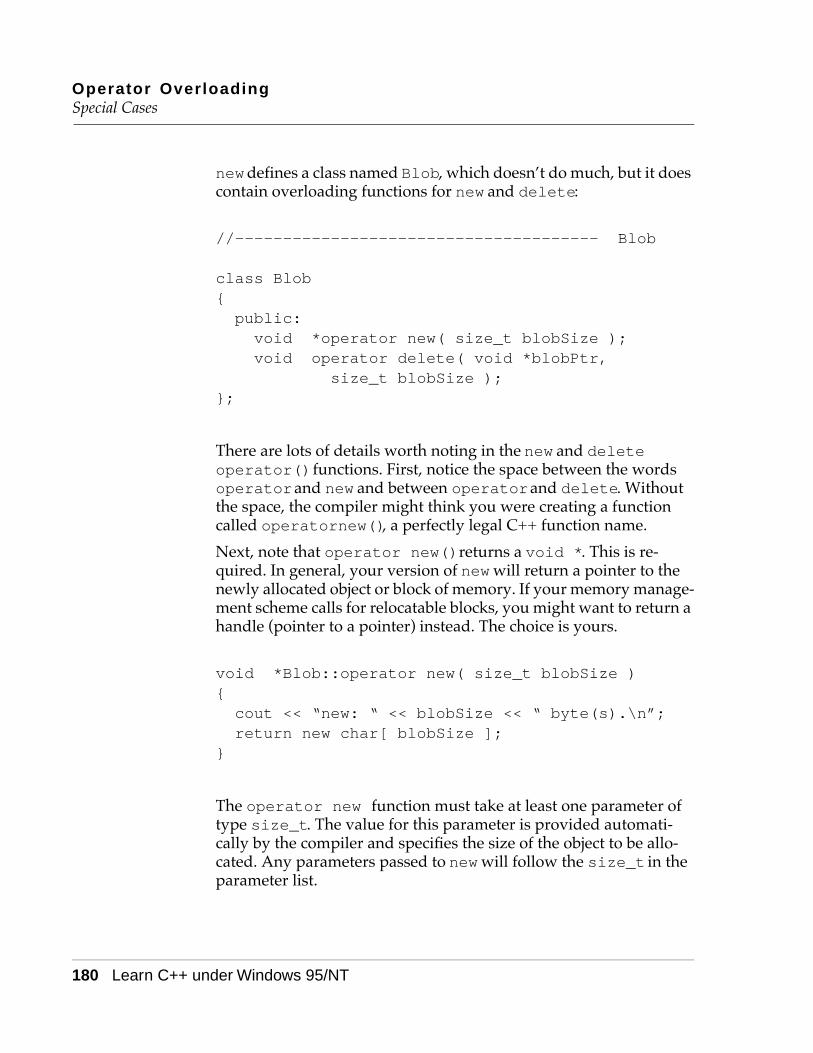
Operator OverloadingSpecial Cases
180 Learn C++ under Windows 95/NT
new defines a class named Blob, which doesn’t do much, but it does contain overloading functions for new and delete:
//-------------------------------------- Blob
class Blob{public:void *operator new( size_t blobSize );void operator delete( void *blobPtr,
size_t blobSize );};
There are lots of details worth noting in the new and delete operator() functions. First, notice the space between the words operator and new and between operator and delete. Without the space, the compiler might think you were creating a function called operatornew(), a perfectly legal C++ function name.
Next, note that operator new() returns a void *. This is re-quired. In general, your version of new will return a pointer to the newly allocated object or block of memory. If your memory manage-ment scheme calls for relocatable blocks, you might want to return a handle (pointer to a pointer) instead. The choice is yours.
void *Blob::operator new( size_t blobSize ){cout << “new: “ << blobSize << “ byte(s).\n”;return new char[ blobSize ];
}
The operator new function must take at least one parameter of type size_t. The value for this parameter is provided automati-cally by the compiler and specifies the size of the object to be allo-cated. Any parameters passed to new will follow the size_t in the parameter list.

Operator OverloadingSpecial Cases
Learn C++ under Windows 95/NT 181
The operator delete function never returns a value and must be declared to return a void. delete always takes at least one param-eter, a pointer to the block to be deleted. The second parameter, a size_t, is optional. If you provide it, it will be filled with the size, in bytes, of the block pointed to by the first parameter.
void Blob::operator delete( void *blobPtr, size_t blobSize )
{cout << “delete: “ << blobSize << “ byte(s).\n”;
delete [] blobPtr;}
Detail Sometimes the size passed as the second parameter to operator delete() isn’t quite what you expected. If the pointer being deleted is a pointer to a base class yet the object pointed to belongs to a class derived from the base class, the second pa-rameter to operator delete() will be the size of the base class.
There is an exception to this rule. If the base class’s destructor is virtual, the size parameter will hold the proper value, the size of the object actually being deleted.
Overloading delete and new is tricky work. If you plan on writing your own operator() functions for new and delete, check out section 12.5 in The Annotated C++ Reference Manual.
main() creates a new Blob and then deletes it:
//-------------------------------------- main()
int main(){Blob *blobPtr;
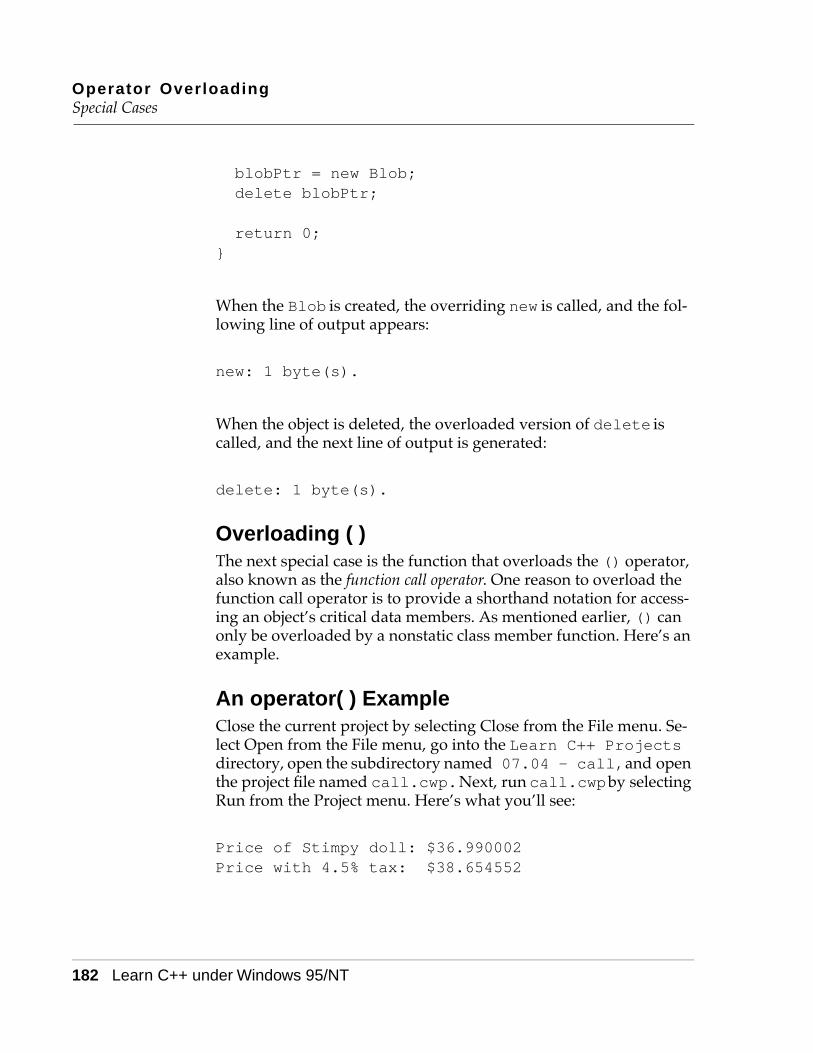
Operator OverloadingSpecial Cases
182 Learn C++ under Windows 95/NT
blobPtr = new Blob;delete blobPtr;
return 0;}
When the Blob is created, the overriding new is called, and the fol-lowing line of output appears:
new: 1 byte(s).
When the object is deleted, the overloaded version of delete is called, and the next line of output is generated:
delete: 1 byte(s).
Overloading ( )The next special case is the function that overloads the () operator, also known as the function call operator. One reason to overload the function call operator is to provide a shorthand notation for access-ing an object’s critical data members. As mentioned earlier, () can only be overloaded by a nonstatic class member function. Here’s an example.
An operator( ) ExampleClose the current project by selecting Close from the File menu. Se-lect Open from the File menu, go into the Learn C++ Projects directory, open the subdirectory named 07.04 - call, and open the project file named call.cwp. Next, run call.cwp by selecting Run from the Project menu. Here’s what you’ll see:
Price of Stimpy doll: $36.990002Price with 4.5% tax: $38.654552
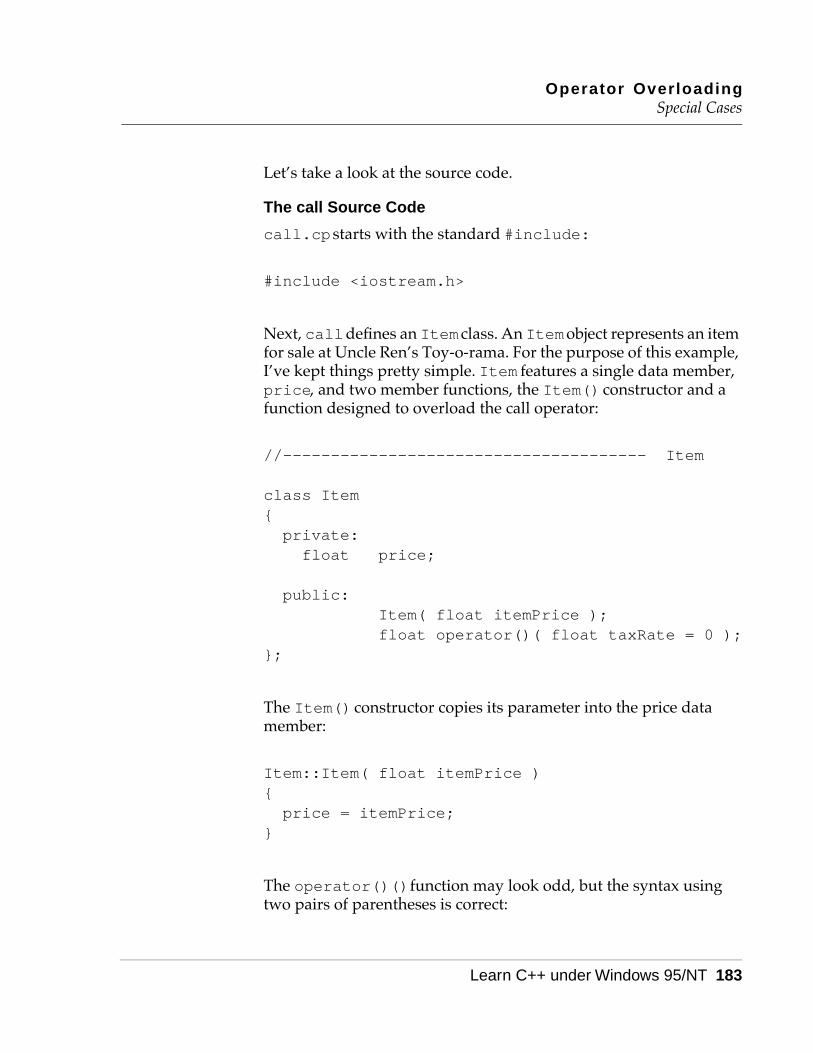
Operator OverloadingSpecial Cases
Learn C++ under Windows 95/NT 183
Let’s take a look at the source code.
The call Source Code
call.cp starts with the standard #include:
#include <iostream.h>
Next, call defines an Item class. An Item object represents an item for sale at Uncle Ren’s Toy-o-rama. For the purpose of this example, I’ve kept things pretty simple. Item features a single data member, price, and two member functions, the Item() constructor and a function designed to overload the call operator:
//-------------------------------------- Item
class Item{private:float price;
public:Item( float itemPrice );float operator()( float taxRate = 0 );
};
The Item() constructor copies its parameter into the price data member:
Item::Item( float itemPrice ){price = itemPrice;
}
The operator()() function may look odd, but the syntax using two pairs of parentheses is correct:

Operator OverloadingSpecial Cases
184 Learn C++ under Windows 95/NT
float Item::operator()( float taxRate ){
The first pair of parentheses designates the operator being over-loaded; the second pair surrounds any parameters being passed to the function. In this case, one parameter, taxRate, is specified. No-tice that taxRate has a default value of 0. You’ll see why in a minute.
The operator()() function takes the specified taxRate and ap-plies it to the Item’s price, returning the Item’s total price:
return( ((taxRate * .01) + 1) * price );}
Detail Since the function call operator can only be overloaded by a class member function, the previous reference to price refers to the data member of the object used in combination with the call opera-tor.
main() starts by creating an Item object. The Stimpy doll was Uncle Ren’s biggest seller last year (although Log came in a close second):
//-------------------------------------- main()
int main(){Item stimpyDoll( 36.99 );
Here’s where the call overload comes into play:
cout << “Price of Stimpy doll: $” << stimpyDoll();
Operator OverloadingSpecial Cases
Learn C++ under Windows 95/NT 185
By taking advantage of the default parameter, the function call
stimpyDoll()
returns stimpyDoll’s price. We could have accomplished the same thing by coding
stimpyDoll.price
or
stimpyDoll( 0 )
Next, we use the same function to calculate the cost of the doll with 4.5% tax included:
cout << “\nPrice with 4.5% tax: $” << stimpyDoll( 4.5 );
return 0;}
Once again, we take advantage of the overloaded function call oper-ator. This time, we provide a parameter. Notice that the same over-loading function is used for two different (though closely related) purposes.
By the Way You may have noticed that the Stimpy doll’s price (including tax) printed as
Price with 4.5% tax: $38.654552
Operator OverloadingSpecial Cases
186 Learn C++ under Windows 95/NT
Wouldn’t it be nice if you could trim the price to $38.65 (who needs those extra digits, anyway)? Well, stick around until Chapter 8, where you’ll learn how to customize iostream in all sorts of ways.
The key to properly overloading the function call operator is to use it to provide access to a key data member. If your object represents a character string, you might overload () to provide access to a sub-string, using a pair of parameters to provide the starting position and length of the substring.
Another strategy uses () as an iterator function for accessing data kept in a sequence or list. Each call to () bumps a master pointer to the next element in the list and returns the new data element. No question about it, the function call operator is a useful operator to overload.
Overloading [ ]Another useful operator to overload is [], also known as the sub-script operator. Although it can be used for other things, [] is fre-quently overloaded to provide range checking for arrays. You’ll see how to do this in a moment.
The subscript overloading syntax is similar to that of the function call operator. In the statement
myChar = myObject[ 10 ];
the [ ] overloading function belonging to the same class as myObject is called with a single parameter, 10. The value returned by the function is assigned to the variable myChar.
On the flip side of the coin, the [] overloading function must sup-port a [] expression on the left side of the assignment statement, like so:
myObject[ 10 ] = myChar;

Operator OverloadingSpecial Cases
Learn C++ under Windows 95/NT 187
The next example shows you how to properly overload [].
An operator[ ] ExampleClose the current project by selecting Close from the File menu. Se-lect Open from the File menu, go into the Learn C++ Projects directory, open the subdirectory named 07.05 - subscript, and open the project file named subscript.cwp. Next, run subscript.cwp by selecting Run from the Project menu. Here’s what you’ll see:
B. X. Clintonindex out of bounds!!!Z. X. Clinton
Let’s take a look at the source code.
The subscript Source Code
subscript.cp starts with some familiar #includes and a con-stant that is used to declare a string data member:
#include <iostream.h>#include <string.h>
const short kMaxNameLength = 40;
The Name class is fairly simple. It is designed to hold a null-termi-nated string containing a person’s name as well as a short contain-ing the length of the string:
//-------------------------------------- Name
class Name{private:char nameString[ kMaxNameLength ];
Operator OverloadingSpecial Cases
188 Learn C++ under Windows 95/NT
short nameLength;
The member functions include a constructor as well as two operator overloading functions. One function overloads []; the other over-loads ():
public:Name( char *name );
void operator()();char &operator[]( short index );
};
The constructor copies the provided string to the nameString data member and places the length of the string in the nameLength data member:
Name::Name( char *name ){strcpy( nameString, name );nameLength = strlen( name );
}
The () operator overloading function simply prints the character string in nameString:
void Name::operator()(){cout << nameString << “\n”;
}
The [] operator overloading function takes a single parameter, an index into the character string. Notice the unusual return type. By specifying a char reference as a return type, the function ensures
Operator OverloadingSpecial Cases
Learn C++ under Windows 95/NT 189
that the [] operator can appear on either side of an assignment statement. Essentially, an expression such as
myObject[ 0 ]
is turned into a char variable containing the character returned by the [] overloading function:
char& Name::operator[]( short index ){
Here’s the real advantage to overloading the [] operator. Before you access the specified character, you can first do some bounds checking, making sure the character is actually in the character string! If the specified index is out-of-bounds, we print a message and point to the first character in the string. In real life, you’d proba-bly want to jump to some error-handling code, but I’ve decided to keep things simple here:
if ( ( index < 0 ) || ( index >= nameLength ) ){cout << “index out of bounds!!!\n”;return( nameString[ 0 ] );
}
If the index is in bounds, the specified character is returned:
elsereturn( nameString[ index ] );
}
main() contains the proof of the pudding. First, a Name object is created, bearing a presidential tag:
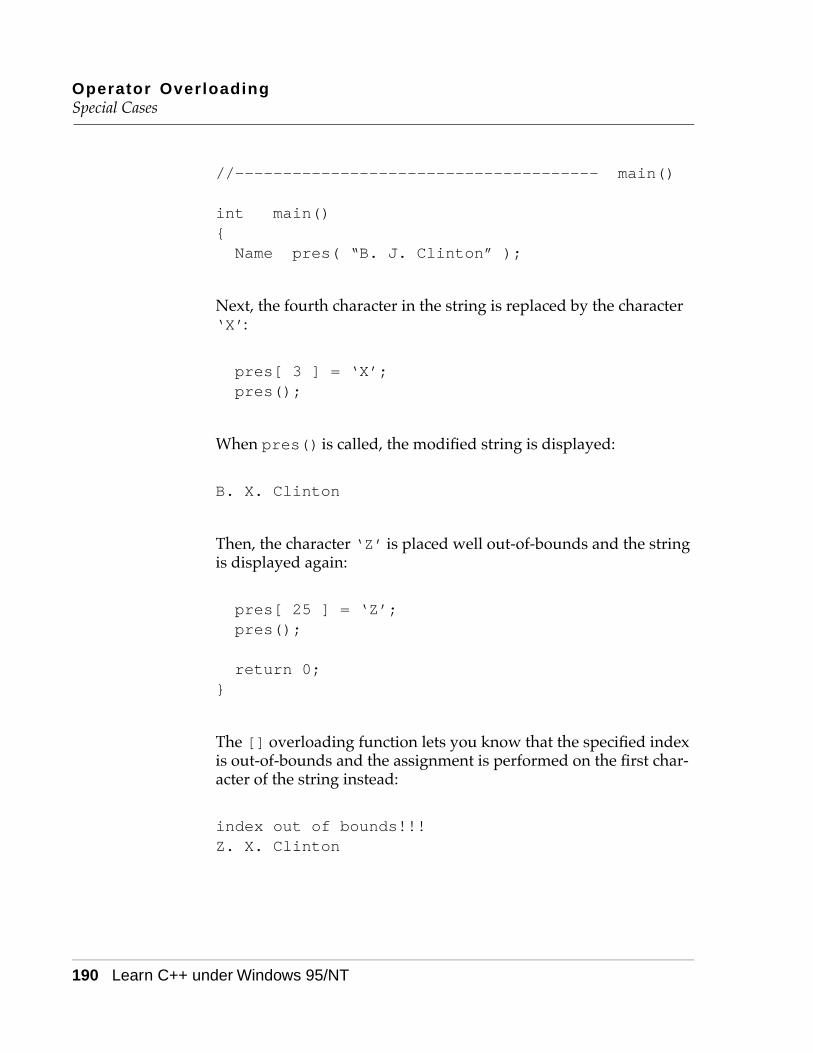
Operator OverloadingSpecial Cases
190 Learn C++ under Windows 95/NT
//-------------------------------------- main()
int main(){Name pres( “B. J. Clinton” );
Next, the fourth character in the string is replaced by the character ‘X’:
pres[ 3 ] = ‘X’;pres();
When pres() is called, the modified string is displayed:
B. X. Clinton
Then, the character ‘Z’ is placed well out-of-bounds and the string is displayed again:
pres[ 25 ] = ‘Z’;pres();
return 0;}
The [] overloading function lets you know that the specified index is out-of-bounds and the assignment is performed on the first char-acter of the string instead:
index out of bounds!!!Z. X. Clinton
Operator OverloadingSpecial Cases
Learn C++ under Windows 95/NT 191
Overloading ->Next on the special cases list is the -> operator, also known as the member access operator. Like the other operators presented in this sec-tion, overloading -> provides a shorthand notation that can save you code and add an elegant twist to your program.
When the compiler encounters the -> operator, it checks the type of the left-hand operand. If the operand is a pointer, -> is evaluated normally. If the operand is an object or object reference, the compiler checks to see whether the object’s class provides an -> overloading function.
If no -> overloading function is provided, the compiler reports an error, since the -> operator requires a pointer, not an object. If the -> overloading function is present, the left operand is used to call the overloading function. When the overloading function returns, its re-turn value is substituted for the original left operand, and the evalu-ation process is repeated. When used this way, the -> operator is known as a smart pointer.
If these rules sound confusing, hold on. The next example should make them loud and clear.
An operator-> ExampleClose the current project by selecting Close from the File menu. Se-lect Open from the File menu, go into the Learn C++ Projects directory, open the subdirectory named 07.06 - smartPtr, and open the project file named smartPtr.cwp. Next, run smartPtr.cwp by selecting Run from the Project menu. Here’s what you’ll see:
Name: Bill Clinton
Let’s take a look at the source code.
The smartPtr Source Code
smartPtr.cp starts with some #includes and a constant that you know and love:
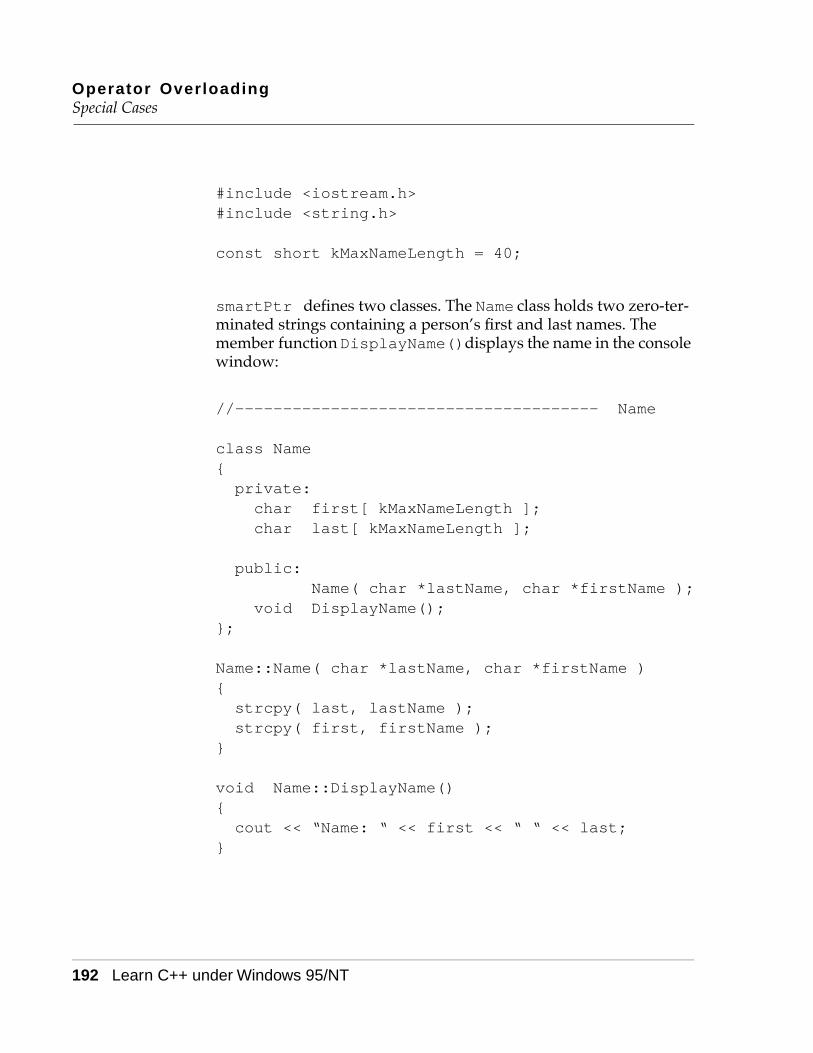
Operator OverloadingSpecial Cases
192 Learn C++ under Windows 95/NT
#include <iostream.h>#include <string.h>
const short kMaxNameLength = 40;
smartPtr defines two classes. The Name class holds two zero-ter-minated strings containing a person’s first and last names. The member function DisplayName() displays the name in the console window:
//-------------------------------------- Name
class Name{private:char first[ kMaxNameLength ];char last[ kMaxNameLength ];
public:Name( char *lastName, char *firstName );
void DisplayName();};
Name::Name( char *lastName, char *firstName ){strcpy( last, lastName );strcpy( first, firstName );
}
void Name::DisplayName(){cout << “Name: “ << first << “ “ << last;
}
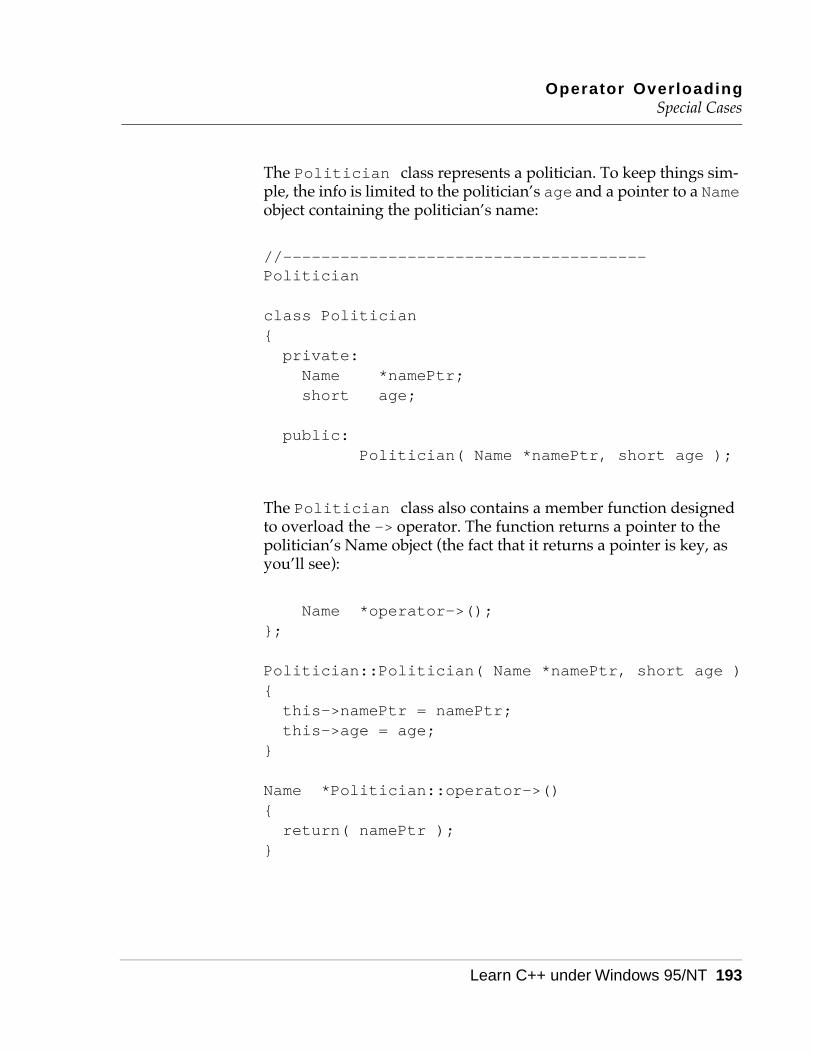
Operator OverloadingSpecial Cases
Learn C++ under Windows 95/NT 193
The Politician class represents a politician. To keep things sim-ple, the info is limited to the politician’s age and a pointer to a Name object containing the politician’s name:
//-------------------------------------- Politician
class Politician{private:Name *namePtr;short age;
public:Politician( Name *namePtr, short age );
The Politician class also contains a member function designed to overload the -> operator. The function returns a pointer to the politician’s Name object (the fact that it returns a pointer is key, as you’ll see):
Name *operator->();};
Politician::Politician( Name *namePtr, short age ){this->namePtr = namePtr;this->age = age;
}
Name *Politician::operator->(){return( namePtr );
}
Operator OverloadingSpecial Cases
194 Learn C++ under Windows 95/NT
main() embeds a last and first name into a Name object and then uses that object to create a new Politician object (so far, no big deal):
//-------------------------------------- main()
int main(){Name myName( “Clinton”, “Bill” );Politician billClinton( &myName, 46 );
Next, the Politician object is combined with the smart pointer to call DisplayName():
billClinton->DisplayName();
return 0;}
There are several problems here. First, billClinton is an object and not a pointer, yet it is used with the -> operator. Second, the member function DisplayName() is not a member of the Politician class. How can it be called directly from a Politician object?
Basically, the -> overloading function is doing its thing as a smart pointer by bridging the gap between a Politician object and a Name member function. When the compiler encounters the -> oper-ator, it checks the type of the left operand. Since billClinton is not a pointer, the compiler checks for an -> overloading function in the Politician class. When the overloading function is found, it is called, using billClinton as the current object. The function returns a pointer to a Name object. The compiler substitutes this re-turn value for the original, yielding
namePtr->DisplayName();
Operator OverloadingSpecial Cases
Learn C++ under Windows 95/NT 195
The compiler again checks the type of the left operand. This time, the operand is a pointer and the -> operator is evaluated normally. The namePtr is used to call the Name function DisplayName(), re-sulting in the following line of output:
Name: Bill Clinton
As you can see, overloading the -> operator provides a shortcut that allows you to run a direct line between two different classes.
Detail You can take this model one step further by supposing that the -> overloading function returns a Name object rather than a pointer to a Name object. The compiler then substitutes the Name object in the original expression and reevaluates:
myName->DisplayName();
Once again, since the left operand is an object and not a pointer, the left operand’s class is examined in search of another -> over-loading function. This substitution and call of -> overloading func-tions is repeated until a pointer is returned (the end of the chain is reached). Only then is the -> operator evaluated in its traditional form.
You can use this technique to walk along a chain of objects. Each -> overloading function evaluates some criteria, returning an ob-ject if the search should continue or a pointer if the end condition has been met. C++ is cool, eh?
Overloading =And now, finally, we’ve reached the last of the special cases, the operator=() function. Why overload the = operator? To best un-derstand why, take a look at what happens when you assign one ob-ject to another.
Operator OverloadingSpecial Cases
196 Learn C++ under Windows 95/NT
Suppose you define a String class, like this:
class String{private:char *s;short stringLength;
public:String( char *theString );
};
The data member s points to a null-terminated string. The data member stringLength contains the length of the string. The con-structor String() initializes both data members. Notice that no memory has been allocated for s. This is done inside the construc-tor.
Now suppose you create a pair of Strings, like this:
String source( “from” );String destination( “to” );
And then, you assign one of the String objects to the other, like this:
destination = source;
What happens?
As it turns out, the = operator copies one object to another by a pro-cess called memberwise assignment. Basically, this means that each data member within one object is copied, one at a time, to the corre-sponding data member in the receiving object.
The trouble with memberwise assignment is in the way it deals with allocated memory, such as you’d find with a null-terminated charac-
Operator OverloadingSpecial Cases
Learn C++ under Windows 95/NT 197
ter string. When one (char *) is copied to another, the address stored in the (char *) is copied, not the data pointed to by the ad-dress. Once the statement
destination = source;
executes, both Strings point to the same null-terminated string in memory. The default = operator isn’t smart enough to allocate the appropriate amount of new memory and then use strcpy() to make a copy of the string. That’s where operator=() comes in.
If you want the ability to assign the contents of one object to another, and the objects contain allocated memory, you’ll have to write a smart = overloading function that knows how to do it right. Here’s an example.
An operator= ExampleClose the current project by selecting Close from the File menu. Se-lect Open from the File menu, go into the Learn C++ Projects directory, open the subdirectory named 07.07 - equals, and open the project file named equals.cwp. Next, run equals.cwp by selecting Run from the Project menu. Here’s what you’ll see:
String address: 3259462String address: 3259472----String address: 3259462String address: 3261024
Let’s take a look at the source code.
The equals Source Code
equals.cp starts with the same old #includes:
#include <iostream.h>#include <string.h>
Operator OverloadingSpecial Cases
198 Learn C++ under Windows 95/NT
The String class described earlier is defined next, with a few addi-tions:
//-------------------------------------- String
class String{private:char *s;short stringLength;
The constructor still allocates the memory for the specified string, but now several new functions are added:
public:String( char *theString );~String();
void DisplayAddress();String &operator=( const String &fromString );
};
The constructor starts by calculating the length of the specified string, storing the result in stringLength. Next, new is used to al-locate the proper amount of memory (the extra byte is for the null terminator at the end of the string). Finally, strcpy() is called to copy the source string to the data member s:
String::String( char *theString ){stringLength = strlen( theString );s = new char[ stringLength + 1 ];
strcpy( s, theString );}

Operator OverloadingSpecial Cases
Learn C++ under Windows 95/NT 199
Detail If s is declared as an array of fixed size, instead of as a dynamic string pointer, memberwise initialization works just fine since the memory for the array is part of the object itself. Since s points to a block of memory outside the object, memberwise initialization passes it by.
The String destructor uses delete to destroy the array of chars pointed to by s:
String::~String(){delete [] s;
}
The member function String::DisplayAddress() provides a shorthand way of displaying the address of the first byte of a string:
void String::DisplayAddress(){cout << “String address: “ << (unsigned long)s <<
“\n”;}
Here’s the = overloading function. Just like operator[](), this function must return an l-value. In this case, we return a reference to a String object. We also take a String reference as a parameter. Use the following sample code as a template for all your operator=() functions:
String &String::operator=( const String &fromString )
{
Operator OverloadingSpecial Cases
200 Learn C++ under Windows 95/NT
Detail Since you can only assign an object to another object of the same class, the type of the return value will always agree with the type of the parameter. const in the parameter declaration just marks the parameter as read-only.
operator=() starts by freeing up the memory occupied by the old string. Next, the new value for the data member stringLength is copied from the source String. After that, new is used to allocate a block for the new string, and strcpy() is used to copy the source string into s:
delete [] s;
stringLength = fromString.stringLength;
s = new char[ stringLength + 1 ];
strcpy( s, fromString.s );
Since this is a pointer to the current object, *this is the object itself. We return *this to satisfy our need to return an l-value.
return( *this );}
main() puts everthing to the test. First, two String objects are cre-ated and initialized:
//-------------------------------------- main()
int main(){String captain( “Picard” );String doctor( “Crusher” );

Operator OverloadingSpecial Cases
Learn C++ under Windows 95/NT 201
Next, the address of each String’s string is displayed, using the overloaded () operator:
captain.DisplayAddress();doctor.DisplayAddress();
The result is the following two lines of output:
String address: 3259462String address: 3259472
Notice that the addresses of the two strings are different.
Now, a separator line is printed:
cout << “----\n”;
Here’s the result:
----
Then, the object captain is assigned to the object doctor, and the addresses of the two text strings are again displayed:
doctor = captain;
captain.DisplayAddress();doctor.DisplayAddress();
return 0;}
Again, notice that the addresses are different:
Operator OverloadingSummary
202 Learn C++ under Windows 95/NT
String address: 3259462String address: 3261024
If the = operator is not overloaded, the address of the captain string simply copies into the doctor object’s s data member and both addresses are the same. Want to prove this? Easy. Comment out the operator=() function (every single line, not just the in-sides) as well as its declaration inside the String class declaration, and run the program again. Without the operator=() function, the String destructor would try to delete the same block of memory twice!
SummaryCongratulations are definitely in order here! Personally, I think that operator overloading is one of the most difficult parts of C++ to un-derstand but provides the most fun in experimentation.
Well, the fun isn’t over yet. In Chapter 8, You’re going to dive into iostream. You’ll find out how to overload the << and >> operators, giving you more control over your output, and you’ll learn the dif-ference between file handling in C and file handling in C++. Let’s go!

Learn C++ under Windows 95/NT 203
8Inside iostreamThroughout this book, we’ve depended on iostream’s insertion operator (<<) for all of our output and iostream’s extraction opera-tor (>>) for all of our input. While these operators serve us well, there’s much more to iostream than has been demonstrated so far.
For example, you can easily customize iostream so that the >> and << operators recognize your own personally designed data structures and classes. You can also use iostream to write to and read from files or even character arrays. As you’ll see, iostream is a powerful extension of the C++ language.
The Character-Based Interfaceiostream’s basic unit of currency is the character. Before a number is written to a file, it is converted to a series of chars. When a num-ber is read from the console, it is read as a series of chars and then, if necessary, converted to the appropriate numerical form and stored in a variable.
iostream was designed to support a character-based user inter-face. As characters are typed on the user’s keyboard, they appear on the console. When your program has something to say to the user, it uses iostream to send a stream of characters to the console.
By the Way If you plan to write programs for environments such as Windows, the Macintosh, or perhaps even a graphical version of Unix (Motif, X-windows, whatever), you’ll probably do all your user-interface development using class libraries that come with your develop-ment environment. iostream doesn’t know a thing about drop-

Inside iostreamThe iostream Classes
204 Learn C++ under Windows 95/NT
down menus, windows, or even a mouse, but as you’ll see, it’s more than a library of user-interface routines.
Even if your user interface isn’t character-based, iostream still has a lot to offer. You can use the same mechanisms you’d use to man-age your console I/O to manage your program’s file I/O. The same methods you’d use to write a stream of characters to a file can be used to write those same characters to an array in memory. What links these disparate techniques is their common ancestry.
The iostream ClassesThe iostream library is built upon a set of powerful classes. The iostream base class is named ios. While you might not work di-rectly with an ios object, you’ll definitely work with ios’ members as well as with classes derived from ios.
istream and ostreamYou’ve already started to work with two classes derived from ios. The istream class is designed to handle input from the keyboard. cin is an istream object that C++ automatically creates for you. The ostream class is designed to handle output to the console. cout, cerr, and clog are ostream objects that are also auto-matically created for you. As you’ve already seen, cout is used for standard output. cerr and clog are used in the same way as cout. They provide a mechanism for directing error messages.
By the Way Usually cerr is tied to the console, although some operating sys-tems (such as Unix) allow you to redirect cerr, perhaps sending the error output to a file or to another console. cerr is unbuffered which means that output sent to cerr appears immediately on the cerr device. clog is a buffered version of cerr and is not sup-ported by all C++ development environments. To decide which
Inside iostreamThe iostream Classes
Learn C++ under Windows 95/NT 205
error output vehicle to use (clog or cerr), consult your operating system manual.
Working with istream and ostreamUp to this point, your experience with iostream has centered on the extraction (>>) and insertion (<<) operators. For example, the following code reads in a number, stores it in a variable, and then prints out the value of the number:
short myNum;
cout << “Type a number: “;
cin >> myNum;
cout << “Your number was: “ << myNum;
There are a couple of things worth noting in this example. First, the iostream input and output are buffered. Just as in C, all input and all output are accumulated in buffers until either the buffers are filled or the buffers are flushed. On the input side, the buffer is tradi-tionally flushed when a carriage return is entered. On the output side, the buffer is usually flushed either when input is requested or when the program ends. Later in the chapter, you’ll learn how to flush your own buffers (how exciting!).
The second feature worth noting is that >> eats up white space. In other words, >> ignores spaces and tabs in the input stream. To >>, the line
123
is the same as this line:
123

Inside iostreamThe iostream Classes
206 Learn C++ under Windows 95/NT
If you’re reading in a series of numbers, this works out pretty well. But if you’re trying to read in a stream of text, you might want to preserve the white space interspersed throughout your input. Fortu-nately, istream offers some member functions that are white-space savvy.
get( )
The istream member function get() reads a single character from the input stream. get() comes in three different flavors.
The first version of get() takes a char reference as a parameter and returns a reference to an istream object:
istream &get(char &destination);
Since get() is an istream member function, you can use cin to call it (after all, cin is just an istream object):
char c;
cin.get( c );
This version of get() reads a single character from the input stream, writes the char into its char parameter (c), and then re-turns the input stream reference (cin). Since get() returns the input stream, it can be used in a sequence, as in the following exam-ple:
char c;short myShort;
cout << “Type a char and a short: “;
cin.get( c ) >> myShort;
Inside iostreamThe iostream Classes
Learn C++ under Windows 95/NT 207
This code grabs the first character from the input stream and stores it in c. Next, the input stream is parsed for a short, and the short is placed in myShort. If the input to this example were
123
then c would end up with the character 1, while myShort would end up with the value 23.
The second version of get() is declared as follows:
istream &get(char *buffer, int length, char delimiter = ‘\n’);
This version of get() extracts up to length - 1 characters and stores them in the memory pointed to by buffer. If the char de-limiter is encountered in the input stream, the char is pushed back into the stream and the extraction stops. For example, the code
char buffer[ 10 ];
cin.get( buffer, 10, ‘*’ );
starts to read characters from the input stream. If a * is encountered, the extraction stops, the * is pushed back into the stream, and a null terminator is placed at the end of the string just read into buffer.
If no * is encountered, nine characters are read into buffer, and, again, buffer is null-terminated. Notice that get() reads only n – 1 characters, where n is specified as the second parameter; get() is smart enough to save one byte for the null terminator.
If the third parameter is left out, this version of get() uses ‘\n’ as the terminating character. This allows you to use get() to extract a full line of characters without overflowing your input buffer. For ex-ample, the code

Inside iostreamThe iostream Classes
208 Learn C++ under Windows 95/NT
char buffer[ 50 ];
cin.get( buffer, 50 );
reads up to 49 characters or one line from the input stream, which-ever is shorter. Either way, the string stored in buffer gets null-ter-minated.
The third version of get() is declared as follows:
int get();
This version of get() reads a single character from the input stream and returns the character, cast as an int, as in the following exam-ple:
int c;
while ( (c = cin.get()) != ‘q’ )cout << (char)c;
This code reads the input stream, one character at a time, until a q is read. Each character is echoed to the console as it is read.
The third version of get() returns an int and not a char to allow it to return the end-of-file character. Typically, EOF has a value of –1. By returning an int, get() allows for 256 possible char values as well as for the end-of-file character. Although EOF isn’t particularly useful when reading from the console, we’ll use this version of get() later in the chapter to read the contents of a file.
getline( )
Another istream member function that you might find useful is getline():
istream &getline(char *buffer, int length, char delimiter = ‘\n’);

Inside iostreamThe iostream Classes
Learn C++ under Windows 95/NT 209
getline() behaves just like the second version of get(), but it re-turns the delimiter character instead of pushing it back into the input stream.
ignore( )
ignore() is used to discard characters from the input stream:
istream &ignore(int length = 1, int delimiter = EOF);
ignore() follows the same basic algorithm as getline(). It reads up to length characters from the input stream and discards them. This extraction stops if the specified delimiter is encountered. Notice that each of these parameters has a default value, which al-lows you to call ignore() without parameters.
Here’s an example:
char buffer[ 100 ];
cin.ignore( 3 ).getline( buffer, 100 );
cout << buffer;
This code drops the first three characters from the input stream and then reads the remainder of the first line of input into buffer. Next, the string stored in buffer is sent to the console. Notice that the value returned by ignore() is used to call getline(). This is equivalent to the following sequence of code:
cin.ignore( 3 );cin.getline( buffer, 100 );
Once again, pick a style you’re comfortable with and stick with it.
Inside iostreamThe iostream Classes
210 Learn C++ under Windows 95/NT
peek( )
peek() allows you to sneak a peek at the next character in the input stream without removing the character from the stream:
int peek();
Just like the third version of get(), peek() returns an int rather than a char. This allows peek() to return the end-of-file character, if appropriate, which makes peek() perfect for peeking at the next byte in a file.
put( )
The ostream member function put() provides an alternative to the << operator for writing data to the output stream:
ostream &put(char c);
put() writes the specified character to the output stream. It then re-turns a reference to the stream, so put() can be used in a sequence. Here’s an example:
cout.put( ‘H’ ).put( ‘i’ ).put( ‘!’ );
As you might have guessed, the preceding line of code produces this friendly message:
Hi!
putback( )
putback() puts the specified char back into the input stream, making it the next character to be returned by the next input opera-tion:
istream &putback(char c);

Inside iostreamThe iostream Classes
Learn C++ under Windows 95/NT 211
Note that c must be the last character extracted from the stream. Since putback() returns an istream reference, it can be used in a sequence, similar to the example combining ignore() and getline() shown earlier.
seekg( ) and seekp( )
The istream member function seekg() gives you random access to an input stream:
istream &seekg(streampos p);
Call seekg() to position a stream’s get pointer exactly where you want it. A second version of seekg() allows you to position the get pointer relative to the beginning or end of a stream or relative to the current get position:
istream &seekg( streamoff offset, relative_to direction );
In this second version of seekg(), the second parameter is one of ios::beg, ios::cur, or ios::end.
The ostream member function seekp() gives you random access to an output stream:
ostream &seekp(streampos p);
Just like seekg(), seekp() allows you to position a stream’s put pointer exactly where you want it. seekp() also comes in a second flavor:
ostream &seekp( streamoff offset, relative_to direction );
Inside iostreamThe iostream Classes
212 Learn C++ under Windows 95/NT
For more detail on seekg(), seekp(), and their miscellaneous support routines, browse through <iostream.h>.
Some Useful UtilitiesTo aid you with your stream input and output operations, C++ pro-vides a set of standard utilities that you may find useful (plain old ANSI C also provides these routines). To use any of the utilities de-scribed in this section, you must include the header file <ctype.h>.
Each of the thirteen functions takes an int as a parameter. The int represents an ASCII character. Two of the functions, tolower() and toupper(), map this character either to its lowercase or its up-percase ASCII equivalent. For example, tolower( ‘A’ ) would return ‘a’, while toupper( ‘x’ ) would return ‘X’.
The remaining eleven functions return either 1 or 0, depending on the nature of the character passed in. The function isalpha() re-turns 1 if its argument is a character in the range ‘a’ through ‘z’ or in the range ‘A’ through ‘Z’. The function isdigit() returns 1 if its argument is a character in the range ‘0’ through ‘9’. The function isalnum() returns 1 if its argument causes either isalpha() or isdigit() to return 1.
The function ispunct() returns 1 if the character is a punctuation character. The punctuation characters are ASCII characters in the ranges 33–47, 58–64, 91–96, and 123–126 (consult your nearest ASCII chart). The function isgraph() returns 1 if its argument causes isalpha(), isdigit(), or ispunct() to return 1.
islower() returns 1 if the character is in the range ‘a’ through ‘z’. isupper() returns 1 if the character is in the range ‘A’ through ‘Z’. isprint() returns 1 if the character is a printable ASCII character. iscntrl() returns 1 if the character is a control character. isspace() returns 1 if the character has an ASCII value in the range 9–13 or if it has a value of 32 (space). Finally, isxdigit() returns 1 if the character is a legal hex digit (0–9, a–f, or A–F).
The thirteen functions just described are summarized in the table in Figure 8.1.

Inside iostreamWorking with Files
Learn C++ under Windows 95/NT 213
Figure 8.1 Some useful utilities. Don’t forget to include the file <ctype.h>.
Working with Filesiostream contains two classes created especially for working with files. The ifstream class is derived from istream and is de-signed to read data from a file. Since ifstream inherits istream’s member functions, you can use an ifstream object to take advan-tage of istream functions like get().
The ofstream class is derived from ostream and is designed to write data to a file. Since ofstream inherits ostream’s member functions, you can use an ofstream object to take advantage of ostream functions like put().
Reading Data from a FileThe ifstream constructor comes in several varieties. The most widely used of these takes two parameters:
ifstream(const char* name, int mode=ios::in );
int isalnum(int);
int isalpha(int);
int iscntrl(int);
int isdigit(int);
int isgraph(int);
int islower(int);int isprint(int);
int ispunct(int);
int isspace(int);
int isupper(int);
int isxdigit(int);
int tolower(int);
int toupper(int);
True if char isalpha() or isdigit().
Is char in range a–z or A–Z?
Is char control character?
Is char in range 0–9?
True if char isalpha() or isdigit() or ispunct().
Is char in range a–z?Is char printable ASCII character?
Is char in ASCII range 33–47, 58–64, 91–96, 123–126?
Is char in ASCII range 9–13 or 32?
Is char in range A to Z?
Is char in ASCII range 0–9, a–f, A–F?
Maps upper case to lower case.
Maps lower case to upper case.
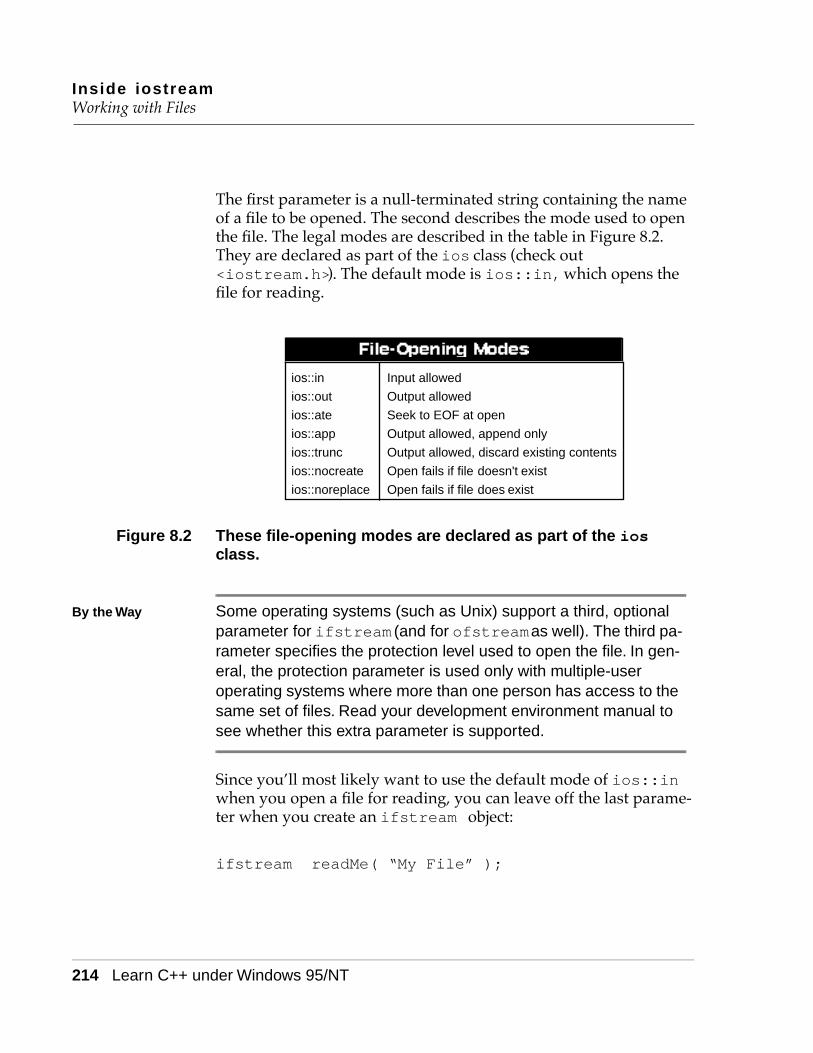
Inside iostreamWorking with Files
214 Learn C++ under Windows 95/NT
The first parameter is a null-terminated string containing the name of a file to be opened. The second describes the mode used to open the file. The legal modes are described in the table in Figure 8.2. They are declared as part of the ios class (check out <iostream.h>). The default mode is ios::in, which opens the file for reading.
Figure 8.2 These file-opening modes are declared as part of the ios class.
By the Way Some operating systems (such as Unix) support a third, optional parameter for ifstream (and for ofstream as well). The third pa-rameter specifies the protection level used to open the file. In gen-eral, the protection parameter is used only with multiple-user operating systems where more than one person has access to the same set of files. Read your development environment manual to see whether this extra parameter is supported.
Since you’ll most likely want to use the default mode of ios::in when you open a file for reading, you can leave off the last parame-ter when you create an ifstream object:
ifstream readMe( “My File” );
ios::in
ios::out
ios::ate
ios::app
ios::trunc
ios::nocreate
ios::noreplace
Input allowed
Output allowed
Seek to EOF at open
Output allowed, append only
Output allowed, discard existing contents
Open fails if file doesn't exist
Open fails if file does exist
Inside iostreamWorking with Files
Learn C++ under Windows 95/NT 215
This definition creates an ifstream object named readMe. Next, it opens a file named My File for reading, attaching the open file to readMe.
ifstream objects have data members that track whether a file is at-tached to the stream and, if so, whether the file is open for reading. If a file is attached and open for reading, a get pointer is maintained that marks how far you’ve read into the file. Normally, the get pointer starts life at the very beginning of the file.
Once your file is opened for reading, you can use all of the iostream input functions described earlier to read data from the file. For example, the following code opens a file and then reads a single character from it:
char c;ifstream readMe( “My File” );
readMe.get( c );
A File-Reading ExampleOur first sample program uses this technique to read a file and dis-play the contents in the console window. If CodeWarrior is already running, close the current project by selecting Close from the File menu. If CodeWarrior isn’t running, launch it by selecting Programs from the Start menu, then selecting CodeWarrior from the Programs menu, then selecting CW IDE. Either way, next select Open from the File menu. Go into the Learn C++ Projects directory, open the subdirectory named 08.01 - readMe, and open the project file named readMe.cwp. Next, run readMe.cwp by selecting Run from the Project menu. Here’s what you’ll see:
The Darlan-Ferengi wars raged onfor centuries before the final battle,known as the “Dawn of Arcturus”, was fought.
Let’s take a look at the source code.
Inside iostreamWorking with Files
216 Learn C++ under Windows 95/NT
The readMe Source Code
As usual, readMe.cp starts by including <iostream.h>. Next, you’ll encounter a new include file, <fstream.h>, which contains the declarations of the ifstream and ofstream classes (take some time and look through this include file; you’ll learn a lot about the nooks and crannies of iostream file management):
#include <iostream.h>#include <fstream.h>
main() starts by defining an ifstream object named readMe, asking the constructor to open the file named My File with the de-fault mode of ios::in:
int main(){ifstream readMe( “My File” );
We’re now ready to read the contents of the file.
The variable c is used to hold each character read from the file:
char c;
Next comes a while loop that reads the contents from the file asso-ciated with readMe, one character at a time. Each time a character is successfully read, it is written out to the console. Notice that the ifstream object readMe is used just like the istream object cin when it comes to calling get(), which is true for all of the other istream member functions as well:
while ( readMe.get( c ) )cout << c;
return 0;

Inside iostreamThe iostream State Bits
Learn C++ under Windows 95/NT 217
}
You may be wondering how this loop ever terminates. Since get() returns an istream reference, how will readMe.get( c ) ever evaluate to false? The answer to this question lies in understanding the iostream state bits.
The iostream State BitsEvery stream, whether an istream or an ostream, has a series of four state bits associated with it:
enum io_state{goodbit=0,eofbit=1,failbit=2,badbit=4
};
iostream uses these bits to indicate the relative health of their asso-ciated stream. You can poke and prod these bits yourself, but there are four functions that reflect each bit’s setting.
For example, the function
int good();
returns nonzero if the stream used to call it is ready for I/O. Basi-cally, if good() returns 1, you can assume that all is right with your stream and expect that your next I/O operation will succeed.
The function
int eof();
Inside iostreamThe iostream State Bits
218 Learn C++ under Windows 95/NT
returns 1 if the last I/O operation puts you at end-of-file.
The function
int fail();
returns 1 if the last operation fails for some reason. As an example, an input operation might fail if you try to read a short but encoun-ter a text string instead.
The function
int bad();
returns 1 if the last operation fails and the stream appears to be cor-rupted. When bad() returns 1, you’re in deep guacamole.
Finally, the function
void clear( int newState=0 );
is used to reset the state bits to the state specified as a parameter. In general, you should call clear() without specifying a parameter. clear()’s default parameter sets the state bits back to the pristine, good setting. If you don’t clear the state bits after a failure, you won’t be able to continue reading data from the stream. (You’ll see an example of this in a moment.)
For the most part, you should focus on the value returned by good(). As long as good() returns 1, there’s no need to check any of the other functions. Once good() returns 0, you can find out why by querying the other three state functions.
Inside iostreamThe iostream State Bits
Learn C++ under Windows 95/NT 219
The Coolness of good( )Now comes the cool part. In the program readMe.cp, we encoun-tered a while loop that used an iostream function as its condi-tional expression:
while ( readMe.get( c ) )cout << c;
What caused this while loop to exit? readMe.get( c ) returns a reference to readMe, correct? Actually, this is where the C++ com-piler displays a little sleight of hand. When the compiler detects an iostream I/O function used where an int is expected, it uses the current value of good() as the return value for the function. The previous while loop exits when readMe.get( c ) either fails or hits an end-of-file.
A good( ) ExampleOur second sample program demonstrates the basics of working with the iostream state bits and state bit functions. Close the cur-rent project by selecting Close from the File menu. Select Open from the File menu, go into the Learn C++ Projects directory, open the subdirectory named 08.02 - stateBits, and open the project file named stateBits.cwp. Next, run stateBits.cwp by selecting Run from the Project menu. Here’s what you’ll see:
Type a number:
Type a number small enough to fit inside a short, like 256:
Type a number: 256
When you hit a return, stateBits will tell you what your number is and then ask you to type another:

Inside iostreamThe iostream State Bits
220 Learn C++ under Windows 95/NT
Your number is: 256
Type a number:
This time, type the letter x and hit a return. stateBits will tell you that the x is not a number and then ask you for another number:
Type a number: xx is not a number...Type 0 to exit
Type a number:
Now type the number 0, which tells stateBits to drop out of its main loop:
Type a number: 0Goodbye...
Let’s take a look at the source code.
The stateBits Source Code
stateBits.cp starts with the usual #include (since we won’t be doing any file I/O, there’s no need to include <fstream.h>):
#include <iostream.h>
stateBits creates a loop that reads in a number and then prints the number in the console window. If the number entered is 0, the program exits. Things start to get interesting when a letter is entered instead of a number.
int main(){char done = false;
Inside iostreamThe iostream State Bits
Learn C++ under Windows 95/NT 221
char c;short number;
Note that done acts as a Boolean logic operator. When it is set to true, the loop exits. c and number are used to hold data read from the console.
Warning Some C++ environments declare true and false; others don’t. Since true and false aren’t technically part of the C++ language, be prepared to add them to your header files. CodeWarrior takes care of this for you.
We enter the main loop, are prompted for a number and then use >> to read the number from the console:
while ( ! done ){cout << “Type a number: “;cin >> number;
If a number appropriate for a short is typed at the prompt, cin.good() returns true:
if ( cin.good() )
If the number typed is 0, we say goodbye and drop out of the loop; otherwise, we display the number and start all over again:
{if ( number == 0 ){cout << “Goodbye...”;done = true;
}
Inside iostreamThe iostream State Bits
222 Learn C++ under Windows 95/NT
elsecout << “Your number is: “ << number
<< “\n\n”;}
If the input is of the wrong type (the letter x or 1.34, for instance) or is a number that is too large (99999) or too small (–72999), the input operation fails and cin.fail() returns 1:
else if ( cin.fail() )
The first thing we must do is call clear() to reset the state bits (if we don’t clear the state bits back to their supple, healthy state, we won’t be able to continue reading data from the stream):
{cin.clear();
Once the state bits are reset, we read the character that caused the the stream to choke. Since we’re not trying to interpret this character as a number, this read won’t fail. Having read in the offending char-acter, we display it, along with an appropriate message on the con-sole:
cin.get( c );cout << c << “ is not a number...”;cout << “Type 0 to exit\n\n”;
}
Detail This example implements a pretty simple-minded recovery algo-rithm. If you typed in something like xxzzy, the loop would fail five times since you knock out only a single character with each recov-ery. You might want to try your hand at a more sophisticated ap-proach. For example, you might use cin.ignore() to suck in all the characters up to and including a carriage return. Better yet,
Inside iostreamMore File Info
Learn C++ under Windows 95/NT 223
you might use cin.get() to read in the remainder of the offend-ing characters and then package them in an appropriate error message.
The final possibility lies with a call to bad(). Since the bad bit will likely never be set, you’ll probably never see this message. No sense taking chances, though:
else if ( cin.bad() ){cout << “\nYikes!!! Gotta go...”;done = true;
}}
return 0;}
More File InfoEarlier, the ifstream constructor was used to open a file for read-ing:
ifstream readMe( “My File” );
In the same way, the ofstream constructor can be used to open a file for writing:
ofstream writeMe( “My File” );
Writing Data to a FileThe ofstream constructor takes two parameters, with ios::out used as the default mode parameter. Note that you can pass more

Inside iostreamMore File Info
224 Learn C++ under Windows 95/NT
than one mode flag at a time. To open a file for writing if the file doesn’t already exist, try something like this:
ofstream writeMe( “My File”, ios::out | ios::nocreate );
Refer back to the table in Figure 8.2 for the rest of the mode flags.
Detail There is a way to open a file for both reading and writing. Use the fstream class and pass both the ios::in and ios::out mode flags, like this:
fstream inAndOut( “Read and Write”, ios::in | ios::out );
The fstream class is set up with two file position indicators, one for reading and one for writing. You really should read through the file <fstream.h>. You’ll find all kinds of cool stuff in there. While you’re at it, read through <iostream.h> as well. If you see a file named <stream.h>, beware! <stream.h> was written to support a library known as streams, a predecessor to iostream. <stream.h> is obsolete.
Once your file is open, you can close it by calling the close() member function:
writeMe.close();
In general, this call isn’t really necessary since the ifstream and ofstream destructors automatically close the file attached to their associated stream.
You can also create an ifstream or ofstream without associat-ing it with a file. Why would you want to do this? If you planned on opening a series of files, one at a time, you might want to do this by
Inside iostreamMore File Info
Learn C++ under Windows 95/NT 225
using a single stream, not by declaring one stream for each file. Using a single stream is more economical. Here’s an example:
ifstream readMe;
readMe.open( “File 1” );// Read contents - be sure to include error //checking!readMe.close();
readMe.open( “File 2” );// Read contents - be sure to include error //checking!readMe.close();
// Repeat this as necessary...
read( ), write( ), and Others
There are some istream member functions that are particularly useful when dealing with files. The member function read() reads a block of size bytes and stores the bytes in the buffer pointed to by data:
istream &read(void *data, int size);
As you’d expect, if an end-of-file is reached before the requested bytes are read, the fail bit is set. The member function istream::gcount() returns the number of bytes successfully read:
size_t gcount();
The member function write() inserts a block of size bytes from the buffer pointed to by data:

Inside iostreamCustomizing iostream
226 Learn C++ under Windows 95/NT
ostream &write(const void *data, size_t size);
The member function ostream::pcount() returns the number of bytes inserted by the preceding write() call:
size_t pcount();
Customizing iostreamThere are times when the standard operators and member functions of iostream just don’t cut it. For example, remember theMenuItem class we declared in Chapter 7:
class MenuItem{private:float price;char name[ 40 ];
public:MenuItem::MenuItem( float itemPrice, char *itemName );
float MenuItem::GetPrice();};
Suppose you want to display the contents of a MenuItem using iostream. You can write a DisplayMenuItem() member func-tion that takes advantage of iostream, but that is somewhat awk-ward. If you want to display a MenuItem in the middle of a cout sequence, you have to break the sequence up, sandwiching a call to DisplayMenuItem() in the middle:
cout << “Today’s special is: “;
Inside iostreamCustomizing iostream
Learn C++ under Windows 95/NT 227
myItem.DisplayMenuItem();cout << “...\n”;
Wouldn’t it be nice if iostream knew about MenuItems so that you could do something more convenient, like this:
cout << “Today’s special is: “ << myItem << “...\n”;
Why, there is a way to do this, after all! Using the techniques cov-ered in Chapter 7, you create an operator<<() function that knows exactly how you want your MenuItem displayed. (You’ll see an example of this in a moment.)
What’s more, you can overload the >> operator, providing an operator>>() function that knows how to read in a MenuItem. The only restriction on both of these cases is that your >> and << overloading functions must return the appropriate stream reference so that you can use the >> and << operators in a sequence.
An >> and << Overloading ExampleOur next sample program extends the ostream and istream classes by adding functions that overload both >> and <<. Close the current project by selecting Close from the File menu. Select Open from the File menu, go into the Learn C++ Projects directory, open the subdirectory named 08.03 - overload, and open the project file named overload.cwp. Next, run overload.cwp by selecting Run from the Project menu. Here’s what you’ll see:
Spring Rolls ($2.99) Hot and Sour Soup ($3.99) Hunan Chicken ($8.99) General Tso’s Shrimp ($9.99)Spring Surprise ($15.99)
Let’s take a look at the source code.
Inside iostreamCustomizing iostream
228 Learn C++ under Windows 95/NT
The overload Source Code
overload.cp starts with some familiar #includes and a const definition from Chapter 7’s menu program:
#include <iostream.h>#include <fstream.h>#include <string.h>
const short kMaxNameLength = 40;
The MenuItem class is a slightly modified version of the one in Chapter 7. For one thing, the constructor is left out. Instead of ini-tializing the data members when a MenuItem is created, iostream is used to read in a series of MenuItems from a file and initialize each data member using the newly added SetName() and SetPrice() member functions:
//-------------------------------------- MenuItem
class MenuItem{private:float price;char name[ kMaxNameLength ];
public:void SetName( char *itemName );char *GetName();void SetPrice( float itemPrice );float GetPrice();
};
SetName() is used to set the value of the name data member:
void MenuItem::SetName( char *itemName )
Inside iostreamCustomizing iostream
Learn C++ under Windows 95/NT 229
{strcpy( name, itemName );
}
GetName() returns a pointer to the name data member. By giving the caller of this public function direct access to name, we’re sort of defeating the purpose of marking name as private. A more appro-priate approach might be to have GetName() return a copy of name. For the purposes of discussion, the version of GetName() shown next will do:
char *MenuItem::GetName(){return( name );
}
SetPrice() is used to set the value of the price data member:
void MenuItem::SetPrice( float itemPrice ){price = itemPrice;
}
GetPrice() returns the value of the price data member:
float MenuItem::GetPrice(){return( price );
}
The operator>>() function is called by the compiler whenever the >> operator is encountered having an istream as its left operand and a MenuItem as its right operand. Since all >> sequences are re-solved to istream references, the left operand is always an

Inside iostreamCustomizing iostream
230 Learn C++ under Windows 95/NT
istream object. To make this a little clearer, imagine an >> se-quence with several objects in it:
cin >> a >> b;
iostream starts by evaluating this expression from the left, as if it were written like this:
(cin >> a) >> b;
Since the >> operator resolves to an istream object, the expression cin >> a resolves to cin, leaving this:
cin >> b;
The same logic holds true for the << operator:
cout << a << b;
As the compiler evaluates this expression from left to right, the left operand of the << operator is always an ostream object.
The point is, whether istream or ostream, all an operator() function needs to do to support sequences is to return the stream reference passed in as the first parameter:
//-------------------------- iostream operators
istream &operator>>( istream &is, MenuItem &item ){float itemPrice;char itemName[ kMaxNameLength ];
Inside iostreamCustomizing iostream
Learn C++ under Windows 95/NT 231
operator>>() reads a single MenuItem object from the specified input stream. First, getline() is used to read the item’s name. No-tice that the second parameter to getline() is used to limit the number of characters read in, ensuring that itemName doesn’t ex-ceed its bounds. SetName() is used to copy the entered name into the name data member:
is.getline( itemName, kMaxNameLength );item.SetName( itemName );
Then, >> is used to read the item’s price into itemPrice, and SetPrice() is used to copy itemPrice into the price data mem-ber:
is >> itemPrice;item.SetPrice( itemPrice );
When the extraction operator reads the price from the input stream, it leaves the carriage return following the number unread. ignore() is used to grab the carriage return, leaving the stream set up to read the next MenuItem:
is.ignore( 1, ‘\n’ );
Finally, the stream passed in to the operator>>() function is re-turned, preserving the integrity of the sequence:
return( is );}
operator<<() is somewhat simpler. It uses << to write the name and price data members:
ostream &operator<<( ostream &os, MenuItem &item )
Inside iostreamCustomizing iostream
232 Learn C++ under Windows 95/NT
{os << item.GetName() << “ ($”<< item.GetPrice() << “) “;
Once again, the stream passed in as the first parameter is returned:
return( os );}
main() declares an ifstream object and ties it to the file named Menu Items. This file contains a list of MenuItems with the name and price of each item appearing on its own line:
//-------------------------------------- main()
int main(){ifstream readMe( “Menu Items” );
main() also declares a MenuItem object named item. Notice that no parameters are passed because there’s no constructor to do any-thing with the parameters:
MenuItem item;
Next, a while loop is used to read in all the MenuItems that can be read from the input stream (which is, in this case, a file named Menu Items). The overloaded version of >> is used to read in a MenuItem, and the overloaded version of << is used to display the MenuItem in the console window:
while (readMe >> item )cout << item << “\n”;
Inside iostreamFormatting Your Output
Learn C++ under Windows 95/NT 233
return 0;}
Here’s what appears on the console:
Spring Rolls ($2.99) Hot and Sour Soup ($3.99) Hunan Chicken ($8.99) General Tso’s Shrimp ($9.99) Spring Surprise ($15.99)
Detail It’s important to note that operator>>() and operator<<() are designed to work with any input and output stream. In this case, the MenuItems are read from a file and displayed in the console window. By making a few changes to main()—and not changing the two operator() functions—you can easily change the pro-gram to read from standard input (you’d probably want to add in a prompt or two) and send the output to a file. That’s the real beauty of iostream!
Formatting Your OutputIn the preceding program, we overloaded the << operator so that we could display a MenuItem precisely the way we wanted it to ap-pear. Unfortunately, there’s no way to overload the << operator to customize the appearance of built-in data types such as short or float. Fortunately, iostream provides several mechanisms that allow you to customize your I/O operations.
Detail In general, iostream follows some fairly simple rules when it comes to formatting output. If you insert a single char in a stream, exactly one character position is used. When some form of integral
Inside iostreamFormatting Your Output
234 Learn C++ under Windows 95/NT
data is inserted, the insertion is exactly as wide as the number in-serted, including space for a sign, if applicable. No padding char-acters are used.
When a float is inserted, room is made for up to six places of precision to the right of the decimal place. Trailing zeros are dropped. If the number is either very large or very small (how big or how small depends on the implementation), exponential nota-tion is used. Again, room is made for a sign, if applicable. For ex-ample, the number 1.234000 takes up five character positions in the stream since the trailing zeros are dropped:
1.234
When a string is inserted, each character, not including any null terminator, takes up one character position.
The Formatting FlagsThe ios class maintains a set of flags that control various formatting features. You can use the ios member functions setf() and unsetf() to turn these formatting features on and off. Each feature corresponds to a bit in a bit field maintained by the ios class.
Some features are independent, while others are grouped together. For example, the flag ios::skipws determines whether white space is skipped during extraction operations. This feature is not linked to any other features, so it may be turned on and off without impacting any of the other formatting flags.
To turn an independent flag on and off, you use the setf() and unsetf() member functions as follows:
cin.setf( ios::skipws ); // Skip whitespace on //input
cin.unsetf( ios::skipws ); // Don’t skip whitespace // on input
Inside iostreamFormatting Your Output
Learn C++ under Windows 95/NT 235
By the Way Alternatively, you can use the flag() member function to retrieve the current flag settings as a group, OR the new flag into the group, and then use flag() again to reset the flag settings with the newly modified bit field:
int myFlags;
myFlags = cout.flag(); // returns flag bitfieldmyFlags |= ios::skipws; // ORs in skipws flagcout.flag( myFlags ); // resets flags
Unless you really need to work at this level, you’re better off stick-ing with setf() and unsetf(). Just thought you’d like to see the whole picture.
Turning independent flags on and off individually is no problem, but things get interesting when flags are grouped. For example, the radix flags determine the default base used to represent numbers in output. The radix flags are dec, oct, and hex, representing deci-mal, octal, and hexadecimal formats, respectively. The problem here is that only one of these flags should be turned on at a time. If you use setf(), you could easily turn all three flags on, producing un-predictable results.
To handle grouped flags, setf() makes use of a second, optional parameter that indicates which group a flag belongs to. For exam-ple, the radix flags dec, oct, and hex belong to the group basefield. To set the hex flag, you make the following call:
cout.setf( ios::hex, ios::basefield );
This call ensures that when the specified flag is set, the remainder of the fields in the group get unset.
The grouped flags left, right, and internal are part of the adjustfield group. They are used in combination with the width() member function. width() determines the minimum number of characters used in the next numeric or string output op-
Inside iostreamFormatting Your Output
236 Learn C++ under Windows 95/NT
eration. If the left flag is set, the next numeric or string output op-eration appears left-justified in the currently specified width(). The output is padded with the currently specified fill() character. You can use fill() to change this padding character. An example should make this formatting feature clearer.
A Formatting ExampleClose the current project by selecting Close from the File menu. Se-lect Open from the File menu, go into the Learn C++ Projects directory, open the subdirectory named 08.04 - formatter, and open the project file named formatter.cwp. Next, run formatter.cwp by selecting Run from the Project menu. Here’s what you’ll see:
202202xx-======101*****Hello
Let’s take a look at the source code.
The formatter Source Code
formatter.cp starts with the standard #include:
#include <iostream.h>
main() starts by displaying the number 202 in the console window:
//-------------------------------------- main()
int main(){cout << 202 << ‘\n’;

Inside iostreamFormatting Your Output
Learn C++ under Windows 95/NT 237
As you’d expect, this code produces the following line of output:
202
Next, width() is used to set the current width to 5, and fill() is used to make x the padding character:
cout.width( 5 );cout.fill( ‘x’ );
Remember, width() applies only to the very next string or numeric output operation, even if it is part of a sequence. The padding char-acter lasts until the next call of fill() or until the program exits.
By the Way If your output operation produces more characters than the current width setting, don’t worry. All your characters will be printed.
Now, the left flag is set, asking iostream to left-justify the out-put in the field specified by width():
cout.setf( ios::left, ios::adjustfield );
cout << 202 << ‘\n’;
When the number 202 is printed again, it appears like this:
202xx
Then, width() is pumped up to 10, fill() is changed to =, and the internal flag is set. The internal flag asks iostream to place padding in between a number and its sign, if appropriate, so that it fills the width() field:

Inside iostreamFormatting Your Output
238 Learn C++ under Windows 95/NT
cout.width( 10 );cout.fill( ‘=’ );cout.setf( ios::internal, ios::adjustfield );
cout << -101 << ‘\n’;
Printing the number –101 produces the following line of output:
-======101
Finally, width() is reset to 10 (otherwise, it would have dropped to its default of 0), fill() is set to *, and the right flag is set to right-justify the output:
cout.width( 10 );cout.fill( ‘*’ );cout.setf( ios::right, ios::adjustfield );
cout << “Hello”;
return 0;}
When the string “Hello” is printed, this line of output appears:
*****Hello
More Flags and MethodsThe showbase flag is independent. If it is set, octal numbers are dis-played with a leading zero and hex output appears with the two leading characters 0x. The showpoint, uppercase, and showpos flags are also independent. If showpoint is set, trailing zeros in floating-point output are displayed. If uppercase is set, E
Inside iostreamUsing Manipulators
Learn C++ under Windows 95/NT 239
rather than e is used in scientific notation and X rather than x is used in displaying hex numbers. If showpos is set, positive num-bers appear with a leading +.
The scientific and fixed flags belong to the floatfield group. If scientific is set, scientific notation is used to display floating-point output. If fixed is set, standard notation is used. If neither bit is set, the compiler uses its judgment and prints very large or very small numbers using scientific notation and all other numbers using standard notation. To turn off both bits, you pass a zero instead of fixed or scientific:
cout.setf( 0, ios::floatfield );
Both the fixed and scientific flags are tied to the precision() member function. precision() determines the number of digits displayed after the decimal point in floating-point output:
cout.precision( 6 ); // The default for //precision...
Finally, the unitbuf and stdio flags are related but not grouped. If unitbuf is set, the output buffer is flushed after each output opera-tion. stdio, which is only for folks using C I/O, flushes stdout and stderr after every insertion.
Using Manipulatorsiostream provides a set of special functions known as manipula-tors that allow you to perform specific I/O operations while you’re in the middle of an insertion or an extraction. For example, consider this line of code:
cout << “Enter a number: “ << flush;
Inside iostreamUsing Manipulators
240 Learn C++ under Windows 95/NT
This code makes use of the flush manipulator. When its turn comes along in the output sequence, the flush manipulator flushes the buffer associated with cout, forcing the output to appear imme-diately as opposed to waiting for the buffer to get flushed naturally (sort of like a C++ version of prunes!).
Just as an I/O sequence can appear in different forms, a manipula-tor can be called in several different ways. Here are two more exam-ples, each of which calls the flush manipulator:
cout.flush(); // Call as a stream member functionflush( cout );// Call with the stream as a
//parameter
Use whichever form fits in with the I/O sequence you are currently building. If you plan on calling any manipulators that take parame-ters, be sure to include the file <iomanip.h>. In addition, some iostream implementations require you to link with the math li-brary to use certain manipulators. Check your development envi-ronment manual to be sure.
The Manipulatorsdec(), oct(), and hex() turn on the appropriate format flags, thus turning off the rest of the flags in the basefield group. endl() places a carriage return (‘\n’) in its output stream and then flushes the stream. ends() places a null character in its out-put stream and then flushes the stream. ws() eats up all the white space in its input stream until it hits either an end-of-file or the first non-white-space character.
None of the manipulators presented so far take any parameters. The six remaining to be discussed all take a single parameter and require the included file <iomanip.h>.
setbase(int b) sets the current radix to either 8, 10, or 16. setfill(int f) is a manipulator version of the fill() member function. setprecision(int p) is the manipulator version of precision(). setw(int w) is the manipulator version of

Inside iostreamistrstream and ostrstream
Learn C++ under Windows 95/NT 241
width(). setiosflags(long f) is the manipulator version of setf(). resetiosflags(long f) is the manipulator version of unsetf().
Here are two manipulator examples. The line
cout << setbase( 16 ) << 256 << endl;
produces this line of output:
100
And, the line
cout << setprecision( 5 ) << 102.12345;
produces this line of output:
102.12
istrstream and ostrstreamIf you’ve ever worked with the C stdio function sprintf(), you’ll recognize a similar feature in C++. sprintf() allows you to perform all the standard I/O functions normally associated with printf() and fprintf() on an array of characters.
The istringstream and ostringstream classes offer all the power of their ancestor classes (istream and ostream and, ulti-mately, ios) and allow you to write formatted data to a buffer that you create in memory. Here’s an example.
Inside iostreamistrstream and ostrstream
242 Learn C++ under Windows 95/NT
A sstream ExampleClose the current project by selecting Close from the File menu. Se-lect Open from the File menu, go into the Learn C++ Projects directory, open the subdirectory named 08.05 - strstream, and open the project file named strstream.cwp. Next, run strstream.cwp by selecting Run from the Project menu. Here’s what you’ll see:
Number of characters written: 26Buffer contents: abcdefghijklmnopqrstuvwxyz
Let’s take a look at the source code.
The strstream Source Code
strstream.cp starts with two #includes, the standard <iostream.h> and the file required for the istringstream and ostringstream classes, <sstream.h>.
#include <iostream.h>#include <sstream.h>
The constant kNumberofLetters is used to define the number of characters that will be added to the buffer that makes up the ostringstream object:
const short kNumberofLetters = 26;
main() first defines the ostringstream object and a variable i that is used to keep track of the number of characters written to the ostringstream:
//-------------------------------------- main()
int main()
Inside iostreamistrstream and ostrstream
Learn C++ under Windows 95/NT 243
{ostringstream ostr;short i;
Next, a for loop uses ostr just as it would use cout, writing kNumberofLetters characters to the stream. When the loop exits, 26 characters, from a to z, have been written to the stream’s buffer:
for ( i = 0; i < kNumberOfLetters; i++ )ostr << (char)('a' + i);
Now, the number of characters written to the stream is displayed:
cout << “Number of characters written: “<< i << ‘\n’;
Here’s the output generated by the previous line of code:
Number of characters written: 26
Finally, the contents of the stream are printed:
cout << “Buffer contents: “ << ostr.str();
return 0;}
The previous line of code results in this line of output:
Buffer contents: abcdefghijklmnopqrstuvwxyz
Inside iostreamSummary
244 Learn C++ under Windows 95/NT
Just as an ostringstream object mirrors the behavior of cout, you can create a similar example, using an istringstream object, that mirrors the behavior of cin.
Together, istringstream and ostringstream give you a pow-erful set of tools to use when you work with strings in memory.
Summaryiostream offers you a significant capability. You can use the classes and member functions provided to build an ample user in-terface for your programs. In the event that you’re working with a class library that provides a more sophisticated, graphical user in-terface, you can still use iostream to manage your file I/O as well as to manage an in-core string manipulation facility.
Although I’ve made every effort to present a complete description of iostream, there’s no substitution for a thorough reading of the iostream included files. You’ll find complete listings of the four included files <iostream.h>, <fstream.h>, <iomanip.h>, and <sstream.h> in appendices at the back of the book.
Chapter 9 starts off with a relatively new feature of C++ known as templates and then moves on to a potpourri of other topics. See you there!

Learn C++ under Windows 95/NT 245
9C++ PotpourriCongratulations! You’ve really come a long way. By getting to this point in the book, you’ve built yourself a strong C++ foundation. Now you’re ready for a few of the more advanced topics. We’ll start off with one of the newest additions to C++, a feature known as templates.
TemplatesWhen you design a class, you’re forced to make some decisions about the data types that make up that class. For example, if your class contains an array, the class declaration specifies the array’s data type. In the following class declaration, an array of shorts is implemented:
class Array{private:short arraySize; // Number of array elementsshort *arrayPtr; // Pointer to the array
public:Array( short size ); // Allocate an array
// of size shorts~Array();// Delete the array
};
In this class, the constructor allocates an array of arraySize ele-ments, each element of type short. The destructor deletes the array. The data member arrayPtr points to the beginning of the array. To
C++ PotpourriTemplates
246 Learn C++ under Windows 95/NT
make the class truly useful, you’d probably want to add a member function that gives access to the elements of the array. You might ex-tend the class further by adding a bounds-checking feature.
This Array class works just fine as long as an array of shorts meets your needs. What happens when you decide that an Array of shorts doesn’t quite cut it? Perhaps you need to implement an array of longs or, even better, an array of your own, home-brewed data type.
One approach you can use is to make a copy of the Array class (member functions and all) and change it slightly to implement an array of the appropriate type. For example, here’s a version of the Array class designed to work with an array of longs:
class LongArray{private:short arraySize; // Number of array elementslong *arrayPtr; // Pointer to the array
public: LongArray( short size ); // Allocate an
// array of size longs ~LongArray( void );// Delete the array
};
There are definitely problems with this approach. You are creating a maintenance nightmare by duplicating the source code of one class to act as the basis for a second class. Suppose you add a new feature to your Array class. Are you going to make the same change to the LongArray class?
The Templates ApproachC++ templates allow you to parameterize the data types used by a class or function. Instead of embedding a specific type in a class dec-laration, you provide a template that defines the type used by that class. An example should make this a little clearer.
C++ PotpourriTemplates
Learn C++ under Windows 95/NT 247
Here’s a templated version of the Array class presented earlier:
template <class T>class Array{private:short arraySize; // Number of array elementsT *arrayPtr; // Pointer to the array
public:Array( short size ); // Allocate an
// array of size T’s~Array( void ); // Delete the array
};
The keyword template tells the compiler that what follows is not your usual, run-of-the-mill class declaration. Following the key-word template is a pair of angle brackets that surround the tem-plate’s template argument list. This list consists of a series of comma-separated arguments (one argument is the minimum). Each argument is made up of the keyword class followed by the argu-ment name. In this case, the template argument list contains a single argument, T. Throughout the body of the class declaration that fol-lows, the template arguments may be used as if they were data types. In the Array class, T is used to declare the data member arrayPtr.
Declaring an Object Using a TemplateOnce your class template is declared, you can use it to create an ob-ject. When you declare an object using a class template, you have to specify a template argument list along with the class name.
Here’s an example:
Array<long> longArray( 20 );
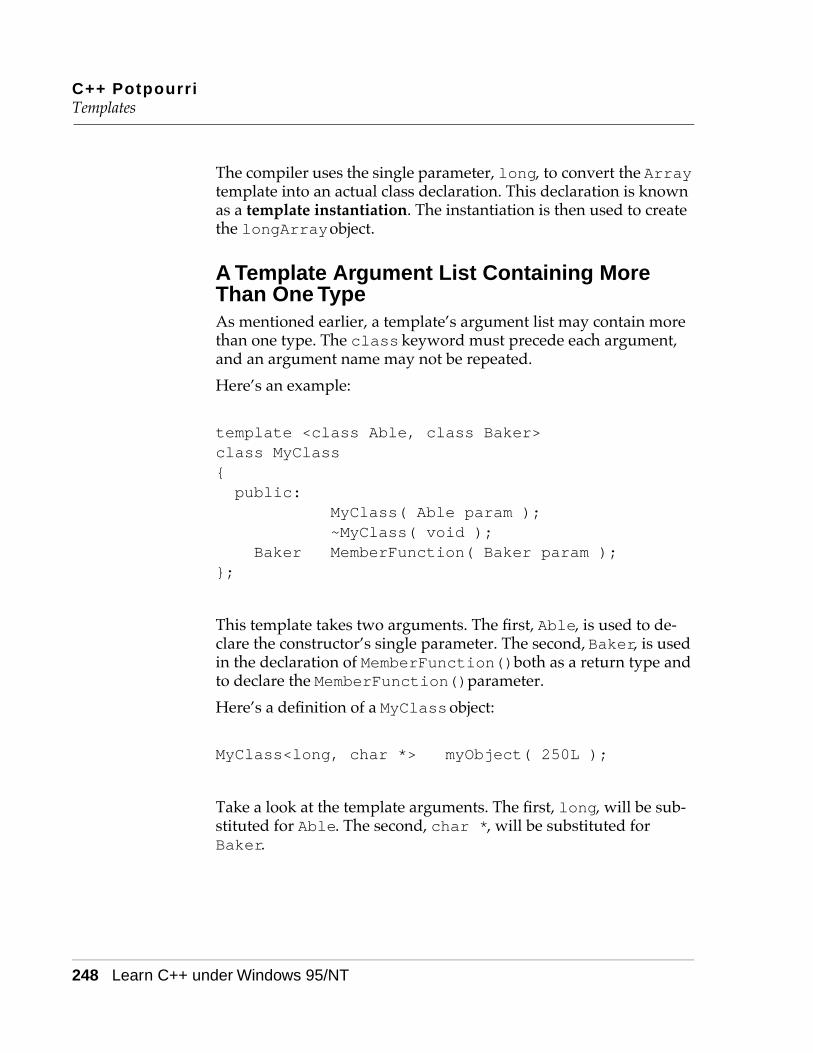
C++ PotpourriTemplates
248 Learn C++ under Windows 95/NT
The compiler uses the single parameter, long, to convert the Array template into an actual class declaration. This declaration is known as a template instantiation. The instantiation is then used to create the longArray object.
A Template Argument List Containing More Than One TypeAs mentioned earlier, a template’s argument list may contain more than one type. The class keyword must precede each argument, and an argument name may not be repeated.
Here’s an example:
template <class Able, class Baker>class MyClass{public:
MyClass( Able param );~MyClass( void );
Baker MemberFunction( Baker param );};
This template takes two arguments. The first, Able, is used to de-clare the constructor’s single parameter. The second, Baker, is used in the declaration of MemberFunction() both as a return type and to declare the MemberFunction() parameter.
Here’s a definition of a MyClass object:
MyClass<long, char *> myObject( 250L );
Take a look at the template arguments. The first, long, will be sub-stituted for Able. The second, char *, will be substituted for Baker.
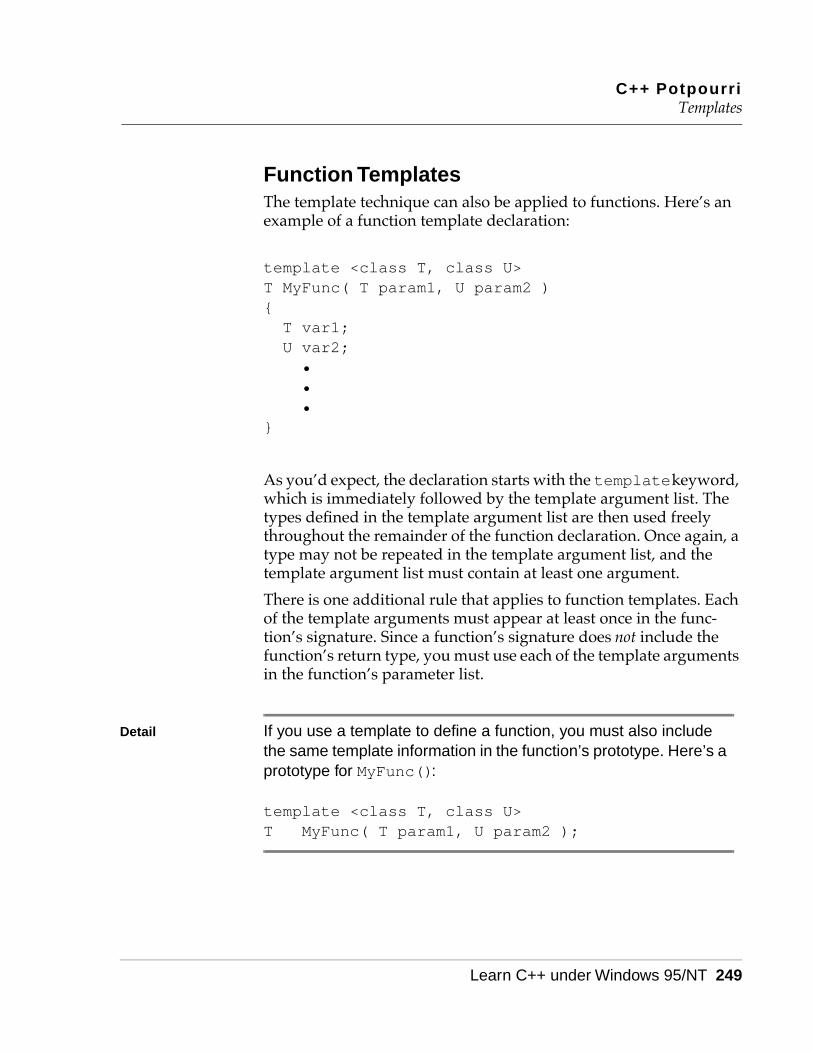
C++ PotpourriTemplates
Learn C++ under Windows 95/NT 249
Function TemplatesThe template technique can also be applied to functions. Here’s an example of a function template declaration:
template <class T, class U>T MyFunc( T param1, U param2 ){T var1;U var2;•••
}
As you’d expect, the declaration starts with the template keyword, which is immediately followed by the template argument list. The types defined in the template argument list are then used freely throughout the remainder of the function declaration. Once again, a type may not be repeated in the template argument list, and the template argument list must contain at least one argument.
There is one additional rule that applies to function templates. Each of the template arguments must appear at least once in the func-tion’s signature. Since a function’s signature does not include the function’s return type, you must use each of the template arguments in the function’s parameter list.
Detail If you use a template to define a function, you must also include the same template information in the function’s prototype. Here’s a prototype for MyFunc():
template <class T, class U>T MyFunc( T param1, U param2 );
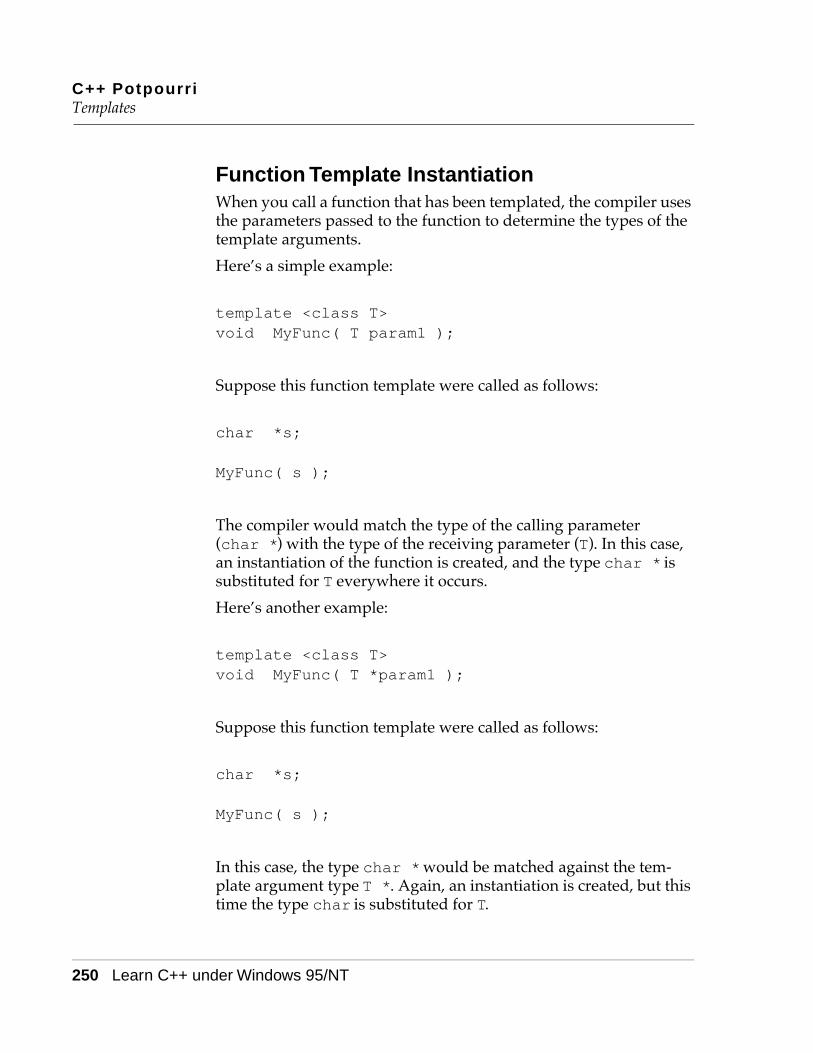
C++ PotpourriTemplates
250 Learn C++ under Windows 95/NT
Function Template InstantiationWhen you call a function that has been templated, the compiler uses the parameters passed to the function to determine the types of the template arguments.
Here’s a simple example:
template <class T>void MyFunc( T param1 );
Suppose this function template were called as follows:
char *s;
MyFunc( s );
The compiler would match the type of the calling parameter (char *) with the type of the receiving parameter (T). In this case, an instantiation of the function is created, and the type char * is substituted for T everywhere it occurs.
Here’s another example:
template <class T>void MyFunc( T *param1 );
Suppose this function template were called as follows:
char *s;
MyFunc( s );
In this case, the type char * would be matched against the tem-plate argument type T *. Again, an instantiation is created, but this time the type char is substituted for T.
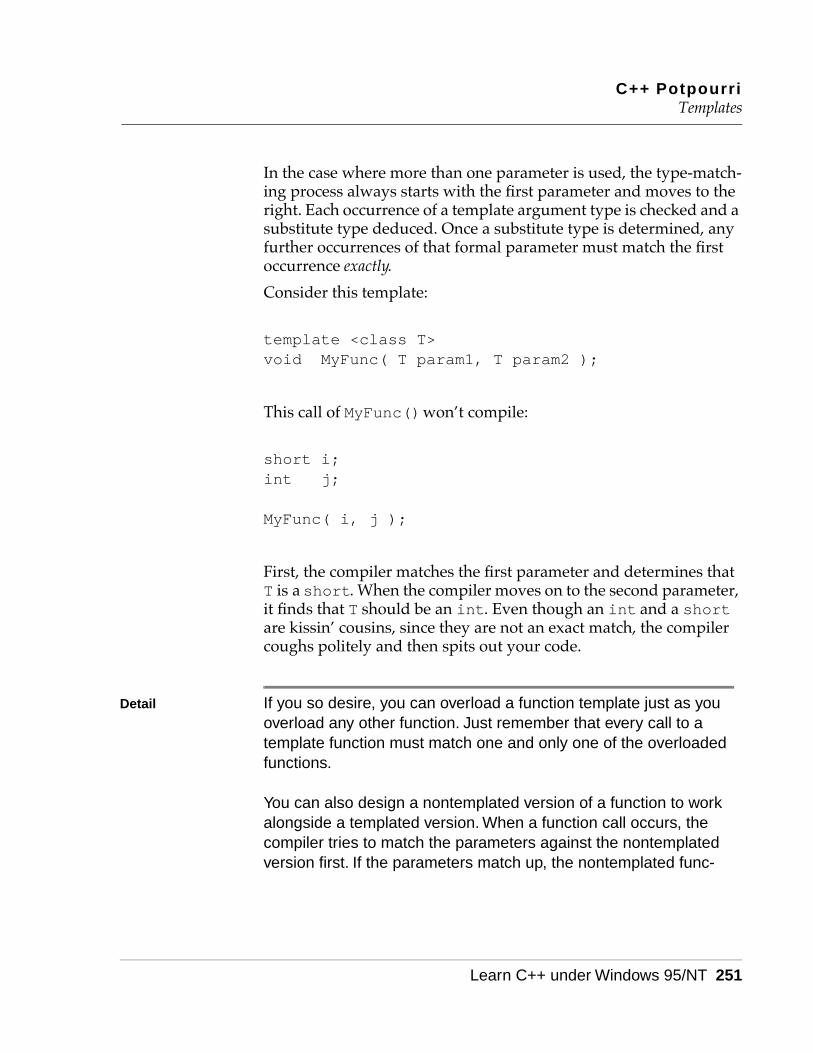
C++ PotpourriTemplates
Learn C++ under Windows 95/NT 251
In the case where more than one parameter is used, the type-match-ing process always starts with the first parameter and moves to the right. Each occurrence of a template argument type is checked and a substitute type deduced. Once a substitute type is determined, any further occurrences of that formal parameter must match the first occurrence exactly.
Consider this template:
template <class T>void MyFunc( T param1, T param2 );
This call of MyFunc() won’t compile:
short i;int j;
MyFunc( i, j );
First, the compiler matches the first parameter and determines that T is a short. When the compiler moves on to the second parameter, it finds that T should be an int. Even though an int and a short are kissin’ cousins, since they are not an exact match, the compiler coughs politely and then spits out your code.
Detail If you so desire, you can overload a function template just as you overload any other function. Just remember that every call to a template function must match one and only one of the overloaded functions.
You can also design a nontemplated version of a function to work alongside a templated version. When a function call occurs, the compiler tries to match the parameters against the nontemplated version first. If the parameters match up, the nontemplated func-

C++ PotpourriTemplates
252 Learn C++ under Windows 95/NT
tion is called. If no match is found, the regular template-matching process is started.
A Template ExampleOur first sample program provides a basic demonstration of class and function templates. If CodeWarrior is already running, close the current project by selecting Close from the File menu. If CodeWar-rior isn’t running, launch it by selecting Programs from the Start menu, then selecting CodeWarrior from the Programs menu, then selecting CW IDE. Either way, next select Open from the File menu. Go into the Learn C++ Projects directory, open the subdirec-tory named 09.01 - template, and open the project file named template.cwp. Next, run template.cwp by selecting Run from the Project menu. Here’s what you’ll see:
index out of bounds(10)----myRay[0]: 1myRay[1]: 4myRay[2]: 16myRay[3]: 64myRay[4]: 256myRay[5]: 1024myRay[6]: 4096myRay[7]: 16384myRay[8]: 0myRay[9]: 0----myLongRay[0]: 1myLongRay[1]: 4myLongRay[2]: 16myLongRay[3]: 64myLongRay[4]: 256myLongRay[5]: 1024myLongRay[6]: 4096myLongRay[7]: 16384
C++ PotpourriTemplates
Learn C++ under Windows 95/NT 253
myLongRay[8]: 65536myLongRay[9]: 262144
Let’s take a look at the source code.
The template Source Code
As usual, template.cp starts by including <iostream.h>. Next, a const, which is used at various points in the program, is declared:
#include <iostream.h>
const short kNumElements = 10;
template declares a class template named Array. Array imple-ments an array of type T, where T is the template’s single argument:
//-------------------------------------- Array
template <class T>class Array
Array features three data members, all of them private. arraySize is the number of elements in the array; arrayPtr points to the beginning of the array; errorRetValue is identical in type to one of the array elements and comes into play when you try to exceed the bounds of the array:
{private:short arraySize;T *arrayPtr;T errorRetValue;
C++ PotpourriTemplates
254 Learn C++ under Windows 95/NT
The Array() constructor allocates memory for the array, the de-structor deletes the allocated memory, and operator[]() is used to implement bounds checking:
public:Array( short size );~Array();
T &operator[]( short index );};
In the following code, notice the format used to define a class tem-plate member function. The function starts with the template key-word, followed by the template’s argument list. Next comes the class name, followed by the argument types surrounded by angle brackets. Finally, the traditional :: is followed by the function’s name and signature:
template <class T>Array<T>::Array( short size )
The constructor uses its parameter, size, to initialize arraySize. Then, an array of size elements of type T is allocated. Finally, errorRetValue is initialized to zero:
{arraySize = size;arrayPtr = new T[ size ];errorRetValue = 0;
}
The destructor uses delete to delete the memory allocated for the array. This statement tells the compiler that the destructor should be applied to every element in the array pointed to by arrayPtr (without the []operators, the destructor is called only for the first element of the array; while this is not particularly interesting in the
C++ PotpourriTemplates
Learn C++ under Windows 95/NT 255
case of an array of shorts, it is vital in working with an array of ob-jects having a specific destructor):
template <class T>Array<T>::~Array(){delete [] arrayPtr;
}
operator[]() is called whenever an Array element is accessed via the [] operators. operator[]() first checks to see whether the index is out of bounds. If it is, an error message is printed and the pseudo-element, errorRetValue, is returned (by placing an un-usual value in errorRetValue, you can clue the calling code to the fact that the array reference was illegal if printing an error mes-sage doesn’t fit into your error-handling strategy):
template <class T>T &Array<T>::operator[]( short index ){if ( ( index < 0 ) || ( index >= arraySize ) ){cout << “index out of bounds(“ << index
<< “)\n”;return( errorRetValue );
}
If the index is in bounds, the appropriate element of the array is re-turned:
elsereturn( arrayPtr[ index ] );
}

C++ PotpourriTemplates
256 Learn C++ under Windows 95/NT
The next function in the source code is the templated function Power(). As you can see, Power() is declared using the template keyword and a single template type, T. Power() takes two parame-ters of type T and returns a value of type T (the key here is that the type of the two parameters must match exactly):
//-------------------------------------- Power
template <class T>T Power( T base, T exponent )
Power() raises the parameter base to the exponent power, and the final result is returned:
{T i, product = 1;
for ( i=1; i<=exponent; i++ )product *= base;
return( product );}
main() starts by defining a short version of Array and a long version of Array (you could have declared a class named EraserHead and used Array to create an array of EraserHeads):
//-------------------------------------- main()
int main(){Array<short> myRay( kNumElements );Array<long> myLongRay( kNumElements );short i, shortBase = 4;long longBase = 4L;
C++ PotpourriTemplates
Learn C++ under Windows 95/NT 257
This loop fills the short array with consecutive powers of 4:
for ( i=0; i<=kNumElements; i++ )myRay[ i ] = Power( shortBase, i );
When i is equal to kNumElements, the array runs out-of-bounds, causing an error message to be printed on the console:
index out of bounds(10)
Next, a separator line is sent to the console:
cout << “----\n”;
This loop prints the value of each element in the short array:
for ( i=0; i<kNumElements; i++ )cout << “myRay[“ << i << “]: “ << myRay[ i ]
<< “\n”;
Here’s the output:
----myRay[0]: 1myRay[1]: 4myRay[2]: 16myRay[3]: 64myRay[4]: 256myRay[5]: 1024myRay[6]: 4096myRay[7]: 16384myRay[8]: 0

C++ PotpourriTemplates
258 Learn C++ under Windows 95/NT
myRay[9]: 0
By the time we get to Power( 4, 8 ) we’ve reached the limits of a signed short. Our solution? Redo the whole thing using longs. Thank goodness for templates, eh?
This loop uses the same approach to fill the array of longs, but this time we won’t let the array run out-of-bounds:
for ( i=0; i<kNumElements; i++ )myLongRay[ i ] = Power( longBase, (long)i );
We print a separator line and then print the elements of the long ar-ray:
cout << “----\n”;
for ( i=0; i<kNumElements; i++ )cout << “myLongRay[“ << i<< “]: “ << myLongRay[ i ] << “\n”;
return 0;}
Here’s the output:
----myLongRay[0]: 1myLongRay[1]: 4myLongRay[2]: 16myLongRay[3]: 64myLongRay[4]: 256myLongRay[5]: 1024myLongRay[6]: 4096myLongRay[7]: 16384

C++ PotpourriMultiple Inheritance
Learn C++ under Windows 95/NT 259
myLongRay[8]: 65536myLongRay[9]: 262144
Templates are an extremely powerful part of C++. You might not make use of them right away, but as you develop more and more C++ code, you’ll use templates to build a set of parameterized util-ity classes. For example, you’ll probably want to create a linked-list template that you can customize to link up objects of varying types.
Multiple InheritanceOur next topic is a variation on an earlier theme, class derivation. In the examples presented in Chapter 6, each derived class was based on a single base class. That doesn’t have to be the case, however. C++ allows you to derive a class from more than one base class, a technique known as multiple inheritance. As its name implies, multiple inheritance means that a class derived from more than one base class inherits the data members and member functions from each of its base classes.
Why would you want to inherit members from more than one class? Check out the derivation chain in Figure 9.1. The ultimate base class, known as the root base class, in this chain is Computer. The two classes ColorComputer and LaptopComputer are special types of Computers, each inheriting the nonprivate members from Computer and adding members of their own as well.
Here’s where multiple inheritance comes into play. The class ColorLaptop is derived from both ColorComputer and LaptopComputer and inherits members from each class. Multiple inheritance allows you to take advantage of two different classes that work well together. If you want a program that models a color, laptop computer and you already have a ColorComputer class that manages color information and a LaptopComputer class that manages information about laptops, why reinvent the wheel? Think of the ColorLaptop class as the best of both worlds—the union of two already designed classes.
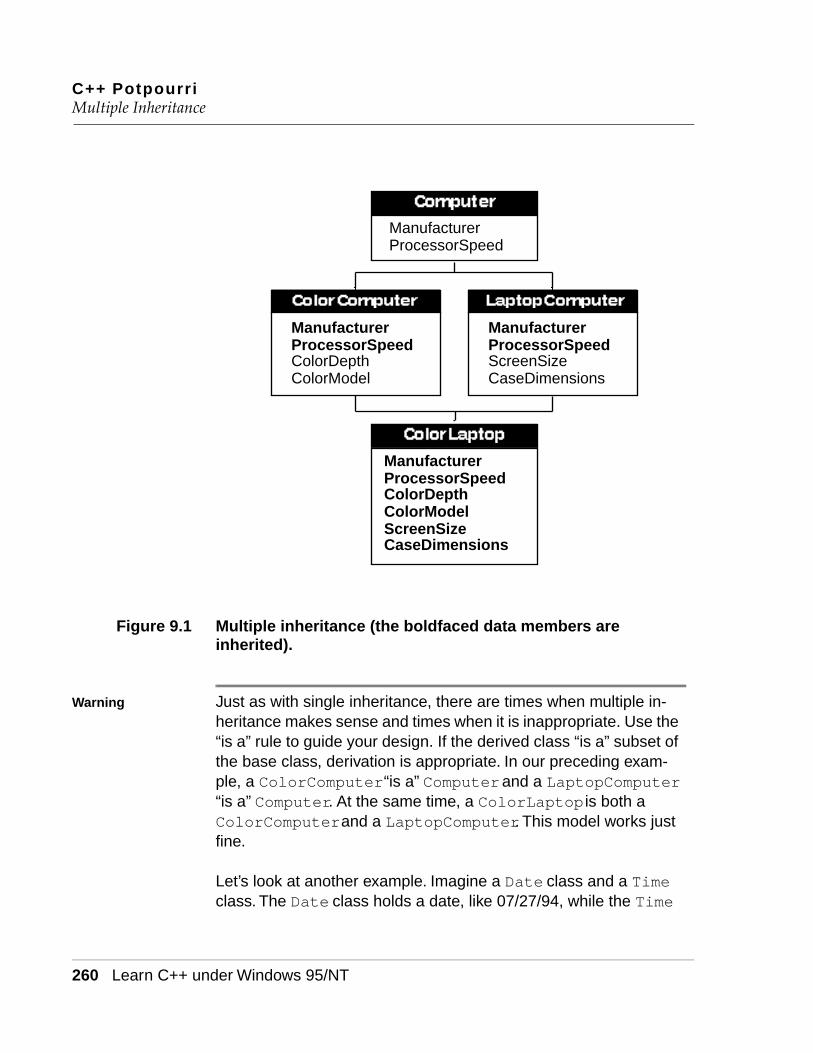
C++ PotpourriMultiple Inheritance
260 Learn C++ under Windows 95/NT
Figure 9.1 Multiple inheritance (the boldfaced data members are inherited).
Warning Just as with single inheritance, there are times when multiple in-heritance makes sense and times when it is inappropriate. Use the “is a” rule to guide your design. If the derived class “is a” subset of the base class, derivation is appropriate. In our preceding exam-ple, a ColorComputer “is a” Computer and a LaptopComputer “is a” Computer. At the same time, a ColorLaptop is both a ColorComputer and a LaptopComputer. This model works just fine.
Let’s look at another example. Imagine a Date class and a Time class. The Date class holds a date, like 07/27/94, while the Time
ManufacturerProcessorSpeedColorDepthColorModel
ManufacturerProcessorSpeedScreenSizeCaseDimensions
ManufacturerProcessorSpeed
ManufacturerProcessorSpeedColorDepthColorModelScreenSizeCaseDimensions
C++ PotpourriMultiple Inheritance
Learn C++ under Windows 95/NT 261
class holds a time of day, like 10:24 am. Now suppose you wanted to create a TimeStamp class, derived from both the Date and Time classes. Would this make sense?
The answer is no! A TimeStamp is not a Date and it is not a Time. Instead, a TimeStamp “has a” Date and “has a” Time. When your derivation fits the “has a” model rather than the “is a” model you should rethink your design. In this case, the TimeStamp class should include Date and Time objects as data members, rather than using multiple inheritance.
“is a” indicates inheritance. If “has a” describes the relationship be-tween your derived and base classes, rethink your design.
A Multiple Inheritance ExampleOur second sample program demonstrates multiple inheritance as well as a few additional C++ features that you should find interest-ing. Close the current project by selecting Close from the File menu. Select Open from the File menu, go into the Learn C++ Projects directory, open the subdirectory named 09.02 - multInherit, and open the project file named multInherit.cwp. Next, run multInherit.cwp by selecting Run from the Project menu. Here’s what you’ll see:
Favorite prey: MiceFavorite toy: Ball of yarncatID: 1---------Favorite prey: CricketsFavorite toy: Bottle capcatID: 2---------Favorite prey: MothsFavorite toy: Spool of threadcatID: 3---------
C++ PotpourriMultiple Inheritance
262 Learn C++ under Windows 95/NT
Cat destructor called: catID = 3...Pet destructor was called!Predator destructor was called!
Cat destructor called: catID = 2...Pet destructor was called!Predator destructor was called!
Cat destructor called: catID = 1...Pet destructor was called!Predator destructor was called!
Let’s take a look at the source code.
The multInherit Source Code
multiinh.cp starts off with a few #includes and a familiar const:
#include <iostream.h>#include <string.h>
const short kMaxStringLength = 40;
Next, three classes are defined. The Predator class represents a predatory animal while the Pet class represents a housepet. The Cat class is derived from both the Predator class and the Pet class. After all, a cat “is a” predator and a cat “is a” pet, right?
The Predator class is pretty simple. It features a single data mem-ber, a string containing the predator’s favorite prey:
//-------------------------------------- Predator
class Predator{private:
C++ PotpourriMultiple Inheritance
Learn C++ under Windows 95/NT 263
char favoritePrey[ kMaxStringLength ];
The Predator class also features a constructor and a destructor:
public:Predator( char *prey );~Predator();
};
The constructor initializes the favoritePrey data member and then prints its value:
Predator::Predator( char *prey ){strcpy( favoritePrey, prey );
cout << “Favorite prey: “<< prey << “\n”;
}
The destructor prints an appropriate message, just to let you know it was called:
Predator::~Predator(){cout << “Predator destructor was called!\n\n”;
}
The Pet class is almost identical to the Predator class, with a fa-vorite toy substituted for a favorite prey:
//-------------------------------------- Pet
class Pet
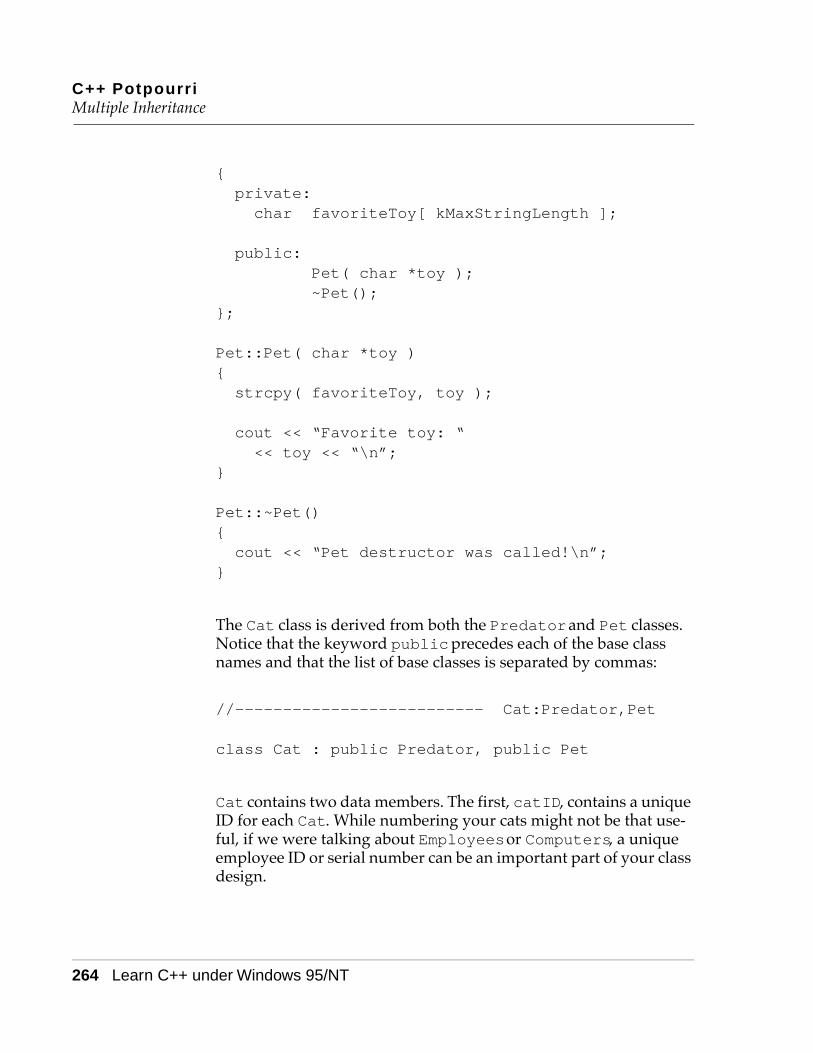
C++ PotpourriMultiple Inheritance
264 Learn C++ under Windows 95/NT
{private:char favoriteToy[ kMaxStringLength ];
public:Pet( char *toy );~Pet();
};
Pet::Pet( char *toy ){strcpy( favoriteToy, toy );
cout << “Favorite toy: “<< toy << “\n”;
}
Pet::~Pet(){cout << “Pet destructor was called!\n”;
}
The Cat class is derived from both the Predator and Pet classes. Notice that the keyword public precedes each of the base class names and that the list of base classes is separated by commas:
//-------------------------- Cat:Predator,Pet
class Cat : public Predator, public Pet
Cat contains two data members. The first, catID, contains a unique ID for each Cat. While numbering your cats might not be that use-ful, if we were talking about Employees or Computers, a unique employee ID or serial number can be an important part of your class design.
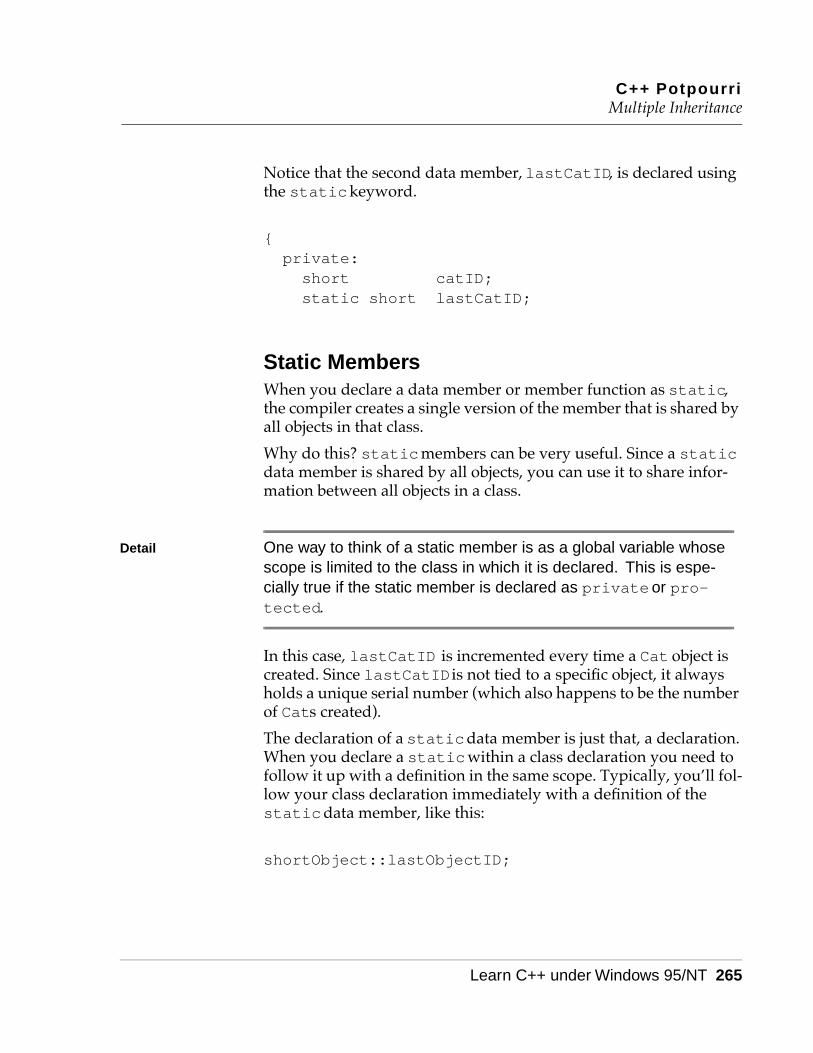
C++ PotpourriMultiple Inheritance
Learn C++ under Windows 95/NT 265
Notice that the second data member, lastCatID, is declared using the static keyword.
{private:short catID;static short lastCatID;
Static MembersWhen you declare a data member or member function as static, the compiler creates a single version of the member that is shared by all objects in that class.
Why do this? static members can be very useful. Since a static data member is shared by all objects, you can use it to share infor-mation between all objects in a class.
Detail One way to think of a static member is as a global variable whose scope is limited to the class in which it is declared. This is espe-cially true if the static member is declared as private or pro-tected.
In this case, lastCatID is incremented every time a Cat object is created. Since lastCatID is not tied to a specific object, it always holds a unique serial number (which also happens to be the number of Cats created).
The declaration of a static data member is just that, a declaration. When you declare a static within a class declaration you need to follow it up with a definition in the same scope. Typically, you’ll fol-low your class declaration immediately with a definition of the static data member, like this:
shortObject::lastObjectID;

C++ PotpourriMultiple Inheritance
266 Learn C++ under Windows 95/NT
If you like, you can use this definition to initialize the static mem-ber. static data member scope is limited to the file it is declared in.
Detail You’ll typically stick your class declaration (along with the class’s static member declarations) in a .h file. This is not the case for your static member definition. The definition should appear in the .cp file where it will be used.
Along with your static data members, you can also declare a static member function. Again, the function is not bound to a par-ticular object and is shared with the entire class. If the class MyClass included a static member function named MyFunc(), you could call the function using this syntax:
MyClass::MyFunc();
Since there is no current object when MyFunc() is called, you don’t have the advantages of this and any references to other data mem-bers or member functions must be done through an object.
static member functions are usually written for the sole purpose of providing access to an associated static data member. To en-hance your design, you might declare your static data member as private and provide an associated static member function marked as public or protected.
Back to multInherit
The Cat class has a constructor and a destructor:
public:Cat( char *prey, char *toy );~Cat();
};
The Cat constructor uses a syntax first laid out in Chapter 6 to map its input parameters to the Predator and Prey constructors.

C++ PotpourriMultiple Inheritance
Learn C++ under Windows 95/NT 267
Cat::Cat( char *prey, char *toy ) :Predator( prey ), Pet( toy )
Definition The list that follows the constructor’s parameter list is called the member initialization list. As you can see, a colon always pre-cedes a constructor’s member initialization list.
Next, lastCatID is incremented and the new value assigned to catID. Then, the new ID and a separator line are printed:
{catID = ++lastCatID;
cout << “catID: “ << catID<< “\n--------\n”;
}
The Cat destructor also prints a message containing the catID, just to make the program a little easier to follow:
Cat::~Cat(){cout << “Cat destructor called: catID = “<< catID << “...\n”;
}
Next, the static member lastCatID is defined. Without this defini-tion, the program wouldn’t compile. Notice also that we take ad-vantage of this definition to initialize lastCatID.
short Cat::lastCatID = 0;
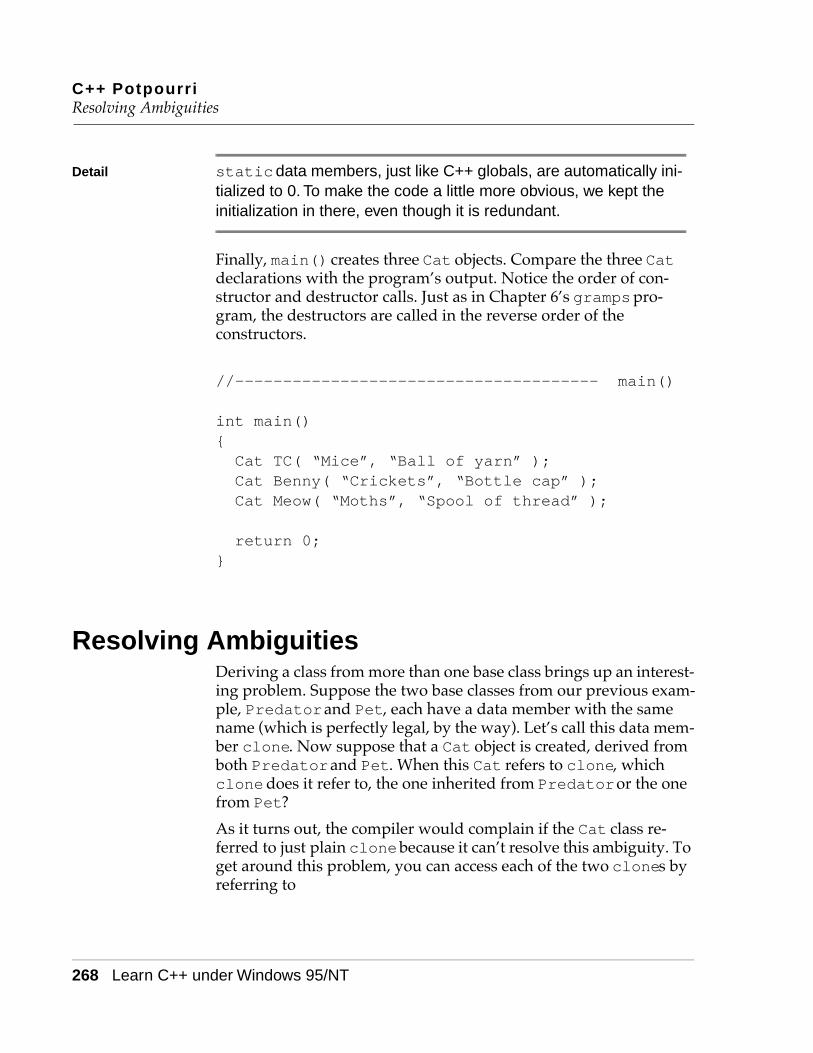
C++ PotpourriResolving Ambiguities
268 Learn C++ under Windows 95/NT
Detail static data members, just like C++ globals, are automatically ini-tialized to 0. To make the code a little more obvious, we kept the initialization in there, even though it is redundant.
Finally, main() creates three Cat objects. Compare the three Cat declarations with the program’s output. Notice the order of con-structor and destructor calls. Just as in Chapter 6’s gramps pro-gram, the destructors are called in the reverse order of the constructors.
//-------------------------------------- main()
int main(){Cat TC( “Mice”, “Ball of yarn” );Cat Benny( “Crickets”, “Bottle cap” );Cat Meow( “Moths”, “Spool of thread” );
return 0;}
Resolving AmbiguitiesDeriving a class from more than one base class brings up an interest-ing problem. Suppose the two base classes from our previous exam-ple, Predator and Pet, each have a data member with the same name (which is perfectly legal, by the way). Let’s call this data mem-ber clone. Now suppose that a Cat object is created, derived from both Predator and Pet. When this Cat refers to clone, which clone does it refer to, the one inherited from Predator or the one from Pet?
As it turns out, the compiler would complain if the Cat class re-ferred to just plain clone because it can’t resolve this ambiguity. To get around this problem, you can access each of the two clones by referring to

C++ PotpourriResolving Ambiguities
Learn C++ under Windows 95/NT 269
Predator::clone
or
Pet::clone
Here’s another interesting problem brought on by multiple inherit-ance. Take a look at the derivation chain in Figure 9.2. Notice that the Derived class has two paths of inheritance back to its ultimate base class, Root.
Since Derived is derived from both Base1 and Base2, when a Derived object is created, Base1 and Base2 objects are created as well. When the Base1 object is created, a Root object is created. When the Base2 object is created, a second Root object is created.
Why is this a problem? Suppose Root contains a data member des-tined to be inherited by Derived. When Derived refers to the Root data member, which of the two Root objects contains the data mem-ber Derived is referring to? Sounds like another ambiguity to me.
Figure 9.2 Four classes in a derivation chain.
A Multiple-Root ExampleBefore we resolve this latest ambiguity, here’s an example that shows what happens when a derived class has two paths back to its root class. Close the current project by selecting Close from the File menu. Select Open from the File menu, go into the Learn C++
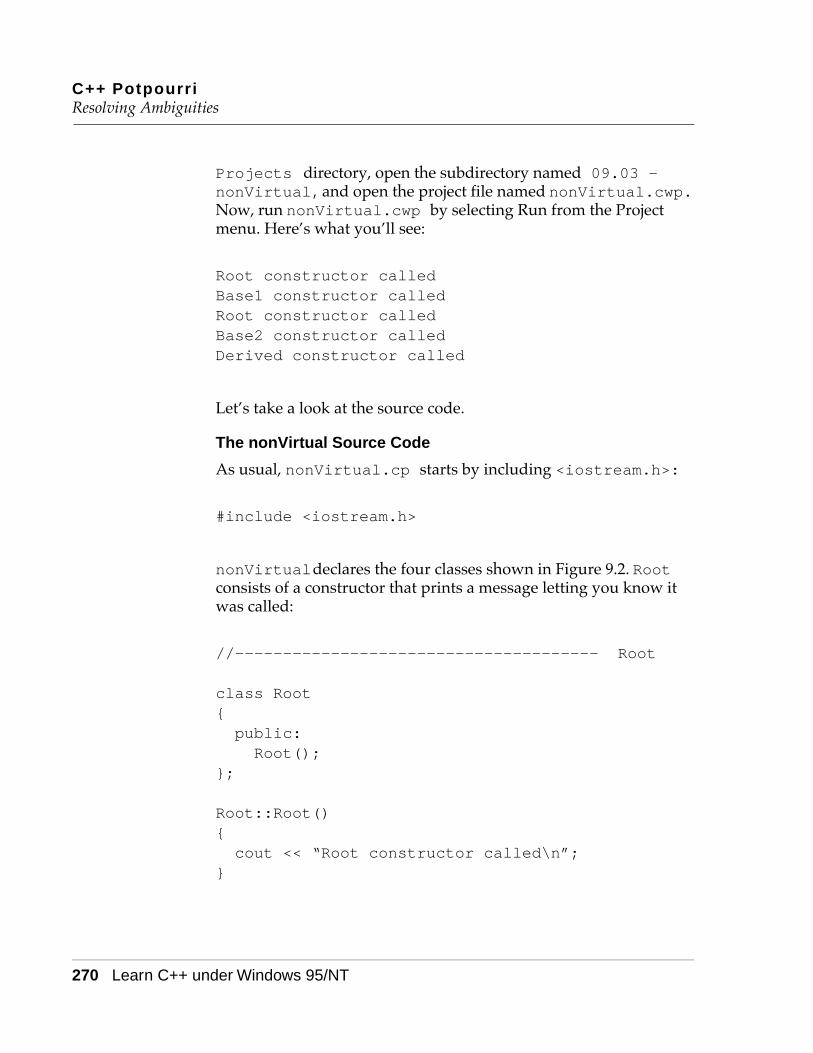
C++ PotpourriResolving Ambiguities
270 Learn C++ under Windows 95/NT
Projects directory, open the subdirectory named 09.03 - nonVirtual, and open the project file named nonVirtual.cwp. Now, run nonVirtual.cwp by selecting Run from the Project menu. Here’s what you’ll see:
Root constructor calledBase1 constructor calledRoot constructor calledBase2 constructor calledDerived constructor called
Let’s take a look at the source code.
The nonVirtual Source Code
As usual, nonVirtual.cp starts by including <iostream.h>:
#include <iostream.h>
nonVirtual declares the four classes shown in Figure 9.2. Root consists of a constructor that prints a message letting you know it was called:
//-------------------------------------- Root
class Root{public:Root();
};
Root::Root(){cout << “Root constructor called\n”;
}

C++ PotpourriResolving Ambiguities
Learn C++ under Windows 95/NT 271
Base1 is derived from Root. Its constructor also prints a useful message:
//-------------------------------------- Base1
class Base1 : public Root{public:Base1();
};
Base1::Base1(){cout << “Base1 constructor called\n”;
}
Base2 is also derived from Root. Its constructor also prints a mes-sage in the console window:
//-------------------------------------- Base2
class Base2 : public Root{public:Base2();
};
Base2::Base2(){cout << “Base2 constructor called\n”;
}
Derived is derived from both Base1 and Base2. Just like all the other classes, Derived has its constructor print a message in the console window just to let you know it was called:
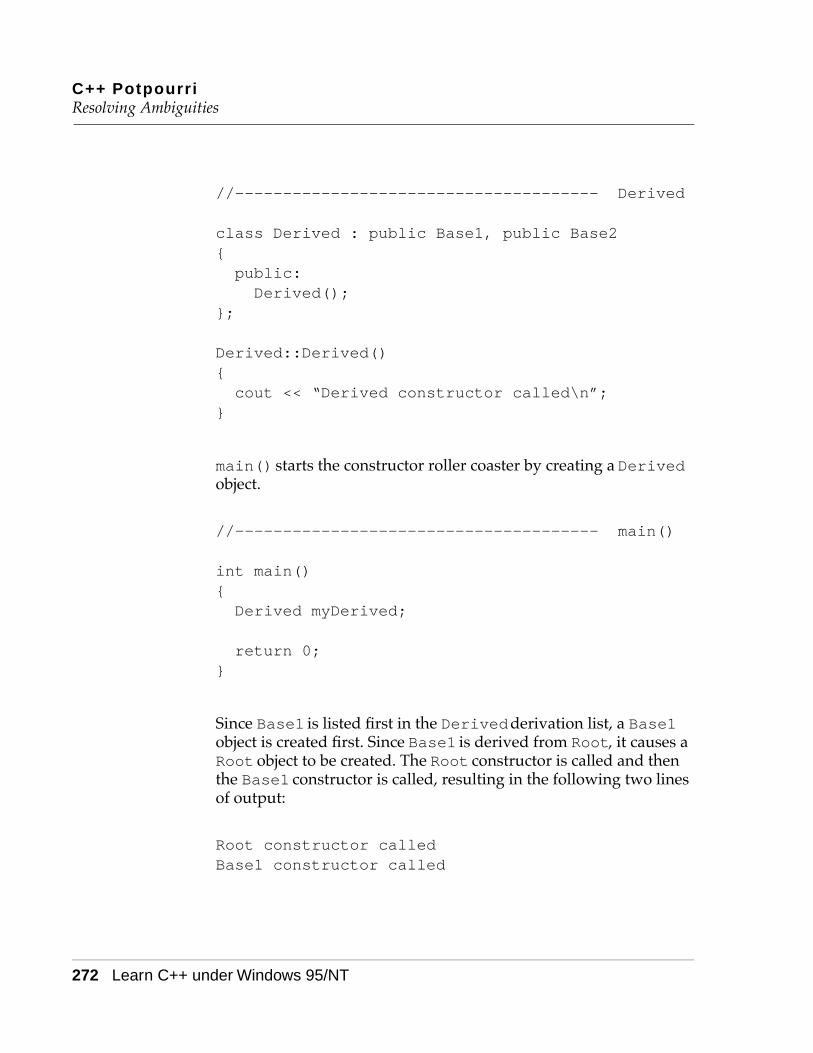
C++ PotpourriResolving Ambiguities
272 Learn C++ under Windows 95/NT
//-------------------------------------- Derived
class Derived : public Base1, public Base2{public:Derived();
};
Derived::Derived(){cout << “Derived constructor called\n”;
}
main() starts the constructor roller coaster by creating a Derived object.
//-------------------------------------- main()
int main(){Derived myDerived;
return 0;}
Since Base1 is listed first in the Derived derivation list, a Base1 object is created first. Since Base1 is derived from Root, it causes a Root object to be created. The Root constructor is called and then the Base1 constructor is called, resulting in the following two lines of output:
Root constructor calledBase1 constructor called

C++ PotpourriResolving Ambiguities
Learn C++ under Windows 95/NT 273
Next, this process is repeated as a Base2 object is created. Since Base2 is also derived from Root, it causes a second Root object to be created. Once the Root constructor is called, control returns to Base2 and its constructor is called:
Root constructor calledBase2 constructor called
Once the Base2 object is created, control returns to the Derived class and the Derived constructor is called:
Derived constructor called
The Virtual Base Class AlternativeOnce again, think about the problem raised by this last example. If the Root class contained a data member, how would the Derived object access the data member? Which of the two Root objects would contain the real copy of the data member?
The answer to this problem lies in the use of virtual base classes. Back in Chapter 6’s whatAmI program, we declared a member func-tion as virtual to allow a derived class to override the function. Basically, when a virtual function is called by dereferencing a pointer or reference to the base class, the compiler follows the deri-vation chain down from the root class to the most derived class and looks at each level for a function matching the virtual function. The lowest-level matching function is the one that is called.
Detail Virtual functions are extremely useful. Here’s why. Suppose you’re writing a program that implements a window-based user interface. Let’s say that your standard window is broken into several areas (we’ll call them panes) and that each pane is broken into sub-panes. When the time comes to draw the contents of your window, your Window class’s Draw() member function is called. If your Pane class also has a Draw() member function and if the Window version of Draw() is declared as virtual, the Pane’s Draw() is
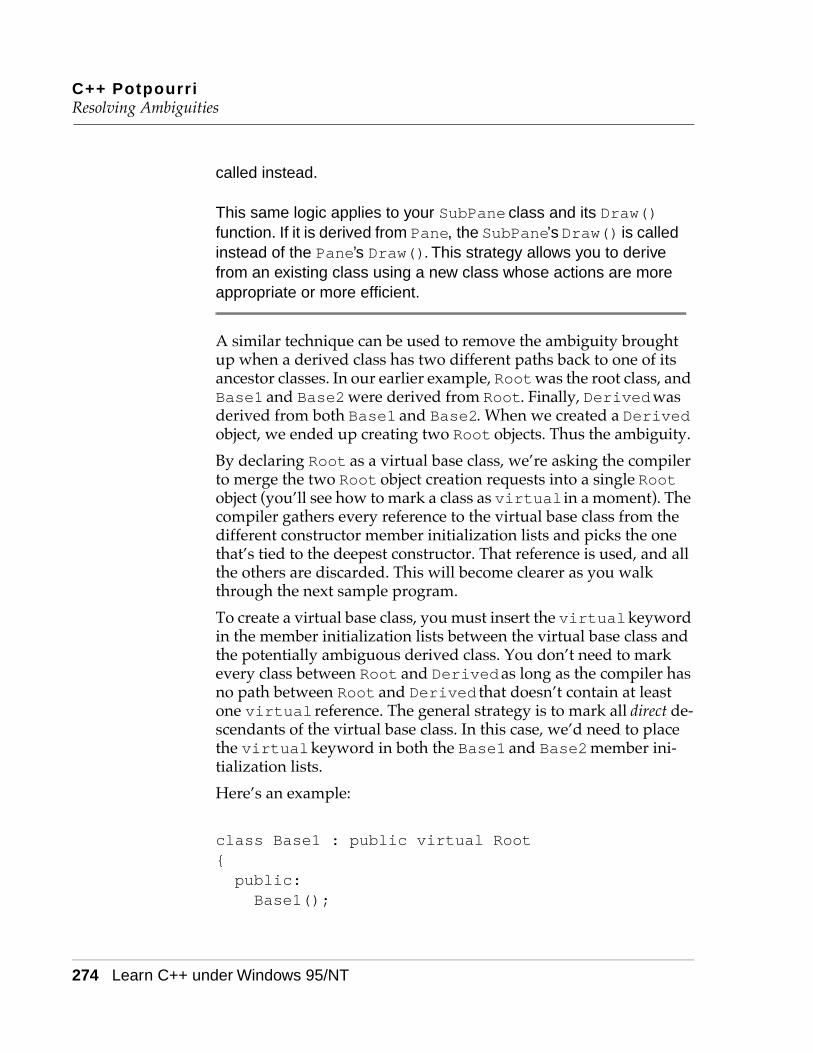
C++ PotpourriResolving Ambiguities
274 Learn C++ under Windows 95/NT
called instead.
This same logic applies to your SubPane class and its Draw() function. If it is derived from Pane, the SubPane’s Draw() is called instead of the Pane’s Draw(). This strategy allows you to derive from an existing class using a new class whose actions are more appropriate or more efficient.
A similar technique can be used to remove the ambiguity brought up when a derived class has two different paths back to one of its ancestor classes. In our earlier example, Root was the root class, and Base1 and Base2 were derived from Root. Finally, Derived was derived from both Base1 and Base2. When we created a Derived object, we ended up creating two Root objects. Thus the ambiguity.
By declaring Root as a virtual base class, we’re asking the compiler to merge the two Root object creation requests into a single Root object (you’ll see how to mark a class as virtual in a moment). The compiler gathers every reference to the virtual base class from the different constructor member initialization lists and picks the one that’s tied to the deepest constructor. That reference is used, and all the others are discarded. This will become clearer as you walk through the next sample program.
To create a virtual base class, you must insert the virtual keyword in the member initialization lists between the virtual base class and the potentially ambiguous derived class. You don’t need to mark every class between Root and Derived as long as the compiler has no path between Root and Derived that doesn’t contain at least one virtual reference. The general strategy is to mark all direct de-scendants of the virtual base class. In this case, we’d need to place the virtual keyword in both the Base1 and Base2 member ini-tialization lists.
Here’s an example:
class Base1 : public virtual Root{public:Base1();

C++ PotpourriResolving Ambiguities
Learn C++ under Windows 95/NT 275
};
The virtual keyword can appear either before or after the public keyword.
Once the virtual keywords are in place, the compiler ignores all member initialization list references to the Root class constructor except the deepest one. This sample Derived constructor includes a reference to the Root constructor:
Derived::Derived( short param ) : Root( param ){cout << “Derived constructor called\n”;
}
Even if the Base1 and Base2 constructors map parameters to the Root constructor, their mappings are superseded by the deeper, Derived constructor. By overriding the constructor mappings, the compiler makes sure that only a single object of the virtual base class (in this case, Root) is created.
A Virtual Base Class ExampleThis next example brings these techniques to life. Close the current project by selecting Close from the File menu. Select Open from the File menu, go into the Learn C++ Projects directory, open the subdirectory named 09.04 - virtual, and open the project file named virtual.cwp. Next, run virtual.cwp by selecting Run from the Project menu. Here’s what you’ll see:
Root constructor calledBase1 constructor calledBase2 constructor calledDerived constructor called------num = 3
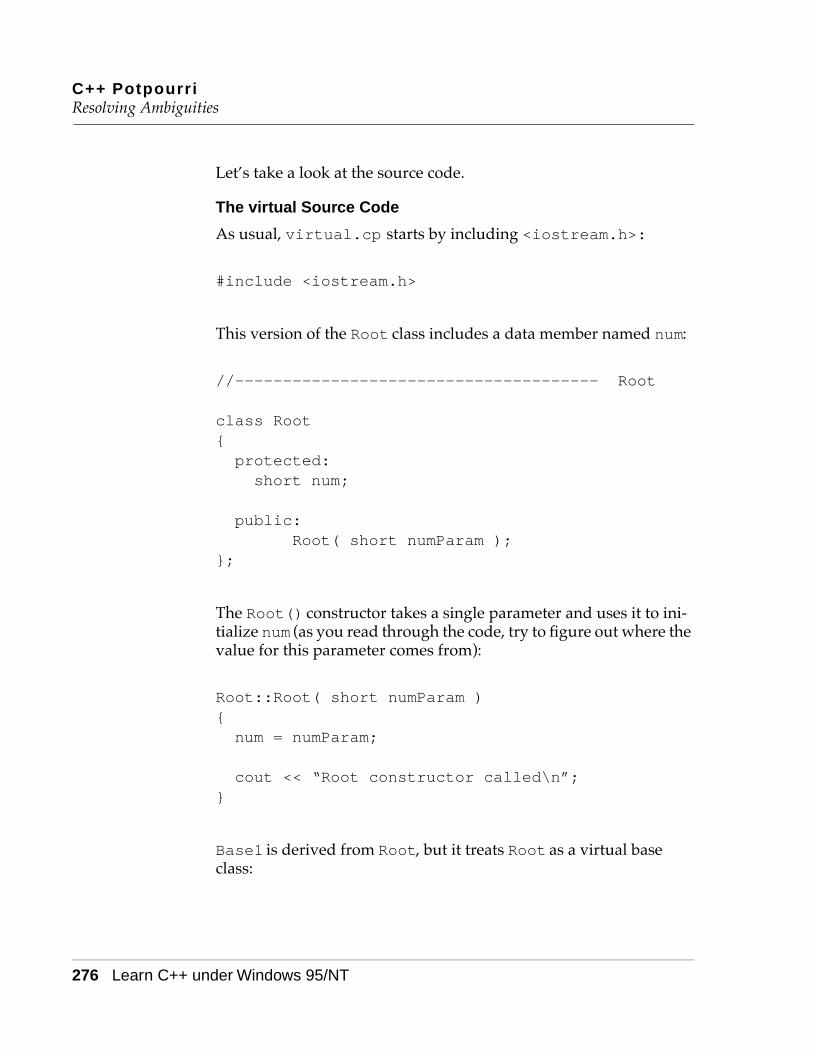
C++ PotpourriResolving Ambiguities
276 Learn C++ under Windows 95/NT
Let’s take a look at the source code.
The virtual Source Code
As usual, virtual.cp starts by including <iostream.h>:
#include <iostream.h>
This version of the Root class includes a data member named num:
//-------------------------------------- Root
class Root{protected:short num;
public:Root( short numParam );
};
The Root() constructor takes a single parameter and uses it to ini-tialize num (as you read through the code, try to figure out where the value for this parameter comes from):
Root::Root( short numParam ){num = numParam;
cout << “Root constructor called\n”;}
Base1 is derived from Root, but it treats Root as a virtual base class:

C++ PotpourriResolving Ambiguities
Learn C++ under Windows 95/NT 277
//-------------------------------------- Base1
class Base1 : public virtual Root{public:Base1();
};
Notice that the Base1() constructor asks the compiler to call the Root() constructor and passes it a value of 1. Will this call take place?
Base1::Base1() : Root( 1 ){cout << “Base1 constructor called\n”;
}
Base2 also declares Root as a virtual base class. Now there’s no path down from Root that’s not marked as virtual:
//-------------------------------------- Base2
class Base2 : public virtual Root{public:Base2();
};
The Base2() constructor asks the compiler to pass a value of 2 to the Root() constructor. Is this the value that is passed on to the Root() constructor?
Base2::Base2() : Root( 2 ){cout << “Base2 constructor called\n”;
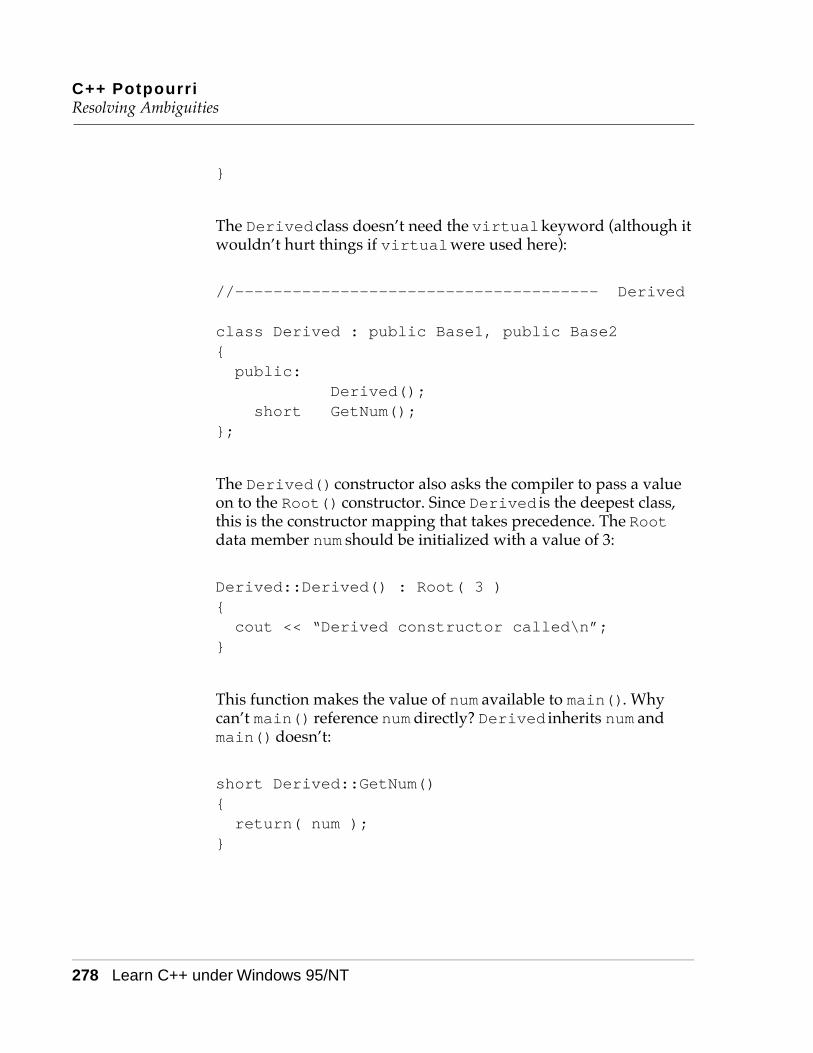
C++ PotpourriResolving Ambiguities
278 Learn C++ under Windows 95/NT
}
The Derived class doesn’t need the virtual keyword (although it wouldn’t hurt things if virtual were used here):
//-------------------------------------- Derived
class Derived : public Base1, public Base2{public:
Derived();short GetNum();
};
The Derived() constructor also asks the compiler to pass a value on to the Root() constructor. Since Derived is the deepest class, this is the constructor mapping that takes precedence. The Root data member num should be initialized with a value of 3:
Derived::Derived() : Root( 3 ){cout << “Derived constructor called\n”;
}
This function makes the value of num available to main(). Why can’t main() reference num directly? Derived inherits num and main() doesn’t:
short Derived::GetNum(){return( num );
}

C++ PotpourriResolving Ambiguities
Learn C++ under Windows 95/NT 279
main() creates a Derived object, causing a sequence of constructor calls:
//-------------------------------------- main()
int main(){Derived myDerived;
Notice that the Root constructor is called only once:
Root constructor calledBase1 constructor calledBase2 constructor calledDerived constructor called
Finally, the value of num is printed (drum roll, please):
cout << “------\n”<< “num = “ << myDerived.GetNum();
return 0;}
As you’ve already guessed, num has a value of 3, showing that the Base1 and Base2 constructor initializations are overridden by the deeper, Derived constructor initialization:
------num = 3
C++ PotpourriInitialization Versus Assignment
280 Learn C++ under Windows 95/NT
Initialization Versus AssignmentWhen you think about initialization, you might think of a line of code like this, where the variable i is defined and initialized to a value of 21:
short i = 21;
In the following code i is defined and then a value of 21 is assigned to i:
short i;
i = 21;
The point here is that the compiler thinks of initialization and as-signment as two completely different operations. Every constructor is broken into two parts, the initialization part and the assignment part. The initialization part takes place in the member initialization list. The assignment part takes place in the body of the constructor. The remainder of this section discusses things you should know about initialization and assignment as they relate to object construc-tion.
const and Reference TypesWhen a const is defined, a value is tied to it at initialization. In the strictest sense of the word, you can’t assign a value to a const. This code will compile:
const short kMaxNameLength = 20;
This code won’t compile:
const short kMaxNameLength;
C++ PotpourriInitialization Versus Assignment
Learn C++ under Windows 95/NT 281
kMaxNameLength = 20; // Aaack!
The same holds true for a reference type. A reference type must be given a value at initialization. This code compiles just fine:
short number = 20;short &numberAlias = number;
This code, on the other hand, is destined for failure:
short &numberAlias; // Error: Must be // initialized!!
You can declare a class data member as a const or a reference type, but beware! You can’t provide these data members their initial value via an assignment statement. Instead, you must use the member ini-tialization list to do your dirty work for you. Here’s an example:
class MyClass{private:const short kMaxNameLength;short &numberAlias;short number;
public:MyClass( short constValue );
};
MyClass::MyClass( short constValue ) :kMaxNameLength( constValue ), numberAlias( number )
{// kMaxNameLength is set to constValue// numberAlias references number
C++ PotpourriInitialization Versus Assignment
282 Learn C++ under Windows 95/NT
}
Up until this point, we’ve used the member initialization list to map parameters from the constructor to a base class. In this example, we use the member initialization list to initialize some members. How appropriate!
If you include a data member name in the member initialization list and follow the name by an expression surrounded by parentheses, the compiler uses the expression to initialize the data member. In the previous chunk of code, kMaxNameLength is initialized to the value in constValue and numberAlias is set to reference number. As you can see, the member initialization list is pretty use-ful.
A Member Initialization List ExampleHere’s a working version of the previous chunk of code. Close the current project by selecting Close from the File menu. Select Open from the File menu, go into the Learn C++ Projects directory, open the subdirectory named 09.05 - init, and open the project file named init.cwp. Next, run init.cwp by selecting Run from the Project menu. Here’s what you’ll see:
Before: number = 10After: number = 20
Let’s take a look at the source code.
The init Source Code
As usual, init.cp starts by including <iostream.h>:
#include <iostream.h>
The declaration of MyClass is pretty much the same as the one you just saw. To simplify things, all the data members are declared as
C++ PotpourriInitialization Versus Assignment
Learn C++ under Windows 95/NT 283
public. Also, the constructor is filled out to make things a little more interesting:
//-------------------------------------- MyClass
class MyClass{public:const short kMaxNameLength;short &numberAlias;short number;
MyClass( short constValue );};
The constructor takes a single parameter, a value used to initialize our const variable. The member initialization list is used to initialize kMaxNameLength and numberAlias:
MyClass::MyClass( short constValue ) :kMaxNameLength( constValue ), numberAlias( number )
We start off by assigning number the value stored in kMaxNameLength:
{number = kMaxNameLength;
To prove that kMaxNameLength is initialized properly, we print out the value in number:
cout << “Before: number = “<< number << “\n”;

C++ PotpourriInitialization Versus Assignment
284 Learn C++ under Windows 95/NT
This results in the following line of output:
Before: number = 10
Next, to prove that numberAlias references number,numberAlias is incremented by 10:
numberAlias += 10;
Now, we print out the value of number again:
cout << “After: number = “<< number << “\n”;
}
Just as we’d hoped, number now has a value of 20:
After: number = 20
main() has a pretty simple job—just to create a MyClass object and pass a value of 10 to its constructor:
//-------------------------------------- main()
int main(){MyClass myObject( 10 );
return 0;}

C++ PotpourriMemberwise Initialization
Learn C++ under Windows 95/NT 285
Memberwise InitializationIn certain instances, a special form of initialization, known as mem-berwise initialization, is used to initialize a newly created object. Basically, memberwise initialization is the technique of copying the contents of one object, data member by data member, into another object.
Memberwise initialization is a convenient way to make a copy of an object. Here’s one way to do this:
MyClassobj1( 20 );MyClassobj2 = obj1; // Uses memberwise
//initialization
The first line of code defines an object of class MyClass and passes the number 20 to its constructor. The second line creates another MyClass object, but instead of calling the constructor, the second object becomes an exact duplicate of the first object.
Detail There are several other ways to achieve memberwise initialization. If you pass an object by value as a parameter, the compiler cre-ates a local copy of your parameter, using memberwise initializa-tion to initialize the copy. Also, if you write a function that returns an object, memberwise initialization is used to copy the returned object into the object receiving the returned object.
Memberwise initialization is easy to use and it is convenient, but there’s a catch. Memberwise initialization makes an exact copy of an object, including any and all pointers. Suppose you declare a Name class that holds someone’s first and last names:
class Name{private:char *last;char *first;

C++ PotpourriMemberwise Initialization
286 Learn C++ under Windows 95/NT
public:Name( char *firstParam, char *lastParam );
};
Suppose also that the Name() constructor allocates the memory for last and first, based on the size of the two constructor parame-ters. This being the case, you might define a Name like this:
Name yourAuthor( “Dave”, “Mark” );
What happens if you define a second Name by using the member-wise initialization syntax?
Name aCopy = yourAuthor;
Now, yourAuthor and aCopy share some common memory. Both copies of last point to the same block of memory, and both copies of first point to the same block of memory. If you delete one of the objects, the other object is left with a dangling pointer. That can be a problem.
The Copy ConstructorYou can provide a memberwise initialization function for any of your classes. Before the compiler does a memberwise copy, it first checks to see whether your class includes an overloaded version of your constructor having the form
MyClass( const MyClass& )
where MyClass is the class being copied. This special constructor is known as a copy constructor.
If you provide a copy constructor, it is called whenever memberwise initialization is called for. Your copy constructor should copy the
C++ PotpourriMemberwise Initialization
Learn C++ under Windows 95/NT 287
current object into the object passed by reference as a parameter. If the object to be copied contains any pointers, you may want to real-locate the necessary memory in the copy instead of blindly copying the pointers.
A Memberwise Initialization Example
Here’s a working version of the previous chunk of code. Close the current project by selecting Close from the File menu. Select Open from the File menu, go into the Learn C++ Projects directory, open the subdirectory named 09.06 - memberWise, and open the project file named memberWise.cwp. Next, run memberWise.cwp by selecting Run from the Project menu. Here’s what you’ll see:
Original constructor...Copy constructor...Original constructor...Name: Dave MarkName: Dave MarkName: Scott Knaster
Let’s take a look at the source code.
The memberWise Source Code
memberWise.cp starts by including <iostream.h> and <string.h>:
#include <iostream.h>#include <string.h>
The Name class includes two data members, last and first:
//-------------------------------------- Name
class Name{

C++ PotpourriMemberwise Initialization
288 Learn C++ under Windows 95/NT
private:char *last;char *first;
The first Name() constructor is for regular Name objects; the second constructor is our copy constructor:
public:Name( char *firstParam, char *lastParam );Name( const Name &original );
The destructor frees up the memory allocated for first and last:
~Name();
The Display() function is used to display the data members of the current Name object:
void Name::Display();
The Name class’s operator=() function provides a service similar to the Name() copy constructor. When the compiler encounters an expression of the form
myObject = yourObject
where both operands belong to the same class, it performs a mem-berwise copy of the right operand to the left operand. If the class in question provides an operator=() function in the proper form, the operator=() function is called in lieu of performing the member-wise copy.
Name &Name::operator=( const Name &original );
C++ PotpourriMemberwise Initialization
Learn C++ under Windows 95/NT 289
};
The regular Name() constructor uses new to allocate memory for first and last:
Name::Name( char *firstParam, char *lastParam ){first = new char[ strlen(firstParam) + 1 ];last = new char[ strlen(lastParam) + 1 ];
Next, strcpy() is called to copy the two parameters into their as-sociated data members:
strcpy( first, firstParam );strcpy( last, lastParam );
Then, a message is printed to let us know which constructor we’re in:
cout << “Original constructor...\n”;}
When the copy constructor is called, the current object is the new Name object. The parameter passed in is the original Name object from which the data is being copied:
Name::Name( const Name &original ){first = new char[ strlen(original.first) + 1 ];last = new char[ strlen(original.last) + 1 ];
strcpy( first, original.first );strcpy( last, original.last );
C++ PotpourriMemberwise Initialization
290 Learn C++ under Windows 95/NT
Once again, a message is printed telling us which constructor we’re in:
cout << “Copy constructor...\n”;}
The destructor deletes the char arrays pointed to by first and last:
Name::~Name(){delete [] first;delete [] last;
}
Again, the Display() function prints the current Name:
void Name::Display(){cout << “Name: “ << first << “ “ << last << “\n”;
}
The operator=() function starts by checking to see whether the left and right operands are the same object, as in this expression:
myObject = myObject;
Why is this case special? As you’ll see, before we copy the right op-erand to the left operand, we delete any memory allocated to the left operand. If the left and right objects are the same object, we’ll lose data if we delete:
Name &Name::operator=( const Name &original )
C++ PotpourriMemberwise Initialization
Learn C++ under Windows 95/NT 291
{if ( this == &original )return( *this );
Once we know we’re dealing with two different objects, we start by deleting any previously allocated memory. Remember, the left-hand operand is the current object; the right hand operand is passed in as the parameter original:
delete [] first;delete [] last;
The next four lines are lifted right from the copy constructor:
first = new char[ strlen(original.first) + 1 ];last = new char[ strlen(original.last) + 1 ];
strcpy( first, original.first );strcpy( last, original.last );
Finally, we return the current object as the result of the = operation:
return( *this );}
main() starts by creating an original Name, reflecting the identity of your hard-working author:
//-------------------------------------- main()
int main(){Name yourAuthor( “Dave”, “Mark” );
C++ PotpourriMemberwise Initialization
292 Learn C++ under Windows 95/NT
This results in a call of the original constructor, and the following message appears in the console window:
Original constructor...
Next, another Name is created using the copy constructor:
NameaCopy = yourAuthor;
This results in the following line of output:
Copy constructor...
The third Name object is used to test our operator=() function:
Name anotherAuthor( “Scott”, “Knaster” );
This results in the following line of output:
Original constructor...
When yourAuthor.Display() is called, the contents of the origi-nal Name are printed:
yourAuthor.Display();
Here’s the result:
Name: Dave Mark

C++ PotpourriSummary
Learn C++ under Windows 95/NT 293
When aCopy.Display() is called, the contents of the copy are printed:
aCopy.Display();
Here’s the result:
Name: Dave Mark
Next, the = operator is used to copy anotherAuthor to aCopy. Be-fore the copy is done, aCopy has the name Dave Mark and anotherAuthor has the name Scott Knaster.
aCopy = anotherAuthor;
aCopy.Display();
return 0;}
This call of aCopy() results in the following line of output:
Name: Scott Knaster
If you have any doubts about memberwise initialization, add some additional output statements to the program to verify that a copied object has its own unique memory allocated for it. To do this, print the addresses of first and last in both the original and the copy.
SummaryOK, time to break out the good champagne (grab a Perrier if you’re driving). You have now officially made it through the basics of C++. Although there are still many interesting things to learn, you’ve
C++ PotpourriSummary
294 Learn C++ under Windows 95/NT
mastered the essentials and you’re ready to code. Chapter 10 offers a look at some C++ class libraries and development environments. Let’s rip!
Learn C++ under Windows 95/NT 295
10Moving On
What does it take to develop a C++ application? The answer de-pends on the computer and operating system under which your ap-plication will ultimately run. Are you writing an application that will run only in Windows? Are you building a program destined for a text-based environment like DOS or Unix? Are you trying to write an application that will run on a variety of platforms?
The User InterfaceIf you can live within the confines of a text-oriented user interface, almost any C++ development environment will work for you. By taking advantage of the iostream library, you can build a C++ ap-plication with a completely portable user interface. The upside here is that you can develop an application on a PC, copy the source code to a Sun workstation, and recompile, and (with some minor retool-ing, perhaps) you’ll have a perfectly acceptable Unix application.
The down side is that a text-oriented user interface is limited. The console works, but it isn’t pretty. (If you tried to fob off an iostream-based user interface on a seasoned Windows user, they’d likely run you out of town.) Graphical user interfaces (GUIs, pro-nounced “gooeys”) provide a sophisticated visual method for con-veying information and providing program control. Windows has its own particular look and feel as do other GUIs such as the Macin-tosh and Motif.
If you can live within the confines of iostream, you’ll have the ul-timate in application portability. If you want to create an application with the look and feel of the environment it’s running under, you’ll have some extra work to do. First, you must become an expert user of the destination environment. You’ll need to recognize each of the
Moving OnThe User Interface
296 Learn C++ under Windows 95/NT
elements that make up that environment’s user interface, as well as the proper behavior of each element. When a window is in front, does it look different than when it is behind another window? What’s the proper way to disable a menu item? Where do scroll bars usually appear? How do you resize a window? When you’ve mas-tered this interface vocabulary, you’re ready to design your applica-tion’s interface.
Warning If you plan to develop an application that will run on more than one platform, you have even more work to do. First, you must absorb the interface vocabulary for each platform you plan to support. Next, you’ll have to make some decisions about your user inter-face. Your programming task will be simpler if you build your inter-face by using elements common to all of the platforms your application will run on. For example, unless all of the candidate platforms support pop-up menus, you might consider leaving them out of your interface. Each special case that you support will make your software more difficult to maintain.
Another option is to take advantage of a cross-platform develop-ment system, a development environment that can generate ver-sions of your application for several different platforms, all from the same specifications/code. The upside to a cross-platform develop-ment system is the ease with which you can maintain your prod-uct. Instead of updating your product on each platform you support, you’ll only have to make your changes once.
There are several down sides. Most cross-platform development systems are very expensive (thousands of dollars). Some restrict their feature set to the smallest common denominator of the fea-tures offered by all supported platforms. In other words, if a spe-cific feature is not found on each and every platform, you won’t be able to use it at all.
Moving OnThe Windows API and Class Libraries
Learn C++ under Windows 95/NT 297
The Windows API and Class LibrariesFor the moment, let’s assume that you wish to use your newfound C++ talents to build a Windows application with all of the user-in-terface elements that Windows users have come to know and love. You’re ready to take advantage of the functions made available by the Windows application programming interface (API).
Fortunately, the CodeWarrior development environment comes with a set of class libraries containing all of the user-interface rou-tines you’ll need to implement the look and feel of Windows and ac-cess other elements of the Windows API. These class libraries are based off of the Microsoft Foundation Classes and contain some functions that create windows on the screen and others that draw text in these windows. There are functions for drawing shapes, lines, and dots in color and in black and white. These libraries pro-vide more than a thousand functions that put the entire Windows interface at your disposal.
Books and Other Reference MaterialNow you’re ready to turn your sights to the specifics of Windows development. If you’re new to Windows, you’ll be glad to know that there’s a lot of reading material available to help ease you through the learning curve associated with Windows programming.
The BibliographyBe sure to check out the bibliography in Appendix G, where you’ll find a list of books that will help ease your transition into Windows C++ programming. Now that you’ve mastered the basics of C++, you should pick up a good reference guide to help complete your education. The C++ Programming Language by Bjarne Stroustrup (the principal architect of C++) is a must. C++ Primer by Stanley Lipp-man is also very helpful. Make sure you get the second edition of both books. Finally, get hold of a copy of The Annotated C++ Refer-ence Manual (also known as the ARM) by Margaret Ellis and Bjarne Stroustrup. Although it was written with the expert C++ program-
Moving OnGo Get ‘Em...
298 Learn C++ under Windows 95/NT
mer in mind, the ARM provides a complete and authoritative C++ reference.
Two good books on the Windows API are Building Windows 95 Ap-plications by Kevin J. Goodman and Windows 95 : A Developer’s Guide by Jeffrey Richter and Jonathan Locke.
Go Get ‘Em...Well, that’s it. I hope you enjoyed reading Learn C++ under Windows 95/NT as much as I enjoyed writing it. Above all, I hope you are ex-cited about C++. Now go out there and write some source code!
Learn C++ under Windows 95/NT 299
AGlossaryabstract class: A base class whose sole purpose is to provide a basis for derived classes. You’ll never create an object based on an abstract class.
access function: A function designed specifically to provide access to a data member.
access specifier: One of public, private, or protected, the access code defines which of your program’s functions has access to the specified data member or function.
application framework: A collection of classes that implement a ge-neric application. Typically, the classes in an application framework act as placeholders. The programmer overloads various parts of the framework to give the application the desired look and feel.
base class: A class used as the basis for the declaration of a second class, known as a derived class. The derived class inherits all the members of the base class.
class: A C++ structure that encapsulates data and functions, known as data members and member functions.
class derivation: The technique of deriving classes based on other classes.
class library: A collection of classes, sometimes used to implement a platform’s user interface. Many class libraries come in the form of an application framework.
constructor function: A member function having the same name as its class. The constructor function is typically used to initialize an object’s data members.

Glossary
300 Learn C++ under Windows 95/NT
copy constructor: A constructor designed to provide an alternative to memberwise initialization for copying one object to another.
current object: The object that launched the current member func-tion. The members of the current object may be referred to from within a member function without using the normal object notation. this is always a pointer to the current object.
data member: One of the data elements of a class.
declaration: A statement that creates a reference to an object or func-tion, without actually allocating memory for the object or function.
default argument initializer: A function argument with an associ-ated default value. If the function is called and no value is passed in corresponding to the argument, the argument is initialized to its de-fault value.
definition: A statement that causes memory to be allocated for a variable or function. A function prototype is a declaration. The en-tire function, including curly braces and all the statements between, is known as the function definition.
derivation chain: The chain of classes running from a root class, through a sequence of derived classes, to the ultimate derived class, which is the last class in the derivation chain.
derived class: A class declared using a base class. The derived class inherits all the members of its base class.
destructor function: A member function having the same name as its class preceded by the ~ character. The destructor function is typi-cally used to delete any member allocated for an object.
extraction operator: The >> operator, part of iostream, that allows you to extract data from a stream.
formatting flags: A series of flags maintained by the ios class used to control various iostream formatting features.
function name overloading: A feature that allows you to create sev-eral functions with the same name, but having different signatures.

Glossary
Learn C++ under Windows 95/NT 301
Each call of an overloaded function is compared against the avail-able signatures and the matching function is called. If no match is found, the compiler reports an error.
inheritance: The technique wherein a derived class inherits the characteristics of its base class.
inline function: A function declared using the inline keyword. The body of an inline function is actually copied into the calling function, allowing you to bypass the overhead normally associated with calling a function.
insertion operator: The << operator, part of iostream, that allows you to insert data into a stream.
interface vocabulary: A language that describes the elements in a platform’s user interface. The terms scroll bar, window, and pull-down menu are all part of the Windows interface vocabulary.
manipulator: A special function, provided as part of the iostream library, that allows you to perform a specific I/O operation while you are in the middle of in insertion or extraction.
member function: One of the functions declared as part of a class.
member initialization list: The list that optionally follows a con-structor’s parameter list, used to initialize an object’s members. The member initialization list is always preceded by a :.
memberwise assignment: The process of copying the value of the data members of one object to the data members of another object belonging to the same class, one at a time.
memberwise initialization: A special form of initialization used to copy one object to another. The first object’s data members are cop-ied to those of the second, one at a time.
multiple inheritance: The technique of defining a class derived from more than one class.
object: Any C++ entity that occupies memory.
Glossary
302 Learn C++ under Windows 95/NT
operator overloading: Similar to function overloading, the tech-nique of assigning more than one meaning to one of the built-in C++ operators. Overloaded operators rely on functions having the name operator, followed by the name of the operator being overloaded. For example, the function operator+() overloads the + operator.
project: A collection consisting of a project file and all the other files that contribute to a particular program.
project file: A file used by the CodeWarrior development environ-ment to manage all of a program’s source and object code. By con-vention, CodeWarrior project files end in “.cwp”.
project window: A window that appears when you open a project using CodeWarrior for Windows. The window that describes all the source code file and library files that make up the project.
read-only memory (ROM): Computer memory that can only be read from, not written to.
reference variable: A variable designed to act as an alias to another variable of the exact same type. To denote a variable as a reference variable, precede its name with an & in its definition. Reference vari-ables must be initialized (set to alias another variable) at the same time they are defined.
root base class: The ultimate base class in a derivation chain.
scope: A variable’s scope defines the availability of the variable throughout the rest of the program.
scope resolution operator: The scope resolution operator, ::, pre-cedes a variable, telling the compiler to look outside the current block for a variable of the same name. The scope resolution operator is also used to refer to a class’s static members.
signature: A function’s parameter list. A function’s name and signa-ture combine to distinguish it from all other functions. A function’s return type is not part of its signature.
smart pointer: An overloaded version of the -> operator, used to walk down a chain of pointers.

Glossary
Learn C++ under Windows 95/NT 303
state bits: A series of bits that reflect the current status of a stream. The bits are goodbit, eofbit, failbit, and badbit.
static member: A data member or member function declared using the static keyword. A static data member is shared by the entire class, rather than allocated for each object of the class. A static mem-ber function is typically created to control access to a static data member. The this pointer is unavailable in a static member func-tion.
template: A function or class definition containing a series of place-holders, each of which represents a type that isn’t provided until the function is called or until an object of the class is defined.
template argument list: The list of type placeholders following the template keyword in a function or class template.
template instantiation: A function or class defined based on a tem-plate.
virtual base class: A root base class having all derived classes marked using the virtual keyword. This ensures that a derived class having more than one path back to the virtual base class will not instantiate more than one copy of the root base class.
Windows Application Programming Interface (API): A set of func-tions that allows you to access and incorporate the features of Win-dows in your programs.
Glossary
304 Learn C++ under Windows 95/NT

Learn C++ under Windows 95/NT 305
BSource Code Listings
call (Chapter 7)
#include <iostream.h>
//--------------------------------------- Item
class Item{private:float price;
public:Item( float itemPrice );
float operator()( float taxRate = 0 );};
Item::Item( float itemPrice ){price = itemPrice;
}
float Item::operator()( float taxRate ){return( ((taxRate * .01) + 1) * price );
}

Source Code Listingscin (Chapter 4)
306 Learn C++ under Windows 95/NT
//--------------------------------------- main()
int main(){Item stimpyDoll( 36.99 );
cout << “Price of Stimpy doll: $” << stimpyDoll();
cout << “\nPrice with 4.5% tax: $” << stimpyDoll( 4.5 );
return 0;}
cin (Chapter 4)
#include <iostream.h>
const short kMaxNameLength = 40; int main(){char name[ kMaxNameLength ];short myShort;long myLong;float myFloat;
cout << “Type in your first name: “;cin >> name;
cout << “Short, long, float: “;cin >> myShort >> myLong >> myFloat;
cout << “\nYour name is: “ << name;cout << “\nmyShort: “ << myShort;cout << “\nmyLong: “ << myLong;
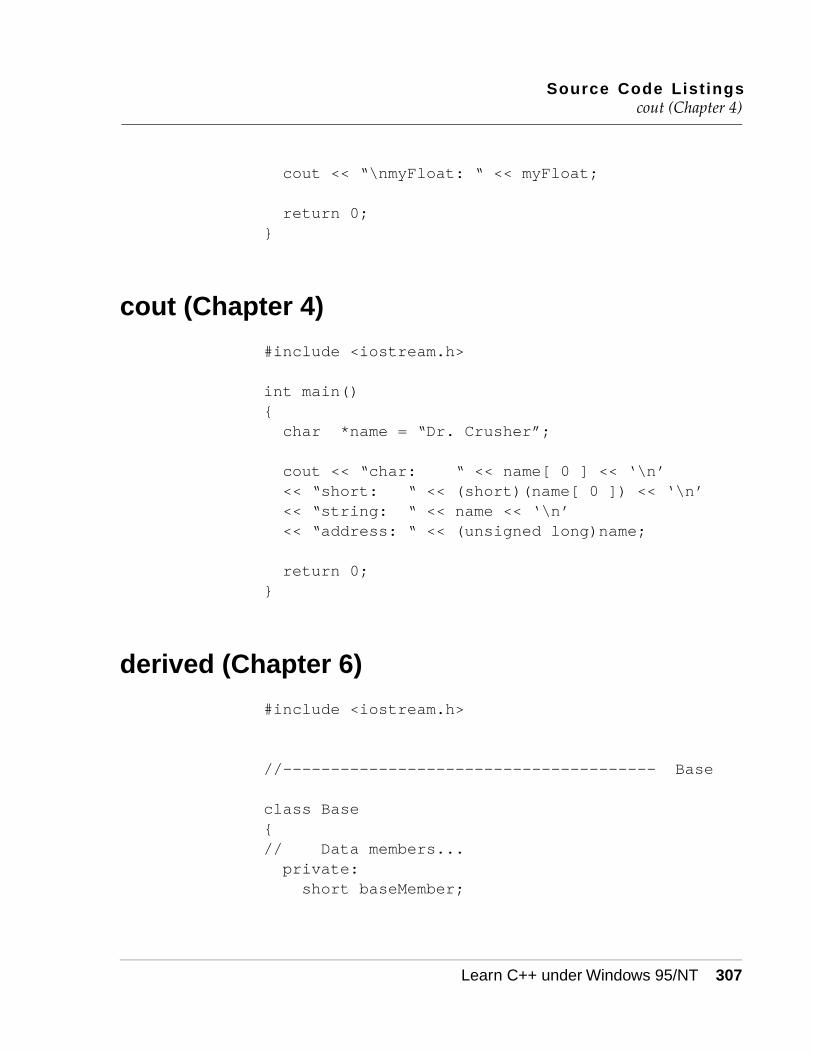
Source Code Listingscout (Chapter 4)
Learn C++ under Windows 95/NT 307
cout << “\nmyFloat: “ << myFloat;
return 0;}
cout (Chapter 4)
#include <iostream.h>
int main(){char *name = “Dr. Crusher”;
cout << “char: “ << name[ 0 ] << ‘\n’<< “short: “ << (short)(name[ 0 ]) << ‘\n’<< “string: “ << name << ‘\n’<< “address: “ << (unsigned long)name;
return 0;}
derived (Chapter 6)
#include <iostream.h>
//--------------------------------------- Base
class Base{// Data members...private:short baseMember;

Source Code Listingsderived (Chapter 6)
308 Learn C++ under Windows 95/NT
// Member functions...protected:void SetBaseMember( short baseValue );short GetBaseMember();
};
void Base::SetBaseMember( short baseValue ){baseMember = baseValue;
}
short Base::GetBaseMember(){return baseMember;
}
//----------------------------------- Base:Derived
class Derived : public Base{// Data members...private:short derivedMember;
// Member functions...public:void SetMembers( short baseValue,
short derivedValue );void PrintDataMembers();
};
void Derived::SetMembers( short baseValue, short derivedValue )
{derivedMember = derivedValue;SetBaseMember( baseValue );
}

Source Code Listingsemployee (Chapter 5)
Learn C++ under Windows 95/NT 309
void Derived::PrintDataMembers(){cout << “baseMember was set to “ << GetBaseMember() << ‘\n’;
cout << “derivedMember was set to “ << derivedMember << ‘\n’;
}
//--------------------------------------- main()
int main(){Derived*derivedPtr;
derivedPtr = new Derived;
derivedPtr->SetMembers( 10, 20 );
derivedPtr->PrintDataMembers();
return 0;}
employee (Chapter 5)
#include <iostream.h>#include <string.h>
const short kMaxNameSize = 20;
class Employee{// Data members...
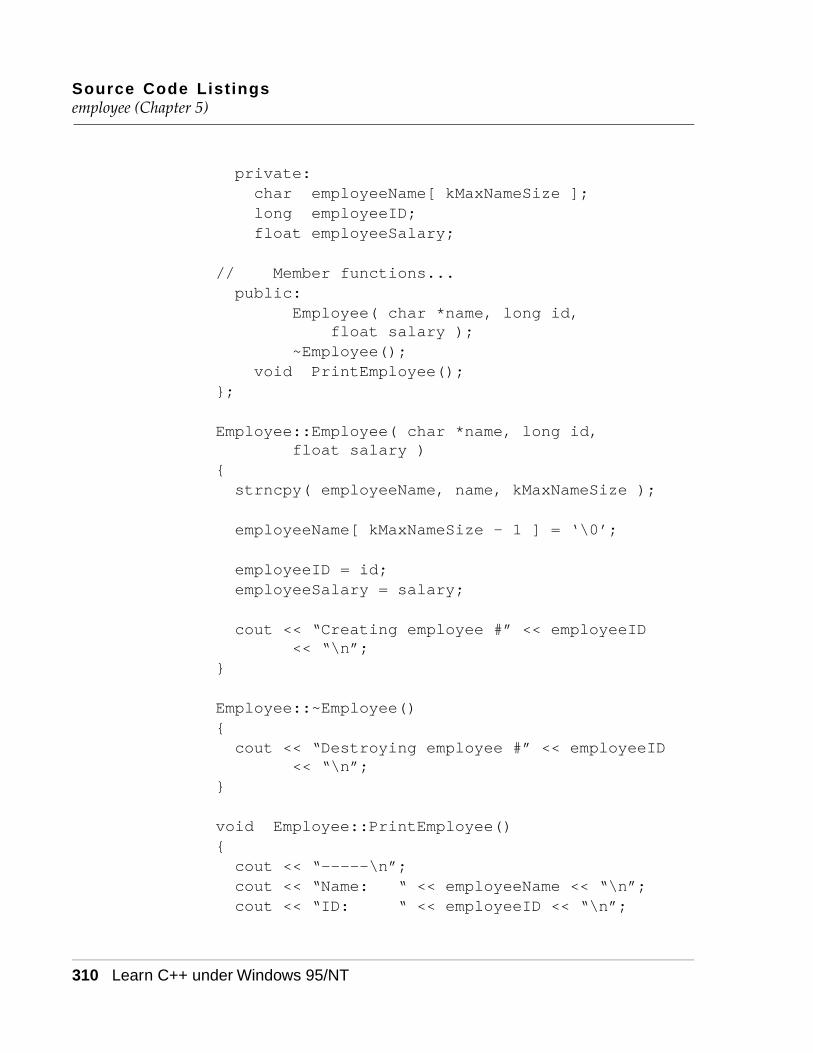
Source Code Listingsemployee (Chapter 5)
310 Learn C++ under Windows 95/NT
private:char employeeName[ kMaxNameSize ];long employeeID;float employeeSalary;
// Member functions...public:
Employee( char *name, long id, float salary );
~Employee();void PrintEmployee();
};
Employee::Employee( char *name, long id, float salary )
{strncpy( employeeName, name, kMaxNameSize );
employeeName[ kMaxNameSize - 1 ] = ‘\0’;
employeeID = id;employeeSalary = salary;
cout << “Creating employee #” << employeeID << “\n”;
}
Employee::~Employee(){cout << “Destroying employee #” << employeeID
<< “\n”;}
void Employee::PrintEmployee(){cout << “-----\n”;cout << “Name: “ << employeeName << “\n”;cout << “ID: “ << employeeID << “\n”;

Source Code Listingsequals (Chapter 7)
Learn C++ under Windows 95/NT 311
cout << “Salary: “ << employeeSalary << “\n”;cout << “-----\n”;
}
int main(){Employee employee1( “Dave Mark”, 1, 200.0 );Employee *employee2;
employee2 = new Employee( “Steve Baker”, 2, 300.0 );
employee1.PrintEmployee();employee2->PrintEmployee();
delete employee2;
return 0;}
equals (Chapter 7)
#include <iostream.h>#include <string.h>
//--------------------------------------- String
class String{private:char *s;short stringLength;
public:String( char *theString );
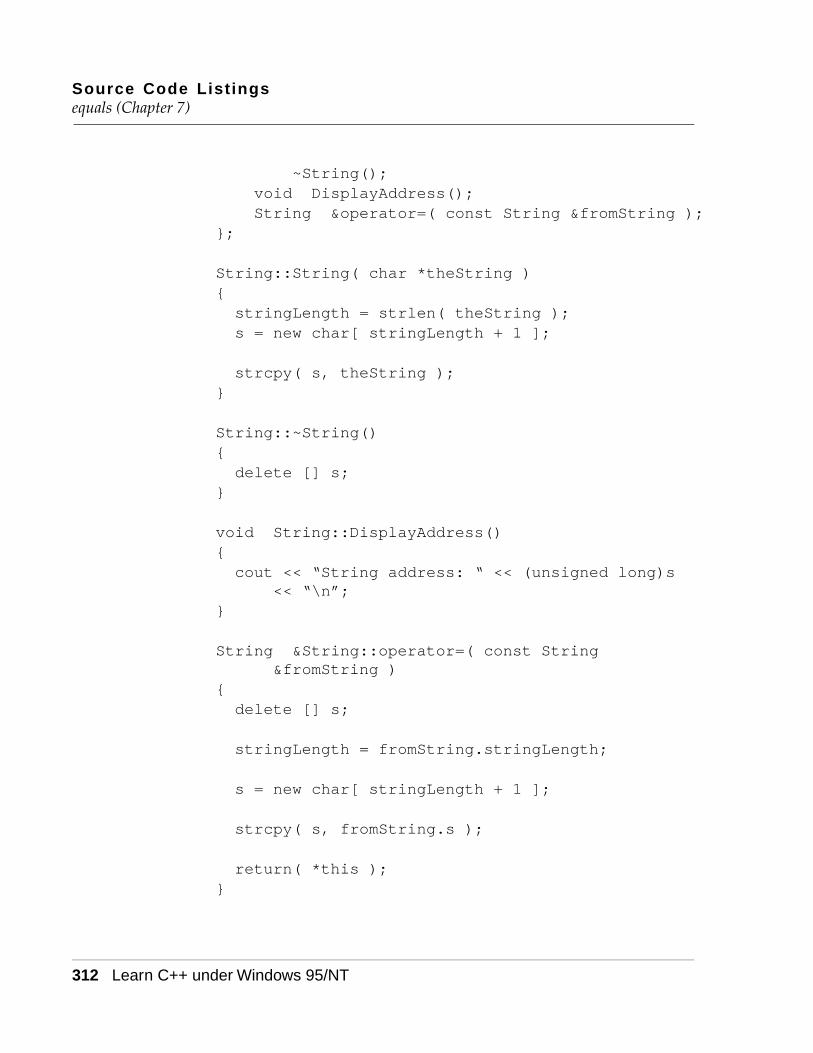
Source Code Listingsequals (Chapter 7)
312 Learn C++ under Windows 95/NT
~String();void DisplayAddress();String &operator=( const String &fromString );
};
String::String( char *theString ){stringLength = strlen( theString );s = new char[ stringLength + 1 ];
strcpy( s, theString );}
String::~String(){delete [] s;
}
void String::DisplayAddress(){cout << “String address: “ << (unsigned long)s
<< “\n”;}
String &String::operator=( const String &fromString )
{delete [] s;
stringLength = fromString.stringLength;
s = new char[ stringLength + 1 ];
strcpy( s, fromString.s );
return( *this );}
Source Code Listingsformatter (Chapter 8)
Learn C++ under Windows 95/NT 313
//--------------------------------------- main()
int main(){String captain( “Picard” );String doctor( “Crusher” );
captain.DisplayAddress();doctor.DisplayAddress();
cout << “-----\n”;
doctor = captain;
captain.DisplayAddress();doctor.DisplayAddress();
return 0;}
formatter (Chapter 8)
#include <iostream.h>
//--------------------------------------- main()
int main(){cout << 202 << ‘\n’;
cout.width( 5 );cout.fill( ‘x’ );cout.setf( ios::left, ios::adjustfield );
Source Code Listingsfriends (Chapter 5)
314 Learn C++ under Windows 95/NT
cout << 202 << ‘\n’;
cout.width( 10 );cout.fill( ‘=’ );cout.setf( ios::internal, ios::adjustfield );
cout << -101 << ‘\n’;
cout.width( 10 );cout.fill( ‘*’ );cout.setf( ios::right, ios::adjustfield );
cout << “Hello”;
return 0;}
friends (Chapter 5)
#include <iostream.h>#include <string.h>
const short kMaxNameSize = 20;
class Employee;
//--------------------------------------- Payroll
class Payroll{// Data members...private:
// Member functions...public:
Source Code Listingsfriends (Chapter 5)
Learn C++ under Windows 95/NT 315
Payroll();~Payroll();
void PrintCheck( Employee *payee );};
//--------------------------------------- Employee
class Employee{friend void Payroll::PrintCheck( Employee
*payee );
// Data members...private:char employeeName[ kMaxNameSize ];long employeeID;float employeeSalary;
// Member functions...public:
Employee( char *name, long id, float salary );
~Employee();void PrintEmployee();
};
//------------------- Payroll Member Functions
Payroll::Payroll(){cout << “Creating payroll object\n”;
}
Payroll::~Payroll(){cout << “Destroying payroll object\n”;
}

Source Code Listingsfriends (Chapter 5)
316 Learn C++ under Windows 95/NT
void Payroll::PrintCheck( Employee *payee ){cout << “Pay $” << payee->employeeSalary << “ to the order of “ << payee->employeeName << “...\n\n”;
}
//------------------- Employee Member Functions
Employee::Employee( char *name, long id, float salary )
{strncpy( employeeName, name, kMaxNameSize );
employeeName[ kMaxNameSize - 1 ] = ‘\0’;
employeeID = id;employeeSalary = salary;
cout << “Creating employee #” << employeeID << “\n”;
}
Employee::~Employee(){cout << “Destroying employee #” << employeeID
<< “\n”;}
void Employee::PrintEmployee(){cout << “-----\n”;cout << “Name: “ << employeeName << “\n”;cout << “ID: “ << employeeID << “\n”;cout << “Salary: “ << employeeSalary << “\n”;cout << “-----\n”;
Source Code Listingsgramps (Chapter 6)
Learn C++ under Windows 95/NT 317
}
//--------------------------------------- main
int main(){Employee *employee1Ptr;Payroll *payroll1Ptr;
payroll1Ptr = new Payroll;
employee1Ptr = new Employee( “Carlos Derr”, 1000, 500.0 );
employee1Ptr->PrintEmployee();
payroll1Ptr->PrintCheck( employee1Ptr );
delete employee1Ptr;delete payroll1Ptr;
return 0;}
gramps (Chapter 6)
#include <iostream.h>
//--------------------------------------- Gramps
class Gramps{// Data members...

Source Code Listingsgramps (Chapter 6)
318 Learn C++ under Windows 95/NT
// Member functions...public:
Gramps();~Gramps();
};
Gramps::Gramps(){cout << “Gramps’ constructor was called!\n”;
}
Gramps::~Gramps(){cout << “Gramps’ destructor was called!\n”;
}
//---------------------------------- Pops:Gramps
class Pops : public Gramps{// Data members...
// Member functions...public:
Pops();~Pops();
};
Pops::Pops(){cout << “Pops’ constructor was called!\n”;
}
Pops::~Pops(){cout << “Pops’ destructor was called!\n”;
}
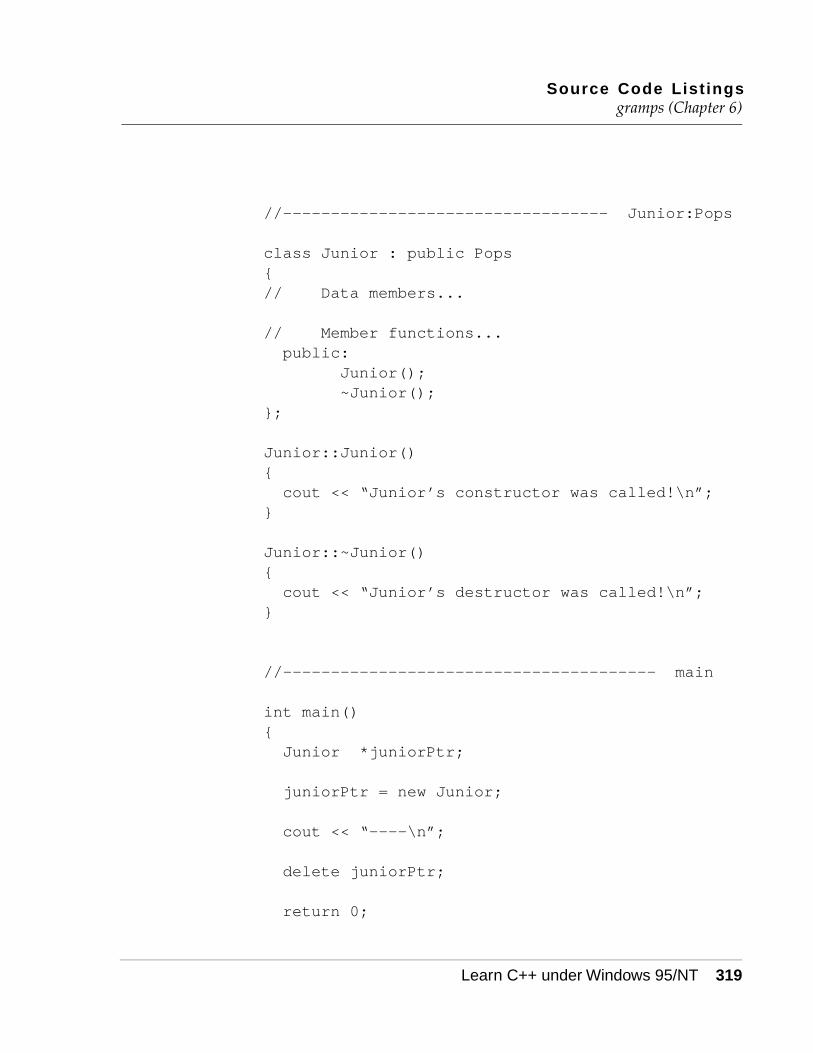
Source Code Listingsgramps (Chapter 6)
Learn C++ under Windows 95/NT 319
//---------------------------------- Junior:Pops
class Junior : public Pops{// Data members...
// Member functions...public:
Junior();~Junior();
};
Junior::Junior(){cout << “Junior’s constructor was called!\n”;
}
Junior::~Junior(){cout << “Junior’s destructor was called!\n”;
}
//--------------------------------------- main
int main(){Junior *juniorPtr;
juniorPtr = new Junior;
cout << “----\n”;
delete juniorPtr;
return 0;
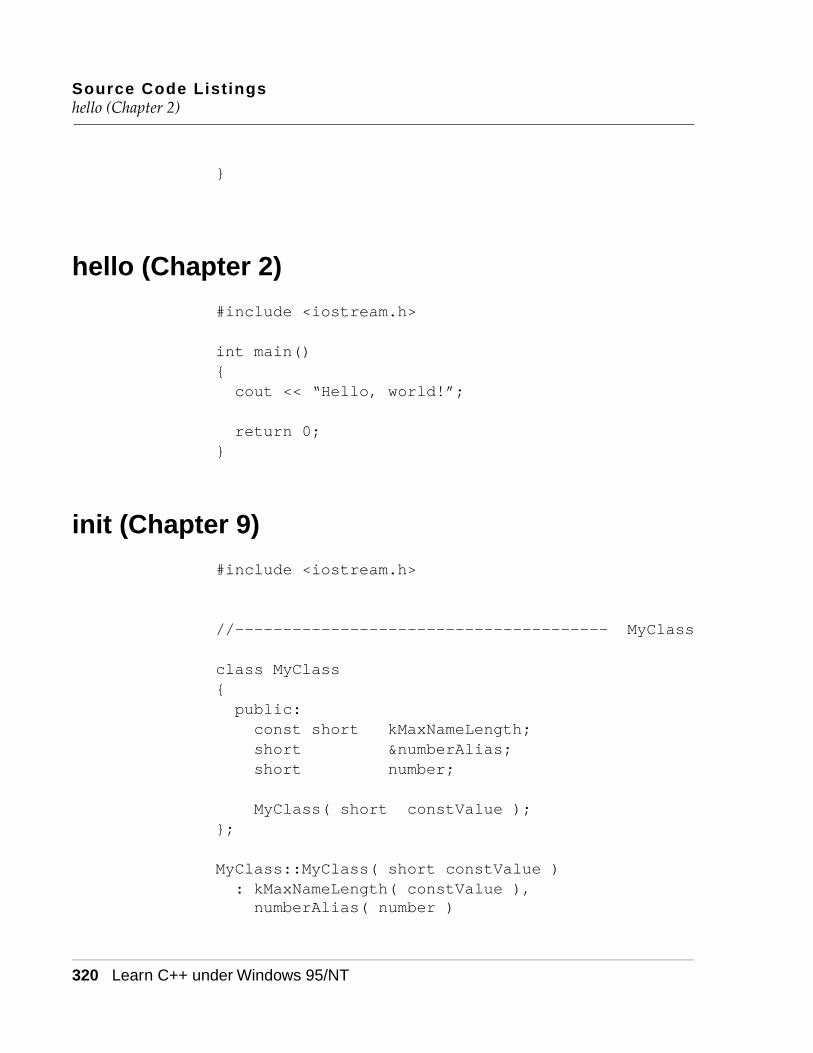
Source Code Listingshello (Chapter 2)
320 Learn C++ under Windows 95/NT
}
hello (Chapter 2)
#include <iostream.h>
int main(){cout << “Hello, world!”;
return 0;}
init (Chapter 9)
#include <iostream.h>
//--------------------------------------- MyClass
class MyClass{public:const short kMaxNameLength;short &numberAlias;short number;
MyClass( short constValue );};
MyClass::MyClass( short constValue ): kMaxNameLength( constValue ), numberAlias( number )

Source Code Listingsinline (Chapter 4)
Learn C++ under Windows 95/NT 321
{number = kMaxNameLength;
cout << “Before: number = “<< number << “\n”;
numberAlias += 10;
cout << “After: number = “<< number << “\n”;
}
//--------------------------------------- main()
int main(){MyClass myObject( 10 );
return 0;}
inline (Chapter 4)
#include <iostream.h>
inlinelong power( short base, short exponent );
int main(){cout << “power( 2, 3 ): “ <<
power( 2, 3 ) << “\n”;
cout << “power( 3, 6 ): “ << power( 3, 6 ) << “\n”;

Source Code ListingsmemberWise (Chapter 9)
322 Learn C++ under Windows 95/NT
cout << “power( 5, 0 ): “ << power( 2, 0 ) << “\n”;
cout << “power( -3, 4 ): “ << power( -3, 4 ) << “\n”;
return 0;}
inlinelong power( short base, short exponent ){long product = 1;short i;
if ( exponent < 0 )return( 0 );
for ( i=1; i<=exponent; i++ )product *= base;
return product;}
memberWise (Chapter 9)
#include <iostream.h>#include <string.h>
//--------------------------------------- Name
class Name{private:char *last;char *first;

Source Code ListingsmemberWise (Chapter 9)
Learn C++ under Windows 95/NT 323
public:Name( char *firstParam, char *lastParam );Name( const Name &original );~Name();
void Display();Name &operator=( const Name &original );
};
Name::Name( char *firstParam, char *lastParam ){first = new char[ strlen(firstParam) + 1 ];last = new char[ strlen(lastParam) + 1 ];
strcpy( first, firstParam );strcpy( last, lastParam );
cout << “Original constructor...\n”;}
Name::Name( const Name &original ){first = new char[ strlen(original.first) + 1 ];last = new char[ strlen(original.last) + 1 ];
strcpy( first, original.first );strcpy( last, original.last );
cout << “Copy constructor...\n”;}
Name::~Name(){delete [] first;delete [] last;
}
void Name::Display()
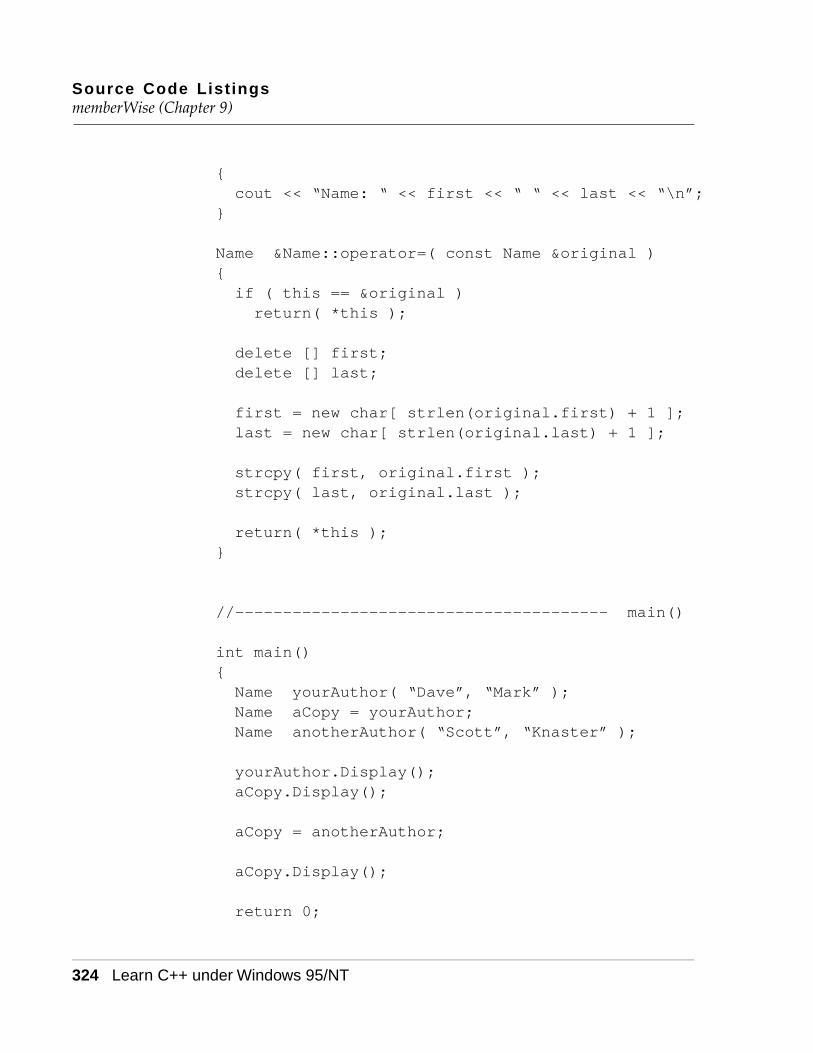
Source Code ListingsmemberWise (Chapter 9)
324 Learn C++ under Windows 95/NT
{cout << “Name: “ << first << “ “ << last << “\n”;
}
Name &Name::operator=( const Name &original ){if ( this == &original )return( *this );
delete [] first;delete [] last;
first = new char[ strlen(original.first) + 1 ];last = new char[ strlen(original.last) + 1 ];
strcpy( first, original.first );strcpy( last, original.last );
return( *this );}
//--------------------------------------- main()
int main(){Name yourAuthor( “Dave”, “Mark” );Name aCopy = yourAuthor;Name anotherAuthor( “Scott”, “Knaster” );
yourAuthor.Display();aCopy.Display();
aCopy = anotherAuthor;
aCopy.Display();
return 0;
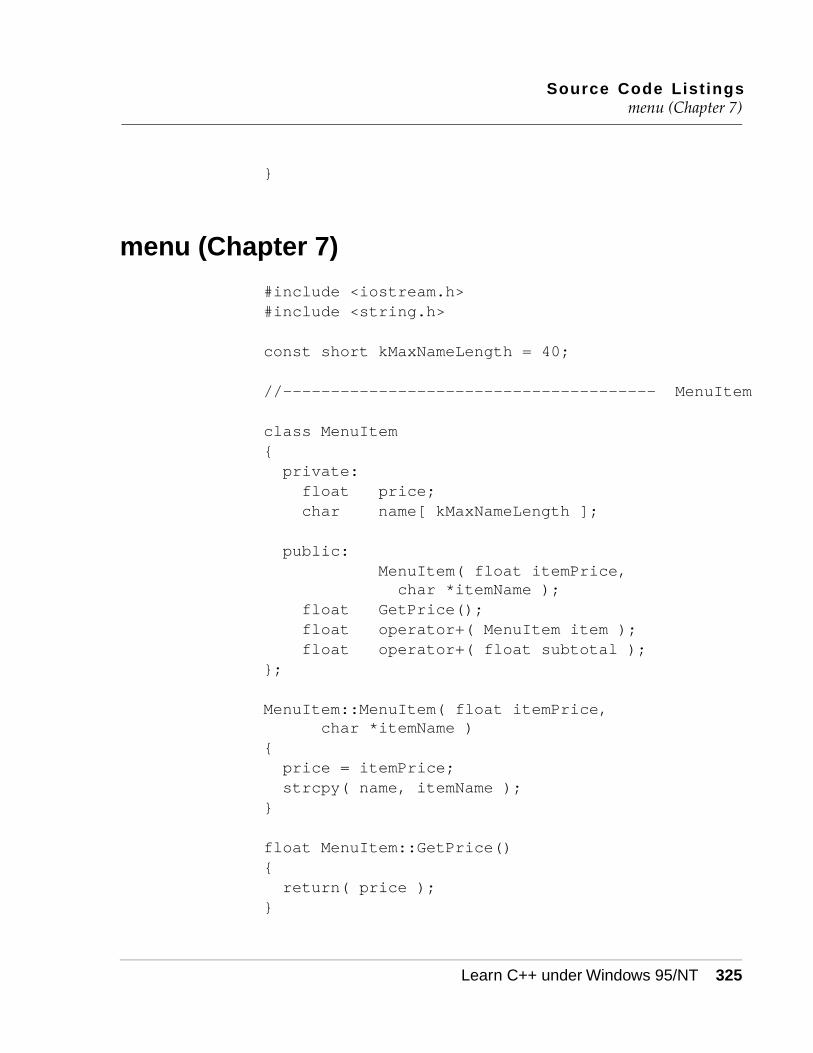
Source Code Listingsmenu (Chapter 7)
Learn C++ under Windows 95/NT 325
}
menu (Chapter 7)
#include <iostream.h>#include <string.h>
const short kMaxNameLength = 40;
//--------------------------------------- MenuItem
class MenuItem{private:float price;char name[ kMaxNameLength ];
public:MenuItem( float itemPrice, char *itemName );
float GetPrice();float operator+( MenuItem item );float operator+( float subtotal );
};
MenuItem::MenuItem( float itemPrice, char *itemName )
{price = itemPrice;strcpy( name, itemName );
}
float MenuItem::GetPrice(){return( price );
}
Source Code Listingsmenu (Chapter 7)
326 Learn C++ under Windows 95/NT
float MenuItem::operator+( MenuItem item ){cout << “MenuItem::operator+( MenuItem item )\n”;
return( GetPrice() + item.GetPrice() );}
float MenuItem::operator+( float subtotal ){cout << “MenuItem::operator+( float
subtotal )\n”;
return( GetPrice() + subtotal );}
//--------------------------------- operator+()
float operator+( float subtotal, MenuItem item ){cout << “operator+( float subtotal, MenuItem item )\n”;
return( subtotal + item.GetPrice() );}
//--------------------------------------- main()
int main(){MenuItem chicken( 8.99, “Chicken Kiev with
salad” );MenuItem houseWine( 2.99, “Riesling by the
glass” );MenuItem applePie( 3.99, “Apple Pie a la
Mode” );
Source Code ListingsmultInherit (Chapter 9)
Learn C++ under Windows 95/NT 327
float total;
total = chicken + houseWine + applePie;
cout << “\nTotal: “ << total<< “\n\n”;
total = chicken + (houseWine + applePie);
cout << “\nTotal: “ << total;
return 0;}
multInherit (Chapter 9)
#include <iostream.h>#include <string.h>
const short kMaxStringLength = 40;
//--------------------------------------- Predator
class Predator{private:char favoritePrey[ kMaxStringLength ];
public:Predator( char *prey );~Predator();
};
Predator::Predator( char *prey ){

Source Code ListingsmultInherit (Chapter 9)
328 Learn C++ under Windows 95/NT
strcpy( favoritePrey, prey );
cout << “Favorite prey: “<< prey << “\n”;
}
Predator::~Predator(){cout << “Predator destructor was called!\n\n”;
}
//--------------------------------------- Pet
class Pet{private:char favoriteToy[ kMaxStringLength ];
public:Pet( char *toy );~Pet();
};
Pet::Pet( char *toy ){strcpy( favoriteToy, toy );
cout << “Favorite toy: “<< toy << “\n”;
}
Pet::~Pet(){cout << “Pet destructor was called!\n”;
}

Source Code ListingsmultInherit (Chapter 9)
Learn C++ under Windows 95/NT 329
//-------------------------- Cat:Predator,Pet
class Cat : public Predator, public Pet{private:short catID;static short lastCatID;
public:Cat( char *prey, char *toy );~Cat();
};
Cat::Cat( char *prey, char *toy ) :Predator( prey ), Pet( toy )
{catID = ++lastCatID;
cout << “catID: “ << catID<< “\n---------\n”;
}
Cat::~Cat(){cout << “Cat destructor called: catID = “<< catID << “...\n”;
}
short Cat::lastCatID = 0;
//--------------------------------------- main()
int main(){Cat TC( “Mice”, “Ball of yarn” );Cat Benny( “Crickets”, “Bottle cap” );Cat Meow( “Moths”, “Spool of thread” );
Source Code Listingsnew (Chapter 7)
330 Learn C++ under Windows 95/NT
return 0;}
new (Chapter 7)
#include <iostream.h>
//--------------------------------------- Blob
class Blob{public:void *operator new( size_t blobSize );void operator delete( void *blobPtr, size_t
blobSize );};
void *Blob::operator new( size_t blobSize ){cout << “new: “ << blobSize << “ byte(s).\n”;
return new char[ blobSize ];}
void Blob::operator delete( void *blobPtr, size_t blobSize )
{cout << “delete: “ << blobSize << “ byte(s).\n”;
delete [] blobPtr;}
//--------------------------------------- main()
Source Code ListingsnewTester (Chapter 4)
Learn C++ under Windows 95/NT 331
int main(){Blob *blobPtr;
blobPtr = new Blob;
delete blobPtr;
return 0;}
newTester (Chapter 4)
#include <iostream.h>#include <new.h>
void NewFailed();
char gDone = false;char *gSpareBlockPtr = 0;
int main(){char *myPtr;long numBlocks = 0;
cout << “Installing NewHandler...\n”;
set_new_handler( NewFailed );gSpareBlockPtr = new char[20480];
while ( gDone == false ){myPtr = new char[1024];numBlocks++;

Source Code ListingsnonVirtual (Chapter 9)
332 Learn C++ under Windows 95/NT
}
cout << “Number of blocks allocated: “ << numBlocks;
return 0;}
void NewFailed(){if ( gSpareBlockPtr != 0 ){delete gSpareBlockPtr;gSpareBlockPtr = 0;
}
gDone = true;}
nonVirtual (Chapter 9)
#include <iostream.h>
//--------------------------------------- Root
class Root{public:Root();
};
Root::Root(){cout << “Root constructor called\n”;
}
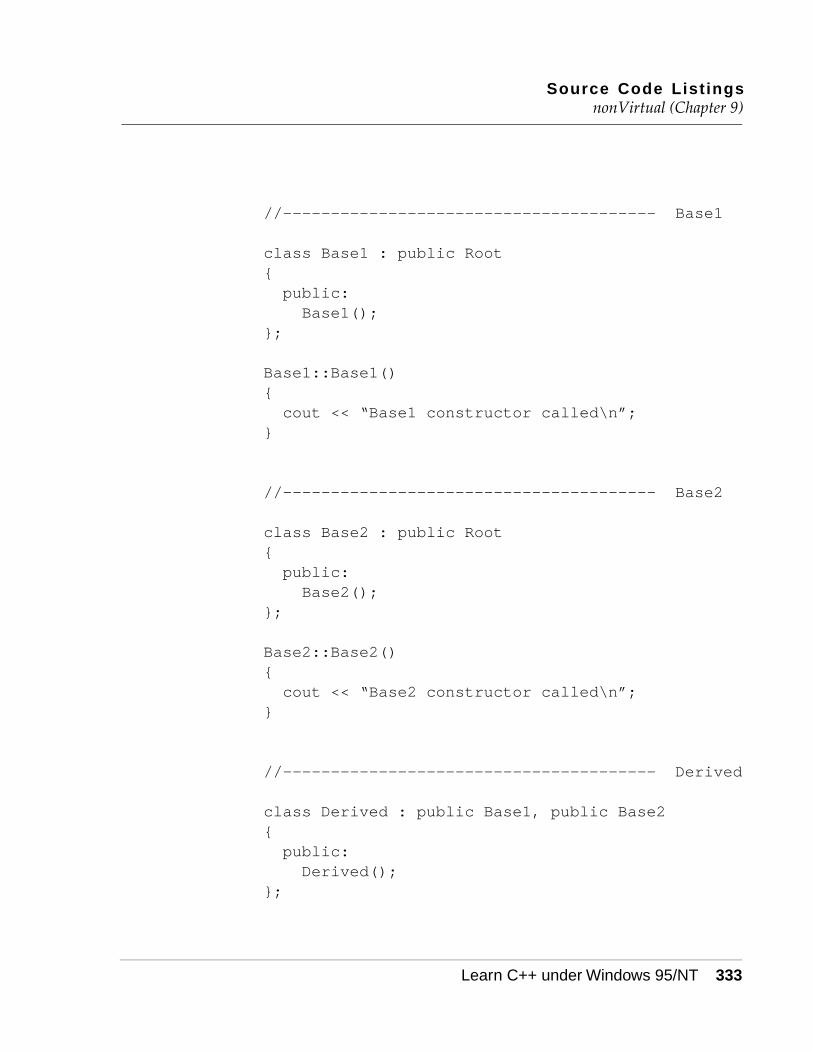
Source Code ListingsnonVirtual (Chapter 9)
Learn C++ under Windows 95/NT 333
//--------------------------------------- Base1
class Base1 : public Root{public:Base1();
};
Base1::Base1(){cout << “Base1 constructor called\n”;
}
//--------------------------------------- Base2
class Base2 : public Root{public:Base2();
};
Base2::Base2(){cout << “Base2 constructor called\n”;
}
//--------------------------------------- Derived
class Derived : public Base1, public Base2{public:Derived();
};
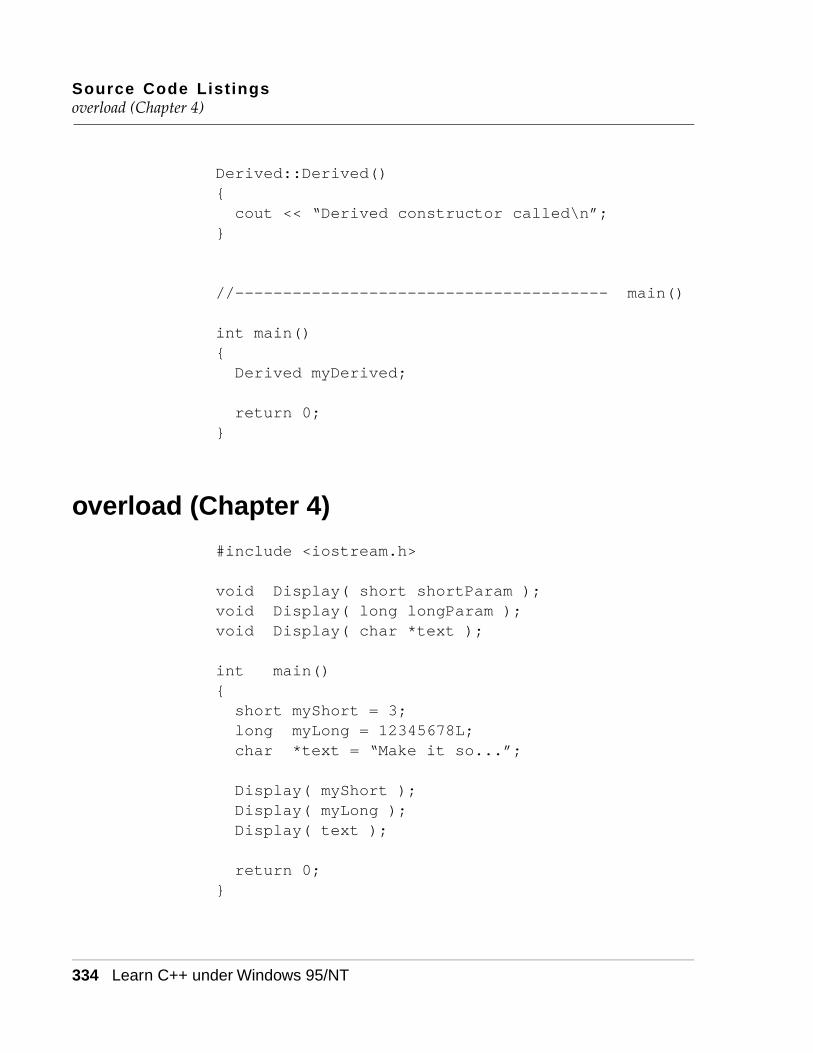
Source Code Listingsoverload (Chapter 4)
334 Learn C++ under Windows 95/NT
Derived::Derived(){cout << “Derived constructor called\n”;
}
//--------------------------------------- main()
int main(){Derived myDerived;
return 0;}
overload (Chapter 4)
#include <iostream.h>
void Display( short shortParam );void Display( long longParam );void Display( char *text );
int main(){short myShort = 3;long myLong = 12345678L;char *text = “Make it so...”;
Display( myShort );Display( myLong );Display( text );
return 0;}
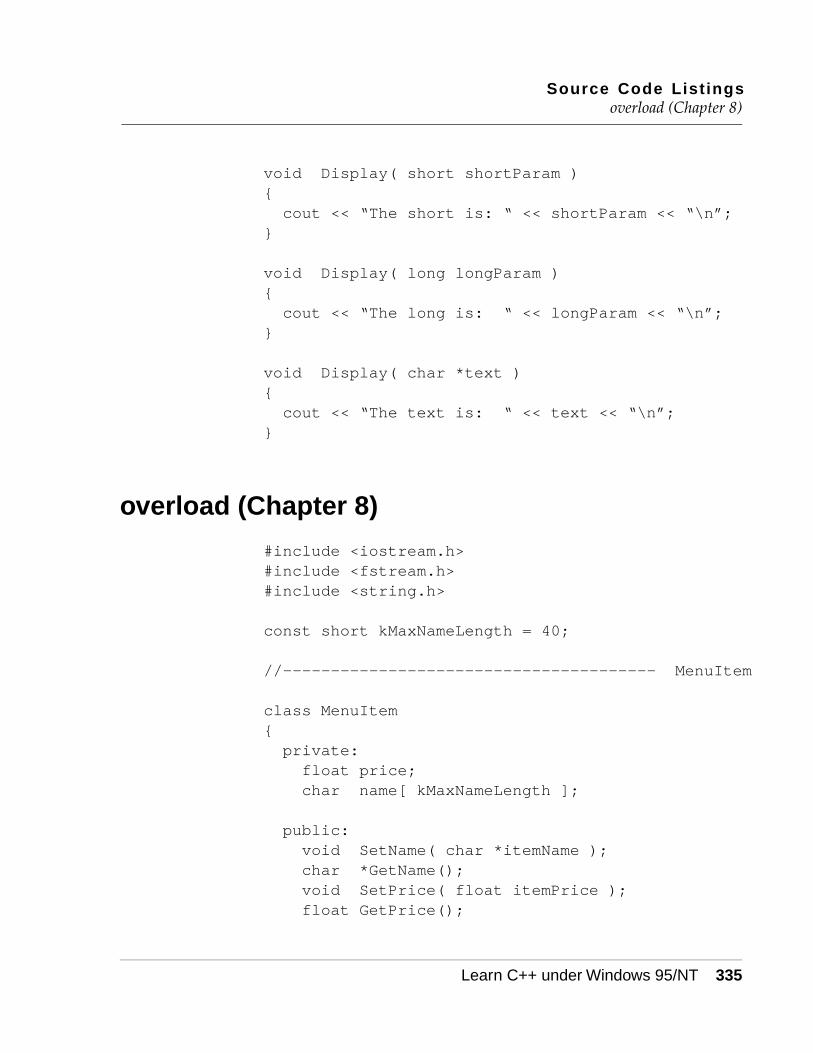
Source Code Listingsoverload (Chapter 8)
Learn C++ under Windows 95/NT 335
void Display( short shortParam ){cout << “The short is: “ << shortParam << “\n”;
}
void Display( long longParam ){cout << “The long is: “ << longParam << “\n”;
}
void Display( char *text ){cout << “The text is: “ << text << “\n”;
}
overload (Chapter 8)
#include <iostream.h>#include <fstream.h>#include <string.h>
const short kMaxNameLength = 40; //--------------------------------------- MenuItem
class MenuItem{private:float price;char name[ kMaxNameLength ];
public:void SetName( char *itemName );char *GetName();void SetPrice( float itemPrice );float GetPrice();

Source Code Listingsoverload (Chapter 8)
336 Learn C++ under Windows 95/NT
};
void MenuItem::SetName( char *itemName ){strcpy( name, itemName );
}
char *MenuItem::GetName(){return( name );
}
void MenuItem::SetPrice( float itemPrice ){price = itemPrice;
}
float MenuItem::GetPrice(){return( price );
}
//-------------------------- iostream operators
istream &operator>>( istream &is, MenuItem &item ){float itemPrice;char itemName[ kMaxNameLength ];
is.getline( itemName, kMaxNameLength );item.SetName( itemName );
is >> itemPrice;item.SetPrice( itemPrice );
is.ignore( 1, ‘\n’ );
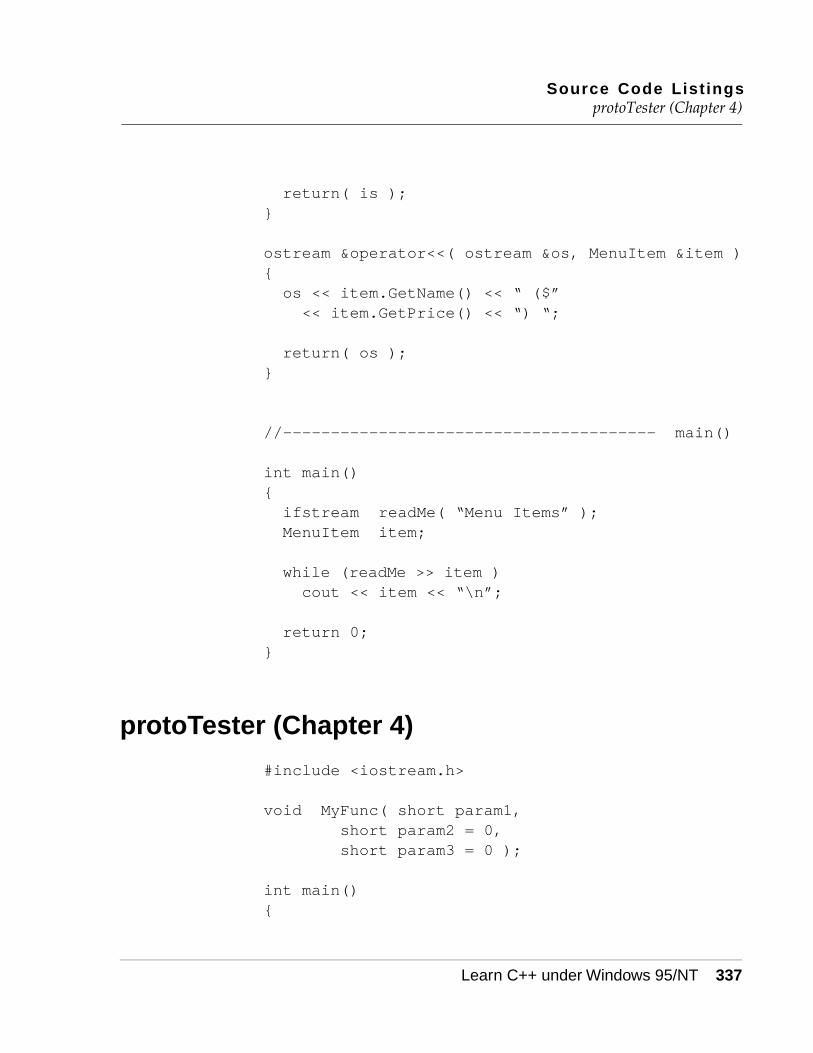
Source Code ListingsprotoTester (Chapter 4)
Learn C++ under Windows 95/NT 337
return( is );}
ostream &operator<<( ostream &os, MenuItem &item ){os << item.GetName() << “ ($”<< item.GetPrice() << “) “;
return( os );}
//--------------------------------------- main()
int main(){ifstream readMe( “Menu Items” );MenuItem item;
while (readMe >> item )cout << item << “\n”;
return 0;}
protoTester (Chapter 4)
#include <iostream.h>
void MyFunc( short param1,short param2 = 0,short param3 = 0 );
int main(){
Source Code ListingsreadMe (Chapter 8)
338 Learn C++ under Windows 95/NT
MyFunc( 1 );MyFunc( 1, 2 );MyFunc( 1, 2, 3 );
return 0;}
void MyFunc( short param1,short param2,short param3 )
{cout << “MyFunc( “ << param1 << “, “ << param2 << “, “ << param3 << “ )\n”;
}
readMe (Chapter 8)
#include <iostream.h>#include <fstream.h> int main(){ifstream readMe( “My File” );char c;
while ( readMe.get( c ) )cout << c;
return 0;}
Source Code Listingsreference (Chapter 4)
Learn C++ under Windows 95/NT 339
reference (Chapter 4)
#include <iostream.h>
void CallByValue( short valueParam );void CallByReference( short &refParam );
int main(){short number = 12;long longNumber = 12L;
cout << “&number: “ << (unsigned long)&number << “\n”;
cout << “&longNumber: “ << (unsigned long)&longNumber << “\n\n”;
CallByValue( number );cout << “After ByValue: “ << number << “\n\n”;
CallByReference( number );cout << “After ByRef( short ): “ << number << “\n\n”;
CallByReference( longNumber );cout << “After ByRef( long ): “ << longNumber << “\n”;
return 0;}
void CallByValue( short valueParam ){cout << “&valueParam: “ << (unsigned long)&valueParam << “\n”;
valueParam *= 2;

Source Code ListingsscopeTester (Chapter 4)
340 Learn C++ under Windows 95/NT
}
void CallByReference( short &refParam ){cout << “&refParam: “ << (unsigned long)&refParam << “\n”;
refParam *= 2;}
scopeTester (Chapter 4)
#include <iostream.h>
short myValue = 5;
int main(){short yourValue = myValue;
cout << “yourValue: “ << yourValue << “\n”;
short myValue = 10;yourValue = myValue;
cout << “yourValue: “ << yourValue << “\n”;
yourValue = ::myValue;cout << “yourValue: “ << yourValue << “\n”;
return 0;}
Source Code ListingssmartPtr (Chapter 7)
Learn C++ under Windows 95/NT 341
smartPtr (Chapter 7)
#include <iostream.h>#include <string.h>
const short kMaxNameLength = 40;
//--------------------------------------- Name
class Name{private:char first[ kMaxNameLength ];char last[ kMaxNameLength ];
public:Name( char *lastName, char *firstName );
void DisplayName();};
Name::Name( char *lastName, char *firstName ){strcpy( last, lastName );strcpy( first, firstName );
}
void Name::DisplayName(){cout << “Name: “ << first << “ “ << last;
}
//------------------------------------ Politician
class Politician{
Source Code Listingssquare (Chapter 6)
342 Learn C++ under Windows 95/NT
private:Name *namePtr;short age;
public:Politician( Name *namePtr, short age );
Name *operator->();};
Politician::Politician( Name *namePtr, short age ){this->namePtr = namePtr;this->age = age;
}
Name *Politician::operator->(){return( namePtr );
}
//--------------------------------------- main()
int main(){Name myName( “Clinton”, “Bill” );Politician billClinton( &myName, 46 );
billClinton->DisplayName();
return 0;}
square (Chapter 6)
#include <iostream.h>
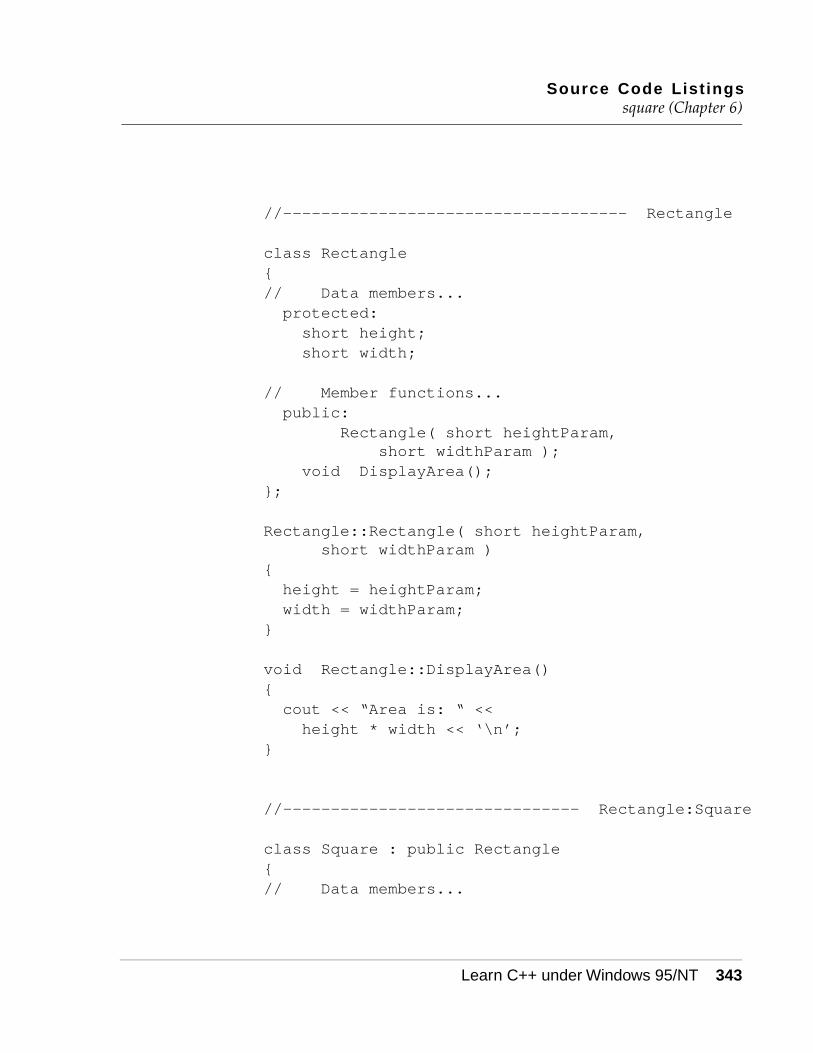
Source Code Listingssquare (Chapter 6)
Learn C++ under Windows 95/NT 343
//------------------------------------ Rectangle
class Rectangle{// Data members...protected:short height;short width;
// Member functions...public:
Rectangle( short heightParam, short widthParam );
void DisplayArea();};
Rectangle::Rectangle( short heightParam, short widthParam )
{height = heightParam;width = widthParam;
}
void Rectangle::DisplayArea(){cout << “Area is: “ <<height * width << ‘\n’;
}
//------------------------------- Rectangle:Square
class Square : public Rectangle{// Data members...

Source Code ListingsstateBits (Chapter 8)
344 Learn C++ under Windows 95/NT
// Member functions...public:
Square( short side );};
Square::Square( short side ) : Rectangle( side, side )
{}
//--------------------------------------- main()
int main(){Square *mySquare;Rectangle *myRectangle;
mySquare = new Square( 10 );mySquare->DisplayArea();
myRectangle = new Rectangle( 10, 15 );myRectangle->DisplayArea();
return 0;}
stateBits (Chapter 8)
#include <iostream.h>
int main(){char done = false;char c;short number;
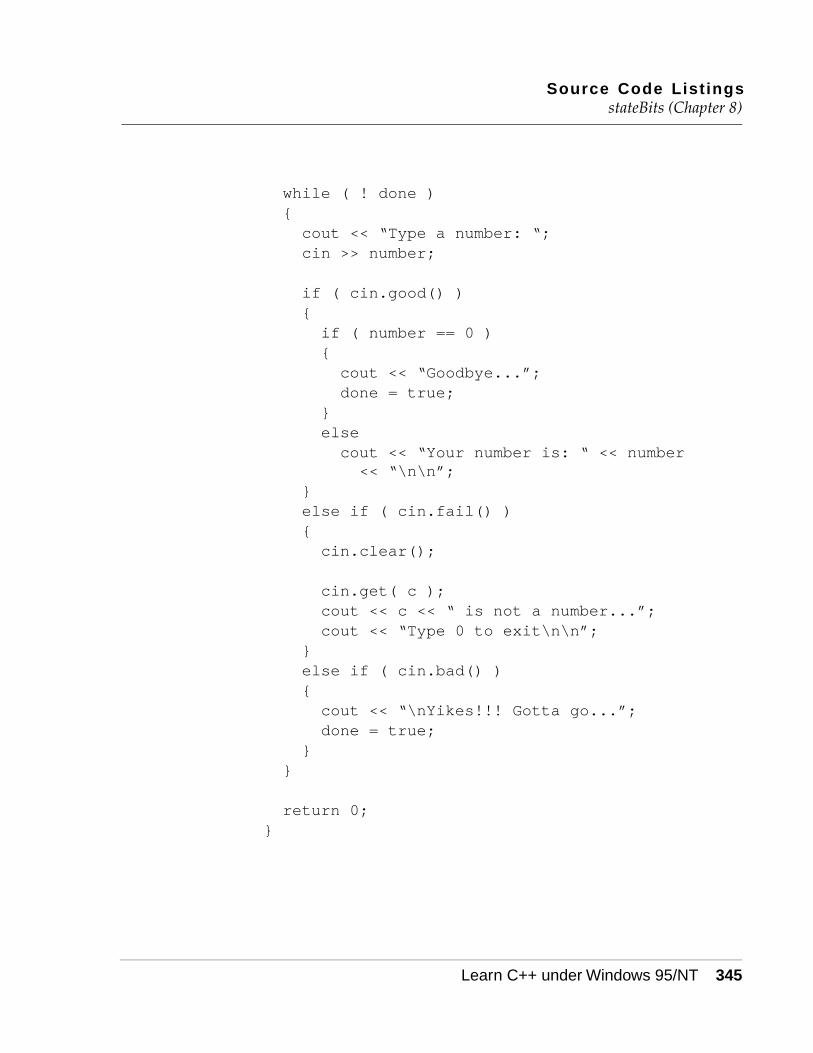
Source Code ListingsstateBits (Chapter 8)
Learn C++ under Windows 95/NT 345
while ( ! done ){cout << “Type a number: “;cin >> number;
if ( cin.good() ){if ( number == 0 ){cout << “Goodbye...”;done = true;
}elsecout << “Your number is: “ << number << “\n\n”;
}else if ( cin.fail() ){cin.clear();
cin.get( c );cout << c << “ is not a number...”;cout << “Type 0 to exit\n\n”;
}else if ( cin.bad() ){cout << “\nYikes!!! Gotta go...”;done = true;
}}
return 0;}

Source Code Listingsstrstream (Chapter 8)
346 Learn C++ under Windows 95/NT
strstream (Chapter 8)
#include <iostream.h>#include <sstream.h>
const short kNumberOfLetters = 26;
//--------------------------------------- main()
int main(){ostringstream ostr;short i;
for ( i = 0; i < kNumberOfLetters; i++ )ostr << (char)('a' + i);
cout << "Number of characters written: "<< i << '\n';
cout << "Buffer contents: " << ostr.str();
return 0;}
subscript (Chapter 7)
#include <iostream.h>#include <string.h>
const short kMaxNameLength = 40;
//--------------------------------------- Name
class Name
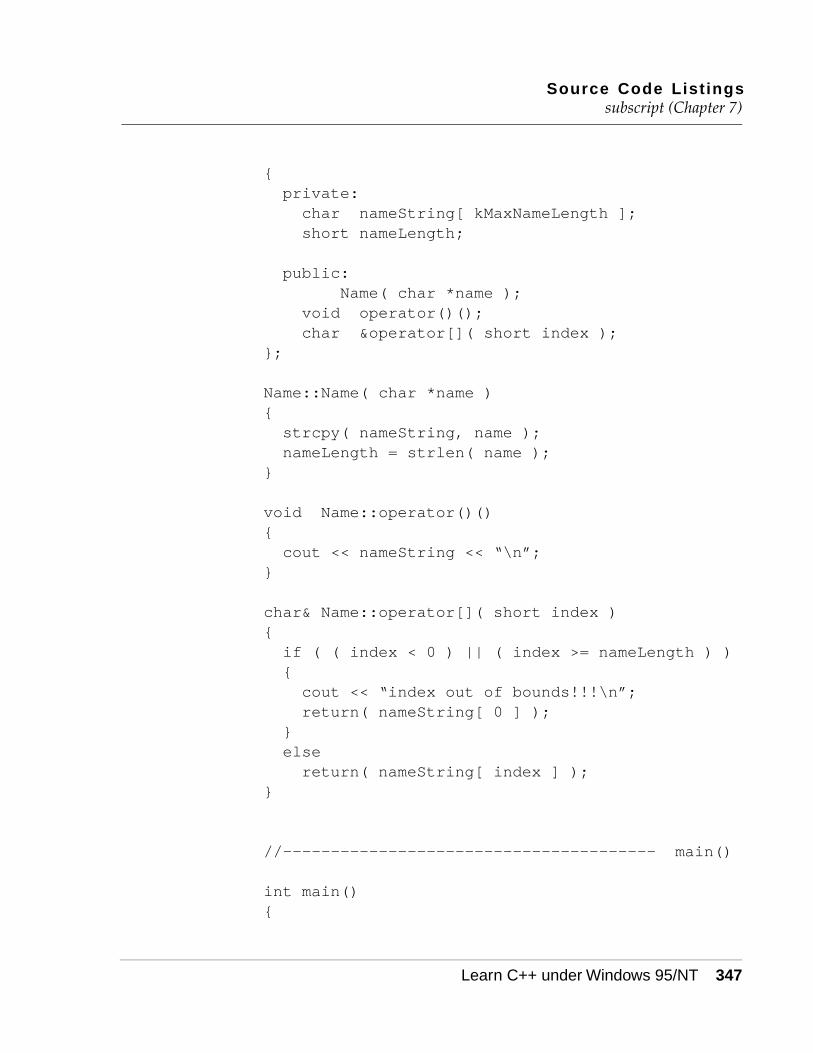
Source Code Listingssubscript (Chapter 7)
Learn C++ under Windows 95/NT 347
{private:char nameString[ kMaxNameLength ];short nameLength;
public:Name( char *name );
void operator()();char &operator[]( short index );
};
Name::Name( char *name ){strcpy( nameString, name );nameLength = strlen( name );
}
void Name::operator()(){cout << nameString << “\n”;
}
char& Name::operator[]( short index ){if ( ( index < 0 ) || ( index >= nameLength ) ){cout << “index out of bounds!!!\n”;return( nameString[ 0 ] );
}elsereturn( nameString[ index ] );
}
//--------------------------------------- main()
int main(){
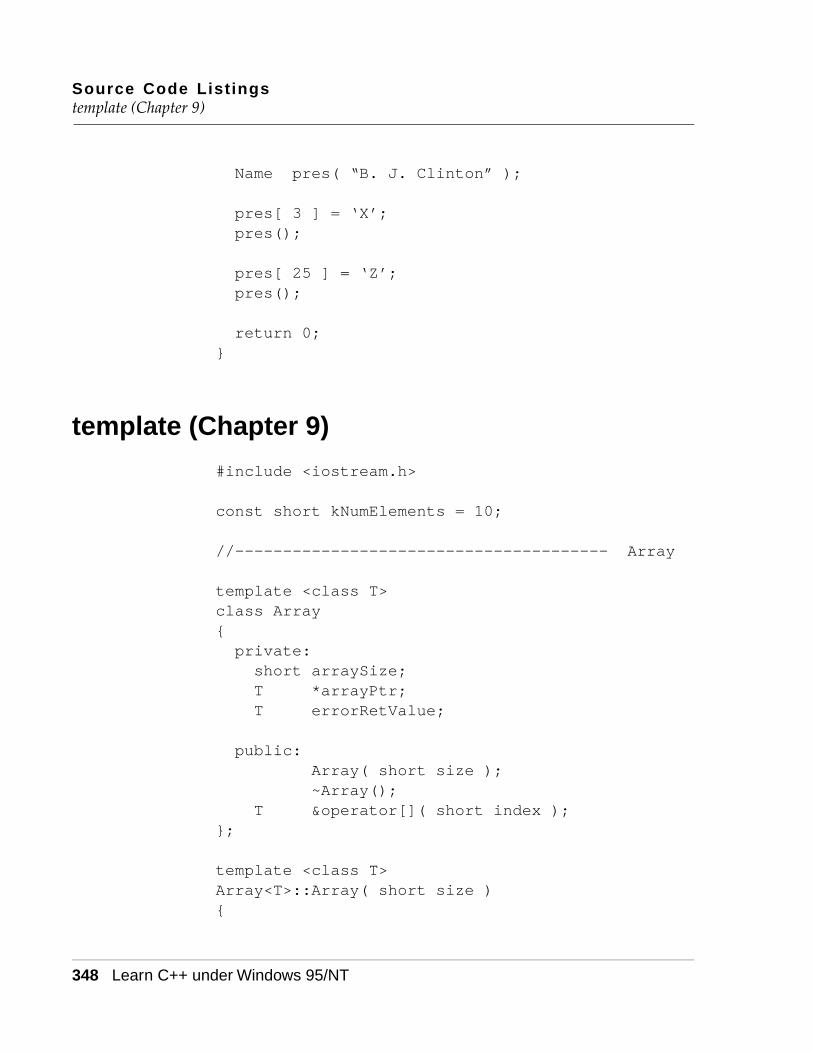
Source Code Listingstemplate (Chapter 9)
348 Learn C++ under Windows 95/NT
Name pres( “B. J. Clinton” );
pres[ 3 ] = ‘X’;pres();
pres[ 25 ] = ‘Z’;pres();
return 0;}
template (Chapter 9)
#include <iostream.h>
const short kNumElements = 10;
//--------------------------------------- Array
template <class T>class Array{private:short arraySize;T *arrayPtr;T errorRetValue;
public:Array( short size );~Array();
T &operator[]( short index );};
template <class T>Array<T>::Array( short size ){

Source Code Listingstemplate (Chapter 9)
Learn C++ under Windows 95/NT 349
arraySize = size;arrayPtr = new T[ size ];errorRetValue = 0;
}
template <class T>Array<T>::~Array(){delete [] arrayPtr;
}
template <class T>T &Array<T>::operator[]( short index ){if ( ( index < 0 ) || ( index >= arraySize ) ){cout << “index out of bounds(“ << index << “)\n”;
return( errorRetValue );}elsereturn( arrayPtr[ index ] );
}
//--------------------------------------- Power
template <class T>T Power( T base, T exponent ){T i, product = 1;
for ( i=1; i<=exponent; i++ )product *= base;
return( product );}
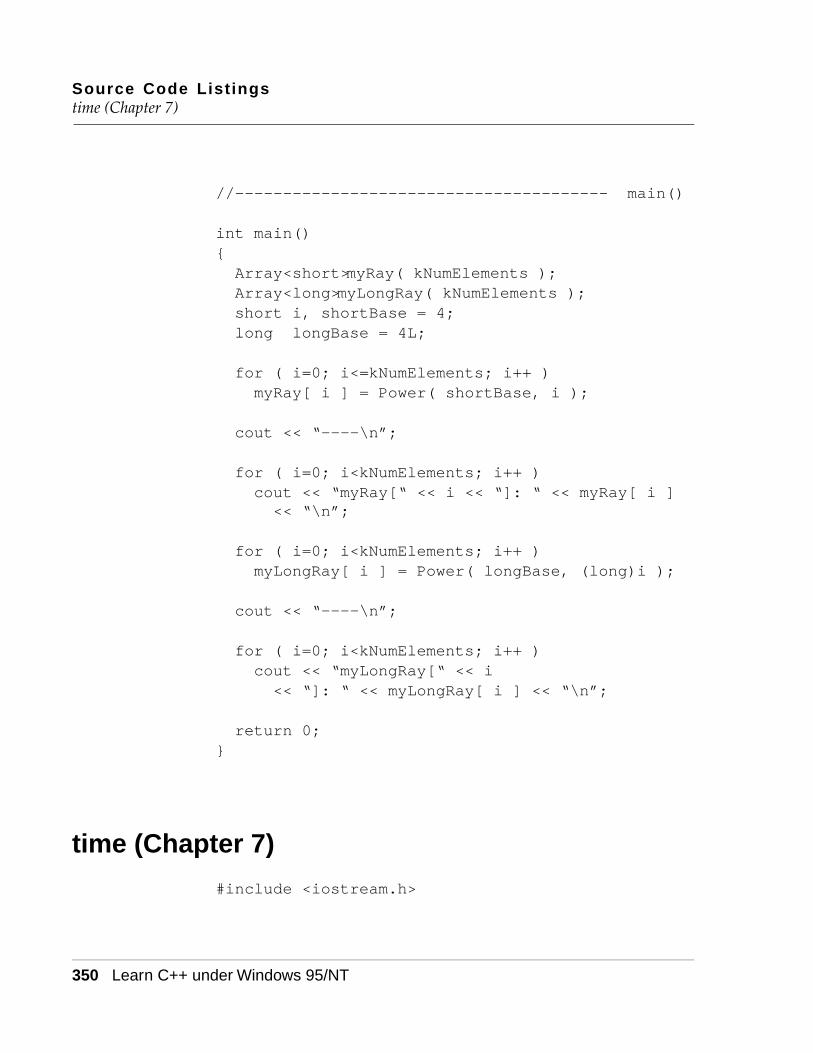
Source Code Listingstime (Chapter 7)
350 Learn C++ under Windows 95/NT
//--------------------------------------- main()
int main(){Array<short>myRay( kNumElements );Array<long>myLongRay( kNumElements );short i, shortBase = 4;long longBase = 4L;
for ( i=0; i<=kNumElements; i++ )myRay[ i ] = Power( shortBase, i );
cout << “----\n”;
for ( i=0; i<kNumElements; i++ )cout << “myRay[“ << i << “]: “ << myRay[ i ] << “\n”;
for ( i=0; i<kNumElements; i++ )myLongRay[ i ] = Power( longBase, (long)i );
cout << “----\n”;
for ( i=0; i<kNumElements; i++ )cout << “myLongRay[“ << i<< “]: “ << myLongRay[ i ] << “\n”;
return 0;}
time (Chapter 7)
#include <iostream.h>

Source Code Listingstime (Chapter 7)
Learn C++ under Windows 95/NT 351
//--------------------------------------- Time
class Time{// Data members...private:short hours;short minutes;short seconds;
// Member functions...void NormalizeTime();
public:Time();Time( short h, short m, short s );
void Display();Time operator+( Time &aTime );void operator*=( short num );
};
Time::Time(){seconds = 0;minutes = 0;hours = 0;
}
Time::Time( short h, short m, short s ){seconds = s;minutes = m;hours = h;
NormalizeTime();}
void Time::NormalizeTime()

Source Code Listingstime (Chapter 7)
352 Learn C++ under Windows 95/NT
{hours += ((minutes + (seconds/60)) / 60);
minutes = (minutes + (seconds/60)) % 60;
seconds %= 60;}
void Time::Display(){cout << “(“ << hours << “:” << minutes
<< “:” << seconds << “)\n”;}
Time Time::operator+( Time &aTime ){short h;short m;short s;
h = hours + aTime.hours;m = minutes + aTime.minutes;s = seconds + aTime.seconds;
Time tempTime( h, m, s );
return tempTime;}
void Time::operator*=( short num ){hours *= num;minutes *= num;seconds *= num;
NormalizeTime();}

Source Code Listingsvirtual (Chapter 9)
Learn C++ under Windows 95/NT 353
//--------------------------------------- main
int main(){Time firstTime( 1, 10, 50 );Time secondTime( 2, 24, 20 );Time sumTime;
firstTime.Display();secondTime.Display();
cout << “---------\n”;
sumTime = firstTime + secondTime;sumTime.Display();
cout << “* 2\n”;cout << “---------\n”;
sumTime *= 2;sumTime.Display();
return 0;}
virtual (Chapter 9)
#include <iostream.h>
//--------------------------------------- Root
class Root{protected:

Source Code Listingsvirtual (Chapter 9)
354 Learn C++ under Windows 95/NT
short num;
public:Root( short numParam );
};
Root::Root( short numParam ){num = numParam;
cout << “Root constructor called\n”;}
//--------------------------------------- Base1
class Base1 : public virtual Root{public:Base1();
};
Base1::Base1() : Root( 1 ){cout << “Base1 constructor called\n”;
}
//--------------------------------------- Base2
class Base2 : public virtual Root{public:Base2();
};
Base2::Base2() : Root( 2 ){
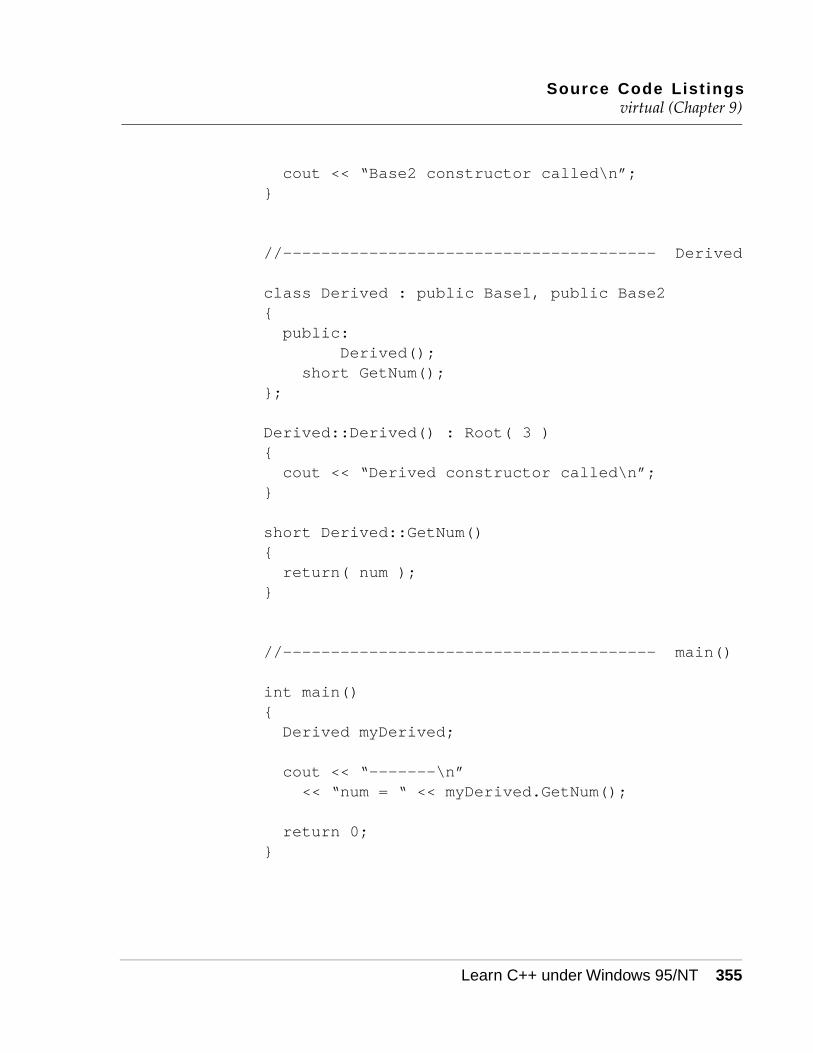
Source Code Listingsvirtual (Chapter 9)
Learn C++ under Windows 95/NT 355
cout << “Base2 constructor called\n”;}
//--------------------------------------- Derived
class Derived : public Base1, public Base2{public:
Derived();short GetNum();
};
Derived::Derived() : Root( 3 ){cout << “Derived constructor called\n”;
}
short Derived::GetNum(){return( num );
}
//--------------------------------------- main()
int main(){Derived myDerived;
cout << “-------\n”<< “num = “ << myDerived.GetNum();
return 0;}

Source Code ListingswhatAmI (Chapter 6)
356 Learn C++ under Windows 95/NT
whatAmI (Chapter 6)
#include <iostream.h>
//--------------------------------------- Shape
class Shape{// Data members...
// Member functions...public:virtual void WhatAmI();
};
voidShape::WhatAmI(){cout << “I don’t know what kind of shape I
am!\n”;}
//-------------------------------- Shape:Rectangle
class Rectangle : public Shape{// Data members...
// Member functions...public:void WhatAmI();
};
void Rectangle::WhatAmI(){cout << “I’m a rectangle!\n”;
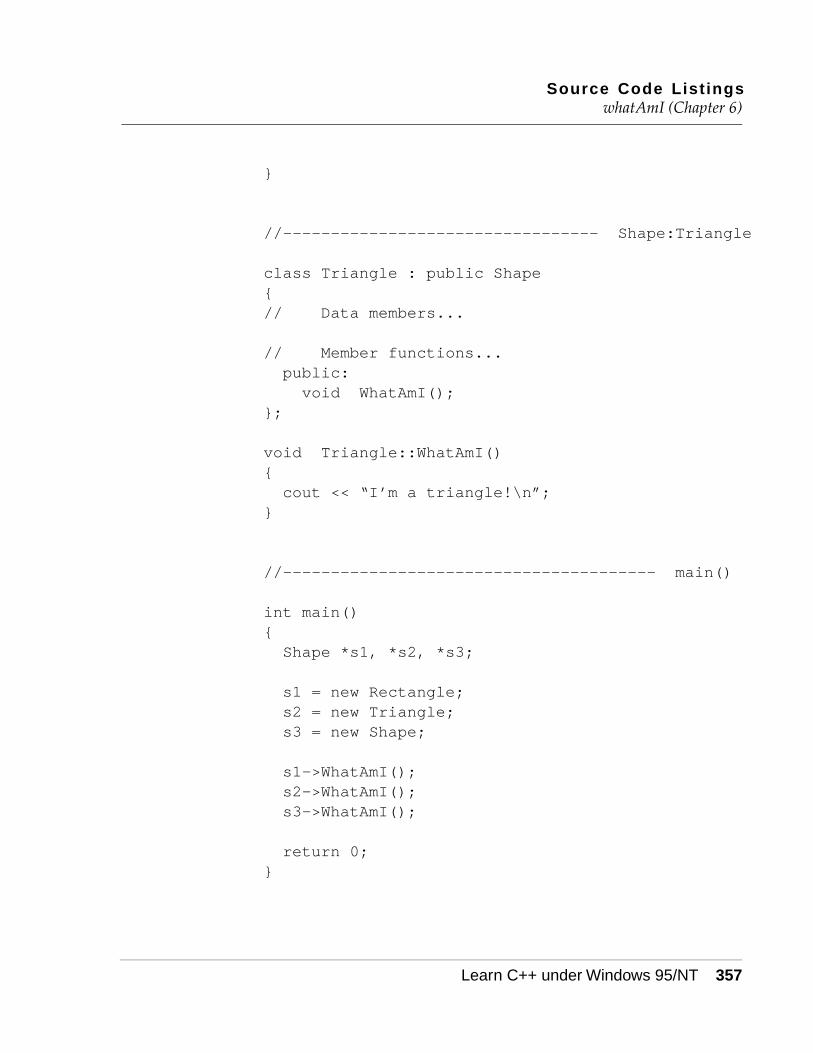
Source Code ListingswhatAmI (Chapter 6)
Learn C++ under Windows 95/NT 357
}
//--------------------------------- Shape:Triangle
class Triangle : public Shape{// Data members...
// Member functions...public:void WhatAmI();
};
void Triangle::WhatAmI(){cout << “I’m a triangle!\n”;
}
//--------------------------------------- main()
int main(){Shape *s1, *s2, *s3;
s1 = new Rectangle;s2 = new Triangle;s3 = new Shape;
s1->WhatAmI();s2->WhatAmI();s3->WhatAmI();
return 0;}

Source Code ListingswhatAmI (Chapter 6)
358 Learn C++ under Windows 95/NT

Learn C++ under Windows 95/NT 359
Cfstream.h/*/ Metrowerks Standard Library Version 1.5
1996 September 30 /*//** ** Lib++ : The Modena C++ Standard Library, ** Version 1.9, May 1996 ** fstream.h ** Copyright (c) 1994-1996 Modena Software Inc. **/
#ifndef MSIPL_FSTREAM_H#define MSIPL_FSTREAM_H
#include <mcompile.h>
#include MOD_INCLUDE(iostream)
#ifdef MSIPL_USING_NAMESPACEnamespace std {#endif
#define __msipl_temp_bufsize 8
#ifdef MSIPL_DEF_TEMPARGtemplate <class charT, class traits = ios_traits<char> >
#elsetemplate <class charT, class traits>#endifclass basic_filebuf : public basic_streambuf<charT, traits> {
public :

fstream.h
360 Learn C++ under Windows 95/NT
typedef charT char_type; typedef traits traits_type; typedef typename traits::pos_type pos_type; typedef typename traits::off_type off_type; typedef typename traits::int_type int_type; typedef typename traits::state_type state_type; typedef basic_filebuf<charT, traits>
filebuf_type;
private:
typedef codecvt<char_type,char,state_type> ofacet_type;
typedef codecvt<char,char_type,state_type> ifacet_type;
typedef codecvt_base::result result;
public:
basic_filebuf ();
basic_filebuf (FILE* pfile_arg);
virtual ~basic_filebuf ();
bool is_open () const;
filebuf_type* open (const char* s, ios_base::openmode mode);
filebuf_type* close ();

fstream.h
Learn C++ under Windows 95/NT 361
protected :
// // Inherited Functions // virtual int_type overflow (int_type c = traits::eof ());
virtual int_type pbackfail (int_type c = traits::eof ());
virtual int_type __pbfile(); virtual int_type underflow ();
virtual pos_type seekoff (off_type off, ios_base::seekdir way, ios_base::openmode which = ios_base::in | ios_base::out);
virtual pos_type seekpos (pos_type sp, ios_base::openmode which= ios_base::in | ios_base::out);
virtual basic_streambuf<charT, traits>* setbuf (char_type* s, streamsize n);
virtual int sync ();
virtual int_type uflow ();
virtual void imbue (const locale& loc);

fstream.h
362 Learn C++ under Windows 95/NT
virtual streamsize showmanyc ();
// // virtual streamsize // xsgetn (char_type* s, streamsize n); // // virtual streamsize // xsputn (const char_type* s, streamsize n); // //
private :
FILE* pfile;
// declare a mutex object. DEC_OBJ_LOCK(_mutex)
};
#ifdef MSIPL_DEF_TEMPARGtemplate <class charT, class traits = ios_traits<charT> >
#elsetemplate <class charT, class traits>#endifclass basic_ifstream : public basic_istream<charT, traits> {
public :
typedef charT char_type; typedef traits traits_type; typedef typename traits::pos_type pos_type; typedef typename traits::off_type off_type; typedef typename traits::int_type int_type;
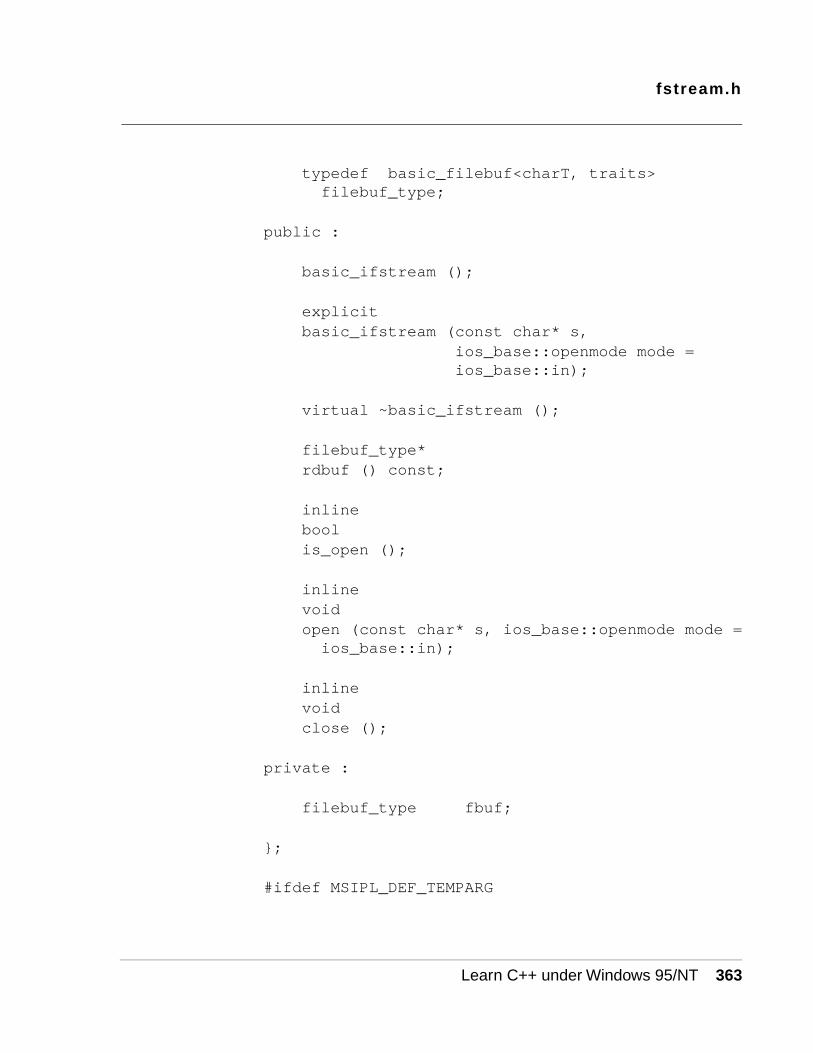
fstream.h
Learn C++ under Windows 95/NT 363
typedef basic_filebuf<charT, traits> filebuf_type;
public :
basic_ifstream ();
explicit basic_ifstream (const char* s, ios_base::openmode mode =
ios_base::in);
virtual ~basic_ifstream ();
filebuf_type* rdbuf () const;
inline bool is_open ();
inline void open (const char* s, ios_base::openmode mode =
ios_base::in);
inline void close ();
private :
filebuf_type fbuf;
};
#ifdef MSIPL_DEF_TEMPARG
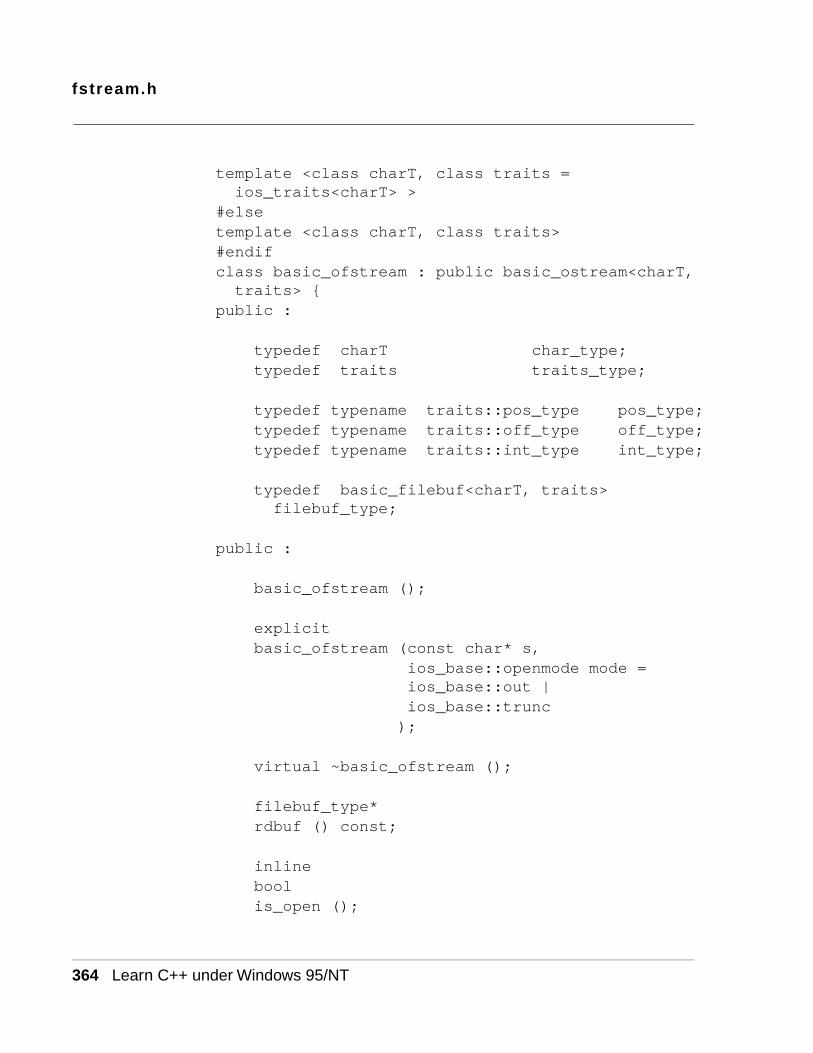
fstream.h
364 Learn C++ under Windows 95/NT
template <class charT, class traits = ios_traits<charT> >
#elsetemplate <class charT, class traits>#endifclass basic_ofstream : public basic_ostream<charT, traits> {
public :
typedef charT char_type; typedef traits traits_type; typedef typename traits::pos_type pos_type; typedef typename traits::off_type off_type; typedef typename traits::int_type int_type;
typedef basic_filebuf<charT, traits> filebuf_type;
public :
basic_ofstream ();
explicit basic_ofstream (const char* s, ios_base::openmode mode =
ios_base::out | ios_base::trunc );
virtual ~basic_ofstream ();
filebuf_type* rdbuf () const;
inline bool is_open ();
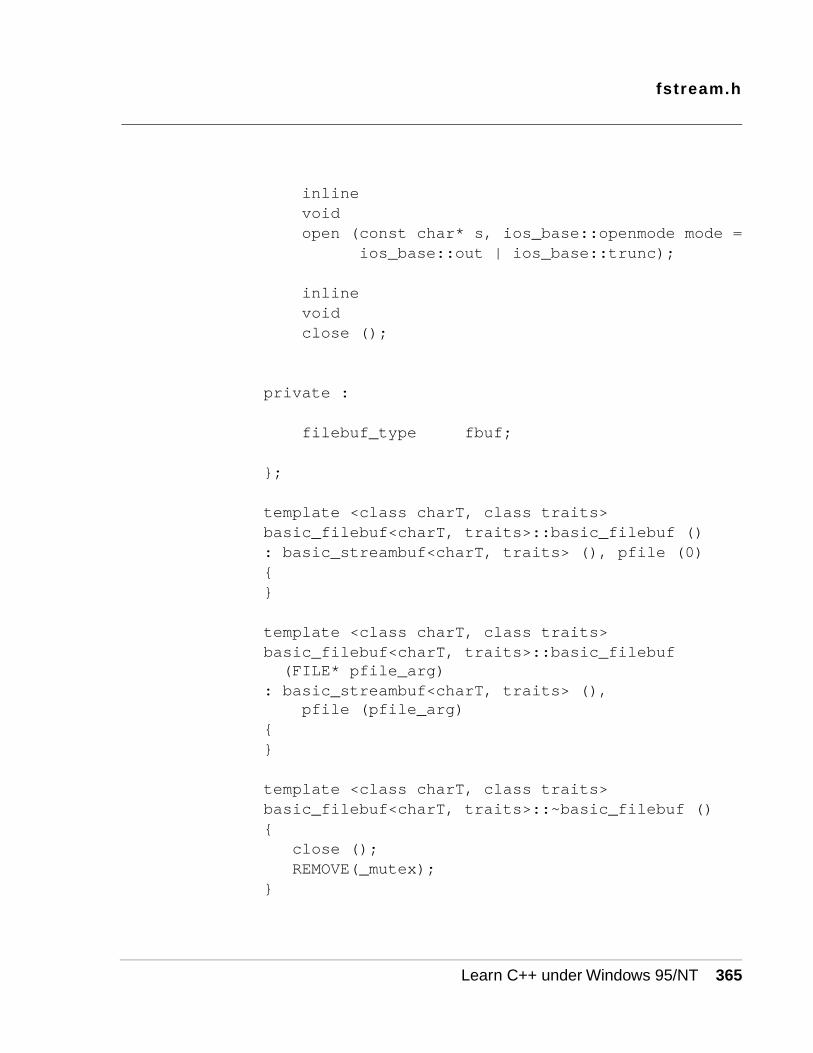
fstream.h
Learn C++ under Windows 95/NT 365
inline void open (const char* s, ios_base::openmode mode = ios_base::out | ios_base::trunc);
inline void close ();
private :
filebuf_type fbuf;
};
template <class charT, class traits>basic_filebuf<charT, traits>::basic_filebuf (): basic_streambuf<charT, traits> (), pfile (0){}
template <class charT, class traits>basic_filebuf<charT, traits>::basic_filebuf (FILE* pfile_arg)
: basic_streambuf<charT, traits> (), pfile (pfile_arg)
{}
template <class charT, class traits>basic_filebuf<charT, traits>::~basic_filebuf (){ close (); REMOVE(_mutex);}

fstream.h
366 Learn C++ under Windows 95/NT
template <class charT, class traits>boolbasic_filebuf<charT, traits>::is_open () const{ READ_LOCK(_mutex); return (pfile != 0);}
template <class charT, class traits>basic_filebuf<charT, traits>::filebuf_type*basic_filebuf<charT, traits>::open (const char* s, ios_base::openmode mode){ static const ios_base::openmode valid_modes[] = { ios_base::in, ios_base::in | ios_base::out, ios_base::in | ios_base::binary, ios_base::out | ios_base::trunc, ios_base::out | ios_base::app, ios_base::out | ios_base::trunc |
ios_base::binary, ios_base::out | ios_base::app |
ios_base::binary, ios_base::in | ios_base::out |
ios_base::trunc, ios_base::in | ios_base::out | ios_base::app, ios_base::in | ios_base::out |
ios_base::binary, ios_base::in | ios_base::out |
ios_base::trunc | ios_base::binary,
ios_base::in | ios_base::out | ios_base::app | ios_base::binary,
0 };
static const char* char_modes[] = {

fstream.h
Learn C++ under Windows 95/NT 367
"r", "r+", "rb", "w", "a", "wb", "ab", "w+", "a+", "r+b", "w+b", "a+b", 0 };
ios_base::openmode mode_save = mode; WRITE_LOCK(_mutex); if (!is_open ()) { int index; init (); mode &= ~ios_base::ate; index = 0; while ((valid_modes[index] != 0) &&
(valid_modes[index] != mode)) ++index;
if (char_modes[index] && ((pfile = fopen (s, char_modes[index]))
!= 0)) { if (((mode_save & ios_base::ate) != 0) && (fseek (pfile, 0, SEEK_END) != 0)) { close (); } else { return this; } } } return 0; }
template <class charT, class traits>basic_filebuf<charT, traits>::filebuf_type*basic_filebuf<charT, traits>::close (){
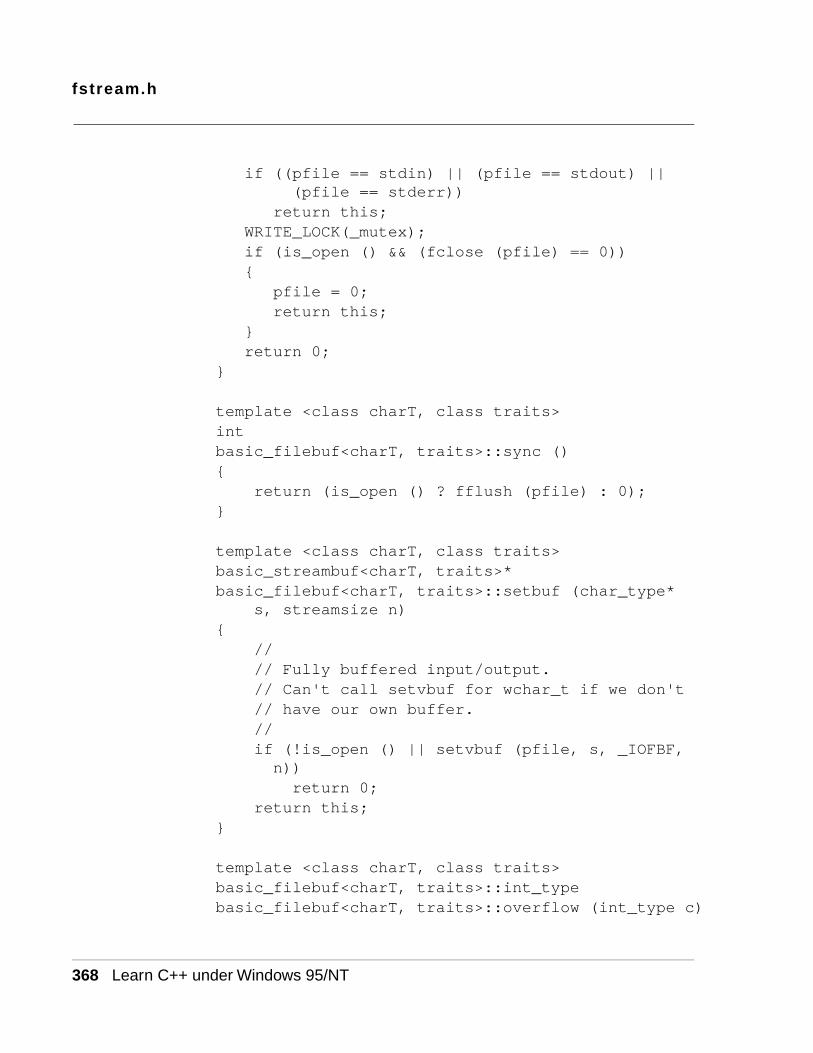
fstream.h
368 Learn C++ under Windows 95/NT
if ((pfile == stdin) || (pfile == stdout) || (pfile == stderr))
return this; WRITE_LOCK(_mutex); if (is_open () && (fclose (pfile) == 0)) { pfile = 0; return this; } return 0;}
template <class charT, class traits>intbasic_filebuf<charT, traits>::sync (){ return (is_open () ? fflush (pfile) : 0);}
template <class charT, class traits>basic_streambuf<charT, traits>*basic_filebuf<charT, traits>::setbuf (char_type*
s, streamsize n){ // // Fully buffered input/output. // Can't call setvbuf for wchar_t if we don't // have our own buffer. // if (!is_open () || setvbuf (pfile, s, _IOFBF,
n)) return 0; return this;}
template <class charT, class traits>basic_filebuf<charT, traits>::int_typebasic_filebuf<charT, traits>::overflow (int_type c)
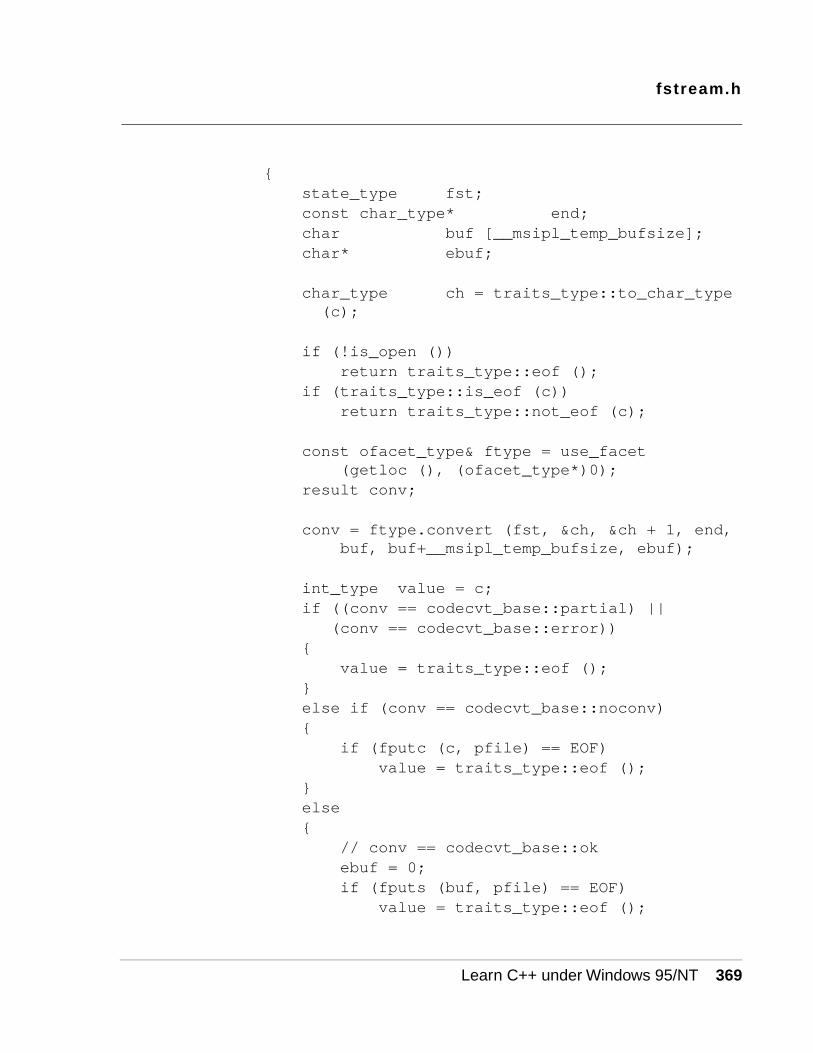
fstream.h
Learn C++ under Windows 95/NT 369
{ state_type fst; const char_type* end; char buf [__msipl_temp_bufsize]; char* ebuf;
char_type ch = traits_type::to_char_type (c);
if (!is_open ()) return traits_type::eof (); if (traits_type::is_eof (c)) return traits_type::not_eof (c);
const ofacet_type& ftype = use_facet (getloc (), (ofacet_type*)0);
result conv;
conv = ftype.convert (fst, &ch, &ch + 1, end, buf, buf+__msipl_temp_bufsize, ebuf);
int_type value = c; if ((conv == codecvt_base::partial) || (conv == codecvt_base::error)) { value = traits_type::eof (); } else if (conv == codecvt_base::noconv) { if (fputc (c, pfile) == EOF) value = traits_type::eof (); } else { // conv == codecvt_base::ok ebuf = 0; if (fputs (buf, pfile) == EOF) value = traits_type::eof ();
fstream.h
370 Learn C++ under Windows 95/NT
} return value;}
template <class charT, class traits>basic_filebuf<charT, traits>::int_typebasic_filebuf<charT, traits>::underflow (){ int_type value = traits_type::eof (); // // Assumption that at least one-character can // be putback and this operation would never
// fail // if (is_open () && (value = ungetc (fgetc
(pfile),pfile)) == EOF ) value = traits_type::eof (); return value;}
template <class charT, class traits>basic_filebuf<charT, traits>::int_typebasic_filebuf<charT, traits>::pbackfail (int_type
c){ int_type value = traits_type::eof ();
if (is_open ()) { value = ungetc (c, pfile); if (value == EOF) value = traits_type::eof (); else if (traits_type::is_eof(c)) { value = fseek (pfile, -1, SEEK_CUR); if (value) value = traits_type::eof (); }

fstream.h
Learn C++ under Windows 95/NT 371
} return value;}
template <class charT, class traits> basic_filebuf<charT,traits>::int_type basic_filebuf<charT, traits>::__pbfile() { int_type value = traits_type::eof();
if (is_open()) { value = fseek (pfile, -1, SEEK_CUR); if (value) value = traits_type::eof ();
} return value; }
template <class charT, class traits>basic_filebuf<charT, traits>::int_typebasic_filebuf<charT, traits>::uflow (){ int_type value = traits_type::eof ();
if ( is_open () && ((value = fgetc (pfile)) == EOF ))
value = traits_type::eof ();
return value;}
template <class charT, class traits>voidbasic_filebuf<charT, traits>::imbue (const locale&
loc_arg)
fstream.h
372 Learn C++ under Windows 95/NT
{ loc = loc_arg;}
template <class charT, class traits>streamsizebasic_filebuf<charT, traits>::showmanyc (){ long int curpos = ftell (pfile); if (curpos == -1) return 0; // // Seek to the end of file. // fseek (pfile,0,SEEK_END); long int endpos = ftell (pfile); if (endpos == -1) return 0;
fseek (pfile, curpos, SEEK_SET); return (streamsize(endpos - curpos));}
template <class charT, class traits>basic_filebuf<charT, traits>::pos_typebasic_filebuf<charT, traits>::seekoff (off_type
off, ios_base::seekdir way, ios_base::openmode /* which */)
{ if (!is_open () || (off == -1) || ((way & ios_base::beg) && (off < 0)) || ((way & ios_base::end) && (off > 0))) return pos_type (-1); int poseek = SEEK_CUR; switch (way) { case ios_base::beg : poseek = SEEK_SET;
fstream.h
Learn C++ under Windows 95/NT 373
break; case ios_base::end : poseek = SEEK_END; break; } if (fseek (pfile, off, poseek)) return pos_type (-1); return pos_type (ftell (pfile));}
template <class charT, class traits>basic_filebuf<charT, traits>::pos_typebasic_filebuf<charT, traits>::seekpos (pos_type
sp, ios_base::openmode /* which */){ if ( !is_open () || sp == pos_type (-1)) return pos_type (-1); if (fseek (pfile, sp.offset (),SEEK_SET)) return pos_type (-1); return pos_type (ftell (pfile));}
template <class charT, class traits>basic_ifstream<charT, traits>::basic_ifstream (): basic_istream<charT, traits> (0) { init (&fbuf);}
template <class charT, class traits>basic_ifstream<charT, traits>::basic_ifstream
(const char* s, ios_base::openmode mode) : basic_istream<charT, traits> (0) { init (&fbuf); rdbuf ()->open (s, mode);}

fstream.h
374 Learn C++ under Windows 95/NT
template <class charT, class traits>basic_ifstream<charT, traits>::~basic_ifstream () { }
template <class charT, class traits>basic_ifstream<charT, traits>::filebuf_type*basic_ifstream<charT, traits>::rdbuf () const{ // use dynamic cast // return dynamic_cast<filebuf_type*>
// (basic_ios<charT, traits>::rdbuf ()); // return const_cast<filebuf_type*> (&fbuf); return (filebuf_type*) (&fbuf);}
template <class charT, class traits>inlineboolbasic_ifstream<charT, traits>::is_open (){ return rdbuf ()->is_open ();}
template <class charT, class traits>inlinevoidbasic_ifstream<charT, traits>::open (const char*
s, ios_base::openmode mode){ rdbuf ()->open (s, mode); if (!is_open ()) { setstate (failbit); }}
template <class charT, class traits>inline
fstream.h
Learn C++ under Windows 95/NT 375
voidbasic_ifstream<charT, traits>::close (){ if (rdbuf ()->close () == 0) { setstate (failbit); }}
template <class charT, class traits>basic_ofstream<charT, traits>::basic_ofstream (): basic_ostream<charT, traits> (0){ init (&fbuf);}
template <class charT, class traits>basic_ofstream<charT, traits>::basic_ofstream
(const char* s, ios_base::openmode mode): basic_ostream<charT, traits> (0){ init (&fbuf); rdbuf ()->open (s, mode);}
template <class charT, class traits>basic_ofstream<charT, traits>::~basic_ofstream () { }
template <class charT, class traits>basic_ofstream<charT, traits>::filebuf_type*basic_ofstream<charT, traits>::rdbuf () const{ // use dynamic cast // return dynamic_cast<filebuf_type*>
// (basic_ios<charT, traits>::rdbuf ()); // return const_cast<filebuf_type*> (&fbuf); return (filebuf_type*) (&fbuf);
fstream.h
376 Learn C++ under Windows 95/NT
}
template <class charT, class traits>inlineboolbasic_ofstream<charT, traits>::is_open (){ return rdbuf ()->is_open ();}
template <class charT, class traits>inlinevoidbasic_ofstream<charT, traits>::open (const char*
s, ios_base::openmode mode){ rdbuf ()->open (s, mode); if (!is_open ()) { setstate (failbit); }}
template <class charT, class traits>inlinevoidbasic_ofstream<charT, traits>::close (){ if (rdbuf ()->close () == 0) { setstate (failbit); }}
//// class basic_fstream//

fstream.h
Learn C++ under Windows 95/NT 377
#ifdef MSIPL_DEF_TEMPARGtemplate <class charT, class traits = ios_traits<charT> >#elsetemplate <class charT, class traits>#endifclass basic_fstream : public basic_iostream<charT,
traits> {public :
typedef charT char_type; typedef traits traits_type; typedef typename traits::pos_type pos_type; typedef typename traits::off_type off_type; typedef typename traits::int_type int_type;
typedef basic_filebuf<charT, traits> filebuf_type;
public :
basic_fstream ();
explicit basic_fstream (const char* s,
ios_base::openmode mode = ios_base::in | ios_base::out);
virtual ~basic_fstream ();
filebuf_type* rdbuf () const;
inline bool is_open ();
fstream.h
378 Learn C++ under Windows 95/NT
inline void open (const char* s, ios_base::openmode mode =
ios_base::in | ios_base::out);
inline void close ();
private :
filebuf_type fbuf;
};
template <class charT, class traits>basic_fstream<charT, traits>::basic_fstream (): basic_iostream<charT, traits> (0) { init (&fbuf);}
template <class charT, class traits>basic_fstream<charT, traits>::basic_fstream (const
char* s, ios_base::openmode mode) : basic_iostream<charT, traits> (0) { init (&fbuf); rdbuf ()->open (s, mode);}
template <class charT, class traits>basic_fstream<charT, traits>::~basic_fstream () { }
template <class charT, class traits>basic_fstream<charT, traits>::filebuf_type*basic_fstream<charT, traits>::rdbuf () const{
fstream.h
Learn C++ under Windows 95/NT 379
// use dynamic cast // return dynamic_cast<filebuf_type*>
// (basic_ios<charT, traits>::rdbuf ()); // return const_cast<filebuf_type*> (&fbuf); return (filebuf_type*) (&fbuf);}
template <class charT, class traits>inlineboolbasic_fstream<charT, traits>::is_open (){ return rdbuf ()->is_open ();}
template <class charT, class traits>inlinevoidbasic_fstream<charT, traits>::open (const char* s,
ios_base::openmode mode){ rdbuf ()->open (s, mode); if (!is_open ()) { setstate (failbit); }}
template <class charT, class traits>inlinevoidbasic_fstream<charT, traits>::close (){ if (rdbuf ()->close () == 0) { setstate (failbit); }}
fstream.h
380 Learn C++ under Windows 95/NT
typedef basic_filebuf <char, ios_traits<char> > filebuf;
typedef basic_ifstream<char, ios_traits<char> > ifstream;
typedef basic_ofstream<char, ios_traits<char> > ofstream;
typedef basic_fstream <char, ios_traits<char> > fstream;
#ifdef MSIPL_WCHART typedef basic_filebuf <wchar_t, ios_traits<wchar_t> > wfilebuf;
typedef basic_ifstream<wchar_t, ios_traits<wchar_t> > wifstream;
typedef basic_ofstream<wchar_t, ios_traits<wchar_t> > wofstream;
typedef basic_fstream <wchar_t, ios_traits<wchar_t> > wfstream;
#endif
#ifdef MSIPL_USING_NAMESPACE} /* namespace std */#endif
#endif /* MSIPL_FSTREAM_H */
Learn C++ under Windows 95/NT 381
Diomanip.h/*/ Metrowerks Standard Library Version 1.5 1996 September 30 /*//** ** Lib++ : The Modena C++ Standard Library, ** Version 1.9, May 1996 ** iomanip.h ** Copyright (c) 1994-1996 Modena Software Inc. **/
#ifndef MSIPL_MANIPULATOR_H#define MSIPL_MANIPULATOR_H
#include <mcompile.h>
#include MOD_INCLUDE(istream)#include MOD_INCLUDE(ostream)
#ifdef MSIPL_USING_NAMESPACEnamespace std {#endif //// Input Manipulators//
//// Template class basic_imanip//
#ifdef MSIPL_DEF_TEMPARG

iomanip.h
382 Learn C++ under Windows 95/NT
template <class T, class charT, class traits = ios_traits<charT> >
#elsetemplate <class T, class charT, class traits>#endifclass basic_imanip {
friend basic_istream<charT, traits>& operator>> (basic_istream<charT, traits>& is, const basic_imanip<T, charT,
traits>& a);
public :
typedef charT char_type; typedef traits traits_type;
typedef typename traits::pos_type pos_type; typedef typename traits::off_type off_type; typedef typename traits::int_type int_type; private:
// typedef basic_ios<charT, traits> // ios_type; // MSIPL-1607
typedef basic_istream<charT, traits> ios_type; // MSIPL-1607
typedef ios_type& (* pf_type) (ios_type&, T); public :
inline basic_imanip (pf_type, T);
private:
pf_type pf;
iomanip.h
Learn C++ under Windows 95/NT 383
T manarg;
};
template <class T> class imanip : public basic_imanip<T, char, ios_traits<char> > { protected: // MSIPL-1607 typedef basic_istream<char,
ios_traits<char> > ios_type; // MSIPL-1607 typedef ios_type& (* pf_type)
(ios_type&, T); // MSIPL-1607 public: imanip (pf_type pf, T t) // MSIPL-1607 : basic_imanip<T, char, ios_traits<char>
> (pf, t) {} // MSIPL-1607 };
#ifdef MSIPL_WCHARTtemplate <class T> class imanip : public basic_imanip<T, char, ios_traits<char> > { };#endif//// Template class basic_omanip//
#ifdef MSIPL_DEF_TEMPARGtemplate <class T, class charT, class traits =
ios_traits<charT> >#elsetemplate <class T, class charT, class traits>#endifclass basic_omanip {
friend basic_ostream<charT, traits>&

iomanip.h
384 Learn C++ under Windows 95/NT
operator<< (basic_ostream<charT, traits>& os, const basic_omanip<T, charT,
traits>& a);
public : typedef charT char_type; typedef traits traits_type;
typedef typename traits::pos_type pos_type; typedef typename traits::off_type off_type; typedef typename traits::int_type int_type; private: typedef basic_ios<charT, traits> ios_type; typedef ios_type& (* pf_type) (ios_type&, T); public :
inline basic_omanip (pf_type, T);
private:
pf_type pf; T manarg;
};
template <class T> class omanip : public basic_omanip<T, char, ios_traits<char> > { };
//// Template class basic_smanip//

iomanip.h
Learn C++ under Windows 95/NT 385
template <class T, class charT, class traits>class basic_smanip {
friend basic_istream<charT, traits>& operator>> (basic_istream<charT, traits>& is, const basic_smanip<T, charT,
traits>& a); friend basic_ostream<charT, traits>& operator<< (basic_ostream<charT, traits>& os, const basic_smanip<T, charT,
traits>& a);
public :
typedef charT char_type; typedef traits traits_type;
typedef typename traits::pos_type pos_type; typedef typename traits::off_type off_type; typedef typename traits::int_type int_type; inline static int_type eof () { return typename traits::
eof (); } inline static char_type newline () { return typename
traits::newline (); }
private:
typedef basic_ios<charT, traits> ios_type; typedef ios_type& (* pf_type) (ios_type&, T); public :
iomanip.h
386 Learn C++ under Windows 95/NT
inline basic_smanip (pf_type, T);
private:
pf_type pf; T manarg;};
template <class T> class smanip : public basic_smanip<T, char,
ios_traits<char> > {private:
typedef basic_ios<char, ios_traits<char> > ios_type;
typedef ios_type& (* pf_type) (ios_type&, T); public :
smanip (pf_type pf_arg, T arg) : basic_smanip<T, char,
ios_traits<char> > (pf_arg, arg) { }
};
template <class T, class charT, class traits>inlinebasic_imanip<T, charT, traits>::basic_imanip (pf_type pf_arg, T manarg_arg): pf (pf_arg), manarg (manarg_arg) { }
template <class T, class charT, class traits>inlinebasic_omanip<T, charT, traits>::
iomanip.h
Learn C++ under Windows 95/NT 387
basic_omanip (pf_type pf_arg, T manarg_arg): pf (pf_arg), manarg (manarg_arg) { }
template <class T, class charT, class traits>inlinebasic_smanip<T, charT, traits>::basic_smanip (pf_type pf_arg, T manarg_arg): pf (pf_arg), manarg (manarg_arg) { }
template <class T, class charT, class traits>basic_istream<charT, traits>&operator>> (basic_istream<charT, traits>& is, const basic_imanip<T, charT, traits>& a){#ifdef MSIPL_EXCEPT try {#endif (*a.pf) (is, a.manarg);#ifdef MSIPL_EXCEPT } catch (...) { is.setstate (ios_base::failbit); }#endif return is;}
template <class T, class charT, class traits>basic_ostream<charT, traits>&operator<< (basic_ostream<charT, traits>& os, const basic_omanip<T, charT, traits>& a){#ifdef MSIPL_EXCEPT try {#endif (*a.pf) (os, a.manarg);#ifdef MSIPL_EXCEPT

iomanip.h
388 Learn C++ under Windows 95/NT
} catch (...) { os.setstate (ios_base::failbit); }#endif return os;}
template <class T, class charT, class traits>basic_istream<charT, traits>&operator>> (basic_istream<charT, traits>& is, const basic_smanip<T, charT, traits>& a){#ifdef MSIPL_EXCEPT try {#endif (*a.pf) (is, a.manarg);#ifdef MSIPL_EXCEPT } catch (...) { is.setstate (ios_base::failbit); }#endif return is;}
template <class T, class charT, class traits>basic_ostream<charT, traits>&operator<< (basic_ostream<charT, traits>& os, const basic_smanip<T, charT, traits>& a){#ifdef MSIPL_EXCEPT try {#endif (*a.pf) (os, a.manarg);#ifdef MSIPL_EXCEPT

iomanip.h
Learn C++ under Windows 95/NT 389
} catch (...) { os.setstate (ios_base::failbit); }#endif return os;}
//// Standard Manipulators//template <class charT, class traits>basic_ios<charT, traits>&freset (basic_ios<charT, traits>& str, ios_base::fmtflags mask){ // reset specified flags str.setf ((basic_ios<charT,
traits>::fmtflags)0, mask); return str;}
template <class charT, class traits>basic_ios<charT, traits>&fset (basic_ios<charT, traits>& str,
ios_base::fmtflags mask){ // set specified flags str.setf (mask); return str;}
template <class charT, class traits>basic_ios<charT, traits>&fsetbase (basic_ios<charT, traits>& str, int n){ // set basefield

iomanip.h
390 Learn C++ under Windows 95/NT
str.setf ((n == 8) ? ios_base::oct : (n == 10) ? ios_base::dec : (n == 16) ? ios_base::hex : (basic_ios<charT, traits>::fmtflags)0, ios_base::basefield); return str;}
/* MW-mm 960703atemplate <class charT, class traits>basic_ios<charT, traits>&ffill (basic_ios<charT, traits>& str, typename basic_ios<charT, traits>::int_type c){ // set fill character str.fill (c); return str;}MW-mm 960703a */
//// Specialization for lack of compiler support//basic_ios<char, ios_traits<char> >&ffill (basic_ios<char, ios_traits<char> >& str, basic_ios<char, ios_traits<char>
>::int_type c){ // set fill character str.fill (c); return str;}
#ifdef MSIPL_WCHARTbasic_ios<wchar_t, ios_traits<wchar_t> >&
iomanip.h
Learn C++ under Windows 95/NT 391
ffill (basic_ios<wchar_t, ios_traits<wchar_t> >& str, basic_ios<wchar_t, ios_traits<wchar_t> >::int_type c)
{ // set fill character str.fill (c); return str;}#endif
template <class charT, class traits>basic_ios<charT, traits>&fprecise (basic_ios<charT, traits>& str,
streamsize n){ // set precision str.precision (n); return str;}
template <class charT, class traits>basic_ios<charT, traits>&fwidth (basic_ios<charT, traits>& str,streamsize n){ // set width str.width (n); return str;}
smanip <ios_base::fmtflags>resetiosflags (ios_base::fmtflags mask){ return smanip<ios_base::fmtflags> (&freset,
mask);}
smanip <ios_base::fmtflags>setiosflags (ios_base::fmtflags mask)
iomanip.h
392 Learn C++ under Windows 95/NT
{ return smanip<ios_base::fmtflags> (&fset,
mask);}
/*template <class charT, class traits>basic_smanip <basic_ios<charT, traits>::fmtflags,
charT, traits>basic_setiosflags (basic_ios<charT,
traits>::fmtflags mask){ return basic_smanip<basic_ios<charT,
traits>::fmtflags, charT, traits> (&fset, mask);
}*/
smanip <int>setbase (int base){ return smanip<int> (&fsetbase, base);}
/* MW-mm 960703a template <class charT, class traits>basic_smanip <typename basic_ios<charT,
traits>::int_type, charT, traits>setfill (typename basic_ios<charT,
traits>::int_type c){ return basic_smanip<typename basic_ios<charT,
traits>::int_type, charT, traits> (&ffill, c);
}MW-mm 960703a */
//
iomanip.h
Learn C++ under Windows 95/NT 393
// Specialization for lack of compiler support.//basic_smanip <basic_ios<char, ios_traits<char>
>::int_type, char,ios_traits<char> >setfill (basic_ios<char, ios_traits<char>
>::int_type c){ return basic_smanip<basic_ios<char,
ios_traits<char> >::int_type, char, ios_traits<char> > (&ffill, c);
}
#ifdef MSIPL_WCHARTbasic_smanip <basic_ios<wchar_t,
ios_traits<wchar_t> >::int_type,wchar_t, ios_traits<wchar_t> >
setfill (basic_ios<wchar_t, ios_traits<wchar_t> >::int_type c)
{ return basic_smanip<basic_ios<wchar_t,ios_traits<wchar_t>
>::int_type, wchar_t, ios_traits<wchar_t> > (&ffill, c);
}#endif
smanip <streamsize>setprecision (streamsize n){ return smanip<streamsize> (&fprecise, n);}
smanip <streamsize>setw (streamsize n){ return smanip<streamsize> (&fwidth, n);}
iomanip.h
394 Learn C++ under Windows 95/NT
#ifdef MSIPL_WCHART
template <class T> class wimanip : public basic_imanip<T, wchar_t,
ios_traits<wchar_t> > { };
template <class T> class womanip : public basic_omanip<T, wchar_t,
ios_traits<wchar_t> > { };
template <class T> class wsmanip : public basic_smanip<T, wchar_t,
ios_traits<wchar_t> > { };
#endif /* MSIPL_WCHART */
#ifdef MSIPL_USING_NAMESPACE} /* namespace std */#endif
#endif /* MSIPL_MANIPULATOR_H */
/* Change logMW-mm 960703a Commented out to workaround compiler problem from Andres MSIPL-1607 Corrections to imanip to allow it to work as before.*/
Learn C++ under Windows 95/NT 395
Eiostream.h/*/ Metrowerks Standard Library Version 1.5 1996 September 30 /*//** ** Lib++ : The Modena C++ Standard Library, ** Version 1.9, May 1996 ** istream.h ** Copyright (c) 1994-1996 Modena Software Inc. **/
#ifndef MSIPL_IOSTREAM_H#define MSIPL_IOSTREAM_H
#include <mcompile.h>
#include MOD_INCLUDE(istream)#include MOD_INCLUDE(ostream)
#ifdef MSIPL_USING_NAMESPACEnamespace std {#endif
#ifdef MSIPL_DEF_TEMPARGtemplate <class charT, class traits =
ios_traits<charT> >#elsetemplate <class charT, class traits>#endifclass basic_iostream : public basic_istream<charT, traits>, public
basic_ostream<charT, traits> {
iostream.h
396 Learn C++ under Windows 95/NT
public: // constructor/destructor explicit basic_iostream (basic_streambuf<charT, traits>*
sb) :basic_istream<charT, traits>(sb),
basic_ostream<charT, traits>(sb), basic_ios<charT, traits>(sb) { }
virtual ~basic_iostream () { }};
extern istream cin;extern ostream cout;extern ostream clog;extern ostream cerr;
static ios_base::Init __msipl_ios_init;
#ifdef MSIPL_USING_NAMESPACE} /* namespace std */#endif
#endif /* MSIPL_IOSTREAM_H */
/* Change record*/
Learn C++ under Windows 95/NT 397
Fsstream.h/*/ Metrowerks Standard Library Version 1.5 1996 September 30 /*//** ** Lib++ : The Modena C++ Standard Library, ** Version 1.9, May 1996 ** sstream.h ** Copyright (c) 1994-1996 Modena Software Inc. **/
#ifndef MSIPL_STRINGBUF_H#define MSIPL_STRINGBUF_H
#include <mcompile.h>
#include MOD_INCLUDE(iostream)
#ifdef MSIPL_USING_NAMESPACEnamespace std {#endif
#ifdef MSIPL_DEF_TEMPARGtemplate <class charT, class traits =
ios_traits<charT> >#elsetemplate <class charT, class traits>#endifclass basic_stringbuf : public
basic_streambuf<charT, traits> {
public:
sstream.h
398 Learn C++ under Windows 95/NT
typedef charT char_type; typedef traits traits_type;
typedef typename traits::pos_type pos_type; typedef typename traits::off_type off_type; typedef typename traits::int_type int_type;
public: typedef string_char_traits<char_type>
string_traits; typedef basic_string<char_type, string_traits>
string_type;
public:
explicit basic_stringbuf (ios_base::openmode which = ios_base::in | ios_base::out);
explicit basic_stringbuf (const string_type& str, ios_base::openmode which = ios_base::in | ios_base::out);
virtual ~basic_stringbuf ();
string_type str () const;
void str (const string_type& str_arg);
protected://// Inherited functions// virtual int_type
sstream.h
Learn C++ under Windows 95/NT 399
overflow (int_type c = traits::eof ());
virtual void imbue (const locale& loc);
virtual int_type pbackfail (int_type c = traits::eof ()); virtual int_type underflow ();
virtual pos_type seekoff (off_type off, ios_base::seekdir way, ios_base::openmode which = ios_base::in | ios_base::out); virtual pos_type seekpos (pos_type sp, ios_base::openmode which
= ios_base::in | ios_base::out);
//// virtual streamsize// showmanyc ();//// virtual int_type// uflow ();//// virtual streamsize// xsgetn (char_type* s, streamsize n);//// virtual streamsize// xsputn (const char_type* s, streamsize n);// // virtual basic_streambuf<char_type, traits>*// setbuf (char_type* s, streamsize n);//// virtual int// sync ();
sstream.h
400 Learn C++ under Windows 95/NT
//private:
void init_string (const char_type* str, streamsize
len, streamsize res);
void init_copy (char_type* to, const char_type*
from, streamsize len, streamsize res);
void clean_string ();
char_type* bend; // To keep // track of the buffer end
ios_base::openmode mode;
enum buf_size { inc_size = 32 };
// declare a mutex object. // DEC_OBJ_LOCK(_mutex)
};
#ifdef MSIPL_DEF_TEMPARGtemplate <class charT, class traits =
ios_traits<charT> >#elsetemplate <class charT, class traits>#endifclass basic_istringstream : public
basic_istream<charT, traits> {
public:
sstream.h
Learn C++ under Windows 95/NT 401
typedef charT char_type; typedef traits traits_type;
typedef typename traits::pos_type pos_type; typedef typename traits::off_type off_type; typedef typename traits::int_type int_type; public: typedef string_char_traits<char_type>
string_traits; typedef basic_string<char_type, string_traits>
string_type; typedef basic_stringbuf<char_type, traits>
sb_type;
public:
explicit basic_istringstream (ios_base::openmode which
= ios_base::in);
explicit basic_istringstream (const string_type& str, ios_base::openmode which
= ios_base::in);
virtual ~basic_istringstream ();
sb_type* rdbuf () const;
inline string_type str () const;
inline void
sstream.h
402 Learn C++ under Windows 95/NT
str (const string_type& str);
private:
sb_type sbuf;
};
#ifdef MSIPL_DEF_TEMPARGtemplate <class charT, class traits =
ios_traits<charT> >#elsetemplate <class charT, class traits>#endifclass basic_ostringstream : public
basic_ostream<charT, traits> {
public:
typedef charT char_type; typedef traits traits_type;
typedef typename traits::pos_type pos_type; typedef typename traits::off_type off_type; typedef typename traits::int_type int_type; public: typedef string_char_traits<char_type>
string_traits; typedef basic_string<char_type, string_traits>
string_type; typedef basic_stringbuf<char_type, traits>
sb_type;
public:
explicit

sstream.h
Learn C++ under Windows 95/NT 403
basic_ostringstream (ios_base::openmode which = ios_base::out);
explicit basic_ostringstream (const string_type& str, ios_base::openmode which
= ios_base::out);
virtual ~basic_ostringstream ();
sb_type* rdbuf () const;
inline string_type str () const;
inline void str (const string_type& str);
private: sb_type sbuf;
};
#ifdef MSIPL_DEF_TEMPARGtemplate <class charT, class traits =
ios_traits<charT> >#elsetemplate <class charT, class traits>#endifclass basic_stringstream : public
basic_iostream<charT, traits> {
public:

sstream.h
404 Learn C++ under Windows 95/NT
typedef charT char_type; typedef traits traits_type;
typedef typename traits::pos_type pos_type; typedef typename traits::off_type off_type; typedef typename traits::int_type int_type; public: typedef string_char_traits<char_type>
string_traits; typedef basic_string<char_type, string_traits>
string_type; typedef basic_stringbuf<char_type, traits>
sb_type;
public:
explicit basic_stringstream (ios_base::openmode which = ios_base::in |
ios_base::out);
explicit basic_stringstream (const string_type& str, ios_base::openmode which = ios_base::in |
ios_base::out);
virtual ~basic_stringstream ();
sb_type* rdbuf () const;
inline string_type str () const;

sstream.h
Learn C++ under Windows 95/NT 405
inline void str (const string_type& str);
private:
sb_type sbuf;
};
template <class charT, class traits>basic_stringbuf<charT, traits>::basic_stringbuf
(ios_base::openmode which): basic_streambuf<charT, traits> (), mode (which),
bend (0){}
template <class charT, class traits>basic_stringbuf<charT, traits>::basic_stringbuf
(const string_type& str,ios_base::openmode which)
: basic_streambuf<charT, traits> (), mode (which) { if (str.size () != 0) { init_string (str.data (), str.size (), (str.size ()/inc_size +
1)*inc_size); } else { bend = 0; }}
template <class charT, class traits>void

sstream.h
406 Learn C++ under Windows 95/NT
basic_stringbuf<charT, traits>::init_string (const char_type* str, streamsize len, streamsize res)
{ char_type* tmp = new char_type [res]; init_copy (tmp, str, len, res);}
template <class charT, class traits>voidbasic_stringbuf<charT, traits>::init_copy
(char_type* to, const char_type* from, streamsize len, streamsize res)
{ traits::copy (to, from, len); if ((mode & ios_base::in) != 0) { setg (to, to, to+len); } if ((mode & ios_base::out) != 0) { setp (to, to+len); } bend = to + res;}
template <class charT, class traits>voidbasic_stringbuf<charT, traits>::clean_string (){ if (gptr () != 0) { delete[] eback (); } else if (pptr () != 0) { delete[] pbase (); } init ();

sstream.h
Learn C++ under Windows 95/NT 407
bend = 0;}
template <class charT, class traits>basic_stringbuf<charT, traits>::~basic_stringbuf (){ clean_string (); REMOVE(_mutex);}
template <class charT, class traits>basic_stringbuf<charT, traits>::string_typebasic_stringbuf<charT, traits>::str () const{ LOCK(put_mut_block, put_lock); LOCK(get_mut_block, get_lock); if (gptr () != 0) { return string_type (eback (), (((pptr ()
!= 0) && (pptr () > egptr ())) ? pptr (): egptr ())-eback ());
} else if (pptr () != 0) { return string_type (pbase (), pptr ()-
pbase ()); } else { return string_type (); }}
template <class charT, class traits>voidbasic_stringbuf<charT, traits>::str (const
string_type& str){

sstream.h
408 Learn C++ under Windows 95/NT
WRITE_LOCK(_mutex); LOCK(put_mut_block, put_lock); LOCK(get_mut_block, get_lock); streamsize len = 0; char_type* tmp; // // mode should be either in or out if ((mode & ios_base::out) != 0) { tmp = pbase (); } else if ((mode & ios_base::in) != 0) { tmp = eback (); } len = bend-tmp; if (str.size () != 0) { if ((str.size () > len) || (tmp == 0)) { clean_string (); init_string (str.data (), str.size (), ((str.size/inc_size +
1)*inc_size)); } else { init_copy (tmp, str.data (), str.size
(), len); } } else { clean_string (); }}
template <class charT, class traits>

sstream.h
Learn C++ under Windows 95/NT 409
basic_stringbuf<charT, traits>::int_typebasic_stringbuf<charT, traits>::overflow (int_type
c){ if (traits::is_eof (c)) { return traits::not_eof (c); } if ((mode & ios_base::out) != 0) { if (!avail_writepos ()) { if (epptr () < bend) { setp (pbase (), epptr ()+1); pbump (epptr ()-pbase ()-1); } else { streamsize gsize = gptr ()-eback (); streamsize psize = pptr ()-pbase (); size_t nsize = (psize/inc_size +
1)*inc_size;
char_type* tmp = new char_type [nsize];
traits::copy (tmp, pbase (), psize); clean_string (); // setting the put area pointers setp (tmp, tmp+psize+1); bend = tmp + nsize; pbump (psize); if ((mode & ios_base::in) != 0) { // Also adjust the get area
// pointers setg (tmp, tmp+gsize, pptr ());

sstream.h
410 Learn C++ under Windows 95/NT
} } } } if (avail_writepos ()) { pptr ()[0] = c; pbump (1); if ((mode & ios_base::in) != 0) { setg (eback (), gptr (), pptr ()); } return traits::to_int_type (c); } return traits::eof ();}
template <class charT, class traits>voidbasic_stringbuf<charT, traits>::imbue (const
locale& loc_arg){ loc = loc_arg;}
template <class charT, class traits>basic_stringbuf<charT, traits>::int_typebasic_stringbuf<charT, traits>::pbackfail
(int_type c){//// If the function can succeed in more than one of // these ways, which way should be chosen ??// if (avail_putbackpos ()) { if (traits::is_eof (c)) {
sstream.h
Learn C++ under Windows 95/NT 411
gbump (-1); return traits::not_eof (c); } else { if (traits::eq_int_type (c,
traits::to_int_type (gptr ()[-1]))) { gbump (-1); } else if ((mode & ios_base::out) != 0) { gbump (-1); gptr ()[0] = traits::to_char_type
(c); } else { return traits::eof (); } } return c; } return traits::eof ();}
template <class charT, class traits>basic_stringbuf<charT, traits>::int_typebasic_stringbuf<charT, traits>::underflow (){ if (gptr () != 0) { if (((mode & ios_base::out) != 0) && (! (gptr () < egptr ())) && (pptr () > egptr ())) { setg (eback (), gptr (), pptr ()); }

sstream.h
412 Learn C++ under Windows 95/NT
if (gptr () < egptr ()) { return traits::to_int_type (*gptr ()); } } return traits::eof ();}
template <class charT, class traits>basic_stringbuf<charT, traits>::pos_typebasic_stringbuf<charT, traits>::seekoff (off_type
off, ios_base::seekdir way, ios_base::openmode which){ off_type newoff = -1; if ((((which & ios_base::in) == which) &&
(gptr ()!= 0)) || (((which & ios_base::out) == which) &&
(pptr () !=0)) || (((which & (ios_base::in | ios_base::out))
== (ios_base::in | ios_base::out)) && (gptr ()!=0) && (pptr ()!=0) &&
((way & (ios_base::beg | ios_base::end)) != 0)))
{ // // If more than one way is set, it is an
// error. // if (((way & ios_base::beg) == way) || ((way & ios_base::end) == way) || ((way & ios_base::cur) == way)) { off_type posin = 0; // way ==
ios_base::beg //
sstream.h
Learn C++ under Windows 95/NT 413
// if way == basic_ios::cur set posin // = xnext - xbeg.
if ((way & ios_base::cur) != 0) { if (gptr () != 0) posin = gptr ()-eback (); else if (pptr () != 0) posin = pptr ()-pbase (); } // // if way == basic_ios::end set posin
// = xend - xbeg. else if ((way & ios_base::end) != 0) { if ((gptr () != 0) && (egptr () >
pptr ())) posin = egptr ()-eback (); else if ((pptr () != 0) && (gptr ()
== 0)) posin = epptr ()-pbase (); else { setg (eback (),gptr (),pptr ()); posin = pptr ()-eback (); } } if ((which & ios_base::in) != 0) { if (((posin + off) >= 0) && ((egptr ()-eback ()) >= (posin
+ off))) { newoff = posin+off; gbump (eback ()-gptr ()+newoff); } if ((which & ios_base::out) != 0) pbump (gptr ()-pptr ()); }
sstream.h
414 Learn C++ under Windows 95/NT
else if ((which & ios_base::out) != 0) { if (((posin + off) >= 0) && ((epptr ()-pbase ()) >= (posin
+ off))) { newoff = posin+off; pbump (pbase ()-pptr ()+newoff); } } } } return pos_type (newoff);}
template <class charT, class traits>basic_stringbuf<charT, traits>::pos_typebasic_stringbuf<charT, traits>::seekpos (pos_type
sp, ios_base::openmode which){ off_type newoff = -1;
if ((newoff = sp.offset ()) < 0) return pos_type (newoff);
if ((gptr () != 0) && (pptr () !=0) && (egptr () < pptr ()))
setg (eback (), gptr (), pptr ());
if ((which & ios_base::in) && (gptr () != 0)) { if (newoff <= (egptr ()-eback ())) { gbump (newoff+eback ()-gptr ()); // // If out specified then make next // pointer of output sequence equal to // next pointer of input sequence
sstream.h
Learn C++ under Windows 95/NT 415
// if ((which & ios_base::out) && (pptr
() != 0)) pbump (gptr ()-pptr ()); } else newoff = -1; } else if ((which & ios_base::out) && (pptr () !=
0)) { if (newoff <= (epptr ()-pbase ())) pbump (newoff+pbase ()-pptr ()); else newoff = -1; } else newoff = -1;
return pos_type (newoff);}
template <class charT, class traits>basic_istringstream<charT, traits>::basic_istringstream (ios_base::openmode which)
: basic_istream<charT, traits> (0), sbuf (which) { init (&sbuf);}
template <class charT, class traits>basic_istringstream<charT, traits>::basic_istringstream (const string_type& str, ios_base::openmode which)
: basic_istream<charT, traits> (0), sbuf (str, which)
{

sstream.h
416 Learn C++ under Windows 95/NT
init (&sbuf);}
template <class charT, class traits>basic_istringstream<charT,traits>::~basic_istringstream ()
{}
template <class charT, class traits>basic_istringstream<charT, traits>::sb_type*basic_istringstream<charT, traits>::rdbuf () const{ // use dynamic cast // return dynamic_cast<sb_type*>
// (basic_ios<charT, traits>::rdbuf ()); // return const_cast<sb_type*> (&sbuf); return (sb_type*) (&sbuf);}
template <class charT, class traits>inlinebasic_istringstream<charT, traits>::string_typebasic_istringstream<charT, traits>::str () const{ return rdbuf ()->str (); // return sbuf.str ();}
template <class charT, class traits>inlinevoidbasic_istringstream<charT, traits>::str (const
string_type& str_arg){ rdbuf ()->str (str_arg); // sbuf.str (str_arg);}
sstream.h
Learn C++ under Windows 95/NT 417
template <class charT, class traits>basic_ostringstream<charT, traits>::basic_ostringstream (ios_base::openmode which)
: basic_ostream<charT, traits> (0), sbuf (which) { init (&sbuf);}
template <class charT, class traits>basic_ostringstream<charT,traits>::basic_ostringstream (const string_type& str, ios_base::openmode which)
: basic_ostream<charT, traits> (0), sbuf (str, which)
{ init (&sbuf);}
template <class charT, class traits>basic_ostringstream<charT,traits>::~basic_ostringstream ()
{}
template <class charT, class traits>basic_ostringstream<charT, traits>::sb_type*basic_ostringstream<charT, traits>::rdbuf () const{ // use dynamic cast // return dynamic_cast<sb_type*> (basic_ios<charT, traits>::rdbuf ()); // return const_cast<sb_type*> (&sbuf); return (sb_type*) (&sbuf);}
template <class charT, class traits>inline
sstream.h
418 Learn C++ under Windows 95/NT
basic_ostringstream<charT, traits>::string_typebasic_ostringstream<charT, traits>::str () const{ return rdbuf ()->str (); // return sbuf.str ();}
template <class charT, class traits>inlinevoidbasic_ostringstream<charT, traits>::str (const string_type& str_arg)
{ rdbuf ()->str (str_arg); // sbuf.str (str_arg);}
//// basic_stringstream members//
template <class charT, class traits>basic_stringstream<charT, traits>::basic_stringstream (ios_base::openmode which): basic_iostream<charT, traits> (0), sbuf (which) { init (&sbuf);}
template <class charT, class traits>basic_stringstream<charT, traits>::basic_stringstream (const string_type& str, ios_base::openmode which)
: basic_iostream<charT, traits> (0), sbuf (str, which)
{ init (&sbuf);
sstream.h
Learn C++ under Windows 95/NT 419
}
template <class charT, class traits>basic_stringstream<charT,traits>::~basic_stringstream ()
{}
template <class charT, class traits>basic_stringstream<charT, traits>::sb_type*basic_stringstream<charT, traits>::rdbuf () const{ // use dynamic cast // return dynamic_cast<sb_type*>
// (basic_ios<charT, traits>::rdbuf ()); // return const_cast<sb_type*> (&sbuf); return (sb_type*) (&sbuf);}
template <class charT, class traits>inlinebasic_stringstream<charT, traits>::string_typebasic_stringstream<charT, traits>::str () const{ return rdbuf ()->str (); // return sbuf.str ();}
template <class charT, class traits>inlinevoidbasic_stringstream<charT, traits>::str (const string_type& str_arg)
{ rdbuf ()->str (str_arg); // sbuf.str (str_arg);}

sstream.h
420 Learn C++ under Windows 95/NT
typedef basic_stringbuf<char, ios_traits<char>> stringbuf;
typedef basic_istringstream <char, ios_traits<char> > istringstream;
typedef basic_ostringstream <char, ios_traits<char> > ostringstream;
typedef basic_stringstream <char, ios_traits <char> > stringstream;
#ifdef MSIPL_WCHARTtypedef basic_stringbuf<wchar_t,
ios_traits<wchar_t> > wstringbuf;typedef basic_istringstream <wchar_t,
ios_traits<wchar_t> > wistringstream;typedef basic_ostringstream <wchar_t,
ios_traits<wchar_t> > wostringstream;typedef basic_stringstream <wchar_t,
ios_traits<wchar_t> > wstringstream;#endif
#ifdef MSIPL_USING_NAMESPACE} /* namespace std */#endif
#endif /* MSIPL_STRINGBUF_H */
/* Change record*/

Learn C++ under Windows 95/NT 421
GBibliography1. The C++ Programming Language, 2nd ed., Bjarne Stroustrup,
1991, Addison-Wesley Publishing Company, Reading MA.
2. C++ Primer, 2nd ed., Stanley B. Lippman, 1991, Addison-Wesley Publishing Company, Reading MA.
3. Advanced C++: Programming Styles and Idioms, James Coplien, 1992, Addison-Wesley Publishing Company, Reading MA.
4. Building Windows 95 Applications, Kevin J. Goodman, 1995, M&T Books, New York, New York.
5. Windows 95 : A Developer’s Guide , Jeffrey Richter and Jonathan Locke, 1995, M&T Books, New York, New York.
6. Windows API Bible, James L. Conger, 1992, The Waite Group, Corte Madera, CA.
7. Programming in C++, Stephen C. Dewhurst and Kathy T. Stark, 1989, Prentice-Hall, Englewood Cliffs, NJ.
8. The Annotated C++ Reference Manual, Margaret Ellis and Bjarne Stroustrup, 1990, Addison-Wesley Publishing Company, Reading MA.

Bibliography
422 Learn C++ under Windows 95/NT


